#CSS for beginners
Text
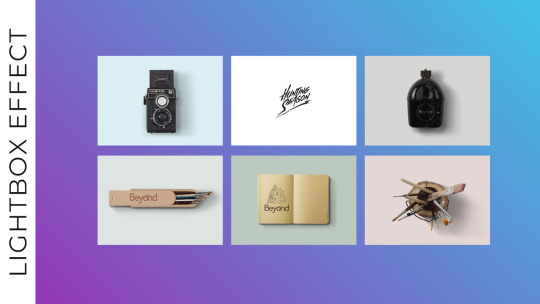
Responsive Image Gallery with Lightbox Effect
#responsive image gallery#lightbox effect#responsive web design#css image gallery#html css#learn to code#code#frontenddevelopment#css#html#css3#divinector#css tutorial#css for beginners
5 notes
·
View notes
Text
WhatsApp Clone Using HTML and CSS
What does cloning a website means?
To make a copy
Cloning a website means copying or modifying the design or script of an existing website to create a new website. Website cloning allows a designer to create a website without writing scripts from scratch.
Any website can be cloned. You are also free to integrate some additional new features while cloning your website.
Cloning a website is one of the proven methods you can use to learn web development faster. It provides basic to advanced ideas about how websites work and work, and how to integrate them.
Let’s learn how to clone a website just using HTML5 and CSS in a simple way.
Will take an example of WhatsApp Website and will clone it.
WhatsApp is a free cross-platform messaging service. iPhone and Android smartphone, Mac and Windows PC users can call or exchange text, photo, voice and video messages with anyone in the world for free, regardless of the recipient's device. WhatsApp uses Wi-Fi connections to communicate across platforms. This differs from Apple iMessage and Messages by Google, which require a cellular network and Short Message Service (SMS).
Key WhatsApp Terminology
Cross Platform
Messaging apps
End-to-end encryption
Video & Audio Calls
WhatsApp Business
HTML (Hyper Text Markup Language) –
HTML stands for Hyper Text Markup Language that is standard markup language to create web pages and web-based applications
It represents the structure of a web page
It comprises of series of elements which tells the browser how to display the content
Basic Structure of a HTML Document –
<!DOCTYPE html>
<html>
<head>
<title>WhatsApp Clone</title>
</head>
<body>
<h1>let's learn Web Development</h1>
<p>My first project - WhatsApp Cloning</p>
</body>
</html>
Let’s Explain the above code –
- It is used to defines that the document is HTML5 document
- It is the root elements on an HTML Page
- It contains all the meta information about the HTML Page
- This element contains all the visible content of the page, such as paragraph, headlines, tables, list, etc.
- It defines the largest heading for any topic, it ranges from -
- It defines a paragraph in the HTML page
Elements –
It is the collection of start and end tag, and in between content is inserted between them.
It major components are–
Opening Tag – Used to tell the browser where the content starts.
Closing Tag – Used to tell the browser where the content material ends.
Content – Whatever written inside the opening and closing tag is content.
Some Most Commonly used tags are –
– Used to define a document or section, as it contains information related to titles and heading of related content.
– The navigation tag is used to declare navigation sections in HTML documents. Websites typically have a section dedicated to navigation links that allows users to move around the site
– Anchor tag is used for creating hyperlink on the webpage. It is used to link one web page from another.
– It is used to define a paragraph. Content written inside tag always starts from a new line.
– It is used to define heading of a web page. There are 6 different heading h1, h2, h3, h4, h5 and h6. H1 is the main heading and the biggest followed by h2, h3, h4, h5 and h6.
- It is used to group multiple elements together. It helps in applying CSS.
- Image tag is used to embed an image in a web page.
CSS (Cascading Style Sheet) –
CSS stands for Cascading Style Sheets, that describes HTML elements that appear on screen, paper, or other media.
It used for designing web pages, in order to make web pages presentable.
It is standardized across Web Browsers and is one of the core languages of the open web system/technology.
CSS Selector –
CSS Selectors are used to select or target the element that you want to style. Selectors are part of the CSS ruleset. CSS selectors select HTML elements by ID, class, type, attributes, etc.
Types of CSS Selectors –
Element Selector – It selects the HTML elements directly using name
ID Selector – It selects the id attribute of an element. ID is always unique, in the code. So, it is used to target and apply design to a specific or a unique element.
Class Selector - It selects the class attribute of an element. Unlike ID selector class selectors can be same of many elements.
Universal Selector – It selects all the elements of the webpage, and apply changes to it.
Group Selector – It is used when same style is to be applied on many elements. It helps in non-duplication of code.
Different ways of applying CSS -
CSS can be applied in different ways –
Inline CSS –
Styling is done using different attributed inside an element itself. It can be used to apply unique style for a single element.
<h1 style="color:blue;">Let's learn Web Development</h1>
Internal CSS –
It is defined or written within the <style> element, nested instead <head> section of HTML document.
It is mainly used when need to apply CSS on a particular page.
<style type="text/css">
h1 {
color:blue;
}
</style>
External CSS –
It is used to apply CSS on multiple pages. As all the styling is written in a different file with an extension “.css” Example style.css.
<link rel="stylesheet" type="text/css" href="style.css">
It is written instead head tag.
For more detailed guide – Click here
Let’s implement the above learnt concepts –
In this example will clone a static page of WhatsApp using Internal CSS-
<!DOCTYPE html>
<html lang="en">
<head>
<style type="text/css">
:root {
font-size: 15px;
--primaryColor: #075e54;
--secondaryColor: #aaa9a8;
--tertierColor: #25d366;
}
* {
margin: 0;
padding: 0;
font-family: inherit;
font-size: inherit;
}
body {
font-family: Helvetica;
font-weight: 300;
}
img {
object-fit: cover;
width: 100%;
}
.container {
margin: 0 1.2em;
}
header {
background-color: var(--primaryColor);
padding: 1.4em 0;
}
header .container {
display: flex;
justify-content: space-between;
align-items: center;
color: white;
}
header .logo {
font-size: 1.5rem;
font-weight: 300;
}
header .menu {
margin-left: 18px;
}
.nav-bar {
background-color: var(--primaryColor);
margin-bottom: 8px;
display: grid;
grid-template-columns: 16% 28% 28% 28%;
justify-items: space-between;
align-items: center;
text-align: center;
box-shadow: rgba(50, 50, 93, 0.25) 0px 2px 5px -1px,
rgba(0, 0, 0, 0.3) 0px 1px 3px -1px;
}
.nav {
color: var(--secondaryColor);
text-transform: uppercase;
padding: 1em 0;
}
.nav.active {
border-bottom: 3px solid white;
color: white;
}
.chat {
padding: 1em 0;
display: flex;
justify-content: space-between;
}
.chat .info {
display: flex;
}
.chat .username {
font-size: 1.2rem;
margin-bottom: 5px;
font-weight: 300;
}
.chat .recent-chat {
color: gray;
max-width: 200px;
text-overflow: ellipsis;
overflow: hidden;
white-space: nowrap;
}
.chat .recent-chat .read {
color: #34b7f1;
}
.chat .photo {
width: 55px;
height: 55px;
border-radius: 50%;
margin-right: 18px;
}
.chat .recent-chat-time {
font-size: 12px;
color: gray;
}
.contact-button {
padding: 1em;
border: 0;
border-radius: 50%;
color: white;
transform: rotate(0deg);
font-size: 1.3rem;
position: fixed;
bottom: 20px;
right: 1.2em;
background-color: var(--tertierColor);
}
</style>
<title>WhatsApp</title>
<link rel="icon" type="image/x-icon" href="wp.png" />
<link rel="stylesheet" href="https://cdn.jsdelivr.net/npm/[email protected]/font/bootstrap-icons.css" />
</head>
<!-- Body section starte here -->
<body>
<header>
<div class="container">
<h1 class="logo">WhatsApp</h1>
<div>
<a role="button" class="bi bi-search icon"></a>
<a role="button" class="bi bi-three-dots-vertical icon menu"></a>
</div>
</div>
</header>
<nav class="nav-bar">
<span class="bi bi-camera-fill nav"></span>
<a role="button" class="nav active">Chats</a>
<a role="button" class="nav">Status</a>
<a role="button" class="nav">Calls</a>
</nav>
<!-- Chat section starts here -->
<!-- chat 1 -->
<section class="chats">
<div class="container">
<div class="chat">
<div class="info">
<!-- <img class="photo" src="user-2.png" alt="User" /> -->
<img class="photo" src="user-2.png" alt="User" />
<div>
<h6 class="username">Anurag</h6>
<p class="recent-chat">
<i class="bi bi-check2-all"></i> Yes, i remembered that! 😄
</p>
</div>
</div>
<small class="recent-chat-time"> 04:20 PM </small>
</div>
<!-- chat 2 -->
<div class="chat">
<div class="info">
<img class="photo" src="user-2.png" alt="User" />
<div>
<h6 class="username">Cipher</h6>
<p class="recent-chat">Do you wanna hangout?</p>
</div>
</div>
<small class="recent-chat-time"> 10:20 AM </small>
</div>
<!-- chat 3 -->
<div class="chat">
<div class="info">
<img class="photo" src="user-2.png" alt="User" />
<div>
<h6 class="username">CipherSchools</h6>
<p class="recent-chat">
<i class="bi bi-check2-all read"></i> Hey bro, time to band!
🥁🎸
</p>
</div>
</div>
<small class="recent-chat-time"> Yesterday </small>
</div>
<!-- chat 4 -->
<div class="chat">
<div class="info">
<img class="photo" src="user-2.png" alt="User" />
<div>
<h6 class="username">Schools</h6>
<p class="recent-chat">Hey, where are you now? 🙄</p>
</div>
</div>
<small class="recent-chat-time"> 7/22/21 </small>
</div>
<!-- chat 5 -->
<div class="chat">
<div class="info">
<img class="photo" src="user-2.png" alt="User" />
<div>
<h6 class="username">Anurag CS</h6>
<p class="recent-chat">
<i class="bi bi-check2-all read"></i> May i borrow your games
for 2 weeks?
</p>
</div>
</div>
<small class="recent-chat-time"> 7/22/21 </small>
</div>
<!-- Contact button on the whatsapp -->
<button type="button" class="bi bi-chat-right-text-fill contact-button"></button>
</div>
</section>
</body>
</html>
23 notes
·
View notes
Text
CSS can eat my entire asshole
HTML you're good
#coding#best places to learn to code#coding meme#html website#learn html#css for beginners#css sucks#programming#programmer#i hate coding#pain and suffering#everything is awful#visual studio code#vscode#notepad coding#notepad#ew
12 notes
·
View notes
Text
#اقتباس#اقتبسات#آل تمبلر#تمبلر بالعربي#عرب تمبلر#تمبلر#تمبلريات#كلمات راقت لي#دعاء#خواطر#عبارات#عرب#حكم#حب#تاق#هاشتاق
#اقتباس#اقتبسات#آل تمبلر#تمبلر بالعربي#عرب تمبلر#تمبلر#تمبلريات#كلمات راقت لي#دعاء#خواطر#عبارات#عرب#حكم#حب#تاق#هاشتاق#css#css for beginners#html5#html tutorial#htmldesign#html website#div layout#div_center#learn css#learn html#html css
2 notes
·
View notes
Text
#css for beginners#development css html5 php nodejs wordpress javascript react angular python vuejs django redux typescript 100daysofcode udemy javascript30#html5 css3#programming
3 notes
·
View notes
Photo


Good afternoon friends!
After a few weeks, I come back with a new post. I recreated this button in CSS, following a Youtube tutorial by Kevin Powell. I must say that I like it a lot, moreover in the video that I followed everything was explained very clearly. I have already finished the advanced CSS course, but I often lack ideas, as I am a beginner. These videos help me better understand the creative process behind it, as well as pick up on some of the concepts seen in the course. If you liked the post, or found it useful, reblog or leave a heart.
Below I leave you the code and the link of the video I followed:
YouTube
GitHub
#css#CSS for beginners#html template#html#html_css#development css html5 php nodejs wordpress javascript react angular python vuejs django redux typescript 100daysofcode udemy javascript30 b#javascript#github#neon button#neon#neon lights#web design#webdesign#web development#website#aesthetic web site#full stack web development#reblog#like
4 notes
·
View notes
Link
2 notes
·
View notes
Text
3 notes
·
View notes
Link
Subscribe & Support Guys
#HTML#html5#learn html#PSD to HTML#HTML Tutorial#html_css#html course#Css#css3#csstricks#css animation#htmlcss#css3 tutorial#css for beginners#frontend#front page#front end#freelancing#frontendfriday#web design#website#WEB#webdesign#web development#webdev#webdesigner#webdevelopment#Webdeveloper
6 notes
·
View notes
Text
CSS Custom Tabs Design
#css custom tab design#custom tabs html css#css tricks#html css#codenewbies#css#html5 css3#webdesign#frontenddevelopment#html css tutorial#pure css tutorial#css for beginners
0 notes
Photo
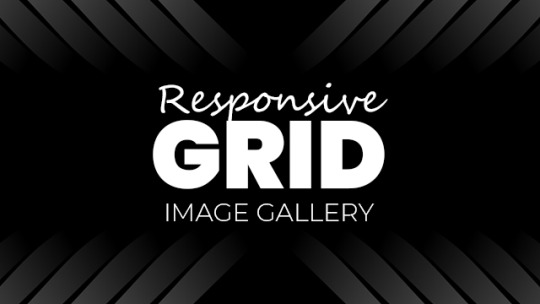
Responsive CSS Grid Layout
Get code on divinectorweb website
#css responsive image gallery#css image gallery#css grid layout#css grid#css tricks#CSS for beginners#learn to code#code#webdesign#frontenddevelopment#frontend#divinectorweb
5 notes
·
View notes
Link
How long does it take to learn Javascript?
#javascript#webdev#web developing company#web developers#webdevelopment#webdesign#html#htmlandcss#html tags#html5 css3#css for beginners#css3
0 notes

Text
youtube
#css for beginners#css grid#css tricks#css animation examples#javascript#html5#programming#coding#html css#earn real money#education#business#Youtube
0 notes
Photo
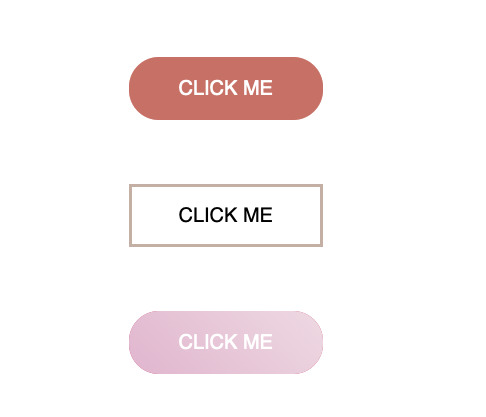


Hello there!
Welcome to my blog. I present to you my first post: I'm studying to become a Full Stack Developer, and I'm constantly looking for inspiration. Today I created these CSS buttons, following a tutorial on Youtube, and changing the color palette. I hope you enjoy the project! Below I leave you the code and the link of the video I followed.
GitHub: click here
Youtube tutorial: click here
#website#web development#web design#webdesign#html template#html_css#html#css animation examples#css2022#pure css animation#css for beginners#css#road to full stack developer#color palette#aesthetic color palette#aesthetic web site#aesthetic css
6 notes
·
View notes
Last Seen Blogs

thecloudiswater
konfidence

diamondairportz85
Diamond Airportcity

mdln-claire
starfall ✴︎

philly-nice
Feelin blammed?

voodoochili
Voodoo Chili