#dffoo lufenia fights series
Text
Dissidia Final Fantasy: Opera Omnia Crevasse Grace Descending Event Part 7
The Crevasse: Grace Descending event just started in the Dissidia Final Fantasy: Opera Omnia (DFFOO) mobile game. This event includes several quests.

Table of Contents
Crevasse: Grace Descending Event Information
Crevasse: Grace Descending Part 1 Lufenia+ quest
Crevasse: Grace Descending Total Points
Conclusion
Crevasse: Grace Descending Event Information
Crevasse: Grace Descending is a type of event wherein players get the chance to build their own fight. Well, sort of.
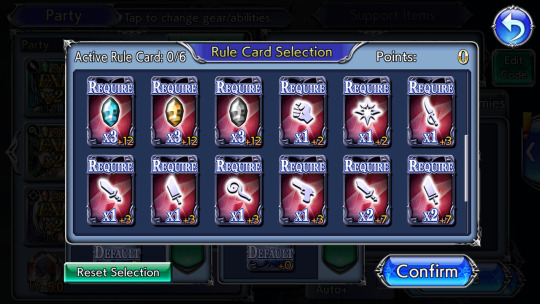
We get a short list of Codes, Lufenia orbs (or special countdown cards), and Force gauge effects (or force weakness cards) as well as a few quests with set enemies. We can then choose which Codes and such should go on which quests.
Codes refer to rules like “use at least 1 Green Crystal char on this fight” or “bring a char who uses a greatsword on this fight”. The Codes, orbs, and force effects have points associated with them. These points vary depending on how hard it is to fulfill their conditions.
Each quest has a multiplier that’s based on how difficult it is. After doing a quest with the Codes you specified, you get some points.
You need a total of 525 points in order to get all the rewards from this event. You also can’t bring a friend support to any of these quests.
I found this event pretty interesting. It was pretty fun being able to decide what Codes should go with which quest.
Your chars get locked out every time you Perfect a quest so this gave me the chance to use chars that I haven’t used in a while. I do wish we got more Codes to choose from though.
Anyway, the Crevasse: Grace Descending event has a total of 6 quests. They are as follows:
Crevasse: Grace Descending Part 1 Lufenia+ (level 250) quest
Crevasse: Grace Descending Part 2 Lufenia+ quest
Crevasse: Grace Descending Part 3 Lufenia+ quest
Crevasse: Grace Descending Part 4 Shinryu (level 300) quest
Crevasse: Grace Descending Part 5 Shinryu quest
Crevasse: Grace Descending Part 6 Shinryu quest
So far, I’ve already cleared the following Crevasse quests:
Crevasse: Grace Descending Part 4 Shinryu Quest
My team for this fight was Sephiroth from Final Fantasy VII, Galuf Halm Baldesion from Final Fantasy V, and Jack Garland from Stranger of Paradise Final Fantasy Origin with The Brothers as my summon.

My Calls were Cid Raines’s from Final Fantasy XIII, Yuna’s from Final Fantasy X, and Keiss’s from Final Fantasy Crystal Chronicles: The Crystal Bearers.
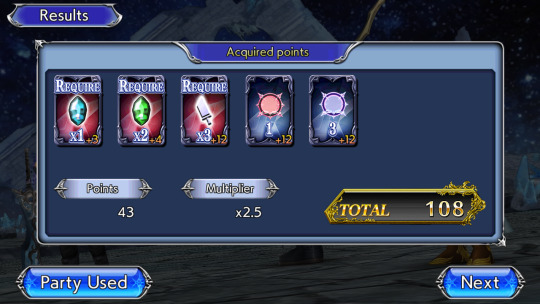
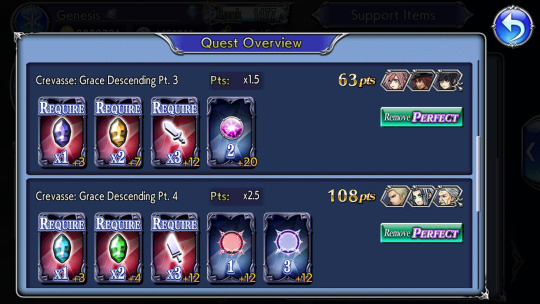
The Codes I used on this fight gave me 43 points. The multiplier for this quest is x2.5. So the total points I got from clearing this fight was 108.
Crevasse: Grace Descending Part 5 Shinryu Quest
My team for this fight was Machina Kunagiri from Final Fantasy Type-0, Leo Cristophe from Final Fantasy VI, and Gladiolus Amicitia from Final Fantasy XV with The Brothers as my summon.

My Calls were Alisaie Leveilleur’s from Final Fantasy XIV, Lilisette’s from Final Fantasy XI, and Yuna’s from Final Fantasy X.
The Codes I used on this fight gave me 44 points. The multiplier for this quest is x2.5. So the total points I got from clearing this fight was 110.

Crevasse: Grace Descending Part 6 Shinryu Quest
My team for this fight was Penelo from Final Fantasy XII, Lion from Final Fantasy XI, and Yuna from Final Fantasy X with The Brothers as my summon.

My Calls were Cid Raines’s from Final Fantasy XIII, Lunafreya Nox Fleuret’s from Final Fantasy XV, and Hope Estheim’s from Final Fantasy XIII.
The Codes I used on this fight gave me 48 points. The multiplier for this quest is x2.5. So the total points I got from clearing this fight was 120.

Crevasse: Grace Descending Part 3 Lufenia+ Quest
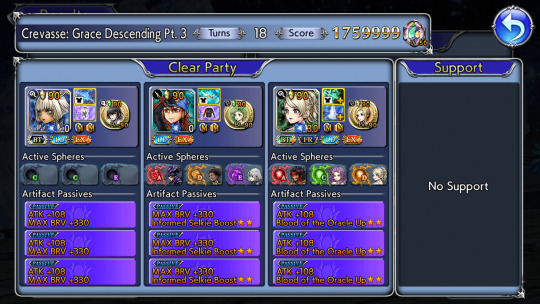
For this fight, my team was Lunafreya Nox Fleuret from Final Fantasy XV, Y’shtola Rhul from Final Fantasy XIV, and Keiss from Final Fantasy Crystal Chronicles: The Crystal Bearers with Pandemonium as my summon.
My Calls were Rydia’s from Final Fantasy IV, Cid Raines’s from Final Fantasy XIII, and Quistis Trepe’s from Final Fantasy VIII.
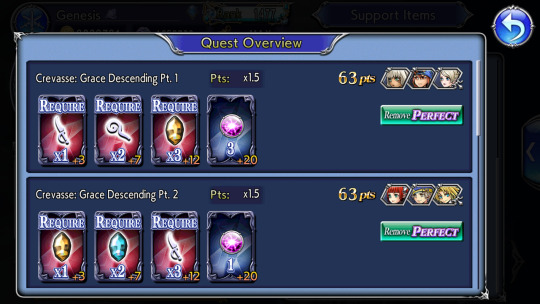
The Codes I used on this fight gave me 42 points. The multiplier for this quest is x1.5. So the total points I got from clearing this fight was 63.

Crevasse: Grace Descending Part 2 Lufenia+ Quest
For this fight, my team was Lilisette from Final Fantasy XI, Locke Cole from Final Fantasy VI, and Zidane Tribal from Final Fantasy IX with The Brothers as my summon.

My Calls were Seymour Guado’s from Final Fantasy X, Laguna Loire’s from Final Fantasy VIII, and Rydia’s from Final Fantasy IV.
The Codes I used on this fight gave me 42 points. The multiplier for this quest is x1.5. So the total points I got from clearing this fight was 63.

So far, I now have a total of 464 points.
Crevasse: Grace Descending Part 3 Lufenia+ Quest
I talk more about this in another post, but I ended up removing my Perfect on the Crevasse: Grace Descending Part 3 Lufenia+ quest.
This time my team for this fight was Noctis Lucis Caelum from Final Fantasy XV, Ardyn Izunia (Ardyn Lucis Caelum) from Final Fantasy XV, and Lightning (Claire Farron) from Final Fantasy XIII with The Brothers as my summon.

My Calls were Seymour Guado’s from Final Fantasy X, Cloud Strife’s from Final Fantasy VII, and Quistis Trepe’s from Final Fantasy VIII.
The Codes I used on this fight gave me 42 points. The multiplier for this quest is x1.5. So the total points I got from clearing this fight was 63. So I still have a total of 464 points so far.

Crevasse: Grace Descending Part 1 Lufenia+ Quest
Also known as Crevasse: Grace Descending Pt. 1. This fight has 1 wave with 2 enemies, the Chimera Golems.
For this fight, my team was Lunafreya Nox Fleuret from Final Fantasy XV (#ad), Y’shtola Rhul from Final Fantasy XIV, and Keiss from Final Fantasy Crystal Chronicles: The Crystal Bearers with The Brothers as my summon.

My Calls were Lilisette’s from Final Fantasy XI, Rydia’s from Final Fantasy IV, and Seymour Guado’s from Final Fantasy X.
Rydia’s LD Call gives the party a buff that lets them evade 3 attacks. This buff has no turn duration and will only disappear once a char has evaded 3 attacks. Her regular Call gives the party a water enchant buff while also giving the enemies a water imperil debuff.
Seymour’s and Lilisette’s Calls inflict the enemies with debuffs. Lilisette’s LD Call can also heal the party. Seymour’s LD Call can also remove the buffs of the enemies and delay them for 2 turns.
The Codes I used for this quest were as follows:
Bring at least 3 Yellow Crystal chars - Lunafreya, Y’shtola, and Keiss fulfills this condition
Bring at least 2 chars who use staves or rods - Lunafreya and Y’shtola fulfills this condition
Bring at least 1 char who uses daggers - Keiss fulfills this condition
Lufenia orb: triggers at the start of the battle and cannot be cancelled
To increase the count of the Lufenia orbs:
Every party member BRV at least 30k after player turn (+4; limit 15)
Player grants party BRV in 1 turn (+2; limit 15)
Every time a char moves, the Lufenia orb count will be decreased by 2. Every time the enemy moves, the Lufenia orb count will be decreased by 2.
Have Y’shtola’s, Keiss’s, and Lunafreya’s 15cp, 35cp, Ex, and LD fully MLB. Their Ex weapons have been Purpled.
Lunafreya and Y’shtola also have their Burst weapons. Both have been fully MLB but only Lunafreya’s has been upgraded to Green or BT+ 3/3.
Lunafreya also has her FR which has been fully MLB. She has her High Armor and it’s been Blued. Keiss and Y’shtola have their High Armors but neither have been Blued.
Everyone has their Bloom Stones and triple perfect Artifacts. Lunafreya has triple real Spheres while Keiss has triple RF Spheres. Y’shtola has no Spheres, real or otherwise.
All of their Summon Boards and Character Enhancement Boards have been completed. Lunafreya also has all of her Force Enhancements while Keiss and Y’shtola don’t have any at all.
Y’shtola is boosted for this fight. Keiss is currently equipped with my Level 5 of 5 Dagger Ultima Weapon.
Lunafreya is a really good support slash buffer slash healer. She provides great party-wide buffs and auras. She can imperil enemies and enchant the party with the ice element. She can also deal pretty good damage.
Lunafreya has instant turn rate moves that can quickly charge the force gauge. She can give herself and her allies multiple turns in a row.
Keiss is a support with decent enough buffs and auras but he can’t heal. He can give his allies a buff that will enable them to initiate launches every time they move. He can battery the party. He can also manipulate his turn so that he will move right after an ally.
Y’shtola is a support slash healer slash buffer. Sadly, she and Keiss are outdated by now, especially since they don’t even have their own Force and Burst weapons yet. It’s actually been a long time since I last got to use them.
Y’shtola can delay an enemy by 1 turn with one of her moves. She has an instant turn rate move that would have charged the force gauge by a lot if I’d gotten all of her Force Enhancements. But since she doesn’t have any Force Enhancements, she can barely charge the force gauge.
With my party, the Lufenia orbs here weren’t an issue at all. Was able to keep the orbs at their max counts easily just by using the skills of my chars.
Since this was only a Lufenia+ quest and since I also have 1 boosted char in my party, started the fight with my force gauge already partially charged so it didn’t take that long before it reached 100%.
Unfortunately, the enemies here can’t be launched so Keiss wasn’t as useful as he could have been. He still dealt pretty good damage though thanks to being equipped with a maxed out Ultima Weapon.
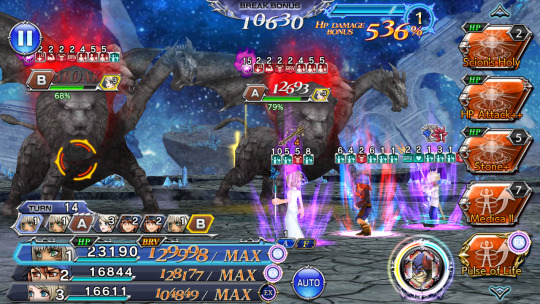
Once my force gauge was fully charged, had Lunafreya activate her FR. By then the Chimera Golems were at 92% HP.
By the time I only have 1 turn of force time left, the HP damage bonus was at 536%. The Chimera Golems were down to 68% and 79% HP.
Upon reaching certain HP percentage thresholds, the enemies here would gain an aura or effect that makes it impossible to delete their turns or delay them, even via break.
This wasn’t that much of an issue though since I do have Rydia’s LD Call for protection. This effect is also dispelled once enough damage has been dealt to the enemies.
When my force gauge was nearing 100% again, had Lunafreya activate her BT+ finisher already. When my force gauge was fully charged, had Luna use her FR again. By now the Golems were down to 49% and 61% HP.
Have 8 turns of force time left and the HP damage bonus was at 205% when I went into Lunafreya’s BT+ mode. The enemies were now down to 43% and 55% HP.

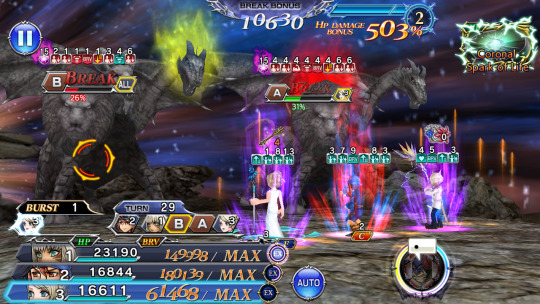
By the time Lunafreya was about to cast Coronal Spark of Life, her finishing Burst+ move, have 2 turns of force time left and the HP damage bonus was at 503%. The Golems were now down to 26% and 31% HP.
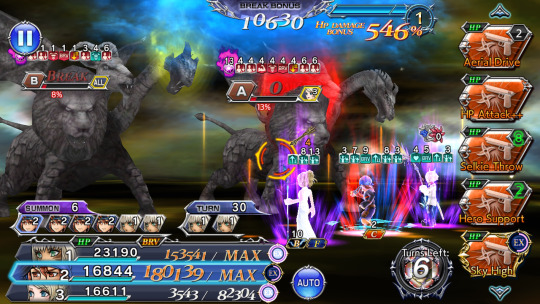
Luna’s attack took the Chimeras down to 14% and 20% HP. Now have only 1 turn of force time left and the HP damage bonus was at 546%.
Summoned The Brothers already. The on-entry attack of The Brothers took the enemies down to 8% and 13% HP.
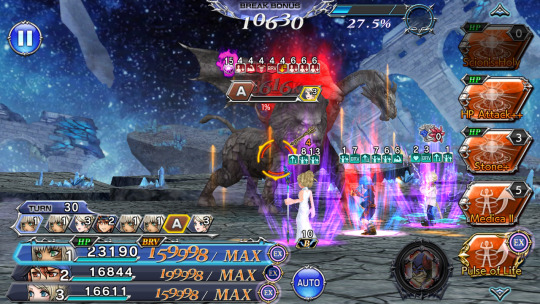
Before my summon ended, the Golems were down to 1% and 2% HP. It was currently Y’shtola’s turn. She gets to move multiple times in a row thanks to the buff from Lunafreya.

IIRC, had her use Afflatus Misery, her special HP attack. This was enough to finish off one of the Golems already. The remaining one was left with 1% HP so Y’shtola’s next attack was more than enough to finish this one off too, ending the battle on turn 30.
Got the score and all the other mission requirements which also got me the Perfect.

This team did really well. This fight was pretty easy with this team.
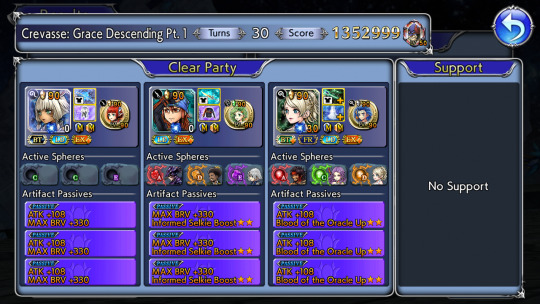

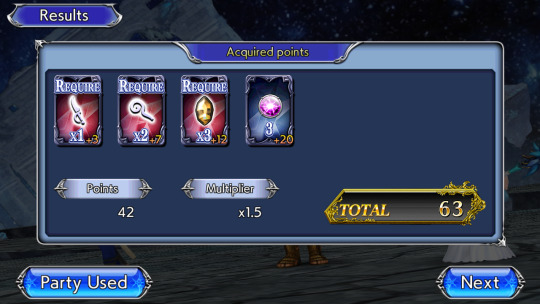
The Codes I used on this fight gave me 42 points. The multiplier for this quest is x1.5. So the total points I got from clearing this fight was 63.
Crevasse: Grace Descending Total Points
And that’s it. That’s all of the quests for the Crevasse: Grace Descending event. After completing everything, ended up with a total of 527 points.

So was able to get all the rewards from this event. Really pleased that I was able to get all the rewards for this event.
This type of event was pretty fun. It was nice to be able to sort-of build our own quests. I do wish we got more Codes to choose from though.
Also glad that I was able to get the chance to use multiple different chars in order to clear these quests.
It’s been a while since I got to use some of these chars so it’s nice to be able to bring them out and add them to my party. Looking forward to the next time we’ll get another event like this.
Here are some screenshots from the Quest Overview tab that came with the Crevasse: Grace Descending event:

Conclusion
So, what about you? Which chars did you use to complete the quests in the Crevasse: Grace Descending event? What do you think about this kind of event? Feel free to share your thoughts and opinions by leaving a comment below or by reblogging or replying to this post.
Notes:
screenshots are from my Dissidia Final Fantasy: Opera Omnia game account
#dissidia final fantasy opera omnia#this post stars:#lunafreya nox fleuret#y'shtola rhul#keiss#final fantasy 15#final fantasy 14#games#gacha games#dffoo lufenia fights series#final fantasy crystal chronicles: the crystal bearers#dffoo
2 notes
·
View notes
Text
Dissidia Final Fantasy: Opera Omnia Lufenia+ Quests with Sephiroth and Zack Fair Part 7
The Lufenia+ fights (level 250; currently the hardest kind of fight in the Dissidia Final Fantasy: Opera Omnia (DFFOO) mobile game) featured in this post include either Sephiroth from Final Fantasy VII (#ad) or Zack Fair from Crisis Core: Final Fantasy VII and Final Fantasy VII as part of the team lineup.

Table of Contents
Sephiroth info
Zack info
Garnet info
Lufenia quests list
Lufenia+ quests list
Finis Est Initium (Boss Rush) Lufenia+ Quest
Conclusion
Sephiroth from Final Fantasy VII
I talk more about this in other posts, but I’ve been using Sephiroth for Lufenia quests (level 200) basically ever since I got his LD and BT even back when he wasn’t that good at all. Would love to be able to keep on using him for as long as possible.
I was really looking forward to the time wherein I can finally upgrade Sephi’s Burst to BT+ 3/3 or Green. And now that time has finally come.
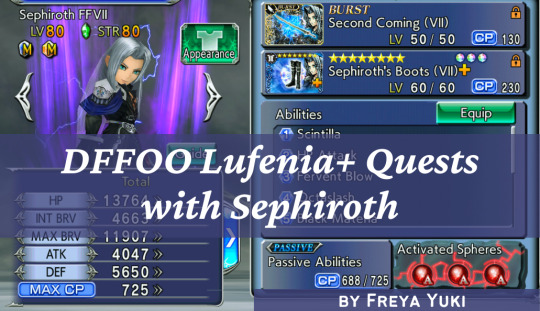
I talk more about this in another post but now my Sephiroth is Crystal Level 90 and Level 90. His 15cp, 35cp, Ex, and LD are fully MLB. His Ex is at Ex+ 3/3 or Purple. His Burst weapon has been upgraded to BT+ 3/3 or Green.

Seph’s currently equipped with a Level 5/5 Greatsword Ultima Weapon (UT). His High Armor’s been upgraded to Blue. All of his Boards have been completed. He has his Bloom Stone.

He has 3 Attack 108 with Max Brave 330 Artifacts and 3 Attack 108 with One-Winged Angel Boost★★ (Raises INT BRV, MAX BRV, ATK, DEF by 5% if HP is MAX at start of last wave) Artifacts.

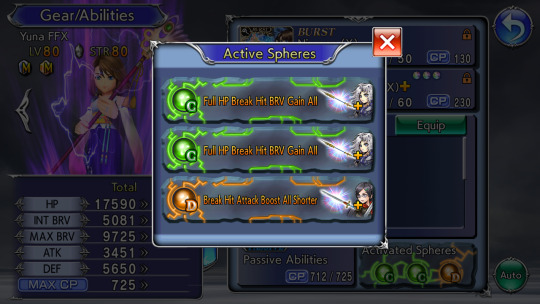
Sephiroth is equipped with the following A Spheres:
Edgar Roni Figaro’s (from Final Fantasy VI) Debuff Power
Increases BRV damage dealt by 10% while an enemy is debuffed
Cloud Strife’s (from Final Fantasy VII) Critical Power
Raises BRV damage dealt with critical hits by 10%
Vayne Carudas Solidor’s (from Final Fantasy XII) Broken Power
When attacking target afflicted with Break:
• Increases BRV damage dealt by 10%

Zack Fair from Crisis Core: Final Fantasy VII and Final Fantasy VII
My Zack is Level 90 and Crystal Level 90. His 15cp, 35cp, Ex, and LD are fully MLB. His Ex is at Ex+ 3/3 or Purple. His Burst weapon has been upgraded to BT+ 3/3 or Green.

Zack used to be equipped with my Level 5/5 Greatsword UT but after Greening Sephi, I gave him this Ultima Weapon. So now Zack is back to being equipped with his BT+ 3/3 weapon.
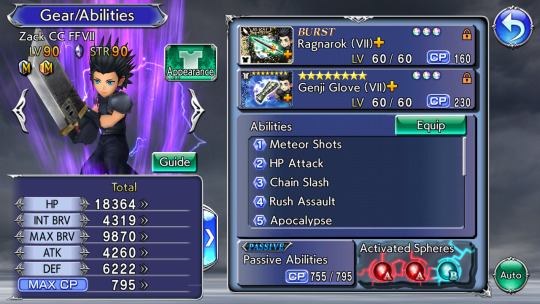
Zack’s High Armor has been upgraded to Blue. All of his Boards have been completed. He has his Bloom Stone.
He has triple ATK 108 with MAX BRV 330 and triple ATK 108 with SOLDIER Grit Boost★★ (Raises MAX BRV by 15% and ATK by 5% if HP is MAX at start of last wave) Artifacts.

Zack is equipped with the following Spheres:
Machina Kunagiri’s (from Final Fantasy Type-0) Break Hit Base Attack Up Shorter A Sphere
Raises INT BRV, ATK by 10% for 3 turns when inflicting Break or attacking target afflicted with Break
Jecht’s (from Final Fantasy X) Critical Base Attack Up Shorter A Sphere
Raises INT BRV, ATK by 10% for 3 turns when dealing critical hit
Snow Villiers’s (from Final Fantasy XIII) Target Attack Up B Sphere
Raises ATK by 10% while targeted by enemies

I’ve used Zack on all the Lufenia+ quests that we’ve had since the debut of his LD although I did have to stop after a while. I talk more about those battles in other posts.
Zack’s one of my fave Final Fantasy chars so it was always my plan to get his Burst weapon and Green it. Now I want to try using him for as long as possible.
Garnet Til Alexandros XVII from Final Fantasy IX
My Garnet Til Alexandros XVII is Level 90 and Crystal Level 90. Her 15cp, 35cp, Ex, and LD are fully MLB. Her Ex is at Ex+ 3/3 or Purple.
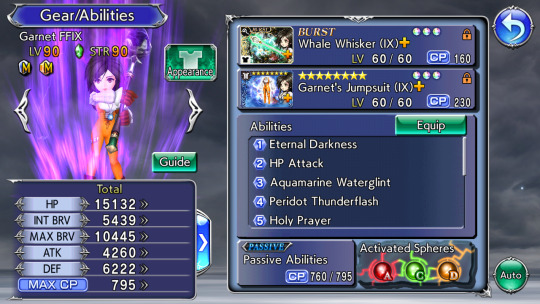
Garnet is currently equipped with her Burst weapon which has been upgraded to BT+ 3/3 or Green. Her High Armor’s been upgraded to Blue. All of her Boards have been completed. She has her Bloom Stone.
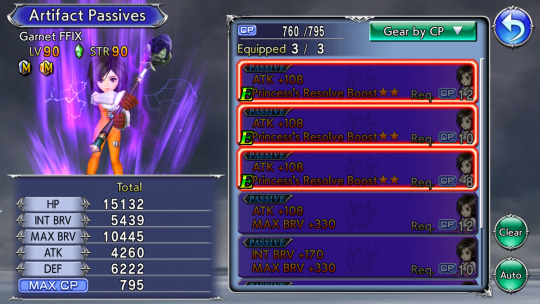
She has 3 ATK 108 with MAX BRV 330 and 3 ATK 108 with Princess’s Resolve Boost★★ (Raises INT BRV, MAX BRV, ATK, DEF by 5% if HP is MAX at start of last wave) Artifacts.
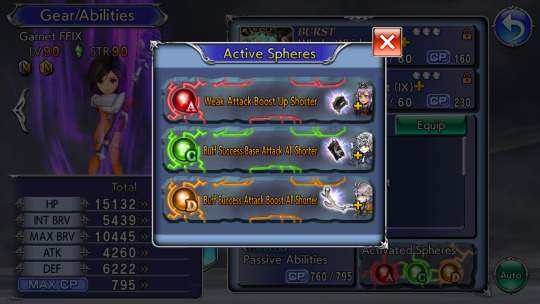
Garnet is equipped with the following Spheres:
Prishe’s (from Final Fantasy XI) Weak Attack Boost Up Shorter A Sphere
When attacking target’s weakness:
• Raises own MAX BRV, ATK by 10% for 3 turns
*Does not stack with same sphere
Alphinaud Leveilleur’s (from Final Fantasy XIV) Buff Success Base Attack All Shorter C Sphere
After granting buff:
• Raises party’s INT BRV, ATK by 5% for 3 turns
Hope Estheim’s (from Final Fantasy XIII) Buff Success Attack Boost All Shorter D Sphere
After granting buff:
• Raises party’s MAX BRV, ATK by 5% for 3 turns
*Does not stack with same sphere

I’ve used Garnet in Lufenia and Lufenia+ fights ever since I got her Burst and Greened it. Now I’ve decided that I’ll use her if I can then no longer try to slot her in everywhere.
Garnet is still really good and she’s still one of the best supports in DFFOO so I’ll most likely still be using her for a lot of fights but there are quests where she won’t be able to work and that’s fine.
Right now, I just want to focus on trying to run Sephi and Zack through all these Lufenia and Lufenia+ fights.
Lufenia Quests List
So far, I’ve been able to use Sephiroth in the following Lufenia fights:
The Terse Turk
Mechanized Sentry (Guard Scorpion Raid)
Roses of May
Thrall of Darkness
Storming the Citadel (Mission Dungeon)
Tree for the Void
Soaring Flames (Boss Rush)
Divine Diabolos (World of Illusions)
Abyss: A Lead to the Thick of It
Keeper of the Farseer
Gentle Giant
Operation Airborne Interception
The Power of Ignorance
Garden of Despair (Boss Rush)
Eternal Light (Story Act 3 Chapter 1, Part 1)
Swordmaiden
Two Moons Waxing (Story Act 3 Chapter 1, Part 2)
Devourer of Light (Hell Wyrm Raid)
Reliable Partner
The Power of Knowledge
Solitude (Story Act 3 Chapter 2, Part 1)
The Yuke Cometh
Searching for Friends (Story Act 3 Chapter 2, Part 2)
His Raging Blade (Kaiser Behemoth Raid)
Abyss: Perfectum Stratum 5
Divine Alexander (World of Illusions)
The Power of Action
Crimson Arms
In the Garden of Evil (Boss Rush)
Dimensions’ End: Transcendence Tier 3
The Ice Reaper
The Man Known as the Immortal
Divine The Brothers (World of Illusions)
Around the Fire
The Power of Wisdom
Lord of Subsidence (Tunneler Raid)
The Redheaded Turk
Equinox Aurora: Gallicinium
The Forbidden Mesa (Boss Rush)
Umbral Equinox: Noctis
Illuminating Dreams (Story Act 3 Chapter 4, Part 1)
The Terse Turk
Twilight Banquet (Astaroth Raid)
Thrall of Darkness
In Passing (Story Act 3 Chapter 4, Part 2)
The Abandoned Laboratory VERY HARD (Boss Rush)
The Abandoned Laboratory VERY HARD+ (Boss Rush)
Perfectum 6th Stratum Part 4
Cavern of No Return VERY HARD+ (Boss Rush)
Lufenia+ Quests List
So far, I’ve been able to use Sephiroth in the following Lufenia+ fights:
Divine Realm
Divine Pandemonium (World of Illusions)
Gentle Giant
Lofty Souls
Commodore of the Skies
A Glimmer in the Dark
Lure of the Lush (Rafflesia Raid)
Illusory Lighthouse (Mission Dungeon)
Shelke the Transparent
Queen of Charm
Whither Feelings (Intersecting Wills)
Divine Shiva (World of Illusions)
Mother Fixation
Triple Gateway (CPU Raid)
Back to Back (Intersecting Wills)
Malodorous Night
Heartless Gaze
Gathering Bearers, Entrusted Principle (Story Act 3 Chapter 5, Part 1)
Mission Dungeon: Glittering City of Gold
Where the Compass Points (Story Act 3 Chapter 5, Part 2)
Savage Winds (Elvoret Raid)
Parted Hopes (Intersecting Wills)
Gentle Fist
Divine Ifrit (World of Illusions)
Return of the Queen
The Power of Wisdom
Wings Graven with Emotion
Crevasse β Part 7
Perfectum 6th Stratum Part 5 Quest Level 215
Perfectum 6th Stratum Part 6
Annular Equinox: Annularity
Annular Equinox: Second Contact Quest Level 220
Unshakable Conviction (Intersecting Wills)
Lunar Tyrant
Family -Shackles- (Story Act 3 Chapter 6, Part 1)
Perfect Size (Intersecting Wills)
Family -Bonds- (Story Act 3 Chapter 6, Part 2)
Supplication for Catastrophe
Starting Out (Intersecting Wills)
Cloudy with a Chance of Squall
Divine Leviathan (World of Illusions)
Lofty Souls
An Elegant Coffee Break
Cloudy with a Chance of Meteor
Our Memories
Howling Winds
Holy Ground (Story Act 3 Chapter 7, Part 1)
Respite? Or Quagmire? (Intersecting Wills)
Distorted Providence
Eyes on the Prize
Six-Warrior Quests (Prelude)
Roaring Thunder (Intersecting Wills)
The Planet & The Hero (Story Act 3, Chapter 7, Part 2)
Divine Bahamut (World of Illusions)
Shelke the Transparent
So far, I’ve been able to use Garnet in the following Lufenia+ fights:
Crevasse β Part 7
Perfectum 6th Stratum Part 4 Lufenia Quest
Perfectum 6th Stratum Part 5 Quest Level 215
Perfectum 6th Stratum Part 6
Annular Equinox: Annularity
Annular Equinox: Second Contact Quest Level 220
Unshakable Conviction (Intersecting Wills)
Lunar Tyrant
Family -Shackles- (Story Act 3 Chapter 6, Part 1)
Perfect Size (Intersecting Wills)
Family -Bonds- (Story Act 3 Chapter 6, Part 2)
Supplication for Catastrophe
Starting Out (Intersecting Wills)
Cavern of No Return VERY HARD+ (Boss Rush)
Cloudy with a Chance of Squall
Divine Leviathan (World of Illusions)
Lofty Souls
An Elegant Coffee Break
Our Memories
Howling Winds
Holy Ground (Story Act 3 Chapter 7, Part 1)
Respite? Or Quagmire? (Intersecting Wills)
Distorted Providence
Eyes on the Prize
Six-Warrior Quests (Prelude)
Roaring Thunder (Intersecting Wills)
Divine Bahamut (World of Illusions)
So far, I’ve been able to use Zack in the following Lufenia+ fights:
Lure of the Lush (Rafflesia Raid)
Illusory Lighthouse (Mission Dungeon)
Shelke the Transparent
Queen of Charm
Whither Feelings (Intersecting Wills)
The Abandoned Laboratory VERY HARD Boss Rush Lufenia
The Abandoned Laboratory VERY HARD+ Boss Rush Lufenia
Divine Shiva (World of Illusions)
Mother Fixation
Triple Gateway (CPU Raid)
Back to Back (Intersecting Wills)
Malodorous Night
Heartless Gaze
Gathering Bearers, Entrusted Principle (Story Act 3 Chapter 5, Part 1)
Mission Dungeon: Glittering City of Gold
Where the Compass Points (Story Act 3 Chapter 5, Part 2)
Divine Ifrit (World of Illusions)
The Power of Wisdom
Crevasse β Part 6
Perfectum 6th Stratum Part 6
Annular Equinox: Second Contact Quest Level 220
Unshakable Conviction (Intersecting Wills)
Cloudy with a Chance of Squall
Divine Leviathan (World of Illusions)
Lofty Souls
An Elegant Coffee Break
Cloudy with a Chance of Meteor
Our Memories
Howling Winds
Holy Ground (Story Act 3 Chapter 7, Part 1)
Respite? Or Quagmire? (Intersecting Wills)
Distorted Providence
Eyes on the Prize
Six-Warrior Quests (Prelude)
Roaring Thunder (Intersecting Wills)
The Planet & The Hero (Story Act 3, Chapter 7, Part 2)
Divine Bahamut (World of Illusions)
Shelke the Transparent
I talk more about these fights in other posts.
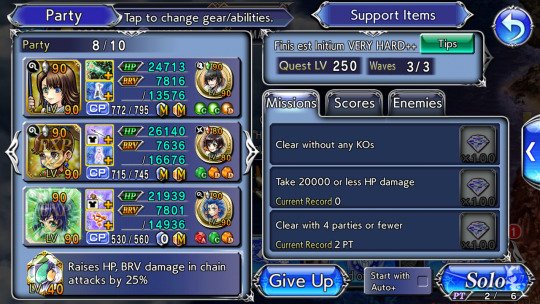
Finis Est Initium (Boss Rush) Lufenia+ Quest
Also known as Finis est Initium VERY HARD++. In a Boss Rush-type of battle, you can use several parties. If you’re able to win by using 4 or less parties, then you can get all the rewards.
Each party is limited to 30 turns. Summons and BT or BT+ phases are considered 1 turn. Each action a char takes, including using their Additional Abilities and equipped Calls, will cause the counter to tick down.
Once all 30 turns are up, you will be asked to change your party. You can also choose to switch to another team before your 30 turns are up.
Also, you can’t bring a friend support to a Boss Rush fight. And you can’t have the same chars or summons in your parties but you can repeat Calls.
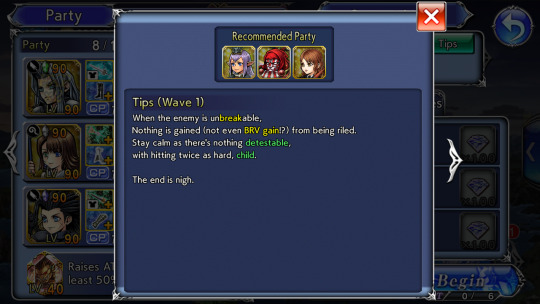
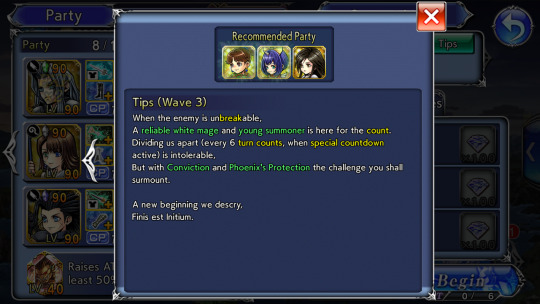
For this particular Boss Rush, there are 3 waves. Found the tips section for this quest pretty interesting. Here are some screenshots for reference:
Tips for wave 1
Tips for wave 2

Tips for wave 3
The first wave of this quest has 2 enemies, the Optimus. Their Lufenia orbs will appear on battle start. Once they drop down to 79% HP, the orbs will disappear but they'll show up again when the bosses get to 49% HP.
If a char deals 400k or more HP damage on a consecutive turn, the Lufenia orb count will be increased by 8. If the Optimus takes 10k or more BRV damage in 1 hit, the count will be increased by 1. If a char moves, the count will be decreased by 2.
Sephiroth was set to get his update, rework, Crystal Level 90 Awakening, and Burst Realization in a few days. When this happens, there will be like 2 days left before the Finis est Initium event ends.
So I decided to wait until I can Green Seph's BT before doing this Boss Rush fight. I thought doing so would make this quest easier. Besides, I was really looking forward to using Sephi on a Lufenia+ fight with a Green Burst and a maxed out Ultima Weapon.
While waiting, I was already thinking about what teams to use for each of the waves of this quest. Also watched a few vids for some ideas on how to deal with each wave.
Didn’t really take notes or anything though since I didn't think this fight was gonna be so hard. But when I finally got the chance to try out this quest, I couldn't even get past the first wave.
To be fair, I only looked up what the Lufenia orbs were for each wave. Didn't even bother reading what else the bosses here could do since I didn't think it was gonna be so bad.
So imagine my surprise when I started wave 1 and my chars weren't gaining brave at all. I was like WTF is happening here?
Apparently, the Optimus blocks all BRV gains other than from BRV attacks. So I can't battery my chars or rely on any battery effects. Eff! Annoying, to say the least.
Yeah, I know this was even mentioned in the Tips section but when I was doing this fight, I didn’t bother glancing at the Tips section again. Just went straight into the fight after setting up my team.
As if the no brave gains things wasn't bad enough, the Lufenia orbs here can be difficult to deal with as well.
Another problem I faced was how freaking hard these enemies hit. So in response to that, I decided to bring attack down debuffs and even the Bahamut summon only to then find out that the Optimus were immune to attack down debuffs. Eff!
They're also immune to breaks so Sephiroth isn't that good for this wave. My plan was to use him against the Optimus so I've been trying him here with different team comps but it wasn't working out.
Seph isn't that bad here though. His rework is really good and with him being fully built and maxed, he deals really good damage.
His LD and his base skills have a lot of BRV hits so he can still deal good damage even without being able to gain BRV via battery effects.
The problem is with his Ex, Black Materia. It doesn't deal BRV hits at all so it was liable to deal 0 HP damage if Sephi doesn't have even just a bit of brave before casting it.
Sephiroth's BT+ effect sets the BRV of all enemies to 1 for 4 turns. This is kinda useless though since the Optimus can't be broken so I can't keep on breaking then delaying them like I'd normally be able to do using Seph's BT.
However, since the enemies here tended to get thousands of brave, having Sephiroth be able to bring all that brave down to 1 does come in handy. Plus, his BT+ comes with other effects like raising the party's ATK.

Anyway, as I kept on trying this fight, it became clear that one of the main problems was the fact that the bosses hit so freaking hard. Sometimes, my chars just end up dying so I really needed some form of damage mitigation.
I tried to bring Zack here as my tank, but the main issue with this was that the Optimus are immune to lock down debuffs so they can't be forced to target Zack.
If they're targeting All, then it's fine but the moment they target someone other than Zack, his damage plummets since he deals more damage as long as he's being targeted.
A few more tries later and I ended up with a team of Sephiroth, Garnet, and Cissnei from Crisis Core: Final Fantasy VII with Ifrit as my summon. My Calls were Prishe's from Final Fantasy XI, Sazh Katzroy's from Final Fantasy XIII, and Seymour Guado's from Final Fantasy X.
Have all of Cissnei’s weapons fully MLB. She has her High Armor. She has triple perfect Artifacts and triple RF Spheres.
All of her Summon Boards have been completed. Unlocked parts of her Character Enhancement Boards, particularly the tiles that would give me her LD Call and LD extension passive.
Cissnei does a follow-up attack every time a char does a damaging move. She has a buff that makes it so that she always deals critical BRV damage even if an enemy isn’t broken.
She’ll always do a follow-up attack but this attack gets stronger the more stacks she has of her overhead buff. The catch is that this buff will always go down by 1 every turn.
With her LD, she’ll get a buff that will keep her overhead buff at max stacks. The catch is that this buff will only last for 1 turn.
Cissnei has some party auras but they’re not that good. She’s definitely more of a DPS than a support. Her damage isn’t that good when compared to other DPS though, especially not when her overhead buff isn’t at max stacks.
Can't get any battery from Garnet even with her BT+ effect up which sucks but she still provided great buffs and auras. Cissnei's follow up-attacks were helpful too so I could deal as much damage as possible to the Optimus.
In fact, things were going so well that by turn 3, the Optimus were down to 64% and 65% HP and I just activated Sephiroth's BT+ phase.
I thought I might as well try going all out in the beginning. The sooner the enemies go down, the better so I don't have to deal with them attacking my chars and possibly killing them.
Even without BRV gains and even with his Ex dealing 0 damage, Sephi still did really well. Having Garnet and Cissnei helped as well.
By the time Sephiroth was about to cast Heaven's Light, his finishing Burst+ move, both Optimus were down to 21% HP.

Sephi was able to deal around 14 million+ total HP damage during his Burst+ mode.
After that, it didn't take long before both Optimus fell. On one hand, this is great. IIRC, they didn't get a chance to move at all so I didn't have to worry about my chars dying.
But on the other hand, the bad news was that my Ifrit summon didn't get charged at all. I was hoping to use it on wave 1 because wave 2 prevents the use of summons.
Your summon's Blessing will still work but you can't use the summon itself on wave 2. So in this case, my chars will still benefit from Ifrit's attack up Blessing as long as they meet the activation condition but I won't be able to summon Ifrit himself at all.
Furthermore, if you enter wave 2 with your summon active, the boss will heal himself once the summon ends. He'll also use a group AoE BRV + HP attack called Megaflare.
The boss in wave 2 is called Dark Bahamut. He can summon a Penelo from Final Fantasy XII Manikin.
The good news about this wave was that BRV gains via battery effects are no longer blocked. Was really happy to see my chars finally being able to get thousands of brave again.
Dark Bahamut is immune to break, Freeze, disables, attack down, and launches. The Lufenia orb will show up once his recast bar is full. It will be canceled when he uses Megaflare+ (a stronger version of Megaflare) or when the orb count reaches 15 or more.
If a char batteries by 100% or more of theirs or an ally's max brave, then the count will be increased by 2 per chara. If the enemy takes critical brv damage, then the count will be increased by 3.
Whenever a char moves, the count will be decreased by 2. If the enemy moves, the count will be decreased by 2.
Bahamut will turn warp whenever the orb count reaches 15 or more. He'll then get 3 instant turns.
When he drops down to 79% and 49% HP, his recast bar will automatically be filled to the max. He'll also be immune to turn deletes and delays. And he'll gain brv every turn. This will be cancelled once he uses Megaflare+ or when the orb count gets to 15 or more.
The Penelo Manikin gets summoned by Bahamut at the 100%, 79%, 49% and 29% HP percentage threshold.
When I entered wave 2 with my current party, I thought things were going pretty well other than being annoyed that I couldn't use my summon anymore.
Still have like 19 turns left with this party so wanted to have them deal as much damage as possible to Bahamut before I have to switch teams.
Then the Penelo Manikin got to move since I was focusing on the boss and ignoring her. Ignoring her was a mistake though as I soon found out because the moment she got a turn, she proceeded to buff herself and Bahamut.
She also removed all of their debuffs except for Sephiroth's gold-framed Cellular Erosion debuff. Then she followed that up with a group BRV + HP attack that dealt full damage to my chars.
Didn't think this would hit so hard but it ended up killing Sephiroth. Eff! It would have killed Garnet too but she was able to survive with 1 HP thanks to her Last Stand. IIRC, the attack missed Cissnei which was the only reason why she didn’t die.
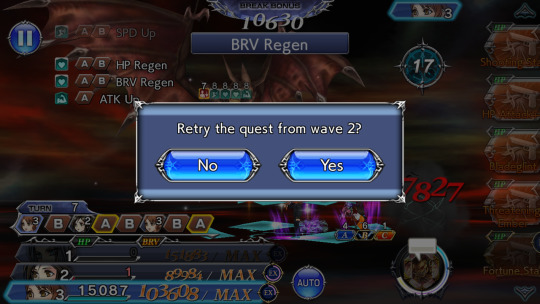
So I decided to "retry the quest from wave 2". This time, had my chars focus on killing Penelo first so she won't be able to move.
It was only after she died that I started attacking Bahamut. Since Garnet can battery now, keeping the Lufenia orb count high wasn't difficult. Cissnei can deal critical BRV damage too even if Bahamut can't be broken thanks to her buffs.
But if the orb count gets too high, Bahamut automatically turn warps. If his recast bar is full when this happens, then it's basically game over. His Megaflare+ move hits really hard. It doesn't help that he gets like 3 turns in a row after warping.
No matter how many times I've tried, there was just no way to survive Bahamut's onslaught of attacks. Really needed some form of damage mitigation here since there was no way to finish off Bahamut before he warps.
So I quit the fight and went back to the drawing board, trying out different comps and such. I was always trying to slot in either Sephiroth or Zack or even both on wave 1.
But then later I thought, why not just slot them on wave 2 or 3 then bring a different team to wave 1?
That team ended up being Garnet, Galuf Halm Baldesion from Final Fantasy V, and Cissnei with Odin as my summon. My Calls were Sazh's, Seymour's, and Prishe's.

Have all of Galuf's weapons fully MLB. All of his Boards have been completed. Galuf has his Bloom Stone. He also has his High Armor which has been upgraded to Blue.
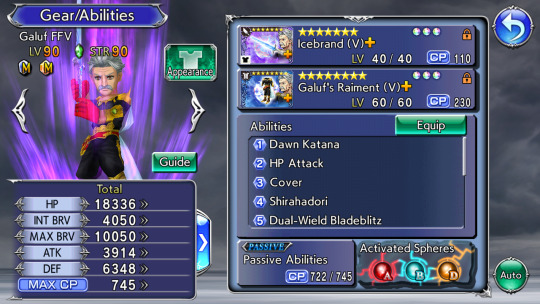
Galuf has perfect Artifacts - 3 ATK 108 with Buff Attack Up★★ (Raises ATK by 5% with active buffs). Even got him 3 ATK 108 with MAX BRV 330 Arts.
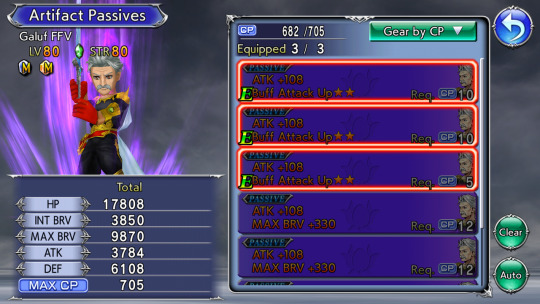
Galuf is equipped with the following real Spheres:
Eight’s (from Final Fantasy Type-0) Evasion Attack Up Shorter A Sphere
Raises own ATK by 20% for 3 turns when evading enemy attack
*Does not stack with same sphere
Galuf Halm Baldesion’s (from Final Fantasy V) Evasion Attack Up Longer B Sphere
When dodging attack:
• Raises ATK by 10% for 6 turns
Wakka’s (from Final Fantasy X) Buff Attack Boost All 5 D Sphere
With 5 or more buffs:
• Raises party’s MAX BRV, ATK by 5%
*Does not stack with same sphere

Galuf is temporarily equipped with my Level 5/5 Greatsword Ultima Weapon. He's a cover tank. He takes the place of his allies whenever they're being targeted so he's the one who will be attacked instead of them.
Galuf can evade most attacks. Whenever he evades an attack, he does 2 counter attacks. With the buff from his LD active, he'll still counter attack once even if he gets hit.
Galuf has some pretty decent party-wide buffs and auras. He can heal. His counters deal good damage too, especially since mine's wielding my maxed out Ultima Weapon and even has his High Armor upgraded to Blue.
With Galuf in my party, it was fine to let the enemies move. Unfortunately, as I soon found out, he can't evade all of their attacks so he ended up losing a lot of HP. Good thing he has Last Stand. And that both he and Garnet can heal.

Everyone was able to deal good damage even with no battery or brv gains. Still miss the battery and brv gain effects though. It sucks to see my chars with 0 or very little brv.
Maintaining the orb on wave 1 is tricky with this team. The 10k brv damage is easy to do but it's only +1 whereas it's minus 2 whenever a char moves so it's not as reliable.
Cissnei can do a consecutive turn but it's only right before an enemy moves because for some reason, her follow-up is counted as a consecutive turn.
So what happens is she uses a skill then, immediately after that, she does her follow-up before the enemy gets a turn, and that will increase the orb count.
Seymour's LD call came in handy for the delay too. Was saving it for later but both Optimus were set to move one after the other and they were targeting All so I just used Seymour's LD Call to delay them and buy me more time.
Both Optimus were already down to 16% HP when that happened, so it was only a matter of time before they fell.
Soon, they were at 6% HP. It was Garnet's turn. Her attack finished off one enemy and left the other at 1% HP. The attack also got my Odin summon to charge to full already.
Then it was Galuf's turn and his attack finished off the last Optimus. The annoying thing was it was now too late to use my summon. Sucks that it only finished charging now and not before.
Decided to just keep going for now. Used Garnet's BT+ phase already since my time was running out with this team.
I didn't use it in the first wave in the hopes of getting the summon gauge charged, so I could use my summon on said wave, but it didn't work out.
Bahamut got to use his recast ability. Was worried but thanks to Galuf, my chars didn't die although they did lose a bit of HP.
But the next time Bahamut used Megaflare+, it was more powerful and my chars nearly died. Their HP bars actually went down to the red.
Was all out of uses of Garnet's LD so I couldn’t use it to heal my chars. But at least her Ex, Holy Prayer, was fully charged.
Holy Prayer’s been fully charged for a while now but I haven’t bothered to use it because it doesn’t deal any damage. But I used it now for the party-wide heal.
Still have 4 turns left with this party but Bahamut was set to move after Garnet and he was targeting All.
If he deals HP damage again, won't have any more ways to heal my chars until Garnet's Ex charges again but with only like 4 turns left, it was doubtful Garnet's Ex would charge in that time since it takes a while to charge and that's even assuming Garnet can get a turn before I have to switch parties.
Considered my options before deciding to just switch partes already. It's a waste of 4 turns like how it was a waste to be unable to use my summon for this team, but eh, as long as I can get the win in the end, then in the grand scheme of things, this doesn't really matter. Still vexing though.

My second party was Sephiroth, Zack, and Yuna from Final Fantasy X with Ifrit as my summon. My Calls were Prishe's, Sazh's, and Ashelia B'nargin Dalmasca's from Final Fantasy XII.
Have all of Yuna’s weapons fully MLB. All of her boards have been completed. She has her Bloom Stone. Her High Armor’s been upgraded to Blue.

Yuna has triple perfect Artifacts - 3 Charged Esuna Boost★★ (Esuna use +1; raises MAX BRV by 40%) with Buff Attack Boost All★★ (Raises party’s MAX BRV, ATK by 10% with active buff).

Yuna is equipped with the following real Spheres:
Paladin Cecil Harvey’s (from Final Fantasy IV) Full HP Break Hit BRV Gain All C Sphere
When inflicting Break or attacking target afflicted with Break while own HP at MAX:
• Grants party 5% of individual MAX BRV once per turn
Queen’s (from Final Fantasy Type-0) Break Hit Attack Boost All Shorter D Sphere
When inflicting Break or attacking target afflicted with Break:
• Raises party’s MAX BRV, ATK by 5% for 3 turns
Yuna is currently equipped with her Burst weapon that's been upgraded to Green or BT+ 3/3. She's a support slash healer slash buffer. She can remove debuffs from the party. She also deals pretty decent damage.
Removed my Greatsword Ultima Weapon from Galuf then gave it back to Sephiroth.
Thanks to the buffs, auras, debuffs and such that I currently had active on the field, everyone was dealing really good damage. Being able to battery my chars helped a lot as well.
With Zack as my tank and with the enemies here not being immune to his lock debuff, there was also no danger of my chars dying.
It's been a while since I did this quest so I don't really remember the reason anymore but I decided to retry the fight from wave 2 and bring in a different party.
I think it was because I wanted to save Yuna for the last wave. Or maybe I was hoping to be able to get through these 2 waves with just 1 party.
When I quit the fight, Bahamut was already down to 36% HP. I'd already used Yuna's and Zack's BT+ finishers. I think I was about to use Seph's as well before opting to just restart the fight instead.

This time, I went in with Sephiroth, Zack, and Freya Crescent from Final Fantasy IX with Ifrit as my summon. My Calls were Prishe's, Ashe's, and Sazh's. Sephi was still equipped with my maxed out Ultima Weapon.

Have all of Freya’s weapons fully MLB. All of her Boards have been completed. She has triple perfect Artifacts and triple RF Spheres. Her High Armor’s been upgraded to Blue.
Freya is a support and healer with pretty good buffs and auras. She can also deal pretty decent damage. Her LD allows her to leap or fly up into the air where she can evade basically anything.
Until her next turn, every time a char moves, she’ll automatically follow that up with an attack of her own. She’ll also battery and heal the party. On her next turn, she’ll do an attack before landing back on the ground.
It was really annoying whenever the enemies got multiple turns in a row. But as long as Freya's up in the air while this happens, she'll deal off-turn damage so at least it doesn't feel like such a waste that my chars were all just standing there, unable to do anything while the boss attacks and attacks some more.

I tried to get rid of the Penelo Manikin but wasn't able to before she got a turn. Thanks to Zack and his BT+ effect, he was the only one who took damage from Penelo's attack.
So it wasn't that bad that Penelo got to move although it was annoying that she got to buff herself and Bahamut. The buffs last pretty long too but at least they didn't really gimp the damage of my chars. They were all still doing really well.
Chose to go with Sephiroth's BT+ phase over Zack's. After all, he's the one equipped with my maxed out Ultima Weapon.
Besides, I've used Zack's BT+ mode for lots of Lufenia+ fights already. But this is like the first Lufenia+ quest I get to use Sephi's Burst+ phase on.
Anyway, when I activated Sephiroth's Burst+ mode, Bahamut was down to 33% HP. The Penelo Manikin was still around but she was nearly dead. Zack had lost a lot of HP but since his BT+ effect was currently up, this wasn't an issue.
Freya was up in the air so she batteried and healed the party and attacked Bahamut every time Sephiroth moved. This helped restore some of Zack's HP and added to the damage Sephi was dealing against Bahamut.
So by the time Seph was about to cast Heaven's Light, the boss was down to 14% HP. The Penelo Manikin had croaked it earlier but Bahamut summoned a new one soon after. Sephi was able to deal around 11 million+ total HP damage during his BT+ mode.
A few turns later, Bahamut was finally down to 1% HP. It was Freya who dealt the killing blow. Still have 16 turns left with this team when this happened.
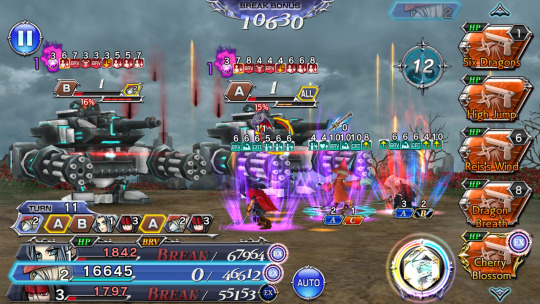
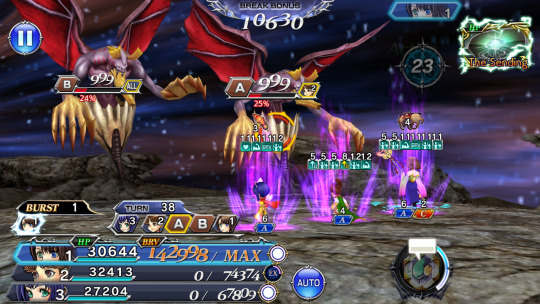
The third and final wave has 2 enemies, the Elvorets. They're immune to break and all debuffs.
They have this buff called Tower's Dark Wings that makes them stronger and weakens the attacks of their enemies. Tower's Dark Wings is a stacking buff and it increases by 1 stack every 6 player actions.
The Lufenia orb will show up once the bosses drop down to 79% HP. It will disappear once they reach 59% HP then reappear when they drop down to 49% HP before disappearing again when they get to 29% HP.
If the enemy takes off-turn, Holy BRV damage, excluding from counters, then the counts will be increased by 3. If a char extends the duration of their buffs, then the counts will be increased by 3.
If a char regens their HP, then the counts will be increased by 1. If a char or the boss moves, then the counts will be decreased by 3.
The Lufenia orb countdown attack isn't lethal. Triggering the orb will cause the enemies to deal group AoE BRV + HP damage then their Tower's Dark Wings buff will be maxed at 5 stacks.
The Elvorets can "cut in turn order" which will cause the turn order bar to now alternate between player and enemy turns.
The most annoying thing about this fight was not being able to debuff the enemies. This meant I couldn't use Zack's Lock debuff or Sephiroth's Cellular Erosion debuff.
Thankfully, the damage of my chars was still good. And the enemies getting to move wasn't a problem since I have Zack and his BT+ effect was still up. And at least I can use my summon now.
Saved Ashe’s Calls for this wave. The reason why I brought her was because her LD Call enchants the party with the holy element for a few turns.
Anyway, managed to get the Elvorets down to 38% HP before I had to switch my party.

Don't remember why now, but instead of switching my party, I decided to retry again from this wave. It doesn't look like it really made much of a difference though.

So this time, after being prompted to switch my party again, I did. Brought in Yuna, Porom from Final Fantasy IV, and Eiko from Final Fantasy IX with Pandemonium as my summon. My Calls were Cid Raines's from Final Fantasy XIII, Yuffie Kisaragi's from Final Fantasy VII, and Seymour's.
Raines's Calls can manipulate the turns of its Caller's allies. His LD Call will enable its Caller to initiate launches for 2 turns. Yuffie's Calls and Seymour’s LD Call can dispel buffs from enemies.
Porom and Eiko are boosted for this quest so they provide synergy stats to the entire party by being part of my team. Both are supports and healers with pretty good buffs and auras.
Mine are fully built and MLB with triple perfect Artifacts and triple RF Spheres. All of Porom’s Boards have been completed, and her High Armor’s been upgraded to Blue.
All of Eiko’s Summon Boards have been completed. Unlocked parts of her Character Enhancement Boards, particularly the tiles that would give me her LD extension passive.
Eiko has her High Armor and it’s been Realized to 0/3. The reason why I brought her to this fight is because she provides party-wide holy enchant so gonna be relying on her to help with the orbs here.
Went into Yuna's Burst+ phase as soon as I was able to set up all my relevant Calls and buffs and auras and such.
I was using Yuna’s Energy Ray++ move but then I discovered that her Sonic Wings++ move was better since it also batteries the party. This will ensure that my chars will always have a lot of brave to dump every time Yuna initiated a launch thanks to Raines’s LD Call.
So I decided to retry the quest from wave 3. When I went into Yuna's Burst+ phase, the Elvorets were down to 35% and 36% HP.

This time, I had Yuna spam Sonic Wings++ although IIRC, I did also use her LD, Energy Nova, once. By the time Yuna was about to cast the The Sending, her finishing Burst+ move, the Elvorets were down to 24% and 25% HP.
Afterwards, just kept on spamming skills. Ended up using my Seymour LD Call for the turn delay (another one of its effects is being able to delay the enemies by 2 turns) because the enemies didn't have their buff up and I thought it wasn't gonna show up anymore.

Was trying to buy more time so they won't get to move, not that it would have mattered much since all my chars can heal and Porom provides party-wide Last Stand.
Eiko's overhead buff will also automatically revive a char if they die as long as said buff has at least 1 stack. The buff will also automatically heal chars if they lose enough HP.
Of course, right after I use Seymour's LD was when the Tower's Dark Wings buff showed up and when the enemies started cutting in the turn order. Eff.
At least I hadn't used Yuffie's Calls yet. The Elvorets were down to 13% and 15% HP but my summon was far from being fully charged.
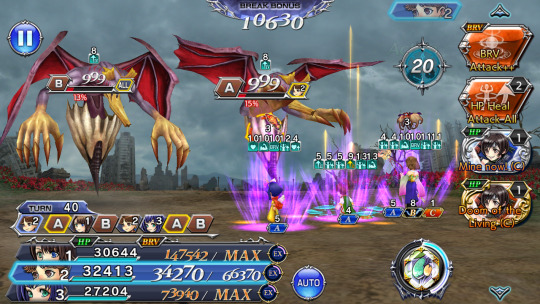
On Yuna's turn, had her use Raines's regular Call for the launch and turn manipulation, hoping to charge the summon gauge some more.
The 1 turn Yuna had left of Raines’s LD Call allowed her to initiate a launch with one of her own skills but this still wasn’t enough to charge the summon bar.
On Porom's turn, had her spam her Additional Ability. This buffs the party but doesn’t deal damage. However, with the buff from Porom’s LD, anything she does will trigger her follow-up attack so this helped in charging my summon gauge.
Summoned Pandemonium as soon as I could. By then the Elvorets were down to 2% and 4% HP so it was over.
IIRC, had Porom use her LD and this was enough to finish off both enemies at the same time, ending the fight on turn 43.
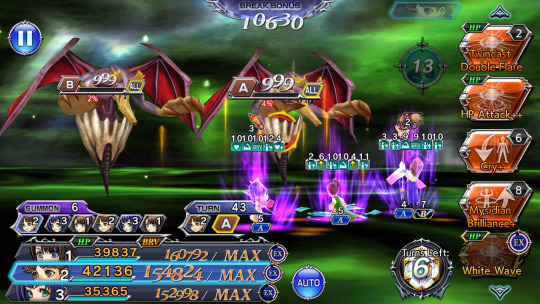
Got the score and all the other mission requirements. Man, this was a really long Boss Rush fight. Felt like it took forever. Glad it's finally over.
Everyone did well but the mechanics here kinda sucked, especially the no brave gains via battery effects thing on wave 1. Also didn’t like that the enemies weren’t breakable.
Glad I was able to get through all of these waves and even got to use Zack and Sephiroth. Sephi with BT+ 3/3 and maxed out Ultima weapon and Blue armor really did well. Looking forward to being able to use him for more Lufenia+ quests.
Anyway, here are the screenshots of all of my parties for this Boss Rush fight:
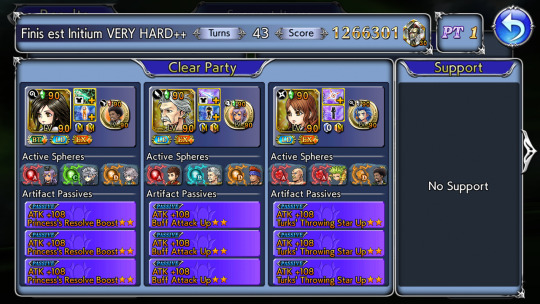
Party 1
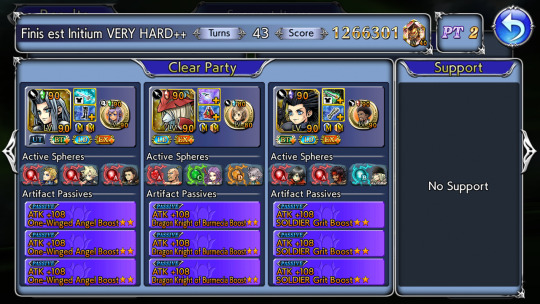
Party 2
Party 3

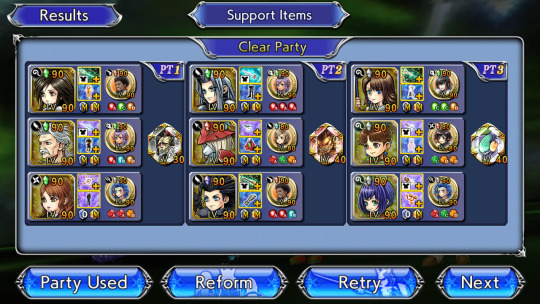
All parties
Conclusion
So, what about you? Which chars did you use to complete these Lufenia and Lufenia+ quests? Did you pull for either Sephiroth or Zack or both? Feel free to share your thoughts and opinions by leaving a comment below or by reblogging or replying to this post.
Notes:
screenshots are from my Dissidia Final Fantasy: Opera Omnia game account
#dissidia final fantasy opera omnia#this post stars:#sephiroth#zack fair#cissnei#final fantasy 7#freya crescent#eiko carol#garnet til alexandros#final fantasy 9#galuf halm baldesion#yuna#porom#dffoo lufenia fights series#dffoo garnet fights#dffoo zack fights#gacha games#mobile games#games#dffoo#dffoo sephiroth fights
2 notes
·
View notes
Text
Dissidia Final Fantasy: Opera Omnia Lufenia+ Quests with Sephiroth and Zack Fair Part 6
The Lufenia+ fights (level 250; currently the hardest kind of fight in the Dissidia Final Fantasy: Opera Omnia (DFFOO) mobile game) featured in this post include either Sephiroth from Final Fantasy VII (#ad) or Zack Fair from Crisis Core: Final Fantasy VII and Final Fantasy VII as part of the team lineup.

Table of Contents
Sephiroth info
Zack info
Garnet info
Lufenia quests list
Lufenia+ quests list
Divine Bahamut (World of Illusions) Lufenia+ Quest
Shelke the Transparent Lufenia+ Quest
Conclusion

Sephiroth from Final Fantasy VII
My Sephiroth is Level 80 and Crystal Level 80. His 15cp, 35cp, Ex, and LD are fully MLB. His Ex is at Ex+ 3/3 or Purple.

He’s currently equipped with his Burst weapon. His High Armor’s been upgraded to Blue. All of his Boards have been completed. He has his Bloom Stone.
He has 3 Attack 108 with Max Brave 330 Artifacts and 3 Attack 108 with One-Winged Angel Boost★★ (Raises INT BRV, MAX BRV, ATK, DEF by 5% if HP is MAX at start of last wave) Artifacts.

Sephiroth is equipped with the following A Spheres:
Edgar Roni Figaro’s (from Final Fantasy VI) Debuff Power
Increases BRV damage dealt by 10% while an enemy is debuffed
Cloud Strife’s (from Final Fantasy VII) Critical Power
Raises BRV damage dealt with critical hits by 10%
Vayne Carudas Solidor’s (from Final Fantasy XII) Broken Power
When attacking target afflicted with Break:
• Increases BRV damage dealt by 10%

I talk more about this in other posts, but I’ve been using Sephiroth for Lufenia quests (level 200) basically ever since I got his LD and BT even back when he wasn’t that good at all. Would love to be able to keep on using him for as long as possible.
Trying to make Sephi work on Lufenia fights even though he wasn’t the best for those quests can be challenging and even frustrating at times but it’s really amazing and awesome whenever it works.
Thankfully, ever since the Lufenia+ era started, I’ve been able to successfully use Sephiroth through all these fights although it hasn’t always been easy.
Needless to say, am really looking forward to the time wherein I can finally upgrade Sephi’s Burst to BT+ 3/3 or Green.
Zack Fair from Crisis Core: Final Fantasy VII and Final Fantasy VII
My Zack is Level 90 and Crystal Level 90. His 15cp, 35cp, Ex, and LD are fully MLB. His Ex is at Ex+ 3/3 or Purple. His Burst weapon has been upgraded to BT+ 3/3 or Green.

He’s currently equipped with a Level 5/5 Greatsword Ultima Weapon (UT). His High Armor’s been upgraded to Blue. All of his Boards have been completed. He has his Bloom Stone.
He has triple ATK 108 with MAX BRV 330 and triple ATK 108 with SOLDIER Grit Boost★★ (Raises MAX BRV by 15% and ATK by 5% if HP is MAX at start of last wave) Artifacts.

Zack is equipped with the following Spheres:
Machina Kunagiri’s (from Final Fantasy Type-0) Break Hit Base Attack Up Shorter A Sphere
Raises INT BRV, ATK by 10% for 3 turns when inflicting Break or attacking target afflicted with Break
Jecht’s (from Final Fantasy X) Critical Base Attack Up Shorter A Sphere
Raises INT BRV, ATK by 10% for 3 turns when dealing critical hit
Snow Villiers’s (from Final Fantasy XIII) Target Attack Up B Sphere
Raises ATK by 10% while targeted by enemies

I’ve used Zack on all the Lufenia+ quests that we’ve had since the debut of his LD although I did have to stop after a while. I talk more about those battles in other posts.
Zack’s one of my fave Final Fantasy chars so it was always my plan to get his Burst weapon and Green it. Now I want to try using him for as long as possible.
Garnet Til Alexandros XVII from Final Fantasy IX
My Garnet Til Alexandros XVII is Level 90 and Crystal Level 90. Her 15cp, 35cp, Ex, and LD are fully MLB. Her Ex is at Ex+ 3/3 or Purple.

Garnet is currently equipped with her Burst weapon which has been upgraded to BT+ 3/3 or Green. Her High Armor’s been upgraded to Blue. All of her Boards have been completed. She has her Bloom Stone.
She has 3 ATK 108 with MAX BRV 330 and 3 ATK 108 with Princess’s Resolve Boost★★ (Raises INT BRV, MAX BRV, ATK, DEF by 5% if HP is MAX at start of last wave) Artifacts.

Garnet is equipped with the following Spheres:
Prishe’s (from Final Fantasy XI) Weak Attack Boost Up Shorter A Sphere
When attacking target’s weakness:
• Raises own MAX BRV, ATK by 10% for 3 turns
*Does not stack with same sphere
Alphinaud Leveilleur’s (from Final Fantasy XIV) Buff Success Base Attack All Shorter C Sphere
After granting buff:
• Raises party’s INT BRV, ATK by 5% for 3 turns
Hope Estheim’s (from Final Fantasy XIII) Buff Success Attack Boost All Shorter D Sphere
After granting buff:
• Raises party’s MAX BRV, ATK by 5% for 3 turns
*Does not stack with same sphere
I’ve used Garnet in Lufenia and Lufenia+ fights ever since I got her Burst and Greened it. Now I’ve decided that I’ll use her if I can then no longer try to slot her in everywhere.
Garnet is still really good and she’s still one of the best supports in DFFOO so I’ll most likely still be using her for a lot of fights but there are quests where she won’t be able to work and that’s fine.
Right now, I just want to focus on trying to run Sephi and Zack through all these Lufenia and Lufenia+ fights.
Lufenia Quests List
So far, I’ve been able to use Sephiroth in the following Lufenia fights:
The Terse Turk
Mechanized Sentry (Guard Scorpion Raid)
Roses of May
Thrall of Darkness
Storming the Citadel (Mission Dungeon)
Tree for the Void
Soaring Flames (Boss Rush)
Divine Diabolos (World of Illusions)
Abyss: A Lead to the Thick of It
Keeper of the Farseer
Gentle Giant
Operation Airborne Interception
The Power of Ignorance
Garden of Despair (Boss Rush)
Eternal Light (Story Act 3 Chapter 1, Part 1)
Swordmaiden
Two Moons Waxing (Story Act 3 Chapter 1, Part 2)
Devourer of Light (Hell Wyrm Raid)
Reliable Partner
The Power of Knowledge
Solitude (Story Act 3 Chapter 2, Part 1)
The Yuke Cometh
Searching for Friends (Story Act 3 Chapter 2, Part 2)
His Raging Blade (Kaiser Behemoth Raid)
Abyss: Perfectum Stratum 5
Divine Alexander (World of Illusions)
The Power of Action
Crimson Arms
In the Garden of Evil (Boss Rush)
Dimensions’ End: Transcendence Tier 3
The Ice Reaper
The Man Known as the Immortal
Divine The Brothers (World of Illusions)
Around the Fire
The Power of Wisdom
Lord of Subsidence (Tunneler Raid)
The Redheaded Turk
Equinox Aurora: Gallicinium
The Forbidden Mesa (Boss Rush)
Umbral Equinox: Noctis
Illuminating Dreams (Story Act 3 Chapter 4, Part 1)
The Terse Turk
Twilight Banquet (Astaroth Raid)
Thrall of Darkness
In Passing (Story Act 3 Chapter 4, Part 2)
The Abandoned Laboratory VERY HARD (Boss Rush)
The Abandoned Laboratory VERY HARD+ (Boss Rush)
Perfectum 6th Stratum Part 4
Cavern of No Return VERY HARD+ (Boss Rush)
Lufenia+ Quests List
So far, I’ve been able to use Sephiroth in the following Lufenia+ fights:
Divine Realm
Divine Pandemonium (World of Illusions)
Gentle Giant
Lofty Souls
Commodore of the Skies
A Glimmer in the Dark
Lure of the Lush (Rafflesia Raid)
Illusory Lighthouse (Mission Dungeon)
Shelke the Transparent
Queen of Charm
Whither Feelings (Intersecting Wills)
Divine Shiva (World of Illusions)
Mother Fixation
Triple Gateway (CPU Raid)
Back to Back (Intersecting Wills)
Malodorous Night
Heartless Gaze
Gathering Bearers, Entrusted Principle (Story Act 3 Chapter 5, Part 1)
Mission Dungeon: Glittering City of Gold
Where the Compass Points (Story Act 3 Chapter 5, Part 2)
Savage Winds (Elvoret Raid)
Parted Hopes (Intersecting Wills)
Gentle Fist
Divine Ifrit (World of Illusions)
Return of the Queen
The Power of Wisdom
Wings Graven with Emotion
Crevasse β Part 7
Perfectum 6th Stratum Part 5 Quest Level 215
Perfectum 6th Stratum Part 6
Annular Equinox: Annularity
Annular Equinox: Second Contact Quest Level 220
Unshakable Conviction (Intersecting Wills)
Lunar Tyrant
Family -Shackles- (Story Act 3 Chapter 6, Part 1)
Perfect Size (Intersecting Wills)
Family -Bonds- (Story Act 3 Chapter 6, Part 2)
Supplication for Catastrophe
Starting Out (Intersecting Wills)
Cloudy with a Chance of Squall
Divine Leviathan (World of Illusions)
Lofty Souls
An Elegant Coffee Break
Cloudy with a Chance of Meteor
Our Memories
Howling Winds
Holy Ground (Story Act 3 Chapter 7, Part 1)
Respite? Or Quagmire? (Intersecting Wills)
Distorted Providence
Eyes on the Prize
Six-Warrior Quests (Prelude)
Roaring Thunder (Intersecting Wills)
The Planet & The Hero (Story Act 3, Chapter 7, Part 2)
So far, I’ve been able to use Garnet in the following Lufenia+ fights:
Crevasse β Part 7
Perfectum 6th Stratum Part 4 Lufenia Quest
Perfectum 6th Stratum Part 5 Quest Level 215
Perfectum 6th Stratum Part 6
Annular Equinox: Annularity
Annular Equinox: Second Contact Quest Level 220
Unshakable Conviction (Intersecting Wills)
Lunar Tyrant
Family -Shackles- (Story Act 3 Chapter 6, Part 1)
Perfect Size (Intersecting Wills)
Family -Bonds- (Story Act 3 Chapter 6, Part 2)
Supplication for Catastrophe
Starting Out (Intersecting Wills)
Cavern of No Return VERY HARD+ (Boss Rush)
Cloudy with a Chance of Squall
Divine Leviathan (World of Illusions)
Lofty Souls
An Elegant Coffee Break
Our Memories
Howling Winds
Holy Ground (Story Act 3 Chapter 7, Part 1)
Respite? Or Quagmire? (Intersecting Wills)
Distorted Providence
Eyes on the Prize
Six-Warrior Quests (Prelude)
Roaring Thunder (Intersecting Wills)
So far, I’ve been able to use Zack in the following Lufenia+ fights:
Lure of the Lush (Rafflesia Raid)
Illusory Lighthouse (Mission Dungeon)
Shelke the Transparent
Queen of Charm
Whither Feelings (Intersecting Wills)
The Abandoned Laboratory VERY HARD Boss Rush Lufenia
The Abandoned Laboratory VERY HARD+ Boss Rush Lufenia
Divine Shiva (World of Illusions)
Mother Fixation
Triple Gateway (CPU Raid)
Back to Back (Intersecting Wills)
Malodorous Night
Heartless Gaze
Gathering Bearers, Entrusted Principle (Story Act 3 Chapter 5, Part 1)
Mission Dungeon: Glittering City of Gold
Where the Compass Points (Story Act 3 Chapter 5, Part 2)
Divine Ifrit (World of Illusions)
The Power of Wisdom
Crevasse β Part 6
Perfectum 6th Stratum Part 6
Annular Equinox: Second Contact Quest Level 220
Unshakable Conviction (Intersecting Wills)
Cloudy with a Chance of Squall
Divine Leviathan (World of Illusions)
Lofty Souls
An Elegant Coffee Break
Cloudy with a Chance of Meteor
Our Memories
Howling Winds
Holy Ground (Story Act 3 Chapter 7, Part 1)
Respite? Or Quagmire? (Intersecting Wills)
Distorted Providence
Eyes on the Prize
Six-Warrior Quests (Prelude)
Roaring Thunder (Intersecting Wills)
The Planet & The Hero (Story Act 3, Chapter 7, Part 2)
I talk more about these fights in other posts.
Divine Bahamut (World of Illusions) Lufenia+ Quest
Also known as Assailing Bahamut LUFENIA+. This fight has 1 wave with 1 enemy, Bahamut <Material>. He's immune to Freeze and other such debuffs that prevent action. He's also immune to turn deletes and delays, including via break. He has attacks that are guaranteed to hit.
Bahamut can summon 2 minions known as the Attack Dragonstar <Material> and the Support Dragonstar <Material>. These add-ons are immortal. Any damage dealt to them will immediately be healed. They're immune to Freeze and debuffs that prevent action. They can't be launched.
The Attack Dragonstar can deal HP damage that's guaranteed to hit. The Support Dragonstar will BRV battery his allies every turn.
The Lufenia orb will appear on Bahamut once he drops down to 89% HP with a max count of 3. It will disappear when he gets to 79% HP.
It will reappear when Bahamut gets to 59% HP with a max count of 2. Then it will disappear when he drops down to 39% HP. It will appear again when he drops down to 29% HP with a max count of 1.
To pause the Lufenia orb count, Bahamut must take 2 consecutive attacks from the same char. There will be no changes to the orb count if a char moves. If Bahamut moves, the count will be decreased by 1.
Once Bahamut drops down to the 89%, 69%, 49%, 29%, and 9% HP percentage thresholds, he will trigger Dragon King's Providence. This will prevent his BRV from dropping below 1% of his max brave. This will last for 10 turns.
The Lufenia orb on this fight can be really tricky to handle. A mistake could cost you the fight, especially during the latter part of the battle when the orb count is maxed out at 1.
The good news is that the count will only decrease whenever Bahamut moves. So if Bahamut never gets a turn, then the orb shouldn't be an issue at all. But the problem is that Bahamut is immune to turn deletes and delays, even via break.
That's where Quistis Trepe from Final Fantasy VIII comes in. IIRC, she's the only char who can bypass an enemy's immunity to turn delays.
My Quistis has all of her weapons fully MLB. She doesn't have her High Armor though. All of her Summon Boards have been completed.
Unlocked parts of her Character Enhancement Boards, particularly the tiles that would give me her LD Call and LD extension passive.
Quistis has triple perfect Artifacts and triple RF Spheres. She also has her Bloom Stone.
Quistis is a support with pretty decent buffs and auras. She can battery the party but she can't heal. She can debuff enemies too. Her main claim to fame is being able to delay enemies with basically all of her skills.
Aside from Quistis, the rest of my team was Zack and Yuna from Final Fantasy X with Ifrit as my summon. My Calls were Cid Raines's from Final Fantasy XIII, Kurasame Susaya's from Final Fantasy Type-0, and Raijin's from Final Fantasy VIII.
Have all of Yuna’s weapons fully MLB. All of her boards have been completed. She has her Bloom Stone. Her High Armor’s been upgraded to Blue.
She has triple perfect Artifacts - 3 Charged Esuna Boost★★ (Esuna use +1; raises MAX BRV by 40%) with Buff Attack Boost All★★ (Raises party’s MAX BRV, ATK by 10% with active buff).

Yuna is equipped with the following real Spheres:
Paladin Cecil Harvey’s (from Final Fantasy IV) Full HP Break Hit BRV Gain All C Sphere
When inflicting Break or attacking target afflicted with Break while own HP at MAX:
• Grants party 5% of individual MAX BRV once per turn
Queen’s (from Final Fantasy Type-0) Break Hit Attack Boost All Shorter D Sphere
When inflicting Break or attacking target afflicted with Break:
• Raises party’s MAX BRV, ATK by 5% for 3 turns

Yuna is a support with pretty great buffs and auras. She can battery. She can heal. She can remove debuffs. She can even deal pretty decent damage.
I wanted to use Yuna as my support for this fight instead of Garnet because I just upgraded or Greened her Burst weapon to BT+ 3/3. I talk more about my reasons for doing this on another post.

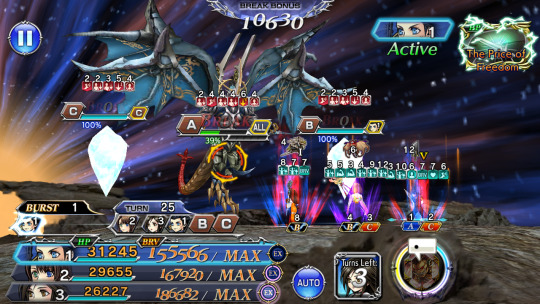
Anyway, so as soon as the fight started and Quistis got to move, just had her focus on delaying Bahamut as much as possible. Had Yuna and Zack use their BT+ finishers already then just had everyone spam their skills. They all did really well.
Zack dealt super special awesome damage as always. Yuna's buffs and auras were helpful.
And with Quistis here, I didn’t need to worry about the Lufenia orb. Her damage wasn't that good though, especially since mine wasn't fully built at all. But she still did pretty well, all things considered.
Much later, I switched out Quistis for the friend support Garnet that I borrowed. After setting up all of my Calls, buffs, debuffs, and such, activated Zack's Burst+ mode already. By then Bahamut was down to 63% HP.

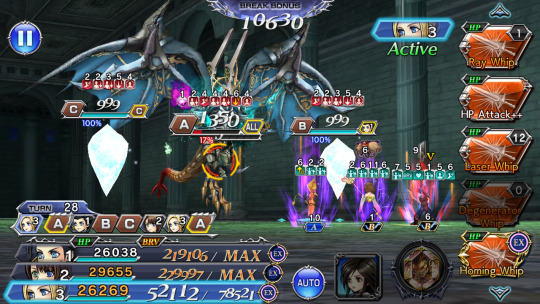
By the time Zack was about to cast the The Price of Freedom, his finishing Burst+ move, Bahamut was down to 39% HP.
Zack was able to deal around 28 million+ total HP damage during his Burst+ phase.
Summoned Ifrit a few turns later. Things would have been going really well if not for the fact that Bahamut was set to get a turn right after the summon ended and it was clear that I wouldn't be able to finish him off before that happened.
The Lufenia orb was currently at 1 and since I have no way of pausing it, letting Bahamut move was not an option.
Needed Quistis back now so when it was Garnet's turn to move, just had her use her Additional Ability instead of her LD. This was a complete and utter waste but had no choice otherwise Bahamut would get a turn.

Managed to get Quistis back on the field but all was still not well. The problem was that I'd already used up all of Quistis's Degenerator Whip moves. This skill allows her to delay an enemy by 3 turns.
I still have uses of her other skills but they only delay enemies by either 1 or 2 turns.
Quistis’s LD, Ray Whip, can delay enemies by 2 turns. Using this will also give back 1 more use of Degenerator Whip. Still have 1 more use of this LD so had Quistis cast this to buy me some more time.
Unfortunately, it wasn't enough. If Quistis had been able to move again before Bahamut, I would have been able to keep on delaying him but her turn got pushed back to after him so it's over.
It was Yuna's turn and Bahamut was moving right after her. Bahamut was down to 14% HP. But there was no way Yuna would be able to take him down to 0 HP with 1 attack.

So had no choice but to try this fight again. Brought in the same team but I opted to change some of my Calls.
My Calls were now Cid Raines's, Rem Tokimiya's from Final Fantasy Type-0, and Seymour Guado's from Final Fantasy X. Also changed my summon from Ifrit to Bahamut.

This time I didn't start by trying to delay Bahamut to oblivion right away. Opted to cast Quistis's other skills first and saved as many uses of her Degenerator Whip as possible.
After all, the Lufenia orb will start with a count of 3 so letting Bahamut move during this time or even during the times wherein the orb wasn't currently around shouldn't be an issue.
It's only when Bahamut gets the 1-count Lufenia orb that I really can't let him move. And this is when I need to spam Quistis's Degenerator Whip.
So in the beginning, I let Bahamut have a few turns. This resulted in my chars losing some HP but at least no one died.

Also opted not to use Yuna's and Zack's BT+ finishers right away. This fight is actually really long because Bahamut has a whopping 60 million HP so I couldn’t just go into Zack’s Burst+ mode right away.
Was still spamming skills with my chars but saved the important abilities and such (like Quistis’s Degenerator Whip and Zack’s BT+ phase) for later in the fight.
Still switched out Qustis for the friend support Garnet that I borrowed but this happened way later on. By the time I activated Zack's Burst+ phase, Bahamut was down to 46% HP and the Lufenia orb was at 2.
By the time Zack was about to cast the The Price of Freedom, Bahamut was down to 25% HP and the Lufenia orb was at 1.

Zack was able to deal around 26 million+ total HP damage during his Burst+ mode.
Before switching out Quistis, had her spam her Degenerator Whip to delay Bahamut so thankfully he wasn't set to move anytime soon.
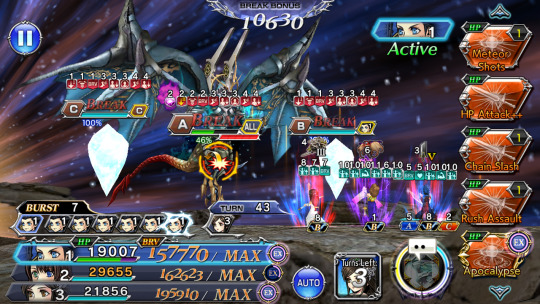
Also thankfully, the fight seemed to be winding down already. Summoned Bahamut a few turns later. By then the enemy was down to 7% HP.
The Bahamut summon enabled my chars to spam their Ex abilities. Zack's Ex, Apocalypse, deals really good damage so just had him keep using it.
Garnet's Ex doesn't deal damage so just kept on having her use her LD. Yuna's Ex does deal damage so alternated between using that and her LD.

Soon Bahamut only had 1% HP left. It was Zack's turn so he was the one who dealt the killing blow, ending the fight on turn 49.

Got the score and all the other mission requirements. Glad I got to use Yuna for this quest.
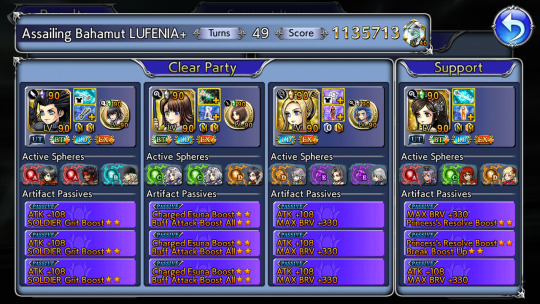
IIRC, this is the first Lufenia+ fight I got to use her in after Greening her. She did really well. Having Quistis helped make this fight a bit easier to deal with and Zack was super special awesome as always.
For my Sephi clear of this fight, my team was Sephiroth, Garnet, and Quistis with Ifrit as my summon. My Calls were Rem's, Raines's, and Lilisette's from Final Fantasy XI.

Like with my Zack clear, let Bahamut have a few turns in the beginning. But since I didn't bring a tank like Zack, there were times wherein my chars nearly died.

At least I have Garnet although she doesn't have an HP Regen buff so I can only rely on her Ex and LD for burst healing. Her Ex doesn't charge that fast though and obviously, couldn't just spam her LD since it has a limited number of uses.
I was worried when Bahamut's recast bar got charged to the max and I couldn't keep him from moving. I could summon Ifrit already but I didn't want to do that yet since the fight was a long way away from ending what with Bahamut still having 75% HP left.

So I decided to just let Bahamut attack. Will just restart the fight if my chars fail to survive. But to my surprise and relief, no one died. Just needed to get everyone back to full health before Bahamut's next HP attack.
Much, much later, I switched out Sephiroth for the friend support Prishe from Final Fantasy XI that I borrowed.
Would have preferred to switch out Quistis instead but I felt like I needed more buffs and auras. And I do need to keep on delaying Bahamut.
After setting up my buffs, Calls, and such, activated Garnet's BT+ mode already. By then, Bahamut was down to 54% HP.
Normally, I would have gone with Sephi's BT phase but with Bahamut having so much HP and with this team lacking an updated DPS (Garnet deals really good damage but she's more of a support than a DPS), it felt like I needed to use a char's BT+ mode for more damage.
Anyway, by the time Garnet was about to cast Divine Judgment, her finishing Burst+ move, Bahamut was down to 45% HP.
Prishe is a DPS who can hit weakness damage. She's actually perfect for this fight when it comes to dealing with the Lufenia orb here.
With her being fully built and in addition to the effects of her BT+ as well as Garnet's and all the other buffs, auras, and such that were currently active on the field, Prishe dealt really good damage.

Prishe made it possible to pause the orb when the turn order got a bit messed up and I wasn't able to get Quistis to delay Bahamut before he got a turn.
As usual Bahamut's recast ability nearly killed my chars but at least they were all able to survive. As soon as Quistis got a turn, had her start delaying Bahamut to oblivion already.

When I summoned Ifrit, Bahamut was down to 32% HP. When Sephiroth returned to the field, Bahamut only had 16% HP left. The orb was now maxed at 1 but it was fine since Bahamut wasn't set to move anytime soon thanks to Quistis.
Just continued spamming skills, hoping the fight would end already. Soon, Bahamut was finally down to 2% HP. It felt like it took forever before this happened. My chars were nearly out of skills so glad the fight was finally winding down already.
It was Quistis's turn and she was all out of uses of her LD and Degenerator Whip. She still has 6 uses of Laser Whip. And at least her Ex, Homing Whip, charges really fast.

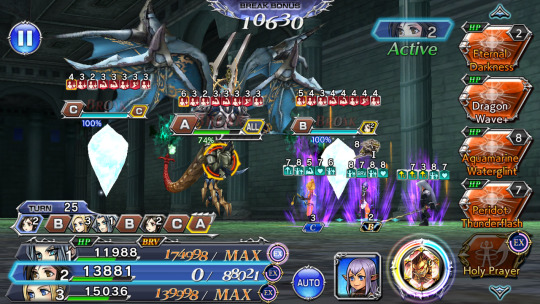
Quistis’s attack took Bahamut down to 1% HP. It was now Garnet's turn. She was all out of uses of her LD. She only has 2 uses of Peridot Thunderflash and 7 uses of Aquamarine Waterglint left.
Garnet’s attack still left Bahamut at 1% HP. He's really freaking tanky so it feels like it takes a few turns before his HP bar goes down.
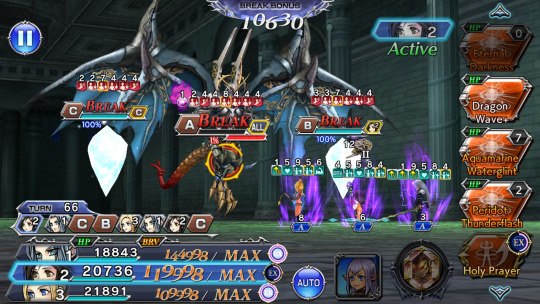
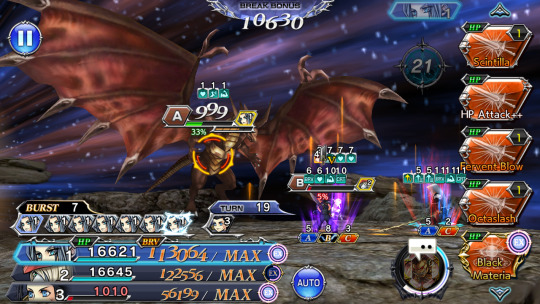
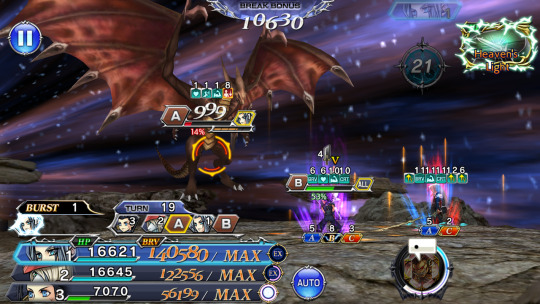
It was now Sephiroth's turn. He has 0 uses of his LD, Scintilla. He has 2 uses of Octaslash and 5 uses of Fervent Blow left. His Ex, Black Materia, will give him a free skill after being used so this helped keep him from running out of abilities.
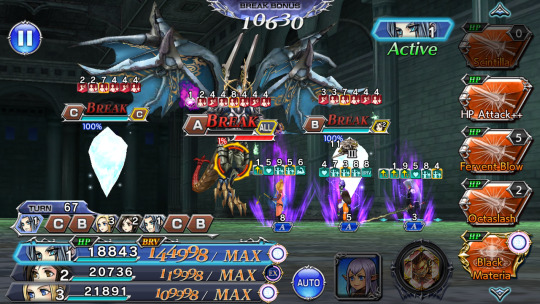
Thankfully, Sephiroth's attack (IIRC, had him use Octaslash) was enough to finish off Bahamut, ending the fight on turn 68. Hell, yes! And freaking finally! Felt like this battle took forever to finish.
Got the score and all the other mission requirements. So glad I was able to run Sephi through yet another Lufenia+ quest. This battle was a pain to run him on though. Definitely don't want to do this again.

Shelke the Transparent Lufenia+ Quest
This fight has 1 wave with 1 enemy, the Dragonfly. He can summon up to 2 add-ons, the Sweepers. The Dragonfly is immune to any debuff that has Confuse.
The Sweeper is immune to being launched. He can inflict the attack down debuff. He also has this move called Supporting Dragonfly. This will cause him to battery the Dragonfly, give him a speed up aura buff, and warp his turn to the front. This can be deadly because the boss can hit really hard.
The Lufenia orb will show up on the boss on battle start. If a char deals fire BRV damage to the boss, the count will be increased by 4. If a char or the boss moves, the count will be decreased by 1.
When the Dragonfly reaches the 100%, 79%, 59%, 39%, and 19% HP percentage thresholds, he will trigger "Calling reinforcements and readying attack!".
If there are less than 2 minions on the field, the Dragonfly will summon one. He will then fully heal and battery his minions. He'll delay himself by like 2 turns then gain a 100% evasion aura. There's no way to stop this from happening. It will even happen during summon mode or a char's BT or BT+ phase.
If any minion is alive by the time the boss gets a turn, he will use an AoE BRV + HP attack that deals full HP damage. Afterwards, his evasion aura will be cancelled.
The only other way to cancel the boss's evasion aura is to kill his minions. Doing this will also cause the Dragonfly to get 1 turn of a defense down and brave damage taken up debuff.
This fight seems really annoying and since I don't really have a lot of time at the moment, decided to only do 1 run of this quest. Besides, considering how hard the boss hits, I'd need a tank for my Sephi clear anyway so might as well pair the 2 SOLDIERs together.
So for this fight my team was Sephiroth, Zack, and Freya Crescent from Final Fantasy IX with Ifrit as my summon. My Calls were Lulu's from Final Fantasy X, Cid Raines's, and Ignis Scientia’s from Final Fantasy XV.

Lulu's regular Call gives a party-wide fire enchant buff. I think her LD Call does this too but, unfortunately, I don't have her LD. My Lulu isn't built at all which is why I can't bring her to this fight and just have to rely on her Call to help with the Lufenia orb here.
Ignis's LD Call also provides party-wide fire enchant. I could have brought him to this fight but I opted to go with Freya instead even if she doesn't have fire enchant because my Freya is more built than my Ignis.
Have all of Freya’s weapons fully MLB. All of her Boards have been completed. She has triple perfect Artifacts and triple RF Spheres. Her High Armor’s been upgraded to Blue.
Freya is a support and healer with pretty good buffs and auras. She can also deal pretty decent damage. Her LD allows her to leap or fly up into the air.
Until her next turn, every time a char moves, she’ll automatically follow that up with an attack of her own. She’ll also battery and heal the party. On her next turn, she’ll do an attack before landing back on the ground.
While Freya is up in the air, she can evade basically anything. All attacks will miss her but this also means that buffs allies can give her will miss her as well.
Buffs she already has won't tick down though. So even if the fire enchant buff runs out on Sephi and Zack, Freya can keep holding on to it as long as she's in the air.
One of the most annoying things about this fight is how the main boss can give himself 100% evasion and how this happens several times during the course of the battle. When this happens, I either have to let him get a turn or finish off his minions so I can cancel or remove his evasion aura.
Since I have Zack, letting the boss attack wasn't really an issue but it's still annoying to have to deal with the evasion aura anyway. Thankfully, the minion doesn't have much HP so it doesn't take that long to get rid of him so I can get back to attacking the main boss.
Zack did very well as always. He would have done better if I'd been able to bring another support for him. Freya did well too. Her follow up attacks mean more damage and her buffs and auras were very helpful as well. Sephi did well enough too, I suppose.
Anyway, activated Zack's Burst+ mode when the Dragonfly was down to 50% HP and his minion was no longer around.

Normally, I would have switched out one of my chars to bring in the friend support that I borrowed. This time, I borrowed a Garnet friend so bringing her in and using her BT+ finisher would have increased Zack's damage output.
But I didn't want to switch out Sephiroth. This is also supposed to be his run so I wanted him to contribute more to this fight.
Didn't want to switch out Freya either since she was helping with her buffs and auras and off-turn damage. So I decided to see if I could make things work like this.
Sometime during Zack's BT+ phase, the Sweeper got summoned again so had no choice but to have Zack switch from attacking the boss to attacking the minion.
Got rid of the Sweeper as soon as possible so Zack could get back to targeting the main boss.
By the time Zack was about to cast the The Price of Freedom, the Dragonfly was down to 29% HP.
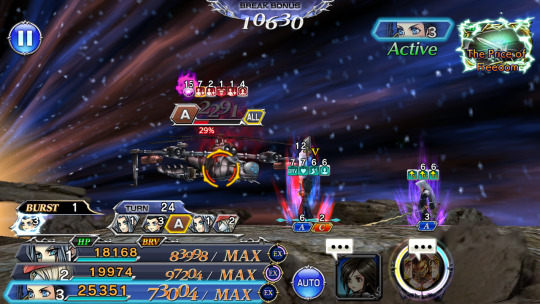
Just kept on spamming skills. Soon, the Sweeper got summoned again so once again, just had my chars focus on getting rid of him ASAP so they can get back to hitting the Dragonfly.

Summoned Ifrit when the Dragonfly was down to 17% HP. Soon, the Dragonfly was at 8% HP. It was Zack's turn. IIRC, had him use Chain Slash and this took the boss down to 2% HP.

It's Sephiroth's turn now. His attack (IIRC, had him use Scintilla, his LD) finished off the Dragonfly, ending the fight on turn 29.
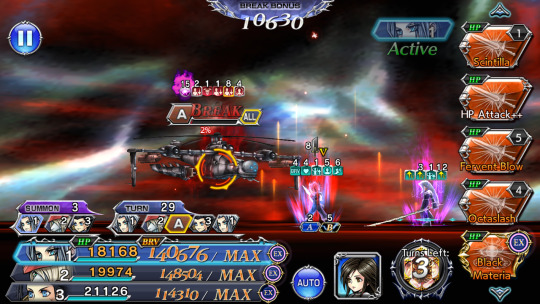
Got the score and all the other mission requirements. It was nice to be able to run both Sephiroth and Zack together on a Lufenia+ quest. Also pleased that I didn't need to bring in the friend support Garnet that I borrowed.

Conclusion
So, what about you? Which chars did you use to complete these Lufenia and Lufenia+ quests? Did you pull for either Sephiroth or Zack or both? Feel free to share your thoughts and opinions by leaving a comment below or by reblogging or replying to this post.
Notes:
screenshots are from my Dissidia Final Fantasy: Opera Omnia game account
#dissidia final fantasy opera omnia#this post stars:#sephiroth#zack fair#final fantasy 7#freya crescent#garnet til alexandros#final fantasy 9#yuna#quistis trepe#dffoo#mobile games#dffoo zack fights#dffoo sephiroth fights#games#gacha games#dffoo garnet fights#dffoo lufenia fights series
2 notes
·
View notes
Text
Dissidia Final Fantasy: Opera Omnia Lufenia+ Quests with Sephiroth and Zack Fair Part 5
The Lufenia+ fights (level 250; currently the hardest kind of fight in the Dissidia Final Fantasy: Opera Omnia (DFFOO) mobile game) featured in this post include either Sephiroth from Final Fantasy VII (#ad) or Zack Fair from Crisis Core: Final Fantasy VII and Final Fantasy VII as part of the team lineup.

Table of Contents
Sephiroth info
Zack info
Garnet info
Lufenia quests list
Lufenia+ quests list
Roaring Thunder (Intersecting Wills) Lufenia+ Quest
The Planet & The Hero (Story Act 3, Chapter 7, Part 2) Lufenia+ Quest
Conclusion

Sephiroth from Final Fantasy VII
My Sephiroth is Level 80 and Crystal Level 80. His 15cp, 35cp, Ex, and LD are fully MLB. His Ex is at Ex+ 3/3 or Purple.

He’s currently equipped with his Burst weapon. His High Armor’s been upgraded to Blue. All of his Boards have been completed. He has his Bloom Stone.
He has 3 Attack 108 with Max Brave 330 Artifacts and 3 Attack 108 with One-Winged Angel Boost★★ (Raises INT BRV, MAX BRV, ATK, DEF by 5% if HP is MAX at start of last wave) Artifacts.
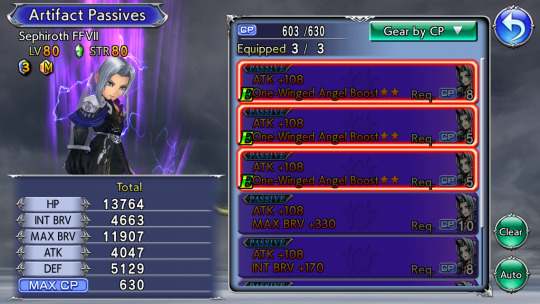
Sephiroth is equipped with the following A Spheres:
Edgar Roni Figaro’s (from Final Fantasy VI) Debuff Power
Increases BRV damage dealt by 10% while an enemy is debuffed
Cloud Strife’s (from Final Fantasy VII) Critical Power
Raises BRV damage dealt with critical hits by 10%
Vayne Carudas Solidor’s (from Final Fantasy XII) Broken Power
When attacking target afflicted with Break:
• Increases BRV damage dealt by 10%

I talk more about this in other posts, but I’ve been using Sephiroth for Lufenia quests (level 200) basically ever since I got his LD and BT even back when he wasn’t that good at all. Would love to be able to keep on using him for as long as possible.
Trying to make Sephi work on Lufenia fights even though he wasn’t the best for those quests can be challenging and even frustrating at times but it’s really amazing and awesome whenever it works.
Thankfully, ever since the Lufenia+ era started, I’ve been able to successfully use Sephiroth through all these fights although it hasn’t always been easy.
Needless to say, am really looking forward to the time wherein I can finally upgrade Sephi’s Burst to BT+ 3/3 or Green.
Zack Fair from Crisis Core: Final Fantasy VII and Final Fantasy VII
My Zack is Level 90 and Crystal Level 90. His 15cp, 35cp, Ex, and LD are fully MLB. His Ex is at Ex+ 3/3 or Purple. His Burst weapon has been upgraded to BT+ 3/3 or Green.
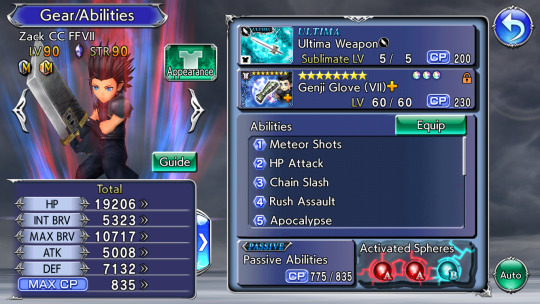
He’s currently equipped with a Level 5/5 Greatsword Ultima Weapon (UT). His High Armor’s been upgraded to Blue. All of his Boards have been completed. He has his Bloom Stone.
He has triple ATK 108 with MAX BRV 330 and triple ATK 108 with SOLDIER Grit Boost★★ (Raises MAX BRV by 15% and ATK by 5% if HP is MAX at start of last wave) Artifacts.
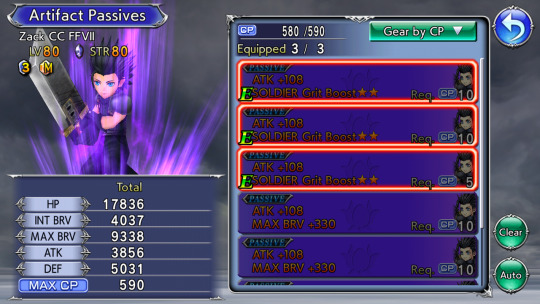
Zack is equipped with the following Spheres:
Machina Kunagiri’s (from Final Fantasy Type-0) Break Hit Base Attack Up Shorter A Sphere
Raises INT BRV, ATK by 10% for 3 turns when inflicting Break or attacking target afflicted with Break
Jecht’s (from Final Fantasy X) Critical Base Attack Up Shorter A Sphere
Raises INT BRV, ATK by 10% for 3 turns when dealing critical hit
Snow Villiers’s (from Final Fantasy XIII) Target Attack Up B Sphere
Raises ATK by 10% while targeted by enemies
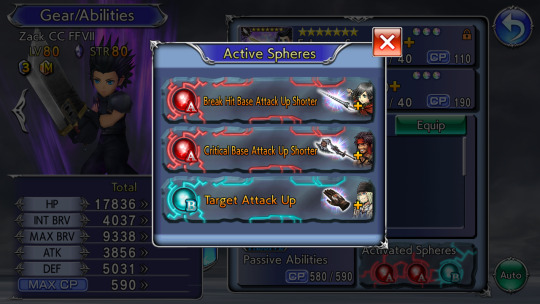
I’ve used Zack on all the Lufenia+ quests that we’ve had since the debut of his LD although I did have to stop after a while. I talk more about those battles in other posts.
Zack’s one of my fave Final Fantasy chars so it was always my plan to get his Burst weapon and Green it. Now I want to try using him for as long as possible.
Garnet Til Alexandros XVII from Final Fantasy IX
My Garnet Til Alexandros XVII is Level 90 and Crystal Level 90. Her 15cp, 35cp, Ex, and LD are fully MLB. Her Ex is at Ex+ 3/3 or Purple.

Garnet is currently equipped with her Burst weapon which has been upgraded to BT+ 3/3 or Green. Her High Armor’s been upgraded to Blue. All of her Boards have been completed. She has her Bloom Stone.
She has 3 ATK 108 with MAX BRV 330 and 3 ATK 108 with Princess’s Resolve Boost★★ (Raises INT BRV, MAX BRV, ATK, DEF by 5% if HP is MAX at start of last wave) Artifacts.

Garnet is equipped with the following Spheres:
Prishe’s (from Final Fantasy XI) Weak Attack Boost Up Shorter A Sphere
When attacking target’s weakness:
• Raises own MAX BRV, ATK by 10% for 3 turns
*Does not stack with same sphere
Alphinaud Leveilleur’s (from Final Fantasy XIV) Buff Success Base Attack All Shorter C Sphere
After granting buff:
• Raises party’s INT BRV, ATK by 5% for 3 turns
Hope Estheim’s (from Final Fantasy XIII) Buff Success Attack Boost All Shorter D Sphere
After granting buff:
• Raises party’s MAX BRV, ATK by 5% for 3 turns
*Does not stack with same sphere

I’ve used Garnet in Lufenia and Lufenia+ fights ever since I got her Burst and Greened it. Now I’ve decided that I’ll use her if I can then no longer try to slot her in everywhere.
Garnet is still really good and she’s still one of the best supports in DFFOO so I’ll most likely still be using her for a lot of fights but there are quests where she won’t be able to work and that’s fine.
Right now, I just want to focus on trying to run Sephi and Zack through all these Lufenia and Lufenia+ fights.
Lufenia Quests List
So far, I’ve been able to use Sephiroth in the following Lufenia fights:
The Terse Turk
Mechanized Sentry (Guard Scorpion Raid)
Roses of May
Thrall of Darkness
Storming the Citadel (Mission Dungeon)
Tree for the Void
Soaring Flames (Boss Rush)
Divine Diabolos (World of Illusions)
Abyss: A Lead to the Thick of It
Keeper of the Farseer
Gentle Giant
Operation Airborne Interception
The Power of Ignorance
Garden of Despair (Boss Rush)
Eternal Light (Story Act 3 Chapter 1, Part 1)
Swordmaiden
Two Moons Waxing (Story Act 3 Chapter 1, Part 2)
Devourer of Light (Hell Wyrm Raid)
Reliable Partner
The Power of Knowledge
Solitude (Story Act 3 Chapter 2, Part 1)
The Yuke Cometh
Searching for Friends (Story Act 3 Chapter 2, Part 2)
His Raging Blade (Kaiser Behemoth Raid)
Abyss: Perfectum Stratum 5
Divine Alexander (World of Illusions)
The Power of Action
Crimson Arms
In the Garden of Evil (Boss Rush)
Dimensions’ End: Transcendence Tier 3
The Ice Reaper
The Man Known as the Immortal
Divine The Brothers (World of Illusions)
Around the Fire
The Power of Wisdom
Lord of Subsidence (Tunneler Raid)
The Redheaded Turk
Equinox Aurora: Gallicinium
The Forbidden Mesa (Boss Rush)
Umbral Equinox: Noctis
Illuminating Dreams (Story Act 3 Chapter 4, Part 1)
The Terse Turk
Twilight Banquet (Astaroth Raid)
Thrall of Darkness
In Passing (Story Act 3 Chapter 4, Part 2)
The Abandoned Laboratory VERY HARD (Boss Rush)
The Abandoned Laboratory VERY HARD+ (Boss Rush)
Perfectum 6th Stratum Part 4
Cavern of No Return VERY HARD+ (Boss Rush)
Lufenia+ Quests List
So far, I’ve been able to use Sephiroth in the following Lufenia+ fights:
Divine Realm
Divine Pandemonium (World of Illusions)
Gentle Giant
Lofty Souls
Commodore of the Skies
A Glimmer in the Dark
Lure of the Lush (Rafflesia Raid)
Illusory Lighthouse (Mission Dungeon)
Shelke the Transparent
Queen of Charm
Whither Feelings (Intersecting Wills)
Divine Shiva (World of Illusions)
Mother Fixation
Triple Gateway (CPU Raid)
Back to Back (Intersecting Wills)
Malodorous Night
Heartless Gaze
Gathering Bearers, Entrusted Principle (Story Act 3 Chapter 5, Part 1)
Mission Dungeon: Glittering City of Gold
Where the Compass Points (Story Act 3 Chapter 5, Part 2)
Savage Winds (Elvoret Raid)
Parted Hopes (Intersecting Wills)
Gentle Fist
Divine Ifrit (World of Illusions)
Return of the Queen
The Power of Wisdom
Wings Graven with Emotion
Crevasse β Part 7
Perfectum 6th Stratum Part 5 Quest Level 215
Perfectum 6th Stratum Part 6
Annular Equinox: Annularity
Annular Equinox: Second Contact Quest Level 220
Unshakable Conviction (Intersecting Wills)
Lunar Tyrant
Family -Shackles- (Story Act 3 Chapter 6, Part 1)
Perfect Size (Intersecting Wills)
Family -Bonds- (Story Act 3 Chapter 6, Part 2)
Supplication for Catastrophe
Starting Out (Intersecting Wills)
Cloudy with a Chance of Squall
Divine Leviathan (World of Illusions)
Lofty Souls
An Elegant Coffee Break
Cloudy with a Chance of Meteor
Our Memories
Howling Winds
Holy Ground (Story Act 3 Chapter 7, Part 1)
Respite? Or Quagmire? (Intersecting Wills)
Distorted Providence
Eyes on the Prize
Six-Warrior Quests (Prelude)
So far, I’ve been able to use Garnet in the following Lufenia+ fights:
Crevasse β Part 7
Perfectum 6th Stratum Part 4 Lufenia Quest
Perfectum 6th Stratum Part 5 Quest Level 215
Perfectum 6th Stratum Part 6
Annular Equinox: Annularity
Annular Equinox: Second Contact Quest Level 220
Unshakable Conviction (Intersecting Wills)
Lunar Tyrant
Family -Shackles- (Story Act 3 Chapter 6, Part 1)
Perfect Size (Intersecting Wills)
Family -Bonds- (Story Act 3 Chapter 6, Part 2)
Supplication for Catastrophe
Starting Out (Intersecting Wills)
Cavern of No Return VERY HARD+ (Boss Rush)
Cloudy with a Chance of Squall
Divine Leviathan (World of Illusions)
Lofty Souls
An Elegant Coffee Break
Our Memories
Howling Winds
Holy Ground (Story Act 3 Chapter 7, Part 1)
Respite? Or Quagmire? (Intersecting Wills)
Distorted Providence
Eyes on the Prize
Six-Warrior Quests (Prelude)
So far, I’ve been able to use Zack in the following Lufenia+ fights:
Lure of the Lush (Rafflesia Raid)
Illusory Lighthouse (Mission Dungeon)
Shelke the Transparent
Queen of Charm
Whither Feelings (Intersecting Wills)
The Abandoned Laboratory VERY HARD Boss Rush Lufenia
The Abandoned Laboratory VERY HARD+ Boss Rush Lufenia
Divine Shiva (World of Illusions)
Mother Fixation
Triple Gateway (CPU Raid)
Back to Back (Intersecting Wills)
Malodorous Night
Heartless Gaze
Gathering Bearers, Entrusted Principle (Story Act 3 Chapter 5, Part 1)
Mission Dungeon: Glittering City of Gold
Where the Compass Points (Story Act 3 Chapter 5, Part 2)
Divine Ifrit (World of Illusions)
The Power of Wisdom
Crevasse β Part 6
Perfectum 6th Stratum Part 6
Annular Equinox: Second Contact Quest Level 220
Unshakable Conviction (Intersecting Wills)
Cloudy with a Chance of Squall
Divine Leviathan (World of Illusions)
Lofty Souls
An Elegant Coffee Break
Cloudy with a Chance of Meteor
Our Memories
Howling Winds
Holy Ground (Story Act 3 Chapter 7, Part 1)
Respite? Or Quagmire? (Intersecting Wills)
Distorted Providence
Eyes on the Prize
Six-Warrior Quests (Prelude)
I talk more about these fights in other posts.
Roaring Thunder (Intersecting Wills) Lufenia+ Quest
This fight has 1 wave with 2 enemies, Seifer Almasy from Final Fantasy VIII and the Cerberus.
The Lufenia orb will show up on the Cerberus once he drops down to 79% HP. If the boss takes a turn and is unable to act, the count will be increased by 8.
If the boss takes increased HP damage due to a debuff, the count will be increased by 2.
If a char moves, the count will be decreased by 2. If an enemy moves, the count will be decreased by 2.
Once the Cerberus drops down to the 89%, 59%, and 29% HP percentage thresholds, he will instantly warp his turn to the front. He'll get 2 turns to move after which he'll also warp Seifer's turn to move right after him.
Seifer has moves that can debuff the party. Once he drops down to the 89%, 69%, 49%, and 29% HP percentage thresholds, he will automatically inflict 2 framed debuffs on the party even if it isn't currently his turn. He'll also trigger an AoE BRV + HP attack that's guaranteed to hit.
For my Seph clear of this fight, my team was Sephiroth, Garnet, and Raijin from Final Fantasy VIII with Ifrit as my summon. My Calls were Cid Raines's (from Final Fantasy XIII), Lilisette's (from Final Fantasy XI), and Lenna Charlotte Tycoon's (from Final Fantasy V).

Raines's LD Call will enable its Caller to initiate launches for a few turns. Lilisette's Calls inflict debuffs. Lenna's regular Call gives the party a buff that will make them 100% immune to debuffs for a few turns.
Raijin is boosted for this fight. Mine has all of his weapons fully MLB. All of his Summon Boards have been completed.
Unlocked parts of his Character Enhancement Boards, particularly the tiles that would give me his LD Call and LD extension passive. He has triple perfect Artifacts. He doesn't have his High Armor.
Raijin's main claim to fame is the debuff he inflicts whenever he uses his LD. This debuff is called “Don’t lay a finger on my friends, ya know!”. This debuff has the following effects:
increases HP damage taken by 20%
reduces HP damage dealt by 100%
lowers attack by 100%
cannot inflict debuffs
Raijin also has ways of paralyzing enemies.
When the fight started, made sure to use Raijin's LD right away so Seifer won't be able to debuff my chars. Also had Raijin use his Additional Ability, Lenna's regular Call and his skill that would paralyze both enemies.
Had Garnet use her BT+ finisher and her Additional Ability as well as one of her base skills (IIRC, it was Peridot Thunderflash).
Had Sephiroth use Fervent Blow. On his next turn, had him use Cid Raines's LD Call then went straight into his Burst phase. By then it was turn 4 and the enemies were down to 65% and 62% HP.

Thanks to Raines's Call, Sephi got to launch every time he moved. One of the effects of Garnet's BT+ finisher ensured that everyone always had a lot of brave to dump during these launches.
Just had Seph focus on the Cerberus since he was the one with the Lufenia orb. By the time Sephiroth was about to cast Heaven's Light, his finishing Burst move, the enemies were down to 52% and 35% HP.

After Seph's Burst mode ended, the Cerberus warped his and Seifer's turns to the front but Raijin's debuffs made this a non-issue.
Summoned Ifrit soon after. Just kept on spamming skills. Sephi's BT effect sets the brave of all enemies to 1, making it easy to break and delay them.
By the end of the summon, the enemies only had 5% and 2% HP left. It was Sephiroth's turn. His attack finished off the Cerberus but he left Seifer with 1% HP.

Too bad Sephi wasn't able to finish off Seifer so it was Garnet who dealt the killing blow, ending the fight on turn 7.
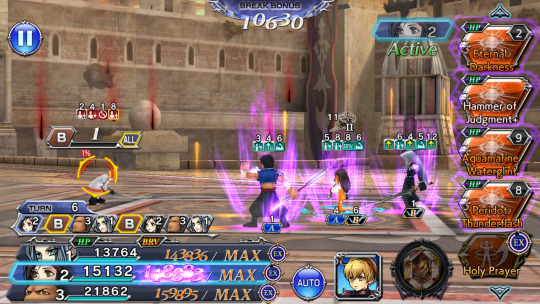
Got the score and all the other mission requirements. This fight was pretty easy. Didn't even need to call on the friend support that I borrowed. The debuff from Raijin's LD is really good. Glad I was able to get him.

For my Zack clear of this fight, my team was Zack, Raijin, and Freya Crescent from Final Fantasy IX with Pandemonium as my summon. My Calls were Cid Raines's, Lilisette's, and Kurasame Susaya's from Final Fantasy Type-0.
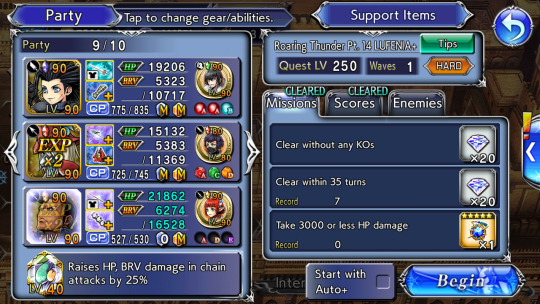
Have all of Freya's weapons fully MLB. All of her Boards have been completed. She has triple perfect Artifacts and triple RF Spheres. Her High Armor’s been upgraded to Blue.
Freya is a support and healer with pretty good buffs and auras. She can also deal pretty decent damage. Her LD allows her to leap or fly up into the air where she can evade basically anything.
Until her next turn, every time a char moves, she’ll automatically follow that up with an attack of her own. She’ll also battery and heal the party. On her next turn, she’ll do an attack before landing back on the ground.
When the fight started, had Freya fly up into the air as soon as possible. AFAIK, had her use her Additional Ability and Kurasame's Calls.
Ended up dealing too much damage right away so Seifer was able to debuff Zack before I could use Raijin's LD. Meh. Maybe I should have brought Lenna's Call. Ah, well. At least this didn't seem to be much of an issue.
Had Raijin use his LD as soon as it was his turn. Also had him use his Additional Ability and Lilisette's regular Call.
Had Zack use his BT+ finisher, his Additional Ability, Cid Raines's LD Call and Meteor Shots. On Zack's next turn, had him activate his BT+ phase already. By then the enemies were down to 67% and 53% HP.

Was able to deal so much damage that by the time Zack was about to cast the The Price of Freedom, his finishing Burst+ move, the enemies were down to 6% and 7% HP.

Zack was able to deal around 17 million+ total HP damage during his Burst+ mode. Zack’s attack finished off Seifer and left the Cerberus with 2% HP.
It was Raijin's turn now. Had him use Lightning Discharge++ which paralyzed the enemy and let Raijin move again. This time, he had more than enough brave to finish off the Cerberus so he was the one who ended the fight on turn 8.

Got the score and all the other mission requirements. And once again, didn't need to call on the friend support that I borrowed. Didn't even need another BT or BT+ in my party.

This fight really was easy. And a fully built Zack with a maxed Ultima Weapon was super special awesome, as always.
The Planet & The Hero (Story Act 3, Chapter 7, Part 2) Lufenia+ Quest
Also known as 7-40 Merciless Angel LUFENIA+. This fight has 1 wave with 1 enemy, Safer Sephiroth from Final Fantasy VII.
Safer Sephiroth is immune to turn delays and deletes. He can be delayed via break but once he drops down to 79% HP, his brave can no longer drop below 1% of his max brave so by then he can no longer be broken.
He's immune to launches and the max HP down debuff. He has a whopping 44 million HP.
The Lufenia orb will show up once Safer Sephiroth drops down to 79% HP.
If he takes critical BRV damage, the count will be increased by 1. If a char "deals BRV damage from additional attack not on own turn (excluding counter, attack triggered on enemy action)", the count will be increased by 1.
The Lufenia orb count maxes out at 10. If a char moves, the count will be decreased by 2. There will be no changes to the orb count if the enemy moves.
Safer Sephiroth has a move that has a 50% chance to inflict 1 turn of the paralyze and/or blind debuffs. He can dispel all unframed buffs. He can also remove all of his debuffs, all except for gold-framed ones.
Once Safer Sephiroth drops down to the 79%, 49%, and 29% HP threshold, he will automatically warp his turn to the front and get 3 instant turns.
When he drops down to 19% HP, he'll trigger Heartless Angel+. This will instantly break all your chars then deal AoE BRV + HP damage. It will also inflict 3 turns of the max HP down debuff.
Was kinda worried that I wouldn't be able to run Sephiroth through this fight. It seems pretty hard since Safer Sephiroth has so much HP but you're supposed to win within 40 turns. He can even debuff the party and cleanse his debuffs.
His Lufenia orb sucks too. It's gonna be really hard to deal critical BRV damage because he can't be broken. As if that wasn't bad enough, he can also hit pretty hard. He can even warp his turns so it's also important to have some way of mitigating damage.
For my Sephi clear of this fight, decided to go in with Sephiroth, Zack, and Cissnei from Crisis Core: Final Fantasy VII with Ifrit as my summon. My Calls were Lenna's, Rem Tokimiya's from Final Fantasy Type-0, and Sazh Katzroy's from Final Fantasy XIII.

Brought Lenna's Call for the debuff immunity buff. Normally, I'd bring Calls that can inflict debuffs but since Safer Sephiroth cleanses his debuffs often, opted to just go with Calls that don't debuff but can still boost the damage of my chars.
Sazh's Calls include a buff that will allow my chars to deal critical BRV damage even if the enemy isn't broken.
Have all of Cissnei's weapons fully MLB. She has her High Armor. She has triple perfect Artifacts and triple RF Spheres.
All of her Summon Boards have been completed. Unlocked parts of her Character Enhancement Boards, particularly the tiles that would give me her LD Call and LD extension passive.
Cissnei is boosted for this fight. In fact, she's the best char to deal with the Lufenia orb here. IIRC, most, if not all, of her buffs are framed so Safer Seph can't dispel them.
She does a follow-up attack every time a char does a damaging move. She has a buff that makes it so that she always deals critical BRV damage even if an enemy isn't broken.
She'll always do a follow-up attack but this attack gets stronger the more stacks she has of her overhead buff. The catch is that this buff will always go down by 1 every turn.
With her LD, she'll get a buff that will keep her overhead buff at max stacks. The catch is that this buff will only last for 1 turn.
Cissnei has some party auras but they're not that good. She's definitely more of a DPS than a support. Her damage isn’t that good when compared to other DPS though, especially not when her overhead buff isn’t at max stacks.
Because Safer Sephiroth has so much HP and I don't have an actual support and buffer like Garnet on this team, couldn't do my usual strat of setting up all my Calls and buffs and such then going straight into Zack's BT+ mode.
Instead, had to take a slower approach. Still spammed skills but didn't use my Calls or even Zack's BT+ finisher right away. I did use Lenna's regular Call soon enough for the debuff immunity buff.
Cissnei and Zack both did very well. They could have done much better if I'd brought an acctual support like Garnet.
Sephi was definitely the weak link on this team. His damage was so bad and pathetic without Garnet to boost and buff him. At least his Cellular Erosion debuff is gold-framed so Safer Sephiroth can't remove it no matter what.
Switched out Sephiroth and brought in the friend support Garnet that I borrowed soon after Safer Sephiroth dropped down to 79% HP.
Had Garnet use her BT+ finisher and one of her base skills (IIRC, it was Peridot Thunderflash). Had Cissnei use her LD, her Additional Ability, and Rem's LD Call.
Had Zack use his Additional Ability, Sazh's LD Call, and Meteor Shots. Then, on his next turn, activated his Burst+ phase already. By then Safer Sephiroth was down to 74% HP.
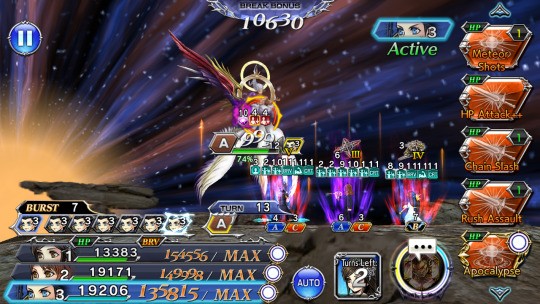
By the time Zack was about to cast the The Price of Freedom, the enemy was down to 50% HP. Zack was able to deal around 12 million+ total HP damage during his BT+ mode.
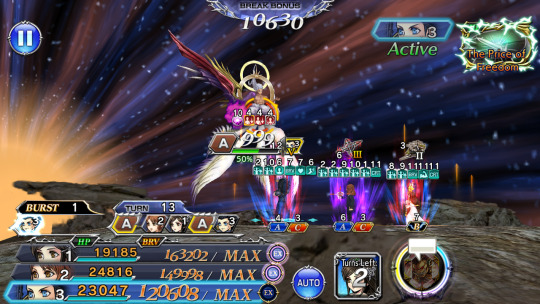
Garnet was still on the field when Sephiroth dropped down to 19% HP. I forgot he was gonna do Heartless Angel+ when this happened. Should have summoned Ifrit a turn or 2 ago so I could have avoided the HP loss on Garnet.

Zack's BT+ effect was currently up so technically, he should have been the only one injured by Heartless Angel+ since one of the effects of his BT+ is being able to take on all attacks. But it looks like Heartless Angel+ can bypass this somehow.
Heartless Angel+ hit really hard but at least no one died. The annoying thing was that I wasn't able to heal Garnet back to full health before she left.
I was eventually able to heal everyone else so the HP loss from Garnet wasn't enough to make me fail the HP mission requirement of this quest but still.
Anyway, when Sephiroth returned to the field, had him reapply his Cellular Erosion debuff. With all the turn warping going on, the aforementioned gold-framed debuff had run out by now.
Safer Sephiroth getting to attack multiple turns in a row also ended up with Zack going down to 0 HP. Good thing his BT+ effect makes him near invincible. He won't be able to survive a Lufenia orb countdown attack but anything else is fair game.
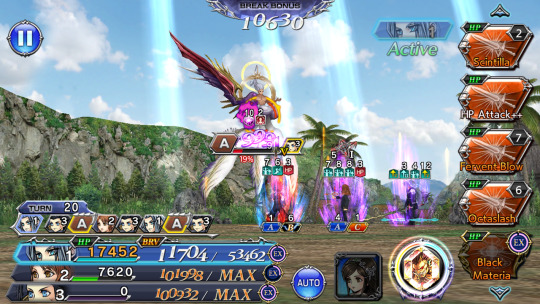
When I summoned Ifrit, Safer Sephiroth was down to 16% HP. Just kept on spamming skills. But Safer Seph was really freaking tanky.
He has so much HP! At least it was steadily going down even if it feels like it's doing so at a snail's pace.
Soon Safer Sephiroth was down to 4% HP. It was Zack's turn and my summon was about to end. AFAIK, had Zack use Chain Slash.

Zack left Safer Sephiroth with 1% HP so it was Cissnei who finished him off, ending the fight on turn 22.
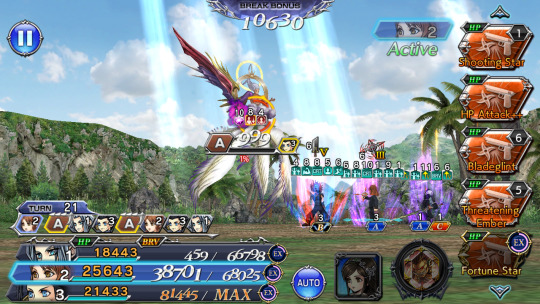
Got the score and all the other mission requirements although I did end up with 8660 HP loss thanks to being unable to heal the friend support Garnet I borrowed before she left.

Super pleased that I was able to run Sephiroth through this quest. Too bad he wasn't the one who got to deal the killing blow on Safer Sephiroth. Also, FF7 team FTW!
Already ran Zack through this Lufenia+ quest but I decided to try another run with him. This time, his teammates were Freya and Cissnei. Brought Ifrit as my summon. My Calls were Rem's, Lenna's, and Sazh's.
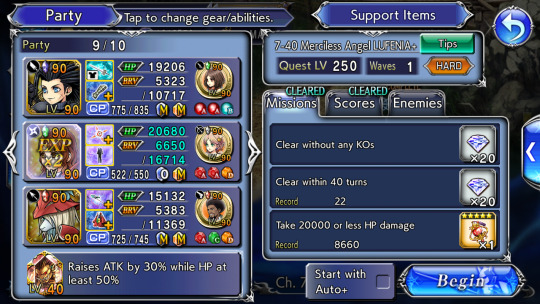
With Freya up in the air and with Sazh's Calls active, Freya will also be able to help increase the Lufenia orb here.
After setting up all my buffs and Calls and auras and such, activated Zack's Burst+ mode already. By then Safer Sephiroth was down to 72% HP. His turn warping had caused the Lock debuff to fall off so now he was targeting Cissnei instead of Zack.
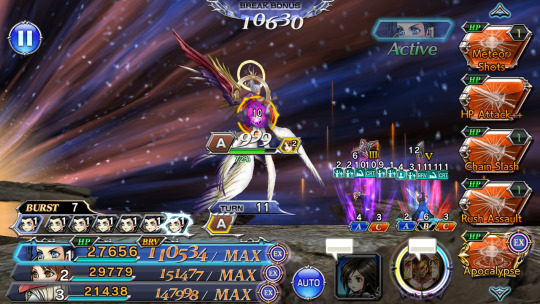
Should have had Zack inflict his Lock debuff again before going into his BT+ phase since he deals more damage if he's being targeted and his Chain Slash skill is executed twice if he's attacking an enemy that's locked on to him.
Safer Sephiroth was at 50% HP by the time Zack was about to cast the The Price of Freedom.
When I summoned Ifrit, Safer Seph only had 22% HP left. Just kept on spamming skills until Safer Sephiroth was down to 1% HP. This time it was Zack who finished off Safer Sephiroth, ending the fight on turn 19.
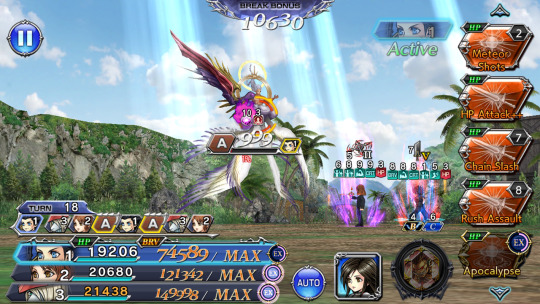
Got the score and all the other mission requirements but ended up with 2068 HP loss. Not sure where this came from though since pretty sure everyone was back to full health by the time the battle ended.

Didn't get to call on the friend support Garnet I borrowed so the HP loss couldn't have been from her. Maybe one of my Calls took some damage when I used them but can't remember for sure now. It doesn't really matter but still.
Should be done with this Lufenia+ fight by now but I wanted to run Kadaj from Final Fantasy VII: Advent Children here as well.
He recently just got his Crystal Level 90 Awakening and he was even featured on the The Planet & The Hero story chapter. He joined the other Final Fantasy VII chars like Zack and Cloud Strife in the fight against Sephiroth.
Have all of Kadaj's weapons fully MLB. His High Armor's been upgraded to Blue. All of his Boards have been completed. He has triple perfect Artifacts and triple real Spheres.
My team was Kadaj, Zack, and Cissnei with Ifrit as my summon. My Calls were Rem's, Lenna's and Sazh's.
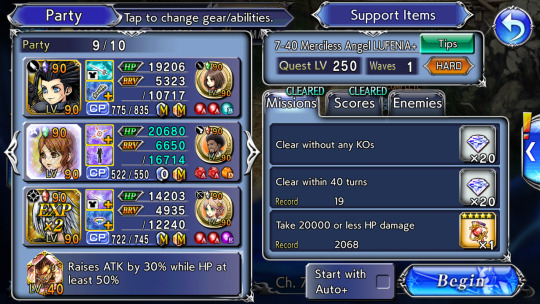
Kadaj has gold-framed debuffs like Sephiroth. He's a debuffer slash DPS. He deals pretty good damage. His debuffs were helpful too.
Sephiroth shows up as part of the animation of Kadaj's Ex which charges fairly fast.
Being Level 90 and Crystal Level 90, Kadaj did pretty well on this fight. I did end up switching him out for the friend support Garnet that I borrowed just before I went into Zack's Burst+ phase.
When Kadaj returned, the battle wasn’t over yet. Eventually, he was the one who dealt the killing blow, finishing off Safer Sephiroth and ending the fight on turn 23.

Got the score and all the other mission requirements. This time my HP loss was 1599. Meh. Can't remember now when and how this happened. I know it doesn't matter but it's still annoying anyway.

Conclusion
So, what about you? Which chars did you use to complete these Lufenia and Lufenia+ quests? Did you pull for either Sephiroth or Zack or both? Feel free to share your thoughts and opinions by leaving a comment below or by reblogging or replying to this post.
Notes:
screenshots are from my Dissidia Final Fantasy: Opera Omnia game account
#dissidia final fantasy opera omnia#this post stars:#final fantasy 7#zack fair#sephiroth#kadaj#cissnei#garnet til alexandros#freya crescent#raijin#dffoo lufenia fights series#dffoo garnet fights#gacha games#games#dffoo sephiroth fights#dffoo zack fights#mobile games#dffoo
2 notes
·
View notes
Text
Dissidia Final Fantasy: Opera Omnia Dimensions’ End Transcendence Tier 8
The Dimensions’ End: Transcendence Tier 8 Lufenia and Lufenia+ quests just started in the Dissidia Final Fantasy: Opera Omnia (DFFOO) mobile game.
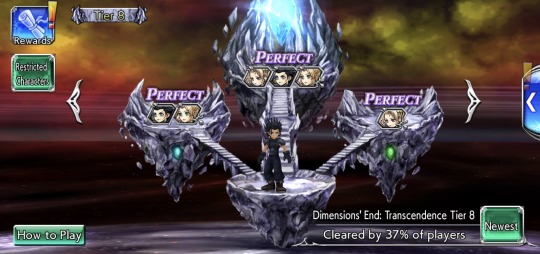
Lufenia quests are Level 200 while Lufenia+ ones are Level 250. They’re currently the hardest kind of fight in this game. If you bring a char equipped with a Burst or BT weapon to a Transcendence battle, the entire party’s stats will be enhanced.
Dimensions’ End: Transcendence, Tier 8, Crucible 1 Lufenia Quest
The Dimensions’ End: Transcendence, Tier 8, Crucible 1 Lufenia quest has 1 wave with 2 enemies, the Lunatic Marilith Tempests.
As part of the mission requirements, you need to win within 60 turns and you need to have a Blue Crystal char in your party.
The Lufenia orbs will appear at battle start and they’ll never disappear. There are 2 ways to increase the counts:
if a char inflicts 1 or more debuffs in 1 turn, increase the counts by 3
if an enemy is afflicted with 1 or more gold-framed debuffs at the end of their own turn, increase the counts by 4
The counts will be decreased by 2 every time a char moves. The Mariliths can buff themselves and debuff their opponents.
For this fight, my team was Zack Fair from Crisis Core: Final Fantasy VII and Final Fantasy VII (#ad) and Rosa Joanna Farrell from Final Fantasy IV with Ifrit as my summon. My Calls were Kurasame Susaya's from Final Fantasy Type-0 and Sephiroth's from Final Fantasy VII.

My Zack's 15cp, 35cp, Ex, LD, and BT have all been fully MLB’d. His Ex has been Purpled or at Ex+ 3/3. His Burst has been Greened or at BT+ 3/3. His High Armor's been upgraded to Blue. All of his Boards have been completed.

He has triple ATK 108 with MAX BRV 330 and triple ATK 108 with SOLDIER Grit Boost★★ (Raises MAX BRV by 15% and ATK by 5% if HP is MAX at start of last wave) Artifacts.
Zack is equipped with the following Spheres:
Machina Kunagiri’s (from Final Fantasy Type-0) Break Hit Base Attack Up Shorter A Sphere
Raises INT BRV, ATK by 10% for 3 turns when inflicting Break or attacking target afflicted with Break
Jecht’s (from Final Fantasy X) Critical Base Attack Up Shorter A Sphere
Raises INT BRV, ATK by 10% for 3 turns when dealing critical hit
Snow Villiers’s (from Final Fantasy XIII) Target Attack Up B Sphere
Raises ATK by 10% while targeted by enemies
Currently, my Zack is equipped with my Level 5/5 Greatsword Ultima Weapon (UT).

Zack is a tank who can also deal really good damage, especially if he's fully built and maxed.
My Rosa's 15cp, 35cp, Ex, and LD have been fully MLB’d. Her Ex is at Ex+ 3/3 or Purple. She doesn't have her High Armor. She has triple perfect Artifacts and 0 Spheres.
All of her Summon Boards have been completed but haven't unlocked any of her Character Enhancement Boards. Yes, not even the tiles that would give me her LD extension passive and LD Call.
Rosa is a support with decent enough buffs and auras but there are plenty of other supports who are better than her.
Wanted to try soloing this Crucible with Zack. He inflicts the Lock debuff with his LD, Ex, and Chain Slash move so he can also take care of the orbs here.
I'm certain my Zack can solo this fight. Unfortunately, I can't do that because one of the mission requirements for this stage was to use at least 1 Blue Crystal char.
Zack's Crystal Color is Black so I needed to bring in a Blue Crystal char to go with him otherwise I'll never be able to Perfect this quest.
The Blue Crystal char I chose was Rosa. Went with her because I didn't think I'd use her on any future Tier considering mine wasn't fully built at all. Another reason why I chose her was because she is a support who can also heal.
Well, Zack provides HP Regen too so I don't really need a healer but I thought I might as well have a support and buffer for the Reckoning stage of this Transcendence Tier. The Reckoning stage is a Lufenia+ quest so I thought it best to bring a full team to that fight.
Anyway, when this Crucible fight started, had Zack use his BT+ finisher right away. He easily tanked all the attacks of the Mariliths. There was no danger at all of anyone dying thanks to Zack. Healing wasn't an issue either since both Zack and Rosa can heal.
Mostly chose to use Zack's Chain Slash over his Rush Assault ability since the former can inflict his Lock debuff. Cast Zack’s Ex whenever it was charged.
Had Rosa use Sephiroth's regular Call as another way to deal with the Lufenia orbs here.
When Sephiroth enters the field, he automatically inflicts a gold-framed debuff called Cellular Erosion on all the enemies.
Sephiroth's Cellular Erosion debuff and Zack's Lock debuff kept the orbs from exploding.
Rosa didn't really do anything. Her damage was practically nonexistent, especially when compared to Zack. She basically just stood there. Well, I guess her auras helped a bit too.
But I don’t think they really mattered all that much in the grand scheme of things. Zack could have handled this on his own.
Activated Zack's Burst+ mode when the Mariliths were both down to 63% HP. The Lufenia orb counts were at 7.

Zack dealt so much damage that by the time he was about to cast the The Price of Freedom, his finishing Burst+ move, the Mariliths only had 29% and 30% HP left.

Zack was able to deal around 11 million+ total HP damage during his Burst+ phase.
Afterwards, just continued spamming moves. Would have summoned Ifrit already but couldn't yet because the summon gauge wasn't fully charged.
Soon, the Mariliths only had 1 turn left of Sephi's Ceullar Erosion debuff. Already had Rosa use Seph's LD Call earlier when the debuff from his regular Call ran out so can no longer inflict a gold-framed debuff on these enemies. It doesn’t really matter anymore though since the fight was nearly over.
It was turn 13. The Mariliths only had 6% and 3% HP left. It was Zack's turn. Still have 6 turns left of his BT+ effect.
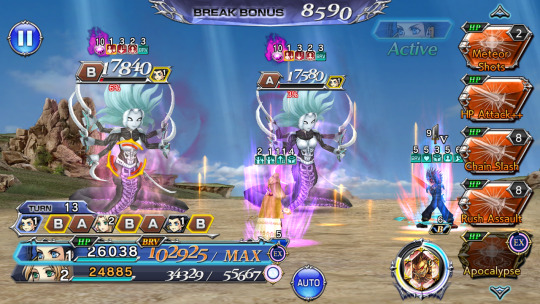
IIRC, opted to use Chain Slash because this move will hit twice if Zack is attacking someone who is targeting him. Had Zack attack the Marilith with 6% HP. Was hoping this would be enough to finish the fight already.
Unfortunately, that's not what happened. Zack was able to kill the Marilith with 6% HP but I was so annoyed when the other one was left with 1% HP. Argh! So frustrating.
This Marilith got to attack and she managed to take off a bit of Zack's HP. Meh. Then, finally, it was Rosa's turn.
She had more than enough brave to finish off the Marilith so she was the one who dealt the killing blow, ending the fight on turn 15.

Got the score and all the other mission requirements which also got me the Perfect.
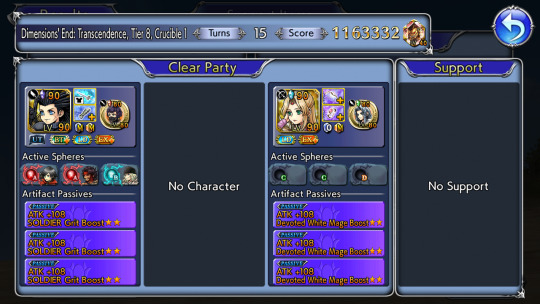
Super pleased that I got to beat this quest using only 2 chars. Zack was really super special awesome, as always.
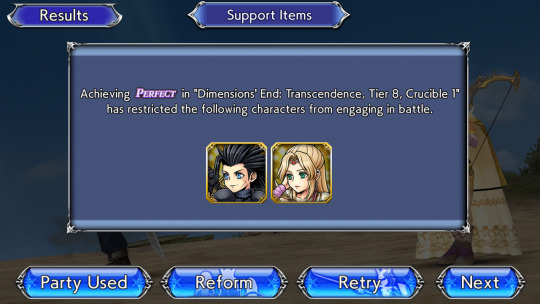
He practically soloed this fight. If this quest didn't need a Blue Crystal char, I’m certain Zack could have done this fight on his own.
Dimensions’ End: Transcendence, Tier 8, Crucible 2 Lufenia Quest
The Dimensions’ End: Transcendence, Tier 8, Crucible 2 Lufenia quest has 1 wave with 2 enemies, the Lunatic Ram Requins.
As part of the mission requirements, you need to win within 50 turns and you need to have a Green Crystal char in your party.
The Lufenia orbs will show up once the enemies drop down to 79% HP and there's no way to cancel them. There are 2 ways to increase the counts:
if an enemy takes damage from "2 consecutive player actions (summoning excluded)", increase the counts by 3
if an enemy takes damage from "5 consecutive player actions (summoning excluded)", increase the counts by 10
The counts will be decreased by 2 every time a char moves. The enemies here can insert themselves in between the turns of your chars.
There are also times wherein their turns will become framed and they'll become immune to turn delays (including from breaks) and deletion.
After successfully being able to duo the Dimensions’ End: Transcendence, Tier 8, Crucible 1 Lufenia quest, was inspired to try soloing Crucible 2 with Terra Branford from Final Fantasy VI.
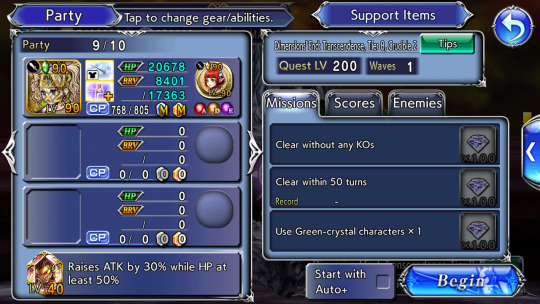
I saw a vid where Terra was able to solo this fight even without having her Burst upgraded to BT+ 3/3 so I know it's possible.
My Terra's 15cp, 35cp, Ex, LD, and BT have been fully MLB’d. Her Ex is at Ex+ 3/3. Her High Armor's been Realized to 0/3.
She's currently equipped with a Level 0/5 Short Sword Ultima Weapon. All of her Boards have been completed. She has triple perfect Artifacts and triple real Spheres.
Terra is a Green Crystal char so I didn't need to bring anyone else to fulfill that mission requirement. She's a magical DPS who can also inflict some debuffs. Her LD makes her perfect for dealing with the orbs on this fight.
Brought Ifrit as my summon. My Call was Lilisette's from Final Fantasy XI. Lilisette's Calls inflict debuffs. Her LD Call can also heal which was the main reason why I opted to bring this over other debuffing Calls.
In the vid that I saw, the enemies got to move near the end of the fight and one of them managed to injure Terra. In the grand scheme of things, this didn't matter since the fight ended soon enough and the player was still able to get the Perfect since there was no HP mission requirement and Terra didn't die.
Still, thought I'd bring a debuffing Call that can heal anyway because why not, right?
When the fight started, just began spamming Terra's moves right away after using Lilisette's regular Call. Also used Terra's Additional Ability.
Terra has a pretty high turn rate so she tends to jump her turns forward. Her LD also enables her to take multiple turns in a row.
This kept the enemies from moving even when they started framing their turns and became immune to being delayed even via break.
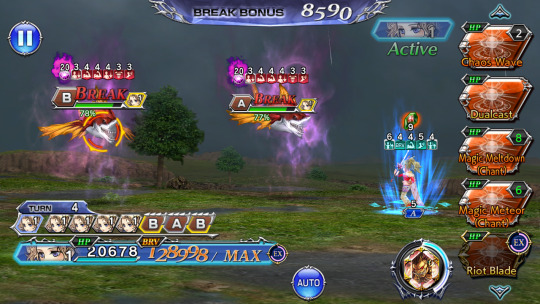
With a 0/5 UT and 0/5 High Armor, Terra was able to deal really good damage. She kept the orbs up so they weren't an issue at all.
She took all the turns so there was also no danger of her being attacked by the enemies. They basically just stood there while Terra threw meteors at them. LOL.
Activated Terra's Burst mode when the enemies were down to 70% and 67% HP. By the time she was about to cast Trance Ultima, her finishing Burst move, they only had 54% and 53% HP left.

Terra was able to deal around 3 million+ total HP damage during her Burst phase.
Summoned Ifrit a few turns later. By then the bosses were down to 19% and 18% HP.
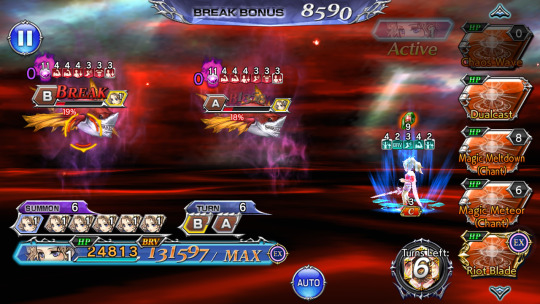
Just used Lilisette's LD Call. Was saving it for the healing but the Lunatic Ram Requins had yet to move and the fight was nearly over now so decided to just use it already.
Terra was all out of uses of Chaos Wave, her LD, so now I have no way of having her take multiple turns in a row.
When the summon ended, the Lunatic Ram Requins only had 1% and 2% HP left. Had Terra use Magic Meltdown (Chant), targeting the enemy with 2% HP.
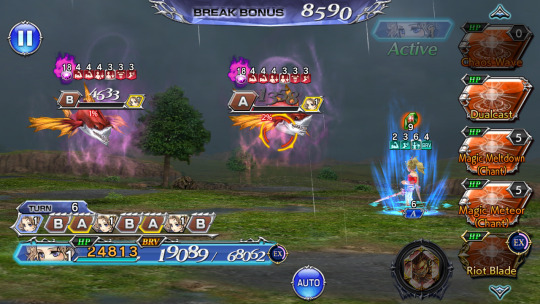
Terra's attack finished off this boss but she left the other one still with 1% HP. Meh. How annoying.
The remaining Lunatic Ram Requin also got to move but at least he didn't really do anything. I don't think he even managed to break Terra.
When Terra finally got to move again, she finished off the last boss, ending the fight on turn 8.

Got the score and all the other mission requirements which also got me the Perfect.
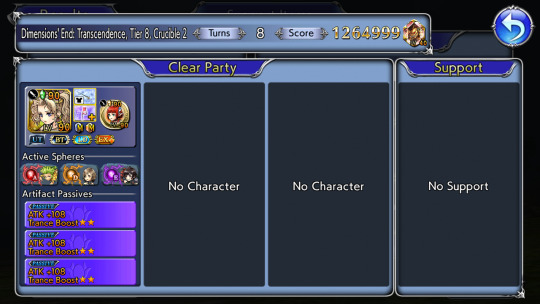
Terra did so well. Really happy I got to solo this quest with her. IIRC, this is the first Lufenia quest I tried to solo and that I was able to solo.

Dimensions’ End: Transcendence, Tier 8 Reckoning Lufenia+ Quest
The Dimensions’ End: Transcendence, Tier 8, Reckoning Lufenia+ Quest has 1 wave with 1 enemy, the Lunatic Quartz Disaster.
This fight has 3 phases. You need to defeat the boss 3 times before being able to get the win.
My team was Zack, Terra, and Rosa with Ifrit as my summon. My Calls were Lilisette's, Kurasame's, and Fran's from Final Fantasy XII.

In phase 1, there's no Lufenia orb but the boss has a 100% additional reduction to BRV gains aura. He can also buff himself with defense up and speed up.
This phase was pretty easy. Just spammed everyone's skills although I didn't use Zack's BT+ finisher and Terra's LD yet.
Zack kept everyone safe from single-target attacks and he and Rosa made sure that everyone was always at full health.
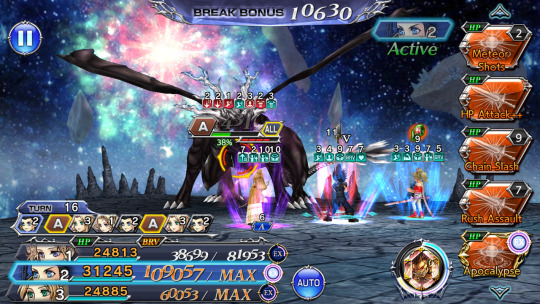
Soon, was able to drop the boss's HP down to 9%. This caused him to trigger Regenerate which brought him back to full health and started phase 2 of this fight.
In phase 2, the boss will now have a Lufenia orb. It will appear with a count of 5 as soon as phase 2 starts. If the boss takes a turn, the count will be decreased by 1. There will be no changes to the count if a char moves.
There's no way to increase this orb. You need to bring the boss down to 9% HP to trigger Regenerate and start phase 3 before the boss takes 5 turns and causes the orb to explode.
Phase 2 was when I used Zack's BT+ finisher. This was also when I started spamming Terra's LD so she would take multiple turns in a row.
In this phase, the boss only got to move like once or twice. Thanks to all the buffs, debuffs, Calls, auras and such that were currently active on the field, Terra did really well.

Soon, the boss was finally down to 9% HP again. He triggered Regenerate, healed himself back to full health then started phase 3 of this fight.
In phase 3, the boss gains immunity from being delayed via break. This phase has a Lufenia orb too. It will appear as soon as phase 3 starts with a count of 10.
If the boss takes a turn, the count will be decreased by 1. If a char moves, there will be no changes to the orb. Once the Lufenia orb hits 0, the boss will trigger his recast ability.
In this phase, you're supposed to let the boss move 10 times. He can only be killed after the orb hits 0. Otherwise the fight won’t end.
So just continued spamming skills and didn't try to hog turns with Terra anymore. Still had like 5 turns left of Zack's BT+ effect so there was nothing to worry about no matter how often the boss got to move.
But then Zack's BT+ effect ran out and I hadn't had the chance to go into his Burst+ phase yet.
It was Terra's turn. The orb was down to 5 and the boss's HP was at 47%. Had Terra use one of her skills which took the boss down to 44% HP.

Then the boss got to move after Terra. He was currently surrounded by this blue aura. IIRC, this prevented him from being broken and gave him a lot of brave.
He had more than enough to kill Zack. Zack would have died if he didn't have Last Stand. As it was, Zack managed to survive but his HP was reduced to 1.

As soon as it was Zack's turn again, activated his Burst+ mode already. By then the orb was at 4 and the enemy only had 45% HP left. Zack got a bit of his health back thanks to his HP Regen buff so at least he was no longer at 1 HP.

Was soon able to get him back to full health thanks to the healing from his LD and Ex.
By the time Zack was about to cast the The Price of Freedom, the enemy was down to 12% HP. Zack was able to deal around 6 million+ total HP damage during his Burst+ mode.
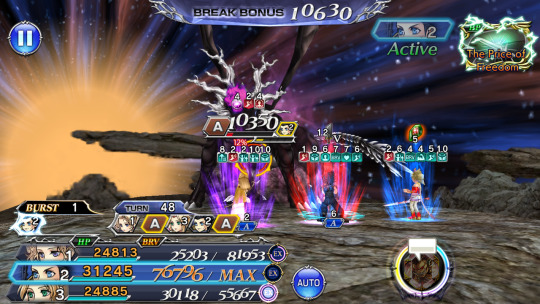
Zack's the The Price of Freedom was more than enough to finish off the boss already but since the orb count was at 4, the fight couldn't end yet.
So the boss was left with 1% HP. Had to keep going, just spamming skills and letting the boss move so the orb would drop down to 0 already.
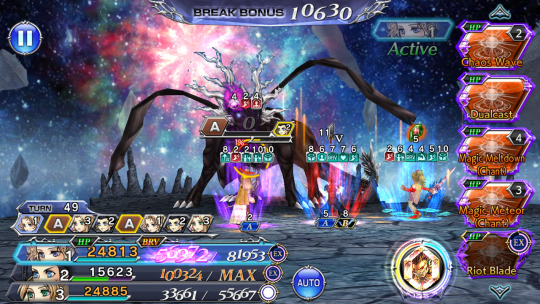
With Zack's BT+ effect up, was back to not worrying much about the boss's attacks even if there was a time wherein he managed to take off a bit of Zack's HP.
After what felt like forever, the orb finally went down to 0. The boss triggered his recast ability then I was finally free to end this fight. It was Zack who dealt the killing blow, ending the battle on turn 57.

Got the score and all the other mission requirements. Very pleased with this team. Zack was super special awesome as always. Terra helped too, especially in phase 2 where I couldn't afford to have the boss move too many times.
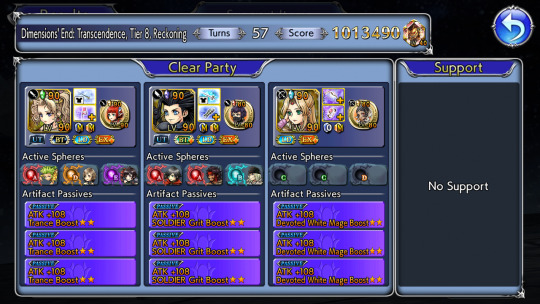
Rosa didn't do much damage but her buffs and auras did help a bit. She did well enough, all things considered. And I'm glad I got to make her work here although she wasn't fully built at all.
Conclusion
So, how ‘bout you? Which characters did you use to clear Dimensions’ End: Transcendence Tier 8? What do you think about the Lufenia and Lufenia+ quests in this Tier? Feel free to share your thoughts and opinions by leaving a comment below or by reblogging this post.
Notes:
screenshots are from my Dissidia Final Fantasy: Opera Omnia game account
#dissidia final fantasy opera omnia#this post stars:#zack fair#final fantasy 7#terra branford#final fantasy 6#rosa joanna farrell#final fantasy 4#games#mobile games#dffoo#gacha games#dffoo de transcendence#dffoo lufenia fights series
3 notes
·
View notes
Text
Dissidia Final Fantasy: Opera Omnia Dark Quickening Lufenia Quest
Lufenia Quests are currently the hardest kind of fight in the Dissidia Final Fantasy: Opera Omnia (DFFOO) mobile game. They’re level 200.
Dark Quickening (Story Act 3, Chapter 3, Part 1) Lufenia Quest
For this fight, my team was Tifa Lockhart from Final Fantasy VII (#ad), Kadaj from Final Fantasy VII: Advent Children, and Galuf Halm Baldesion from Final Fantasy V with Odin as my summon.

My Calls were Bartz Klauser’s from Final Fantasy V, Faris Scherwiz’s (Sarisa Scherwil Tycoon) from Final Fantasy V, and Gabranth’s (Noah fon Ronsenburg) from Final Fantasy XII.
The Dark Quickening Lufenia quest has 1 wave with 2 enemies - Chaos Bahamut and an Eald’narche (from Final Fantasy XI) Manikin. Both heavily resist magical attacks and they’re immune to elemental resist down.
There’s only 1 Lufenia orb and it’s on Chaos Bahamut. To increase it, you need to inflict break.
When Bahamut drops below 49% HP, the orb disappears and he changes into his Gestalt form. He’ll now have a recast bar. If you prevent him from being able to act for 2 turns (such as by paralyzing him), then he won’t be able to use his recast ability.
Tifa, Kadaj, and Galuf are fully MLB and Purple, including their LD. They have their Bloom Stones and all of their Boards have been completed. They're equipped with their High Armors, all of which have been upgraded to Blue.
Kadaj has 3 ATK 108 with Remnant Up★★ (While Latent Thoughts active: Raises own MAX BRV, ATK by 5%) Artifacts.
Tifa has 3 ATK 108 with MAX BRV 330 Artifacts. Galuf has 3 ATK 108 with Buff Attack Up★★ (Raises ATK by 5% with active buffs) Artifacts.
Galuf is equipped with the following real Spheres:
Eight’s (from Final Fantasy Type-0) Evasion Attack Up Shorter A Sphere
Raises own ATK by 20% for 3 turns when evading enemy attack
*Does not stack with same sphere
Galuf Halm Baldesion’s (from Final Fantasy V) Evasion Attack Up Longer B Sphere
When dodging attack:
• Raises ATK by 10% for 6 turns
Wakka’s (from Final Fantasy X) Buff Attack Boost All 5 D Sphere
With 5 or more buffs:
• Raises party’s MAX BRV, ATK by 5%
*Does not stack with same sphere
Kadaj is equipped with the following real Spheres:
Garland’s (from Final Fantasy I) Break Hit Raging Attack Up A Sphere
Raises ATK by 2% when inflicting Break or attacking target afflicted with Break up to 5 times, once per turn
Oerba Yun Fang’s (from Final Fantasy XIII) Break Hit Attack Up Longer A Sphere
Raises ATK by 10% for 6 turns when inflicting Break or attacking target afflicted with Break
The Emperor’s (from Final Fantasy II) Debuff Success Attack Up Longer E Sphere
Raises own ATK by 10% for 6 turns when inflicting debuff on target
Tifa is equipped with the following real Spheres:
Shadow’s (from Final Fantasy VI) Single Critical Attack Up Longer A Sphere
Raises ATK by 10% for 6 turns when dealing critical hit to single target
Leo Cristophe’s (from Final Fantasy VI) Single Power A Sphere
When attacking single target:
• Increases BRV damage dealt by 10%
Lyse Hext’s (from Final Fantasy XIV) Break Hit Attack All Longer D Sphere
After inflicting Break or attacking target afflicted with Break:
• Raises party’s ATK by 5% for 6 turns
For this fight, I decided to go with Tifa, Kadaj, and Galuf because I really wanted to use the first 3 chars who I Blued together on the same team. Kadaj was my first Blue followed by Galuf and then Tifa.
Was kinda worried about doing this though because none of them have a Burst weapon.
For Lufenia quests, I almost always have at least 1 char with a BT even if it’s just from a support char like Paladin Cecil Harvey from Final Fantasy IV or even if it’s from kinda outdated chars like Sephiroth from Final Fantasy VII and Cloud Strife from Final Fantasy VII.
In fact, can’t quite remember the last time I did a Lufenia fight without at least 1 BT char. So wasn’t sure if I’d be able to get the win with this team. Nevertheless, wanted to try so decided to go for it.
Another thing that kinda worried me was the fact that I didn’t have anyone who could break and rebreak Bahamut to take care of the orb. All I could do was wait for him to get out of his broken state then break him again.
But I soon found that it wasn’t that bad because the count starts at 15 and it’s increased by 7 every time you break Bahamut. Plus I only had to deal with the orb until I manage to get Bahamut down to 49% HP.
There’s no one on my team who has a BT weapon and none of them are boosted or synergy for this fight but they all did very well anyway. Was really super impressed with them. They all contributed to the fight.
Tifa dealt amazing damage. Kadaj debuffed the enemies and also helped deal damage. Galuf provided lots of battery as well as pretty great auras and buffs. He also protected his allies from all single target attacks and, with the appropriate buffs up, he countered and dealt off-turn damage to the enemies.
To illustrate just how super special awesome this team was, just take a look at the screenshot below.

I’m only on turn 4 and yet Bahamut was already down to 79% HP while the Manikin was at 87% HP.
Speaking of Bahamut’s current HP threshold, when he gets down to 79% HP, he gains a lot of brave (he would have gained a lot more if not for Kadaj’s brave sap and steal) and, until you break him, your chars will deal 1 brave damage.
Made sure that Kadaj’s Ex ability, Divinity, was charged for this. Divinity sets the brave of all enemies to 0 then deals a brave + HP attack so Kadaj was able to easily get rid of Bahamut’s brave charge.
For my friend support, was debating on whether to borrow Tifa or Garland from Final Fantasy I.
In the end, I went with Tifa since I didn’t have anyone to keep the enemies from moving which would severely gimp Garland’s BT effect. Well, he could delay both enemies for now but once Bahamut switches into his Gestalt mode, he can no longer be delayed and his turns can’t be deleted either.
Anyway, I switched out my Tifa for the support Tifa that I borrowed when Bahamut was at around 76% HP. Wanted to get Bahamut down to 49% HP ASAP to get rid of the orb so I wouldn’t have to worry about it anymore.
The support Tifa who I borrowed also had her High Armor upgraded to Blue. So it didn’t take that long before Bahamut switched into his Gestalt form.
When he did, his HP went back to 100%, the Lufenia orb disappeared, his recast gauge showed up and it was filled to the max, and he removed all of his debuffs.
Well, all of his debuffs except for Kadaj’s gold-framed ones. And, as aforementioned, Bahamut’s turns could no longer be delayed so he now has spikes on his turn icon.

Didn’t have any way of keeping Bahamut from acting. Had no way of paralyzing him and such so he was able to get a turn and he fired off his recast ability.
It’s a group brave + HP attack which took everyone down to around half of their HP or thereabouts. It “ignores effects that reduce, nullify BRV, HP damage” and is guaranteed to hit so not even Galuf can dodge this attack.

Really glad that my chars were able to survive Bahamut’s recast ability attack. The debuffs helped. It was also good that Bahamut didn’t dispel anyone’s buffs.
Unfortunately, wasn’t able to get the support Tifa back to full health before she left the field.
When Bahamut was down to 76% HP and the Manikin was at 68% HP, summoned Odin.
It was Kadaj’s turn. Galuf’s Cover buff on him was about to run out and he was being targeted by Bahamut and the Manikin was targeting All so I didn’t want to risk him not having any protection, especially since he wasn’t back to full health yet.
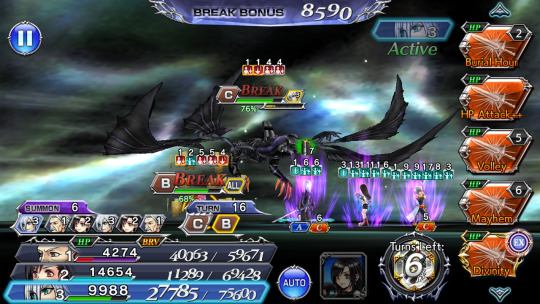
Everyone managed to get a lot of brave during the summon which was really nice to see.

Just continued spamming everyone’s skills. Bahamut’s and the Manikin’s HP kept on decreasing. Too bad I wasn’t able to beat Bahamut before he could fire off his recast ability again.
His attack took Tifa’s HP down to the red. Kadaj was left at around half of his HP again. Galuf’s HP actually went to 0. Welp, if it wasn’t for his LD buff, he would have been dead by now.

Now I found myself worrying that I won’t be able to get everyone back to full health before the fight ended because Bahamut was now down to 7% HP while the Manikin was at 50% HP.
Continued spamming skills. Soon, Bahamut was at 1% HP while Tifa and Galuf had gotten back a bit of their health.
It was Tifa’s turn. Her HP Attack (Full Throttle) finished off Bahamut.

Now only the Manikin, who was at 47% HP, was left. He wasn’t that much of a threat, really, especially with Galuf dodging and countering his single target attacks.
Soon, Kadaj only had 1 more use of his LD, Burial Hour, left. He still has 4 uses of Volley and 5 uses of Mayhem. He has no more uses of his Additional Ability (AA).
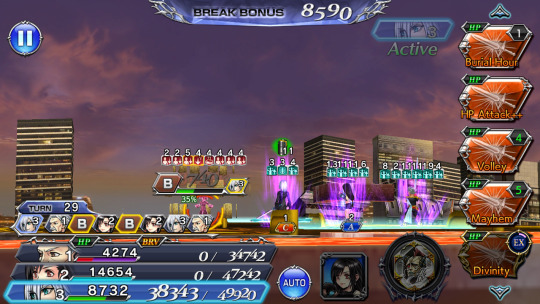
Used his first AA on Bahamut. When Bahamut transformed into his Gestalt form, had Kadaj use his AA on the Manikin to switch the target of his follow-up attacks.
Read somewhere that, for some reason, Kadaj’s follow-up attack triggers Bahamut’s counter.
Bahamut counters all magical attacks unless he’s paralyzed or otherwise unable to move. But Kadaj’s follow-up isn’t magic so Bahamut shouldn’t be countering him.
Saw a video where it happened though. When Bahamut counters, he also dispels his target’s buffs. To prevent this from happening, I just had Kadaj switch his follow-up’s target to the Manikin since the Manikin also needed to be defeated anyway.
When the Manikin was down to 30% HP, it was also turn 30 and Galuf’s turn. He was down to 2 uses of Dawn Katana, his LD. He still has 2 uses of Shirahadori+ and 6 uses of Cover+.
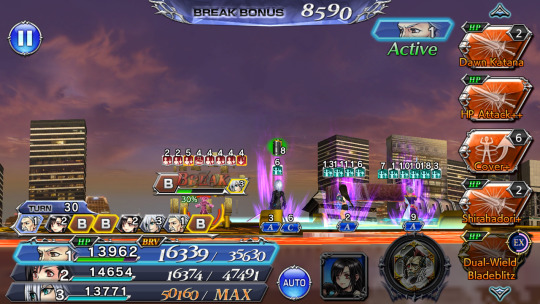
Used his own AA so he could restore more of his HP. Only used his Cover+ skill like once or twice or so. It wasn’t really needed since he could apply the Cover buff to his allies via his LD ability. Cover+ does battery though so it wasn’t that bad even if it didn’t deal damage.
Also used Tifa’s AA to help her get back to full health. Used the last of her LD, Meteor Crusher. She still has 9 uses of Beat Rush+ and 1 use of Battle Cry left.
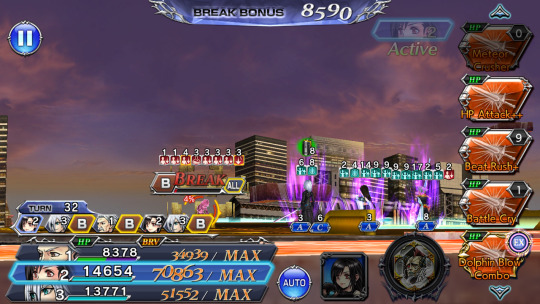
After using the last of her Meteor Crusher, the Manikin was down to 11% HP. Used her HP Attack (Full Throttle) for the instant turn rate and free skill. Her Battle Cry ability brought the Manikin down to 4% HP.
Tifa’s Ex ability, Dolphn Blow Combo, was charged so decided to use that to initiate a launch. This finished the fight on turn 33.
Had 6,361 HP lost thanks to being unable to heal the friend support Tifa that I borrowed. Thankfully, still managed to get the score as well as all the other mission requirements.

Really super pleased with this team. Everyone contributed and did very well. Looks like it was perfectly fine even if there was no one with a Burst weapon on my party.
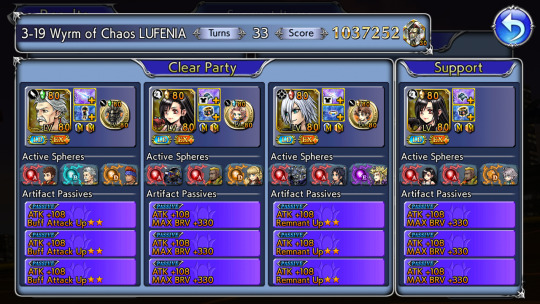
Is this the power of an all-Blue lineup? LOL. Would love to be able to use this team again on another Lufenia fight.
Kadaj Lufenia Quests List
The following is a list of Lufenia quests that I was able to complete with Kadaj from Final Fantasy VII: Advent Children in my party ever since he got introduced to DFFOO via the Mother Fixation event and after I was able to fully build him.
Mother Fixation
Love, the Melody of Courage
Crimson Arms
In the Garden of Evil Boss Rush
Dark Quickening (Story Act 3, Chapter 3, Part 1)
Conclusion
So, what about you? Which chars did you use to complete these Lufenia Quests? Have you decided to Blue a char’s High Armor? Feel free to share your thoughts and opinions by leaving a comment below or by reblogging or replying to this post.
Notes:
screenshots are from my Dissidia Final Fantasy: Opera Omnia game account
#dissidia final fantasy opera omnia#this post stars:#final fantasy 7#tifa lockhart#kadaj#galuf halm baldesion#final fantasy 7 advent children#final fantasy 5#dffoo kadaj fights#dffoo#gacha games#games#dffoo lufenia fights series#mobile games
0 notes
Text
Dissidia Final Fantasy: Opera Omnia In the Garden of Evil Boss Rush Lufenia Quest
Lufenia Quests are currently the hardest kind of fight in the Dissidia Final Fantasy: Opera Omnia (DFFOO) mobile game. They’re level 200.
In the Garden of Evil Boss Rush Lufenia Quest
The In the Garden of Evil Boss Rush Lufenia quest has 4 waves. To get all the time-limited rewards, you need to win using at least 3 parties or fewer. If you bring a char that’s synergy for this fight, the rest of your team will get boosted stats as well.
My first party was Garland from Final Fantasy I, Tifa Lockhart from Final Fantasy VII (#ad), and Paladin Cecil Harvey from Final Fantasy IV with Ramuh as my summon.

My Calls were Bartz Klauser’s (from Final Fantasy V), Cloud Strife’s (from Final Fantasy VII), and Ramza Beoulve’s (from Final Fantasy Tactics). Tifa is synergy for this fight.
Cecil, Garland, and Tifa are fully MLB and Purple, including their LD. They have their Bloom Stones and all of their Boards have been completed.
Tifa’s High Armor has been upgraded to Blue. Cecil and Garland are equipped with their Burst weapons and they have their High Armor.
Garland has 3 ATK 108 with He Who Thirsts for Strife Boost★★ (Raises MAX BRV, ATK by 5% while Soul of Chaos buff active) Artifacts. Tifa has 3 ATK 108 with MAX BRV 330 Artifacts.
Paladin Cecil has 3 ATK 108 with Ordeal Grasping Light Boost★★ (Raises own INT BRV, MAX BRV, ATK, DEF by 5% if HP is MAX at start of last wave) Artifacts. Should have replaced Cecil’s Arts with triple 108/330 instead since this party didn’t even get to the last wave, but I forgot. Ah, well.
Tifa is equipped with the following real Spheres:
Shadow’s (from Final Fantasy VI) Single Critical Attack Up Longer A Sphere
Raises ATK by 10% for 6 turns when dealing critical hit to single target
Leo Cristophe’s (from Final Fantasy VI) Single Power A Sphere
When attacking single target:
• Increases BRV damage dealt by 10%
Lyse Hext’s (from Final Fantasy XIV) Break Hit Attack All Longer D Sphere
After inflicting Break or attacking target afflicted with Break:
• Raises party’s ATK by 5% for 6 turns
Garland is equipped with 3 of Vayne Carudas Solidor’s (from Final Fantasy XII) Breaking Power (RF) A Spheres:
When attacking target afflicted with Break:
• Increases BRV damage dealt by 4%
Paladin Cecil is equipped with the following RF Spheres:
Cloud Strife’s (from Final Fantasy VII) Critical Power (RF) A Sphere
Raises BRV damage dealt with critical hits by 4%
Maria’s (from Final Fantasy II) HP Heal Base Attack All Shorter (RF) C Sphere
After recovering HP:
• Raises party’s INT BRV, ATK by 2% for 3 turns
The first wave only has one enemy. The Lufenia orb is increased every time the boss takes critical BRV damage. The boss has some pretty annoying gimmicks so it’s better to not let him get a turn.
When the fight started, used Cecil’s LD right away for the buffs and auras. Used Tifa’s Battle Cry then Meteor Crusher.
On Garland’s turn, had him use Bartz’s regular Call. Was second-guessing myself on whether it would work or not though because the boss was immune to all debuffs. But reading through Bartz’s Call again, there was nothing there about inflicting a debuff.
Looks like the wind enchant and imperil were both tied to the “C” icon that Garland got underneath him when he used Bartz’s Call. So I took a chance and, thankfully, it worked. Right after activating Bartz’s regular Call, I had Garland go into his Burst mode. By then, the boss was down to 88% HP.

By the time he was about to cast Ultimate Conflict, his finishing Burst move, the boss was down to 76% HP. Thanks to Garland, the boss’s turns got pushed back a lot.
Just kept on spamming everyone’s skills since I only had 50 turns with this party anyway so there was no point saving ability uses. Garland kept on delaying the enemy and dealing a lot of damage.
Tifa dealt lots of damage too. She’s really amazing. Her DPS was off the charts, especially with her Blue armor, Garland’s BT effect, and Cecil’s auras and buffs. With her Ex, she can launch an enemy and delay them by 1 turn.

Cecil didn’t deal much damage. His healing wasn’t that useful either since the enemy never got a turn but his auras and buffs were amazing and really helped Tifa and Garland dish out a lot of damage.
I’m sure wave 1 would have been a lot harder if the boss actually got a turn, but since that never happened, he basically just stood there while my chars attacked and attacked some more.
My party only had 24 turns left when they finished off wave 1′s boss and got to the second wave. There are 2 enemies on this wave. The Lufenia orbs here are increased when the enemies take BRV damage.
Once again, just spammed skills and delayed the enemies to oblivion. Summoned Ramuh when I only had 5 turns remaining. By then, one enemy was down to 34% HP while the other was at 24% HP.
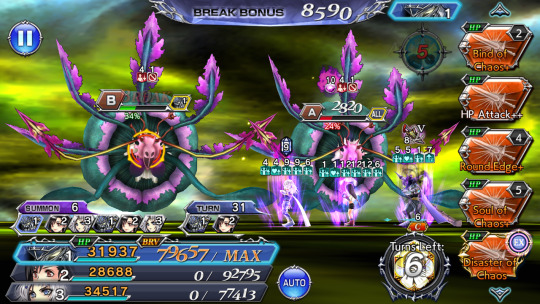
On Tifa’s turn, used the last of her LD, Meteor Crusher. On a side note, it’s really nice to see her with so much brave. She can get a lot even outside the summon.
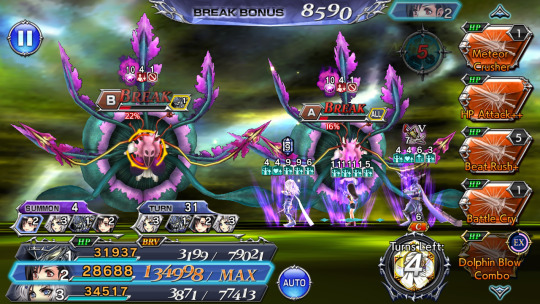
Was already more than pleased with this team. They’d already done more than enough by getting past wave 1 and like more than half of wave 2 so I didn’t mind if they weren’t able to finish wave 2. But they’re all so super special awesome that they were able to finish off wave 2′s bosses by the time the summon ended.
Two turns before the summon ended was Garland’s turn. One enemy was at 1% HP while the other was at 14% HP. His Bind of Chaos+ finished off the boss who was at 1% HP and left the other at 5% HP. Tifa finished off the last enemy with her Beat Rush+.
My chars entered the 3rd wave with 5 turns remaining. I think they might have been able to go all the way to the last wave if there was no turn count limit per party and they had ways of dealing with the rest of the Lufenia orbs. Nevertheless, it’s really great how they were able to get this far.
Anyway, so Paladin Cecil was all out of his LD. He still has 4 uses of Saint’s Fall and 5 uses of Holy Flame left.
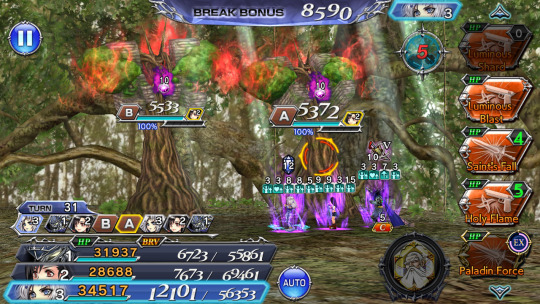
Garland has 1 use of Bind of Chaos+, 4 uses of Round edge+, and 5 uses of Soul of Chaos+ left. On his turn, used the last of his LD.
Tifa has no more uses of her LD but she still has 4 uses of Beat Rush+ and 1 use of Battle Cry left.
By the time it was Tifa’s turn, there were only 3 turns left before I had to switch my party. Used the last of her Battle Cry then her HP Attack (Full Throttle) for the instant turn rate then either her Ex or Beat Rush+ for her last turn.

For my second party, I decided to bring Terra Branford from Final Fantasy VI, Ramza, and Galuf Halm Baldesion from Final Fantasy V with Shiva as my summon.

My Calls were Bartz’s, Tifa’s, and Amidatelion’s (from Final Fantasy Crystal Chronicles: The Crystal Bearers).
Galuf, Terra, and Ramza are fully MLB and Purple, including their LD. They have their Bloom Stones and all of their Boards have been completed.
Galuf’s High Armor has been upgraded to Blue. Terra and Ramza are equipped with their Burst weapons and Terra has her High Armor.
Terra has 3 ATK 108 with Trance Boost★★ (Raises INT BRV, MAX BRV, ATK, DEF by 5% if HP is MAX at start of last wave) Artifacts.
Galuf has 3 ATK 108 with Buff Attack Up★★ (Raises ATK by 5% with active buffs) Artifacts.
Ramza has 3 ATK 108 with Mightiest Squire Boost★★ (Raises INT BRV, MAX BRV, ATK, DEF by 5% if HP is MAX at start of last wave) Artifacts. Should have replaced Terra’s and Ramza’s Arts with triple 108/330 but I forgot.
Galuf is equipped with the following real Spheres:
Eight’s (from Final Fantasy Type-0) Evasion Attack Up Shorter A Sphere
Raises own ATK by 20% for 3 turns when evading enemy attack
*Does not stack with same sphere
Galuf Halm Baldesion’s (from Final Fantasy V) Evasion Attack Up Longer B Sphere
When dodging attack:
• Raises ATK by 10% for 6 turns
Wakka’s (from Final Fantasy X) Buff Attack Boost All 5 D Sphere
With 5 or more buffs:
• Raises party’s MAX BRV, ATK by 5%
*Does not stack with same sphere
Terra is equipped with the following real Spheres:
Gau’s (from Final Fantasy VI) Full HP Power A Sphere
Increases BRV damage dealt by 10% while HP is MAX
Ashelia B'nargin Dalmasca’s (from Final Fantasy XII) Buff Success Attack All Longer D Sphere
After granting buff:
• Raises party’s ATK by 5% for 6 turns
Yuffie Kisaragi’s (from Final Fantasy VII) Debuff Success Attack Boost Up Shorter E Sphere
Raises own MAX BRV, ATK by 10% for 3 turns when inflicting debuff on target
Ramza is equipped with 2 of Sazh Katzroy’s (from Final Fantasy XIII) Critical Attack All Longer RF D Sphere:
When dealing critical hit:
• Raises party’s ATK by 2% for 6 turns
The third wave has 2 enemies. The Lufenia orbs here are increased by dealing magic BRV damage.
When I started wave 3 with this team, one of the enemies was already down to 88% HP while the other was at 75% HP thanks to Garland, Cecil, and Tifa.
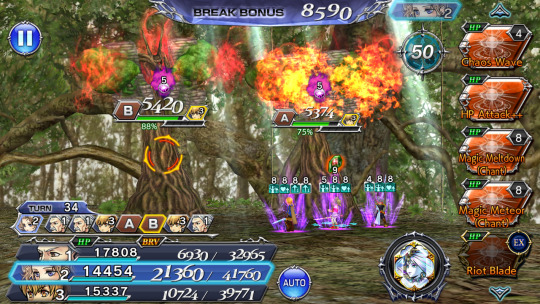
Terra took the first turn. Had her use one of her base skills. On Ramza’s turn, used his LD to get his overhead buff up and running for the party auras. On Galuf’s turn, used Shirahadori+ and Dawn Katana for the buffs and auras. Also had him use Bartz’s LD Call.
When Terra got to move again, had her use Tifa’s LD Call then activated her Burst mode. By then, the Lufenia orbs were at 1. Was really pushing it since only Terra can handle the orbs here.
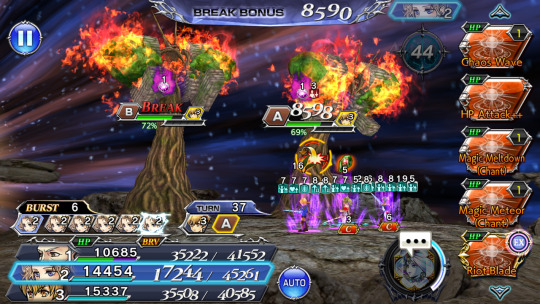
By the time she was about to cast Trance Ultima, her finishing Burst move, the orbs were at 9 and 7 while the enemies were at 66% and 57% HP.
Afterwards, just continued spamming skills. Everyone did pretty well, especially considering no one has synergy stats. Terra took a lot of turns thanks to her LD. In retrospect, I should have spammed her LD more since I didn’t get to use it in the last wave.
Also in retrospect, maybe I shouldn’t have brought Glauf to this wave and with this party. I wanted to use him in the boss rush, especially since I even upgraded his armor to Blue but I feel like he didn’t get to shine much with this party. He batteried his allies and he provided decent buffs and auras.
However, thanks to Terra being able to get multiple turns, the enemies only got to move a few times which also meant that Galuf only got to counter their attacks a few times.
Ramza supported the party with his buffs, auras, and battery. The primary reason why I brought him here though was that when the enemies get down to 29% HP, they gain massive amounts of brave and you’ll deal 1 BRV damage until you break them. Ramza’s Shout can instantly break one enemy.
The timing got a bit messed up though. It was Terra’s turn when the massive brave damage reduction happened. Had to summon Shiva so I could quickly get to Ramza’s turn already.
Then when he finally got to move, I ended up just having him use Amidatelion’s LD Call instead of his Shout skill. Amidatelion’s LD Call reduced the brave of all enemies to 0 so it’s easy to break them. I opted for this instead of Ramza’s Shout since it’s AoE whereas Shout was single target.

Another thing I kinda regret was using up all of Ramza’s LD on this wave. Should have saved at least 1 for the final wave since his LD launches. It’s fine though. I mean, things still worked out anyway. There were only 21 turns left by the time Terra finished off both bosses.
The final wave has 2 enemies. The Lufenia orbs here are increased by dealing wind BRV damage.
My current party has no way of taking care of the orbs here other than by using Bartz’s regular Call since I didn’t think that they’d be able to get this far.
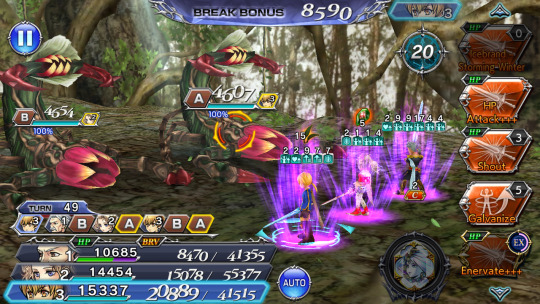
This team wasn’t prepared for this wave at all, but they did well enough, all things considered.
Terra was gimped here since the bosses heavily resist magic and I didn’t have anyone to imperil and enchant her. However, thanks to the battery from her allies and her brave gains before her attacks, she was able to deal decent enough damage.
Refrained from using Terra’s LD, so the enemies got to move more often. This also meant that Galuf got to counter more as well. Then I managed to get both bosses down to below 79% HP.
When that happened, a message appeared on the screen, saying something about the bosses. From looking it up, it seems they just used Sylvan Union and they need to be launched to get rid of this.
Couldn’t do anything about that though and by then my party only had a few turns left so I didn’t think it mattered anymore. Was basically just waiting for time to run out and for the game to prompt me to switch parties.
Before that though, the enemies were set to move. Didn’t think that’d be so bad since I had Galuf. I thought, why not let him deal more damage via his counters, right?
So the enemies attacked and suddenly Galuf was at 1 HP. All his buffs had disappeared. Welp, guess I should have paid more attention to that Sylvan Union thing.

At least Galuf didn’t die thanks to his Last Stand. Still, was very annoyed about this because now instead of 0 HP damage, I ended up with 10685 HP damage.
One of the mission requirements was to take 15k or less HP damage so the HP loss wouldn’t cost me the run. Nevertheless, this was infuriating. So I decided to “Retry from wave 4″. Did pretty much what I did before.

That is, until the bosses dropped down to 77% and 79% HP. The orbs were currently at 15.
It was Ramza’s turn and I still had 6 turns left with this party. Didn’t want to risk Galuf being brought down to 1 HP again though so I decided to “Retire current party and continue with next party”.
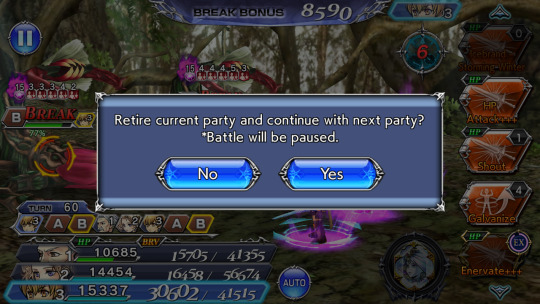
My third and final team was Bartz, Kadaj from Final Fantasy VII: Advent Children, and Dark Knight Cecil Harvey from Final Fantasy IV with Pandemonium as my summon.
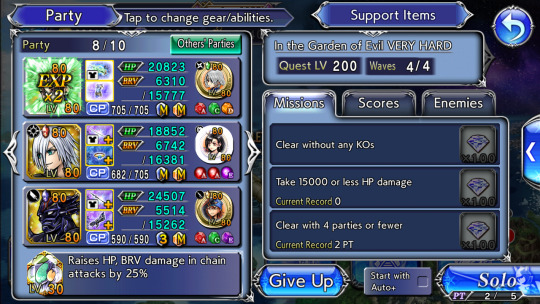
My Calls were Keiss’s (from Final Fantasy Crystal Chronicles: The Crystal Bearers), Tifa’s, and Fujin’s (from Final Fantasy VIII).
Bartz, Kadaj, and Dark Knight Cecil are fully MLB and Purple, including their LD. They have their Bloom Stones and all of their Boards have been completed.
Kadaj’s High Armor has been upgraded to Blue. Bartz is equipped with his Burst weapon and his High Armor.
Cecil has 3 ATK 108 with MAX BRV 330 Artifacts. Kadaj has 3 ATK 108 with Remnant Up★★ (While Latent Thoughts active: Raises own MAX BRV, ATK by 5%) Artifacts.
Bartz has 3 ATK 108 with Simple Mastery Boost★★ (Raises party’s INT BRV, MAX BRV, ATK, DEF by 5% while 2 abilities mastered) Artifacts.
Kadaj is equipped with the following real Spheres:
Garland’s (from Final Fantasy I) Break Hit Raging Attack Up A Sphere
Raises ATK by 2% when inflicting Break or attacking target afflicted with Break up to 5 times, once per turn
Oerba Yun Fang’s (from Final Fantasy XIII) Break Hit Attack Up Longer A Sphere
Raises ATK by 10% for 6 turns when inflicting Break or attacking target afflicted with Break
The Emperor’s (from Final Fantasy II) Debuff Success Attack Up Longer E Sphere
Raises own ATK by 10% for 6 turns when inflicting debuff on target
Dark Knight Cecil is equipped with the following RF Spheres:
Jecht’s (from Final Fantasy X) Critical Base Attack Up Shorter (RF) A Sphere
When dealing critical hit:
• Raises INT BRV, ATK by 4% for 3 turns
Alphinaud Leveilleur’s (from Final Fantasy XIV) Buff Success Base Attack All Shorter (RF) C Sphere
After granting buff:
• Raises party’s INT BRV, ATK by 2% for 3 turns
Seymour Guado’s (from Final Fantasy X) Debuff Success Raging Attack Up (RF) E Sphere
When inflicting debuff on target:
• Raises own ATK by 3% up to 2 times, once per turn
*Does not stack with same sphere
Bartz is equipped with the following RF Spheres:
Seven’s (from Final Fantasy Type-0) Weak Power (RF) A Sphere
When attacking target’s weakness:
• Raises BRV damage dealt by 4%
Alphinaud Leveilleur’s (from Final Fantasy XIV) Buff Success Base Attack All Shorter (RF) C Sphere
After granting buff:
• Raises party’s INT BRV, ATK by 2% for 3 turns
Hope Estheim’s (from Final Fantasy XIII) Buff Success Attack Boost All Shorter (RF) D Sphere
After granting buff:
• Raises party’s MAX BRV, ATK by 2% for 3 turns
*Does not stack with same sphere
I brought Bartz to deal with the Lufenia orbs here. He’s synergy for this fight and he’s a good support with pretty decent buffs and auras, especially with his Burst effect.
Brought Cecil for the launches. He also provides HP damage up and he batteries the party when he launches.
Brought Kadaj since I wanted to use him. He’s the first char I Blued. He’s a debuffer with some DPS capabilities. He can gold frame his debuffs so they can’t be dispelled.
When I started the last wave with this party, the Lufenia orbs were at 15, the enemies were at 77% and 79% HP, and it was turn 60.
Used Kadaj’s Additional Ability (AA), Tifa’s LD Call, then Kadaj’s LD.

On Cecil’s turn, used both of Keiss’s Calls (with his regular Call, I targeted Bartz), his LD then Valiant Blow+.
On Bartz’s turn, used Fujin’s LD Call then went straight into his Burst mode. By the time he was about to cast Quick Spellblade Dual-Wield Rapid Fire, his finishing Burst move, the enemies were down to 53% and 49% HP.
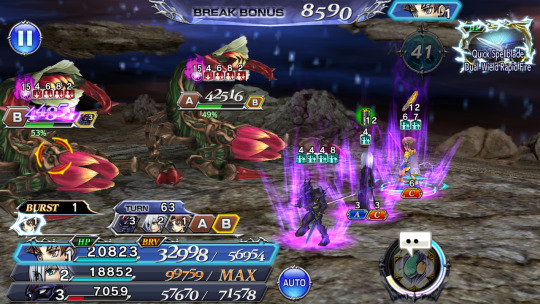
Afterwards, just kept on spamming skills. Got to launch the enemies a lot thanks to Dark Knight Cecil. Between him and Bartz and even Kadaj’s own brv gain, there was a lot of battery to be had.
With all the buffs, debuffs, and auras that were currently up, everyone was able to deal a lot of damage. It was really awesome to see my chars with so much brave, especially Kadaj who got brave that broke the 99999 cap thanks to his Blue armor.
To prevent the bosses from getting a turn, I summoned Pandemonium on turn 67.
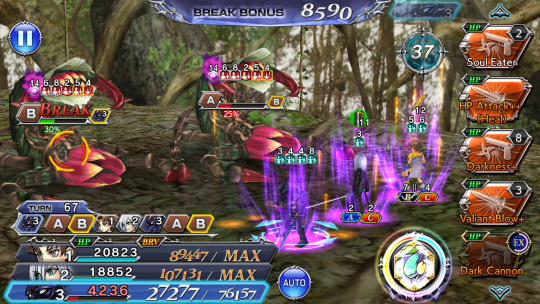
Dealt even more damage during the summon so before it ended, the bosses were down to 8% and 9% HP.
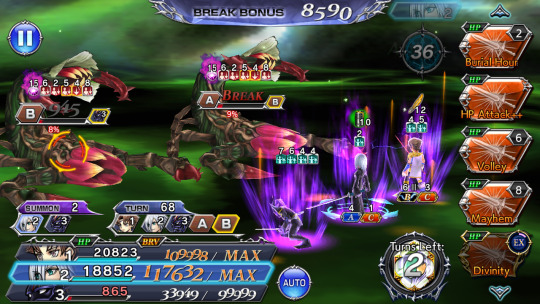
On the last turn before the summon ended, one boss was at 1% HP while the other was at 8% HP.
It was Cecil’s turn. Bartz and Kadaj had more than 100k+ brave. Used Cecil’s Valiant Blow+ to launch the boss who was at 8% HP. Bartz’s HP attack took the enemy down to 3% HP. Kadaj finished him off.
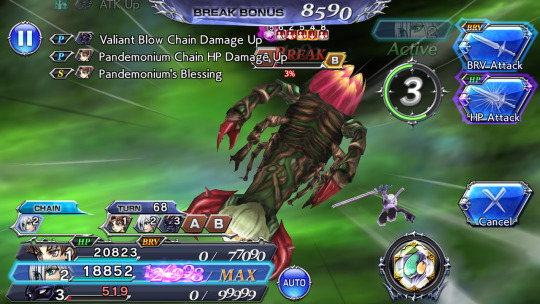
The summon ended, leaving one enemy who was basically dead already since he only had 1% HP remaining.
It was Bartz’s turn. Any one of his moves could have finished off the last boss already. Was hoping for Kadaj to be the one to deal the killing blow though. Unfortunately, that wasn’t possible since even Bartz’s BRV+ attack deals HP damage.
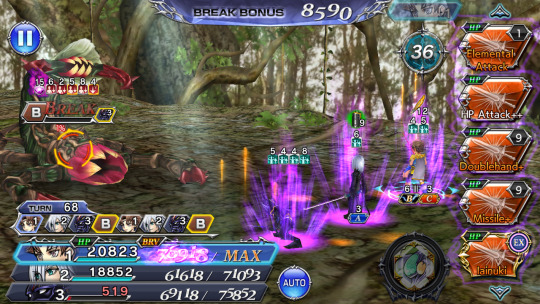
So Bartz was the one who ended the fight on turn 69. Managed to get the score and all the other mission requirements.
The bosses on the last wave never got a turn. Bartz, Kadaj, and Cecil had plenty of skills left. Heck, they still had 36 turns left before I had to switch them out.
Feels like they really steamrolled this wave. I think I could and should have just switched to them the moment Terra, Galuf, and Ramza got to this wave.
Anyway, here are screenshots of my parties:
Party 1

Party 2

Party 3
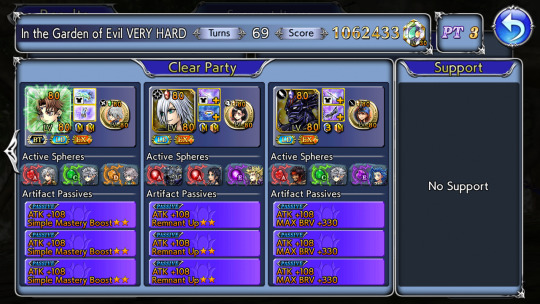
All parties
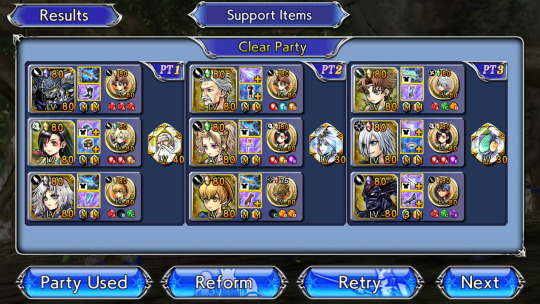
Conclusion
So, what about you? Which chars did you use to complete these Lufenia Quests? Have you decided to Blue a char’s High Armor? Feel free to share your thoughts and opinions by leaving a comment below or by reblogging or replying to this post.
Notes:
screenshots are from my Dissidia Final Fantasy: Opera Omnia game account
#dissidia final fantasy opera omnia#this post stars:#final fantasy 7#kadaj#tifa lockhart#terra branford#bartz klauser#ramza beoulve#cecil harvey#galuf halm baldesion#garland#paladin cecil#dark knight cecil#games#final fantasy 7 advent children#gacha games#dffoo lufenia fights series#dffoo#dffoo kadaj fights#mobile games
0 notes
Text
Dissidia Final Fantasy: Opera Omnia Love, the Melody of Courage Lufenia Quest
Lufenia Quests are currently the hardest kind of fight in the Dissidia Final Fantasy: Opera Omnia (DFFOO) mobile game. They’re level 200.
Love, the Melody of Courage Lufenia Quest
For this fight, my team was Kadaj from Final Fantasy VII: Advent Children (#ad), Garland from Final Fantasy I, and Kurasame Susaya from Final Fantasy Type-0 with Shiva as my summon.
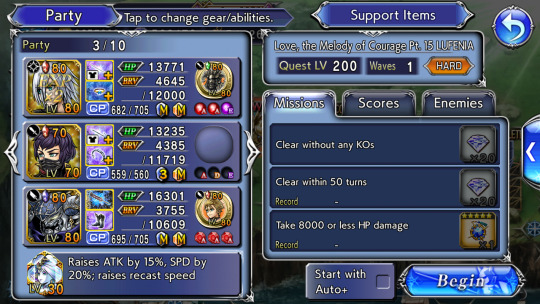
My Calls were Gabranth’s (Noah fon Ronsenburg from Final Fantasy XII) for the HP damage up debuff and Jack’s (from Final Fantasy Type-0) for the BRV damage up debuff.
I wanted to wait for Galuf Halm Baldesion’s (from Final Fantasy V) arrival before doing this quest but it looks like I won’t be able to use him here anyway so I decided to just try this fight now.
Galuf’s a cover tank which means that he wants enemies to attack so he can dodge them and then counter and deal damage. But in the Love, the Melody of Courage Lufenia quest, you basically never want the enemies to take a turn.
This is one absolutely, completely ridiculous fight. It has lots of annoying gimmicks. You need to clear it within 50 turns. You need to take 8k or less HP damage.
The Lufenia orb requires ice elemental BRV damage. When the bosses are down to 79% and 49% HP, they will gain this red aura. When they’re down to 29% HP, they’ll gain this green aura. These auras are very bad.
If you let these guys attack while these auras are active, you can say goodbye to your chars because it’s gonna be game over. The red aura attack will instantly KO a char while the second attack while the green aura is active will KO the entire party.
You can get rid of the red aura by reducing the HP of your opponents by 20% before they get a turn, which means quickly bringing them down from 79% to 59% and 49% to 29% HP.
These enemies hit pretty hard so it’s best to limit the amount of turns that they take. Heck, the best thing to do is to just never let them move. That requires certain chars though.
The synergy chars for this fight are Bartz Klauser from Final Fantasy V, Hope Estheim from Final Fantasy XIII, Edward Chris von Muir from Final Fantasy IV, and Palom from Final Fantasy IV.
Palom’s an ice DPS so he can take care of the orb. Edward’s a support who can’t heal. But he has a mechanic that lets him stop enemies from acting though there are caveats to that.
Of the listed chars, I only have Hope and Bartz. Hope’s a support who can heal. Here are my only options of being able to deal with the Lufenia orbs:
Shiva summon
Celes Chere from Final Fantasy VI - fully MLB and Purple, including LD. All Summon Boards completed but no Character Enhancement Boards
Kurasame Susaya - fully MLB and Purple, including LD. All Boards completed except he hasn’t gotten his LD Board yet and he’s still stuck at level 70 for now so he can’t equip a Call Ability
Cater’s (from Final Fantasy Type-0) regular Call Ability - she provides the char who Called her a few turns of ice enchant. Don’t have her Ex so haven’t built het. She has yet to get an LD so she’s pretty outdated by now
Onion Knight from Final Fantasy III - 15cp, 35cp, and Ex are fully MLB except he’s at base Ex only and I’m missing his LD and Burst. He can enchant the party with his Additional Ability but I doubt that he’d be better than Celes or Kurasame even if I Purple him since I don’t even have his LD
Just Blued Kadaj’s High Armor so I want to bring him to this fight but I wasn’t sure how I was gonna be able to pull that off considering all the aforementioned annoying gimmicks of this quest, not to mention its utterly ridiculously tight turn count requirement.

Tried searching for vids that featured Kadaj but couldn’t find any so far. And then I saw a screenshot of a clear of this Lufenia quest that featured him (also with Blue armor) alongside Garland and Kurasame.
IIRC, the equipped Calls were Ignis Scientia’s (from Final Fantasy XV) and Jack’s, the summon was Shiva, and the friend support was Garland. The Garlands had their BTs and High Armors. The Kurasame had his High Armor too.
Didn’t see a write-up or anything (unless I just missed it somehow), but seeing that screenshot told me it was possible to win this battle with Kadaj.
Thankfully, I can actually replicate this comp except I don’t have Ignis’s LD so I can’t bring him as a Call. Also don’t have Kurasame’s High Armor and I don’t want to buy it just for 1 fight.
Anyway, my Garland is fully MLB and Purple, including his LD, Burst and High Armor. All of his Boards have been completed.
He has his Bloom Stone and 3 ATK 108 with He Who Thirsts for Strife Boost★★ (Raises MAX BRV, ATK by 5% while Soul of Chaos buff active) Artifacts.
Garland is equipped with 3 of Vayne Carudas Solidor’s (from Final Fantasy XII) Breaking Power (RF) A Spheres:
When attacking target afflicted with Break:
• Increases BRV damage dealt by 4%
As aforementioned, my Kurasame is fully MLB and Purple, including his LD but he’s missing his High Armor. All of his Boards have been completed.
He has 3 ATK 108 with Silent Commander Up★★ (While Quiet Instructor active: Raises MAX BRV, ATK by 5%) Artifacts.
My Kadaj is fully MLB and Purple, including his LD. He has his Bloom Stone and all of his Boards have been completed. And, as aforementioned, his High Armor has been Blued.
Kadaj has 3 ATK 108 with Remnant Up★★ (While Latent Thoughts active: Raises own MAX BRV, ATK by 5%) Artifacts.
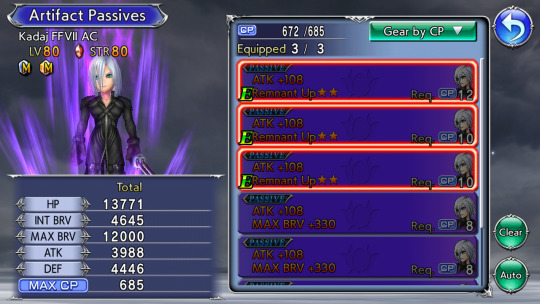
Kadaj is equipped with the following real Spheres:
Garland’s (from Final Fantasy I) Break Hit Raging Attack Up A Sphere
Raises ATK by 2% when inflicting Break or attacking target afflicted with Break up to 5 times, once per turn
Oerba Yun Fang’s (from Final Fantasy XIII) Break Hit Attack Up Longer A Sphere
Raises ATK by 10% for 6 turns when inflicting Break or attacking target afflicted with Break
The Emperor’s (from Final Fantasy II) Debuff Success Attack Up Longer E Sphere
Raises own ATK by 10% for 6 turns when inflicting debuff on target

Anyway, when the battle started, I used both of Jack’s Calls already as well as Gabranth’s regular Call.
On Kurasame’s turn, activated his LD for the debuff. Had Kadaj apply all of his debuffs too. Soon, the enemies were afflicted with the following debuffs:
Katana Wounds Level 5 from Jack’s LD Call - lowers DEF; increases BRV damage taken when being afflicted with or while afflicted with break
Outlaw’s Brand from Gabranth’s regular Call - reduces ATK; effects a certain amount of BRV damage; increases HP damage taken; returns to Criminal’s Mark while afflicted with less than 4 debuffs
Judgment from Gabranth’s regular Call - lowers MAX BRV
Hyōrō Level 5 from Kurasame’s LD - increases HP damage taken; lowers SPD, ice resist (SPD effects do not increase based on level; lowered resist does not stack)
Stigma from Kadaj - lowers ATK; effects a certain amount of BRV damage; increases BRV damage taken
Fixation V from Kadaj - lowers ATK, DEF, PHY DEF; steals BRV recovery
The Hyōrō debuff’s level is raised by 1 after the afflicted target’s turn until it reaches level 5, and then it returns to level 1 after the target’s turn. Only 1 enemy can be afflicted with Fixation V at a time. The other will be at Fixation I until Kadaj switches targets.
Had Garland use his LD, Bind of Chaos+, first then I mostly had him spam his Round Edge+ skill. He can delay with all of his moves as long as the appropriate buff is up. Only his LD and Round Edge+ give AoE delay though.
Wanted to save his LD for later or when I need to refresh the buff it gives so I only used it once for now then just spammed Round Edge+. Used his Ex whenever it was up.
Garland dealt a lot of damage. He was super special awesome as my main and primary DPS. He even provided some utility via his ability to delay the enemies.
If he had someone to battery him, particularly whenever his Ex was up, he’d undoubtedly be able to deal even more damage. Even without more of a support and battery, he still did very well though. All the aforementioned debuffs helped as well.
Kadaj was super special awesome too. He did really well. He provided useful debuffs and he helped Garland deal damage to the enemies. He was always at max brave thanks to his buffs and debuffs.
Really pleased with him. No regrets on spending the resources to Blue his armor.
Used Kadaj’s Volley skill when both enemies needed to be broken, otherwise just used his Mayhem skill. Cast his Ex whenever it was up and used the free skill on his Additional Ability. After the initial cast, only used his LD again when I needed to refresh the buff it gives.
Kurasame was really only here to deal with the Lufenia orbs. He’s stuck at level 70 and he doesn’t even have his LD Boards and his High Armor so his damage was subpar. Still, at least he took care of the orbs and the HP damage up from his debuff was helpful too since it stacks with Gabranth’s.
With only Kurasame to deal with the orbs, there were times when I worried that they might go off like in the screenshot below where both were down to 5.

For Kurasame, I mostly spammed his Multi Blizzaga MIS-II skill since it’s AoE so I could increase both orbs at once. Cast his Ex whenever it was up. It’s AoE too so it’s too bad that it isn’t up more often. Also ended up using his Additional Ability just to try and get the enemies out of break.
Unfortunately, with only Garland to delay the enemies, it wasn’t possible to keep them from moving. They still got a few turns (2 or 3 or so maybe).
I could only be grateful that their attacks didn’t deal HP damage yet because I have no way to heal my chars. They inflicted a debuff (BRV poison, IIRC) on my chars but it wasn’t really a problem. The duration of said debuff wasn’t that long either.
After what felt like forever, finally managed to bring the enemies down to 79% and 78% HP. The Lufenia orbs disappeared and the red auras showed up.
At least the bosses delayed themselves a bit when that happened, buying me some time to delay them some more.
Had Kurasame use his LD again to quickly get his Hyōrō debuff back to max stacks. On his next turn, I switched him out for the friend support Garland that I borrowed.
Used that Garland’s Burst. On my own Garland’s turn, was debating on whether to activate his Burst already. His Ex was charged and he had max brave so I knew it’d be able to deal a lot of damage, especially with the addition of the support Garland’s Burst effect.

But one of the enemies was set to move right after him. Yeah, I’d be able to delay this guy by using Garland’s Ex but the turn order wasn’t looking very good unless my Garland ends up moving his turn up.
I was thinking if he uses his Ex to delay enemy A then the support Garland will be able to move next. I’d use that Garland’s LD for the AoE delay then Kadaj will take the next turn unless my Garland ends up moving before him.
If Kadaj does get to move first, then I’ll need to be able to break enemy A so my Garland can move again. But if enemy A is still unbroken - yeah, I didn’t want to risk it. So I just activated Garland’s Burst mode already.
This let me delay both enemies to oblivion, buying my party lots of turns. When my Garland started his Burst mode, the support Garland’s BT effect was only at 3 stacks.
It wasn’t long before it was at 5 stacks and that upped my Garland’s damage even more when combined with all the debuffs that both enemies were currently afflicted with.
By the time my Garland was about to cast Ultimate Conflict, his finishing Burst move, his opponents were down to 64% and 60% HP.

He was able to deal over 2 million+ total HP damage during his Burst mode. Was super pleased to see this since my BT chars usually only end up dealing 1 million+. It’s even more amazing that this happened although I didn’t have a support and battery on the team.
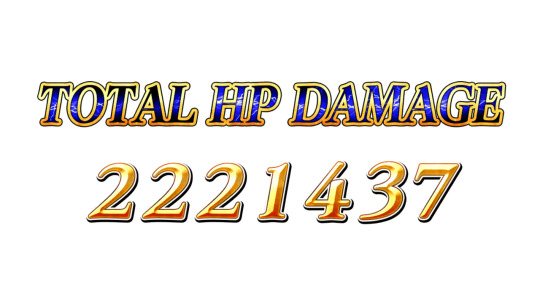
After that, just had everyone spam their skills. The Burst effects of both Garlands unfortunately don’t stack but it didn’t stop all my chars from dealing awesome damage anyway.
Both Garlands just kept on delaying the enemies while taking chunks off their HP bars while Kadaj also dealt a lot of damage and kept his debuffs up.
The red auras disappeared soon after my Garland’s Burst mode ended, but it didn’t take long for it to reappear as my chars kept the relentless onslaught of attacks. The reappearance of the red auras also marked the return of the Lufenia orbs. Welp, didn’t miss them at all. Wish that they’d never returned.

It wasn’t long before the support Garland’s time was up and he left the field. Was sad to see him go but it was just as well because the Lufenia orbs were at an all-time low.
Needed Kurasame to deal with them already. Could have summoned Shiva but didn’t want to yet since both Garlands had been able to delay the bosses a lot so they weren’t set to move anytime soon. Wanted to save Shiva as a last resort of sorts.
So Kurasame came back and I had him increase the orb counts with his moves. Soon the red auras disappeared but with both bosses being below 29% HP, it was now time to deal with the green auras.
Summoned Shiva a few turns later. The enemies were down to 22% and 23% HP.
Garland has 2 uses of his LD, 1 use of Round Edge+, and 7 uses of Soul of Chaos+ left. Used one of his LD now.
Kadaj has 1 use of his LD, 4 uses of Volley, and 2 uses of Mayhem left. Kurasame has 1 use of his LD, 7 uses of Ice Blade Renzan, and 2 uses of Multi Blizzaga MIS-II left.
When the summon ended, the bosses were down to 15% and 13% HP. Just kept on spamming skills. Also remembered that I still hadn’t used Gabranth’s LD Call so used it now for more damage and a bit of battery.
Things seemed dicey at first as my turn count went up and the skills of my chars got lower and lower. At least the HP bars of the enemies were getting lower too.
But it was getting harder to keep delaying them since Garland was starting to run out of his AoE moves. Used up the last of his LD then used the free skill that gave on Round Edge+ which bought me a few more turns. Used up the last of Kurasame’s LD as well.
It’s turn 46 now. It’s Kadaj’s turn. He has 1 use of Burial Hour, 3 uses of Volley, and 1 use of Mayhem left. The Lufenia orbs were at 10 and the HP bars of both enemies were at 2%.
Used Kadaj’s Additional Ability, Set Fixation Slash, on enemy B which brought it down to 1%. Used the last of it on the same enemy. The 30k+ brave he got back was enough to finish off enemy B.

Switched his target to enemy A then used Volley. Enemy A wasn’t at Fixation V so his follow-up attack didn’t activate but the move was enough to finish off enemy B and bring enemy A down to 1% HP.
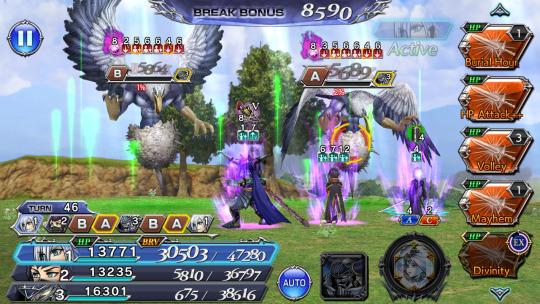
It’s Kurasame’s turn now. He has 0 uses of Absolute Zero, 6 uses of Ice Blade Renzan, and 2 uses of Multi Blizzaga MIS-II left.
The Lufenia orb count was at 7. Enemy A was gonna move next but, thankfully, he was out of break so if I can break him, then I get another chance to kill him with Garland, unless Kurasame manages to get the win now.

But Kurasame’s damage was so meh and he didn’t get to break the enemy until a bit into his attack that I actually got worried that he wouldn’t be able to do it. Cue huge sigh of relief when enemy A got broken. Phew.
So it’s Garland’s turn now. The last enemy still has 1% HP left though the orb count was now at 11. Garland has 0 uses of his LD, 0 uses of Round Edge+, and 7 uses of Soul of Chaos+.
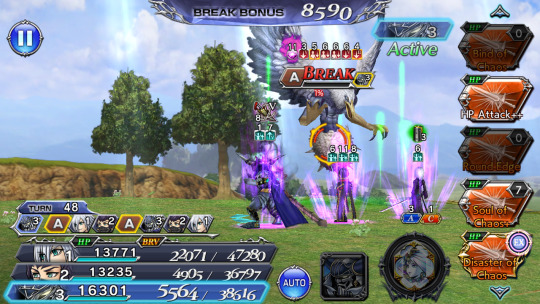
Disaster of Chaos, his Ex, was currently charged. He didn’t have much brave and I was all out of his Additional Ability. Still, I figured his Ex would deal more damage than Soul of Chaos+.
If the enemy failed to croak it, at least he can delay him by another turn then Kadaj can surely finish things off then. Thankfully, that didn’t have to happen since Garland was able to kill enemy A, ending the battle on turn 49.
Man, that was one intense fight. Really, really glad that I was able to win on the first try. Never want to do this quest again.

It was difficult, but I’m especially pleased that I was able to use Kadaj here. He did very well. So did Garland. Even Kurasame helped.
Here’s to hoping that I can use Kadaj on more Lufenia fights. Hey, I Blued him. So far, he’s the only char who I’ve Blued so I definitely want to keep using him for as long as possible.
On a side note though, it’s vexing that the bug with his Ex still hasn’t been fixed. It’s supposed to charge after using 2 of his skills but, thanks to the bug, it’s taking 3 skills to recharge, which sucks.
Was really hoping that this bug would get fixed already, but it doesn’t seem to be happening anytime soon.
Conclusion
So, what about you? Which chars did you use to complete these Lufenia Quests? Have you decided to Blue a char’s High Armor? Feel free to share your thoughts and opinions by leaving a comment below or by reblogging or replying to this post.
Notes:
screenshots are from my Dissidia Final Fantasy: Opera Omnia game account
#dissidia final fantasy opera omnia#this post stars:#kadaj#kurasame susaya#garland#final fantasy 7 advent children#final fantasy 7#final fantasy type-0#final fantasy 1#games#mobile games#gacha games#dffoo kadaj fights#dffoo#dffoo lufenia fights series
0 notes
Text
Dissidia Final Fantasy: Opera Omnia Mother Fixation Lufenia Quest
Lufenia Quests are currently the hardest kind of fight in the Dissidia Final Fantasy: Opera Omnia (DFFOO) mobile game. They’re level 200.
Mother Fixation Lufenia Quest
For the Mother Fixation Lufenia quest, my team was Paladin Cecil Harvey from Final Fantasy IV, Bartz Klauser from Final Fantasy V, and Kadaj from Final Fantasy VII: Advent Children (#ad) with Diabolos as my summon.
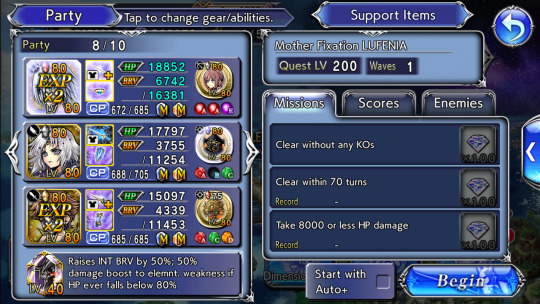
My Calls were Serah Farron’s from Final Fantasy XIII, Golbez’s from Final Fantasy IV, and Amidatelion’s from Final Fantasy Crystal Chronicles: The Crystal Bearers.
Kadaj is boosted in this quest and I just got both him and Bartz so I wanted to use them.
Kadaj is a debuffer with DPS capabilities while Bartz is a support. Neither can heal and the enemies here can hit pretty hard so that’s why I chose to bring in Cecil. He’s a support who can heal.
All 3 chars are fully MLB and Purple, including their LDs. Cecil has his Burst weapon as well as the passive from his Dark Manikin weapon. They have their Bloom Stones and High Armors and all of their Boards have been completed.
Cecil has 3 ATK 108 with Ordeal Grasping Light Boost★★ (Raises own INT BRV, MAX BRV, ATK, DEF by 5% if HP is MAX at start of last wave) Artifacts.
Kadaj has 3 ATK 108 with Remnant Up★★ (While Latent Thoughts active: Raises own MAX BRV, ATK by 5%) Artifacts.

Kadaj is equipped with the following real Spheres:
Garland’s (from Final Fantasy I) Break Hit Raging Attack Up A Sphere
Raises ATK by 2% when inflicting Break or attacking target afflicted with Break up to 5 times, once per turn
Oerba Yun Fang’s (from Final Fantasy XIII) Break Hit Attack Up Longer A Sphere
Raises ATK by 10% for 6 turns when inflicting Break or attacking target afflicted with Break
The Emperor’s (from Final Fantasy II) Debuff Success Attack Up Longer E Sphere
Raises own ATK by 10% for 6 turns when inflicting debuff on target
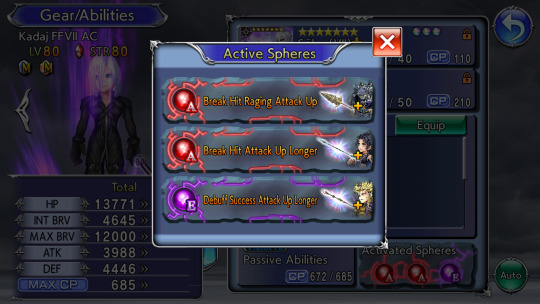
Paladin Cecil is equipped with the following RF Spheres:
Cloud Strife’s (from Final Fantasy VII) Critical Power (RF) A Sphere
Raises BRV damage dealt with critical hits by 4%
Maria’s (from Final Fantasy II) HP Heal Base Attack All Shorter (RF) C Sphere
After recovering HP:
• Raises party’s INT BRV, ATK by 2% for 3 turns
Actually, I didn’t really want to do this quest yet. See, the thing is, there’s this bug on Kadaj’s Ex. It’s supposed to charge after using 2 of his skills but, thanks to the bug, it’s taking 3 skills to recharge, which sucks.
Was really hoping that this bug would get fixed already, but it doesn’t seem to be happening anytime soon. I was worried that the Mother Fixation event would end before this bug was fixed so I decided to just do the Lufenia quest already.
Still hoping that the bug would get fixed soon though since I’d like to keep using Kadaj on more Lufenia quests.
This fight only has 1 wave with 2 enemies. The Lufenia orbs are increased if the enemies are afflicted with at least 2 debuffs.
This battle has a lot of pretty annoying gimmicks. For starters, the enemies here can’t be delayed except via break. Their turns can’t be deleted either.
If they’re not afflicted with at least 1 debuff when their recast bar goes off, then they will petrify their target for 2 turns. They can inflict a poison debuff. They can even buff themselves.
Every time they lose 10% of their HP, they will remove all of their debuffs, including silver-framed ones. When their HP drops to 79%, 49%, and 29%, they will remove all of their debuffs, gain thousands of brave, and delay themselves by 1 turn.
Until they’re broken, all brave damage that they take is greatly reduced to the point that all of your chars will be dealing 1 BRV damage. To deal with this, a char who can instantly break or who can reduce a lot of brave down to 1 or 0 is needed.
And did I mention that these enemies can hit pretty hard if you don’t have some form of damage mitigation? The turn count requirement is also pretty low. You need to get the target score of 980k, win within 70 turns, clear without any KOs, and take 8k or less HP damage in order to get all of the rewards.
Kadaj really helps to trivialize this fight though. He can gold-frame his debuffs, which means that they can’t be cleansed no matter what. Just having him on the team makes the Lufenia orbs here a non-issue.
You just need to make sure that you refresh his debuffs before they fall off. But this can be a bit tricky thanks to the bug with his Ex.
Kadaj can also deal with the massive BRV gain and BRV damage reduction that happens once the enemies reach the aforementioned HP percentage thresholds.
His Ex, Divinity, reduces the BRV of all enemies not afflicted with break to 0. So the subsequent attack breaks them. His Ex can even dispel buffs. Although Kadaj is more of a debuffer, he can also deal pretty decent damage, especially when provided with great supports, buffs, and auras.
Both Bartz and Cecil can readily provide the aforementioned things. Bartz’s LD has a similar effect to Kadaj’s Ex so I have another way to deal with the BRV gain and BRV damage reduction in case Kadaj’s Ex isn’t charged when I need to use it. This is also the reason why I brought Amidatelion as a Call.
With my team, this fight wasn’t that bad at all. Kadaj handled the Lufenia orbs with ease even with his Ex being bugged (still want it to be fixed already though).
Cecil can inflict the holy resist down debuff and he can enchant his allies with the holy element via his Additional Ability.
However, since the enemies constantly cleansed their debuffs, Cecil’s imperil and enchant weren’t that reliable. It was still fine though since there was still a lot of damage to be had thanks to Bartz’s and Cecil’s auras and buffs.
There was also a lot of battery to be had too. Between Bartz and Cecil, my team usually had a lot of brave. This is especially so with Bartz and Kadaj since they can increase their brave based on the HP damage that they deal. Kadaj can also absorb 50% of the brave gains of the enemies via his debuffs.

In the screenshot above, one enemy was down to 79% HP while the other was at 80%. The enemy that was at 79% HP had around 20k brave. It would have been more without the BRV absorb from Kadaj’s debuffs.
Had Bartz use Amidatelion’s regular Call but it wasn’t enough to get the other enemy down to 79% HP. So I decided to just use Bartz’s LD already.
Anyway, the overhead buff from his LD was about to run out so I’d have cast this regardless. It would have been nice if Elemental Attack, Bartz’s LD, could have dealt with both enemies at 79% HP though.
So the boss that was at 80% HP finally dropped down to 78% HP while the other was down to 77% HP.
The first boss removed the debuffs that Amidatelion’s regular Call inflicted and he gained 20k+ brave. Thankfully, Kadaj’s Ex was charged and it was now his turn since the boss delayed himself when he dropped below 79% HP. So I readily cast Divinity.

Thanks to Cecil, the enemies didn’t hit hard at all. They barely did any HP damage. The little that they managed to deal gets healed back to full as soon as the injured char gets a turn thanks to the HP Regen from Paladin Cecil.
I was trying to bring the HP of the enemies down equally but this wasn’t entirely possible since Kadaj was mostly a single target attacker even if he does have some splash in his kit.
The same could be said for Bartz although at least he wasn’t locked to focusing on a single enemy at a time. Kadaj kinda requires you to focus on 1 enemy at a time if you want to maximize his damage.
Anyway, when the bosses were down to 61% and 56% HP, I decided to switch out Bartz for the friend support Golbez from Final Fantasy IV that I borrowed.
Was preparing for the upcoming 49% HP threshold. Golbez’s BT effect is freezing the BRV gains of the enemies. This isn’t a debuff so the bosses here can’t stop this from happening.
As long as Golbez’s Burst effect is up when the enemies reach the aforementioned HP percentage thresholds, they won’t be able to gain thousands of brave. They’ll get 0 BRV instead so it’ll be easier to break them and cancel their massive BRV damage reduction.
After using Golbez’s Burst, I activated Paladin Cecil’s own BT on his turn. By then, the bosses were down to 53% and 51% HP.
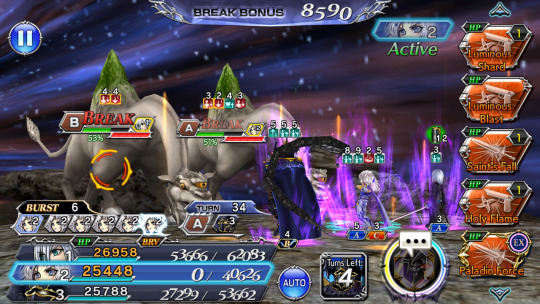
By the time Cecil was about to use Soul Shift, his finishing Burst move, the enemies were down to 49% and 48% HP. Pleased that he was able to deal over 1 million total HP damage during his Burst mode.
Afterwards, just continued spamming skills. Summoned Diabolos a few or so turns later, mostly because one of Kadaj’s debuffs was about to fall off of one of the enemies and I wanted to buy some time to be able to refresh them.
Thankfully, his Ex got charged sometime during the summon so I readily cast Divinity as soon as it was up.

When the summon ended, both bosses were down to the red. It wasn’t long before Golbez left and Bartz came back.
By then, the bosses were down to 14% and 18% HP so I just continued spamming all of the skills and abilities that my chars had left.
Soon, Cecil’s Burst effect ended and the skill counts of all of my chars started getting lower and lower. At least the same thing was happening to the HP bars of their opponents.
Anyway, soon, both bosses only had 4% HP remaining. Paladin Cecil had 1 use of his LD, 3 uses of Saint’s Fall, and 1 use of Holy Flame left. His attack brought one of the bosses down to 3% HP while the other was still at 4% HP.

Bartz had 1 use of his LD, 7 uses of Doublehand+, and 5 uses of Missile+ left. His attack brought both enemies down to 1% HP.
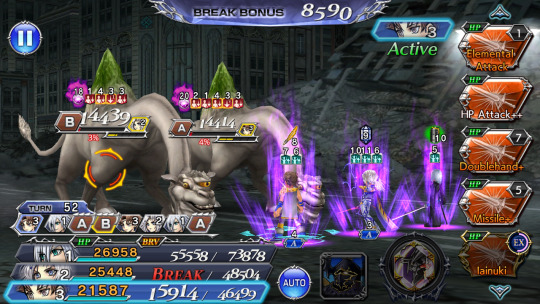
It’s now Kadaj’s turn. He has 0 uses of his LD and 2 uses left of each of his base skills.

Used his Additional Ability, which finished off one of the bosses. Now only one more was left. Used the last of Kadaj’s Additional Ability then one of his base skills to finish off the last boss, ending the fight on turn 54.

Yay! Super pleased to have been able to win this fight even with Kadaj’s Ex still bugged. Here’s to hoping that it gets fixed soon.
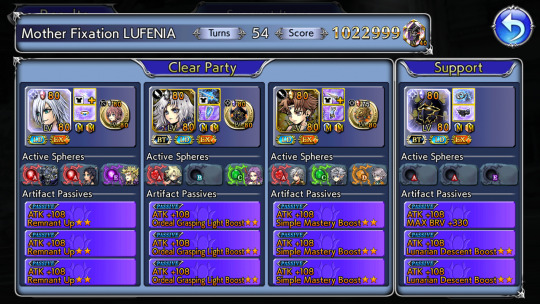
Also hoping that I can use Kadaj on more Lufenia quests. So far, I’m enjoying using him. Would love to be able to get Bartz’s Burst weapon as well.
Blue Armor for Kadaj from Final Fantasy VII: Advent Children
After finishing the Mother Fixation Lufenia quest, I found myself thinking a lot about getting Kadaj his Blue Armor. Feeling really tempted to Blue him although the resources to do this are super scarce and, so far, no one really needs to be Blued.
I’ve yet to Blue anyone. I thought that I wouldn’t be doing this for anyone anytime soon. I thought that I’d just let the resources pile up for now.
But I don’t know. Right now, I’m really tempted to Blue Kadaj. Ahh, if only the resources to do this weren’t so scarce, then I’d gladly Blue anyone who could be Blued. Sigh.
Let’s see. This feature was just introduced so, at the moment, there’s only a few chars who can get Blue Armor. The resources for this also just showed up so there’s hardly any. These resources can be obtained by completing certain quests and the like.
Currently, I have 2 Book of Refuge’s Miracles. This one is used to Realize a char’s High Armor. Doing this will give you 1 Refuge’s Ultima Ingot. You need 3 of these Ingots to Blue a char’s High Armor. Right now, I only have 2 of these Ingots.
Fragment of Refuge’s Miracles - you need 20 of these in order to create 1 Book of Refuge’s Miracles. Only have 10 at the moment though I’ll be able to get 10 more once I finish the Crimson Arms Lufenia Quest.
Refuge’s Ultima Nugget - you need 20 of these to create 1 Refuge’s Ultima Ingot. Currently have 0.
But these are available for purchase from the High Guard Token Exchange. You can exchange 10 High Guard Tokens for 5 Refuge’s Ultima Nuggets. So you’ll need a total of 40 Tokens just to get 1 Ingot. To get 3 Ingots, you’ll need a whopping 120 Tokens.
Ahh, why does it have to be so expensive? See, the thing is, you get 20 Tokens every time you beat a Lufenia Quest. These Tokens are used to buy High Armor for your chars. Each High Armor costs 20 Tokens.
So far, I’ve been able to clear all Lufenia quests (except for the Crimson Arms one, but I’ll get to that soon. Wanted to wait for Galuf Halm Baldesion’s (from Final Fantasy V) LD to show up so I could bring him to said fight. Also hoping that the bug with Kadaj’s Ex will get fixed already), and I’ve only bought High Armors for a few chars so I currently have 840 High Guard Tokens.
That seems like a lot, and it is if I’m just looking to get High Armors. But if I also want the Nuggets, then that amount’s gonna quickly go down, especially if I’m trying to get 3 Ingots.
In short, definitely need to be more selective in who I Blue. The best thing to do would be to just not bother with this right now. But that’s easier said than done. I really want to get Kadaj his Blue Armor. Someone talk me out of this.
Much later: kept thinking about the pros and cons of spending all the resources needed to get Kadaj his Blue Armor. This wasn’t the best of ideas. Okay, okay, it’s totally a bad idea, but I couldn’t seem to talk myself out of it though.
I thought about who else I wanted to give Blue Armor to. Of the chars that were coming very soon, only Tifa Lockhart from Final Fantasy VII and Galuf fit that description.
After them, I think the next chara that I’d want to Blue would be Sephiroth from Final Fantasy VII, and that won’t be possible until sometime in July or August 2021.
Initially, I only gave Kadaj a Book of Refuge’s Miracles to Realize his High Armor to 0/3. I was like, let’s give it a try and see how it goes. Tried him out in the Crimson Arms co-op quest and he seemed to do well enough, I suppose.

His performance didn’t seem that different when compared to before I got him to 0/3 but I suppose that’s just because I haven’t Blued him yet.
Or maybe that’s the sign that I really shouldn’t be doing this. For a short time, I thought that I’d be fine with just having Kadaj at 0/3, but I still couldn’t stop thinking about wanting to Blue him.
Besides, having him at 0/3 barely made a visual difference. His armor was still Reflect Ring (VII). It was still colored Purple except now it had a plus sign on it and instead of being Level 50 of 50, it was now at Level 1 of 45.

I kept thinking about what to do. In the end, I decided to go for it. Why not anyway, right? Welp, I can only hope that I don’t end up regretting this.
At least I don’t have to spend any High Guard Tokens yet since Realizing Kadaj’s High Armor to 0/3 gave me 1 Refuge’s Ultima Ingot so I now have exactly 3, enough to Blue his armor.
It does mean that I don’t have any more for Tifa and Galuf unless we get more events that give us more or I spend Tokens to get some.
Once I finish the Crimson Arms Lufenia Quest, I should have 2 Books of Refuge’s Miracles. Using those to Realize Tifa’s and Galuf’s High Armors will give me 2 Ingots so I just need to worry about where and how I’ll obtain 4 more to Blue their armors.
Giving Kadaj’s Reflect Ring (VII) 3 Ingots raised its level cap to 60. Was surprised and rather confused when the armor was still Purple even after spending the 3 Ingots.

It was only after I leveled it up from 1 to 60 did it actually turn Blue. So that’s how it works, huh? This is the very first armor that I’ve Blued.
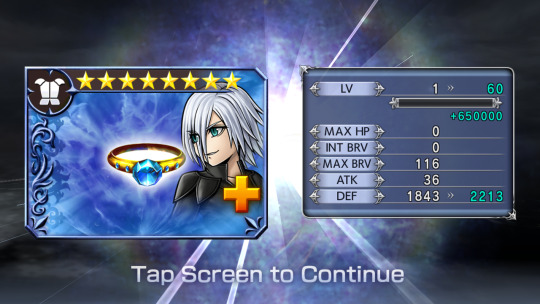
Once again, I can only hope that I don’t end up regretting this. I do wish that I hadn’t done the Mother Fixation Lufenia quest yet so I could have used a Blue Kadaj there. Well, I guess I can always just try that quest again with my Blue Armor Kadaj.
On a side note, I really like this shade of blue. Was getting kinda sick of that purple color that designated that an item’s been maxed. Now I wish that Ex weapons could be Blued as well even if only so that they’d be nicer to look at visually.

I mean, having a purple weapon then a blue armor doesn’t look that good. They don’t seem to fit that well. What do you think?
Conclusion
So, what about you? Which chars did you use to complete these Lufenia Quests? Have you decided to Blue a char’s High Armor? Feel free to share your thoughts and opinions by leaving a comment below or by reblogging or replying to this post.
Notes:
screenshots are from my Dissidia Final Fantasy: Opera Omnia game account
#dissidia final fantasy opera omnia#this post stars:#kadaj#final fantasy 7#bartz klauser#cecil harvey#paladin cecil#final fantasy 5#final fantasy 4#final fantasy 7 advent children#dffoo lufenia fights series#gacha games#dffoo#dffoo kadaj fights#mobile games#games
0 notes
Text
Dissidia Final Fantasy: Opera Omnia Crevasse Grace Descending Event Part 6
The Crevasse: Grace Descending event just started in the Dissidia Final Fantasy: Opera Omnia (DFFOO) mobile game. This event includes several quests.

Table of Contents
Crevasse: Grace Descending Event Information
Crevasse: Grace Descending Part 1 Lufenia+ quest
Crevasse: Grace Descending Part 3 Lufenia+ quest
Conclusion
Crevasse: Grace Descending Event Information
Crevasse: Grace Descending is a type of event wherein players get the chance to build their own fight. Well, sort of.
We get a short list of Codes, Lufenia orbs (or special countdown cards), and Force gauge effects (or force weakness cards) as well as a few quests with set enemies. We can then choose which Codes and such should go on which quests.
Codes refer to rules like “use at least 1 Green Crystal char on this fight” or “bring a char who uses a greatsword on this fight”. The Codes, orbs, and force effects have points associated with them. These points vary depending on how hard it is to fulfill their conditions.

Each quest has a multiplier that’s based on how difficult it is. After doing a quest with the Codes you specified, you get some points.
You need a total of 525 points in order to get all the rewards from this event. You also can’t bring a friend support to any of these quests.
I found this event pretty interesting. It was pretty fun being able to decide what Codes should go with which quest.
Your chars get locked out every time you Perfect a quest so this gave me the chance to use chars that I haven’t used in a while. I do wish we got more Codes to choose from though.
Anyway, the Crevasse: Grace Descending event has a total of 6 quests. They are as follows:
Crevasse: Grace Descending Part 1 Lufenia+ (level 250) quest
Crevasse: Grace Descending Part 2 Lufenia+ quest
Crevasse: Grace Descending Part 3 Lufenia+ quest
Crevasse: Grace Descending Part 4 Shinryu (level 300) quest
Crevasse: Grace Descending Part 5 Shinryu quest
Crevasse: Grace Descending Part 6 Shinryu quest
So far, I’ve already cleared the following Crevasse quests:
Crevasse: Grace Descending Part 4 Shinryu Quest
My team for this fight was Sephiroth from Final Fantasy VII, Galuf Halm Baldesion from Final Fantasy V, and Jack Garland from Stranger of Paradise Final Fantasy Origin with The Brothers as my summon.
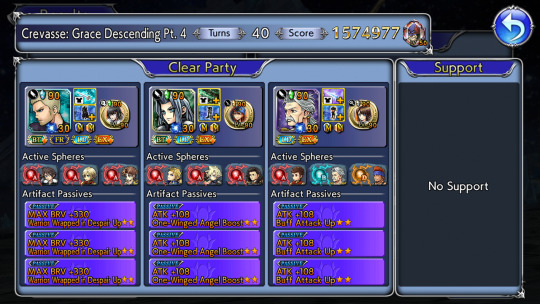
My Calls were Cid Raines’s from Final Fantasy XIII, Yuna’s from Final Fantasy X, and Keiss’s from Final Fantasy Crystal Chronicles: The Crystal Bearers.
The Codes I used on this fight gave me 43 points. The multiplier for this quest is x2.5. So the total points I got from clearing this fight was 108.

Crevasse: Grace Descending Part 5 Shinryu Quest
My team for this fight was Machina Kunagiri from Final Fantasy Type-0, Leo Cristophe from Final Fantasy VI, and Gladiolus Amicitia from Final Fantasy XV with The Brothers as my summon.

My Calls were Alisaie Leveilleur’s from Final Fantasy XIV, Lilisette’s from Final Fantasy XI, and Yuna’s from Final Fantasy X.
The Codes I used on this fight gave me 44 points. The multiplier for this quest is x2.5. So the total points I got from clearing this fight was 110.
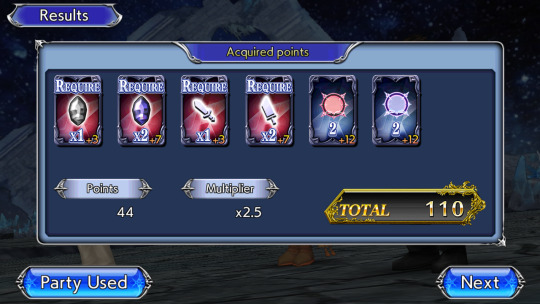
Crevasse: Grace Descending Part 6 Shinryu Quest
My team for this fight was Penelo from Final Fantasy XII, Lion from Final Fantasy XI, and Yuna from Final Fantasy X with The Brothers as my summon.
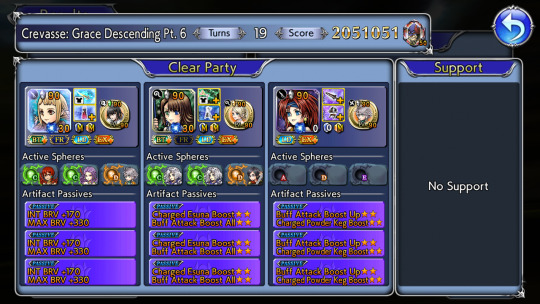
My Calls were Cid Raines’s from Final Fantasy XIII, Lunafreya Nox Fleuret’s from Final Fantasy XV, and Hope Estheim’s from Final Fantasy XIII.
The Codes I used on this fight gave me 48 points. The multiplier for this quest is x2.5. So the total points I got from clearing this fight was 120.

Crevasse: Grace Descending Part 3 Lufenia+ Quest
For this fight, my team was Lunafreya Nox Fleuret from Final Fantasy XV, Y’shtola Rhul from Final Fantasy XIV, and Keiss from Final Fantasy Crystal Chronicles: The Crystal Bearers with Pandemonium as my summon.

My Calls were Rydia’s from Final Fantasy IV, Cid Raines’s from Final Fantasy XIII, and Quistis Trepe’s from Final Fantasy VIII.
The Codes I used on this fight gave me 42 points. The multiplier for this quest is x1.5. So the total points I got from clearing this fight was 63.

Crevasse: Grace Descending Part 2 Lufenia+ Quest
For this fight, my team was Lilisette from Final Fantasy XI, Locke Cole from Final Fantasy VI, and Zidane Tribal from Final Fantasy IX with The Brothers as my summon.

My Calls were Seymour Guado’s from Final Fantasy X, Laguna Loire’s from Final Fantasy VIII, and Rydia’s from Final Fantasy IV.
The Codes I used on this fight gave me 42 points. The multiplier for this quest is x1.5. So the total points I got from clearing this fight was 63.
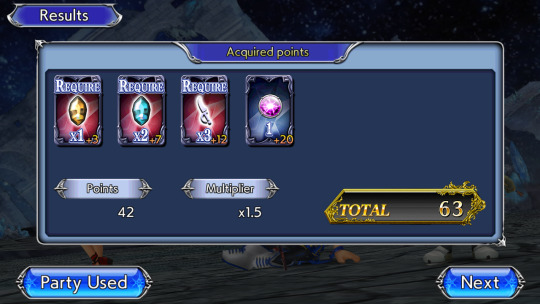
So far, I now have a total of 464 points.
Crevasse: Grace Descending Part 1 Lufenia+ Quest
Also known as Crevasse: Grace Descending Pt. 1. This fight has 1 wave with 2 enemies, the Chimera Golems.
Since I currently have 464 points and the total points I need to get all the rewards from this event is 525, I need to get at least 61 points from this quest.
The team that I came up with that would give me at least 61 points was Noctis Lucis Caelum from Final Fantasy XV (#ad), Ardyn Izunia (Ardyn Lucis Caelum) from Final Fantasy XV, and Lightning (Claire Farron) from Final Fantasy XIII.
Currently, my Lightning has her 15cp, 35cp, Ex, LD, and BT fully MLB. Her Ex has been Purpled. But haven’t Greened her BT. She doesn’t have her own Force weapon yet.

Lightning has her High Armor and it’s been Realized to 0/3. She has her Bloom Stone. She has triple perfect Artifacts and triple real Spheres.
All of her Summon Boards and Character Enhancement Boards have been completed. But haven’t gotten any of her Force Enhancements.
It feels like a really long time ago since Lightning was last updated. Since mine isn’t even fully built, it’s been a while since I last used her.
Gonna need her for this fight though and I do like her. Even gave her triple real Spheres. Just didn’t Green her Burst since the resources needed to do this are pretty scarce so need to be very selective in whose BTs to upgrade.
For this fight, decided to go ahead and complete all of Lightning’s Force Enhancements. Also went ahead and spent the 3 Ingots needed to Blue her High Armor.

Lightning is a DPS who deals physical lightning damage. She’s really fast. She tends to take multiple turns in a row. She can also jump her turns forward. She can delay an enemy with her Ex ability. She also has moves that can break and rebreak enemies.
Lightning is primarily a single target DPS. Since she’s faster than Ardyn and Noctis and she’s undoubtedly gonna take way more turns than those 2, decided to equip her with my Level 4 of 5 Short Sword Ultima Weapon.

Currently, my Ardyn has his 15cp, 35cp, Ex, LD, and BT fully MLB. His Ex has been Purpled. But haven’t Greened his BT.
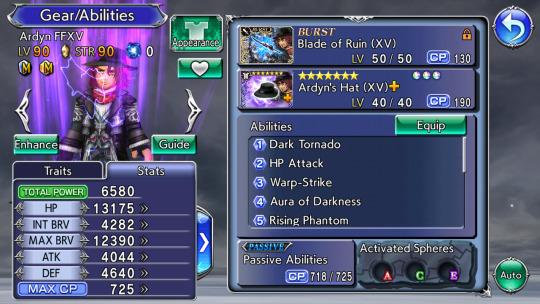
Just got Ardyn’s Force weapon. I talk more about that in another post. But I wasn’t planning to MLB it since it’s not that good and my Ardyn isn’t fully built.
He doesn’t even have his High Armor. Just have up to his second armor maxed. He does have his Bloom Stone as well as triple perfect Artifacts. But he doesn’t have any Spheres, real or otherwise.
All of his Summon Boards and Character Enhancement Boards have been completed. But haven’t gotten any of his Force Enhancements.
Since I’m gonna be using Ardyn for this fight and since Noctis and Lightning don’t have their own Force weapons yet, went ahead and spent the resources needed to max out Ardyn’s FR.

Also bought Ardyn’s High Armor and Realized it to 0/3. Ardyn is a DPS who deals physical, non-elemental damage. He can break and rebreak enemies. As long as the buff from his LD is up, he can’t be killed. He and Lightning are boosted for this fight.

Currently, my Noctis has his 15cp, 35cp, Ex, LD, and BT fully MLB. His Ex has been Purpled. But haven’t Greened his BT. He doesn’t have his own Force weapon yet.
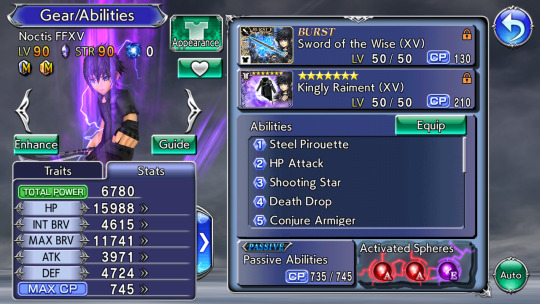
Noctis has his High Armor but haven’t even bothered to Realize it. He has his Bloom Stone. He has triple perfect Artifacts and triple real Spheres.
All of his Summon Boards and Character Enhancement Boards have been completed. But haven’t gotten any of his Force Enhancements.
For this fight, went ahead and Realized Noctis’s High Armor to 0/3. Noctis is a physical, non-elemental DPS. He can launch enemies with one of his moves but that’s useless for this fight since the Chimera Golems can’t be launched.

Noctis also has some turn manipulation in his kit. With the buff from his LD, he can extend this to his allies so they can all move before the enemies.
For my very first try of this fight, my team was Lightning, Noctis, and Ardyn with The Brothers as my summon.

My Calls were Seymour Guado’s from Final Fantasy X, Reno’s from Final Fantasy VII, and Cloud Strife’s from Final Fantasy VII.
Seymour’s Calls debuffs the enemies. His LD Call can also dispel the buffs of enemies and delay them for 2 turns. Cloud’s regular Call can launch an enemy. His LD Call can delay enemies by 2 turns.
Reno’s regular Call inflicts enemies with a debuff that will delay them every time they use a melee attack. His LD Call can make 1 attack deal 0 damage.
For now, I’ve opted not to Realize Ardyn’s High Armor.
The Codes I used for this quest were as follows:
Bring at least 1 Black Crystal char - Noctis fulfills this condition
Bring at least 2 Yellow Crystal chars - Lightning and Ardyn fulfills this condition
Bring at least 3 chars who uses short swords - Lightning, Ardyn, and Noctis fulfills this condition
Lufenia orb: triggers at the start of the battle and cannot be cancelled
To increase the count of the Lufenia orb:
inflicting break on count target (+4; limit 15)
count target turn delayed at least 2 by effect (+6; limit 15)
Every time a char moves, the Lufenia orb count will be decreased by 2. Every time the enemy moves, the Lufenia orb count will be decreased by 2.
Since this is only a Lufenia+ fight and I have 2 boosted chars, got to start this quest with my force gauge with around 50%+ charge already.
So, even though only Lightning has max Force Enhancements, it didn’t take that long before my force gauge was fully charged to 100%.
Had Ardyn use his FR once my force gauge was fully charged. The conditions for increasing the HP damage bonus of Ardyn’s FR are as follows:
+20% when party member inflicts break on party member’s own turn
additional +20% when inflicting break on own (Ardyn’s) turn
+20% when party member selects melee attack on party member’s own turn
+10% when melee attack selected on own (Ardyn’s) turn
Everyone deals physical damage but Noctis has a mixed ranged and melee kit. Lightning can break and rebreak enemies but she can’t do this all the time. So only Ardyn can really increase the HP damage bonus of his FR by a lot.
Was only able to get the HP damage bonus to 483% by the time I only had 1 turn of force time left. By now the enemies were down to 74% and 81% HP.

Thanks to being boosted, both Ardyn and Lightning dealt pretty good damage. Since Lightning has my Short Sword Ultima Weapon, she was able to deal even more damage than Ardyn and Noctis.
Both Ardyn and Lightning also helped deal with the Lufenia orbs here. On the other hand, Noctis was sadly the weak link in this team. His damage was pretty bad, especially since he isn’t even boosted for this fight.
His turn manipulation wasn’t that useful here either since Ardyn and Lightning were able to just keep on breaking the enemies and delaying their turns. Lightning herself was so fast that she tended to get multiple turns in a row.
Noctis was also unable to help deal with the orbs here. At first, I thought that was fine but upon reaching certain HP percentage thresholds, the enemies would gain this effect or aura that gave them immunity to delays, even via break. While in this state, you also can’t forcibly break them via an effect.
This is really bad because if my chars can’t break the enemies, then the orbs will continue to tick down.
So far, I’ve been able to get past this effect. It looks like my chars just needed to deal a certain amount of damage in order to break through and cancel this effect. That’s easier said than done though, especially since all my chars are DPS.
Anyway, once my force gauge was fully charged back to 100% again, had Ardyn use his FR. On Lightning’s turn, had her go into her Burst phase. By then the enemies were down to 42% and 49% HP. Have 5 turns of force time left and the HP damage bonus was at 367%.
By the time I only had 1 turn of force time left, the HP damage bonus was at 542%. The enemies were now down to 25% and 41% HP.

Summoned The Brothers soon after Lightning’s Burst mode ended. Just when I thought that I actually had the chance to get the win, one of the enemies got that annoying effect again.
Kept trying and trying but my chars just couldn’t break them or deal enough damage to cancel out the effect so eventually the Lufenia orb went down to 0.

When that happened, the bosses were already down to 17% and 24% HP. Argh! Eff this fight.
Before trying this fight again, went ahead and Realized Ardyn’s High Armor to 0/3. Also dropped Reno’s Call and brought in Rydia’s from Final Fantasy IV.
The enemies didn’t get to move that much so Reno’s Call turned out to be useless. But there were times wherein the enemies would suddenly get a turn right after my chars so I brought Rydia’s Call to deal with that.
Rydia’s LD Call gives everyone a buff that will allow them to evade 3 attacks. This buff has no turn duration and will only disappear once a char has evaded 3 attacks. Her regular Call imperils enemies and enchants the party with the water element.
Speaking of imperils and enchants, the bosses here actually have a stance that makes them resistant to the lightning element. But since Lightning is boosted here and is even wielding an Ultima Weapon and has her High Armor maxed, she’s still able to deal good damage.
Anyway, this time, I ended up going into Ardyn’s BT phase while his FR was up. Was able to increase the HP damage bonus of his FR a lot so by the time I only had 1 turn of force time left, the HP damage bonus was at 701%.

Unfortunately, once again, one of the Lufenia orbs went down to 0. This time, the enemies were at 49% and 26% HP. Argh! Getting really sick and tired of this fight.
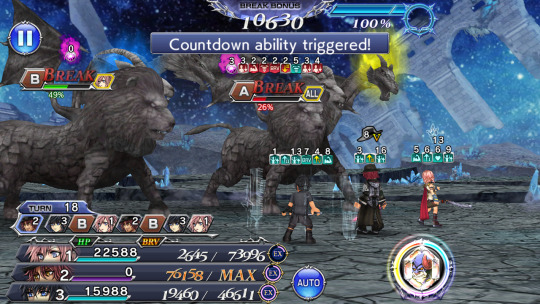
For my next try, I dropped Noctis and brought in Gabranth (Noah fon Ronsenburg) from Final Fantasy XII. Doing this will give me less points but thankfully still enough to get all the rewards from this event. My Calls and summon were all still the same.

My Gabranth has his 15cp, 35cp, Ex, LD, and FR fully MLB. His Ex has been Purpled. He has his High Armor and it’s been Realized to 0/3.
He already has a Burst weapon but, unfortunately, don’t have it so I still have him equipped with his Ex weapon.
Gabranth has his Bloom Stone. He has triple perfect Artifacts and 1 RF Sphere. All of his Summon Boards have been completed.
Unlocked parts of his Char Boards, particularly the tiles that would give me his LD Call and LD extension passives. Also unlocked up to Level 3 of his Force Enhancements.
Gabranth is a debuffer who can deal pretty decent damage. He can also break and rebreak enemies with some of his moves. He deals physical, melee, and non-elemental damage.
Gabranth did pretty well on this fight although his damage wasn’t that good since mine wasn’t fully built. At least he was able to help deal with the Lufenia orbs here. And having another FR helped as well.
On this run, actually managed to finish off one of the enemies. The remaining one was left with 23% HP.

By now I’d already used up my summon as well as Ardyn’s Burst phase. IIRC, I can still use an FR or 2 but had to wait for my force gauge to be fully charged again. At the moment, my force gauge was only at 40.4%.
Unfortunately, once again, the remaining Chimera Golem got that aura or effect that made it impossible to break him. So once again, the Lufenia orb kept ticking down.

Kept trying to either break the enemy or deal enough damage to get rid of that blasted aura but no dice. Managed to get the Golem down to 15% HP before I had to just quit the fight because the Lufenia orb was already at 1 yet my chars still can’t break the Chimera.
Crevasse: Grace Descending Part 3 Lufenia+ Quest
Also known as Crevasse: Grace Descending Pt. 3. This fight has 1 wave with 2 enemies, the Tyrant, and his minion, the Centaurion Blade.
Since the Lightning and Ardyn plus either Noctis or Gabranth team was clearly not working against the Chimera Golems, I decided to try them on the Crevasse: Grace Descending Pt. 3 Lufenia+ quest instead.
Hopefully, I’ll be able to clear this fight with that team. Then I can just have Lunafreya, Y’shtola, and Keiss deal with the Chimera Golems.
For my first try of this Lufenia+ quest, went in with Lightning, Ardyn, and Noctis with The Brothers as my summon.

My Calls were Seymour’s, Cloud’s, and Quistis Trepe’s from Final Fantasy VIII. Quistis’s Calls can delay enemies. IIRC, she’s the only char who can bypass an enemy’s immunity to turn delays.
When the fight started, only the Tyrant was around. With only one enemy, it was easy to keep him from moving and just keep on delaying his turns.
The Tyrant isn’t immune to breaks so between Ardyn and Lightning, it was easy to keep the count of the Lufenia orb up. The boss isn’t immune to launches either so Noctis was able to help a bit more as well.
Once again, when my force gauge was fully charged to 100%, had Ardyn activate his FR. By the time I only have 1 turn of force time left, the HP damage bonus was at 464%. The Tyrant was now down to 76% HP.
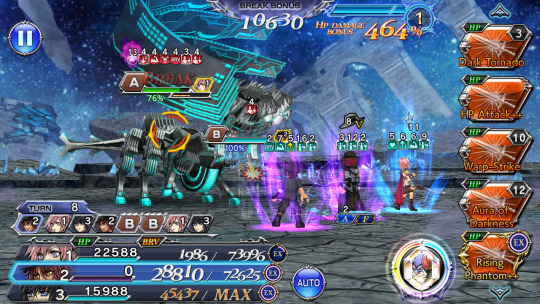
When the Tyrant dropped down to 79% HP or thereabouts, he summoned his minion. Unfortunately, this minion can’t be delayed, even via breaks. And apparently, it’s not possible to beat him either.
Made use of Quistis’s Calls to delay the minion and keep him from moving. The minion still got to move anyway. IIRC, he got to move like 2 or 3 times. He didn’t deal any damage the first 2 times that he moved.
From my previous clear of this fight with Lunafreya, Keiss, and Y’shtola, I know that the minion has this move that can apparently instantly KO a char. Was worried about that since I wasn’t able to keep the minion from moving anymore.
But, as luck would have it, the third time that the minion got to move, he was targeting Ardyn who still had the buff from his LD. Thanks to that, Ardyn was able to survive the minion’s attack.
This attack apparently causes the minion to KO himself so once again only the Tyrant was on the field. Glad the Tyrant didn’t try to summon his minion again.
This fight was pretty easy without the minion around. The Tyrant still had yet to get a turn. He basically just stood there while my chars spammed their attacks at him.
Once my force gauge was fully charged back to 100% again, had Ardyn activate his FR again. By now the Tyrant was down to 58% HP.
Had Ardyn go into his Burst phase right after activating his FR. By the time Ardyn was about to cast Royal Retribution, his finishing Burst move, have 5 turns of force time left and the HP damage bonus was at 482%. The Tyrant was down to 46% HP.
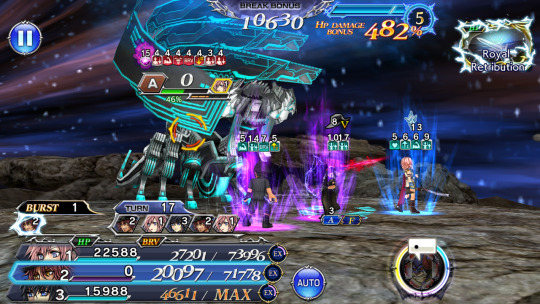
By the time I only have 1 turn of force time left, the HP damage bonus was at 656%. The Tyrant was down to 37% HP. Summoned The Brothers already. The on-entry attack of The Brothers took the enemy down to 23% HP.
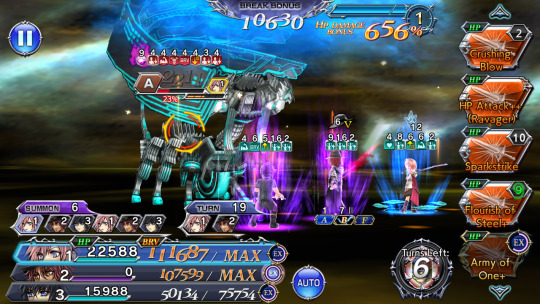
After that, just continued having all my chars spam their skills. The Tyrant has a lot of HP so it took a while before the fight ended. But without the minion, there was no danger at all.
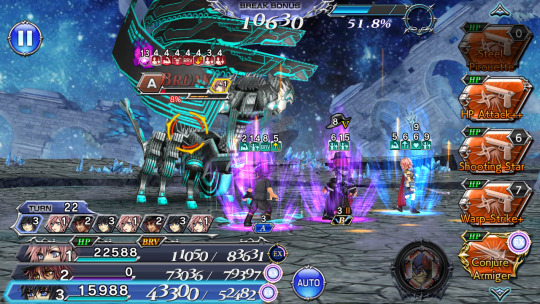
Soon, the Tyrant was down to 3% HP. It was Lightning’s turn. Used the last of her LD, Crushing Blow. This gave her 3 turns in a row. Then she got a few more thanks to her speed and the high turn rate of her moves.
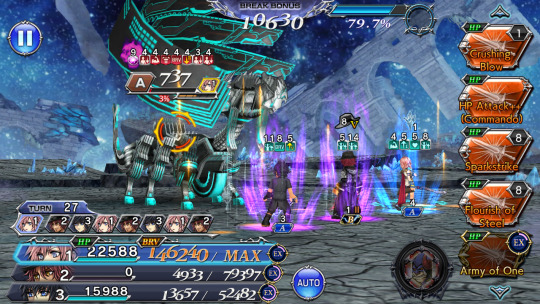
She just kept on jumping turns so Ardyn and Noctis didn’t get to move anymore. So it was Lightning who dealt the killing blow, finishing off the Tyrant on turn 29.

Got the score and all the other mission requirements which also got me the Perfect.

This team did really well. Glad I was finally able to clear a fight with these 3.
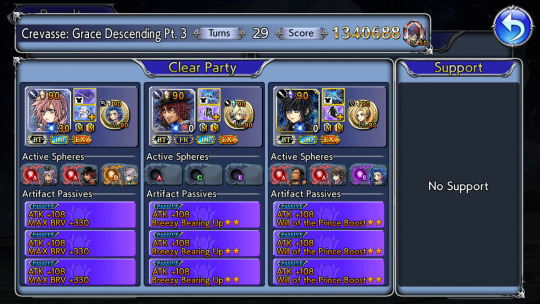
Now I just need to be able to clear the last Crevasse Lufenia+ quest with Lunafreya, Y’shtola, and Keiss.

The Codes I used on this fight gave me 42 points. The multiplier for this quest is x1.5. So the total points I got from clearing this fight was 63.

So I still have a total of 464 points so far.

Conclusion
So, what about you? Which chars did you use to complete the quests in the Crevasse: Grace Descending event? What do you think about this kind of event? Feel free to share your thoughts and opinions by leaving a comment below or by reblogging or replying to this post.
Notes:
screenshots are from my Dissidia Final Fantasy: Opera Omnia game account
#dissidia final fantasy opera omnia#this post stars:#claire farron#noctis lucis caelum#ardyn izunia#ardyn lucis caelum#lightning#final fantasy 15#final fantasy 13#gacha games#games#dffoo#dffoo lufenia fights series
1 note
·
View note
Text
Dissidia Final Fantasy: Opera Omnia Crevasse Grace Descending Event Part 5
The Crevasse: Grace Descending event just started in the Dissidia Final Fantasy: Opera Omnia (DFFOO) mobile game. This event includes several quests.

Table of Contents
Crevasse: Grace Descending Event Information
Crevasse: Grace Descending Part 2 Lufenia+ quest
Conclusion
Crevasse: Grace Descending Event Information
Crevasse: Grace Descending is a type of event wherein players get the chance to build their own fight. Well, sort of.
We get a short list of Codes, Lufenia orbs (or special countdown cards), and Force gauge effects (or force weakness cards) as well as a few quests with set enemies. We can then choose which Codes and such should go on which quests.
Codes refer to rules like “use at least 1 Green Crystal char on this fight” or “bring a char who uses a greatsword on this fight”. The Codes, orbs, and force effects have points associated with them. These points vary depending on how hard it is to fulfill their conditions.

Each quest has a multiplier that’s based on how difficult it is. After doing a quest with the Codes you specified, you get some points.
You need a total of 525 points in order to get all the rewards from this event. You also can’t bring a friend support to any of these quests.
I found this event pretty interesting. It was pretty fun being able to decide what Codes should go with which quest.
Your chars get locked out every time you Perfect a quest so this gave me the chance to use chars that I haven’t used in a while. I do wish we got more Codes to choose from though.
Anyway, the Crevasse: Grace Descending event has a total of 6 quests. They are as follows:
Crevasse: Grace Descending Part 1 Lufenia+ (level 250) quest
Crevasse: Grace Descending Part 2 Lufenia+ quest
Crevasse: Grace Descending Part 3 Lufenia+ quest
Crevasse: Grace Descending Part 4 Shinryu (level 300) quest
Crevasse: Grace Descending Part 5 Shinryu quest
Crevasse: Grace Descending Part 6 Shinryu quest
So far, I’ve already cleared the following Crevasse quests:
Crevasse: Grace Descending Part 4 Shinryu Quest
My team for this fight was Sephiroth from Final Fantasy VII, Galuf Halm Baldesion from Final Fantasy V, and Jack Garland from Stranger of Paradise Final Fantasy Origin with The Brothers as my summon.

My Calls were Cid Raines’s from Final Fantasy XIII, Yuna’s from Final Fantasy X, and Keiss’s from Final Fantasy Crystal Chronicles: The Crystal Bearers.
The Codes I used on this fight gave me 43 points. The multiplier for this quest is x2.5. So the total points I got from clearing this fight was 108.

Crevasse: Grace Descending Part 5 Shinryu Quest
My team for this fight was Machina Kunagiri from Final Fantasy Type-0, Leo Cristophe from Final Fantasy VI, and Gladiolus Amicitia from Final Fantasy XV with The Brothers as my summon.

My Calls were Alisaie Leveilleur’s from Final Fantasy XIV, Lilisette’s from Final Fantasy XI, and Yuna’s from Final Fantasy X.
The Codes I used on this fight gave me 44 points. The multiplier for this quest is x2.5. So the total points I got from clearing this fight was 110.

Crevasse: Grace Descending Part 6 Shinryu Quest
My team for this fight was Penelo from Final Fantasy XII, Lion from Final Fantasy XI, and Yuna from Final Fantasy X with The Brothers as my summon.

My Calls were Cid Raines’s from Final Fantasy XIII, Lunafreya Nox Fleuret’s from Final Fantasy XV, and Hope Estheim’s from Final Fantasy XIII.
The Codes I used on this fight gave me 48 points. The multiplier for this quest is x2.5. So the total points I got from clearing this fight was 120.
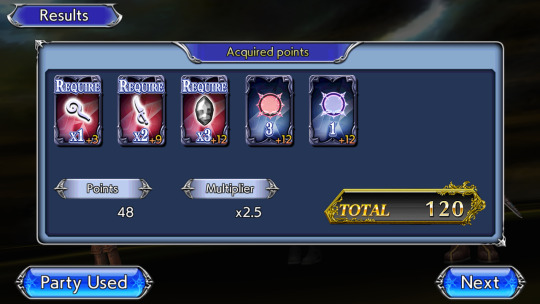
Crevasse: Grace Descending Part 3 Lufenia+ Quest
For this fight, my team was Lunafreya Nox Fleuret from Final Fantasy XV, Y’shtola Rhul from Final Fantasy XIV, and Keiss from Final Fantasy Crystal Chronicles: The Crystal Bearers with Pandemonium as my summon.

My Calls were Rydia’s from Final Fantasy IV, Cid Raines’s from Final Fantasy XIII, and Quistis Trepe’s from Final Fantasy VIII.
The Codes I used on this fight gave me 42 points. The multiplier for this quest is x1.5. So the total points I got from clearing this fight was 63.

So far, I now have a total of 401 points.
Crevasse: Grace Descending Part 2 Lufenia+ Quest
Also known as Crevasse: Grace Descending Pt. 2. This fight has 1 wave with 3 enemies, the Strong Beasts.
For this fight, my team was Lilisette from Final Fantasy XI, Locke Cole from Final Fantasy VI, and Zidane Tribal from Final Fantasy IX (#ad) with The Brothers as my summon.

My Calls were Seymour Guado’s from Final Fantasy X, Laguna Loire’s from Final Fantasy VIII, and Rydia’s from Final Fantasy IV.
Rydia’s LD Call gives the party a buff that lets them evade 3 attacks. This buff has no turn duration and will only disappear once a char has evaded 3 attacks. Her regular Call gives the party a water enchant buff while also giving the enemies a water imperil debuff.
Seymour’s and Laguna’s Calls inflict the enemies with debuffs. Seymour’s LD Call can also remove the buffs of the enemies and delay them for 2 turns.
The Codes I used for this quest were as follows:
Bring at least 1 Yellow Crystal char - Lilisette fulfills this condition
Bring at least 2 Blue Crystal chars - Locke and Zidane fulfills this condition
Bring at least 3 chars who uses daggers - Lilisette, Zidane, and Locke fulfills this condition
Lufenia orb: triggers at the start of the battle and cannot be ancelled
To increase the count of the Lufenia orb:
player grants 1 or more buffs in 1 turn (+2; limit 15)
player inflicts 2 or more debuffs in 1 turn (+2; limit 15)
Every time a char moves, the Lufenia orb count will be decreased by 2. Every time the enemy moves, the Lufenia orb count will be decreased by 2.
Have Zidane’s, Locke’s, and Lilisette’s 15cp, 35cp, Ex, and LD fully MLB. Their Ex weapons have been Purpled. They all have their High Armors and Bloom Stones. Locke also has his Burst weapon but it hasn’t been upgraded.
Lilisette has her Force weapon too. IIRC, it had only been limit broken once but I went ahead and spent the rest of the High Power Stones needed to fully limit break said weapon for this fight. Now she’s currently equipped with it.

Zidane is currently equipped with my Level 5 of 5 Dagger-type Ultima Weapon. All of his Summon Boards and Character Enhancement Boards have been completed.
Lilisette and Locke also have all of their Summon Boards completed. Unlocked parts of their Character Enhancement Boards, particularly the tiles that would give me their LD Calls and LD extension passives.
Everyone has triple perfect Artifacts and triple RF Spheres. No one has any of their Force Enhancements.
Lilisette is a support slash healer slash buffer. She provides pretty decent buffs and auras for the party. She can even debuff enemies. She can also battery the party. She can deal pretty decent damage too.
Locke and Zidane are both DPS. Locke has a bit of turn manipulation in his kit as well as some free turns and such. Zidane can debuff enemies and delete their turns. He’s also really fast.
The enemies have a recast bar and they got to move often enough even with the turn deletes from Zidane. However, they weren’t that dangerous. Any HP damage they dealt was easily healed by Lilisette. Even Locke has a move that can heal the party so that helped as well.

The Lufenia orbs weren’t much of an issue either since Zidane and Lilisette can easily debuff the enemies basically every time they move. All my chars can also buff themselves.
Since there was no one in my party who has any Force Enhancements, had to wait for a while before my force gauge was fully charged.
Thankfully, since this was only a Lufenia+ fight, I got to start this quest with my force gauge already half-filled.
Still, by the time my force gauge was finally fully charged to 100%, the Strong Beasts were already down to 79%, 84%, and 77% HP.

Had Lilisette activate her Force ability, Butterfly Steps, as soon as it was her turn. Then just had everyone spam their moves as usual.
It was pretty easy for my chars to increase the HP damage bonus of Lilisette’s FR since it has generic conditions. So by the time I only had 1 turn of force time left, the HP damage bonus was at 750%. The enemies were down to 52%, 54%, and 60% HP.
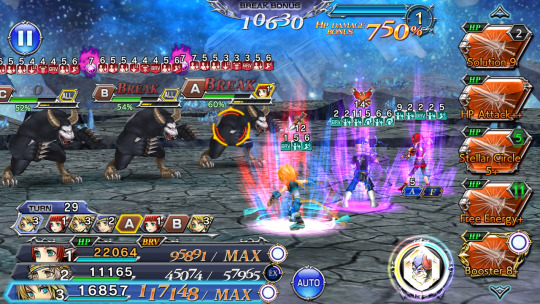
My plan was to go into Locke’s Burst mode once my force gauge was once again fully charged back to 100%. But my force gauge charged at a snail’s pace. It was so slow that it seemed like the fight was gonna end before I could use Lilisette’s FR again.
So eventually, I decided to just go ahead and go into Locke’s Burst mode already. I thought that I might as well benefit from the party-wide effects of Locke’s BT while the fight was still ongoing.
By the time I went into Locke’s Burst phase, the enemies were down to 32%, 29%, and 23% HP. My force gauge was at 67.6%.
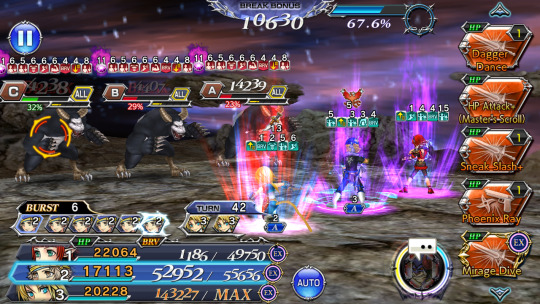
Locke didn’t deal that much damage during his BT mode, which was understandable since my Locke wasn’t fully built at all.
By the time Locke was about to cast Forever-Shining Magicite, his finishing Burst move, the Strong Beasts were down to 27%, 26%, and 20% HP. My force gauge was at 71.6%.
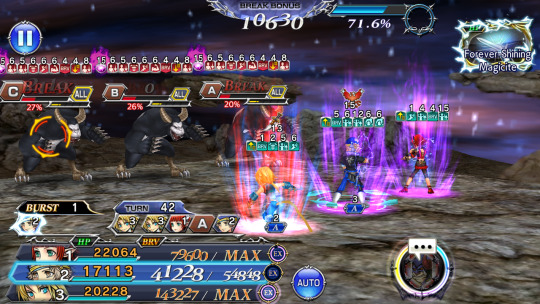
By the time my force gauge was finally fully charged back to 100% again, the enemies were down to 15%, 13%, and 11% HP.
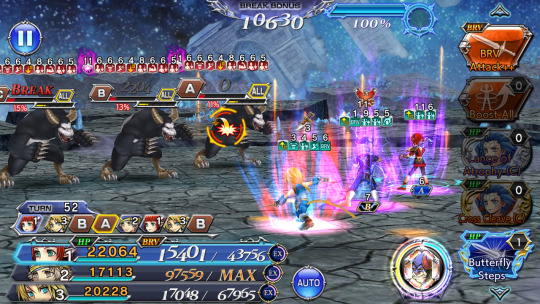
Soon, the enemies were at 3%, 5%, and 4% HP. Have 7 turns of force time left and the HP damage bonus was at 330%.

It was Zidane’s turn. Was all out of uses of his LD. But he still has 3 uses of each of his base skills. He was able to initiate a launch with his attack and this finished off the Strong Beast with 5% HP.
It was now Locke’s turn. Have 6 turns of force time left and the HP damage bonus was at 400%. Locke still has lots of his skills left. He also still has 7 turns left with his BT effect.
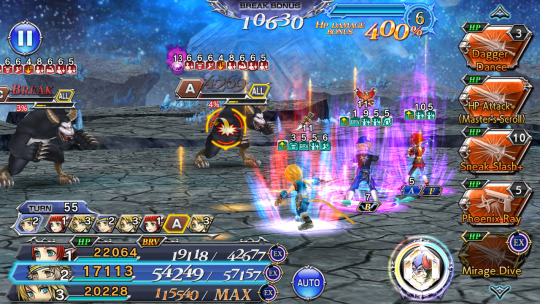
Either had Locke use his LD or summoned The Brothers already. Can’t remember for sure now but this (either Locke’s attack or the on-entry attack of The Brothers) was more than enough to finish off the last 2 remaining enemies.
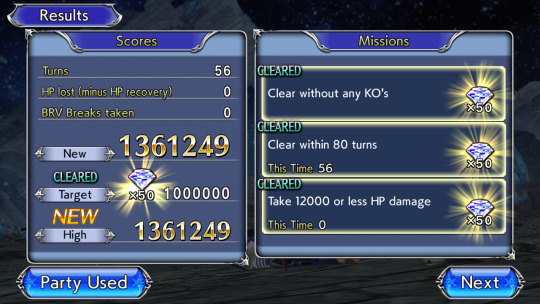
The battle ended on turn 56. Got the score and all the other mission requirements, which also got me the Perfect.

This fight wasn’t that hard but it did feel like it dragged on since it took me so long to fully charge my force gauge and finish off the 3 enemies.

This team did really well though. Glad I was able to get the win even though my Lilisette, Zidane, and Locke weren’t fully built at all.

The Codes I used on this fight gave me 42 points. The multiplier for this quest is x1.5. So the total points I got from clearing this fight was 63. So I now have a total of 464 points.

Conclusion
So, what about you? Which chars did you use to complete the quests in the Crevasse: Grace Descending event? What do you think about this kind of event? Feel free to share your thoughts and opinions by leaving a comment below or by reblogging or replying to this post.
Notes:
screenshots are from my Dissidia Final Fantasy: Opera Omnia game account
#dissidia final fantasy opera omnia#this post stars:#locke cole#zidane tribal#lilisette#final fantasy 9#final fantasy 6#final fantasy 11#games#dffoo lufenia fights series#gacha games#dffoo
0 notes
Text
Dissidia Final Fantasy: Opera Omnia Crevasse Grace Descending Event Part 4
The Crevasse: Grace Descending event just started in the Dissidia Final Fantasy: Opera Omnia (DFFOO) mobile game. This event includes several quests.

Table of Contents
Crevasse: Grace Descending Event Information
Crevasse: Grace Descending Part 3 Lufenia+ quest
Conclusion
Crevasse: Grace Descending Event Information
Crevasse: Grace Descending is a type of event wherein players get the chance to build their own fight. Well, sort of.
We get a short list of Codes, Lufenia orbs (or special countdown cards), and Force gauge effects (or force weakness cards) as well as a few quests with set enemies. We can then choose which Codes and such should go on which quests.
Codes refer to rules like “use at least 1 Green Crystal char on this fight” or “bring a char who uses a greatsword on this fight”. The Codes, orbs, and force effects have points associated with them. These points vary depending on how hard it is to fulfill their conditions.

Each quest has a multiplier that’s based on how difficult it is. After doing a quest with the Codes you specified, you get some points.
You need a total of 525 points in order to get all the rewards from this event. You also can’t bring a friend support to any of these quests.
I found this event pretty interesting. It was pretty fun being able to decide what Codes should go with which quest.
Your chars get locked out every time you Perfect a quest so this gave me the chance to use chars that I haven’t used in a while. I do wish we got more Codes to choose from though.
Anyway, the Crevasse: Grace Descending event has a total of 6 quests. They are as follows:
Crevasse: Grace Descending Part 1 Lufenia+ (level 250) quest
Crevasse: Grace Descending Part 2 Lufenia+ quest
Crevasse: Grace Descending Part 3 Lufenia+ quest
Crevasse: Grace Descending Part 4 Shinryu (level 300) quest
Crevasse: Grace Descending Part 5 Shinryu quest
Crevasse: Grace Descending Part 6 Shinryu quest
So far, I’ve already cleared the following Crevasse quests:
Crevasse: Grace Descending Part 4 Shinryu Quest
My team for this fight was Sephiroth from Final Fantasy VII, Galuf Halm Baldesion from Final Fantasy V, and Jack Garland from Stranger of Paradise Final Fantasy Origin with The Brothers as my summon.

My Calls were Cid Raines’s from Final Fantasy XIII, Yuna’s from Final Fantasy X, and Keiss’s from Final Fantasy Crystal Chronicles: The Crystal Bearers.
The Codes I used on this fight gave me 43 points. The multiplier for this quest is x2.5. So the total points I got from clearing this fight was 108.

Crevasse: Grace Descending Part 5 Shinryu Quest
My team for this fight was Machina Kunagiri from Final Fantasy Type-0, Leo Cristophe from Final Fantasy VI, and Gladiolus Amicitia from Final Fantasy XV with The Brothers as my summon.
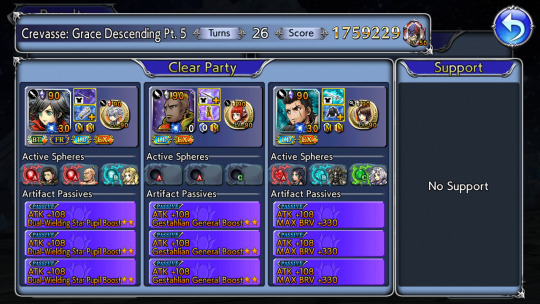
My Calls were Alisaie Leveilleur’s from Final Fantasy XIV, Lilisette’s from Final Fantasy XI, and Yuna’s from Final Fantasy X.
The Codes I used on this fight gave me 44 points. The multiplier for this quest is x2.5. So the total points I got from clearing this fight was 110.

Crevasse: Grace Descending Part 6 Shinryu Quest
My team for this fight was Penelo from Final Fantasy XII, Lion from Final Fantasy XI, and Yuna from Final Fantasy X with The Brothers as my summon.

My Calls were Cid Raines’s from Final Fantasy XIII, Lunafreya Nox Fleuret’s from Final Fantasy XV, and Hope Estheim’s from Final Fantasy XIII.
The Codes I used on this fight gave me 48 points. The multiplier for this quest is x2.5. So the total points I got from clearing this fight was 120.

So far, I now have a total of 338 points.
Crevasse: Grace Descending Part 3 Lufenia+ Quest
Also known as Crevasse: Grace Descending Pt. 3. This fight has 1 wave with 2 enemies, the Tyrant, and his minion, the Centaurion Blade.
For this fight, my team was Lunafreya Nox Fleuret from Final Fantasy XV (#ad), Y’shtola Rhul from Final Fantasy XIV, and Keiss from Final Fantasy Crystal Chronicles: The Crystal Bearers with Pandemonium as my summon.

My Calls were Rydia’s from Final Fantasy IV, Seymour Guado’s from Final Fantasy X, and Lilisette’s from Final Fantasy XI.
Rydia’s LD Call gives the party a buff that lets them evade 3 attacks. This buff has no turn duration and will only disappear once a char has evaded 3 attacks. Her regular Call gives the party a water enchant buff while also giving the enemies a water imperil debuff.
Seymour’s and Lilisette’s Calls inflict the enemies with debuffs. Lilisette’s LD Call can also heal the party. Seymour’s LD Call can also remove the buffs of the enemies and delay them for 2 turns.
The Codes I used for this quest were as follows:
Bring at least 3 Yellow Crystal chars - Lunafreya, Y’shtola, and Keiss fulfills this condition
Bring at least 2 chars who use staves or rods - Lunafreya and Y’shtola fulfills this condition
Bring at least 1 char who uses daggers - Keiss fulfills this condition
Lufenia orb: triggers at the start of the battle and cannot be cancelled
To increase the count of the Lufenia orb:
Every party member BRV at least 30k after player turn (+4; limit 15)
Player grants party BRV in 1 turn (+2; limit 15)
Every time a char moves, the Lufenia orb count will be decreased by 2. Every time the enemy moves, the Lufenia orb count will be decreased by 2.
Have Y’shtola’s, Keiss’s, and Lunafreya’s 15cp, 35cp, Ex, and LD fully MLB. Their Ex weapons have been Purpled.
Lunafreya and Y’shtola also have their Burst weapons. Both have been fully MLB but only Lunafreya’s has been upgraded to Green or BT+ 3/3.
Lunafreya also has her FR which has been fully MLB. She has her High Armor and it’s been Blued. Keiss and Y’shtola have their High Armors too but neither have been Blued.
Everyone has their Bloom Stones and triple perfect Artifacts. Lunafreya has triple real Spheres while Keiss has triple RF Spheres. Y’shtola has no Spheres, real or otherwise.
All of their Summon Boards and Character Enhancement Boards have been completed. Lunafreya also has all of her Force Enhancements while Keiss and Y’shtola don’t have any at all.
Y’shtola is boosted for this fight. Keiss is currently equipped with my Level 5 of 5 Dagger Ultima Weapon.
Lunafreya is a really good support slash buffer slash healer. She provides great party-wide buffs and auras. She can imperil enemies and enchant the party with the ice element. She can also deal pretty good damage.
Lunafreya has instant turn rate moves that can quickly charge the force gauge. She can give herself and her allies multiple turns in a row.
Keiss is a support with decent enough buffs and auras but he can’t heal. He can give his allies a buff that will enable them to initiate launches every time they move. He can battery the party. He can also manipulate his turn so that he will move right after an ally.
Y’shtola is a support slash healer slash buffer. Sadly, she and Keiss are outdated by now, especially since they don’t even have their own Force and Burst weapons. It’s actually been a long time since I last got to use them.
Y’shtola can delay an enemy by 1 turn with one of her moves. She has an instant turn rate move that would have charged the force gauge by a lot if I’d gotten all of her Force Enhancements. But since she doesn’t have any Force Enhancements, she can barely charge the force gauge.
This fight is only Level 250 so it didn’t seem that hard when compared to a Level 300 or Shinryu quest. However, the main boss here has lots of health so it’s best to use a Force ability otherwise it’ll take forever before this fight will end.
With my party, the Lufenia orb here wasn’t an issue at all. Was able to keep the orb at its max count easily just by using the skills of my chars.
Since this was only a Lufenia+ quest and since I also have 1 boosted char in my party, started the fight with my force gauge already partially charged so it didn’t take that long before it reached 100%.
Had Keiss give his launch buff to both Lunafreya and Y’shtola so they can initiate launches every time they moved.
Once my force gauge was fully charged, had Lunafreya activate her Force ability. By then the boss was down to 90% HP.

At first, things seemed to be going really well. Just had everyone spam their skills. Thanks to Y’shtola, was able to just keep on delaying the boss so he didn’t get the chance to move. He basically just stood there while all my chars attacked him.
But then when the Tyrant dropped down to a certain HP threshold (IIRC, it was at around 79% HP or so), he summoned his minion.
Unfortunately, the Centaurion Blade can’t be delayed, even via breaks. And apparently, it’s not possible to beat him either.
Managed to get my HP damage bonus to 508% before my force time ended. Had Lunafreya activate her BT+ finisher now while the HP damage bonus was so high.
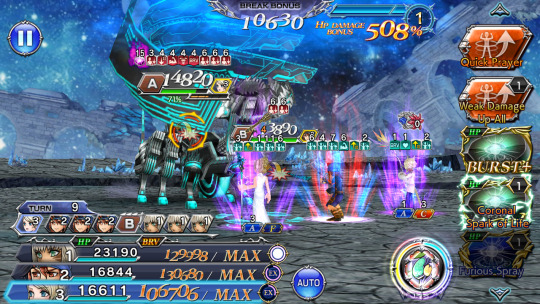
By now, had been able to delay the Tyrant so much that his icon was no longer visible on the turn order list.
Had my chars continue to focus their attention on the Tyrant. Ignored the minion but I did use Rydia’s LD Call.
The minion got to move like once or twice so far but he wasn’t able to do anything thanks to the buff from Rydia’s LD Call.
Was waiting for my force gauge to charge back to 100% again. Didn’t want to spam Lunafreya’s instant turn rate moves too much since doing that would quickly eat through the duration of her BT+ effect.
Once again, the minion managed to get a turn. He was targeting Lunafreya but wasn’t worried since she still has the buff from Rydia’s LD Call.
However, to my surprise, the minion’s attack somehow managed to pierce through Rydia’s LD Call buff which allowed him to KO Lunafreya.

I was like WTF? What just happened? Did I miss something or what? Because I’m pretty sure that Luna still has the buff from Rydia’s LD Call.
Ugh, seriously. How’d this happen? Why’d this happen? The minion got to move earlier and he didn’t kill anyone since he wasn’t able to bypass Rydia’s LD Call buff. So what happened now? Have no idea.
With Lunafreya dead, have no choice but to restart this fight again. This time, the Calls I brought were Cid Raines’s, Rydia’s, and Quistis Trepe’s from Final Fantasy VIII.
Raines’s Calls can initiate launches and manipulate the turns of his allies. Don’t really need the launch since Keiss can already enable the party to do that but I thought the turn manipulation could be of use.
Quistis’s Calls delay the enemies. IIRC, she’s the only char who can bypass an enemy’s immunity to delays.
Once again, activated Lunafreya’s FR once my force gauge was fully charged. Still kept on spamming everyone’s skills while keeping the Tyrant from moving.
By the time I only had 1 turn of force time left, the HP damage bonus was at 512%. The Tyrant was now down to 71% HP. His minion had just shown up.
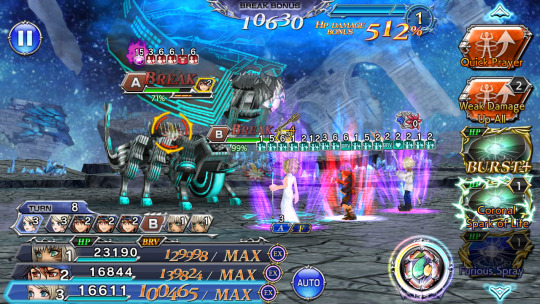
It was currently Lunafreya’s turn. Had her use her BT+ finisher, Coronal Spark of Life.
Also made use of Quistis’s Calls to delay the minion and keep him from moving. And made use of Raines’s Calls to get my chars to move before the minion.
Y’shtola’s Medica II skill has instant turn rate but, as mentioned, since she doesn’t have Force Enhancements, using this doesn’t charge the force gauge by much at all.
Nevertheless, just had Y’shtola spam this until she ran out. Her LD, Scion’s Holy, deals damage but also has instant turn rate. Spammed this too since this was another way to keep the minion from moving.
Also had Luna give everyone multiple turns in a row. Had Keiss manipulate his own turns too so he’d get to move after one of his allies. All of this added up so I was able to keep the minion from moving.
Used Rydia’s LD Call too, just in case. But considering what happened earlier, I’d really rather not let the minion move at all.
So far, have been able to keep the enemies from moving. Once my force gauge was fully charged to 100% again, had Lunafreya activate her FR again.
On her next turn, went into her Burst+ phase. By then have 8 turns of force time left and the HP damage bonus was at 214%. The Tyrant was down to 46% HP.

By the time Lunafreya was about to cast Coronal Spark of Life, her finishing Burst+ move, the Tyrant was down to 27% HP. Have 2 turns of force time left and the HP damage bonus was at 507%.

Lunafreya’s attack took the Tyrant down to 24% HP. Now only have 1 turn of force time left and the HP damage bonus was at 550%.
It was Keiss’s turn. Had him summon Pandemonium already. Pandemonium’s on-entry attack took the boss down to 19% HP.

Just kept on spamming everyone’s skills while keeping the enemies from moving.

The fight dragged on since I can only use Lunafreya’s FR twice per battle and Keiss and Y’shtola unfortunately don’t have their own Force weapons yet.
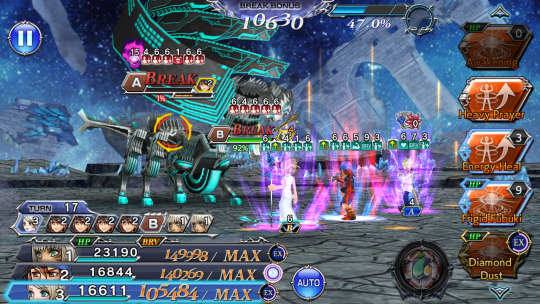
It was Keiss who ended up dealing the killing blow, finishing off the Tyrant on turn 18.
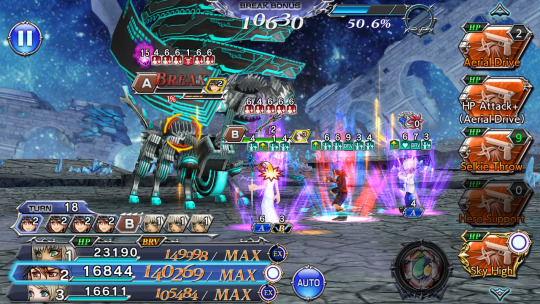
Got the score and all the other mission requirements which also got me the Perfect.

Neither of the enemies ever got to move. This team did really well. But this fight really dragged on, especially once I could no longer use any FRs.

Never got to see the main boss move so he came across as harmless. His minion would have been harmless too if he hadn’t been able to somehow bypass Rydia’s LD Call buff. Still have no idea how that happened. LOL.

Anyway, the Codes I used on this fight gave me 42 points. The multiplier for this quest is x1.5. So the total points I got from clearing this fight was 63. So now I have a total of 401 points.

Conclusion
So, what about you? Which chars did you use to complete the quests in the Crevasse: Grace Descending event? What do you think about this kind of event? Feel free to share your thoughts and opinions by leaving a comment below or by reblogging or replying to this post.
Notes:
screenshots are from my Dissidia Final Fantasy: Opera Omnia game account
#dissidia final fantasy opera omnia#this post stars:#lunafreya nox fleuret#y'shtola rhul#keiss#final fantasy 15#final fantasy 14#dffoo lufenia fights series#games#gacha games#dffoo#final fantasy crystal chronicles: the crystal bearers
0 notes
Text
Dissidia Final Fantasy: Opera Omnia Dimensions’ End Transcendence Tier 1 New Team
I’ve already cleared the Dimensions’ End: Transcendence Tier 1 quests in the Dissidia Final Fantasy: Opera Omnia (DFFOO) mobile game. But I decided to redo some of the fights here. Why?

Lufenia quests are Level 200 while Lufenia+ ones are Level 250. These used to be the hardest kind of fights in DFFOO but they’ve basically been powercrept by now.
Now the hardest kind of fight in Dissidia Final Fantasy: Opera Omnia are the Shinryu quests. These are Level 300.
If you bring a char equipped with a Burst or BT weapon to a Transcendence battle, the entire party’s stats will be enhanced.
Dimensions’ End: Transcendence Tier 1 Old Teams
For the Dimensions’ End: Transcendence, Tier 1, Crucible 1 Lufenia quest, my team was Paladin Cecil Harvey from Final Fantasy IV, Arciela V. Adoulin from Final Fantasy XI, and Ardyn Izunia (Ardyn Lucis Caelum) from Final Fantasy XV.

For the Dimensions’ End: Transcendence, Tier 1, Crucible 2 Lufenia quest, my team was Cloud Strife from Final Fantasy VII (#ad), Keiss from Final Fantasy Crystal Chronicles: The Crystal Bearers, and Dark Knight Cecil Harvey from Final Fantasy IV.
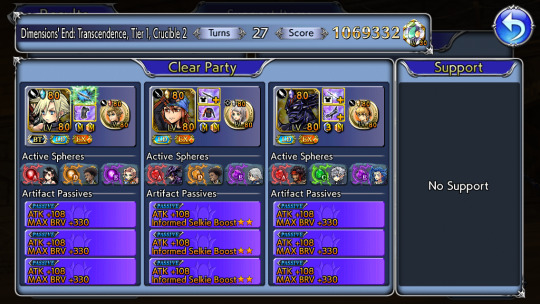
For the Dimensions’ End: Transcendence, Tier 4, Reckoning Level 220 quest, my team was Cloud, Keiss, and Paladin Cecil.

I talk more about the above fights in this post.
It was a long time ago when I cleared Dimensions’ End: Transcendence Tier 4. Now Tier 12 just arrived in the Global version of the game. The Japanese version has up to Tier 15 now and IIRC, Tier 16 is coming soon there.
Since Dimensions’ End: Transcendence Tier 12 came out, we got a time-limited mission that wants us to clear the Reckoning quest of said Tier with Seymour Guado from Final Fantasy X in our party.

Seymour is the main featured char for Dimensions’ End: Transcendence Tier 12. When said Tier showed up, a banner featuring all of Seymour’s weapons appeared as well.
Was able to clear the aforementioned mission as well as all the quests in Dimensions’ End: Transcendence Tier 12. I talk more about that in another post.
IIRC, future Transcendence Tiers will also have the aforementioned time-limited mission for their featured char. Let’s see. The featured chars for the following Dimensions’ End: Transcendence Tiers are as follows:
Dimensions’ End: Transcendence Tier 13 - Dark Knight Cecil Harvey from Final Fantasy IV
Dimensions’ End: Transcendence Tier 14 - Kurasame Susaya from Final Fantasy Type-0
Dimensions’ End: Transcendence Tier 15 - Rem Tokimiya from Final Fantasy Type-0
Dimensions’ End: Transcendence Tier 16 - this Tier hasn’t come out yet but it looks like they already announced that Setzer Gabbiani from Final Fantasy VI will be the featured char here
So I want to free up Dark Knight Cecil from Dimensions’ End: Transcendence Tier 1. While I’m at it, will see if I can also free up more chars from this stage.
Dimensions’ End: Transcendence, Tier 1, Reckoning Quest
The Dimensions’ End: Transcendence, Tier 1, Reckoning Level 220 quest has 2 waves. The mission requirements include winning within 95 turns and taking 15k or less HP damage.
To increase the Lufenia orbs in the first wave, you need to inflict 2 or more debuffs in 1 turn.
For the second and final wave, the counts of the Lufenia orbs will be paused when “player HP at least 100%”. The orbs will be paused as long as at least 1 char in your party has max HP.
I recently saw a video of this fight being soloed by a Level 90 and Crystal Level 90 Cloud Strife. IIRC, that Cloud was fully built as in his BT has been Greened, his High Armor’s been Blued, etc.
I wanted to see if my Cloud can solo this quest too even though he’s not fully built. If my Cloud can’t solo this fight, then I’ll have to see about pairing him with another char or 2.
Anyway, right now, my Cloud has his 15cp, 35cp, Ex, LD, and BT fully MLB. He’s at Crystal Level 90 and Level 90. He doesn’t have his Force weapon or Force Enhancements yet, unfortunately.

Have Cloud’s Bloom Stone. He has triple perfect Artifacts and triple real Spheres. All of his Summon Boards and Character Enhancement Boards have been completed.
He has his High Armor and it’s been Realized to 0/3. His Burst weapon has been leveled to the max so I have its passive but what I haven’t bothered to do is Realize it and Green it. Also opted not to Blue his High Armor.
Since my Cloud isn’t fully built, it’s been a long time since I last got to use him. This fight’s been powercrept by now though so hopefully, Cloud will be able to handle this on his own.
I actually have a Level 5 of 5 Greatsword Ultima Weapon so for now, I equipped this to Cloud. This will help to further increase his damage output.

Brought my Level 40 Alexander as my summon for this fight. Alexander raises the max HP of chars by 15%. Once a char’s HP falls below 80%, Alexander will give them an HP Regen buff that will last for 10 turns. When summoned, Alexander restores the party’s HP back to full.
Cloud can’t heal himself which was why I chose to bring Alexander. If I didn’t need healing in the last wave, I would have brought one of my Level 50 summons instead for more damage.
The Call ability I equipped to Cloud was Rydia’s from Final Fantasy IV. Rydia’s regular Call imperils enemies with the water element while giving the party a water enchant buff that lasts for a few turns.
Rydia’s LD Call gives the party a buff that will allow them to evade 3 attacks. This buff has no duration. It will only disappear once a char has evaded 3 attacks.
Cloud is a physical, non-elemental DPS. He has a low chance of paralyzing 1 enemy with his Cross Slash skill. The upgraded version of this skill is guaranteed to paralyze 1 enemy.
Cloud can initiate launches with his Finishing Touch skill. After using Finishing Touch, his Cross Slash ability will be upgraded to its plus version.
Blade Beam, Cloud’s LD ability, can delay all enemies by 2 turns. Meteorain, Cloud’s Ex ability, charges really fast. This allows Cloud to alternate between using one of his skill and his Ex ability.
As soon as the battle started, made use of Rydia’s LD Call already. Then I used Cloud’s LD to delay the enemies.
By turn 2, the enemies were down to 73% and 57% HP. Welp, this fight really has been powercrept by now.
Once the enemies dropped below 79% HP, they gained thousands of brave but wasn’t worried at all since Cloud does have the buff from Rydia’s LD Call. Plus, the enemies weren’t even set to move yet thanks to Cloud delaying them.
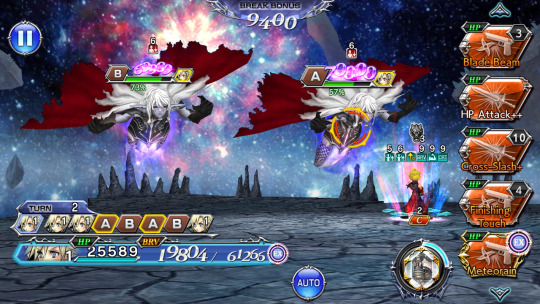
Cloud was able to deal a lot of damage every time he moved. Used Cloud’s LD again but I eventually had to let the enemies move since I wanted to save the rest of Cloud’s Blade Beam for the final wave.
Thanks to Rydia’s LD Call, Cloud was able to evade all the attacks of the enemies.
Eventually, the Lufenia orbs showed up. Cloud can’t debuff the enemies but the orbs weren’t really a problem since Cloud was able to finish off the enemies before the counts could go down to 0.
By turn 7, the enemies were down to 21% and 12% HP while the Lufenia orbs were at 12 and 7.

Had used Cloud’s Additional Ability earlier and it was still active now. His Ex was charged so had him use that. This attack was enough to finish off one of the enemies already.
The last one was left with 1% HP. LOL. Too bad Cloud hadn’t been able to finish off both enemies at the same time. Ah, well. Anyway, IIRC, had Cloud use his HP Attack++ to end the first wave.

The enemies in the second and final wave have this annoying flames aura that they tended to put up upon reaching certain HP percentage thresholds. This aura will cause them to restore a lot of their HP every time someone moves.
This aura will also sap a bit of the HP and brave of chars every time they move. To get rid of this aura, each enemy needs to be launched.
Cloud can easily launch the enemies but I still found this aura really annoying anyway. It’s such a hassle to deal with the enemies healing themselves and Cloud’s HP being drained every time he moved. This is why I need the healing from Alexander.
Just like with the first wave though, the enemies here were easy enough to deal with. This entire quest has been really powercrept by now. LOL.
Just made sure not to let the enemies here get a turn since I’d already used up all of Rydia’s evasion buff on the first wave. So I used Cloud’s LD to delay the enemies. Made sure to use his Finishing Touch every time the enemies got their flames aura.
When the enemies were down to 66% and 79% HP, activated Cloud’s Burst mode already. The Lufenia orbs were at 7 and 10. They showed up once the enemies dropped below 80% HP.
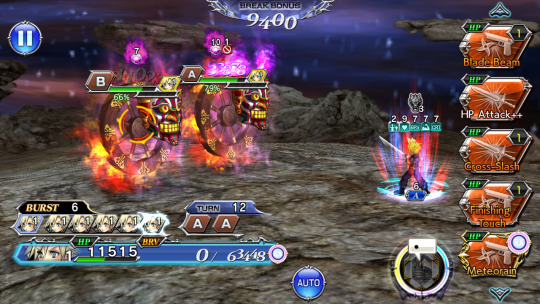
The Lufenia orbs weren’t much of an issue even though Cloud wasn’t currently at full health since the counts started at a pretty high number and they only went down by 1 each turn.
It also helped that Cloud was able to deal a lot of damage every time he moved so the HP of the enemies was quick to go down.
Anyway, by the time Cloud was about to cast Omnislash Version 5, his finishing Burst move, the enemies were down to 3% and 63% HP.

Cloud was only able to deal 4506458 total HP damage during his Burst phase which is really pathetic. But it was only to be expected considering he wasn’t fully built and he didn’t even have other chars supporting and buffing him.
Had Cloud target the enemy with 63% HP with his Omnislash Version 5. The boss with 3% HP ended up dying thanks to the splash damage from said attack.
A few turns after the end of Cloud’s Burst mode, summoned Alexander already. This instantly brought Cloud back to full health.

The last boss was down to 12% HP. So Cloud’s attack was more than enough to finish off this enemy already, ending the battle on turn 15.

Got the score and all the other mission requirements. Really super pleased that I was able to solo this quest with Cloud.
Dimensions’ End: Transcendence, Tier 1, Crucible 2 Lufenia Quest
The Dimensions’ End: Transcendence, Tier 1, Crucible 2 Lufenia Quest has 1 wave with 2 enemies.
As part of the mission requirements, you need to win within 75 turns and you need to have a Blue Crystal char in your party. To increase the counts of the Lufenia orbs here, you need to launch the enemies.
Since I was able to solo the Dimensions’ End: Transcendence, Tier 1, Reckoning Level 220 quest with Cloud, I thought I’d be able to solo this Crucible too.
Cloud is a Blue Crystal char who can easily launch enemies so he’s perfect for this fight. Still had Cloud equipped with Rydia’s Call. But this time the summon I brought was The Brothers who is at Level 50. This summon raises the party’s MAX BRV by 30%.

This fight was as powercrept as the Tier 1 Reckoning quest. Basically just had Cloud spam his moves. The Lufenia orbs weren’t an issue at all since Cloud can easily launch the enemies whenever he wants.
The enemies got to move a few times but they weren’t able to harm Cloud thanks to Rydia’s Call so it didn’t matter even if they got thousands of brave.
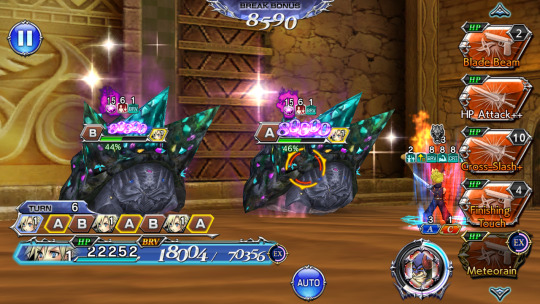
When the enemies moved, they were able to buff themselves but this didn’t matter either because Cloud can also dispel buffs.
When the enemies were down to 44% and 41% HP, activated Cloud’s Burst phase already. The Lufenia orbs were at 12.

By the time Cloud was about to cast Omnislash Version 5, the enemies were down to 10% and 13% HP and the Lufenia orbs were at 20.
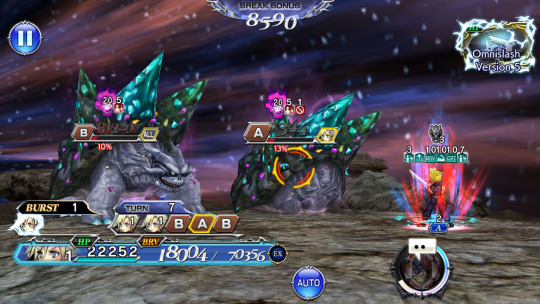
Cloud was able to deal 5293113 total HP damage during his Burst mode. Still very meh but slightly better than his total damage on the Tier 1 Reckoning quest.
Cloud’s finishing Burst move left the enemies at 8% and 2% HP. The enemy with 2% HP was currently paralyzed so I thought I might as well have Cloud paralyze the other one too.

So had him use Cross Slash+ on the enemy with 8% HP. Now that enemy was down to 1% HP. So Cloud’s next attack (IIRC, it was either his LD or Ex) finished off both enemies at the same time, ending the battle on turn 10.
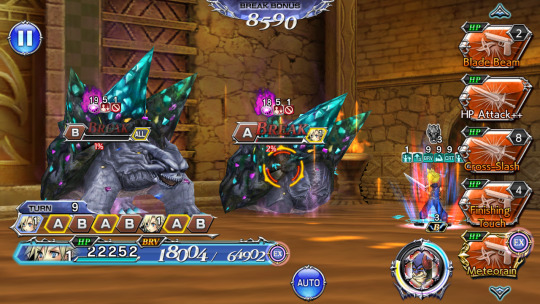
Didn’t even get to use my summon. Heck, my summon didn’t even get fully charged. LOL.
Got the score and all the other mission requirements, which also got me the Perfect.

Yay! So glad that I was once again able to solo a quest with Cloud. And doing this let me free up Keiss and Dark Knight Cecil so I can use them for future Tiers, if needed.

Dimensions’ End: Transcendence, Tier 1, Crucible 1 Lufenia Quest
The Dimensions’ End: Transcendence, Tier 1, Crucible 1 Lufenia Quest has 1 wave.
As part of the mission requirements, you need to win within 65 turns and you need to have a White Crystal char in your party. To increase the Lufenia orbs here, you need to deal holy damage.
Since I was able to solo both the Reckoning and Crucible 2 quests of Dimensions’ End: Transcendence Tier 1, I thought I’d try and see if I can solo Crucible 1 as well.
I remember hearing that Arciela can solo this quest. My Arciela isn’t fully built but I decided to give it a try anyway.
After all, I was able to solo 2 of the Tier 1 quests with Cloud although mine wasn’t fully built. So maybe I’ll be able to do the same with Arciela.
Have Arciela’s 15cp, 35cp, Ex, and LD fully MLB. Her Ex has been Purpled. She has her High Armor. She’s Crystal Level 90 and Level 90. She has her Bloom Stone.
All of Arciela’s Summon Boards and Character Enhancement Boards have been completed. She has 0 Force Enhancements. She has triple perfect Artifacts and triple RF Spheres.
Arciela is a support slash healer slash debuffer slash buffer. She provides pretty good party-wide buffs and auras. She can afflict enemies with a number of debuffs, including HP attack disable.
It’s been a while since she was last updated though and she doesn’t even have a Force weapon and/or Burst weapon yet so she’s been powercrept by now.
Arciela’s weapon type is special or unique so I was able to equip her with my Level 5 of 5 Special or Unique-type Ultima Weapon. Brought The Brothers as my summon.

The Call I brought was Ashelia B'nargin Dalmasca's from Final Fantasy XII. Arciela deals non-elemental magical damage so in order to deal with the Lufenia orbs here, I needed to bring a Call that can enchant its user with the holy element.
Ashe’s LD Call imperils enemies and enchants the party with the lightning and holy elements.
Like the other fights in Dimensions’ End: Transcendence Tier 1, this quest has been powercrept by now.
Even though my Arciela wasn’t fully built, she was still able to deal a lot of damage per turn. Having a maxed out Ultima Weapon definitely helps.
Didn’t have any way of delaying the enemies so they got to move pretty often. This wasn’t really a problem though since I always made sure that Arciela’s HP attack disable debuff was on them before letting them have a turn. So they were never able to deal any HP damage to Arciela.
The main issue I found on this quest was with the Lufenia orbs. They appear on battle start and they can’t be cancelled. Every time an enemy takes holy elemental damage, the count is increased by 5. The max count is 15.
Each time a char moves, the orb counts will tick down by 1. Each time an enemy moves, the counts will tick down by 2.
Only Ashe’s LD Call can enchant the party with the holy element and this only lasts for like 6 turns.
Maybe if my Arciela was fully built, this would be enough but since mine wasn’t, I found that sadly, I couldn’t finish off both enemies before the orbs became a problem.
Was able to get the enemies down to 35% and 37% HP before I had no choice but to just quit the fight because the Lufenia orbs were down to 2 and 7.

I’d already used up Ashe’s LD Call earlier so didn’t have any more ways to get the orb counts up. My summon wasn’t even fully charged yet so couldn’t use it to buy some more time.
Checked out a vid of Arciela soloing this quest to see if I could get some ideas or something. The vids I saw all had Arciela equipped with Enna Kros’s (from World of Final Fantasy) Call.
Apparently, both of Enna’s Calls can enchant its user with the holy element. Sadly, I don’t have Enna’s LD (actually, don’t have most of her weapons at all).
I could try changing my summon to Alexander since, when summoned, he will enchant the party with the holy element, but in my previous try, wasn’t even able to summon The Brothers.
IIRC, both summons charge at about the same speed so it looks like I really need Enna’s Calls if I want to be able to solo this quest with Arciela.
Ah, well. It sucks that I can’t solo this quest with Arciela, at least not right now but at least I was able to free up Keiss and Dark Knight Cecil from this Tier.

And at least I was able to solo 2 of the fights here with Cloud. If I ever manage to get Enna Kros’s weapons, I’ll try soloing this fight again with Arciela.
Conclusion
So, how ‘bout you? Which characters did you use to clear Dimensions’ End: Transcendence Tier 1? What do you think about the quests in this Tier? Feel free to share your thoughts and opinions by leaving a comment below or by reblogging this post.
Notes:
screenshots are from my Dissidia Final Fantasy: Opera Omnia game account
#dissidia final fantasy opera omnia#this post stars:#cloud strife#final fantasy 7#arciela v adoulin#final fantasy 11#gacha games#dffoo#games#dffoo de transcendence#dffoo lufenia fights series#dffoo cloud strife fights
0 notes
Text
Dissidia Final Fantasy: Opera Omnia Dimensions’ End Transcendence Tier 4 New Team
I’ve already cleared the Dimensions’ End: Transcendence Tier 4 quests in the Dissidia Final Fantasy: Opera Omnia (DFFOO) mobile game. But I decided to redo some of the fights here. Why?

Lufenia quests are Level 200 while Lufenia+ ones are Level 250. These used to be the hardest kind of fights in DFFOO but they’ve basically been powercrept by now.
Now the hardest kind of fight in Dissidia Final Fantasy: Opera Omnia are the Shinryu quests. These are Level 300.
If you bring a char equipped with a Burst or BT weapon to a Transcendence battle, the entire party’s stats will be enhanced.
Dimensions’ End: Transcendence Tier 4 Old Teams
For the Dimensions’ End: Transcendence, Tier 4, Crucible 1 Lufenia quest, my team was Yuna from Final Fantasy X, Tifa Lockhart from Final Fantasy VII (#ad), and Gladiolus Amicitia from Final Fantasy XV.

For the Dimensions’ End: Transcendence, Tier 4, Crucible 2 Lufenia quest, my team was Vaan from Final Fantasy XII, Noctis Lucis Caelum from Final Fantasy XV, and Setzer Gabbiani from Final Fantasy VI.

For the Dimensions’ End: Transcendence, Tier 4, Reckoning Level 220 quest, my team was Yuna, Setzer, and Tifa.

I talk more about the above fights in this post.
Then, much, much later, I decided to redo some of the fights here because I wanted to free up Yuna and Tifa so I can use them on future Dimensions’ End: Transcendence Tiers.
So I ended up with these new clears:
For the Dimensions’ End: Transcendence, Tier 4, Crucible 1 Lufenia quest, my team was Cissnei from Crisis Core: Final Fantasy VII, Seymour Guado from Final Fantasy X, and Y’shtola Rhul from Final Fantasy XIV.

For the Dimensions’ End: Transcendence, Tier 4, Reckoning Level 220 quest, my team was Cissnei, Vaan, and Y’shtola.

I talk more about these fights in this post.
It was a long time ago when I cleared Dimensions’ End: Transcendence Tier 4. Now Tier 12 just arrived in the game.
There’s a time-limited mission that wants players to clear the Reckoning stage of Dimensions’ End: Transcendence Tier 12 with Seymour in the party.

So that’s why I want to free up Seymour from Tier 4. Just need to figure out who will replace him.
At least I only need to redo one Crucible on this Tier. That is, unless I also end up not using Cissnei and/or Y’shtola.
Dimensions’ End: Transcendence, Tier 4, Crucible 1 Lufenia Quest
The Dimensions’ End: Transcendence, Tier 4, Crucible 1 Lufenia quest has 1 wave with 3 enemies. To be more precise, there’s one main boss and his 2 add-ons.
As part of the mission requirements, you need to win within 65 turns and you need to have a White Crystal char in your party.
To increase the counts of the Lufenia orbs here, you need to remove debuffs from your chars.
Yuna is actually the best char to deal with the Lufenia orbs here. She’s also a White Crystal char, making her perfect for this Crucible. But there’s no way I’m bringing her back here. Still set on wanting to use her on a higher Tier.
Other than Yuna, some of my other options for dealing with the Lufenia orbs here are as follows:
Yuffie Kisaragi from Final Fantasy VII
Penelo from Final Fantasy XII
Mog from Final Fantasy VI
Ceodore Harvey from Final Fantasy IV
Balthier (Ffamran mied Bunansa) from Final Fantasy XII
Unfortunately, I’m missing Mog’s LD and Ceodore’s LD and BT so can’t use them.
My Penelo is locked on to Dimensions’ End: Transcendence Tier 2, and I’d rather not repeat that stage if at all possible.
I have Balthier’s weapons but his Ex is only at Ex+ 0/3. I’m reluctant to Purple him if I can’t be sure that he can actually help me beat this Crucible.
My Yuffie is fully built and free but her Crystal Color is Red. So if I bring her, I’m gonna have to drop either Cissnei or Y’shtola so I can add a White Crystal char to my party.
After considering my options and thinking about all this some more, I settled for a team of Yuffie, Nine from Final Fantasy Type-0, and Shelke Rui from Dirge of Cerberus: Final Fantasy VII with The Brothers as my summon. My Calls were Seymour’s, Yuna’s, and Leo Cristophe’s from Final Fantasy VI.
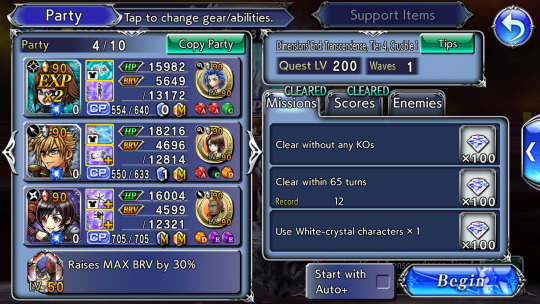
Have Yuffie’s, Nine’s, and Shelke’s 15cp, 35cp, Ex, and LD fully MLB. Their Ex weapons have been Purpled or upgraded to Ex+ 3/3.
All of their Summon Boards have been completed. But I have yet to unlock any of their Force Enhancements.
Unlocked parts of Shelke’s Character Enhancement Boards, particularly the tiles that would give me her LD Call and LD extension passive. For Nine, completed the entirety of his LD Boards. For Yuffie, all of her Char Boards have been completed.
They all have triple perfect Artifacts. Yuffie and Shelke have triple RF Spheres while Nine only has 2 RF Spheres.
Nine and Shelke have their High Armors while Yuffie only has up to her second armor maxed out.
Shelke is currently equipped with my Level 5 of 5 Special or Unique-type Ultima Weapon while Nine has my Level 2 of 5 Spear-type Ultima Weapon.
Nine is a tank who deals decent enough damage. The main reason why I picked him for this fight was because his Crystal Color is White. It also helps that he can equip my Spear-type Ultima Weapon since that would help to further increase his damage output even if he wasn’t fully built.
Shelke is a physical DPS. Her damage output is pretty good although it would definitely be much better if she was fully maxed out. Being able to equip my max level Ultima Weapon was the main reason why I want to bring her to this fight as my main DPS.
Right now, I only have 4 Ultima Weapons - the aforementioned Spear and Special ones, a Level 5 of 5 Fist-type Ultima Weapon, and a Level 5 of 5 Greatsword-type Ultima Weapon.
So unfortunately, I don’t have an Ultima Weapon to give to Yuffie. I brought Yuffie as another way to deal with the Lufenia orb here. Yuffie is a debuffer who deals decent enough damage. She has a move that can battery the party.
Seymour’s and Leo’s Calls afflict the enemies with debuffs. Seymour’s LD Call can also delay all enemies by 2 turns.
When this fight started, I thought it was going to be pretty easy to get the win. It was a long time ago since this fight showed up so it has been powercrept by now.
My chars may not be fully built but they were all Level 90 and Crystal Level 90 and 2 of them are even wielding Ultima Weapons. All of these plus the debuffs and buffs and such that were currently active on the field really helped to increase everyone’s damage output.
Had a problem with Shelke though. She has this gimmick that gives her extra turns. This happens a lot, which is not good at all for this quest. Because while Shelke is taking all these turns, the Lufenia orb keeps ticking down.
By turn 6, the main boss was down to 78% HP but the Lufenia orb was at 1. It was currently Shelke’s turn.
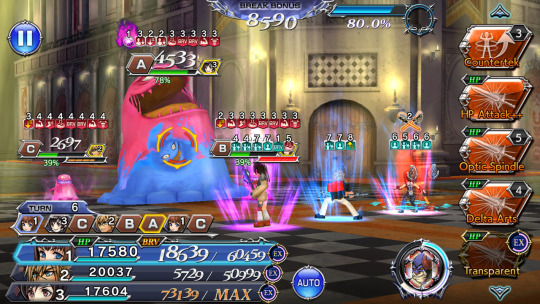
Yuffie currently has a debuff on her so if I can use one of Yuna’s Calls or Yuffie’s own cleanse skill, then I can increase the count of the Lufenia orb. The problem was that I had Yuna’s Call equipped to Nine. Yuffie was moving right after Shelke but since the orb count was already at 1, it was too late.
So I just quit the fight. Decided to drop Shelke since her extra turns gimmick was causing trouble.
This time, my team was now Nine, Yuffie, and Sice from Final Fantasy Type-0 with The Brothers as my summon. My Calls were Yuna’s, Seymour’s, and Beatrix’s from Final Fantasy IX.
Beatrix’s Calls buff the party. Her LD Call - well, I was sure I picked this because it can remove debuffs from the party. But I just double-checked and unfortunately, Bea’s Calls have no esuna effects at all.
Welp, don’t know why I thought Beatrix’s Calls can esuna the party. Maybe I meant to use a different Call and picked this one by mistake.
Anyway, have Sice's 15cp, 35cp, Ex, and LD fully MLB. Her Ex has been Purpled. She has her High Armor. She has triple perfect Artifacts and triple RF Spheres. She has her Bloom Stone.
All of Sice’s Summon Boards have been completed. Unlocked parts of her Character Enhancement Boards, particularly the tiles that would give me her LD Call and LD extension passive.
Sice is currently equipped with my Level 5 of 5 Special-type Ultima Weapon.
Sice deals dark elemental damage. With her LD, she afflicts all enemies with a debuff that will tick down and deal damage each turn.
Sice and her traps dealt a lot of damage. She did really well here. Unfortunately, ended up running into the same issue I had before in some of my previous tries of this fight.
Sometimes, there are times wherein the enemies will attack but they won’t debuff any of my chars so I’d have no way to increase the count of the Lufenia orb.
This time, what happened was that by turn 11, the Lufenia orb was at 2 and none of my chars had a debuff.
It was currently Sice's turn. If one of my chars had a debuff, I could have had Sice use Beatrix’s Call to get the orb count back up.
No, wait. Beatrix’s Calls wouldn’t have made a difference since neither have an esuna effect, but I didn’t know or somehow forgot about that when I was doing this fight.
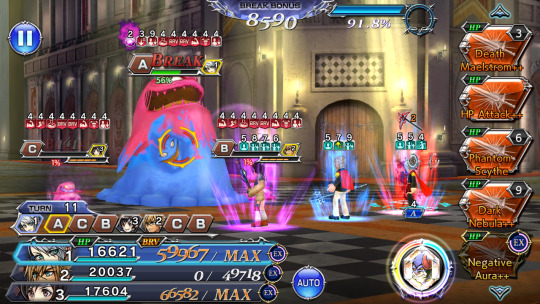
If only the orb and enemies here weren’t such trolls, this fight would have been over by now. Because the boss was already down to 56% HP. If the orb wasn’t an issue right now, I could have kept going and would probably be able to get the win in a few more turns.
I suppose I could have summoned The Brothers already. But I wasn’t sure if my chars can finish off the boss by the end of the summon.
At the end of the summon, I should have at least 1 or 2 more turns before the Lufenia orb goes down to 0. It’s game over if the boss is still alive by then.
Anyway, so instead of just retrying from this wave, decided to quit the fight. Because I was thinking of getting Yuffie’s High Armor.
I just noticed that I actually have all of her Char Boards completed. That’s more than can be said for Nine and Sice and yet both have their High Armors while Yuffie doesn’t.
So I figured I might as well get Yuffie’s High Armor as well. That should help to further increase her damage output.
So my team, summon, and Calls were all still the same except this time Yuffie has her High Armor.

I should have replaced Beatrix’s Calls but when I was doing this quest, I was apparently still under the impression that I can use said Calls to esuna the party and increase the count of the Lufenia orb here.
Ah, well. At least that didn’t turn out to be an issue. Got lucky or RNG was on my side this time since the enemies actually debuffed my chars.
Still had some close calls though. Like that time the orb count dropped down to 2. Thankfully, it was currently Yuffie’s turn and Nine had a debuff that she could cleanse.
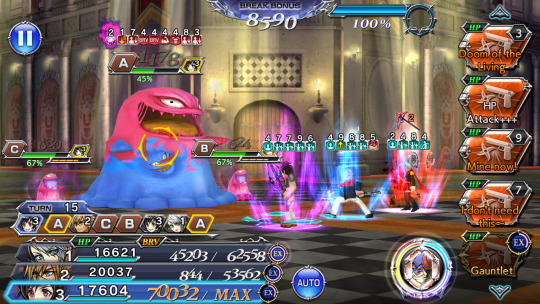
So just kept on having everyone spam their moves. The enemies got to move often enough. Their attacks weren’t that bad or dangerous, especially with Nine’s protection and defenses.

Sice even has an evasion buff for herself. Had been kinda worried about that since I wasn’t sure if that buff can also protect Sice against debuffs. Good thing the enemies didn’t always target Sice so it was fine even if she couldn’t be debuffed.
Anyway, summoned The Brothers when the main boss was down to 12% HP. After that, it only took a few more turns before the boss fell. It was Yuffie who dealt the killing blow, ending the battle on turn 21.
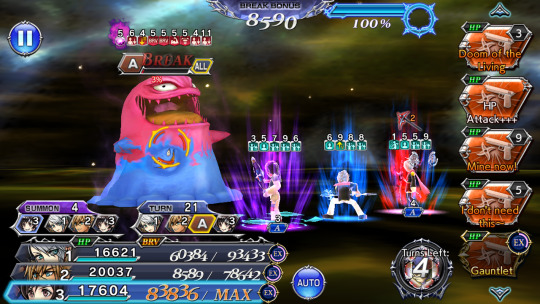
Got the score and all the other mission requirements, which also got me the Perfect.

Super pleased with this team. Everyone did really well. Yeah, this Crucible has been powercrept by now but still. Glad I was able to get through this quest without Burst and/or Force weapons in my party and with my chars not being fully built or maxed out.

And really glad I was able to free Seymour from this Tier. Now I can freely use him in Dimensions’ End: Transcendence Tier 12. Wasn’t planning to free up Cissnei and/or Y’shtola but glad I got to remove them from this quest as well. Maybe I can use them elsewhere or something.
Dimensions’ End: Transcendence, Tier 4, Crucible 2 Lufenia Quest
Since I ended up freeing Cissnei and Y’shtola too, I now have to clear the Dimensions’ End: Transcendence, Tier 4, Reckoning quest again.
And since I have to do that anyway, I decided I might as well take the opportunity to clear the Dimensions’ End: Transcendence, Tier 4, Crucible 2 Lufenia quest again.
I’ve been wanting to do that ever since I found out that Noctis had gotten his own Force weapon in the Japanese version of Dissidia Final Fantasy: Opera Omnia.
I’m planning to pull for Noctis’s FR so I want to be able to use him on a higher Transcendence Tier. If I can free up either Vaan or Setzer or both as well, then even better.
The Dimensions’ End: Transcendence, Tier 4, Crucible 2 Lufenia Quest has 1 wave with 2 enemies.
As part of the mission requirements, you need to win within 75 turns and you need to have a Red Crystal char in your party.
The Lufenia orbs will show up once the enemies drop down to 79% HP. The count is maxed at 8. You can increase them by 2 each time a char deals ranged BRV damage.
For this fight, my team was now Y’shtola, Cissnei, and Sazh Katzroy from Final Fantasy XIII with The Brothers as my summon. My Calls were Seymour’s, Leo’s, and Cid Raines’s from Final Fantasy XIII.

Raines’s Calls will move the turns of its user’s allies so they can move right after the Caller. The Calls will also initiate launches and battery the party for these launches.
And Raines’s LD Call will enable its user to be able to initiate launches for 2 turns.
Have Y’shtola’s, Cissnei’s, and Sazh’s 15cp, 35cp, Ex, and LD fully MLB. Their Ex weapons have been Purpled. Y’shtola also has her Burst weapon, and it’s been fully leveled but haven’t even bothered to Realize it yet.
Y’shtola and Cissnei have their High Armors while Sazh has up to his second armor maxed out.
They all have their Bloom Stones. They have triple perfect Artifacts. Sazh and Cissnei have triple RF Spheres.
All of their Summon Boards have been completed. Y’shtola has all of her Character Enhancement Boards completed as well.
Sazh has the Boards for his 15cp, 35cp, and Ex completed. Unlocked parts of his LD Board, particularly the tiles that would give me his LD Call and LD extension passive.
Only unlocked parts of Cissnei’s Character Enhancement Boards, particularly the tiles that would give me her LD Call and LD extension passive.
Sazh and Cissnei have 0 Force Enhancements while Y’shtola doesn’t have said feature available to her yet.
Sazh is a Red Crystal char. He and Cissnei deal ranged damage while Y’shtola deals magical damage.
Thanks to having Y’shtola and her Burst in my party, all my chars get a boost to their stats for this fight.
Y’shtola and Sazh are both supports. The former can heal while the latter can’t. They both offer pretty good buffs and auras. They can deal pretty decent enough damage as well.
Cissnei has some party auras but they’re not that good and she’s really more of a DPS than a support. Her main gimmick is being able to do a follow-up attack every time a char does a damaging move.
With 2 ranged chars in my party and with the follow-up attacks from Cissnei, the Lufenia orbs here weren’t an issue at all.
This fight was pretty easy with this team. Even when the enemies got thousands of brave, my chars were able to break them soon enough.

The enemies got to move often enough and they even debuffed my chars, but neither seemed all that dangerous. IIRC, my chars didn’t even take any HP damage.
This fight has been so powercrept by now that it feels like the HP bars of the enemies were quick to go down after just a few turns.
I mean, by turn 3, the enemies were already down to 73% HP. I was planning to go into Y’shtola’s Burst phase later but I decided not to bother since it just seemed like a waste of time.
Instead, by turn 6, decided to just summon The Brothers already. By now the enemies were down to 16% HP. Before summoning The Brothers, had Y’shtola use her Additional Ability and Raines’s LD Call.

Y’shtola can battery the party with most of her moves. Her LD ability, Scion’s Holy, deals damage and batteries the party. It also has instant turn rate. So just had Y’shtola spam this move.
Soon, there was only one enemy left. He was down to 2% HP. IIRC, was all out of uses of Scion’s Holy by now so just had Y’shtola use her Afflatus Misery move to finish off the last boss, ending the battle on turn 6.

Got the score and all the other mission requirements which also got me the Perfect.

Welp, this feels like one of the easiest fights ever. LOL. Also, looks like I ended up using Y’shtola and Cissnei for this Tier after all but that’s fine.

The important thing is that I was able to free up Noctis and Seymour and even Setzer and Vaan.
Dimensions’ End: Transcendence, Tier 4, Reckoning Quest
The Dimensions’ End: Transcendence, Tier 4, Reckoning Level 220 quest has 2 waves with 2 enemies each. The mission requirements include winning within 70 turns and taking 3k or less HP damage.
For this fight, my team was Y’shtola, Cissnei, and Sice with The Brothers as my summon. My Calls were Seymour’s, Raines’s, and Lilisette’s from Final Fantasy XI.
Lilisette’s Calls afflict the enemies with various debuffs. Her LD Call can also heal the party.
The Lufenia orbs in wave 1 will appear at quest start. They’ll disappear once the bosses drop down to 79% HP then reappear again when they get to 49% HP.
To increase the orb counts, your party must have a total of 12 or more buffs. I thought this’d be easy enough to fulfill since chars usually come with more than a few buffs.
But apparently that wasn’t the case at all for this team. Had to quit the fight because I didn’t have enough buffs.
This time I went in with the same team and summon but my Calls were now Seymour’s, Raines’s, and Hope Estheim’s from Final Fantasy XIII.

Hope’s Calls give multiple buffs to the party. These buffs last for several turns. Hope’s LD Call can also afflict enemies with a debuff that lowers BRV damage resistance and magical resistance.
This fight was so powercrept by now that by turn 4, wave 1′s enemies were down to 12% HP.
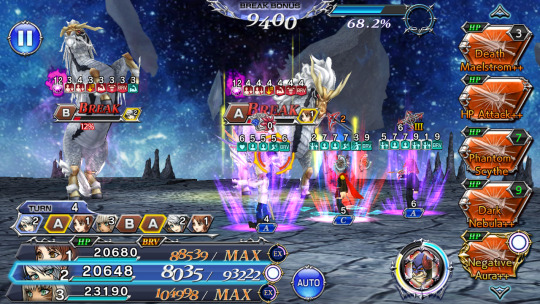
Everyone did really well so damage wasn’t an issue at all. The constant follow-ups from Cissnei plus the trap attacks from Sice really made quick work of the enemies here.
IIRC, the enemies only got to move a few times. They didn’t really do anything dangerous. They just did a brave attack that failed to break my chars and then they buffed themselves.
Anyway, by turn 5, there was only 1 enemy left on the field, and he was down to 9% HP. It was currently Cissnei’s turn. Her attack and follow-up plus Sice’s trap attack was more than enough to finish this boss off and end wave 1.

The second and final wave’s Lufenia orbs will also appear at the beginning of the fight.
They’ll disappear when the enemies drop down to 79% HP then reappear when they get to 59% HP and then disappear again when they drop down to 39% HP.
The orb counts can be increased by dealing critical BRV damage to the enemies. If the enemies are broken, all BRV hits become critical, so keeping the orb counts up was pretty easy.
Well, there were lots of times wherein the enemies here suddenly got thousands of brave so my chars couldn’t always break them right away. This was fine though as long as the bosses don’t get a turn while they’re not currently broken.
Anyway, can’t remember if the enemies here even managed to get a turn because as usual my chars were able to deal a lot of damage in a short amount of time.
By turn 9 the enemies were down to 27% and 38% HP. Instead of going into Y’shtola’s Burst mode, decided to just summon The Brothers already.

Had Y’shtola use Raines’s Calls for the launch, which meant even more damage. It didn’t take long before one of the enemies finally croaked it.
The last one was left with 5% HP. It was now Sice’s turn. Have 2 more turns left before the summon would end. Sice’s attack plus trap and Cissnei’s follow-up was more than enough to finish off the last boss, ending the battle on turn 9.
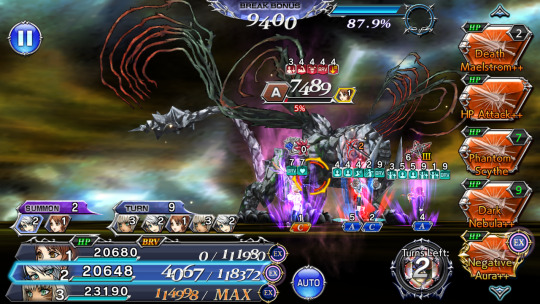
Got the score and all the other mission requirements. This team did really well. They all worked pretty well together.

Conclusion
So, how ‘bout you? Which characters did you use to clear Dimensions’ End: Transcendence Tier 4? What do you think about the quests in this Tier? Feel free to share your thoughts and opinions by leaving a comment below or by reblogging this post.
Notes:
screenshots are from my Dissidia Final Fantasy: Opera Omnia game account
#dissidia final fantasy opera omnia#this post stars:#final fantasy 7#yuffie kisaragi#sazh katzroy#y'shtola rhul#cissnei#nine#sice#dffoo#games#gacha games#final fantasy type-0#final fantasy 13#final fantasy 14#final fantasy crisis core#crisis core: final fantasy vii#dffoo lufenia fights series#dffoo de transcendence
0 notes
Text
Dissidia Final Fantasy: Opera Omnia Dimensions’ End Transcendence Tier 5 New Teams
I’ve already cleared the Dimensions’ End: Transcendence Tier 5 quests in the Dissidia Final Fantasy: Opera Omnia (DFFOO) mobile game. But I decided to redo some of the fights here. Why?

Lufenia quests are Level 200 while Lufenia+ ones are Level 250. These used to be the hardest kind of fights in DFFOO but they’ve basically been powercrept by now.
Now the hardest kind of fight in Dissidia Final Fantasy: Opera Omnia are the Shinryu quests. These are Level 300.
If you bring a char equipped with a Burst or BT weapon to a Transcendence battle, the entire party’s stats will be enhanced.
Dimensions’ End: Transcendence Tier 5 Old Teams
For the Dimensions’ End: Transcendence, Tier 5, Crucible 1 Lufenia quest, my team was Ace from Final Fantasy Type-0, Deuce from Final Fantasy Type-0, and Amidatelion from Final Fantasy Crystal Chronicles: The Crystal Bearers.
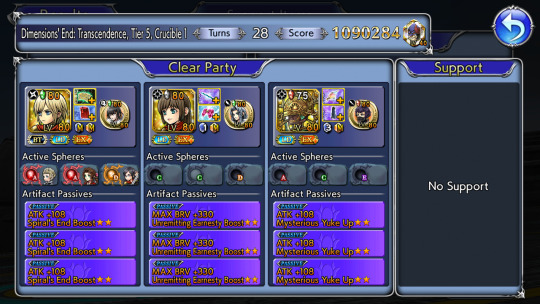
For the Dimensions’ End: Transcendence, Tier 5, Crucible 2 Lufenia quest, my team was Cid Raines from Final Fantasy XIII, Aphmau from Final Fantasy XI, and Rude from Final Fantasy VII (#ad).
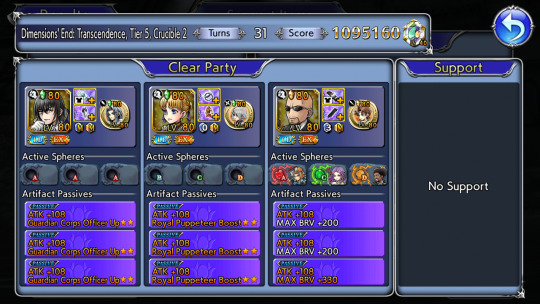
For the Dimensions’ End: Transcendence, Tier 5, Reckoning Lufenia+ quest, my team was Ace, Aphmau, and Raines.

Reasons to Redo Dimensions’ End: Transcendence Tier 5 Quests
Back then, I thought I’d never have to do any of the quests in Dimensions’ End: Transcendence Tier 5 again. Was perfectly fine with keeping Ace, Aphmau, Raines, Rude, Deuce, and Amidatelion locked on this Tier.
Then fast forward to now. Cid Raines just got his Force and Burst weapons. Prior to that, already have his 15cp, 35cp, Ex, and LD fully MLB. His Ex weapon has been Purpled or upgraded to Ex+ 3/3.
Cid has his High Armor and it’s been upgraded to 0/3. He has his Bloom Stone. He has triple perfect Artifacts. All of his Summon Boards and Character Enhancement Boards have been completed.
Although Raines is really good, didn’t really have any plans of building him. I was able to get his Force weapon but didn’t even bother to fully MLB it.
But a few or so days later, I actually ended up building Cid Raines. I talk more about that in another post but I ended up spending lots of resources to fully max out my Raines.
Got his Burst weapon and proceeded to Green it or upgrade it to BT+ 3/3. Spent the 3 Ingots needed to Blue his High Armor.

Completed his Force Enhancements. Gave him triple real Spheres. Fully limit broke his Force weapon.
Now my Raines is complete. I don’t regret building him. He really is very good. But now that I have a fully built Cid Raines, I want to be able to use him on a future Dimensions’ End: Transcendence Tier. Which means removing him from Tier 5 where he’s currently locked.
Dimensions’ End: Transcendence, Tier 5, Crucible 2 Lufenia Quest
The Dimensions’ End: Transcendence, Tier 5, Crucible 2 Lufenia quest has 1 wave with 2 enemies, the Lunatic Cavaliers.
As part of the mission requirements, you need to win within 65 turns and you need to have a Yellow Crystal char in your party.
The Lufenia orbs will show up once the enemies drop down to 79% HP. The count of these orbs is maxed at 15. There are 2 ways to increase the counts of the Lufenia orbs:
if the enemies take elemental weakness damage, then the counts will be increased by 1
if the enemies take wind elemental weakness damage, then the counts will be increased by 2
So just bring a wind enchanter and problem solved, right? Wrong. Because the catch is that these Lunatic Cavaliers are immune to elemental resist down debuffs which means you can’t make them weak to the wind element by applying a wind resist down debuff.
I remember having trouble with this quest before thanks to the Lufenia orbs. Had to bring 2 Calls just to deal with these orbs.
Basically had to rush through the fight to beat the bosses before the effects of the Calls I’d brought could run out.
This Crucible fight has been powercrept by now though. Heck, this entire Tier has been powercrept by now.
Back when Dimensions’ End: Transcendence Tier 5 came out, IIRC, all chars were still locked to Level 80 and Crystal Level 80. But now all chars can be awakened to Crystal Level 90 and Level 90.
We even have Force weapons and Force Enhancements now. We also have Ultima Weapons. In short, a lot of things have happened in the game by now so this fight shouldn’t be that hard anymore. The Lufenia orbs here still suck though.
My initial clear of this fight was with Cid Raines, Rude, and Aphmau. Cid served as my DPS while Rude and Aphmau supported him.
Neither my Rude nor Aphmau were fully built so don’t mind leaving them locked in here. Just need to find another DPS to replace Cid.
Was looking through my chars list, wondering who could take Raines’s place on this Tier, when I spotted Cid Highwind from Final Fantasy VII.
It’s been a long time since I got to use Cid so I was like wait, doesn’t he deal wind damage? Isn’t he a DPS of sorts? So I went to take a closer look at my Cid.
He does deal wind damage but it looks like he doesn’t imperil enemies with the wind element, not that that would have made a difference anyway since the Lunatic Cavaliers are immune to elemental resist down debuffs.
My Cid has his 15cp, 35cp, Ex, and LD fully MLB. His Ex has been Purpled. He has his High Armor but it’s at level 1. He has his Bloom Stone.
All of his Summon Boards have been completed. Unlocked parts of his Character Enhancement Boards, particularly the tiles that would give me his LD Call and LD extension passive.
He doesn’t have his Force Enhancements and currently have no plans of spending the points needed to give him said Enhancements.
Aside from the fact that he can deal wind damage, another thing that swayed me to try using Cid on this Crucible was the fact that I currently have a Level 2 of 5 Spear-type Ultima Weapon.
Cid can equip this weapon, which will help to further boost his damage output. I thought that might help make up for the fact that my Cid wasn’t fully built or maxed out.
Besides, all my chars are Level 90 and Crystal Level 90 now so that should help as well. Some of the summons can even be leveled up to 50 now.
So my new team for this fight was now Cid Highwind, Rude, and Aphmau with The Brothers as my summon. My Calls were Bartz Klauser’s from Final Fantasy V, Seymour Guado’s from Final Fantasy X, and Cyan Garamonde’s from Final Fantasy VI.

Cyan’s Calls just deal damage. Brought this in case I needed a bit more extra damage to help me clear this quest.
Seymour’s Calls afflict the enemies with multiple debuffs. His LD Call can also delay the enemies by 2 turns. IIRC, it can dispel the buffs of enemies as well.
Bartz’s regular Call provides a wind imperil aura that lasts for a few turns. IIRC, it’s 3 or so. Both of his Calls deal wind elemental damage.
The Brothers is one of the few summons who can be leveled to 50. Their Blessing raises the max brave of your chars by 30%.
My Rude has his 15cp, 35cp, Ex, and LD fully MLB. His Ex has been Purpled. He doesn’t have his High Armor but he has up to his second armor fully maxed out.
He has his Bloom Stone. He has triple perfect Artifacts and triple RF Spheres. All of his Summon Boards have been completed. He doesn’t have his Force Enhancements.
The Char Boards for his 15cp, 35cp, and Ex have been completed. Then I unlocked parts of the Boards for his LD, particularly the tiles that would give me his LD extension passive.
Rude’s Crystal color is Yellow. He’s a healer who provides decent enough party-wide auras and buffs.
I have a Level 5 of 5 Fist-type Ultima Weapon. Since Rude can equip said weapon, gave it to him for now to help boost his damage even just a bit.
My Aphmau’s 15cp, 35cp, Ex, and LD are fully MLB. Her Ex has been Purpled. She has up to her second armor maxed out. She has her Bloom Stone as well as triple perfect Artifacts.
All of her Summon Boards have been completed. Unlocked parts of her Char Boards, particularly the tiles that would give me her LD Call and LD extension passive. She doesn’t have any of her Force Enhancements.
Aphmau is a support and healer like Rude. Her main gimmick is that she can give one ally a buff called Tactical Switch.
As long as a char has this buff, they get another turn every time Aphmau moves. Aphmau has 2 instant turns whenever she has her special overhead buff.
Had Aphmau give her Tactical Switch buff to Cid so he got to move pretty often. Cid dealt pretty good damage, especially since he’s carrying an Ultima Weapon even if said weapon isn’t fully maxed.
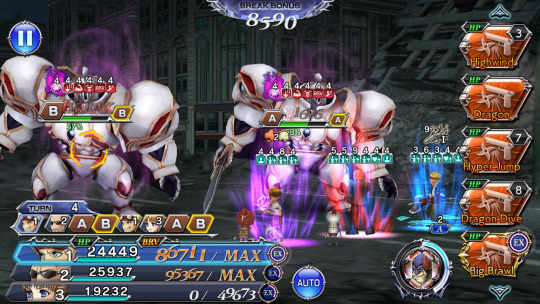
The buffs and auras from Rude and Aphmau and the debuffs from Seymour’s Calls also helped to further boost Cid’s damage output.
Rude and Aphmau did pretty well too. Rude did much better than Aphmau on account of having a maxed out Ultima Weapon.
IIRC, the enemies got to move a few times but they didn’t do much damage at all.
This fight really has been powercrept by now since it was pretty easy even with a team like this. Even with my chars not being fully built and maxed out, they all still did really well.
The main issue that I had with this quest was with the Lufenia orbs. It really sucks that the enemies here are immune to imperil debuffs.
With Cid being the only one who can deal wind damage and with the fact that I didn’t bother to bring a Call that can enchant the party with the wind element, there were times wherein I worried that the orbs would explode on me and make me have to do this fight all over again.
At one point, the orb counts were both at 2. It was currently Rude’s turn. At least Cid was moving right after him so was able to get the orb counts back up again soon enough but still. That was a pretty close call.
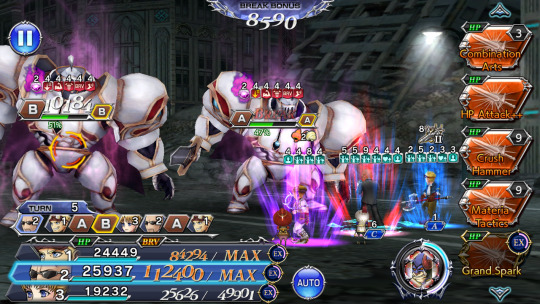
At least my chars were able to deal a lot of damage per turn so hopefully I can finish this fight as soon as possible.
It felt like forever before my summon was finally fully charged. By the time I summoned The Brothers, the fight was nearly over.
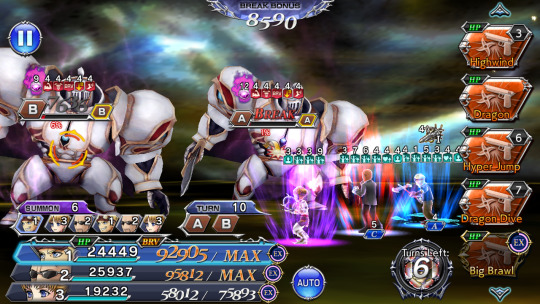
Thanks to the on-entry attack of The Brothers, the Cavaliers were now down to 6% and 1% HP. It was Cid’s turn. IIRC, had him use either Cyan’s LD Call or his own LD, Highwind, or maybe it was both.
Either way, whatever Cid did was enough to finish off both enemies at the same time, ending the battle on turn 10.

Got the score and all the other mission requirements, which also got me the Perfect.
This team did really well. This fight would have been really easy (or even easier, I guess) if it weren’t for the Lufenia orbs here.
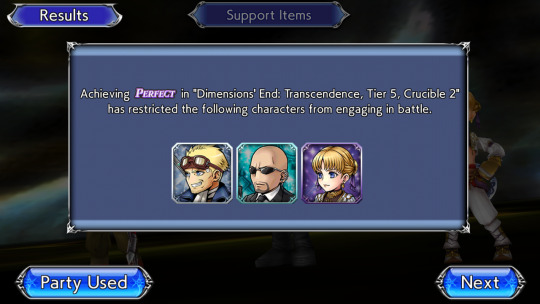
Dimensions’ End: Transcendence, Tier 5, Reckoning Lufenia+ Quest
The Dimensions’ End: Transcendence, Tier 5, Reckoning Lufenia+ quest has 1 wave with 3 enemies. To be more precise, there’s one main boss, the Lunatic Royal Mummy, and his 2 add-ons, the Lunatic Royal Mini Mummies.
The mission requirements include winning within 70 turns and taking 15k or less HP damage.
The Lufenia orb will appear on the main boss at quest start and it cannot be canceled. To increase it, the Royal Mummy’s BRV must be less than 10k after his turn.
The main gimmick of this fight is that the add-ons must be at or below 49% HP before the Lunatic Royal Mummy’s HP drops down to 79%, 49%, and 29% HP otherwise it’s game over.
This is because at the aforementioned HP percentage thresholds, the Royal Mummy will sacrifice his add-ons.
Before they go, the adds will do an attack that depends on their current HP. If they have less than or equal to 49% HP, they’ll just recover from break then do a single target BRV + HP attack.
But if their HP is greater than or equal to 50%, then they’ll recover from break, remove all of their target’s buffs (including silver-framed ones) then KO said target. Afterwards, the Royal Mini Mummies will immediately be revived with full HP.
For this fight, my team was Rude, Cid, and Ace with The Brothers as my summon. My Calls were Seymour’s, Cid Raines’s, and Keiss’s from Final Fantasy Crystal Chronicles: The Crystal Bearers.
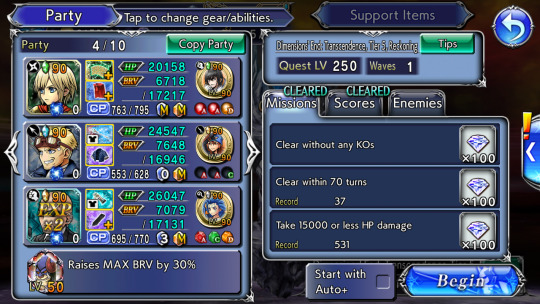
Keiss’s LD Call will afflict the enemies with a debuff that will battery the party every time a launch occurs. Raines’s LD Call will enable its user to initiate launches for 2 turns.
Have Ace’s 15cp, 35cp, Ex, LD, and BT fully MLB. His Ex has been Purpled. His Burst has been Greened or upgraded to BT+ 3/3. He has his High Armor and it’s been Blued.
Ace has his Bloom Stone. He has triple real Spheres and triple perfect Artifacts. All of his Summon Boards and Character Enhancement Boards have been completed but didn’t get any of his Force Enhancements.
Ace is a magical, non-elemental DPS. With his LD, he can afflict enemies with a trap debuff that ticks down and deals damage every turn.
It’s been a long while since I last used Ace. Sadly, he’s kinda outdated by now. He doesn’t even have a Force weapon yet.
But since this quest came out a long time ago and it’s only level 250, it’s also been kinda powercrept by now.
Since Ace was now Level 90 and Crystal Level 90, he was able to deal more damage to the enemies.
Too bad I don’t have an Ultima Weapon for him to use. He would have dealt even more damage if I’d been able to equip him with one.
Ace’s traps proved to be really useful as well. I was able to just keep on targeting the main boss then just let Ace’s traps and everyone’s splash and AoE attacks deal with the add-ons.
Unfortunately, with this team, didn’t really have a way of delaying the enemies and keeping them from moving. So they got to move regularly which meant having to deal with their attacks.
The enemies can hit fairly hard. They also seem to love doing HP attacks. They can debuff their opponents as well. One of these debuffs has an HP poison effect.
Ace ended up being hit with this debuff. The more he moved, the more he lost some HP. So his HP steadily went down until it was at 1.
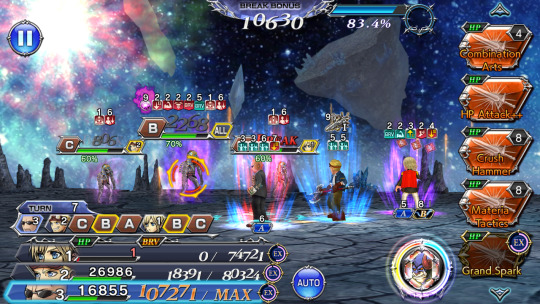
IIRC, Rude doesn’t have an HP Regen buff but he can heal the party just by using any one of his skills. So even if my chars lose HP, it’s fine. Rude just needs to get a turn to heal everyone before the enemies can move again.
The Lufenia orb here was basically a non-issue. Never had to worry that it would suddenly go off and explode. My chars were able to keep its count up just fine.
Used Ace’s BT+ finisher soon after the fight started so my chars could have an additional source of auras and buffs.
By turn 11, the main boss was already down to 49% HP. He started sacrificing his minions. The add-ons didn’t do much damage so no one died.

But, IIRC, Ace had already lost a bit of HP before this happened. It was most likely due to that poison debuff he still had on him. So what happened was that Ace lost even more HP when one of the minions targeted him.
After the minions had been sacrificed, the boss tended to do this AoE group HP attack. With Ace’s low HP (his health bar wasn’t down to the red yet but it was at around half or thereabouts), was worried that the boss’s AoE attack might end up killing him.
Really glad that didn’t happen at all. Ace just lost a lot more HP until his health bar was down to the red but it’s fine. Just glad he didn’t end up dying.

Rude and Cid were all right as well. Rude lost about half of his HP or thereabouts while Cid didn’t lose that much. As soon as Rude got a turn, was able to get everyone back to full health.
A few turns later, decided to activate Ace’s Burst+ mode already. By then he has 4 turns left with his BT+ effect. Just used his Additional Ability so he still has 6 turns left with it.

The main boss was now down to 30% HP while his minions were at 14% HP. Before going into Ace’s Burst+ phase, made sure to use the rest of my debuffing Calls.
Would have had Ace use Raines’s LD Call before going into his BT+ mode but I was afraid that doing so would bring the boss down to 29% HP which would then trigger the minions to attack my chars and sacrifice themselves again.
I was hoping to avoid that. I thought that Ace’s BT+ phase would be enough to end the fight already. After all, the boss was down to 30% HP. I suppose if I’d brought better chars to support Ace, he would have been able to finish off the boss by now.
But as it was, Ace only managed to bring the boss down to 13% HP by the time he was about to cast VB Type 100, his finishing Burst+ move. The minions had died and then been resummoned again so they were now at 58% HP.
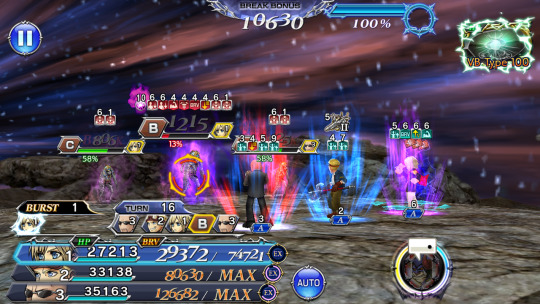
Ace’s BT+ finisher brought the boss down to 8% HP. Right after his Burst+ phase ended, the minions started sacrificing themselves. Ugh. Was hoping to avoid that.
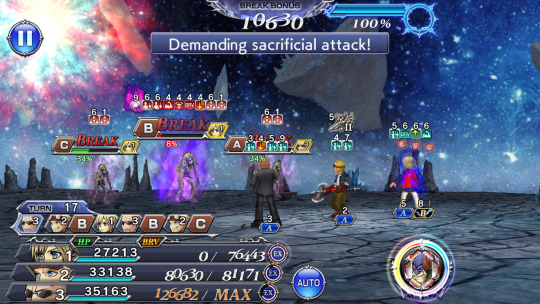
Maybe I should have just let Ace use Raines’s LD Call earlier if the minions were going to end up sacrificing themselves anyway.
My chars lost a lot of HP but at least they didn’t die. And it really wasn’t that bad since no one’s HP bars went down to the red. Rude lost more HP than the others though. Ace got broken so that probably contributed into my chars taking more damage from the attacks.

It was Rude’s turn so just had him use one of his skills to heal my chars. I think I might have used his LD, Combination Arts, but can’t remember for sure anymore.
Rude was able to get Ace and Cid back to full health but he himself was still missing a bit of HP.
It was now Cid’s turn. The boss was now down to 3% HP. IIRC, had Cid use his LD, HIghwind, and that was more than enough to finish off the boss already.
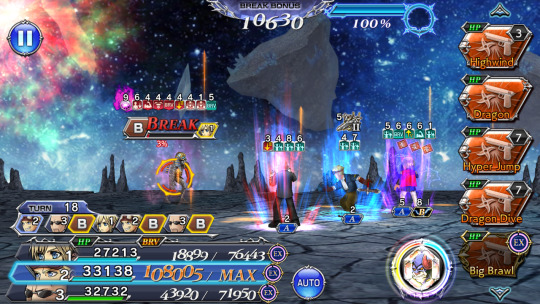
The battle ended on turn 19. Got the score and all the other mission requirements. Ended up with 2431 HP lost since I wasn’t able to heal Rude before the fight ended. But I did get a new high score.
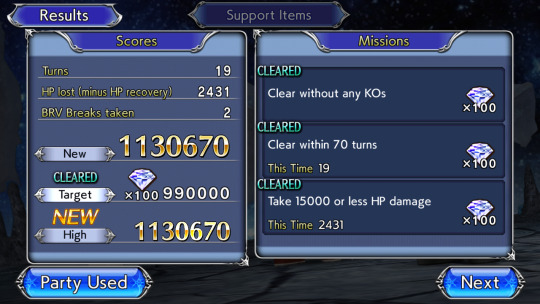
This party did really well. So glad that I was able to free up Cid Raines from Dimensions’ End: Transcendence Tier 5.
Now I’m free to use him on a future Transcendence Tier. Also pleased that I got to use both Cid Highwind and Rude on a team. Final Fantasy VII FTW! LOL.
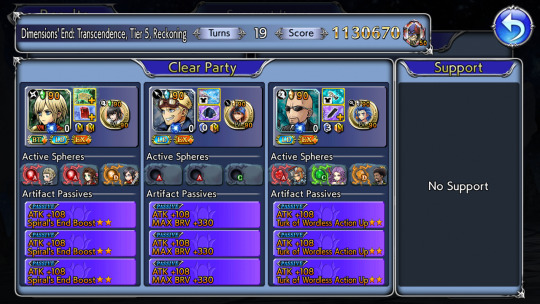
Conclusion
So, how ‘bout you? Which characters did you use to clear Dimensions’ End: Transcendence Tier 5? What do you think about the quests in this Tier? Feel free to share your thoughts and opinions by leaving a comment below or by reblogging this post.
Notes:
screenshots are from my Dissidia Final Fantasy: Opera Omnia game account
#dissidia final fantasy opera omnia#this post stars:#final fantasy 7#cid highwind#rude#aphmau#ace#final fantasy type 0#final fantasy 11#gacha games#dffoo de transcendence#dffoo lufenia fights series#games#dffoo
0 notes
Text
Dissidia Final Fantasy: Opera Omnia Dimensions’ End Transcendence Tier 15
The Dimensions’ End: Transcendence Tier 15 Lufenia (level 200) and Shinryu (level 300) quests just started in the Dissidia Final Fantasy: Opera Omnia (DFFOO) mobile game.

If you bring a char equipped with a Burst or BT weapon to a Transcendence battle, the entire party’s stats will be enhanced.
Dimensions’ End: Transcendence, Tier 15, Crucible 1 Lufenia Quest
The Dimensions’ End: Transcendence, Tier 15, Crucible 1 Lufenia quest has 1 wave with 2 enemies, the Lunatic Gaia Behemoths.
As part of the mission requirements, you need to win within 60 turns and you need to have a Green Crystal char in your party.
The Lufenia orbs will show up on battle start and they cannot be cancelled. The Lufenia orbs will be increased by 10 whenever the “count target takes magic BRV damage”.
The count will be decreased by 1 every time a char moves. It will be decreased by 2 every time the enemies move.
Decided to try soloing this fight with Rem Tokimiya from Final Fantasy Type-0 (#ad). She’s a Green Crystal char so don’t need to bring anyone else to complete all the missions and get the Perfect for this quest.

My Rem has her 15cp, 35cp, Ex, LD, BT or Burst, and Force or FR fully MLB. Her Ex has been Purpled. Her Burst has been Greened. Her High Armor has been Blued.
Rem has her Bloom Stone. She has triple perfect Artifacts and triple real Spheres.
All of her Summon Boards, Character Enhancement Boards (including her Force Boards and Force Echoes), and Force Enhancements have been completed.
Unfortunately, currently don’t have a Dagger Ultima Weapon that I can equip to Rem. So not entirely sure if she can solo this quest. Will just have to try and see how it goes. Then again, this is only a level 200 quest so it shouldn’t be that hard.
Anyway, my Summon was Bahamut. My equipped Call was Seymour Guado’s from Final Fantasy X. Seymour’s Calls debuff the enemies. His LD Call will delay all the enemies by 2 turns and remove all of their buffs.
The enemies got to move first. They used this move that delayed Rem so they got to move again. This time, they actually used an attack that dealt HP damage.
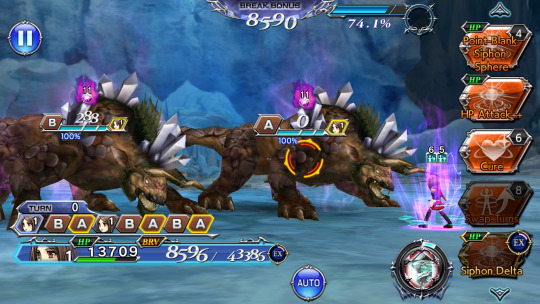
Was gonna restart the fight but since Rem didn’t die, decided to just keep going for now. Besides, Rem’s a healer so it didn’t take that long before she was back to full health.
Used Seymour’s Calls to debuff and delay the enemies. Then spammed Rem’s Cure ability a few times to speed up the charging of my force gauge.
Since this was only a Lufenia quest, got to start this fight with my force gauge already charged to 50% so only had to wait for a bit more before Rem was ready to activate her Force ability.
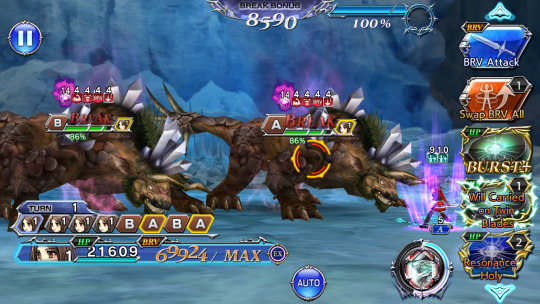
When I cast Rem’s FR ability, the enemies were already down to 86% HP. Anyway, a turn after activating Rem’s FR, went into her Burst+ phase already.

Rem dealt so much damage that the enemies died before her Burst+ mode was set to end.
By the time Rem was about to cast Will Carried on Twin Blades, her finishing Burst+ move, there was only one Behemoth on the field, and he’s been stuck at 1% HP for a while now. Have 3 more turns of force time left and the HP damage bonus was at 490%.
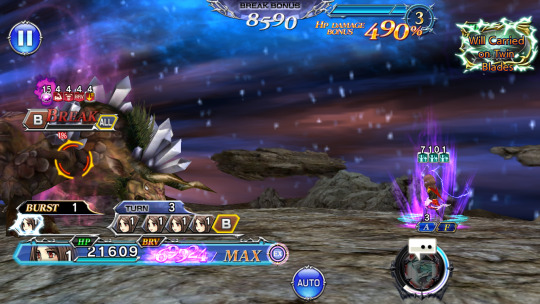
So right after Rem used her BT+ finisher, the battle ended. It was only turn 4 and didn’t even get to use my summon.
Got the score and all the other mission requirements, which also got me the Perfect.

Welp, was worried for nothing. This fight was really easy. And Rem did really well even without a Dagger-type Ultima Weapon.
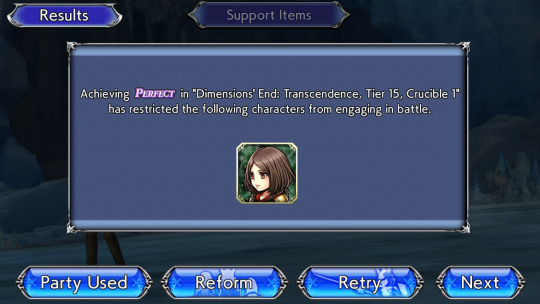
Dimensions’ End: Transcendence, Tier 15, Crucible 2 Lufenia Quest
The Dimensions’ End: Transcendence, Tier 15, Crucible 2 Lufenia quest has 1 wave with 2 enemies, the Lunatic Sergeant Imps.
As part of the mission requirements, you need to win within 65 turns and you need to have a Red Crystal char in your party.
The Lufenia orbs will show up on battle start. Once the HP of the enemies falls below 80%, the Lufenia orbs will be cancelled. But they’ll show up again once the enemies drop down to below 50% HP.
The counts will be decreased by 1 every time a char moves. It will be decreased by 2 every time the enemies move. There is no way to increase the count of the Lufenia orbs here.
Decided to duo this fight with Paine from Final Fantasy X and Edgar Roni Figaro from Final Fantasy VI. My summon was Bahamut. My Calls were Seymour’s and Lunafreya Nox Fleuret’s from Final Fantasy XV.

Lunafreya’s regular Call heals the party. Her LD Call will enable its user to get 3 turns in a row. Chars to the right of the user will also get 2 turns in a row.
My Paine and Edgar are as fully built as my Rem. Paine is currently equipped with a Level 5 of 5 Greatsword Ultima Weapon while Edgar has a Level 1 of 5 Spear Ultima Weapon. Edgar is a Red Crystal char.
Paine and Edgar are both debuffers who can deal pretty good damage. Edgar can imperil enemies and make them weak to melee, magic, and ranged weapons.
Got to start this fight with my force gauge already partially charged.
Paine got the first turn. Had her use Seymour's Calls to debuff and delay the enemies. Then I used her Additional Ability and her BT+ finisher.
One of the effects of her BT+ is that it will deal HP poison damage to the enemies each turn. It will also give the party a stacking buff. Once this buff gets to 3 stcks, the char it's on will get a free turn.
On Edgar's turn, had him use his LD to apply his Weak debuff to the enemies. This is the one that will make them weak to the aforementioned weapon types.
Soon, my force gauge hit 100%. So just had Edgar use his Additional Ability then Lunafreya's LD Call. Then I either used his BT+ finisher or activated his FR ability first. Can't remember for sure now which one I did first but it doesn't really matter either way.

By now the enemies were already down to 77% and 73% HP. And they haven't even gotten the chance to move yet.
After using Edgar's FR and BT+ finisher, used the last of his Force Echoes.
It was now Paine's turn again. Have 9 turns of force time left and the HP damage bonus was now at 315%. The enemies were down to 21% and 16% HP.
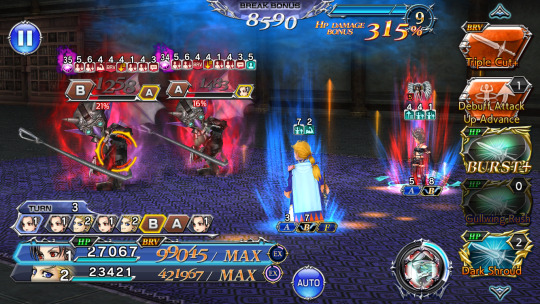
Paine gets 2 turns in a row thanks to the buff from Lunafreya's LD Call but, as it turned out, she didn't need another turn.
Had her use one of her Force Echoes, and that was more than enough to finish off both of the Imps at the same time, ending the battle on turn 3. Didn't even get to use my summon or go into anyone's Burst+ phase. LOL.
Got the sore and all the other mission requirements which also got me the Perfect.

This fight was really easy. Well, this was only a Lufenia quest so I guess that's only to be expected.

Dimensions’ End: Transcendence, Tier 15 Reckoning Shinryu Quest
The Dimensions’ End: Transcendence, Tier 15, Reckoning Shinryu quest has 1 wave with 2 enemies, the Lunatic Disaster Beasts.
Looking at the in-game info for this fight makes the mechanics of the enemies here seem really complicated.
But it looks like the most important thing to take note of is the fact that the Disaster Beasts have HP gates. This means that, upon reaching certain HP thresholds, their health won't drop down lower until they do certain things or perform certain actions.
Thankfully, for this fight, the enemies don't need to get a turn. Once they drop down to an HP gate, they will just automatically do what they need to do then the HP lock will disappear.
However, the enemies won't do their HP lock actions during a summon or inside a BT phase.
Another thing to take note of for this quest is the fact that the enemies here will automatically restore their HP by 20% of their max health when they drop down to 29% HP.
They will also lower the party’s health upon reaching certain HP thresholds.
So my team for this fight was Rem, Paine, and Edgar with The Brothers as my summon. My Calls were Seymour's, Qistis Trepe's from Final Fantasy VIII, and Cloud Strife's from Final Fantasy VII.

Quistis's Calls debuff the enemies. Her regular Call will delay an enemy by 3 turns while her LD Call will delay all the enemies by 2 turns. Cloud's regular Call initiates a launch. His LD Call will delay all the enemies by 2 turns.
Had Paine activate her BT+ finisher right away for the HP poison damage and free turns. Paine's BT+ will also give the enemies an HP silence debuff. So even if the enemies manage to get a turn, they won't be able to deal any HP damage to the party.
Had Rem speed up the charging of my force gauge. Once my force gauge was nearing 100%, had Rem and Edgar use their Additional Abilities and BT+ finishers. Made sure everyone's buffs and such had been refreshed.
Once my force gauge was fully charged, had Edgar activate his Force ability already. Then just had everyone spam their moves. For now, refrained from using any of my Force Echoes or going into a char's BT+ phase. When my force time was nearly over though, started using everyone's Force Echoes already.
By the time I only have 2 turns of force time left, the HP damage bonus was at 820%. The Disaster Beasts were down to 58% HP. It was currently Edgar's turn. Had him use his Force Echo now.

A turn or so later, summoned The Brothers already. Only have 1 turn of force time left and the HP damage bonus was at 999%. The enemies had already automatically restored their HP a turn or so ago. Now they were down to 34% HP.
It was currently Paine's turn. Had her use one of her Force Echoes. This took the enemies down to 23% HP.
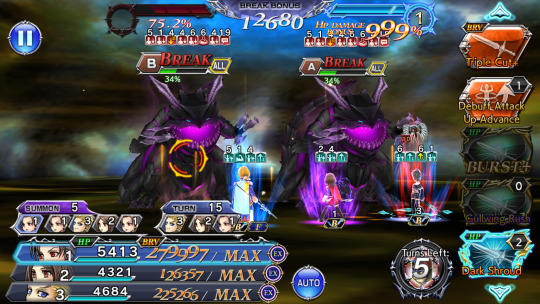
Thanks to the buff from Paine's BT+, she got another turn. So just had her use her last Force Echo.
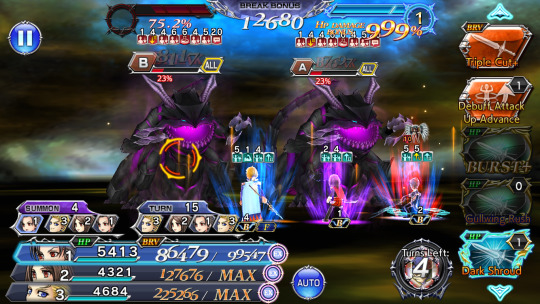
The enemies were now down to 12% HP. It was Edgar's turn again. Just had him use his LD ability since already used the last of his Force Echo earlier.
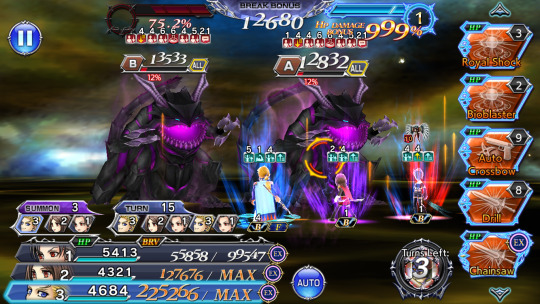
Edgar's attack took the Disaster Beasts down to 4% HP. Too bad he wasn't able to finish them off already.
My force time was over now. Don't have any more FRs I can use either so there was no point in trying to charge my force gauge again. Just had my chars spam the rest of their moves.
When my summon ended, the enemies were at 3% HP. It was Rem's turn. Had her go into her Burst+ phase.
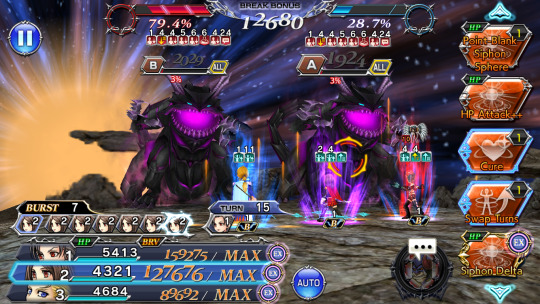
Thankfully, the enemies croaked it even before the end of Rem's Burst+ mode.
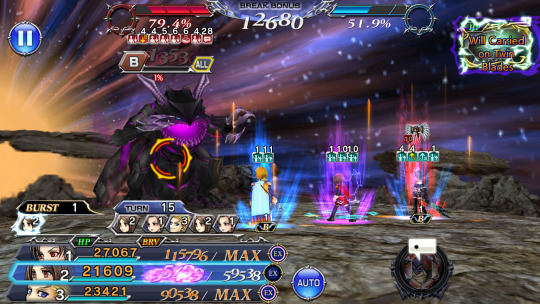
The battle ended on turn 15 as soon as Rem cast her finishing Burst+ move and her Burst+ phase was over.
Got the score and all the other mission requirements which also got me the Perfect.
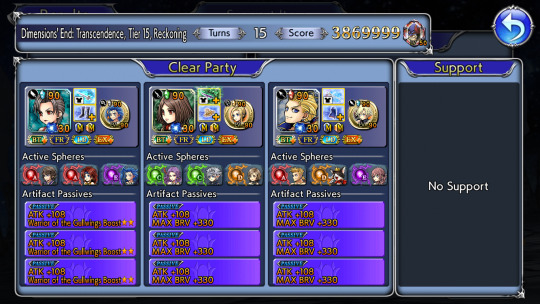
This fight wasn't that bad although the HP gates were annoying. Rem, Edgar, and Paine did really well.
Also, there’s a time-limited mission that wants players to clear the Reckoning stage of Dimensions’ End: Transcendence Tier 15 with Rem in the party so glad I was able to get this done as well.
Conclusion
So, how ‘bout you? Which characters did you use to clear Dimensions’ End: Transcendence, Tier 15? What do you think about the Lufenia and Shinryu quests in this Tier? Feel free to share your thoughts and opinions by leaving a comment below or by reblogging this post.
Notes:
screenshots are from my Dissidia Final Fantasy: Opera Omnia game account
#dissidia final fantasy opera omnia#this post stars:#rem tokimiya#edgar roni figaro#paine#final fantasy type-0#final fantasy 10#final fantasy 6#games#mobile games#dffoo#gacha games#dffoo de transcendence#dffoo lufenia fights series#dffoo shinryu fights
1 note
·
View note
Last Seen Blogs

youwillfindilluminating
that I think you will find illuminating

harishrane17
Life Mode

writesfic
冷月如霜

honstock
ほんすとっくブログ

mechadeimos
[ • • • ]