koala-teacakes
Koala-Tea Cakes
For the love of cake and the art of cake decorating
20 posts
Don't wanna be here? Send us removal request.
Last Seen Blogs

andyrivasart
Draw The Blog

noccor
Noccor

unsp0k3n-desires
Yaquesita

crycrocodiles
Daria Soloveva

amvision
Eye and Child Treatment
Text
Baking Tip - Overmixing and Scraping Down
This month’s tip is a two-in-one. The tips are related so I thought I might as well do them at the same time. I’ll start with the slightly more important one – overmixing.
What happens when you overmix?
It messes with the texture of your cake. It just results in a gummy, heavy cake instead of a nice, fluffy crumb. It can actually end up looking underbaked or raw on the inside. If your cake has a glossy, almost jelly-like look on the inside, you have over mixed it.
How to prevent it?
Don’t overmix duh. Ok jokes aside, you will be fine to mix to your heart’s content until you add eggs to your batter. Most cake recipes start with creaming your butter and sugar. At this point, there is nothing to worry about. Once you start adding your eggs, only mix until just combined. This applies once you start adding wet and dry ingredients – just mix until you can’t see the individual ingredients anymore.
That brings me to the second tip – scraping down. Scraping down the sides of your bowl as you go helps with combining the ingredients well without mixing longer (obviously then resulting in the gummy cake.) Use a rubber spatula to scrape down any ingredients left on the side of the bowl, so that it can be incorporated into the batter. Do this regularly throughout the mixing process.
That’s it. They’re not the most mind-blowing tips but they do make all the difference.
#baking tips#baking#overmixing batter#scraping down batter#cake batter tips#cake tips#koala-tea cakes
29 notes
·
View notes
Text
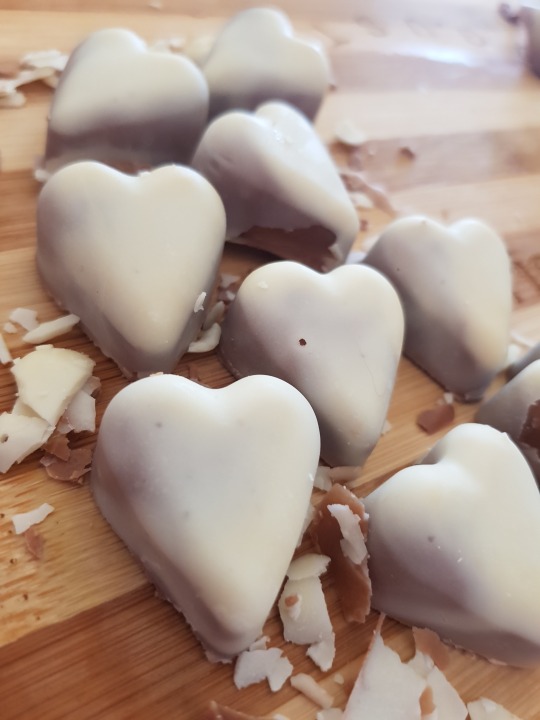
What Inspires Me - Cake Pops

Let me just start off by saying that I did not like cake pops at first. Like at all. With making my cakes, I ended up with a lot of cakes scraps and my hubby wasn’t getting to eating it all. So I decided to give cake pops a second chance. And now I’m not turning back!

They’re so fun and yummy, and you get to use all your leftover cake and icing. Also, if a cake comes out a bit dry or over-baked, you don’t have to throw it away (YAY!) As you can probably tell, I don’t like waste. It just feels so wrong throwing away perfectly good cake.

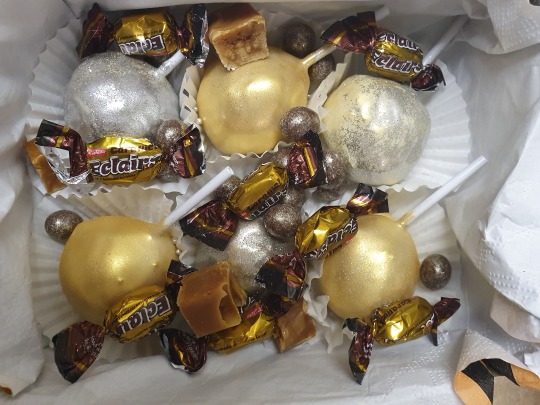
But that’s not the only advantage to cake pops. You can do so much with them, and they’re fun to make – especially with others (I love making these with my hubby – weekly date night CHECK.) Once you’ve mastered the cake pop, definitely try moulding them into different shapes (check out the hearts I did in the pic, and let me know what you think) or making cakesicles.
And don’t hold back! Play with colours, textures and shapes. This is basically cake clay, so the sky is the limit. I would love to see your creations so please share them!
8 notes
·
View notes
Text
Vanilla Cake
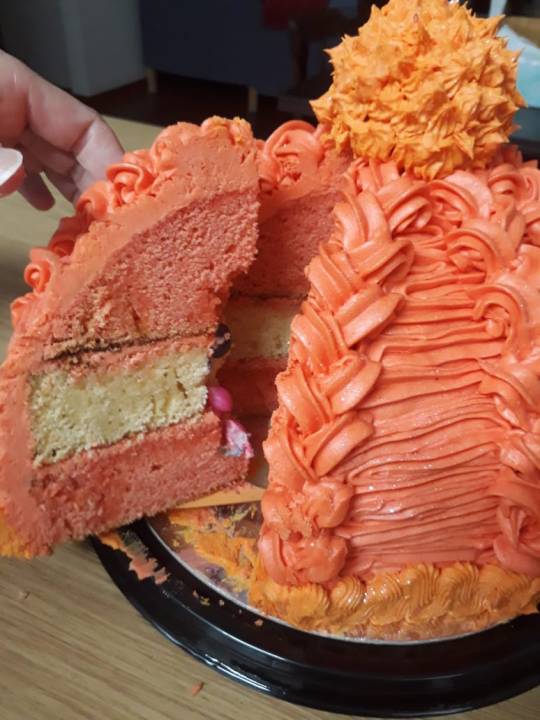
This gorgeous, versatile cake is so underrated. In fact, it has become a rather negative comment; calling someone “vanilla” now means boring or bland. I think this is quite a travesty. I find that velvety, subtle flavour tasty, and I absolutely LOVE the way you can customise it. Think of it: rainbow cakes, themed cakes, sculpted cakes. Really, the possibilities are endless. Therefore this month I want to highlight this beautiful flavour and hopefully give it some of the credit it deserves.
This vanilla cake recipe is my favourite to use because it is sturdy (perfect for tall or sculpted cakes) but still absolutely delicious! (Also, the scraps make wonderful cake pops.) One note though: DO NOT OVERMIX the batter at any point after adding the eggs!
Ingredients:
1 cup butter
2 cups sugar
2 teaspoons vanilla essence
4 eggs
2 ½ cups cake flour
2 ½ teaspoons baking powder
½ teaspoon salt
1 cup milk
Method:
Preheat oven to 180oC and prepare pans.
Cream together the butter, sugar and vanilla.
In the meantime, sift together the dry ingredients.
Add the eggs into the butter mixture two at a time. Beat until just combined after each addition.
Alternate adding the dry ingredients (in 3 parts) and the milk (in two parts). i.e. Start and end with dry ingredients.
Pour the batter into the prepared cake pans and bake until a toothpick inserted in the centre comes out clean. This is about 40 minutes for two 8” round pans.
Let cool completely before icing. (Cooling racks are perfect for this.)
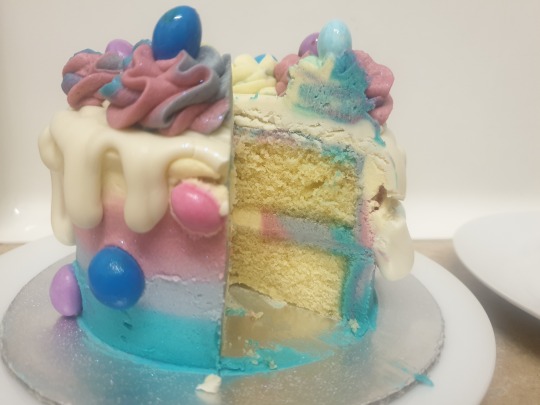
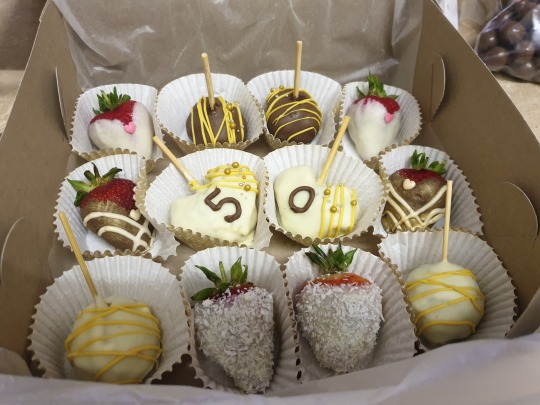
Have fun with this recipe; try it in different shapes and colours, try it with different fillings, and try it with fruits and flowers. And when you do, don’t forget to show me!! I’ve included some of my creations in this post so while you get ready to make your own, let me know which is your favourite.
#vanilla#vanilla cake#very vanilla#vanilla is delicious#vanilla cake recipe#recipe#cake recipe#everybody loves cake#cake#koala-tea cakes
17 notes
·
View notes
Text
Carrot Cake Recipe
I was recently asked to make a carrot cake for a special couple. I had a base recipe but needed to make some changes. I tried some different ingredients here and there, and this was the result. I am really happy with the way it came out – it is yummy (this coming from someone who hates carrots) and a bit sturdier so it’s great for taller or fondant-covered cakes. It is also easy to make so don’t hesitate to give it a try.
Ingredients:
2 ½ cups cake wheat flour
1 tsp baking powder
1 tsp baking soda
1 tsp ground cinnamon
¾ tsp salt
½ tsp ground nutmeg
340g butter (unsalted)
1 cup brown sugar
½ granulated sugar
3 eggs
2 tsp vanilla essence
½ cup orange juice
450g cups grated carrot (2 ¾ cups)
Optional: nuts
Method:
Preheat the oven to 180C. Prepare pans/tins.
Whisk together the dry ingredients (not carrots).
Use a mixer to cream together the butter, sugar, and vanilla.
Add the eggs one at a time, and mix until just combined.
Add juice and carrots and beat until well combined.
Add in flour mixture in three parts, mixing between each addition.
If using nuts, add them now and mix. Do not overmix.
Pour batter into prepared pans/tins and bake until a toothpick inserted into the middle comes out clean (approx. 30 minutes).
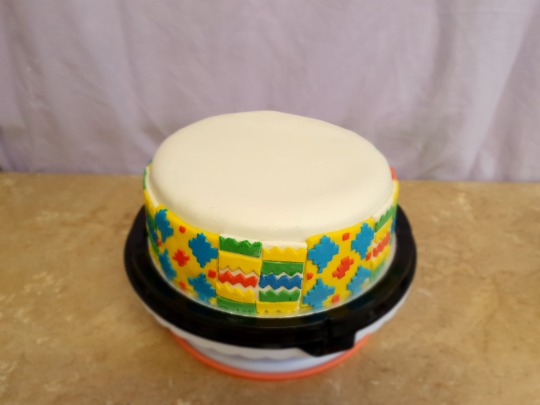
See, simple. It’s definitely worth a try! And then let me know what you think of it and tag me on the photos – would love to see what creative ideas you come up with.
7 notes
·
View notes
Text
Baking Tip - Toothpicks!
Since we’re having fun with sugar cookies this month, I thought I’d share one of my favorite baking tools – the humble toothpick. You can do SO much with toothpicks. I always keep a bunch of them at hand. With regards to sugar cookies, toothpicks are perfect for flooding. And cheaper than buying a special tool. Don’t get me wrong, if you are going to be doing a lot of cookies, go ahead and get yourself a pretty flooding tool, but in the meantime, or for home bakers, toothpicks work great. You can correct little flaws, pop air bubbles, and of course, flood the royal icing. Just make sure that you give it a wipe so that the icing doesn’t crust on it and flake off onto your artwork.
I also use toothpicks quite extensively in my cake decorating. For example, I use them to marble cake batter, mark where the front of the cake is, sketch where I will pipe lettering, add little bits of coloring to icing, and to draw or write with. To name just a few.
What do you like to use toothpicks for??
2 notes
·
View notes
Text
Trends I Love... Sugar Cookies
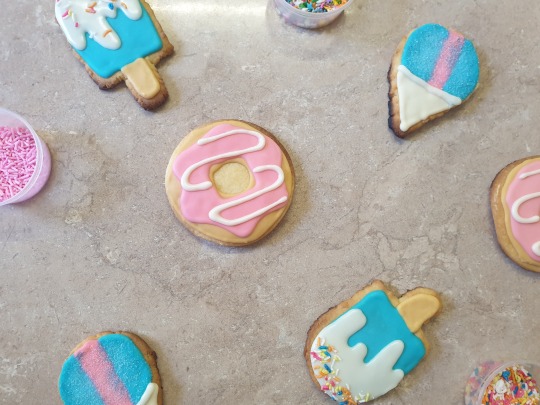
Ok, I am well aware that this is not “new” or “trendy” but I LOVE sugar cookie decorating right now. The cookie bug has bitten and it has bitten HARD. I just love all the exciting things you can do with cookies and royal icing. Initially the beauty and variety of the humble decorated sugar cookie really drew me (see the photo for some of my summertime cookies) but then I discovered 3D cookie art! It’s amazing! The gorgeous sculptures and absolutely realistic-looking creations leave me in awe. You should definitely check it out - there’s everything from animals to buildings to out-of-this world creations. What skill and artistry! Cake decorating is what I love most but I am loving this cookies thing! So watch this space as I try different things and work on improving my own skills (and hopefully yours too.)
1 note
·
View note
Video
This month I’m sharing TWO recipes. Because some things just go better together… Like peanut butter and jam, coffee and donuts, and sugar cookies and royal icing. Yes, I know that last one isn’t an actual saying, but it should be! I loooove the taste of decorated sugar cookies so much that I crave them at the weirdest times. And aren’t they just absolutely gorgeous!? So here are my favorite sugar cookie and royal icing recipes….
Sugar Cookies
Aaaah, the humble sugar cookie. You can do so much with these, and they are super simple to make. You can eat them as is, or decorate them with some royal icing– the possibilities are endless! This recipe does not require rest time, so you can make and bake straight away. Enjoy!

Ingredients:
1 cup butter
1 cup sugar
2 tsp vanilla essence
1 egg
2 ¾ cups sieved flour
1 tsp sieved baking powder
Method:
Beat butter, sugar and vanilla on high speed.
In a separate bowl, combine flour and baking powder.
Add egg to butter mixture, and beat again until combined.
Add dry ingredients to the wet ingredients in 3 additions. Mix between each addition.
Transfer dough to lightly floured surface and roll out to desired thickness.
Cut out shapes and place on a prepared sheet tray.
Bake at 180C until the cookies have golden brown edges.
Let cool before decorating or eating as is.
Notes:
Makes about 20 10x10cm round cookies.
Can keep for about 2 weeks in an airtight container.
Royal Icing
I held back from making this for far too long. I honestly got scared off, believing royal icing is super hard to make. It’s not! Thing is, now I’m addicted. Not only do I love the taste of sugar cookies with royal icing, I also love how gorgeous they can look.
Quick tip: I use 15 second royal icing to flood my cookies. That means it takes approximately 15 seconds for the icing to smooth out after “interrupting” it. i.e. in a bowl, draw a line in the icing using a knife or spatula and count how long it takes to return to normal. If it’s longer than 15 seconds, it’s too thick; if it takes less than 15 seconds, it’s too thin.
Note about flavoring: I usually use 2 teaspoons of vanilla essence, but 1 teaspoon lemon extract is also common. If you would like to use a stronger flavoring, you usually wouldn’t need more than ½ a teaspoon.

Ingredients:
4 large egg whites
4 cups sifted icing sugar
2 tsp vanilla essence (see notes)
Method:
Place egg whites in a clean, large bowl. Use a mixer at high speed and beat until foamy.
Gradually add the icing sugar and vanilla essence.
Beat at high speed until thickened.
Add more water (tiny amounts at a time) for a more runny consistency. Add more icing sugar for a thicker consistency.
And that’s it!
Easy right? Making these can be such a fun family-time project (or date night😉). They also make great gifts for teachers, friends and loved ones (anniversary presents CHECK). If you’d like to see me decorate some of these, take a look at my YouTube channel. As delicious as these cookies are, they might just be more fun to make than to eat. Let me know in the comments which side you’re on “making” or “eating.”
#sugar cookies#royal icing#recipes#easy and delicious recipes#cute cookies#koala-tea cakes#family time project#date night idea#decorating cookies
12 notes
·
View notes
Text
Working with Chocolate
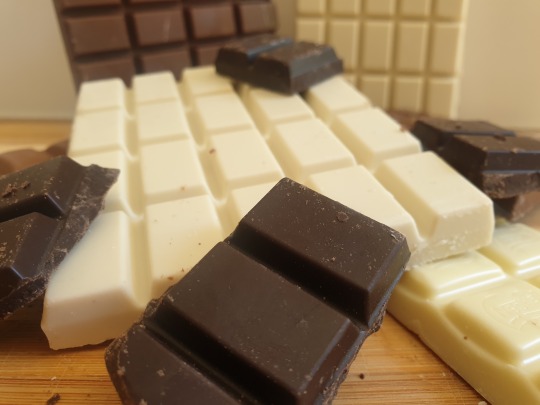
If you’re anything like me, you would have gone most of your life thinking chocolate is chocolate is chocolate. Shocker!! It’s not! I learned this the hard way. My hubby and I wanted to make some chocolate-covered goodies as anniversary gifts for family. We used regular grocery store chocolate. What a mess! It didn’t set; there was melted chocolate everywhere; the goodies were smudged – it just was not pretty. This made me do some research and look into it more because “normal” chocolate is so yummy but not easy to use, whereas baking chocolate is super easy to use but not as tasty. So here are the basics and my suggestion for overcoming chocolate drama.
Keep reading
6 notes
·
View notes
Text
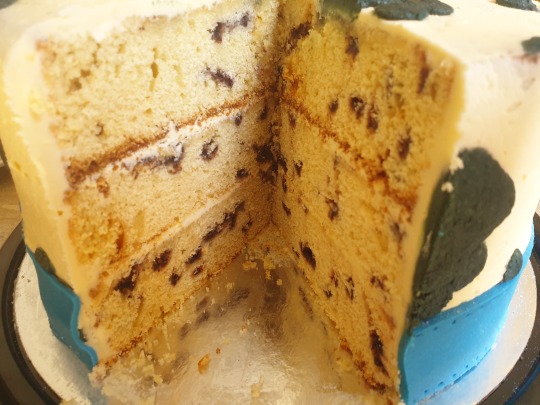
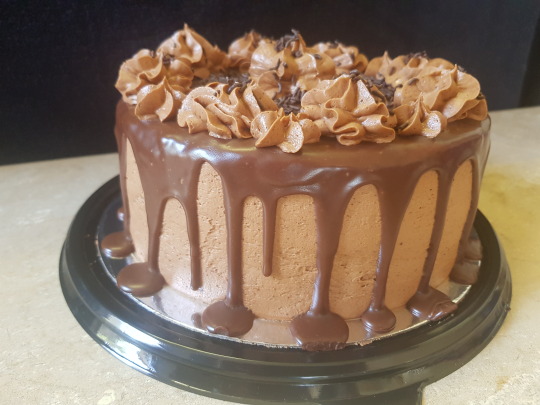
Chocolate Cake Upgrade
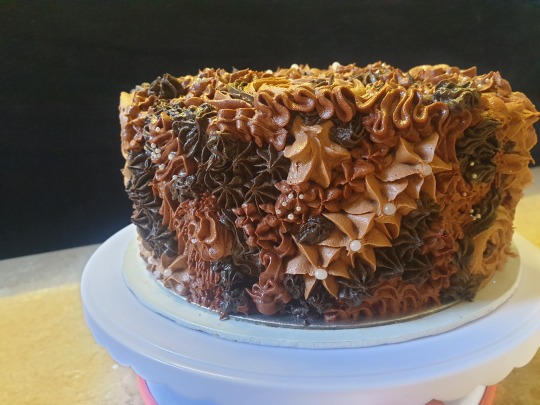
Last week I posted a super simple chocolate cake recipe. Today I wanted to help you guys give it an easy upgrade. In fact, this tip takes any chocolate cake to the next level – and it is super easy!
Keep reading
6 notes
·
View notes
Text
Working with Chocolate
If you’re anything like me, you would have gone most of your life thinking chocolate is chocolate is chocolate. Shocker!! It’s not! I learned this the hard way. My hubby and I wanted to make some chocolate-covered goodies as anniversary gifts for family. We used regular grocery store chocolate. What a mess! It didn’t set; there was melted chocolate everywhere; the goodies were smudged – it just was not pretty. This made me do some research and look into it more because “normal” chocolate is so yummy but not easy to use, whereas baking chocolate is super easy to use but not as tasty. So here are the basics and my suggestion for overcoming chocolate drama.
There are two basic types of chocolate; eating chocolate and baking chocolate. Eating chocolate is the one we typically find at a grocery store and eat as is. It has a high fat content so it doesn’t set as easily or as quickly as baking chocolate. To make it more “user friendly” it needs to be tempered. Baking chocolate, on the other hand, is more stable. It is often sold as baking, cooking, or compound chocolate. Because it sets a lot quicker than eating chocolate, it can be great to use in hotter climates, but if you are making decorations like a chocolate collar, you don’t have much time to attach them. All-in-all, each one of them has its own advantages and disadvantages. When it comes to cake decorating, I find what works best in most situations is a combination of the two; 2/3 baking chocolate and 1/3 eating chocolate (you can play around with this ratio to find what works best in your area.) This also makes it taste better than just using baking chocolate by itself - because let’s be honest, taste is the most important thing.
This is a life-changing little trick. I hope it helps you and makes your life easier too! Let me know what ratio works for you guys, and what exciting things you are creating with chocolate. Happy chocolate-ing!
6 notes
·
View notes
Text
Chocolate Cake Upgrade
Last week I posted a super simple chocolate cake recipe. Today I wanted to help you guys give it an easy upgrade. In fact, this tip takes any chocolate cake to the next level – and it is super easy!
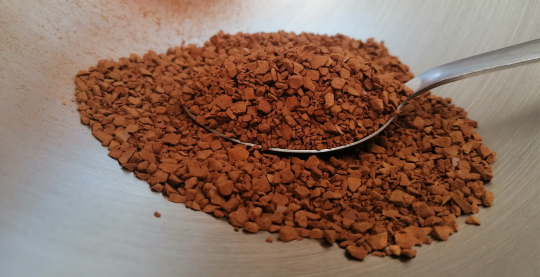
Simply add some coffee to your mix (coffee is always the answer;)). Coffee enhances the flavor of the chocolate (and who wouldn’t want that?). Simply add a tablespoon of instant coffee powder to your recipe. A shot of espresso works perfectly too.
A secret to a moist and tender chocolate cake is using buttermilk (in most recipes, this can be substituted with vinegar). Using oil instead of butter also helps to give a light texture to a chocolate cake. A combination of these two ingredients helps to counteract the cocoa (cocoa can lead to dryer cakes.)
And voila, instantly more flavorful chocolate cakes. Anyone say “decadent?”
6 notes
·
View notes
Link
Watch me decorate these cookies and let me know which one is your favourite!
5 notes
·
View notes
Link
Watch me decorate these cookies and let me know which one is your favourite!
5 notes
·
View notes
Text
Easy Chocolate Cake
Let’s just talk about how amazing easy recipes are! Who’s got time for long, complicated procedures, and missioning with twenty bowls (dishes are THE WORST)? In this crazy busy world, nobody has time for that. So I absolutely love turning to quick and easy recipes. This one is great – I mean chocolate and easy – can’t get any better than that. The only thing that requires a little bit of extra effort is sifting the dry ingredients. I have learned the hard way that that is definitely not a step to be skipped. I usually make this as a sheet cake but go ahead and do you. Here it is…
Ingredients:
1 ½ cup Sugar
1 cup Oil
1 cup Water
6 Eggs
2 cups Flour
½ cup Cocoa Powder
1 tsp Vanilla Essence
6 tsp Baking Powder
Method:
Preheat the oven to 180C.
Grease pan/s.
Add all the ingredients into a large bowl (don’t forget to sieve the dry ingredients!) and mix well. Do not overmix.
Pour the batter into prepared pan/s.
Bake for 20-25 minutes or until a toothpick inserted in the middle comes out clean.
And that’s it. How easy is that?! You’re welcome;)

I would really love to see what you create with this recipe so please share pics! And if you like this recipe/post, and would like to buy me a coffee, you can do it here: https://ko-fi.com/koala_teacakes. Thanks so much and until next time; happy chocolate-ing!
#chocolate cake#easy recipe#easy chocolate cake#chocolate makes the world go round#chocolate#koala-tea cakes
4 notes
·
View notes

Photo

Hey guys! I have recently started a YouTube channel. Go check out my latest video to learn how to make adorable (and super simple) koala cookies.
https://youtu.be/IdbjJe46xxs
Would love to hear from you on what you thought of the video. If you tried making these cookies please share pics!!!
12 notes
·
View notes
Photo
Hey guys! I have recently started a YouTube channel. Go check out my latest video to learn how to make adorable (and super simple) koala cookies.
https://youtu.be/IdbjJe46xxs
Would love to hear from you on what you thought of the video. If you tried making these cookies please share pics!!!
#koala-tea cakes#koala cookies#sugar cookies#royal icing#simple recipe#KTC#KTBA#how to video#tutorial
12 notes
·
View notes