#chaotiresources
Photo
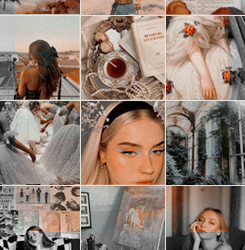
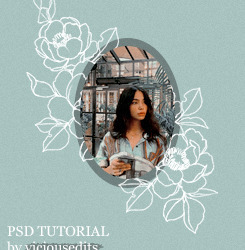
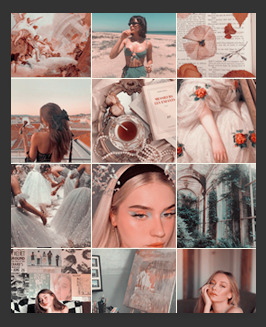
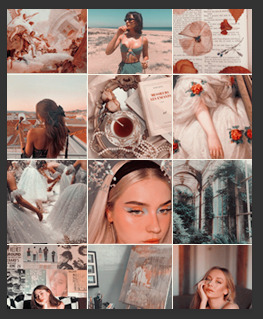
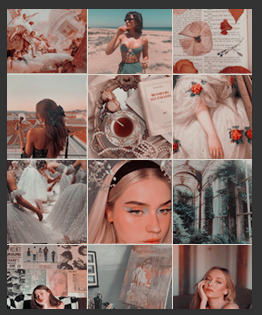
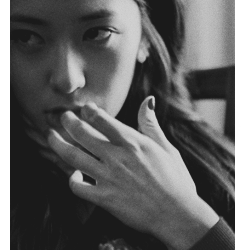
psd tutorial #2 by starfalledits
please, if this tutorial was useful for you in any way, like/reblog the post
if you’re a lovely person, follow me on twitter @vicxtorvale.
and remember treat people with kindness, always.
PORTUGUÊS
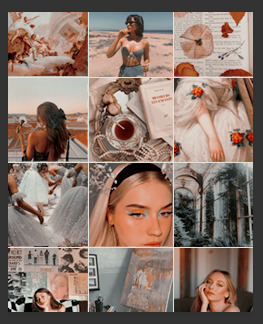
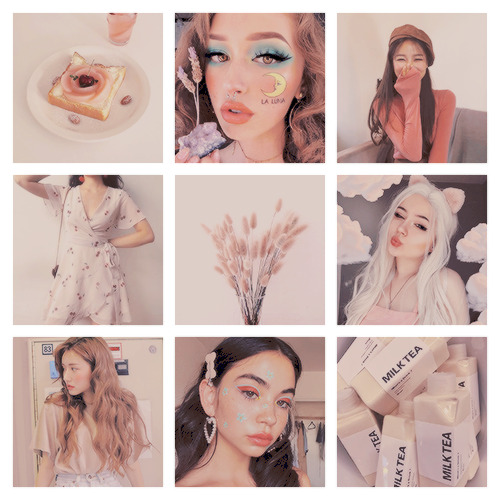
Oi morecosssssss. Como estão? Espero que em casa e bem <3 Um anony me pediu tutorial de psd laranjinha e cá estou eu. Vamos ao tutorial!
1. Curvas - para ajustar a luminosidade da imagem


2. Pesquisa de Cores - vamos usar a pesquisa de cores para usar um ‘filtro’ pronto do photoshop e dar uma mudada drástica nas cores e ficar com esse aspecto rosado. Use o filtro 2Strip.look e deixe a opacidade em 47%:


3. Misturador de Canal - para intensificarmos o tom rosado e mudar algumas cores como o verde em azul


4. Cor seletiva - para mexermos com as partes vermelhas e amarelas, para caminharmos para o laranja que todos amamos


5. Curvas - para deixarmos as partes com mais brilho opacas.


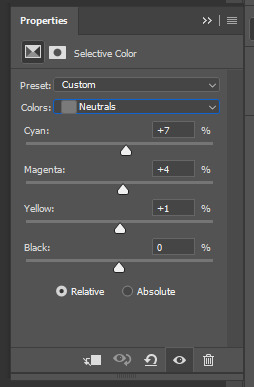
6. Cor seletiva - para deixarmos as cores mais acizentadas e intensificar as áreas escuras


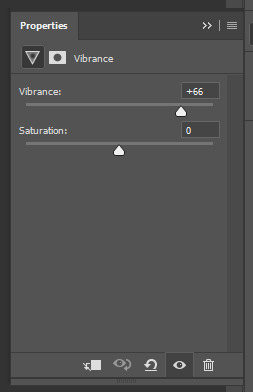
7. Vibração - para acender um pouco as cores

8. Mapa gradiente - inverta ele para darmos mais um pouco de efeito opaco. Deixe o modo de mesclagem dele em luz suave e a opacidade em 21%


9. Balanço de cores para tirar um pouco o amarelo predominante

10. Cor seletiva - para mais uma vez intensificarmos as partes vermelhas e amarelas, e deixar um pouco mais opaco as áreas com mais brilho


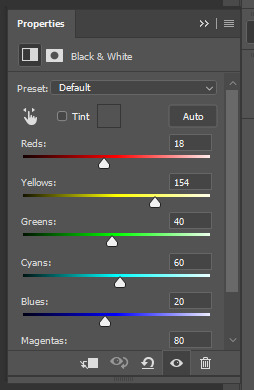
11. Preto e branco - para darmos uma pequena mudada na luz. Deixe o modo de mesclagem em diferença e a opacidade em 12%

12. Brilho/Contraste - para ajustar um pouco a luz


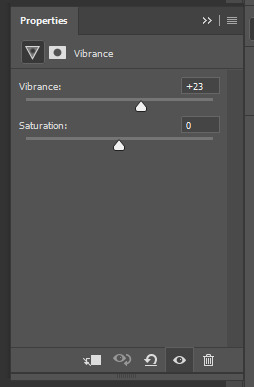
13. Vibração - para mais uma vez dar um pouquinho só de intensidade nas cores

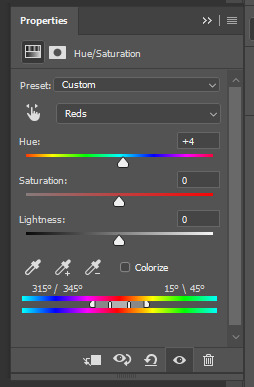
14. Matiz/Saturação - para alterarmos o tom das partes com ciano


15. Cor seletiva - para mudarmos de novo o tom do ciano, darmos o tom mais alaranjado do vermelho e intensificarmos as áreas mais escuras


16. Matiz/Saturação - para finalizarmos com um tom mais alaranjado

É isso pessoal, espero que tenha ajudado, caso tenha alguma dúvida é só enviar uma ask que irei te ajudar. SE ALGO FOI ÚTIL PARA VOCÊ, POR FAVOR, DÊ LIKE/REBLOG NO POST. Vejo vocês no próximo tutorial.
ENGLISH
Hi bbyssssss. How's it going? I hope at home and well <3 An anony asked me a orange psd tutorial and here I am. Let's go to the tutorial!
1. Curves - to adjust the brightness of the image
2. Color lookup - let's use color lookup to use a photoshop 'filter' and give a drastic change in colors and get that rosy look. Use the 2Strip.look filter and leave the opacity at 47%:
3. Channel Mixer - to intensify the rosy tone and change some colors
4. Selective color - to adjust the red and yellow parts, open the way to the orange we all love
5. Curves - to make the parts more glossy opaque
6. Selective color - to make the colors greyer and intensify the dark areas
7. Vibrance - to light up the colors a little
8. Gradient map - invert it to give us a little more opaque effect. Leave its blending mode in soft light and opacity at 21%
9. Color balance - to take a little of the predominant yellow
10. Selective color - to once again intensify the red and yellow parts, and leave a little more opaque the areas with more brightness
11. Black and white - to give a little changed in the light. Leave blending mode in difference and opacity at 12%
12. Brightness/Contrast - to adjust the light a little
13. Vibrance - to once again give a little bit of intensity in the colors
14. Hue/Saturation - to change the tone of the cyan parts
15. Selective color - to change the tone of the cyan again, give the more orange shade on the red and intensify the darker areas
16. Hue/Saturation - to finish with a more orange tone
That's it guys, I hope it helped, in case you have any questions just send an ask and I will help you. IF SOMETHING WAS HELPFUL TO YOU, PLEASE LIKE/REBLOG THE POST. See you in the next tutorial.
#itsphotoshop#whoaps#completeresources#chaotiresources#psd tutorial#psd tutorials#tutorial#tutorials#lily#mine#requests
216 notes
·
View notes
Photo

PSD #149 (download)
If you make the download please give your like or reblog this post.
Don’t copy or claim it as your own. DONT REPOST
I hope you enjoy!
Please follow ♥
478 notes
·
View notes
Photo

Coloring by MESSYARTS
✿ PSD 104 ✿
If you happened to hit the download button:
Do not forget to like or reblog
Do not claim it as yours
Feel free to adjust some layers
#psd#psd for icons#completeresources#wasirauhlpsds#chaotiresources#yeahps#resourcehive#allresources#itsphotoshop#peachresources#quirkyresources#biresources#favereblog#onlyresources
128 notes
·
View notes
Photo
psd number 06 by twtarchive (dark scenes)
fav or reblog if you save
don’t repost or claim as your own
#sistaround#wasirauhlpsds#dailypsd#completeresources#favereblog#sibylresources#psds#psd#psd for dark scenes#allresources#resources#dark scenes#poc friendly psd#chaotiresources#yeahps#wehearttutorials#itsphotoshop
43 notes
·
View notes
Photo
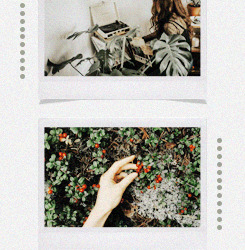
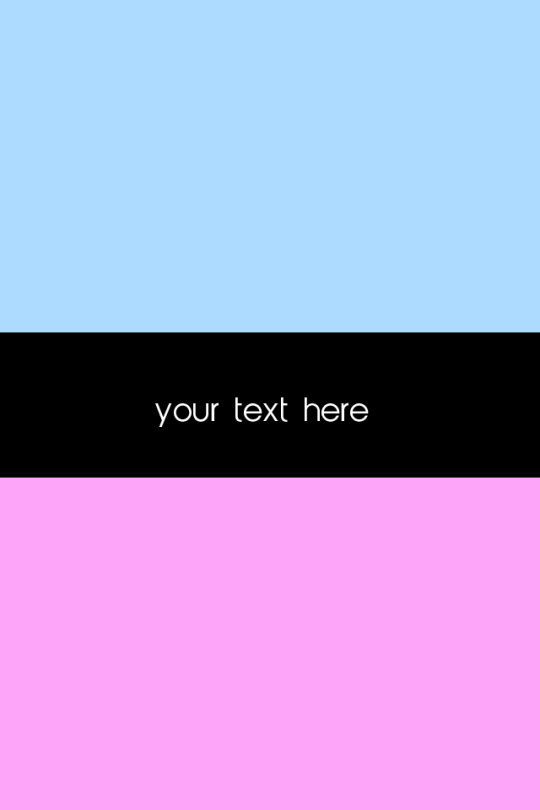
POLAROID PNG PACK #2 MADE BY SELENAPASTEL. If you download the pack, please like or reblog the post, it’s very important. Don’t redistribute or claim a your own, it’s not a very cool thing to do. Thank you and enjoy honey <3 If you want to download the pack just click here.
#whoaps#completeresources#itsphotoshop#yeahps#chaotiresources#pack#packs#png pack#png packs#lily#mine
806 notes
·
View notes
Photo

T E M P L A T E #07 by ghoxtscreen (xbatgirl DA) Please, don’t claim as your own and not repost.
Like or reblog if you use / do download.
(download here)
#templates#template#twitter template#template twitter#resource#resources#completeresources#resourceme#chaotiresources#itsphotoshop#yeahps#yeahsource#stuckreblogs#reblogfi#reblogxs#xreblogs#brmaker#huntereditreblog
37 notes
·
View notes
Photo

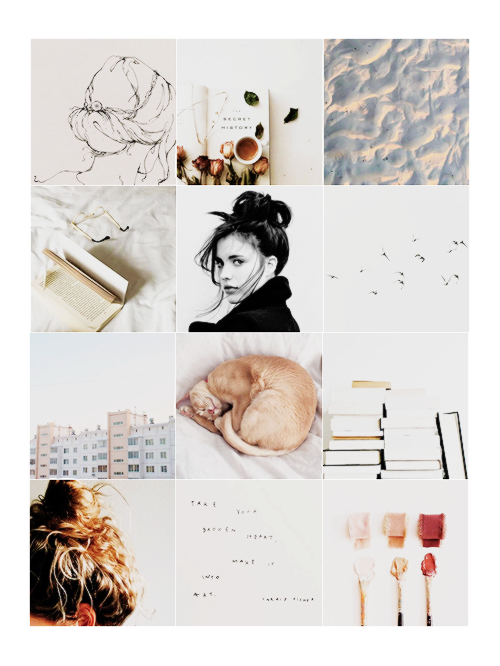
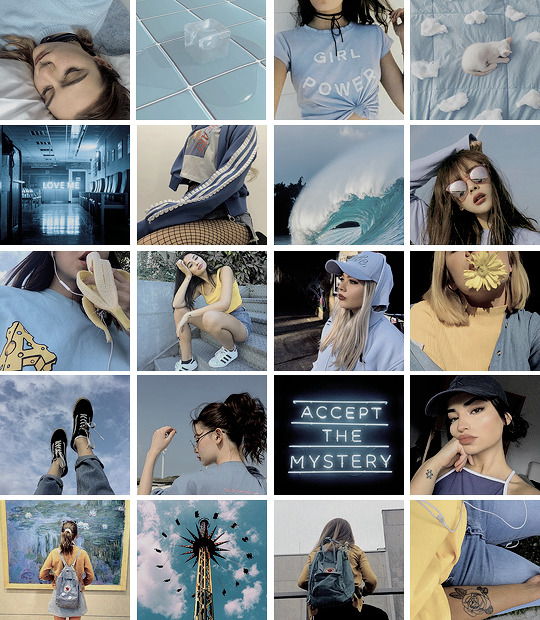
100+ misc icons made by leejordan. please like or reblog if you take any. check out my fandom icons here.
#icons#misc icons#yeahps#resourcehive#completeresources#chaotiresources#creatorsresourcenetwork#resources#aesthetic icons#resourcemarket#mine#sabrinasfamily
419 notes
·
View notes
Photo

[03] LIE - PSD
If you have downloaded make sure you give fav or reblog.
Don’t repost it, please. [DOWLOAD]
72 notes
·
View notes
Photo
THIRTY PIECES OF SILVER.psd
don’t repost or claim as your own;
please, like or reblog if you save;
more resources on ROSIEPSDS.
#yeahps#completeresources#itsphotoshop#colorspreview#chaotiresources#psd#psds#resources#colorings#random
157 notes
·
View notes
Text
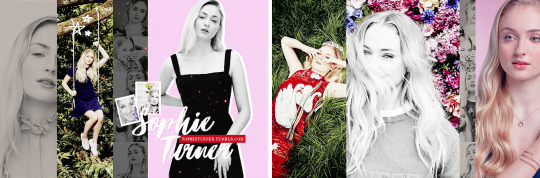
Fansite Header Tutorial by Arizona Designs
Finally here it is! So this is a very easy and quick fansite header tutorial. You don’t really need to be a professional using Photoshop (I am not btw) to create this header. I use cs 5 but you can use whatever version you own. I’m from Spain so my photoshop is in Spanish and I tried to translate the tools in English so if you don’t understand something just let me know. And if you speak Spanish and want me to translate this into Spanish let me know because that would be so easy for me. Hope you like it and if you recreate it let me know, I’d love to see your version of the header :)
1. First thing is choosing your header size, mine is 1366x450, this is up o you. Next, depending on the pictures I normally divide the space of the header using the guides [how to show guides here], this might change along I’m making the header.
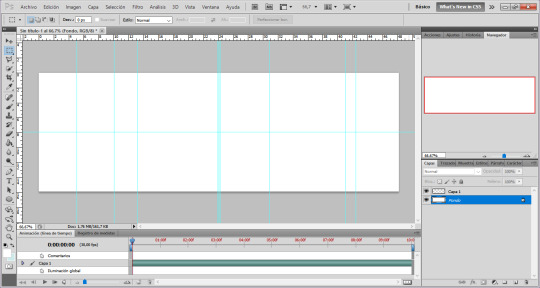
2. Now I placed the first picture I wanted and using the quick selection tool I selected Sophie’s silhouette and turn it into black and white and the background in color [see how here].
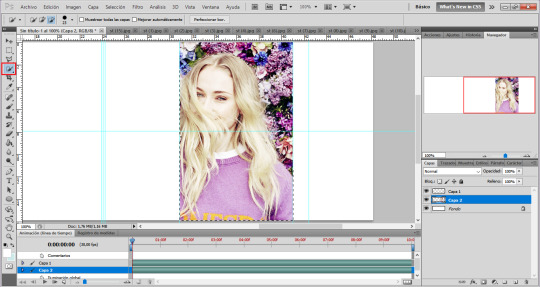
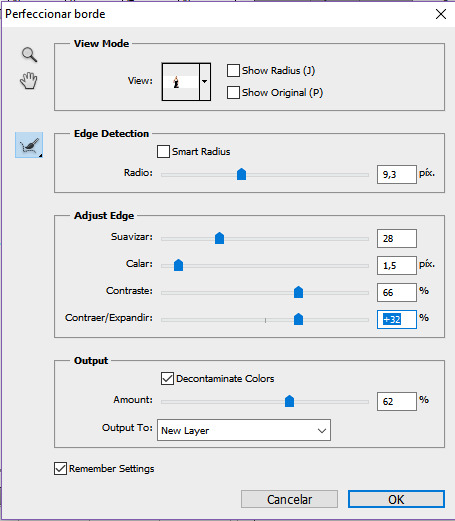
3. With the same tool I told you before, I did the same thing with this picture but in this case I delete the background. I also used the option refine edges to make it look more even.

These are the setting I used for my picture [the name of the settings in English]:
4. I used this color #f4cdef as my new background and I turned the picture into black and white. Then I duplicate the Sophie picture and place it under the original one. Click the layer style option and then go to color overlay, choose white, or the color you want, and click okay. Now you are slightly going to move this new layer to the left or right depending on where you want to place it.

5. I added a few pictures more and with this one I wanted to match the background with the other one so I used the quick selection tool again. Then go to image/adjustments/hue-saturation and using the setting you can see below I change the background color.

6. Then I just added some more pictures to fill in the header.
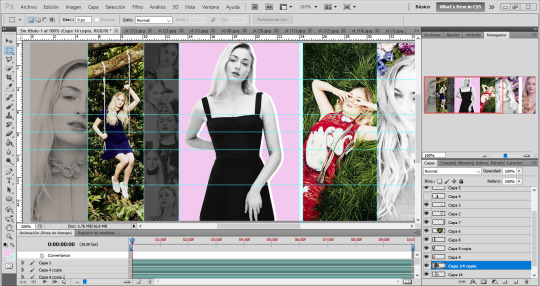
7. Here I added a few textures to my header, the title and those little pictures of Sophie which I think looks so cute. In case you wanna know, the fonts I used are called “Hubster”, for the main title and “BodoniFLF” for the url.
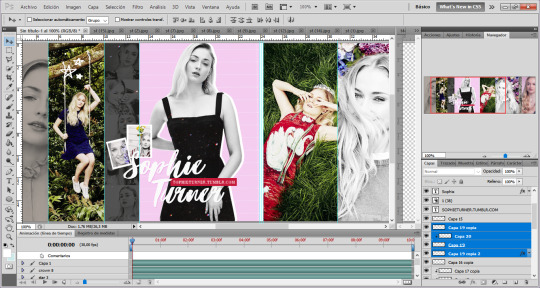
Lastly I added a PSD and a sharpen action and that’s it. Let me know if you want me to clarify something or whatever. Sorry about my possible English mistakes, is not my mother tongue.
Just to let you know, I'm actually accepting orders so if you want a personalized header contact me :)
*The bold word are links that shows you how to do it. The pictures are from Google, not mine, just because my photoshop is in Spanish so it would be easier for you with the English version.
#tutorial#header tutorial#itsphotoshop#yeahps#completeresources#chaotiresources#fansite header#fansite
212 notes
·
View notes
Photo
psd.52: BUBBLE BLUE // by LUVSOURCERS.
please, like or reblog if you save, this is important! you can adjust your way, but without removing the credits. respect my work, don’t repost and don’t say that you did it. you can find more psds here. i hope you enjoy ♡ {download}
#psd#psds#psd for icons#for icons#for icon#for random#psd for random#site model psd#site models psd#psd site model#psd site models#evy#random psd#psd random#yeahps#yeahsource#chaoticresources#chaotiresources#peachresources#completeresources#rresources#rreblog#resourceme#itsphotoshop#whoaps#quirkyresources#wasirauhlpsds#reblogxs#resourcesnetwork#selenapastel
259 notes
·
View notes
Photo

PSD #150 (download)
If you make the download please give your like or reblog this post.
Don’t copy or claim it as your own. DONT REPOST
I hope you enjoy!
Please follow ♥
364 notes
·
View notes
Photo
Coloring by MESSYARTS
✿ PSD 102 ✿
If you happened to hit the download button:
Do not forget to like or reblog
Do not claim it as yours
Feel free to adjust some layers
#psd#psd for icons#completeresources#wasirauhlpsds#chaotiresources#yeahps#resourcehive#allresources#itsphotoshop#peachresources#quirkyresources#stylenanda#biresources
277 notes
·
View notes
Photo

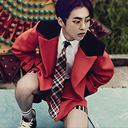
dance with somebody psd by psplastic.
download here; do you enjoy it? please leave your like love to me.
#m#psd#psds#aestheitcs#psds for icons#orange psd#orange tones#miley cyrus#zayn#joe kerry#yeahps#itsphotoshop#itscoloring#stuckreblogs#reblog#allresources#completeresources#photoshop#chaotiresources
25 notes
·
View notes
Photo
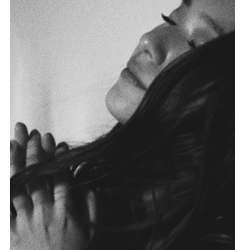


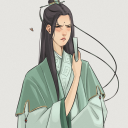
WASIRAUHLPSDS, coloring
295. vousmevoyez (x)
Don’t repost or claim as your own.
You can adjust the layers if you need to.
#yeahps#itsphotoshop#chaotiresources#psd#psds#nathalia#resources#295#psd295#black and white#b&w#p&b#krystal jung#nathfav
228 notes
·
View notes
Photo


T E M P L A T E #06 by collinspastel Please, don’t claim as your own and not repost.
Like or reblog if you use / do download.
{download all} or {01.} {02.} {03.} {04.} {05.} {06.} FONT - {wendy} {abeat}
#itsphotoshop#yeahps#whoaps#chaotiresources#wildfireresources#completeresources#stuckreblogs#templates#template#lockscreen template#template lockscreen#resource#collinspastel#lua#wealphotoshop
221 notes
·
View notes
Last Seen Blogs

i-am-very-drunk-blog
Lame.

borbonsg
𝑩𝑶𝑫𝒀 ﹠ 𝑺𝑶𝑼𝑳
byun-baekyung
My Beautiful Fallen Angel, how have they hurt you?
pinkscrap
Pinkscrap

corrupted-souls
Corrupted Souls