#very... messy looking lineart but thats just the style ;^)
Text
Handy book of tips and tricks for using Krita (by a user thats used krita for a while)
HI! So i'm a krita user, and i figure since i know fellow artists that are moving to krita, i might as well make a handy guide to some of the tricks i use to snazzy up my art and basic howtos. This will be splitup into three sections: Tools, Layers, Filters. I'll also be interspersing how i used them in my art as examples!! Thisll be a two parter so hold on tight.
Shortcut keys:
P = colourpick
E = eraser
B = brush
Tools:
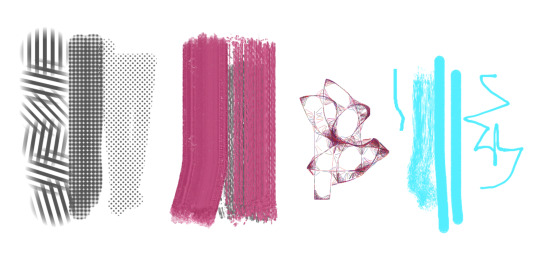
Obviously try using all of the brushes and seeing which ones you like. Krita has a myriad of handy and good brushes, and you can even make your own if you feel like it. I personally like to modify the rectangle eraser to a normal brush and using it, before i modified it a little more to be my own brush.
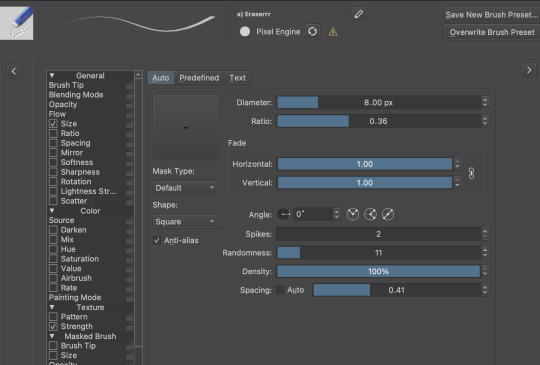
You can change the settings of the brush youre using on any layer by clicking this little dropdown menu in the top left of your screen. That little three dot button by the left side also goes into more detail about the brushes in case you want to fine tune a brush to your liking.

Personally, these are the custom brush edits ive used to make my art just that bit crunchier. As you can see, theres a lot more options you can tick and mess around with if you feel like it too.
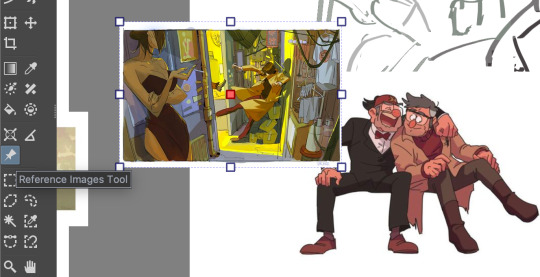
The pin button is the reference tool. If you copy paste an image into krita while the pin tool is selected, it will appear as its own image above all layers that can be moved around using the pin tool to use as a reference. Real handy so you dont waste layers on ref images.
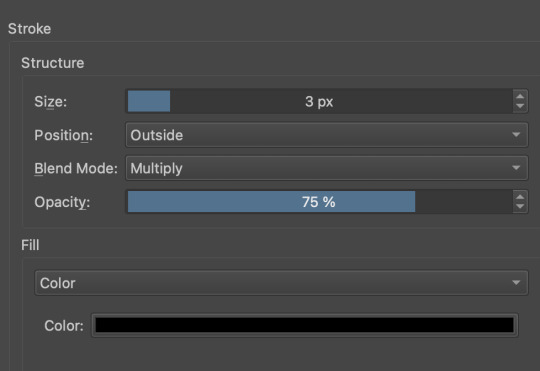
Layer styles
Ok, you probably know the basics of how to change layers, (its this little dropdown menu here) but did you know that krita has a cool thing called LAYER PROPERTIES??

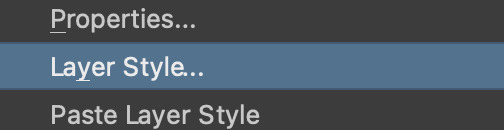
If you right click a layer and click this little button here..it should bring you to this handy menu with styles! These are really useful
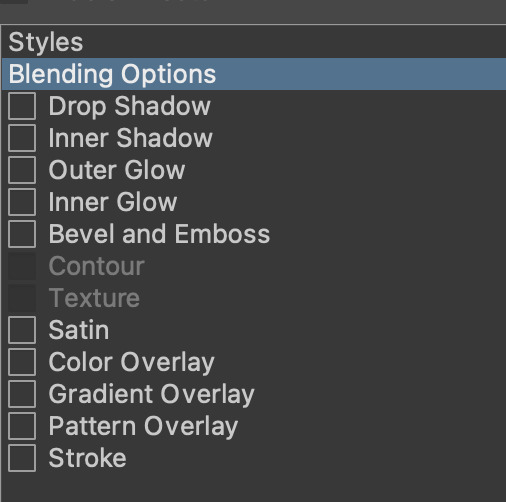
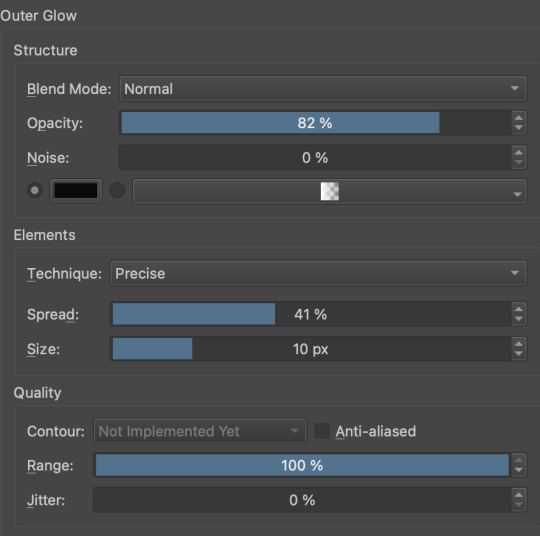
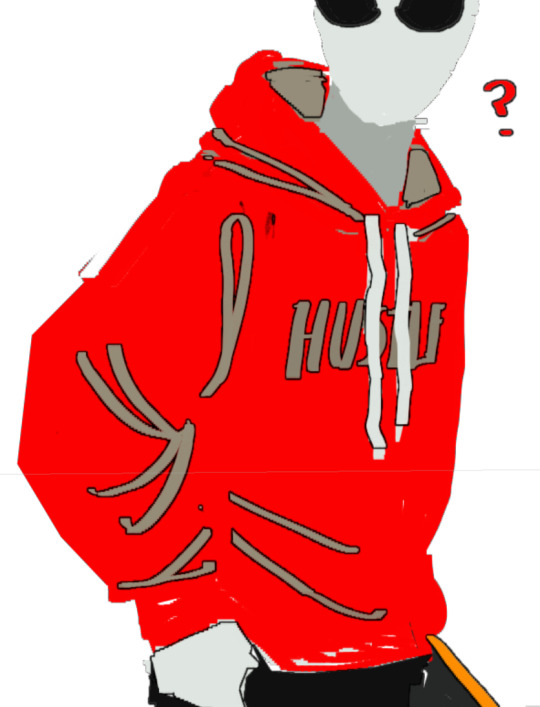
Now, i used to usually use outer glow set to these parameters to give the illusion of lines (and this is how anime artists usually line their very delicate pieces of hair and stuff), but i found an even better way!!
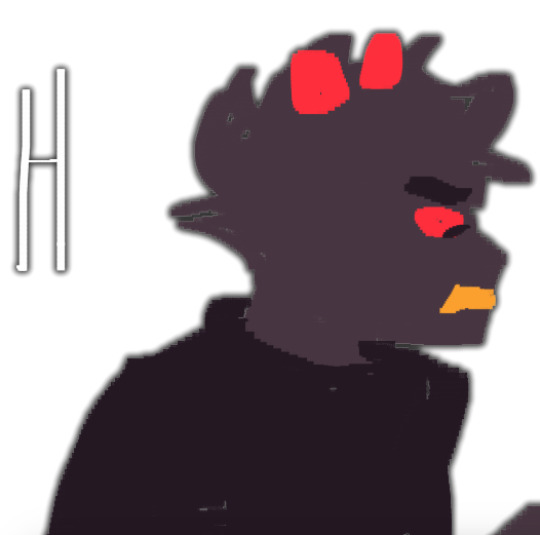
Its called stroke, and you can just modify it to be as thin or thick as you like. I recently used it for these two pieces, because its more precise, and used across multiple layers makes your work look cool and like you gave a damn about lineart. This is especially helpful if youre a stubborn son of a bitch that isnt going to to take the time to line your lineless work, or if you want to line really small items like string on shoelaces and not have it look messy (just set the colour to white and draw as usual.)
PART TWO
64 notes
·
View notes
Note
Hey! How do you do lineart & Sketches???
You’re one of my biggest inspirations for drawing and I really love your art style!
UM??? THANK YOU?? I 🥺🥺🥺
I’ll try to word this as best as I can but I am honestly terrible at text descriptions/explanations sometimes, so I’m sorry if anythings unclear or odd. My process also varies sometimes depending on the artwork
Sorry for somewhat long answer ahead!
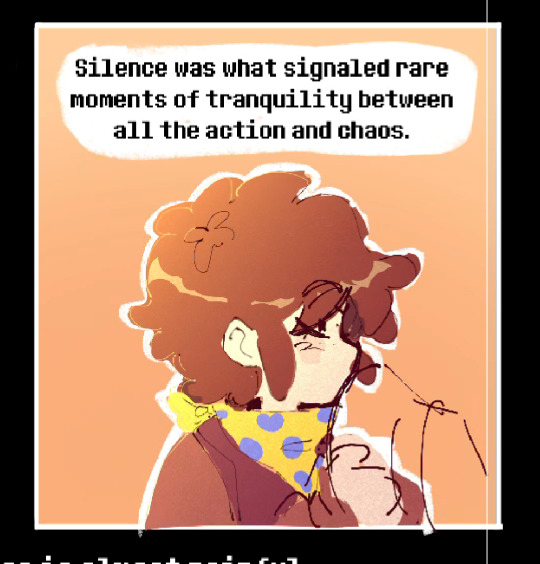
Usually for any artwork that I know will take a longer amount of time, I start with a really quick 1 minute sketch to get the proof of concept down. It doesn’t have to look good and the proportions may be very off and really messy but thats ok, my main goal is just to get the whole idea down and interpret it again later. I write notes next to the sketches sometimes if I have a specific thing I want to include later like for the coloring or lighting.
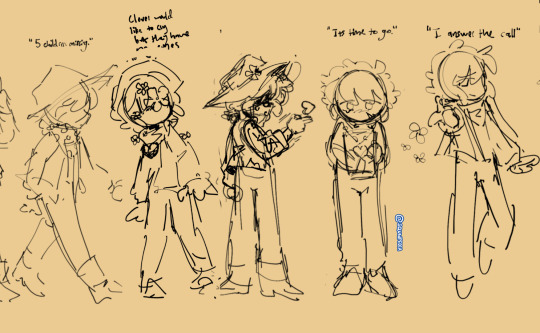
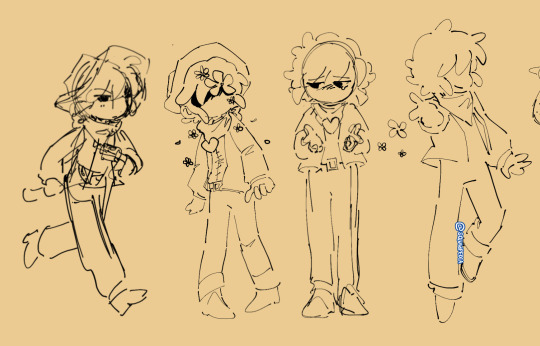
After that, I usually make a revised sketch on top of that and keep tweaking or redoing the sketch until I get something I like. This is also where I reccomend you start checking proportions and flipping the canvas. The first and third image had to be revised before I was able to make lineart I was happier with. Some other times I just jump straight into the lineart if I think the sketch already looks ok (but this is kinda risky as I usually end up having to resize a lot of the lineart later when doing this, which can end up dropping the quality of the selected area and making it slightly blurred compared to everything else. Sometimes I just end up redoing the lineart entirely for the selected area when this happens).
When coloring the lineart I try to mostly color lines that exist inside the silhouette of the person, but I’m also kinda loose with this rule and also will color anything on the edges if I think it looks better in a certain instance.
I’ve been trying to keep my lineart much thinner and enjoy using Procreate’s ballpoint pen for lineart. For sketches I usually use whatever feels most satisfying or convenient or just try a new brush for sketching to spice up my process every now and then.
In worst case-scenarios, if I’m really struggling to get something I like when sketching, then I just keep redoing the sketch and trying to figure out what I don’t like about it. The undertale the musical gif had something around 6 redo’s before I finally liked it enough to give it lineart
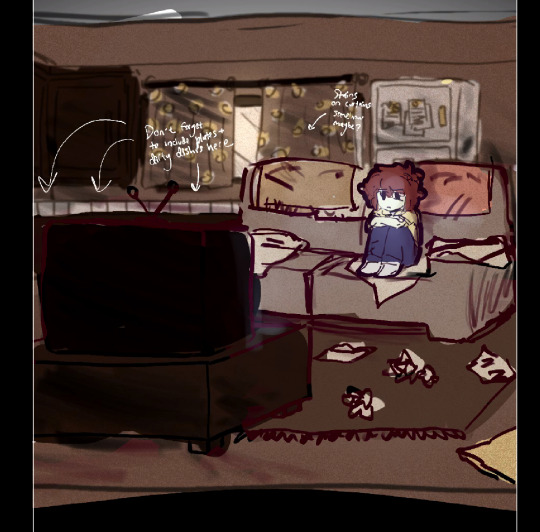
Sometimes I also try making quick messy color mock-ups of my sketches to plan out colors or specific effects for later to test what colors I like and what I think would look good for later. I also might write notes if there’s any extra details I think of that I want to include later
Thats everything I can think of, I hope this helps and sorry again for this being a pretty long answer, its the best way I could think to explain my process, but I hope its a bit helpful at least!
43 notes
·
View notes
Note
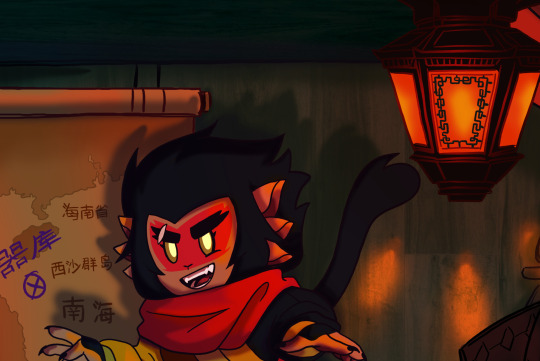
what's your process for coloring like? the look of that elendira is so textured and interesting, i can't figure out how you do it
AA THANK YOUU ^__^ !! textures & brushwork are my favorite things abt my art, so im happy you find it interesting hehe . its SOO cool to look at & so much fun to draw imo
i prefer to color by building in layers , if that makes sense 🤔!! hundreds of them !! such that i'm always drawing on Top of previous layers, working from big & messy blocks of color to, eventually, small and refined blocks of color until it feels processed enough. as a result, i rarely ever erase (!!) and i rarely ever draw lineart aside from the initial sketch
a rough, patchy textured brush is key here, as it'll give you dimension and variability w/ your colors. i recommend "Brush and various sets of fountain pen style (万年筆風ブラシと色々セット)" on Clip Studio (ID: 1679706) !! :3

im terrible with explanations though, so i'm going to show a step by step of that elendira drawing if you dont mind :3
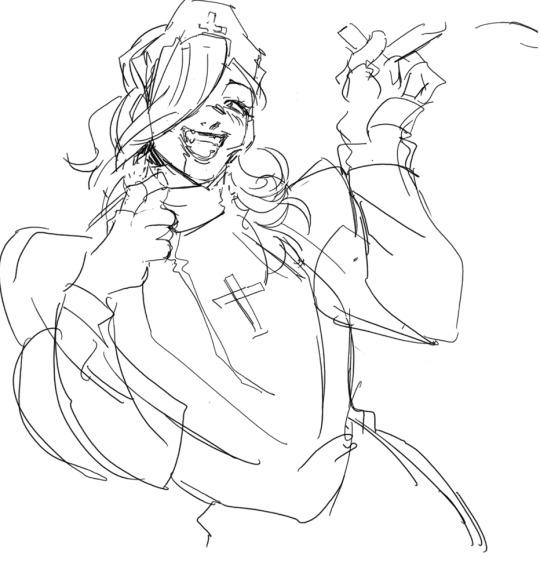
sketch layer !! because i mostly render through color alone, i try to make this as close to the finished thing as possible . ^__^ i hateee drawing the same thing over and over and like the expressivity and movement of my sketches anyways , so the more i can preserve at this step, the better. if u were to look at a side by side of my sketches and finished pieces, youd notice a lot of those og lines are present in the final drawing :3

2. flats !! pretty self explanatory, but the solid background gives me an idea of where the figure begins & ends while the colors themselves help distinguish whats what . i stick to ambient lighting @ this point because im usually not sure what i want to do with the overall palette or lighting yet . having two tones (ex, dark and light in her hair or dark and light on her skin) can also help in identifying key features early on that u wanna preserve. as you build layer by layer, sometimes these areas will remain untouched and i think it makes for a rly lovely feel at the end

3. start blocking !!! to be totally honest with you, i dont really know what i do here HAHAHA. like i just scribble the shit out of it, usually focusing on what i might want to do with lighting (ex: grey areas to accentuate folds in her costume). i think i like to start "erasing" the sketch where possible by coloring on top of it .. like if you look at her hat or her arm , you can tell i'm starting to get a sense of the shapes i like vs the ones i dont. it's at this point that the final image starts to emerge in my mind , like im gradually pulling her from a tarpit of scribbles until shes recognizable lol. chipping away at the marble until i can free her. tbh.

4. keep blockingg...when u think u are done , block some more . as you can probably see, the brushwork becomes more intentional as i add more shape, with specific focus on line weight. this is also where the patchiness of that textured brush comes in - notice how none of the colors seem totally uniform (ex: the red cross or the original sketchlines for her waist). you can see bits and pieces of the layers underneath pushing through and i really like that !! ^__^ its very fun and sketchy to me, so i try to keep them around. those areas are also great to colorpick from, because it'll give you "new" colors to work w/ that are already part of your palette.

5. GRADIENTS & GRADIENT MAPS !! TONE CURVE !! COLOR PICKER !! this is the best stage tbh. flatten your image so its all on one layer and just go crazy with all the color settings in ur program. add gradient layers and set them to darken, or overlay, or subtract, orrr. lighten or dodge glow or divide or soft/hard light.! OR!! edit the hue, saturation, luminosity and contrast.and then color pick from these edits, block even more on top of ur image, flatten, color edit again, etc. etc. until u feel satisfied.
ANYWAYSS . i hope that makes sense @__@ sry i wrote this out and deleted it like 23 times trying to make it make More sense but thats what ive got HAHA i hope its useful though :3 !
#SRY I STRUGGLED 2 EXPLAIN THIS#dude its like my brain bcomes stuffed w/ cotton anytime i try 2 write#i hope it makes sense tho..#it also probably sounds so redundant to make new layer one after the other for just a few brushstrokes#but those brushes i linked have a multiply property so if you draw on top of prev lines they'll create dark patches#and so if im working over a large area ill generally need like . 5 layers each with one brushstroke :sob: if that makes sense#this one had . 84 i think. total. layers i mean. the merylvash one had 300+ HAHAH so it rly depends#like YEAAH i could just use a normal brush but i really like the way this looks#andd sometimes the multiply function works really well or will give me the proper shadow tone im looking for#anywas.wanywaysn anyways#asktag#anonymous#long post
58 notes
·
View notes
Note
if I’ve already sent this ask before I’m so sorry, I’ve got adhd, but how did you find your art? (I’m in my questioning phase)
hihi!!! no problem! i think i have some kind of glitch with asks bc when i go look for them it says i have 3, but when i check it, there isn’t any so im sorry if any of u have ever sent asks and i havent answered them it’s probably bc of that😭
but anyways lets get on it!
finding you art style is not smth simple at ALL. ive been drawing my entire life!!! and ive had a bunch of different styles until now, they kinda used to change every few months or so, i was always happy with them but it never really lasted??? and i always had at least one part of the process of it to dread doing, for example, coloring.
it wasn’t until recently i FINALLLYYY found a style im 100% comfortable in.
it really takes experimenting and finding what elements of creating art you love and enjoy the most. for me, i used to mostly do traditional art, just pencil or ink sketching and i would OCCASIONALLY color them. so i really used to enjoy kinda the messiness of the pencil on trad mediums and stuff? and i never rlly found a way to translate that element to digital art which is the one i enjoy the most now.
brushes are very important! it depends on the look you like. since i like that pencil feel, i use a pencil looking brush! (softy from esbenlash’s procreate brush set) and i also got a paper feel screen protector for my ipad to enhance the experience🔥
i found i mostly enjoyed doing lineart and didnt rlly look forward to coloring, i didnt find my past styles enjoyable bc they kind of felt restricting in that area? since i didnt find a way to make it more abt the lineart and less abt coloring that i liked (ofc theres plenty! i just didnt find one for me)
so tbh i think what mostly influenced the style i enjoy the most now is film, and baroque art!
i had recently seen:
Crimson Peak (2015)
The Shape of Water (2017)
and ofc


Stranger Things DUHHHHH
and i fell in love with the way the lightning was, heavy dark shadows and moody lights, and tried to match my style to it and found that it highlighted all the things i enjoy doing the most while drawing! so thats where i am now
special mention to the one movie im obsessed with currently


The Crow (1994)
also has the similar style
all that + experimenting, studying other’s art i liked and finding elements to integrate to my art, ANDDD music also played a huge part in it. so as you can see for me its about kind of combining aspects of every single piece of media i like 😭
its not gonna be the same for everyone, but its always good to have a guide so i hope this was useful for you and anyone else! im always willing answer any art questions :)
don’t worry too much about speeding up finding your style, it’ll come to you eventually, so focus on enjoying the moment and learning, take mental notes of what you like and don’t like!
sorry this is kinda long as hell… but i like rambling
#perfect opportunity to show off these shots from my fav movies teehee#art truly is all one!#i love getting inspired from multiple medias and combining it into drawing#ari answers asks
18 notes
·
View notes
Note
I am all about constructive criticism. I mean, how am I supposed to get better at writing/drawing if people won't be honest with me and give me tips to get better. I personally think that people who can't take constructive criticism aren't very bright. How are they supposed to get better at things if they don't listen to others who are just trying to guide them?
Also, I would love some more tips on how to make the shell better. If you are willing, of course. :)
I am horrible at drawing. I usually have to trace things to get a decent drawing. (For instance, I traced like five different things to make Mikey a pony.)
I'm so much better at coloring than I am at drawing. My writing needs work, too, but I'm getting better.
First of all, can I just say that you shouldnt worry about tracing art to improve your own (as long as u aren't posting it as soley your own but thats a whole other rabbit hole) I did too! It helps build ground work for a good understanding of anatomy and poses.
However there are a few holes in tracing. Forst of all it is quite limiting in the outcome of your work, as your art is stuck static in one pose. this can alkost hinder your ability to see things in '3D' and visualise objects for multiple angles. it can also lead to 'skin wrapping' , which i think is the hole you fell into here (and also a term i just made up now)
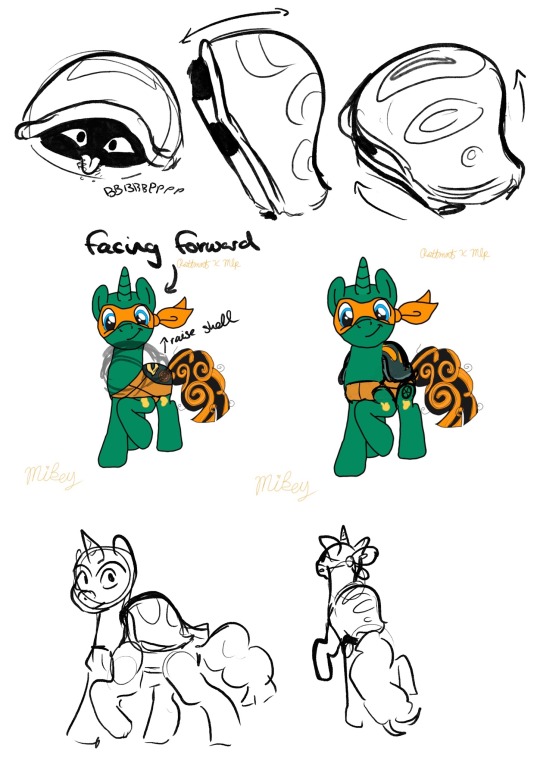
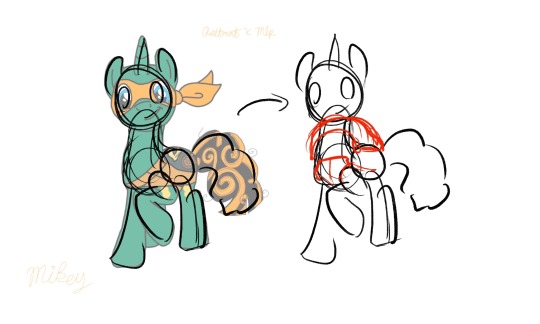
with the shell, you only coloured it within Mikey's trace lines - this caused the shell to loose a lot of its mass - making it look, quite frankly, not like a shell.
a way to improve on this is to look at more references of Mikey's shell in the show and its shape from different angles. this can help you get a good idea of how it should look, and it is a good idea to practice drawing it from these angles. this will improve your ability to think in a 3D space, (which is so darn hard, but seriously useful)
however, and you may have noticed this yourself, when you add new additions to the figure, the line art just doesnt line up! the line quality is different!
This is because the line you have done for the addition is Your Line. And we love your line.
so lets make the rest of the traced lineart fit into your style, instead of you fitting yours into theirs okay?
You may notice that when you trace art, the line work is just not the same, the lines are shakier than the original and it just doesn't look as good. this is not a reflection of your skill.
It is because, usually, (at least when I did it) you follow the original line so closely that it turns out shaky, probably taking your pen off the page a few times to take a break from the oen stroke. while the original artist did that line in one sweeping stroke.
a way to fix this, and make the line arr cleaner and more you, is to instead use the drawing as a very close reference. for example:
instead of tracing the exact lines of the art, merely trace the general shapes of the art. not only then do you add your own flair and gesture to the drawing, you are then more free to add more shapes to this sketch.
You can still use the reference drawing as closly as you want, but try to focus less on getting the exact lines copied, and more on the general shape. you linework wont be perfect the first time, it might be really messy compared to your usual tracing, and thats fine! you should see some of my sketches before i refine them!
But these will be your lines, theyll be smoother and more gestural, and overtime you will get better control over your penstrokes doing this.
Okay I cant really think of anymore to add here, I hope this helps! i think this was just one big word vomit lol. Keep drawing!! cause no matter what you do, as long as you are actively drawing you are always improving! dont be afraid to push yourself out of you comfort zone! who cares if it doesnt turn out the way you wanted it to? Its your art, You Created That with your Own Hands, and I think that is amazing.
<3
#asks#animal-lover-forever#i really hope this helped#its always hard for me to articulate my thoughts like this lol#YOU ARE GETTING BETTER#YOU ARE ALWAYS GETTING BETTER#art help#i hope#rottmnt#rottmnt mikey#mlp
36 notes
·
View notes
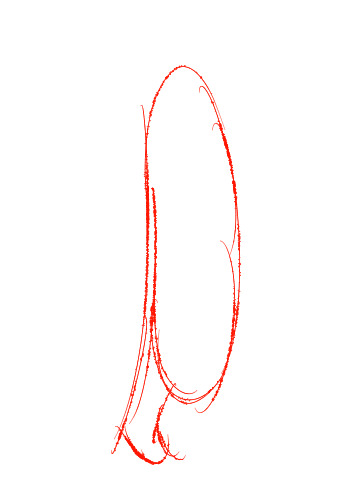
Photo
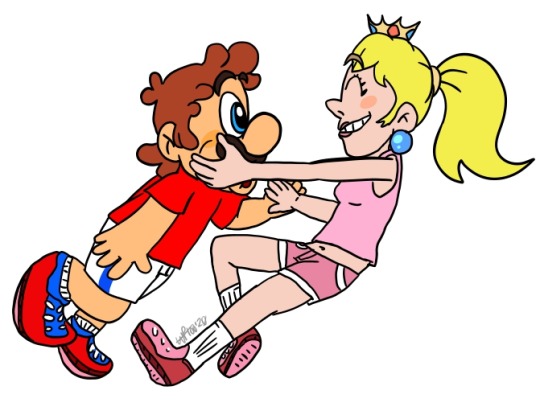
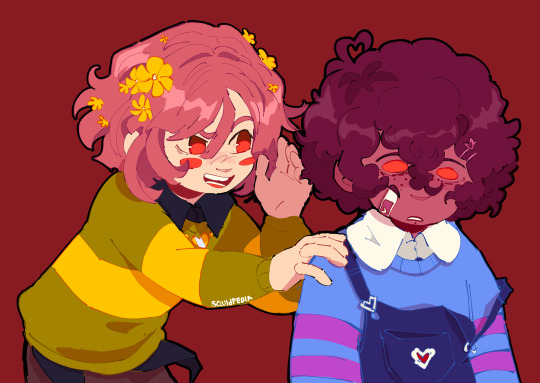
#mario#princess peach#smb#ship art#i can't do shoes but hey im doin lineart at least ...#very... messy looking lineart but thats just the style ;^)
4 notes
·
View notes
Photo

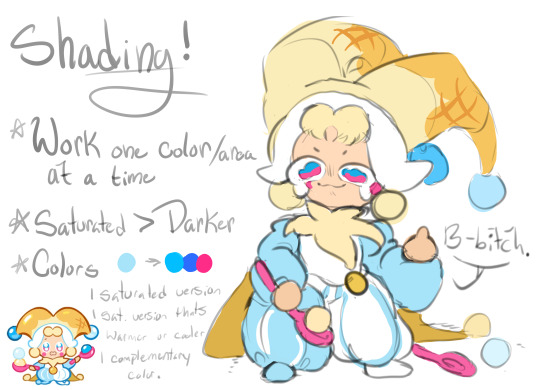
Okay so I generally have two styles for doing shaded stuff
Painted and then my “holographic sticker” style with the dots and that one swishy dotty gradient pen. This is for my painted style!!! Long story short here’s a tutorial on how I do that for some friends on discord hehe.


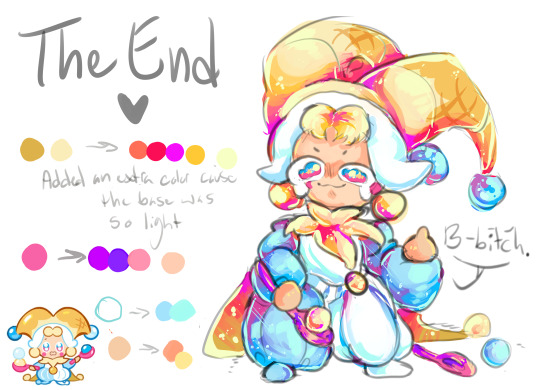
AND TADAAAAAA THATS HOW I DO IT~~
cant read my absolutely ADDHORENT handwriting? No worries!!!! Captions/Transcript + some extra notes below !!!
TRANSCRIPT!
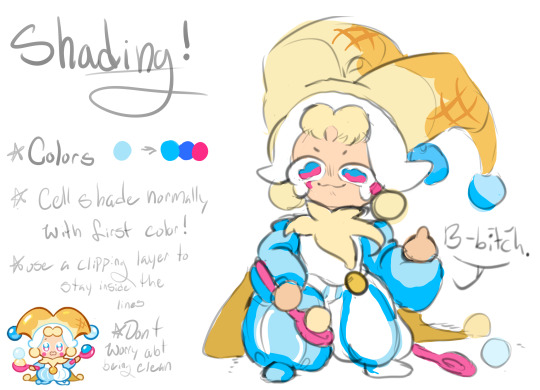
Step 1: Lay down your flat colors! I always color drop everything to make sure its as close as possible. The only time I don’t color drop is if I’m adjusting a red to a more pinkish color!
Step 2: Shading time! The first step is to choose what color you want to work with!! Remember that when you’re shading that SATURATED IS BETTER. Don’t darken the color unless you really need to. Just make it more saturated and/or cooler. Cooler colors are darker than warm tones. So if you need to adjust go saturated - cooler - and then lastly darker if needed!!
For the sake of the tutorial make 3 colors.
The first one a saturated color / A DARKER saturated color / a complimentary or contrasting color. This is our lightest to darkest scale!
To start off take your first color and cell shade ONE FLAT COLOR or SECTION with it!!!! Do NOT use this for the ENTIRE drawing!! Work in pieces!!!
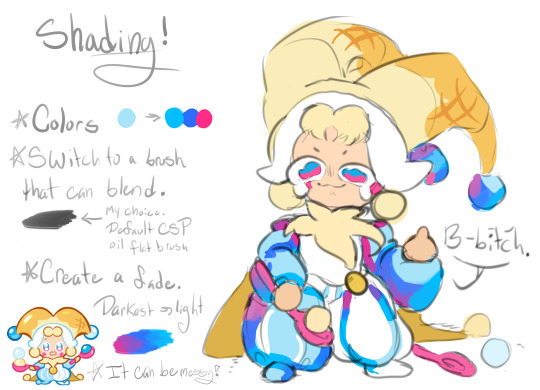
Step 3: Add a gradient to that cell shade~~ So you just used 1/3 colors to cell shade with. Now take your other two colors and create a gradient with it!!! You’ll want a blendable brush for this. I like CSP’s oil flat brush! Make sure your contrasting color is in the darkest spots!
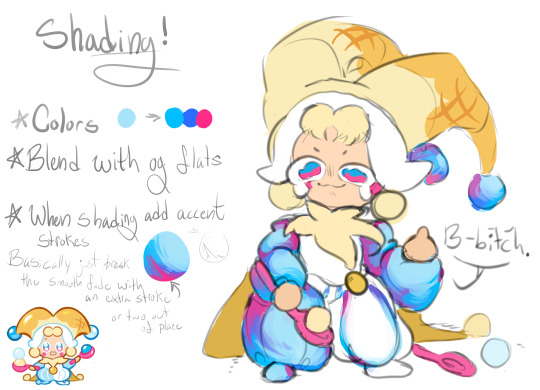
Step 4: Blend with the flat color bordering your cell shade!! AKA just make the border that meets the cell shade softer.
Honestly, dont worry about making it clean. Really all you need to do is take a few strokes of the flat color and put it into the cell shade a little and youre good to go. I like doing little dashes. Also when you do this feel free to take that yummy contrasting color and make it bleed up towards the lighter color!! It’s not accurate with like how shading works or whatever, but it looks super fucking cool.
Step 5: Highlights!! Its time to add some highlights!! Basic rule for highlights.
Warm flat color = cool toned highlight!
Cool flat color = warm toned highlight!
Literally just put this color anywhere you want a shine and then take that color and OUTLINE the cell shade like riiiiiight up against the lineart. Trace your lineart with this color where its darkest basically. This counts as your “backlighting” and all that nonsense, but more importantly it just looks cool. If your highlight is too bright for the shadows you can also outline with your flat color!!
Step 6: Details!! Add sparkles and shit. I also like little lines. Draw diamonds, fish, stars, planets, flowers, etc etc. Whatever the fuck you want! I use the highlight color or I use a slightly lighter version of it to do this
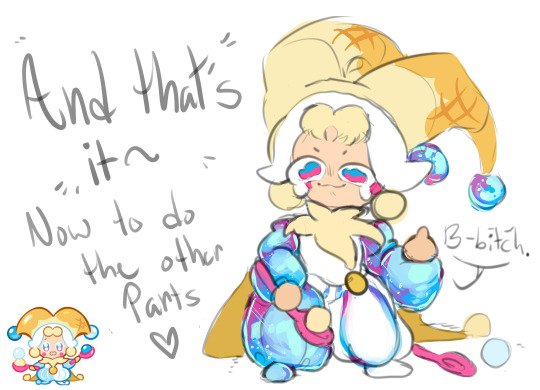
Aaaaand youre done!!!!!
I don’t do all of these in this order obviously, usually I wait until I do EVERYTHING with cell shading before I add my highlights and details, but for the sake of doing one section of the tutorial I figured it would be easier to see how its done. If you wanna try drawing this way just know that with time you dont need to plan out your colors and eventually youll just know what to do as you go along and you’ll probably jump around a bunch.
My tips are make it messy, have fun with it, dont worry about all the little details until the very END (i.e lines or patterns on the clothes. You’ll just cover it up otherwise), and feel free to fuck with your glorified cell shade as much as you want!!!
Dont over think it either~ Its literally just a cell shade with a gradient + highlights that outline the lineart where its darkest. Thats alllll it is~
Hope this helped and have fun drawing guyssssss
#im actually shit at drawing tutorials#but i hope this explained some of it lmfao#if this made even a little sense ill be happy#art tutorial#shading#my art#cookie run#lmao tagging that anyways
148 notes
·
View notes
Note
*rolls in late as hell* SO. If you're still up for the art ask meme! 23, 24, and 25 perhaps?
not at all, i left you a parking space *parks you up*
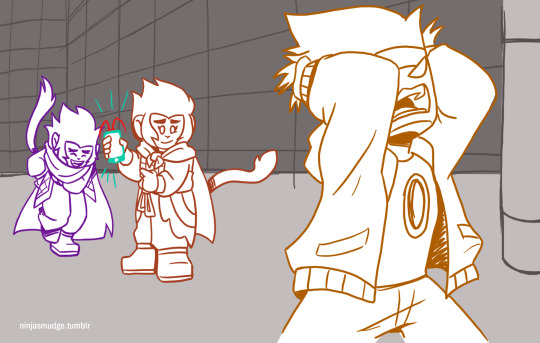
23. favorite pose youve drawn
is probably all the ones in this panel, you wouldnt believe it since its a reasonably simple pose but i redrew mk so so many times, and had to go back and edit macaques legs so they made sense abt 4 times
24. what do you like most about your art style
mmm i like the sketchy lines and i like to experiment with like bold shading, when i got pen pressure working it was an absolute GODSEND for what i was trying to achieve. i also quite like the colors i use, im still working out stuff thats nice to look at and a lot of my stuff tends to very warm tones bc i just really like shading everything with dusky pinks and purples
25. best advice youve recieved this year or something new you learned about art
to be honest most of what i know abt digital art has been worked out in the last 6 months or so, theres a couple of transformers pieces from like a year ago, but i did those mostly with a mouse, and it took me WEEKS, i got a tablet p much excactly six months ago, and actually made it work as a monitor abt 3 months ago so i have to keep relearning how to use it. BUT! i really love using color on the pc particularly changing the lineart colors to match overall tone, which i couldnt change on paper.
also since im still learning, im trying to decide between styles of clean vs messy lines
which is why my style fluctuates so VERY much
ty for the questions! 👋👋
11 notes
·
View notes
Note
you’re a big inspiration to me! I idolize both your line art and shape language in your characters. If it’s not too much to ask, what’s your process for constructing/drawing a character? shapes n stuff? your style is very simple yet conveys forms with fluidity!
thank u so much omg !!!! ;u;
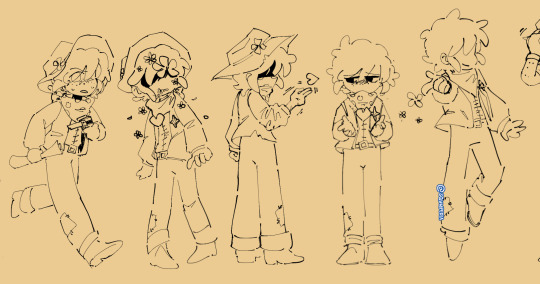
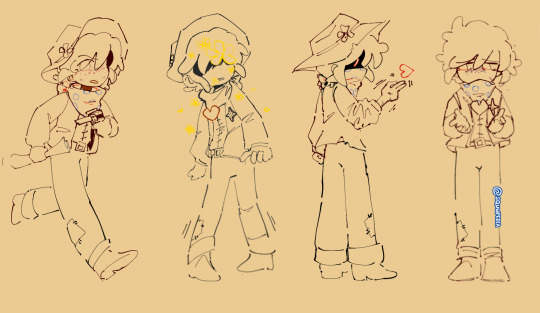
uhhh my process is kind a like... like using Fast Pen Strokes and Shape as a main thing kinda? like one sec lemme show u a step by step drawing of tommy n that basically encapsulates how draw stuff.
step 1: shapes!!! u kno em u see em!
ok get a shape in ur mind and sketch it out REAL fast its ok if its messy as long as its the shape u want it to be ur GOOD i draw tommy w long head long face syndrome so i sketched out ths bean shape. one of the things i learned from taking Drawing Naked People Class is that getting the basic sketch OUT super fast, disregarding messiness and mistakes, is th best way 2 keep ur art lookin dynamic n shit. its all about the movement babey!!!! im still struggling w that tho but m getting there! drawing tommy def helps tho hes like a tall noodle boy. but yeah like stay loose w ur drawing in those first steps bc u can get some realy nice fluidity there.
step 2: details n other shit
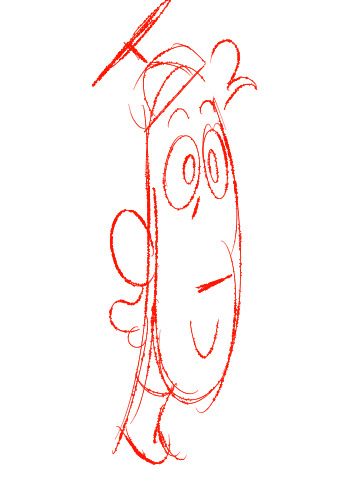
ok yeah self explanatory add details remember being messy being fast is a-ok bc being fast means ur getting all those good less controlled shapes that make drawing FUN remember: loosey goosey arms babey!!! u dont gotta be super restricted to these details if u dont want to be, this is like a Vague Concept of where u want to put the things. sometimes i’ll start this EXACT process again on different parts of the drawing just to get it right. its all trial n error n stuf.
step 3: LINEART or at least a version of lineart i like 2 do like sketch lineart idk

so w this instead of drawing onto another layer i actually erased all the messy lines to create like, a nice messy lineart kinda look where its solid enough that its lineart but because it wasnt drawn on another layer, tracing over ur super fast shape concept, the drawing stil retains the shape it had in the sketch process and retains its fluidity. if u do this and the lines art still too light for ur liking just copy the layer and put the opacity at any percent u like so then u end up w the same lines but darker ig.
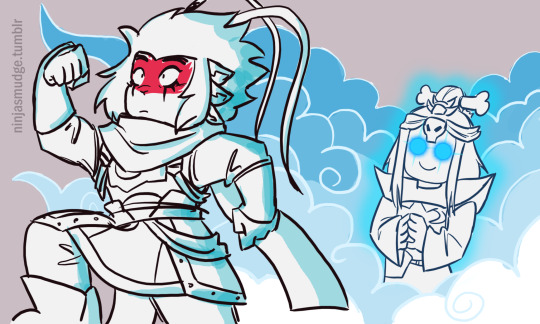
an example of cleaner lineart would look kinda like this

which, YES the lines are cleaner and thicker which is good for certain times of drawings but i find it looks a lot more flat and its not exactly my preferred go to kinda thing (altho it is sometimes easier!)
i dont typically LIKE doing actual lineart w a separate later bc it RLLY stiffens up my style, BUT i like to do it for like comics or Specific Illustrations or, in one case, th animatic, bc its just a lot cleaner of a Look.
w both versions i basically fixed a couple things wrong with the basic sketch, added more detail, slapped on some color for aesthetic purposes and added everyones favorite iconic tommy quote from hlvrai act 5 icarly edition: )
ANYWAY YEA thats like essentially it! im gonna do another art stream this saturday (and since im not working on animatic it’l actually be fun to watch and epic!!! requests n stuff maybe!!) nd u can seehow i make cartoons REAL!!! anyway ya thank u hope this isnt completely nonsensical n make sense n stuff!!!!
167 notes
·
View notes
Text
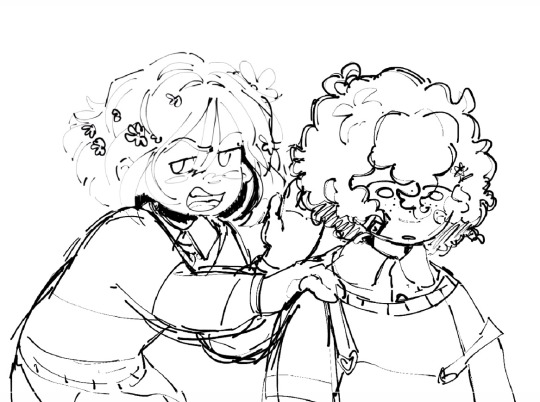
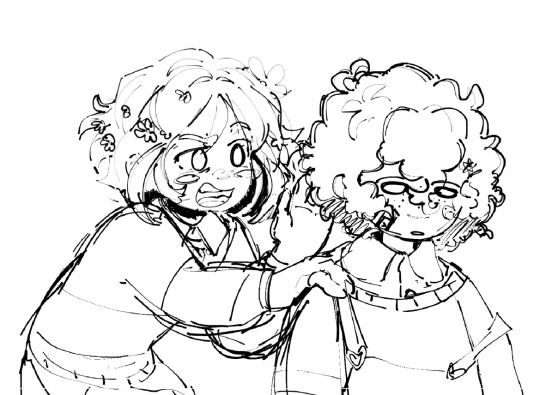
Honestly i was very on and off with being happy about my art for a long time because i really wanted to constrict myself to a specific style that i thought looked more professional ie bold straight lines and quite a bit of rendering and it was such an unenjoyable experience honestly. I thought it would look better if i ever wanted to become an animator or professional artist in general. All the time i would see these animators and comic artists with messy lines and no shading and i would just be like. God i wish i could do that. And then i started to realize, why can’t i? In order for me to make my art more enjoyable for me to do i needed to stop trying to force it into a box. I needed to amplify what i enjoyed about making art and lessen/drop what i didnt. I thought i wouldn’t be able to do it, having always been a rlly heavy perfectionist with my art but.. the moment i started to let myself stop caring so much, the moment it got way better. Shit like... i love doing lineart! But i always did it to be straight, bold lines, and it was honestly physically straining and it made it unenjoyable. So i went back to what i use to do when i was 13 and get messy with the lineart. And i love it! Its so fun to do and honestly if youre having fun then thats the biggest improvement you could ever make. I really disliked the shading/rendering process, so now i barely do it/do it in minimal amounts. Theres no right or wrong to art theres no real rules and it gets so much better for you when you just do what makes you happy... dont connect your lines draw too many lines color outside the lines use the fill tool render the hell out of it dont do lines at all its just like !!! Genuinely whatever is going to make you happy to make art and happy with your results will ALWAYS be a better improvement then trying to figure out what its Supposed to be
#sorry for the random long ramble im just thinking about how ive been improving mentally lately and how art has actually become an enjoyable#process for me because ive finally allowed myself to do what makes me happy#i think every artist deserves that feeling
2 notes
·
View notes
Last Seen Blogs
doireannn
Hello Friends

pamietnikiwampirows8-blog
Pamiętniki Wampirów Sezon 8 PL
thatgayshitxxx
that sexy gay stuff
ace-harbinger-of-chaos
untitled-clusterfuck