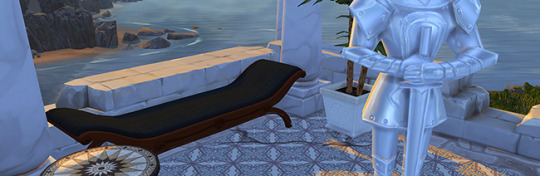
#Why paint backgrounds when you can download them and blend them and no one will suspect a thing
Text
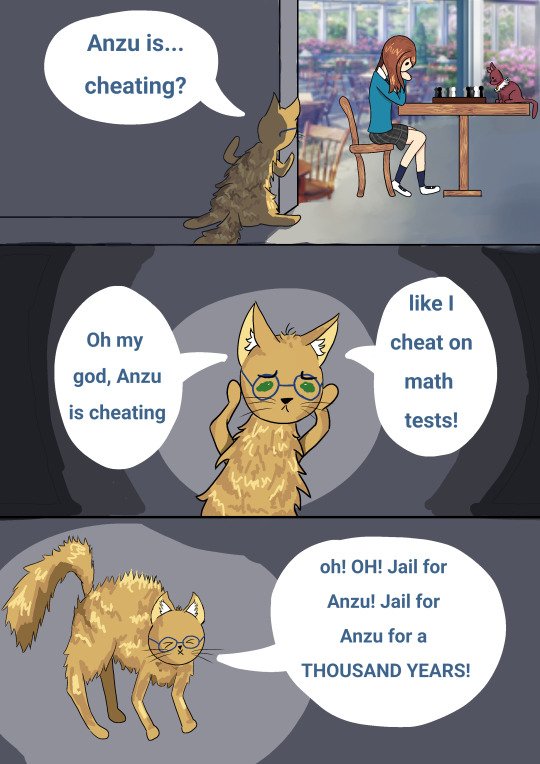
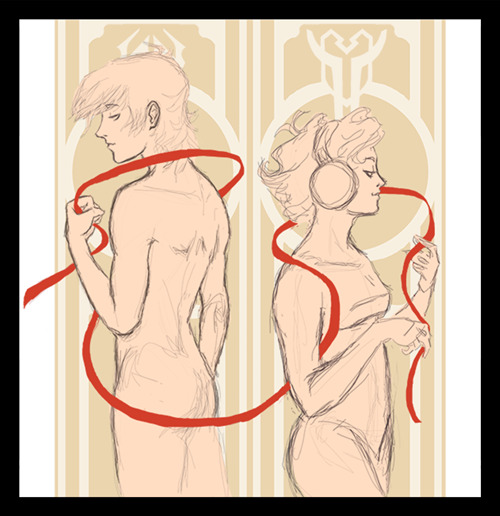
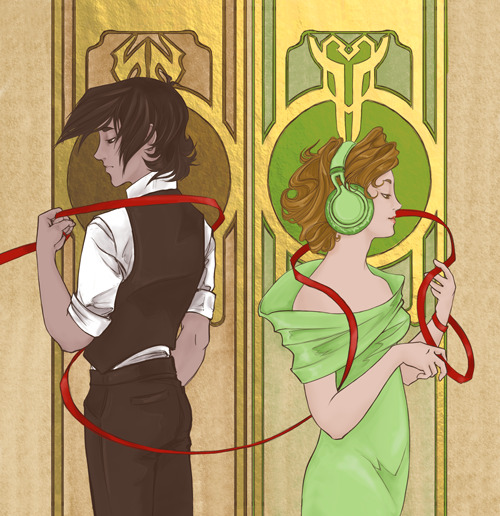
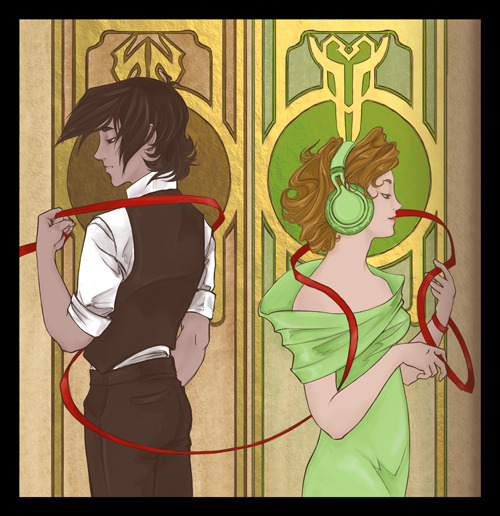
Day 7: free day - Miette (?)
I was re-reading old stories and this part reminded me of the miette tweet.
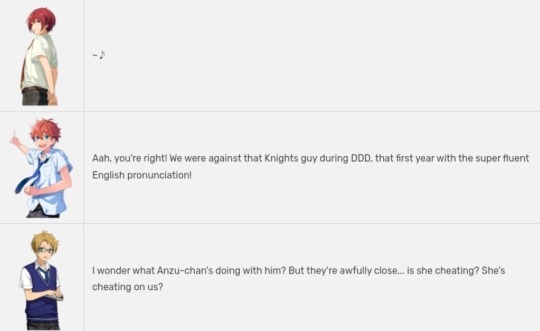
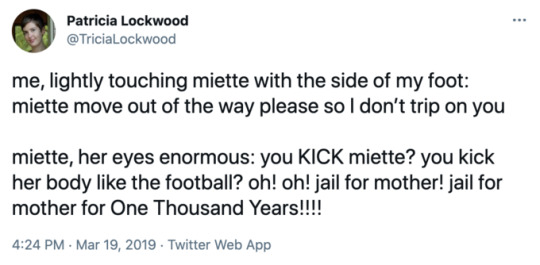
(this is the miette tweet btw)
#Your honor i deliver you high quality shitposts even when wrapped up in 10 blankets due to sickness#Why paint backgrounds when you can download them and blend them and no one will suspect a thing#You know reading the old stories reminded me how much of a huge crush kasa had on anzu#Me too kasa...me too#anzu enstars#anzuweek2023#I missed two days...but overall it was fun :)#cookie draws#enstars
25 notes
·
View notes
Note
hi! sorry if you've already answered this somewhere, but what program do you use and do you have any favourite brushes, particularly for colouring/shading? i use krita and have been meaning to experiment with new brushes, but it's just hard to know where to start, and i love the way your art looks so i figured this might be a good starting point. thank you!
I don't think I've answered that here, but I don't mind repeating myself if I have XD
I use Clip Studio Paint for my digital art, and I only use a few brushes for most of what I make. I don't know if they'll be compatible with Krita, but I'll share the sources anyway. All of these are free to download (though the deviantArt ones might require an account to log in? i got these brushes years ago so i don't remember for sure).
For sketching and lineart stuff, I use either Loose Inker Smooth or a brush I modified to be blocky. The cel brush is originally from this pack, but what I use looks pretty different now. While these are mostly for sketching/lining, I also use them for other parts of drawings too, such as giving a little texture to the edges of cell shading or for hatching.

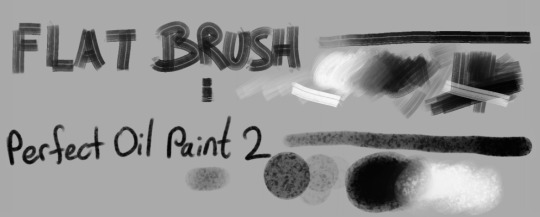
For coloring/shading, I most often use Perfect Oil Paint 2 or Flat Brush from this pack. They both have nice texture to them and blend in different, fun ways.
I'm not sure how compatible brushes like these are with Krita, so some general tips I have for finding brushes are:
find brushes that you enjoy using
find at least two with textures that appeal to you. smooth lines and shadows are nice and all, but textures give bonus visual interest for minimal effort. good for backgrounds and accents if nothing else
if you like a brush in general but it's not quite satisfying, then make a duplicate of it and mess with the settings. poke around at enough things, and you might find your new fave! (this is what I did for my Cel blocky brush)
Good luck!
Bonus silly sketch because why not:
often when I want to shade a sketch, I'll block in the colors with a hard brush first [left side] then grab one of my textured brushes [this one was perfect oil paint 2] to blend some of the edges softer. bonus hue shift along the edge of the shadows because I felt like it. Drawing on a background that isn't pure white (eg. grey or a muted color) can add visual interest and allow for quick highlights to be added without needing to fully color the sketch.
#flame answers#art stuff#also thank you!! glad you like how my art looks haha#the extra bit at the bottom was just cuz i was thinking about it but it's not as related to your question
9 notes
·
View notes
Text
CW: trauma, abuse, substance misuse (codeine)
I've been finding myself reflecting on my past a lot this week. I don't know if it's just the change of scenery or an upcoming visit to my grandma's that has my brain pondering traumas of days gone by.
Today it's fixated on one point: I'll never know true darkness.
Now this isn't some emo/goth or drawn to serial killers thing. Yes I like black and goth things. I despise humanity's fixation/fetishisation of killers. This is more about the darkness you see when all the lights are off. I will never know such an emptiness or fear the night because even when I close my eyes at night or meditate in a dark room, I don't see nothingness. What I see resembles more of the starry void of space. I see sparkles. It's like staring with your nose pressed to the screen of a 50s TV set. It's as if I downloaded the early glitter effects used on Myspace to my eyeballs and it NEVER goes away.
I don't precisely know when it started. This could be down to trauma or could be simply blamed on the bedroom I was kept in for most of my childhood. (The wall paper looked like a clown had ate too much funfetti cake and threw up every where.) You see I went threw some shit as a kid. But I know that if I stare at glittery things or patterns with lots of dots, the sparkles I see all the time blend in and almost disappear. It's comforting like the relief you get when you take your shoes off after a long day. That's why I find glitter calming. You might find me in the dead of night, when I'm at my worse just painting things with glitter. It's also why I painted my bedroom ceiling with glittery white paint. For when my insomnia is high and I'm lay there looking up, the sparkles take the strain off my eyes and helps me go to sleep.
Until recently I didn't know this was a weird thing. I was never afraid of the dark as a child. Yeah my depth perception can suck and I can't play badminton or tenis but who cares. Sure I might not be able to read a book by a pool in the summer (because the white paper causes me pain) but I can't stay still that long anyway. I'd rather be walking through a forest or having an adventure on holiday anyway. (I'm perfectly capable of being a human sized slug at home thank you. I don't need to spend money to do that.) However my perception of the world is apparently not normal and I've been told that it's a sign of brain damage. Then I was just thrust back into the world knowing that I'm damaged, without knowing how badly or why. I don't know how to deal with this or what to do with this information. But I do know that I detest the sparkles now. I can't unsee it as yet another thing that makes me damaged and part of me wishes it would disappear. But that makes me feel sad. I can't imagine a world without the constant glittery background radiation. It still makes me unique but not in a good way.
Just another thing that makes me brain quirkier than most and it fills me with such sadness.
Why am I like this? Was it the abusive childhood? Was it one of the head traumas I've had and was never taken to hospital for? Was it the adult strength codeine I was force fed for pain as a child? I know the later made it worse. When I'd trip of codeine and the migraine meds I was given the sparkles would almost burn into my eyes. I could feel every single one of them sting my retinas and I'd lock myself away in dark rooms. It was like rubbing my eyes after handling chilli whilst soap was poured into them at the same time and the longer I stared the more intense it got. It's why when I was still medicated with (and addicted too) the codeine in my teens I had to wear tinted dark glasses all the time.
But now that I'm older and I'm free from all that, I don't get those same pains. Sure if I'm burnt out I'll need dark glasses and I detest white buildings but I'm OK.
I just wish I knew why but I never will.
0 notes
Text
Painttool sai grass texture

#Painttool sai grass texture how to#
#Painttool sai grass texture software#
#Painttool sai grass texture professional#
#Painttool sai grass texture download#
#Painttool sai grass texture windows#
There are no reasons why this beauty cannot be one of your favorites. While on one hand, it gives soft starry night sky effects, on the other hand, it also produces bright sharp spray effects with elegant color combination giving your rendition of the universe a classy edge. The floating stars, the luminance that these Paint tool SAI brushes can etch is truly amazing when you want to render paintings of the cosmos for commercial illustrations or personal use. SAI Brush Nebula Galaxy:Īn incredible tool, the SAI Brush Nebula Galaxy made by Nefur Studios can build magic on your canvas.
#Painttool sai grass texture download#
To give your artwork a pencil finish, you can download these Paint tool SAI brushes by DocSinistar from the Deviantart website. It lets you use softer lines or hard and crisp marks like that of shading pencils, depending on what you need for your drawing. The Pencil tool is just perfect when you want to maintain the natural traditional look of a pencil drawing in your digital art. You truly need to know your pencil strokes and lines well enough to bring out a sketch painting as beautiful as you imagined. You can check out the Paint Tool SAI 2 blur setting here. This is the right kind of brush that can be used for creating an illusion in your artwork. It also works great when you are trying to put a focus on the foreground and want to blur out the objects in the background. If you are very particular about being a perfectionist, then you will need the right kind of blurring tool that will not just serve your purpose but also gives it a natural twist. This one proves to be significant when you want to create an illusion in your artwork and do not have the right tool for that. This blur brush created by Lilli-Loves-Carrots is a must-have in your Paint Tool SAI brushes collection. The combination of these sets can be a great asset to you if you want to add some textures to your art. There are several parameters in the Paint Tool SAI brush settings like acrylic, airbrush, blending, ink pen, marker, paint, density, color. Some paint tool Sai texture brushes are the brush tool kit include carpet, cloud, dirt, fabric, glass, grain, leather, and more. This one has a large collection of textured brushes. The First and the Basic Brush Set Is the “default Paint Tool SAI Brushes”: This part of the article will cover some creative brush combinations and packs that their creators have made to make the life of the artists easier when they are confused with choosing the right brush for their work.
#Painttool sai grass texture professional#
While most professional artists love to experiment by creating their custom brush tips and sharing them in the community for all the art enthusiasts to use, amateur artists can explore them and use them to practice different art styles using them. When it comes to painting or creating art, brushes play a vital role in making the artwork successful. Some Interesting Examples of Paint Tool SAI Brush That You May Be Interested in and the Descriptions of Each Brush Set:
#Painttool sai grass texture how to#
This article will mainly focus on various types of Paint tool SAI brushes, SAI brush settings, how to use the paint tool SAI brushes, SAI brush packs, line art brushes, and more.
#Painttool sai grass texture software#
If you are one of those people who love to create art when traveling or going to different places, then this can be a very handy software that can be used on phones as well as laptops that run on Microsoft OS apart from your home personal computer. The Paint Tool SAI brushes are much easier to use, adding up to the comfort of the user. This software is mainly used by beginners and professional artists who enjoy creating raster graphics, animation, characters, and high-quality paintings. Paint Tool SAI is a simple painting and editing software when compared with other similar software available in the market, making it easy to use. What Is Paint Tool SAI Software Used for? Therefore, if you are looking for software that does not slow down your personal computer as such, then you can keep an eye on this option. Now onto the matter of the Paint tool SAI Brushes. It is a smaller program which means it does not occupy a lot of space in your device’s memory, unlike Photoshop which is a much heavier software and needs a lot of space.
#Painttool sai grass texture windows#
Paint Tool SAI is a concise painting and graphics editing software that is created for Microsoft Windows users.
0 notes
Photo
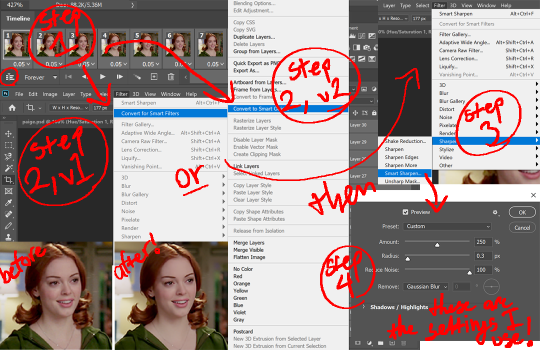
I've recently been asked by several lovely and curious souls to break down this Witcher set, so I thought I’d go ahead and put together a proper tutorial for everyone. All you need is Photoshop and basic giffing knowledge, preferably using the timeline. This isn't necessarily simple, but I would say it's one of the simpler things I've done—somewhere between easy and medium difficulty, maybe.
I. MAKE YOUR BASE GIF
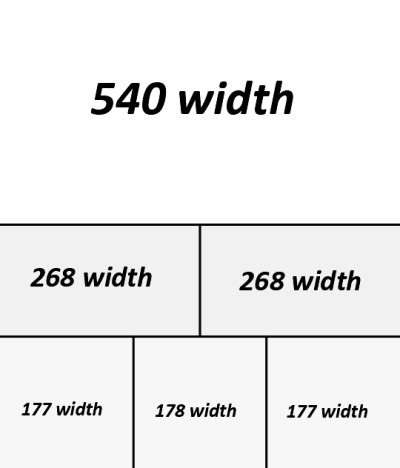
To start, we’re going to be making our base/background gif, which is 540x540. You can color it any way you’d like, but I picked black and white for that particular set because I didn’t want the final product to be too ‘busy’. I wanted to keep the attention on a pop of color at the center instead, which ended up being the second gif and the text.
As a quick sidenote:
Since the gif is so big, I would recommend using at least 1080p footage. I’d recommend always using 1080p footage regardless, but I wouldn’t call it 100% necessary unless you’re making larger (540px, as opposed to 268px or 177px) gifs.
Keeping in mind that the second gif and text will be going in the center of the gif, you’ll want to align the subject/s accordingly. For example, I kept Geralt and Jaskier and Yennefer mostly to the left or right.

Here is the base gif I'll be using:

And here is a tutorial on how I make my black and white gifs if you’d like to get the same grain effect.
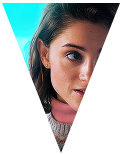
II. MAKE YOUR [SHAPE] GIF
Next is the gif for the shape. Sizing is up to you and ultimately depends on the shape you choose. For me, I know I want an isosceles triangle, so the height of my gif is going to be slightly bigger than the width. My dimensions in the original set were 118x150, so I’ll be making my gif 122x154. You want to oversize here since we’ll be trimming the edges off later on.
After sharpening and coloring, this is what my gif looks like:

III. GROUP YOUR LAYERS
Sounds simple, right? And it is, but it’s as pivotal as it is easy. Maybe it’s dramatic of me to say that I live and breathe by this step, but I kind of do live and breathe by this step. It’s the same technique from this tutorial, and it’s a pivotal step in my blending process also.
Having said that, let’s put all your layers in a group. Do this for both gifs!
CTRL + A or Select > All
Layer > Layer Mask > Reveal Selection

IV. CUT OUT YOUR SHAPE
You can go about this a couple of different ways, but regardless, it’s as simple as editing your layer mask. No, really. It’s why I love grouping layers and slapping a layer mask on. It makes life so much easier in the long run.
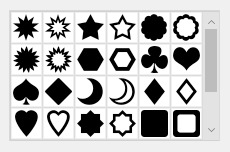
➥ PHOTOSHOP’S CUSTOM SHAPE TOOL
The Custom Shape tool on Photoshop has all the basic shapes you need. Triangles, circles (even though you could just use the round selection tool), stars, and even all the playing suits.
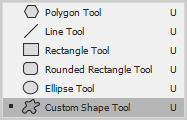
Go ahead and pick a shape to add to your canvas if you haven’t already. Don’t worry too much about the dimensions; you can manually input a specific width and height at the top. Rotate it if you need to (I’ll be rotating my triangle 180° so that it’s upside down) or leave it as is, but when you have it sized the way you’d like, center it and then merge it with a new layer. This way, we can right click on the layer thumbnail and select ‘Select Pixels’.

Next, click on the group layer mask. Invert your selection [SHIFT + CTRL + I or Select > Inverse] and then invert that part of the mask [CTRL + I or Image > Adjustments > Inverse]. Your gif should now be shaped accordingly.
➥ B&W TEXTURES AND VECTORS/PNGs
Alternatively, if you don’t want to limit yourself to basic shapes, you can use a texture or png of anything at all. An instrument, a specific symbol, something abstract, maybe even a flower—it can be literally anything, so long as it’s pure black and pure white. (If you aren’t familiar with how layer masks work, white is what shows and black is what’s hidden. Anything in between and what you get is partially or not all the way transparent, which will look wonky when the smaller gif goes on top of the base gif.)
For example, here’s an icon template by @argetnallison:

Select your image (CTRL + A or Select > All) and copy it.
Go back to your gif. Press ALT and click on the group layer mask at the same time. This will pull up your layer mask.
Paste your image onto the layer mask.
Et voila, as the French and magicians and... other various individuals including myself say.
➥ PAINT BRUSHES
If you’re like me and have a bunch of custom brush sets downloaded, brushes are another way to get fun shapes. If you don’t have any downloaded but are interested in trying it out for yourself, DeviantArt and Brusheezy are the best (or at least my favorite) places to look for them.
It’s the same steps as above, but painting instead of pasting.
V. FINISHING TOUCHES
Now that you’re probably sick of me going on and on about shapes this and shapes that—we get it, Ava, there are shapes, get on with it—it’s time to drag the gif shape onto the base.
To center, because I am admittedly border-obsessive when it comes to things being perfectly 100% centered, I set guides [View > New Guide] in the middle. It’s your width and height divided by two, so I have a vertical guide at 270 and a horizontal guide at 270.
For a “3D” (I don’t know what else to call it, other than “well, I just thought it looked neat”) effect, I added a gradient with the same exact layer mask as my gif shape and positioned it underneath and slightly below the gif.
All that’s left is to add text (I wrote a mini tutorial on gradient text here if you’re interested) and we’re finally done!
You can also do this with more than one shape, like here:

Or make the shape full-scale, like here:
Happy editing!
#completeresources#allresources#yeahps#itsphotoshop#resources#tutorials#ps asks#mine*#as always feel free to reach out if any of this is confusing#i'm sleep deprived so i feel like the chances of that are pretty likely
1K notes
·
View notes
Text
color things funky: a tutorial

protip! it’s best to pick gifs were the subject doesn’t really move. if you go well, hey! you pick gifs where the subject really moves all the time! yes, i do, because i am a clown who loves making things difficult for herself. if you do not love making things difficult for yourself, pick gifs where the subject barely moves.
part zero: the gifs themselves
idk if you have ever made a gif before the quick n easy way i go of making them is finding a clip on youtube, putting it in this 4k video downloader, opening photoshop File > Import > Video Frames to Layer, take the selected clip, bada bing bada boom you’ve got a gif.
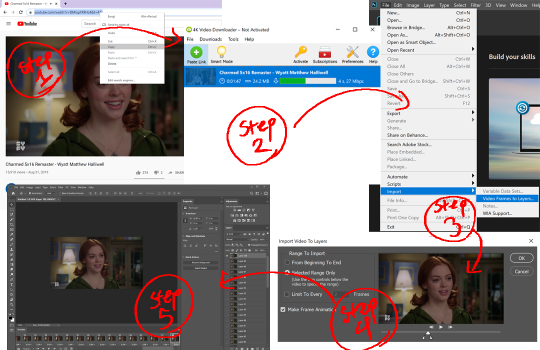
but as you can see for the first row, with no lighting adjustments, your gif is kinda dull. i use 2 (two) steps in lighting. curves and levels. (you’re also gonna wanna crop that bad boy and set the frame rate the .05)

alright! you’re basically done, but now you just want to add a sharpening feature. if you’re good at making gifs and like now how to use other people’s sharpening actions that’s litty but if you’re like me and only read one gif making tutorial ever and have just been making the rest up as you go, then here’s what i do: using the lil button in the bottom left corner of the timeline, convert the timeline from frame animation to video timeline. select all your frames (except text, if you have it!) and convert to a smart object. then go to Filter > Sharpen > Smart Sharpen
but now let’s get to why you’re really here:
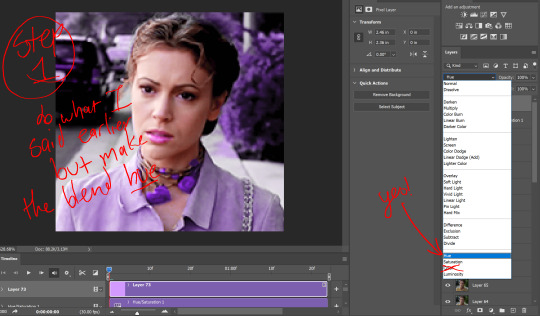
part one: coloring with hue/saturation
this methods works great if your subject moves a lot in the frame, but won’t work well if the background is the same color as your subject’s skin (reds & oranges, some yellows)
this methods works great if your subject moves a lot in the frame, but won’t work well if the background is the same color as your subject’s skin (reds & oranges, some yellows)
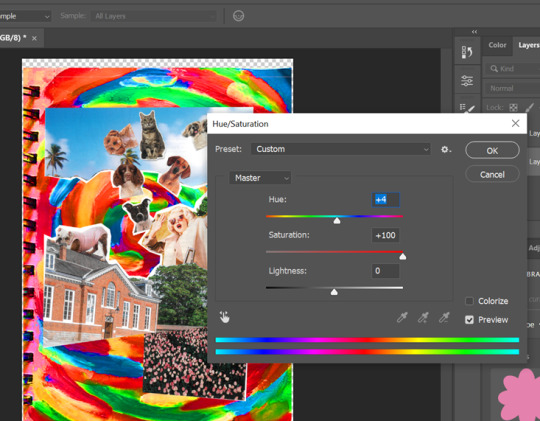
so: you’ve lightened your gif. it looks like the middle one. now, you open the adjustment for hue/saturation. as the background is yellow, i am going to go to the yellow adjustments. the first thing i do is blast the saturation and adjust the parameters so i know that it won’t effect my subjects skin tone. one that’s out of the way, i can put the saturation back to normal and start working with hue. you don’t want to go all the way to a new color at once, with yellows you can usually reach a green or a pink in one layer.
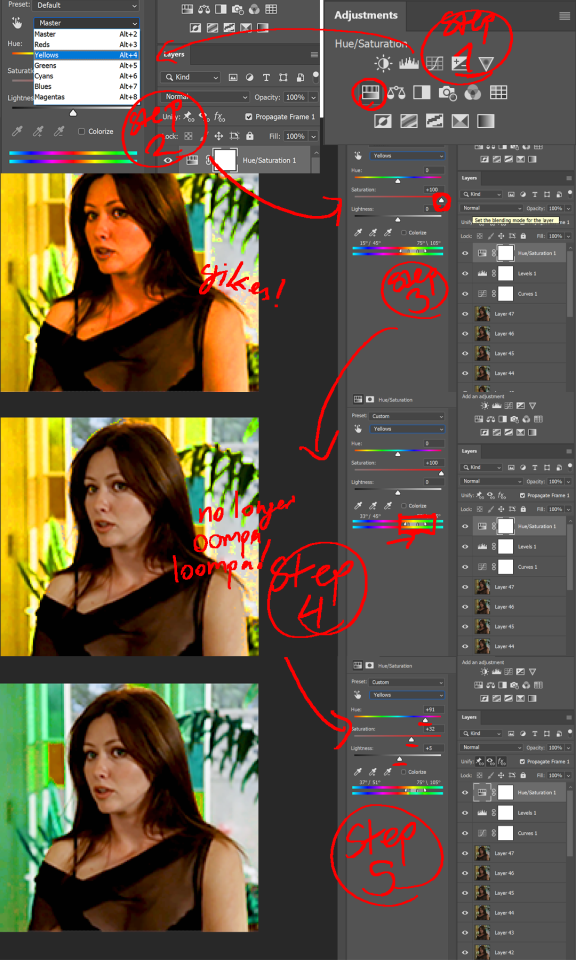
then you can open another hue/saturation, go into the greens and just mess around until you like the color background. but now her skin is looking very yellow against a cyan background. time to fix that! go to reds, make everything a little cooler, lighten it, saturate it. hmm. still yellow. go to yellows, make everything a little cooler, lighten it, saturate it. and then, as a little bonus, go to magentas and drag them over until they are affecting just the lips and parts of the cheeks, saturate it and mess with the hue until the lips/cheeks are a color you like.

part two: coloring with a color layer
the following methods are for when the subject and background are too similar in hue or you just want a specific color are don’t want to have to dick around with the hue slider.
okay, you did lighting, your subject doesn’t move; it’s time to open a layer, pick a color, and grab your brush tool. paint the entire canvas, then set blending mode to color. put a mask on that bad boy. get that layer off your subject. maybe feather it a little. adjust skin tone to match the new background. done!
two notes: on your color layer, you want to make sure your thumbtack, eye, and fx keys are all ON, that way the layer is visible with the color filter applied and the mask location remains consistent. you’ll be able to tell if you missed this step. the other note is that i have my hue/saturation added under the color layer. this is so i don’t accidentally manipulate the color i’ve dyed the gif. this is purely a case by case basis, and you should do whatever works best for your gif.

part three: coloring with a hue layer
this is basically the same process as the above method. the only difference is blending mode is hue not color. the difference between these two filters is that hue will not dye colors that are already in grayscale, giving the gif a more subtle coloring.
the only difference between the left and right gifs is hue vs color, no saturation was change.
part four: get jiggy with it
combine methods! paint backgrounds! add gradients! live ur life!
this is just a color blended layer! but rather than paint it one solid color, i used the gradient tool to give it a different color background. to change the hoodie from green to red, i added a hue/saturation layer, masked it so it only covered the hoodie, and "colorized” the layer to entirely red.

you can do any combination of blends you want! mess around with things! have fun! do what you want! and if you want to share what you make with me, i track #usermargaret!
#😊#resources#editing resources#tutorial#photoshop tutorial#ps tutorial#i'm not proofreading this lmao
119 notes
·
View notes
Text
Process of rendering physical work
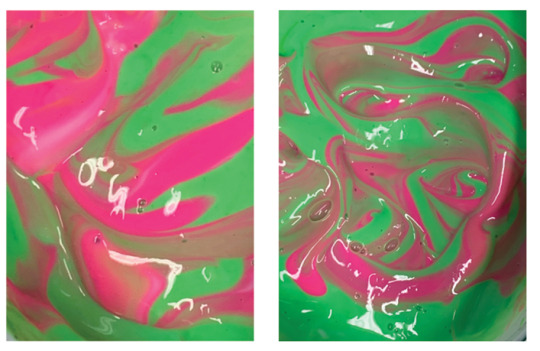
This post involves some screengrabs of the process of samples I have currently made.
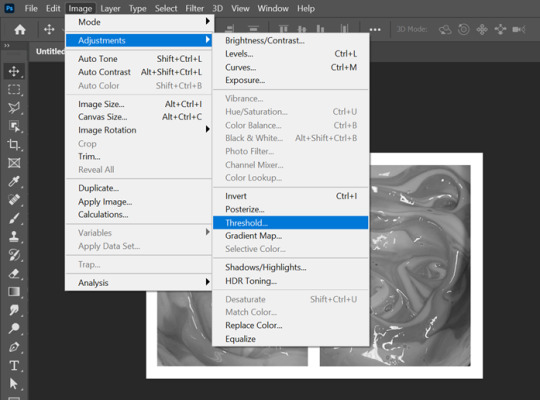
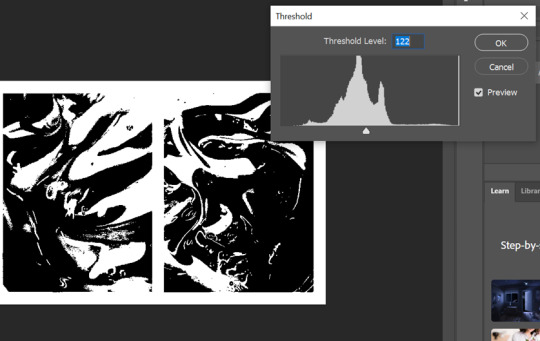
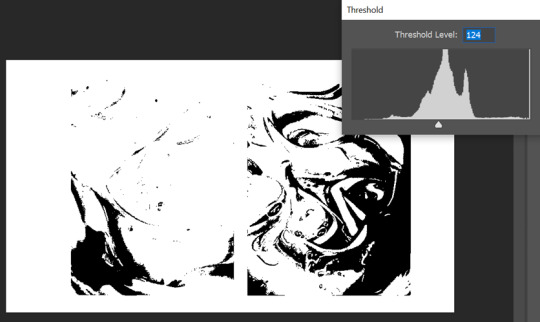
As you can see above, I have began to edit the original image of the paint. Threshold has been used to segment the image into sections. As I wanted the image to be binary, I did this process twice but at different levels. On the left I set the threshold level to 122 however the other image I placed it at 124. This brings out different shaded areas. Before I began the duotone process I had to flatten the image using grayscale so I am able to see the threshold better.

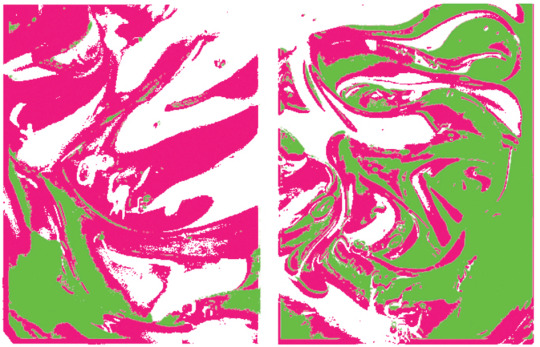
I then used duotone with the two layers I had made with the threshold and set them to the original colours of the picture I took. This was because I wanted to see the difference between the two. Above are the results. This was the most enjoyable process by far as the fact that the paint gave a marble effect so I was able to create to outcomes with the duotone and threshold combination.
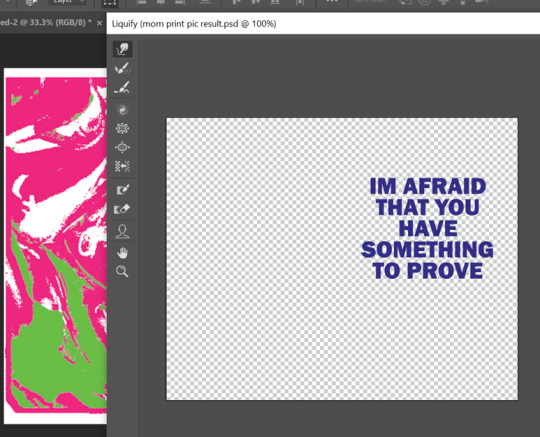
This was a screenshot of the art which I had created on the opposite side of the print sample. This was a font which I had downloaded of adobe fonts as I wanted to find the best block like text. This enabled me to liquify it better using the smudge and expand tool. I had done this process already however I loved this outcome more as I began to become more familiar with the technique and the result I wanted.
Here is another outcome of the process above. Again, I went through the combined techniques twice to get different colours within the duotone image. My final outcome is pink and orange however this was originally created with different shaded of pink because I thought it would be beneficial to use in my zine.
Moving away from the digital comparison samples, I began to look at my aesthetic post where I looked at artists work which had inspired me. I had yet to make many physical samples so I began to look through magazines for any imagery I liked and could cut out. I knew I wanted to make some ‘abnormal’ collages. This means combining multiple objects which aren't normally combined to create this new sense of reality. I wanted this kind of escapism in my work ,with the help of landscapes, to portray the abnormality of stressing over tiny problems. I want the readers to remind themselves of who they are and where they are which I hope eases their worries because its easy to get lost in your own world without acknowledging your the world your living in with others.
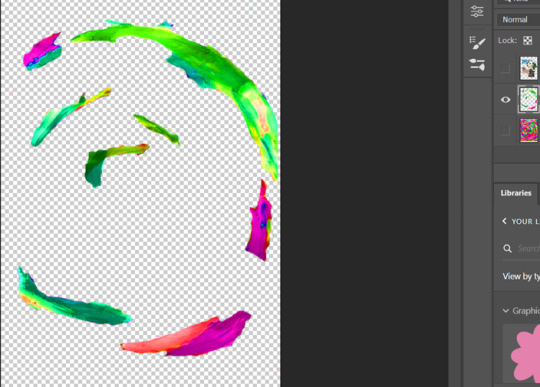
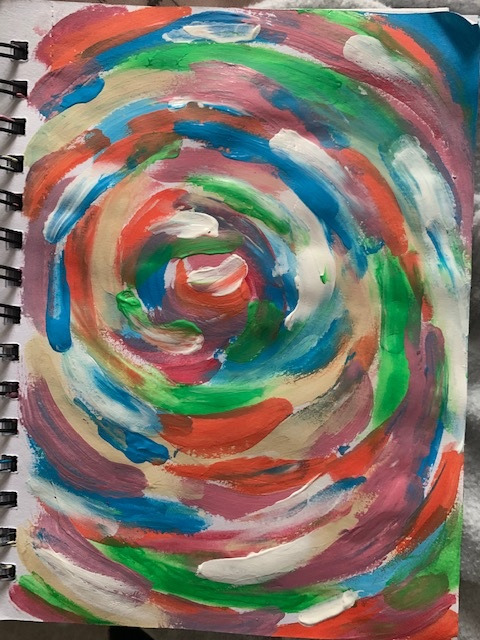
Above was the process of working into the collage once I had scanned it in. I removed its white background, which is formed after scanning, using ‘colour range’ then, I used one of my mixed media art pieces to create its background. I made this using acrylic paint and my fingers. I would normally use a brush to be precise but I didn't want this outcome. I then began to adjust the image using the ‘saturation tool’ to make it appear brighter almost like the collage was spiralling into the page. My previous samples have been looking flat against the backgrounds which is why I created another layer of the background and erased certain areas of the brushstrokes. I then layered this on top of the collage to make the two blend together. I liked this outcome because not only does the collage reflect the common saying ‘ It’s raining cats and dogs outside’, but the outcome doesn't look flat against the page. Keeping the binding of the book I painted on helped bring in the personal elements of the samples aswell. Overall I hope the sample has reflected the meaning behind the saying in visual form to highlight the silliness of life's problems sometimes. This sample is humorous and uplifts me so I am interested in including this style in my work to create the same emotion for the readers.

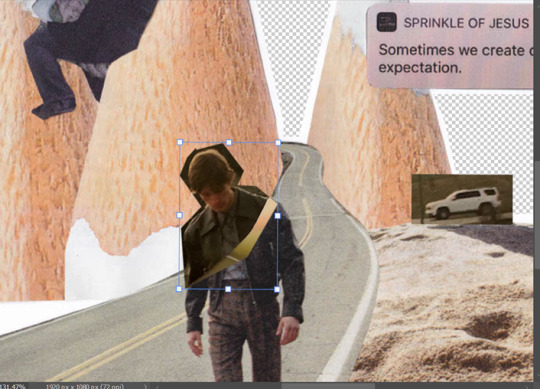
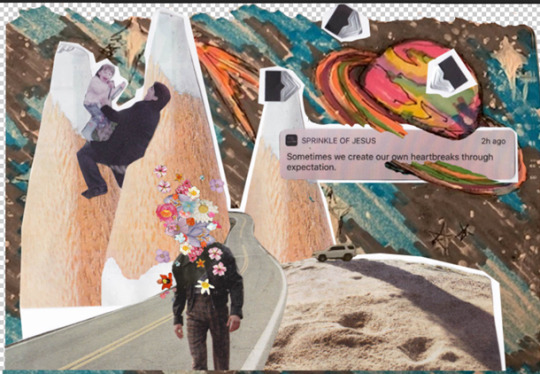
This was the process of another collage sample. This time I wanted to add more personal imagery alongside the magazine cutouts to help portray my story. At first, this collage only had the road in the centre of the pencils, and I was going to edit out the man walking along it as I didn't need it however not only was this difficult to do, but I thought the sample looks empty so it was harmless to leave him in. Luckily, I didn't throw away my cut outs so I found the head of the model to attach back to the body. This didn't look right either. I tried to create a new layer with the man selected and adjusted the image to make it look smooth however this didn't work very well. I think this was because of the angle I scanned in the second cut out. The first collage was scanned in on my printer at home however the second was scanned in through my phone instead. Nevertheless, I worked around this dilemma by adding loads of flowers on the models head. This helps the abnormality become present in the centre of the sample. I also believe this helps portray my message of growth. For example, the pencils in the back symbolises a playground and all aspects of what the noun is associated with which is why I am playing on it as a child with my mom (image on the near left). The road coming out the the pencil mountain portrays the aging of life and abandonment of childhood as you have to grow up. The man in the centre also helps this interpretation with him walking on the road with flower blossoms on his head symbolising the growth of the mind and soul within a person. Aka character development. This is also one of my favourite samples as it holds its message well and feels more personal with my childhood images. It has helped me understand the exact message I want to give to my audience visually.
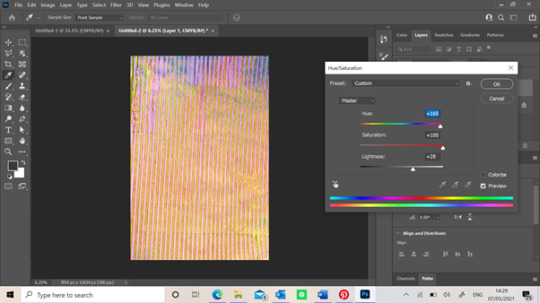
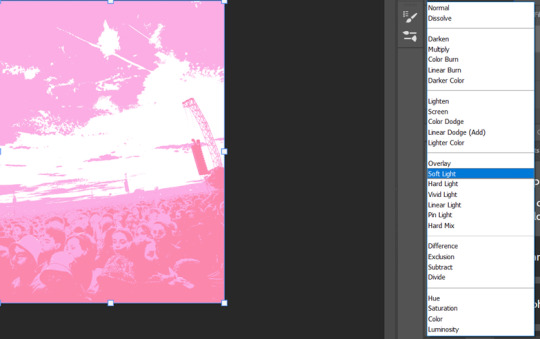
This final screengrab is of the process of the poster sample I had made digitally. Although the collage was made digitally, the background wasn't. The image above is actually a picture of one of the screen prints I made using a stripped generic screen. Originally, it was purple but as you can see above, I changed it’s saturation and hue to create new colours. I loved this outcome because you can see the different textures of the screen print especially since its on paper. When screen printing, the paper obviously got wet so it caused the paper to crimple which is why there are different tons in this adjusted image. This process was before I liquified it and I think I were to do it again, I might have left it like the image before to make the outcome look more authentic.(scrapbook/journal)
1 note
·
View note
Photo
Since the zine is going to be printed, we have to follow some specific setup requirements. So we’ve made an image template to help our artists get their work print ready. We’ve even thrown together a quick tutorial on how to use the template so y’all can be sure you’re doing it right. Just follow these easy steps.
Step 1: Download the Template

PNG (works in most programs) | Photoshop File
Use the links above to download whichever template works best for you. Do NOT use the image above the links, it’s the wrong size. Both templates are just a black border on a transparent background to give you the aspect ratio and show you where the bleeds will be. There’s some text in the middle but that should be removed and replaced with your image. The Photoshop file is in the correct color profile with layers already set up for your image to be placed under the border but the PNG works just as well. We might do a color tutorial later to help y’all with converting RGB to CYMK.
Step 2: Check Your Size
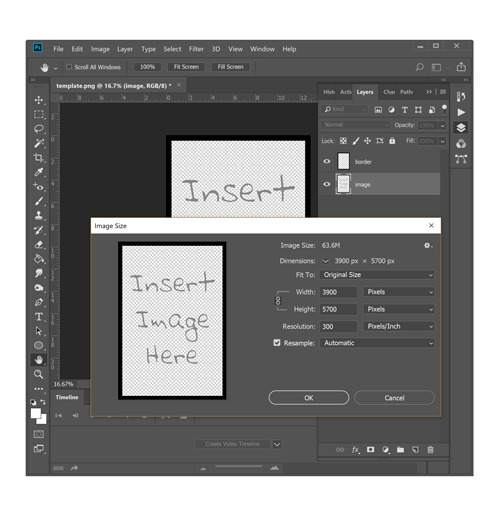
The templates should be 13 by 19 inches at 300 dpi with a half inch black border (bleed) around the edge. It’s possible the PNG may save at a lower dpi so go to your image properties and be sure you’ve got all the right numbers. It should be 3900x5700 pixels which will print 13x19 inches at 300 pixels/inch resolution. If your computer has trouble with that size you can shrink it down to 1950x2850 (6.5x9.5 at 300dpi) but that is the minimum print size so don’t go any smaller.
Step 3: Drop in Your Art
This is best done at the sketch stage but you can drop in more finished work too, you may just have to make some adjustments for the bleed. Your image should go on a layer below the black border which should always be the very top layer. That border is the bleed - a 3 to 6mm border of unimportant but still complete extension of your finished image. Your work should look its best with that border turned on (covering the bleed) but still look ok with the border off (showing the bleed). If your composition looks better with the border turned off then you need to shrink your image so that it fits inside the border (see gif at end of post).
Why do we do this? Because most printers leave a white border around the edge of the paper, so most print shops will print an image on a larger sheet and cut it down to the desired size to create the effect of a ‘full bleed’ where the image goes all the way to the edge of the page. The bleed is the part of the image that gets cut off but printers and cutters aren’t perfect. They’re often a bit crooked so if your image doesn’t extend into the bleed you run the risk of little white edges where the cutter wasn’t properly aligned.
Step 4: Paint the Whole Canvas

Extend your image all the way to the canvas edge and finish your sketch. I usually turn the bleed layer to a low opacity while I’m doing line work then hide it completely when I color, occasionally turning it back on to be sure my piece still looks best with the border on. If your piece is already finished you may have to do some extra work to paint the bleed. The edge underneath the border is getting cut off so you don’t have to be perfect with it. You can be downright sloppy with your bleeds if you want. It’s going to get cut off. Don’t waste time putting detail in the bleed. It will confuse your printer (me) and make them think your piece doesn’t have proper bleeds. I will pester you about bleeds if you have detail on your edges.
Step 5: Hide the Bleed and Save
If you leave that black border there you’ll run the risk of having black edges instead of white ones. Hide the bleed layer and save your file. It’ll look a little strange with the border turned off but that’s ok so long as it looks the best with the border on. If you have Photoshop you can just send us the PSD file. If you don’t then you’ll need to save the file in a format we can use. PNG is a pretty reliable format but it will convert your image to RGB color which is bad if you were working in CYMK. PNGs can also be tricky about their dpi so make sure your pixel sizes are right if you use this format. TIFFs are the old reliable of print media but they are huuuge files. They are the best quality though so save as TIFF if your computer and file transfer method can handle it. Google Drive is a great file transfer method. Do NOT save as JPG - these are for web use only. Do NOT save as PDF unless you know how to prevent it from converting your images to JPGs. We might do a tutorial on that later.
Special Consideration: Books Add Curve
If you’re preparing your image to be printed in a book (which you are) then you’ve also got the special consideration of the curve. Open any book with a spine. See how the inside edge of the page is curved and a bit shadowed? Open a bigger book and see how that makes the effect worse. If your image is going to be in a book you need to be sure to account for this and not put anything super important on the inside edge. You may not know which edge that is so it’s best to just not put anything on either side. You can request a specific side if you really want something to be right on the outer edge but there's only so many of each side so ask first.
Special Consideration: Finished Image
Some of y’all have already (or nearly) finished your images. Hopefully you’ve accounted for bleed but it’s ok if you didn’t. You’ve got plenty of time to fix it. Just drop your image into the template and resize until it fits inside the black border. Once you’ve got it to the right size all you need to do is lay down color that approximately extends your image. You do not need to be nit picky about this. Just get it close enough to blend into the finished image. Don’t put anything new on the edge because it will get cut off. If you need help I can teach you some tricks to easily add bleed (clone tool is amazing), just find me (umbraja) on Discord.
53 notes
·
View notes
Photo


(First off, apologies if this is like 3 million years late, bc good ol tumble likes eating my messages :’D)
I use Painttool Sai for nearly everything, and Gimp just for scaling and rotating (bc Sai doesn’t have an option to scale things without interpolation, so it makes everything blurry) and exporting all the individual frames to a gif when i’m done! Sai is TOTALLY not designed for pixel art honestly, but I stick with it just cuz I’m already familiar with it and I’m too lazy to learn how to use/download a better pixel art program 😅
As for tips, hmmm - I’m not an expert by any means but this is what I find useful! (esp working with Sai)
A bajillion layers - I usually have one background layer, then a folder for each moving element. E.g. a folder for blinking stars, with 3 different frames that I’ll repeat over and over. A folder for Taako, with 6 different frames of his hair fwhooping in the wind. The number of repeating frames for each element needs to divide evenly into the total number of frames for it to loop evenly (i.e. I could have 12 or 18 or 24 total, bc both the stars and Taako would loop evenly). I usually end up with like 24-36 frames and 100ish layers ¯\_(ツ)_/¯ whoops im a mess !
The patience of a goddamn saint - I do pixel animation in the worst way possible, i.e. by drawing a few key layers for each element, copy-and-pasting them to form in between layers and editing/moving them as need be, then exporting each frame as a PNG. It is painstaking and awful, and every loved one of mine who has watched me doing it has expressed concern for my wellbeing, but it’s kind of meditative in a weird way lmao! (And also the reason why I haven’t produced any pixel art recently, bc with college in session i no longer have hours upon hours to while away movin pixels.)
Figuring out your colors first - ok, some actual advice that will hopefully be useful even if you’re not a masochistic Sai goblin like me. I always start off with an idea of what environment/what idea i want the colors to convey, then paint a super rough sketch of the whole thing just to figure out the composition. Then tweak the colors till I’m happy with it, save my color palette in a different file, and neaten up that messy sketch until it eventually becomes my BG layer.
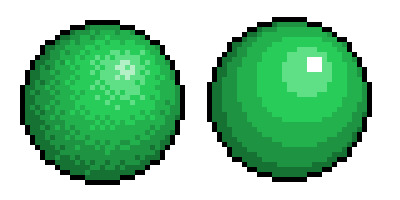
Don’t use the airbrush tool! - I’m always tempted to use the airbrush tool to add some extra shading, but since gifs only allow a palette of so many colors (as I understand it), any gradient/airbrush shading will be automatically DITHERED you export it to a gif. This gives it a kind of crunchy look I really don’t like, personally:
That’s why, in my later gifs, I tried to do more cell shading - i.e. where you pick a restricted palette to start with, and don’t blend any of the colors together.

(Here’s a clearer example of the difference between dithering and cell shading:)
If you do want some smoother shading though, you can do the dithering manually - which seems nearly always to work out nicer than just letting the art program do it automatically when you export to a gif. That way you can pick your own palette of colors and choose what dithering pattern you want to use, depending on the texture of the surface.
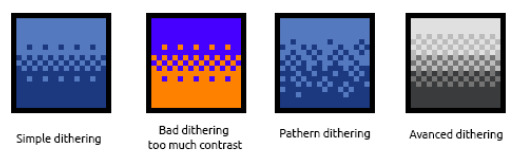
Most good pixel art seems to use a combination of cell shading and dithering, like the gif below.

OK UHH to conclude this super-long post:
Sources for images above: X X X (Couldn’t find the source of the last one to save my life, bloody Pinterest >://)
Mini Pixel Art Tutorials (very useful and cute)
Lots of art I was inspired by composition- or pixel-wise: X X X X X
#i always make super long posts i apologize#also that Story and Song final pixel is on the way i swear smh my professors are just trying to kill me#asks#anon#bobbytriesatlife
31 notes
·
View notes
Text
Torrent For Adobe Photoshop Cs6 For Mac

Torrent For Adobe Photoshop Cs6 For Mac Free Download Utorrent
Photoshop Cs6 For Mac Free
Torrent For Adobe Photoshop Cs6 For Mac Free Full
Photoshop Cs6 For Mac Trial
Adobe Photoshop 2020 Crack v21.2.1.265 Torrent Full Version Latest I want to send you a new version of Adobe Photoshop 2020 Crack for Mac with a serial number, which is part of Creative Cloud. Adobe Photoshop is one of the best graphic raster editors that can work with a large number of graphic formats.
Download Adobe Photoshop CS6 for Mac free latest version offline setup. Adobe Photoshop CS6 for Mac is a powerful and professional image editing solution for dealing with different types of computer graphics and provides a variety of powerful tools.
Adobe Photoshop CS6 for Mac Review
Photoshop CS6 provides a professional set of tools with a variety of powerful tools that enhances the designing process and makes it very easy for the users to effortlessly edit the photos. It provides an intuitive user interface with different sidebars, tools and menu options that make it convenient for users to enhance digital photos.
Plugins support make it very easy to enhance the photos. Edit the raster designs and work on vector images as well as process RAW photos. The application comes with complete support for enhancing the photos as well as fix images with minimum efforts.
Change the color of the images as well as adjust different settings to enhance the photos. Change the background and other details with minimum efforts as well as use different brushes and other tools to enhance the digital photos. All in all, it is a complete application to edit and enhance the digital images with minimum efforts.
Adobe CS6 Master Collection 32/64bit Torrent Free Download: The Adobe Creative Suite 6 Cloud is a collection of 20+ desktop and mobile apps and services for photography, design, video, web, UX and more. Now you can take your ideas to new places with Photoshop on the iPad, draw and paint with Fresco and design for 3D and AR.
Adobe Photoshop 2020 Crack v21.2.1.265 Torrent Full Version Latest I want to send you a new version of Adobe Photoshop 2020 Crack for Mac with a serial number, which is part of Creative Cloud. Adobe Photoshop is one of the best graphic raster editors that can work with a large number of graphic formats.
Features of Adobe Photoshop CS6 for Mac
Powerful application to edit and enhance the photos
Simple and intuitive user interface with a wide range of powerful tools
Edit and enhance the digital images with minimum efforts
Plugins support to enhance the functionality of the application
Fix different image issues and change the background of photos
Provides over 65 features and capabilities
Different improvements and optimizations
Change the background and color of the images
Layers support and adjust different settings
Remix tool and use 3D option with trimming features
GPU processing units with boosting and editing features
Pixels bending features and quality adjustments
Adjust the background of the photos
Apply different filters and effects to the videos
Editing the 3D components of the videos
Sliders to make different adjustments
Blending and masking features
Many other powerful options and features
Technical Details of Adobe Photoshop CS6 for Mac
File Name: Adobe_Photoshop_CS6_13.0_Final.zip
File Size: 1.0 GB
Developer: Adobe
System Requirements for Adobe Photoshop CS6 for Mac
Mac OS X 10.7 or later
2 GB Free HDD
1 GB RAM
Intel Core 2 Duo or higher
Adobe Photoshop CS6 for Mac Free Download
Download Adobe Photoshop CS6 latest version offline setup for Mac OS X by clicking the below button. You may also like to download Adobe Master Collection CS6 for Mac
Download Adobe Photoshop CS6 Full Version
Adobe Photoshop CS6 : is a very famous photo/image editing tool, which is preferred & used by millions of professionals around the globe, it has a very user-friendly UI that’s why its easier to use for both “newbies and PRO’s”.By using Adobe Photoshop CS6 edition you can create new images and edit them easily, Photoshop used to create photorealistic images to work with color images, retouching, color correction, graphics transformation, color separation etc.
Offline Installer of Adobe Photoshop CS6 Free Download. Adobe Photoshop CS6 free download for Windows XP, Windows Vista, Windows 7, Windows 8, and Windows 10. You can get Adobe Photoshop CS6 portable and extended edition.
Adobe Photoshop CS6 Introduction :
Adobe Photoshop CS6 (extended edition) or Adobe Photoshop Creative Studio 6 is a famous suite of Adobe creative tools that have changed the World of an image and video editing. It’s a new era of Photoshop to edit images more precisely and perfectly. Photoshop CS6 is a creative image editing suite with a bunch of new functionalities in comparison to previous Photoshop CS versions. It isn’t only makeup that makes people beautiful but more than that Photoshop is used by many graphic designers that make images more beautiful than cameras can ever catch. Nowadays cameras enhanced features could be easily added to previous images with the help of Adobe Photoshop CS6 designing tool. Whether you need DSLR taken the image or any other enhanced particular image, you can simply ask any Photoshop geek which has a new version and skills of PS, he will make it for you within minutes. Similarly, Photographers nowadays didn’t sell their images directly as competition here is also on high peaks, so they use Photoshop to make their images look more beautiful.
Adobe Photoshop CS6 Summary :
Famous Photoshop inventor made image editing more enhanced with its new suite that is also known as Adobe Photoshop CS6.
Like other creative suites, CS6 also came with video editing tool as an extension for few popular video editing formats.
As the purpose of releasing a new version, Photoshop CS6 also added new features like Straighten tool, Content-Aware tool, and background saving feature.
Alarming conditions will now never stop for XP users as Adobe also drop support for XP in Photoshop CS6 just like Microsoft did with Windows XP.
Adobe Photoshop is CS6 will now release as part of Adobe Photoshop CC because Adobe Photoshop CC or Creative Cloud is subscription service plus a new edition of Adobe Photoshop CS or Creative Studio.
Adobe Photoshop CS6 is released in May 2013 with new creative design and enhanced features to make image editing awesome than ever, with an aim of improved performance. With these intensifying performance, new features like Content Aware Move has been added in the form of a Content-Aware patch. Another move with video editing has been made in CS6 Photoshop suite by famous tech giant Adobe. This move may not be made to replace Adobe premier a standard tool for video editing but some standard features were added like color and exposure adjustments, support for few popular video formats as well as a layered approach is just an extension to Photoshop suite. Video editing is just like the addition of Visio viewer to MS Office suites by Microsoft to just editing videos on a small level as standard tools for image and video editing is nowadays become more complex. “Straighten” tool is also a part of image editor as a new enhancement in Photoshop CS6 which makes the user able to draw a straight line on the image anywhere while CS6 now also allows background saving feature. Here a bad news for Windows XP users as Adobe dropped support for Windows XP in CS6 in favor of Microsoft and it’s better when XP left by MS too. But you can also Adobe Photoshop CS6 free. download full version for Windows XP But here one thing has to remember that it could be used with Windows XP still and may not create problems in simple image editing features but may create issues in complex or advanced features. Adobe Photoshop cs6 download and enjoy.
Labels serve many functions in a busy office, from filing organization to postal mailings. Label template for pages.
Features of Adobe Photoshop CS6 :
Torrent For Adobe Photoshop Cs6 For Mac Free Download Utorrent
its more Advanced than ever.
Time savings, improvements to user feedback.
Easier to use.
Image optimization for different monitor resolutions.
The effectiveness of the tools.
It’s easier to switch between screens.
Smart Objects to be more intelligent.
Opportunity to voice control operations along with keyboard and mouse.
Deformation operation, interpolation, canvas rotation, 3D-manipulation, etc.
3D graphics.
Convert video and images that were not possible before.
Switching between the screens and get more accurate results than previous.
There is a new drawing tools and graphics etc.
The most advanced tools for working with photos.
Color and tone control.
Intuitive creation and video clips.
Performing quantitative analysis.
Combining images with advanced features.
Creation of expression layouts and graphics.
Edit and process images with excellent tools for image.
Professional image processing with the use of the plug Adobe Photoshop Camera Raw 7.
Simplified workflow.
Simple tools for creating 3D-graphics.
Other adobe Related CS6 Products :
it Allows you to edit images and also create three-dimensional graphics, two-dimensional projects, as well as film. Adobe Photoshop CS6 is the world’s most popular graphics and digital photo-editing software program. It is used by millions of graphic designers and photographers. it has an Extended version of photoshop too, Adobe Photoshop CS6 extended is a professional software for digital image processing with quality, effects and changes that can be set according to what you expect. Get Adobe photoshop cs6 free. download full version for Windows 7, Windows 8, Windows XP, Windows 10 from below provided links.
How to Crack, Register Or Activate Photoshop CS6 for free ?
TURN OFF YOUR INTERNET CONNECTION BEFORE PROCEEDING (IMPORTANT)
install application from “Adobe CS6” folder by double clicking on
the “Set-up.exe” (with administrator rights on your system.)
After that Choose TRY install “OPTION”
Then Select your language. (You can not change it after installation so choose wisely)
After installation Close the Application “PS CS6” (IMPORTANT)
Go to the installation folder and Rename the original “amtlib.dll” to (amtlib.dll.BAK)
C:Program FilesAdobeAdobe Photoshop CS6 OR,
C:Program Files (x86)AdobeAdobe Photoshop CS6 OR,
C:Program FilesAdobeAdobe Photoshop CS6 (64 Bit)
Copy “amtlib.dll” from “crack” folder and paste it into the installation folder / Directory.
Double click on “AdobePatchInstaller.exe” in the folder “Photoshop_CS6_13_0_1_update” to update version 13.0.1
Photoshop Cs6 For Mac Free
Do not update to upcoming builds after applying crack “RECOMMENDED”
All done, Enjoy ! Adobe Photoshop CS6 13.0.1 full version for free… 😀
Torrent For Adobe Photoshop Cs6 For Mac Free Full
Adobe Photoshop CS6 incl Crack Download Links !
Photoshop Cs6 For Mac Trial
Download Adobe Photoshop CS6 Cracked.zip / Alternate Link / Link 2 / Mirror Link (1.5 gb)
0 notes
Photo
What kind of sorcery is this ?
Okay, people usually don't say it that way, but while posting my pictures for the TS4 Edit Challenge, a received some messages asking me how I do that.. Every picture is different, but most of the time, the first steps are really similar. For the moment, we will focus on that !
I use Photoshop, so some of the tools I use can be specific to this software. But most of my tips can be done on other programs.I will try my best to explain everything, but if you are not familiar with a graphic editor software, this may be too complicated.
For each complex function in Photoshop, I will try to give you a link to the official help page, in case you need more informations.
But as you can imagine, before editing something, you need some screenshots from your game ! I will begin with this, but before that, I need to explain some of the technics I use, so you can understand why I take my screens in this way.
For this tutorial, I will only focus on technical stuff.
Photomerging
Something usefull if you want to create a illustration in portrait format. The pictures you take in game are in landscape format, and usually big enough if you keep this orientation.
It’s easier to work on a bigger base picture : when you scale it down, the imperfections will be less visible, the result will be sharper. But when you want to create a picture in portrait format, you may be limited by your computer screen height, when you take your screen in game.
Fortunately, le Photomerge tool in photoshop allow you to merge two pictures automatically. It works this way :
To access the tool, go to File > Automate > Photomerge. More informations on the Adobe official page.
As you see, to use this tool, you will need to take more screens in game.
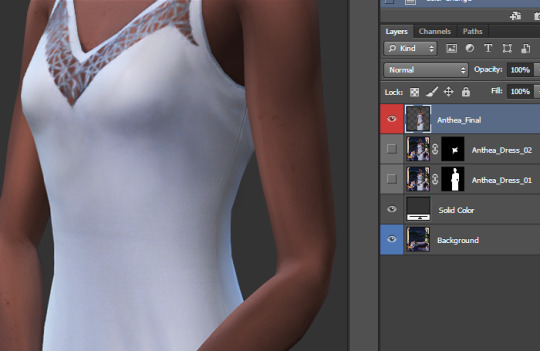
Separated layers
And... it’s not the only reason why I take lots of screens when working on a picture ! The title says it all : I work with different layers in photoshop : for exemple my background and my character are not on the same layer, allowing me to edit them separately, more easely. So I need to take screens of the different elements separately in game.
Nothing more to explain, for the moment, just keep that in mind for the next step.
In Game.
For this step, there is three essential mods I will use :
Pose Player, and poses I created/downloaded. Have a look at the topic for more explanation.
Teleport Any Sims, to place my sims precisely.
MasteController, with the Dresser module, to change my sims outfit while she will be posing.
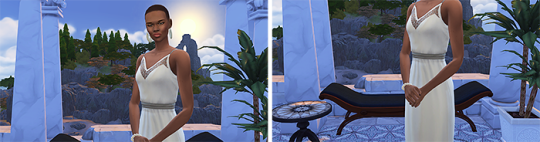
For this tutorial, I will create a simple picture : a not too complex background, a single sims, wearing a dress. To explain a trick I often use, this dress will be composed of two different dresses from the game.
To begin with, I just lay the foundations of the decor, and then, I place a teleporter statue to define where my sims will be. I need define the location of my camera before finishing the setting. When you will go in buy/build mode to finish the background, the sims posing will be reseted and you will need to place another statue, so don't forget where you placed it at the first place (you can place a small object on floor to mark the location).
Now it's time to teleport my sims, and make her pose (I won't detail how to use the mods here).
Press TAB to go in camera mode, and choose your view. To save your camera setting, simply press Ctrl and one number between 5 and 9 (not on the numeric keypad). Then, if you press the number you chosen (without Ctrl), the camera will return to the saved state.
As I will use the photomerging tool for this exemple, you need to save two camera states, like this :
You can already take two screenshots, to test the photomerging (you need to have enough common areas between the two screenshots for the tool to work). If it doesn’t work fine, redefine your camera states.
These screenshots will also help you determine the zones you need to fill in you background. Time to finish your setting, and don't forget to place a teleporter statue again.
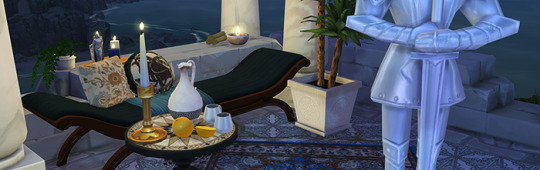
When it’s done, you can take your final screenshots. Quick note, you can move your objects in the background, if some areas still seem too empty. Your sims will be reseted again, and you will need a new statue to replace her.
The scene now takes place later in the evening, as I wanted to use candles. Don't forget to choose the color and intensity of each of your light sources, it can help creating an atmosphere.
When all is ready, save your game, in case you need to make some changes, or take some new screenshots. The camera states are automatically saved when you quit the game.
I take two screenshots with the first dress. Then, I use the Master Controler (click on your sims, MC Command Cender > MC Dresser > Change Outfit) to change her outfit, and screen her with the second dress. When it’s done, I make my sims stop posing and go away, to take a screen of my background without the sims.
I now have 6 screenshots to work with :

Working with layers.
At first, I use the Photomerge tool to combine my differents screens (I checked perspective, for my exemple). I now have three different pictures. I Put the in the same Photoshop file. If I try to superpose them, the landscape may not match perfectly, as Photoshop never assemble your pictures exactly the same way.
But it’s not a problem : I’m going to separate my sims from the background. I will only keep the middle part of the second dress, to mask the belt, so I put this on aside for the moment !
You can already crop your screen at this step, to keep only the zone you want. I won't speak about composition rules this time, but they are the same as in photography.
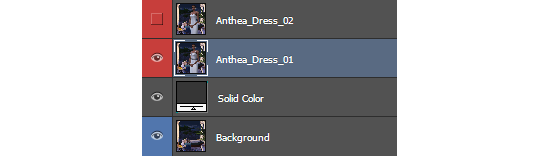
I added a solid color below my sims layer, to see the result when I will cut her out of the background.
For this step, I use... the polygonal lasso tool (1) ! Using the pen tool would be more precise, but it can takes more time, especially if you are not familiar with this tool.
When I’m done selecting my sims with the lasso, I create a mask using the selection, by cliquing on this icon, in the layer panel (2).

If you need to edit your selection, simply click on the mask (3), and paint in black (to erase) and white (to show) to make corrections. More informations about how to use layer masks here.
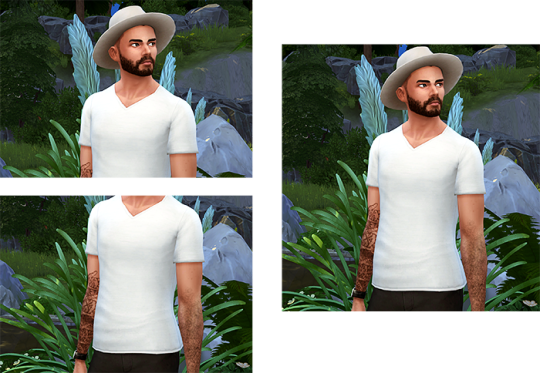
After that, I did the same thing with the middle of the dress (I didn't bother with the face and shoulders this time, as I won't keep them on this layer). Then, I edited the mask to create a nice transition between the two dresses.
I use this trick quite often, if I need to combine to clothes or hairstyles, add a jacket on a specific top, or make the skin visible on some areas. For exemple, in my FULL BODY picture, I use this tip to make the legs and the ear visible.
When I'm satisfied with the result, I duplicate the two layers (my sims, and the bottom of the dress) and combine them. Select the two layers in the layer panel, right click on them, and use Duplicate Layers. Then, select the copies, right click on them again, and select Merge Layers. I keep the original ones just in case I need to edit my mask (you will have to do all this again), I simply hide them.
Some random tips.
I'm now ready to work on my picture, in the best conditions. These steps are common to all my pictures, but the following ones are differents for each picture. But I still have some useful tips to share !
Most of them concern nondestructive editing : it allows you to revert or modify the effects you apply on your picture at every moment.
Convert to smart object
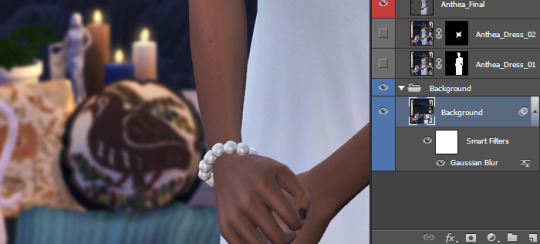
As I want to focus the picture on my sims (like in my LIGHT picture), I will blur the background layer a bit. If you simply apply a Gaussian Blur filter, and then continue your work, it will be impossible to revert or change the intensity later.
Except if your layer is a smart object. Select your layer, right click on it and select Convert to smart object. The original state of your layer will be saved, and you will be able to edit or delete each filter you applyied on it, at every moment, by double clicking on the filter name.
Ajustement Layer
If you go in the Image > Adjustments menu, there is many way to adjust the contrast and colors of your pictures. But these modifications are destructive, as the directly change your image, and can't be edited/deleted later.
Thats the reason why I use adjustment layer instead. In the Layer panel, click here (1) to create an adjustment layer. And place this newly created layer at the top (2), above all your layers, to make it affect the whole picture.
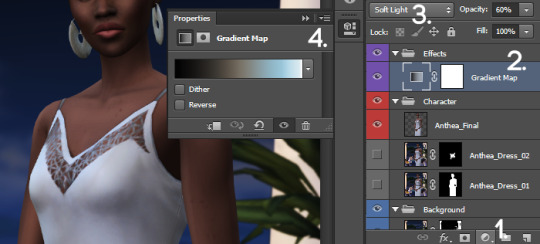
You can even change the blending mode of these layers (3), to obtain different effects. In a previous tips post, I already talk about the Gradient Map layer, in Soft Light mode, to add contrast and change the atmosphere of my picture. Try, experiment, there is a large variety of effects you can create that way ;)
You can also try to add a Color Lookup layer, and try the different options !
You can edit your adjustment layer parameters in the Properties panel (4). If you can find it, in the menu, go to Window, find Properties in the list, and click.
One last thing : as you can see, adjustment layer come with a mask. It's completely white by default (it affect the whole picture), but you can adjust where and with which intensity it is applied, by painting on the mask.
Create Clipping Mask
If you want to apply your layer adjustment layer only on one precise layer, instead of the whole picture, move it above this layer, right click on it, and select Create Clipping Mask.
This tips also work with a classic layer. On my pictures, I always correct or redraw some parts of my sims face, not on the original layer (as I avoid any destructive modicitaion), but on a new layer, applyed only on the base layer.
On a previous tips post, I spoke about my basic editing process, including how I manually adjust the shadows on my sims (I'm not going to rexplain the whole precess here, have a look at the post). I paint my shadows and light on a grey layer on Soft Light mode. If I don't use the clipping mask, it will also affect the background.
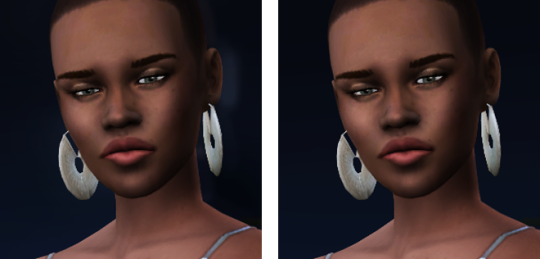
Without and with clipping mask
Another use of the clipping mask, to conclude with this. Afterwards, I decided to add some transparency to the dress. I reopened my game, take two screens of my sims without clothing (and photomeged them), and added this new layer just above my Sims layer, using the clipping mask. Then, I added a mask on this layer, turned it black, and paint some areas with a white brush with low opacity to make the skin visible.

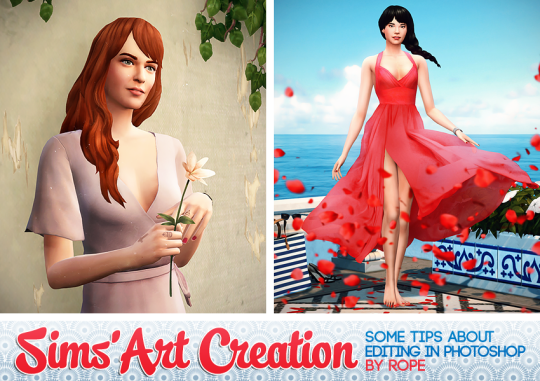
The Final Picture.
And here is the result ! Again, I won't explain everything, as I already spoke about some of these things in this previous tutorial post. If you are curious to see my layer panel at the end, click here.
Here is the final picture.

Base Picture - Final picture in full size
Voilà ! I think it's the first time a post this long in english. I hope everything is understandable. ;)
Don’t hesitate to tag me if you create pictures using these tips ! The same goes for my Sims Creation Tips, you can tag me too if you create sims using it.
If you are looking on more tips (not only about photoshop), don't forget to have a look at my Tips tag. To see my other illustrations created with the sims, simply click here !
And if you like this tutorial, or my creations for the Sims, feel free to buy me a coffee (and a croissant if you want :D)
1K notes
·
View notes
Note
Hey! I love your blog and your edits. Can you explain how you colored the episode per gifset thing for the second episode? How did you get all the colors to match like that!?? Thank you
okayyyyy hi!!! thank you for the kind words. sorry it took a while for me to type this up!! the tutorial for how i colored this gifset is below the cut.
what you’ll need:
photoshop (i’m using cc)
know how to make a gif (i’m only going over coloring with psds included, not the actual gif making part)
please like/reblog if you use or found this helpful!
if you want, i uploaded a couple psds i used on mediafire. you are free to download them and use! just please don’t claim as your own, steal, or redistribute.
here’s a more detailed explanation though:
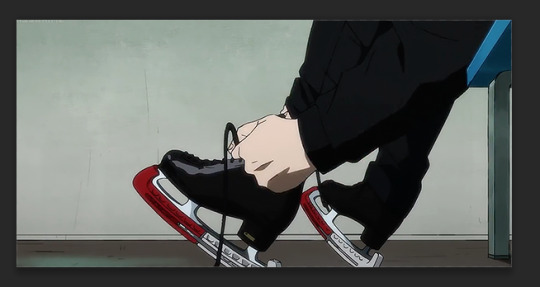
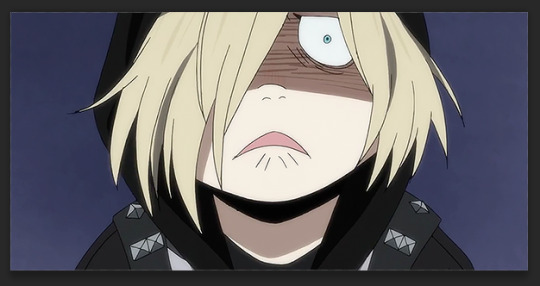
here’s the first gif before coloring.
i use a couple different coloring methods, and one of them is tweaking the neutral/white colors of a gif by using selective color.
you have your usual brightness/contrast, curves, etc, basically like a base. the settings are slightly different for each gif, and there are a lot of psds out there to help you with a base (oh hey, check out my photoshop blog @winchesterpsds XD).
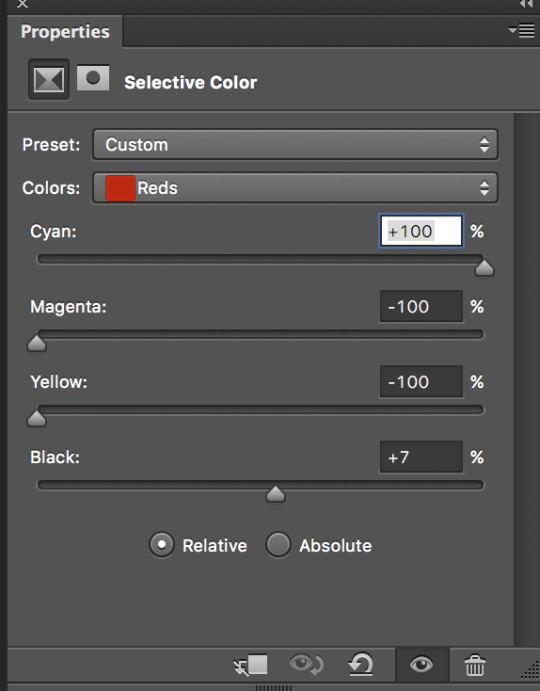
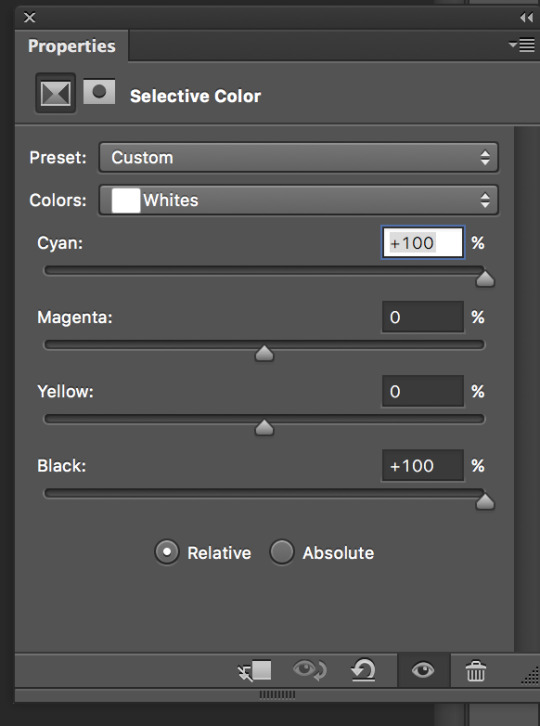
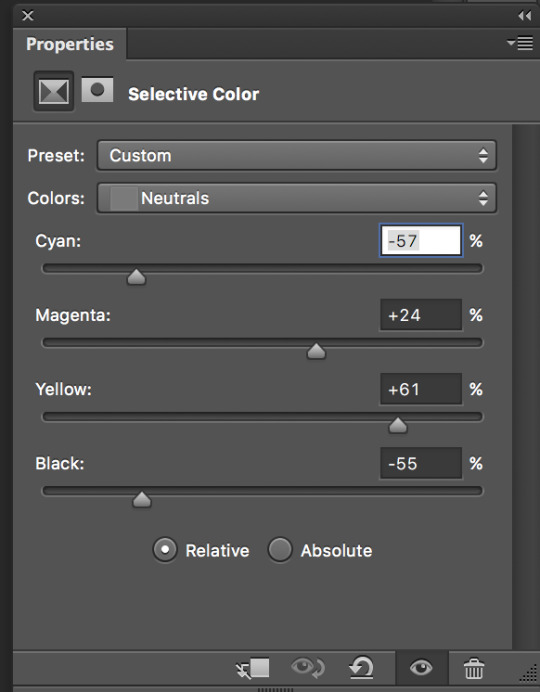
anyway, how i got the wall to be that shade of blue was by using selective color.
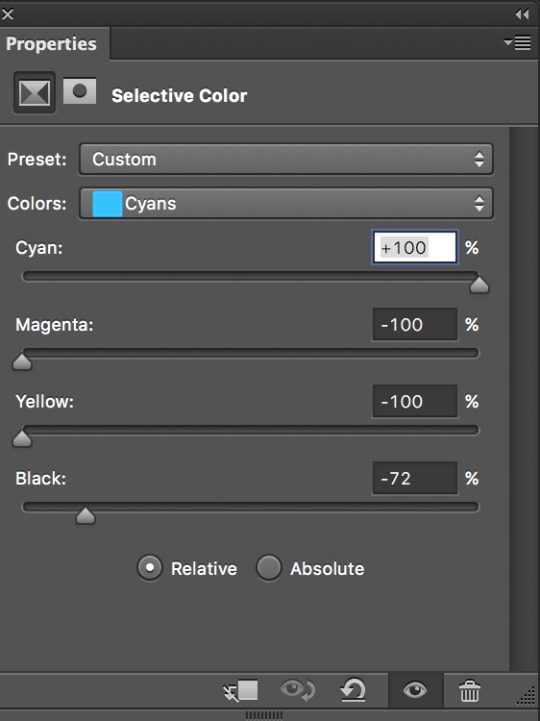
the wall is mainly white, so i cranked up the cyan component of the white. the ground is mainly neutral gray tones, so i messed with the neutral components until i got the color i wanted. i also turned down the red expression with selective color because i didn’t want the red on the skate guards to show. then i turned up the black component because the colors always pop more when there is true black in your gif. i messed a bit with the cyans too to get the shade i wanted.

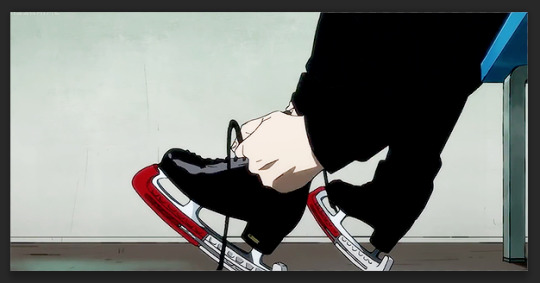
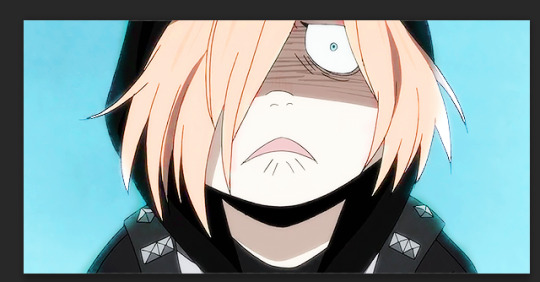
and there.

it’s honestly like magic. but still not done. i layered a couple more brightness/contrasts and a color balance to get the shades i wanted.

and done.
using selective color is all about messing with each individual component in terms of color. it doesn’t work out all of the time, especially if your colors and grayscales aren’t that well-distinguished.
sometimes it’s quicker to use hue/saturation to color gifs instead. i normally use hue/saturation to make color changes (like changing purple to cyan) and selective color to change grays and whites (like changing white to cyan). of course, you can use them together to get the best effects.
for example:
i want the area around yurio to be cyan, maybe change his hair to a peachish color just for consistency’s sake.
of course, i first added a base. then added the hue and saturation layer.
hue/saturation also lets you edit each color as a separate component, but there is a master option as well. i messed with yurio’s hair until it turned peach, then messed with the purple background (the main component of that shade of purple is actually blue, not magenta) until it turned cyan.


note: lightness is kind of like how much white you mix into the color. you can use that too, and it’s especially useful in making pastel-looking gifs.

our angry child is now on a blue background. using more brightness/contrasts, vibrancy, and the selective color method i described above, i got it to then look like the final.
the third and final (and the quickest) way i colored in that gifset was just by saying “screw it all, i’m not doing any of this.”
because it does take a lot of time to get all the colors matched up. i always work with my gifs side by side in photoshop so i can see exactly how their colors match up.
but, say your gif is white text on a black background or a very simple thing that’s mainly black or white or even gray.
kind of like this.
this is super easy.
make a new layer and paint it all over in the color you want (peach, cyan, gradients, anything). in my gif, i colored it over in solid peach. color it in completely, don’t try to dodge the text because it doesn’t matter. you can just make a new fill layer honestly, but i was dumb and didn’t do that when i made the gifset. oops.

now, make sure the layer with the color(s) is selected. go change the blending mode from normal to screen.

that’s it. literally.

the easiest gif i have ever colored in my life.
for the opposite effect of turning white into peach/color of choice, set the blending mode to multiply instead. it should do the trick. if i set the peach layer to multiply on the gif i have, it also turns the white to peach and ends up looking like this:

this method of coloring is wicked quick, which is why i use it whenever i can get away with it. it only works on very minimalist/simple gifs like the one above though.
i hope this helped! feel free to ask me any questions or clarifications ❤❤
#yeahps#completeresources#chaoticresources#rresources#itsphotoshop#a#anon#mine#tutorials#psds#resources#i feel so loved asdlasdjlakdjsasd ;A;#thank u anon#uhhh i should mention that for one of the gifs i layer masked every frame by hand but i thought it wouldn't be worth explaining#bc too tedious and takes too long and not good way to color oops#ps
33 notes
·
View notes
Text
I Need a Kit Kat
Hey readers, I have recently re-branded my channel, i’ve changed the icon, the header, and the name of the channel itself. Now Wayward Edward is no more, it’s chronicles of Edward now, the previous personality I wanted to portray was a very saturated one, as well as exuberant, all presented through the aesthetic of pixel art and emojis. I’ve replaced that image with a new more serene one.
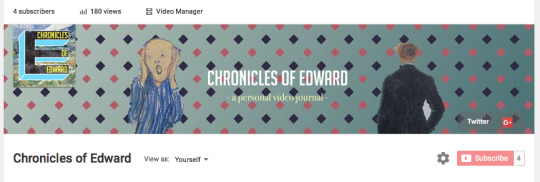
It took such a long time to make everything, the icon was especially tricky to make,
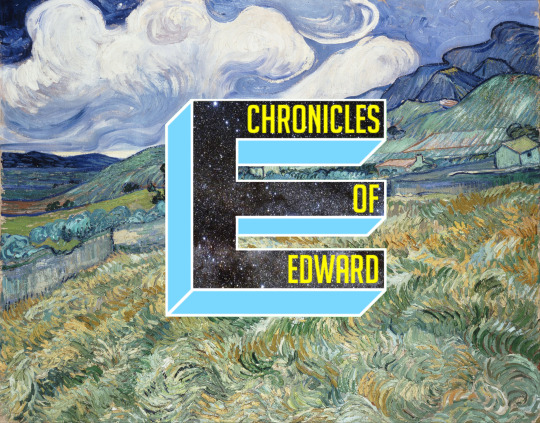
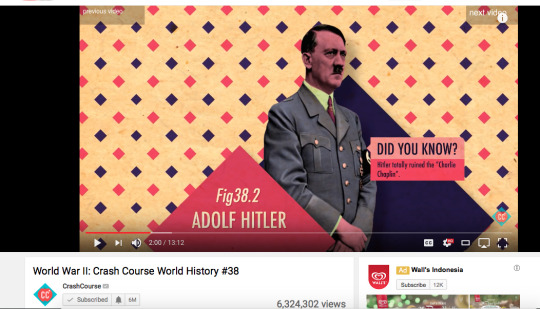
it went through a bunch of changes, in the end I used Van Gogh’s painting, for the background, the only element that remained from the initial design was the cubic letter E design. And the header was inspired from the world war 2 video from the Crash Course Channel,
and the background gradation was inspired from an iOS game The Sailor’s dream.

It took about 1 to 2 weeks to make all that. Overall i’m pretty proud, of how it turned out. But i’m not looking forward to doing graphic design, at least not anytime soon, I was partly motivated to rebrand because Dan aka Danisnotonfire. Has came to a realization that using a name like that doesn’t quite reflect well on the owner of the name. And I thought that makes sense. So now I’ve switched to a username that is less extravagant. That and because my previous design which no longer suits me.
Along with my rebranding, I have a rule to decree for my youtube channel channel, it’s not exactly a new rule it’s more of a restoration. Back at the end of 2013 I was feeling pensive because the year was about to end, and I felt like i’ve wasted another year, because I haven’t done anything with my life, so I tried to retrospect on the year that was about to end, and I was right, the days seemed to blend into one, and it was all empty. I had been drifting through life, I had no purpose or motivations. My days were so dull that almost none of them left a mark as they passed by. It felt like I had just been dormant for the past year. It felt like I was going to shrink and shrink until I disappear. To lead a life that others don’t find remarkable is common, but to lead a life that even I myself find forgettable, that’s a whole new level of vapid. And I felt a moderate degree of terror, because I came to a realization that this is the only life i get, and if I don’t do anything with it, i’m going to die with a bunch of wasted yesterdays.
So i opted to make a scrapbook to keep record of what i’ve experienced throughout the following year, so when I retrospect about my life again, I won’t feel that terror anymore, because I have evidence that I did indeed experience the year for myself. But that would require me to own a polaroid camera and I never got around to having one. So I made another compromise. I started a blog instead. And I switched to making vlogs. And here I am.
So initially this channel was created for me to keep records of my own life. But gradually I have —without realizing it— shifted the orientation of this channel to appeal to external viewership, as if I have any. And this factors into the script i write and what I include or exclude from these videos. When i’m writing with the intention of being externally appealing, the outcome would differ, from the scripts that I write for the sake of chronicling my life. Youtubers make compromises to make their content appealing to the mass of crowds, and I am not so willing to make such compromises. But as I said I have gradually shifted the orientation of this channel, therefore this calls for a reinstatement of the of this channel, I am reorienting this channel to it’s original purpose, to serve as a reserve for my days gone by. Therefore from now on, I will start my videos by saying “Hey Future Edward.” So that when I begin to write my next video scripts, having addressed myself in the beginning of it, I would be oriented to write for myself.
That doesn’t mean I don’t welcome external viewership, if anybody else enjoys the contents I create, then you’re welcome to listen in. I just had to establish the purpose of this channel. This also doesn’t mean I want to put less effort in producing these videos, because like Plato said, when you do or make anything, have the ideal version of it in mind. And then aspire to match it. When I look back in my life, I don’t want to just see a bunch of lousily made videos, but i’m still working on that, as for the videos I make now are still pretty lousy. I want to look at it through a lens that allows for HD resolution, not 360p not 480p, but 720p the least. I want to have the accounts of my life to be in the form of interesting videos.
Well then, anyway i’m on my holiday right now, and It takes so much work to make a vlog, it requires me to write a script, recording myself reciting the script takes much time because speaking itself is hard for me, and computer editing takes the longest time and is the most tedious because I have to edit out all the pauses and make cartoons and download and insert pictures, just editing alone can take up to a week even when I work full-time each day. It would be tremendously easier if I can speak in fluent streams of words. and as much as this is a voluntary hobby, this is also a form of labor.
And I am just tired of any forms of labor right now. I don’t even want to play video games. As I said I am having my long awaited graduating holiday right now, and I want to rest up, after having gone into overdrive mode during mid April. I need to lie down and cocoon. Which is why this video is titled “I need a Kit Kat” because that’s when you have a break, apparently, when you have a kit kat. I don’t get it, it’s been 2 months since I graduated, and I still feel tired. That said, I just bought a new camera, well my father bought it for me, 9more about that on my next video) so I am going to make another video, using that camera, before I go for a hiatus. I don’t know how this hiatus will end, n’sync or one direction. Although i’m not sure one direction is a proper opposing counterpart to N’sync because they might not get back together. Anyway you get the point.
So don’t be confused when I start my videos by saying “Hey Future Edward” when and if I make another video okay?
Well then, that’s all for this entry of Chronicles of Edward. Goodbye.
1 note
·
View note
Text
My name is Rémy Lach. I live near Paris, in France. As for my artistic background, I only drew and painted 2 hours per week during plastic art courses in middle school. In a nutshell, I wasn’t born with a paint brush in my hand. To be honest, I used to live a pretty ordinary and happy life until watercolor decided to knock on my door.
My watercolor journey began in 2013. At this time, Youtube wasn’t so popular but I already spent hours and hours on it watching videos on my couch. Lazy man. One day, I stumbled upon a video from Direk Kingnok, a Thai watercolorist. I couldn’t take my eyes off this video. I was like a child watching “Frozen” for the first time. It was magic for me. Everything was memorable: the confident brush strokes, the light on the painting, the watery effects…
I bought a 10€ set of 12 half pans from Winsor & Newton Cotman and started my journey. The first attempts were successful. The colors blended nicely. I discovered the power of watercolor. Wow, nice! I would then be able to master this medium in no time. I was so naive, and so wrong. I was such an amateur and watercolor reminded me of it relentlessly.
When it came down to a whole landscape painting, I can’t remember how many times I failed. I constantly switched between joy and despair. I looked at how people painted on Youtube and I tried to reproduce the same paintings. Unsuccessfully…
My Erratic Learning Curve
One night in 2014. Already 2:00 am… Not tonight! Not again!! As yesterday… and the day before yesterday… disappointed… I looked dully at my watercolor painting. Actually, it is looking at me… with dead eyes. No light, no mood, no atmosphere. Nothing.
I messed this painting up. This time, I put too much water when I shouldn’t, creating these so-dreaded cauliflowers. I know them too well. I can feel my best friend coming right away to taunt me: Frustration. Its voice pops into my head: “Why not give up on painting? See, you just embarrassed yourself. Stop doing it, for God’s sake. This path is a dead end. Start something new instead! Something that would make you happier.”
That same voice telling me that I shouldn’t paint because I’ll screw up.
That same voice which makes me click on the Netflix app just after I decided to paint.
That same voice convincing me that I’m too tired to paint after a working day as an engineer. Unfortunately, I know that voice too well.
Here is the sad truth about watercolor: Frustration will become a close friend to you. And it sometimes becomes unbearable. At this time, I didn’t know that I would struggle for 2 whole years. 2 years before painting the first landscape I would be proud of.
From this moment, I started painting 2 to 3 landscapes every week for 1 year while working full time until 2016. I gained momentum. I even succeeded in selling up to 12 paintings in one exhibition. Good job, kiddo!
My Watercolor Supplies
With that money in my pocket, I upgraded my art supplies. I bought a Holbein palette. An easel, some masking tape, a bottle spray and some minor stuff. I stuck exclusively to Arches paper rough 140 lbs. I used Winsor & Newton professional quality tubes. At this time and until now, the brushes I had were still the first ones I bought: Raphael 803 brushes size 0/3, 2 and 4, and a synthetic brush with a fine point.
If you want to know the exact references of all my supplies, you can check my website where you can download the .pdf checklist. For each supply, I go deep into what I would recommend and the product references I exactly use (the exact colors etc.)
Then… Then I became a father, the best job in the world. A job which required me to make some sacrifices. Among them, putting watercolor aside for 4 years. Until recently, I started to paint again in March 2020 as I now have more time.
I also created a Youtube channel for those who want to join me in this artistic and fabulous journey. I know how solitary this painting activity may be. I can only help if we can support each other.
My Painting Process
I usually paint at night, when children are asleep. I pick a photo according to composition, light and mood. I mainly choose landscapes as there are already so many subjects to paint: rural landscapes, cityscapes, snowy landscapes, seascapes etc. I describe my art as atmospheric watercolor landscapes.
I tweak the photo so that it matches the result I have in my mind. I draw a quick sketch (5 to 10 minutes max) to get the big shapes on the paper. And I start painting. The painting process itself takes on average one hour.
Actually, watercolor fits my personality quite well. Since I started this Youtube channel, many people ask me the best advice I can give to a complete beginner in watercolor. Still with me? Okay, let’s move on then!
How To Improve In Watercolor As A Beginner
Having failed many times, here is what I would suggest to someone who starts painting in watercolor:
1. Learn the technical skills first. Know how to create a wash and a graded wash. Be familiar with color mixing, wet in wet techniques, dry brush marks and learn how to avoid cauliflowers. There’s a ton of free tutorials on the web which are very well explained. Use them to your advantage.
2. Choose a mentor. Someone whose work inspires you. Learn everything you can learn from this person. One tip: It’s better if you have access to painting videos from this artist as you will have to reverse engineer the paintings. Try to recognize when this artist uses the techniques you acquired in step 1.
3. Lastly, copy the paintings you analyzed until you end up with a satisfying result. There is no shame in copying for a learning purpose. The purpose in this process is not to find your style, it is to learn the technical moves. Select the simplest subjects first and as you improve your skills, you can switch to more difficult topics.
Then, you reach a tipping point where you actually enjoy the painting process more than before as you are no more limited by your technical skills. Then, you can broaden your vision by getting inspiration from other artists (not necessarily watercolorists by the way). I would not recommend checking other artists’ stuff before mastering the technical part first or you may end up switching relentlessly from one artist to the other without actually improving.
When you reach this point, then you have achieved a huge milestone! Congratulations. You can give yourself a pat on the back. Take the time to appraise what you already accomplished so far. You deserve it.
How To Find Your Own Style
I have some bad news for you…only then can the real journey begin. The good news? It’s fun. It’s real fun. I mean: Finding your own style and exploring new compositions and new subjects is what I find the most satisfying moments. Recently, I decided to give a shot to snowy landscapes:
Then I spent some time exploring asian landscapes:
It’s a never ending process and it makes you grow as an artist. It also makes you grow as a human being. Thanks to watercolor, I learned to embrace frustration. Of course there will be some failures. When I started painting, culpability was striking me like a lightning bolt whenever a painting didn’t turn out the way I wanted.
But I now feel gratitude when my best friend, Frustration, knocks on my door. I now understand the happy truth behind watercolor: Frustration is what comes before fulfillment. And fulfillment leads to gratitude. And gratitude is closely linked to happiness.
So… Wanna be in? Yes? Nice!!! Welcome on board then. I hope you don’t care about my strong Frenchy accent (as you could have read it!) and I’m glad we met. If we get to know each other, I would suggest you to subscribe to my YouTube channel. I share every week a time lapsed painting demonstration.
Take a seat, have some rest and let’s start painting! I would like to thank Charlie for his incredible work. It takes so much courage and perseverance to inspire people with his daily post. Respect to the man! Peace, joy and long life to watercolor!
Rémy Lach
YouTube
Website
Instagram
GUEST ARTIST: "The Insightful Truth Behind Watercolor" by Rémy Lach - #doodlewash #WorldWatercolorGroup #watercolor #watercolour #aquarelle My name is Rémy Lach. I live near Paris, in France. As for my artistic background, I only drew and painted 2 hours per week during plastic art courses in middle school.
#WorldWatercolorGroup#aquarelle#artist#doodlewash#featured#France#inspiration#Landscape#landscapes#painting#Paris#watercolor#watercolor landscape#watercolour
0 notes
Text
How to Create Twinkle Lights for Christmas Tree Portraits in Photoshop
The post How to Create Twinkle Lights for Christmas Tree Portraits in Photoshop appeared first on Digital Photography School. It was authored by Jackie Lamas.
Christmas is almost here and like you, many photographers are getting ready to photograph their holiday sessions and are likely using Christmas trees. In this article, we’re going to show you how to add a little more twinkle to your Christmas photos so that you can wow your clients. Even if your trees have lots of lights, this will show you how to create twinkle lights in Photoshop so you can add more cheer to your photos!
Learn how to add twinkle lights to your holiday photo sessions in this article.
Step 1. Create your twinkle lights pattern
In order to add the twinkle lights to the lights and create more lights, you’ll need to first create the brush preset. This isn’t as difficult as it seems. Of course, you could download brush presets online, but there’s nothing like having the perfect brush you’ve created for your photos.
1.1 Create a new document. It doesn’t have to be a large document. Use a predetermined one and make sure you aren’t using artboards and that your resolution is at 300dpi. A white background will help you see what you’re doing.
Create a new document. It doesn’t have to be large since you’ll end up with a brush preset that can be sized after.
1.2 Next, go into Brush Settings. If you don’t see this on the icon menus on the left (or where you have your tools), you can open it by going to Windows -> Brush Settings and the window with the settings will pop up.
Choose the round brush with zero hardness – it should be brush 30 in the brush menu. It’s a predetermined brush.
Here, you’ll want to select the roundness of the brush to around 8%. This will make sure your brush is flat to make the different strokes of the twinkle.
For this tutorial, we’ve made our twinkle with 5 points, but you can get creative with the size and add in additional points if you like.
You can see how the brush is flattened.
1.3 Choose the angles of your brush. Respectively, they are 90-degrees, 180-degrees, 45-degrees, and -45-degrees to make the five points. You can set a ruler to help guide you, making sure the lines intersect in the middle. For this one, I just painted with the brush by eye.
1.4 Once you have all five points or as many points as you want for your twinkle, go back to the Brush Settings and change the roundness back to 100%. With this brush, go to the center of your star and fill in the middle with a couple of clicks to add more to the middle.
This will give the twinkle a little more fullness and make it look like an actual light in the Christmas tree.
1.5 We’re almost done! Finally, we’ll add in a nice Gaussian Blur to the twinkle so it looks more real in the background and the points on the starburst aren’t too harsh when you’re adding them into the images.
Of course, this is preference and you can make one brush with the blur and another brush without so you have options. We’ve added the blur to our starburst. Go to Filter -> Blur -> Gaussian Blur and choose how much blur you want.
1.6 Now you have a nice full twinkle light! From here, we’ll need to create the Brush Preset pattern so that you can use it in the future on any image in Photoshop. Go to Edit -> Define Brush Preset -> Change the name to what you’d like to call it and click OK.
This will create your brush pattern! Now you have your twinkle light brush ready to use and you can change the color and size.
Step 2. Clone lights to make the twinkle lights look more real
If you add your twinkle lights to the photo, it will look oddly out of place. This is because it needs an actual light to shine off of an actual light source. The best way to do this is to clone a light in the original photo to other parts of the tree before using the twinkle light brush.
While you could just paint on dots, they don’t have the same color and gradient as a light that is already in the tree and may look out of place.
2.1 To do this, first create a new layer so that your twinkle lights can become moveable after you’ve added them. Also, this will keep you from cloning and using the brush on the original image in case you need to start over, you can simply delete the layer.
2.2 Now go to the layer of your original image, click on the Stamp Tool. In the menu bar at the top, make sure that you uncheck where it says Aligned. This will make sure to only clone the light as you click on various parts of the layer.
Click on ATL and click a light. Make sure the brush is just large enough for the light tip so you don’t clone too much of the tree/background.
2.3 Once you’ve made your selection of which light you’ll clone, go back to the new layer and click on the parts of the image you see that you want to add the lights in. Don’t worry, you’re not cloning on the image itself, this layer is transparent and that’s why you can see the photo in the layer below. It helps to see where you’re putting the extra lights.
2.4 All right, now that you’ve added more lights to the tree, you are ready to add in the twinkle lights brush! Go to Brush and choose the brush you just created. Usually, new brushes show up at the end of the brush list.
Choose your twinkle light brush. Make sure that the color for your brush is set to white. Alternatively, you can choose the color picker and get a warmer yellow color that matches the lights. It’s your choice! You can also add colored lights if you wish!
Leave the hardness and opacity at 100%, go to your new layer where you’ve cloned the lights on. Go to each light and add in the twinkle onto it. Adding the lights and the twinkle makes the twinkle look real and not too fake.
Change the size for a few of the twinkles so they look more random.
3. Add in additional colors
The great thing about doing the twinkle lights this way is that because you’ve added them onto a transparent layer, you can move them around and resize them as you need.
The amazing part is that you can duplicate the twinkle lights layer, move it around, and add colors to it to create colored twinkle lights. Here’s a break down of how you do that for multiple colors:
3.1 Duplicate the twinkle lights layer.
3.2 Move it around and transform it so that it’s not directly on top of the other twinkle lights. If you’re going to add in more colors, I suggest that you don’t add in too many twinkle lights in the original layer so that you can fill in those empty spots with the colored twinkle lights.
3.3 Go to Layer -> New Fill Layer -> Solid Color. Choose a color. I did blue, green, and red. But you can add in any color.
3.4 You’ll end up with a solid color onto your images. Don’t worry, right-click on the layer and choose Create Clipping Mask to clip it to the twinkle light duplicate layer.
3.5 Go to Blending modes at the top of the layer window and choose Color. This will overlay the color on the twinkle lights and make it look more real.
3.6 A great tip is to merge each color to the twinkle lights layer. Then add a mask so that you can go into the layer with your brush and take out the twinkle lights for that layer without having to deal with the color clipping mask and all that.
It’ll make removing them easier. This is ideal in case you need to remove one from an ornament or face.
You can also add a clipping mask to the original twinkle lights layer to help brush out unwanted twinkle lights as well.
Using a mask on the layer can help you to take out unwanted twinkle lights.
And that’s it! That’s how you add in additional twinkle lights in color to your image!
Before and after with the twinkle lights in color. You can make it more subtle by adding fewer twinkle lights.
Use in non-holiday images as well
Use this tutorial on other images where you’d like to add in some twinkle too! It doesn’t have to just be for holiday sessions, simply just use the brush only with a color set.
Use the twinkle lights brush on other portraits that you’d like to add some sparkle to.
Make sure you’re working on the transparent layer and play with opacity levels and additional colors.
In a new transparent layer, I selected the twinkle lights brush and added the twinkle lights to various parts of the layer in white in different sizes. Then, set the blending mode to Overlay to get the right look. I also lowered the opacity.
Twinkle lights with more than 5 points
The great thing about adding in twinkle lights is that you’re creating your own brush preset! This lets you create different types of brushes, and one might be adding more points to the twinkle light.
Here’s a comparison of no twinkle lights, a five-point twinkle, and a multi-point twinkle light.
Go through all of the steps in Step One, only this time add more angles and add in more points. It also looks great when you change the size within the same brush.
In the close-up, you can see that the brush preset has more points than the five-point twinkle light brush we made previously.
It’s really all about preference, so play around and see what look is the right one for your portraits.
In conclusion
Before and after on another photo. This is more subtle and only uses white twinkle lights.
It may sound complicated the first time you give it a try, but with time it gets easier! Adding in additional twinkle lights can give your holiday photos a little more twinkle and pop that will make your clients very happy to see in their final images!
Will you be using this tip to add in twinkle lights to your images?
The post How to Create Twinkle Lights for Christmas Tree Portraits in Photoshop appeared first on Digital Photography School. It was authored by Jackie Lamas.
Read more about this at digital-photography-school.com
https://coolarticlespinner.com/how-to-create-twinkle-lights-for-christmas-tree-portraits-in-photoshop/
0 notes
Text
Understanding The Background Of Winston Churchill Painting For 10th Birthday | Winston Churchill Painting For 10th Birthday
Understanding The Background Of Winston Churchill Painting For 10th Birthday | Winston Churchill Painting For 10th Birthday – Friend Winston Leonard Spencer-Churchill (30 November 1874 – twenty-four January 1965) was the British politician, army official, and writer. He was Prime Minister of the particular United Kingdom from 1940 to 1945, when he led Britain to success in the Second World Conflict, and again from 1951 to 1955. Churchill represented five constituencies during his career as a Member of Parliament (MP). Ideologically an economic liberal and imperialist, for many of his profession he was a member of the Conservative Party, which often he led from 1940 to 1955, but from 1904 to 1924 had been a member of the particular Liberal Party.
Of blended English and American parentage, Churchill was born inside Oxfordshire to a wealthy, aristocratic family. He joined the particular British Army in 1895, and saw action within British India, the Anglo-Sudan War, and the Second Boer War, gaining fame since a war correspondent in addition to writing books about his campaigns. Elected an MEGAPIXEL in 1900, initially because a Conservative, he defected to the Liberals inside 1904. In H. H. Asquith’s Liberal government, Churchill served as President of the Board of Trade, Home Secretary, and Very first Lord of the Admiralty, promoting prison reform and workers’ social security. During typically the First World War, this individual oversaw the Gallipoli Marketing campaign; after it proved the disaster, he resigned through government and served inside the Royal Scots Fusiliers around the Western Front. In 1917, he returned to federal government under David Lloyd George as Minister of Munitions, then as Secretary associated with State for War in addition to Air, and finally with regard to the Colonies, overseeing the Anglo-Irish Treaty and Britain’s Middle East policy. After two years from Parliament, he served as Chancellor of the Exchequer in Stanley Baldwin’s Conservative authorities, returning the pound pristine in 1925 to the gold standard at the pre-war parity, a shift widely seen as creating inflationary pressure and depressing typically the UK economy.
Understanding The Background Of Winston Churchill Painting For 10th Birthday | Winston Churchill Painting For 10th Birthday – winston churchill painting for 80th birthday
| Allowed to help my own blog, in this time I will provide you with about keyword. And now, this can be the first graphic:
Winston Churchill 10th birthday portrait | Churchill … – winston churchill painting for 80th birthday | winston churchill painting for 80th birthday
Why don’t you consider image over? is which awesome???. if you feel and so, I’l d explain to you several photograph once more below:
So, if you’d like to have all these great graphics regarding (Understanding The Background Of Winston Churchill Painting For 10th Birthday | Winston Churchill Painting For 10th Birthday), simply click save button to download these pics in your personal pc. These are all set for obtain, if you’d prefer and want to own it, simply click save badge on the page, and it will be directly saved in your pc.} At last if you desire to gain new and the latest graphic related to (Understanding The Background Of Winston Churchill Painting For 10th Birthday | Winston Churchill Painting For 10th Birthday), please follow us on google plus or book mark the site, we try our best to provide regular up grade with all new and fresh shots. Hope you love staying here. For some up-dates and recent information about (Understanding The Background Of Winston Churchill Painting For 10th Birthday | Winston Churchill Painting For 10th Birthday) images, please kindly follow us on tweets, path, Instagram and google plus, or you mark this page on bookmark area, We try to present you up-date regularly with fresh and new shots, enjoy your searching, and find the right for you.
Here you are at our website, contentabove (Understanding The Background Of Winston Churchill Painting For 10th Birthday | Winston Churchill Painting For 10th Birthday) published . Nowadays we’re pleased to declare we have discovered an awfullyinteresting contentto be pointed out, that is (Understanding The Background Of Winston Churchill Painting For 10th Birthday | Winston Churchill Painting For 10th Birthday) Many individuals looking for specifics of(Understanding The Background Of Winston Churchill Painting For 10th Birthday | Winston Churchill Painting For 10th Birthday) and definitely one of them is you, is not it?
Mystery of The Lost Paintings – Graham Sutherland : Lost … – winston churchill painting for 80th birthday | winston churchill painting for 80th birthday
10 – The Portrait painted by Mr. Graham Sutherland … – winston churchill painting for 80th birthday | winston churchill painting for 80th birthday
Churchill and his portrait – Iconic Photos – winston churchill painting for 80th birthday | winston churchill painting for 80th birthday
The Crown: What really happened to the painting of Winston … – winston churchill painting for 80th birthday | winston churchill painting for 80th birthday
Destroying the World Famous Portrait of Winston Churchill. – winston churchill painting for 80th birthday | winston churchill painting for 80th birthday
An 10th birthday portrait of Churchill in the cabinet room … – winston churchill painting for 80th birthday | winston churchill painting for 80th birthday
Goldsmiths, Art and Winston Churchill – Goldsmiths History … – winston churchill painting for 80th birthday | winston churchill painting for 80th birthday
Arthur Pan – Wikipedia – winston churchill painting for 80th birthday | winston churchill painting for 80th birthday
NPG x10; Winston Churchill giving his 10th birthday … – winston churchill painting for 80th birthday | winston churchill painting for 80th birthday
from WordPress https://paintingarta.online/understanding-the-background-of-winston-churchill-painting-for-10th-birthday-winston-churchill-painting-for-10th-birthday/
0 notes
Last Seen Blogs

telest-starfall
Just a Miqo'te Shelter

gold-leeaf
Stay gold. *fingerguns away*
delisae
Lisae

yesmila1609
Без названия
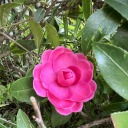
ben-c-group-therapy
Let’s Get Lost