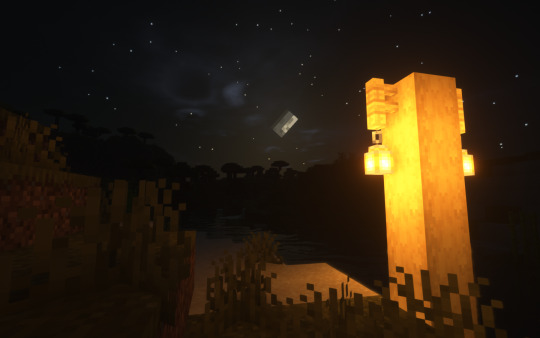
#minecraft volumetric light
Text
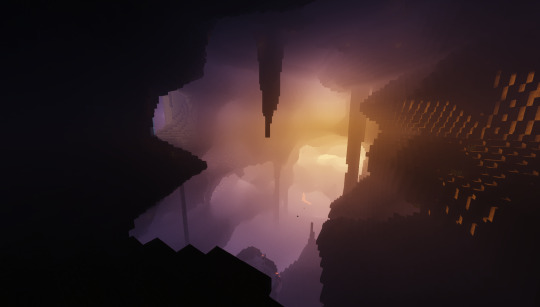
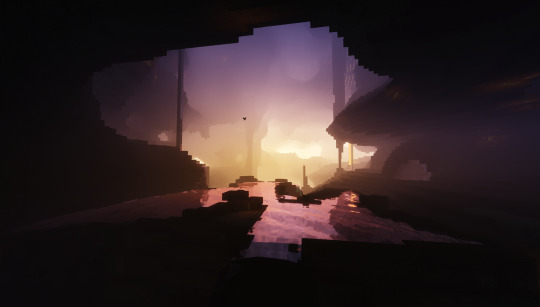
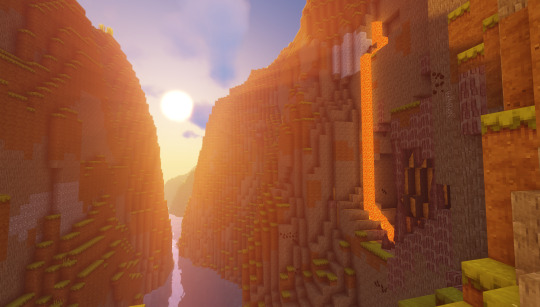
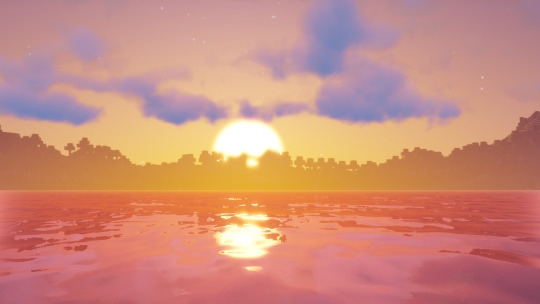
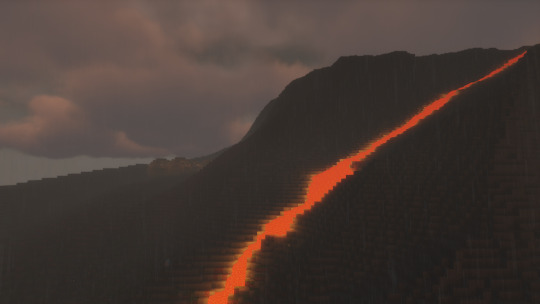
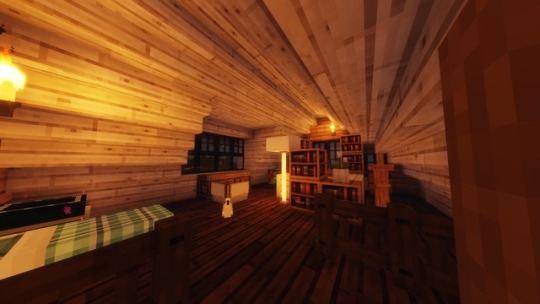
#caves don't normally look like this with this shader#I took these during a sunset while moving into the cave before it switched to the cave lighting#minecraft#mineblr#minecraft screenshots#caves#*mine#resource pack: personal pack based on summerfields#shader: sildur's vibrant shaders extreme volumetric lighting
12 notes
·
View notes
Text

Here's how i made it:
My idea was to make something similiar to this:
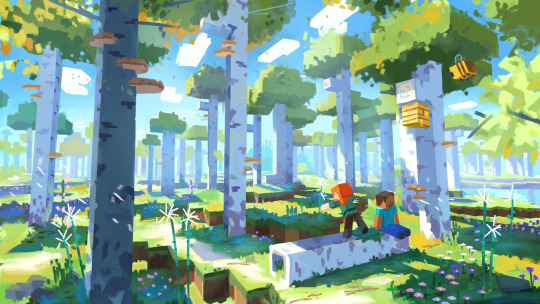
First, i created a Minecraft world and looked for a place that looked similar, made some changes so the composition would be better and imported it to mine-imator.
After that, its just getting the lighting right and adding a few more elements. The key is to use the subsurface scattering thingy as much as you can. Also, there's a lot of cheating to the camera.
Here you have a preview of the full scene:
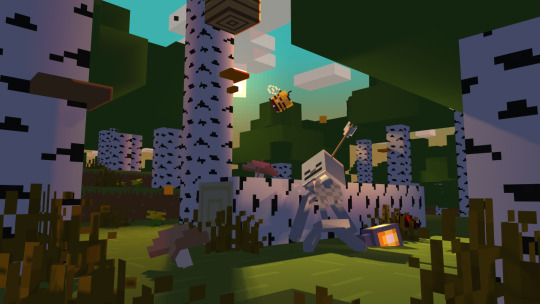
Here's the final render:
The last step is to import the image to ibispaint and add the cool volumetric light, fix a bit the shading in the sketelon by hand, and a few other things to make the main focus the skeleton
Final result!
#art#digital art#mineimator#minecraft#digital artist#small artist#artists on tumblr#3d render#my art#ibispaintx#ibispaint art
23 notes
·
View notes
Text
'Minecraft' Looks like an Entirely new Game using NVIDIA's RTX Ray Tracing
When you think of Minecraft you might think of blocky graphics and simplistic textures. But the recent beta launch of ray tracer support for NVIDIA's RTX graphics card transforms it into a completely different game. To put it simply, ray tracing enables more realistic lighting, reflections, and shadows. It's like the jump from grainy VHS tapes to HD.
Although I'm forced to admit that I've not spent a lot of time with Minecraft however, I am a fan of it as a fun tool for kids. 35eng It was partly because I didn't have enough patience to play an unstructured, large-scale game. Also, I didn't like how it looked. The aesthetics matter a lot when you're going to be spending hours in the virtual world (this is the reason I didn't get into World of Warcraft). Ray tracing makes Minecraft more immersive.
The difference is evident the first time you load up one of the six environments that comprise NVIDIA's Ray Tracing Worlds pack, all of which were created by master Minecraft builders. When I first started Aquatic Adventure I was stunned by the reflections of water and the clarity of crystal blocks. We've seen similar visual effects from big budget titles such as the Assassin's creed series, but they've always felt like an approximate representation of the real world. Minecraft's water blocks, mirrored although flat and immobile seemed a little closer to looking at an actual lake.
The rays of sunlight also provide the game with the appearance of a warm glow. It's almost like feeling the sun's rays on your face. These are volumetric light scattering effects that mimic the way that sunlight shines through clouds. Although they can be overused for example, like the way J.J. Abrams flings lens flares at everything, it was amazing to witness god rays through ray tracing. The diffuse light was so natural that I was unable to believe it was real-time rendering, no matter if I was in the water or not.
Although it could appear that I am giddy about the beautiful graphics after having spent hours in the Minecraft beta I am more enthusiastic than ever about how Ray Tracing will alter the way we experience games. Remedy's Control, for example utilized ray tracing in an unorthodox way, where it worked in conjunction with traditional rendering techniques. Going full tilt in ray tracing is something that we've only presented in the past with this Minecraft beta and NVIDIA's RTX enabled Quake 2 demo.
Ray tracing is similar to HDR in that it's a new method to add depth and texture, regardless whether it's rendered in 1080p or 4K. I've always found the rush to 4K to be a bit reckless. That's an enormous amount of processing power utilized to crunch more pixels, though you may not notice a huge difference compared to 1,440p or 1080p -- especially from your couch. As TVs and monitors move towards higher refresh rates, I'd expect that many gamers will put more emphasis on framerates and noticeable visual improvements such as HDR and ray tracing above 4K rendering. (But of course, the ultimate goal is to hit all of those benchmarks at some point.)
My main takeaway from the Minecraft RTX beta? realistic lighting is a huge help. It makes everything appear more real and immersive when light comes from the place it's needed to, when shadows respond in a realistic way, and reflections appear like you'd expect. It's the difference between feeling like you're playing a video game, and feeling like you're in an actual world.
Unfortunately Ray tracing is incredibly power hungry, and inaccessible to most gamers. My test rig is powered by a Core i7 8700K processor and an RTX2080 Ti. Minecraft slows down to 53 FPS at 1080p when the ray tracing feature is turned on. And the hit is even greater on the less expensive RTX 2060, which drops to 30 FPS according to NVIDIA's benchmarks. This is where the company's DLSS technology comes in. It uses AI powered rendering to produce better quality results from lower resolution images. After I switched that on, Minecraft was able to run at 93FPS in 1080p. NVIDIA promises to give the struggling RTX 2060 GPU an additional 53FPS.
Performance is worse on RTX laptops which aren't as powerful as their desktop counterparts. NVIDIA claims that its RTX 2080 Max-Q machine like Acer's Triton 500, will hit 57 FPS in Minecraft with ray tracing and DLSS enabled. You can expect things to be slower with RTX 2060 or 2070 machines because this is the top-of-the-line mobile GPU.
With these limitations, I don't think that many games to fully embrace Ray Tracing anytime sooncertainly not in the manner we've seen in Minecraft. I'd also bet the PlayStation 5 or Xbox Series X will face similar issues managing the performance of ray-tracing. It's enjoyable to see developers experiment with this new technology. Don't get caught up in the rush to 4K. We'll be judging future games based on how they incorporate Ray Tracing and other graphical upgrades that you'll actually see.
0 notes
Text
Player Pascal - Progress log #06

I was not expecting to run into this, but I wanted to ask Reddit a question regarding PBR textures and ran into this topic:
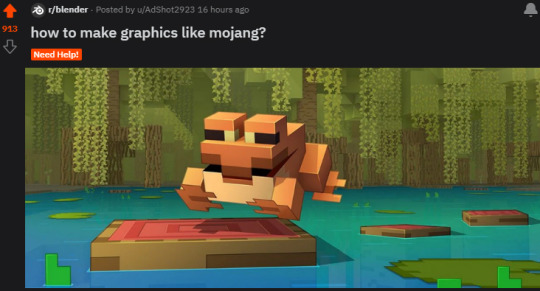
I figured to save this in the queue to easily revisit later, when shading and rendering becomes more relevant to the end result of this little project.
Some choice comments:
It seems that MCprep is a Blender plugin that allows you to import animated mob rigs, animated blocks and sets up "better materials"; whatever that might mean.
Mineways is a Blender plugin that allows you to import complete Minecraft worlds and manipulate them more easily inside Blender. This means that if I want Pascal to interact with any Minecraft environment, I can just set it up in Creative mode and import it later. Definitely something worth remembering.
I was already familiar with the Barebones texture pack; I have been using it as my go-to texture pack since I started playing again.
(It just looks nicer in my opinion)
Mort Mort is a developer employed at Mojang. I`m not sure of their exact position, but it does not matter when they are such a lovely artist that puts out free tutorials like this:
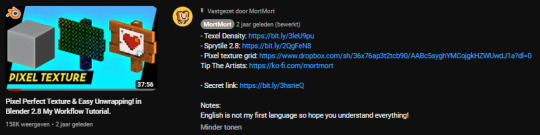
A lot of things mentioned in this video were modeling basics, but there were certainly a few new things regarding Blender I had not considered yet, such as pixel perfect texture swapping and connecting Aseprite to Blender.

This is a set of resources by VortexTheBreadMan, which relies on the Goo Engine branch of Blender.
Their shader is Eevee based and adds procedural highlights, outlines and gradients.
They have a Volumetrics pack for, well, volumetrics and also two rigs: Player and Cat.
Last but not least, some good remarks about the renderer setup.
Light sources in 3D environments were never my strong suit, so any pointers regarding those are always helpful.
Not sure how willing I am to trust a Source on Reddit, but I`m sure its fine as long as it is not medical advice!
Now back to my PBR experiments.. 🐨👍
0 notes
Text
If you want to take Minecraft's look to the next level, shaders are the best way to do it. They bring a completely different feel and look than vanilla Minecraft, and can even bring new features that weren't possible before.
Minecraft shaders are a popular alternative to texture packs. They can not only change the overall look of Minecraft but also make it more realistic-looking. These shaders can be used in all versions, so here is a list of the best Minecraft Shaders 1.19 in 2023.
Continuum Shader
Continuum's shaders are a brighter shaders pack in the day. It has more white light than yellow light, so you will see better during the day.
Moving to nighttime can be tricky, but Continuum is one of the darkest shader packs I've seen. It's not the brightest by any means either, but it still looks amazing during the day.
Download Here
Chocapic13's Shaders
The 3rd one on the list is Cocapic's Shaders which is a good mix between Continuum and Sildurs. It has a medium yellow look during the day, but it is very dark at night, being one of the darkest, if not the darkest, at night on this list.
Keep torches with you and your work areas very well lit with this Shaders Pack. This pack is MAC and WINDOWS compatible.
Download Here
Sildur's Vibrant Shaders
Sildur's famous Vibrant Shaders. It has been around for a long time, and it is still updated today with a huge range of different options to suit your needs.
If you are having trouble running the shaders on a weak PC, this is the pack for you.
You can go with the lowest settings for everything. Vibrant Shaders for Minecraft is a very yellow shaders pack during the daytime, making it very dark at night & this pack is also MacOS and Windows compatible.
Download Here
Sonic Ether's Unbelievable Shaders
After picking up the legendary Shaders by Chocapic13, Sonic Ether's unbelievable shades are a classic pack that still sees new updates. It's a yellow-tinted pack with beautiful sunrises and better nighttime quality.
The SEUS is a shader pack, which is great if you're exploring in the dark a lot. The shaderpack is compatible with Mac & Windows and looks good on both operating systems.
Download Here
MakeUp Ultra Fast Shaders
Most shaders for Minecraft will cause some lag because they're trying to make the graphics better by taking things to the next level. Better lighting & shading are the major benefits of using a shader pack.
MakeUp Ultra Fast Shaders is able to offer the best performance-to-quality ratio. They let you build your own shaders so that you have control over every effect and change. This means that you don't need to spend extra time reading a whole tutorial or watching a video explaining how it works.
Download Here
BSL Shaders
If you're looking for the perfect Minecraft shader, BSL is the place to go. Whether you're playing on your low-end machine or high-end PC, it'll run smoothly. There's a warm light, realistic water (and other visuals), and a welcoming UI.
Some other shaders do lose the vanilla look of Minecraft but not with Overloaded Shaders! There are no lag spikes or performance issues with Overloaded Shaders, so be sure to try them out!
Download Here
Nostalgia Shader
If you're feeling nostalgic and miss the older versions of Shaders, Nostalgia Shader is for you. This mod is designed to imitate old mods back when they used to look so cool like Chocapic or SUES shaders.
You can now adjust the fog with volumetric rendering and configure how it affects your nostalgia. The new settings are available in the Nostalgia Shader now!
Download Here
Beyond Belief Shaders
If you're looking for a Sonic Ether-based shader pack, Beyond Belief Shaders is the one for you!
This shaders pack enhances the looks of Minecraft on different levels - it's bright, with water reflections when it rains, and features specific to the nether & end. It's colorful too!
It allows you to toggle everything and provides a level of customization that's unparalleled. Along with this, there are motion blur and volumetric clouds.
All in all, Beyond Belief Shaders is a great pack of Sonic Ether-based shaders with more settings and features!
Download Here
Vanilla Plus Shaders
Vanilla Plus Shaders is a pack of shaders that provides improvements such as dynamic shaders, better clouds, and increased game performance.
If you're looking for some different styles of SUES and Chocapic shaders, there's also a selection of them to choose from.
The Vanilla Plus Shaders profile will also enable you to create a beautiful cinematic experience with volumetric clouds, lens flares, motion blur, bloom, and more. It's compatible with the macOS and Windows platform.
Download Here
Complementary Shaders
Complementary Shaders is a shader pack based on the BSL Shaders yet its goal is being able to have a balance between performance, gameplay, and beauty.
It strives to be fast, supports almost every GPU and driver, and doesn't require any installation.
This shader pack works really well with mods that have had issues. It also makes a great addition to packs that struggle with issues because it has many more features. This is the perfect pack for players who have tried other shaders and been unsatisfied.
Download Here
Sildur’s Enhanced Default Shaders
If you’re looking to get more FPS than a traditional pack with high-quality content, Sildur’s Enhanced Default Shaders is the perfect shader pack for you.
This pack is based on Sildur's Vibrant Shaders and adds reflections, shadows, god rays, and more while still keeping vanilla Minecraft's style. It's also extremely customizable - you can turn the variables of the pack off in order to increase FPS.
Download Here
YoFPS Shader
The YoFPS Shader pack is based on Chocapic13 but it's the best option for low-end computers. With this shader, it's easy to add shaders to your own computer.
With that being said, not a lot of shading is in this pack. It can give you the feel of shaders by giving things like trees and grass the look of flow in the wind. It's also one of the best shader packs I've seen inside the building.
Download Here
Conclusion
Here is our list of the best shader packs for Minecraft. These are not all the shader packs that are available, but these are some that we regard as being the best in our opinion.
We tried to include all different kinds of shader packs. Whether you are looking for a low-end PC shader pack or some that make Minecraft look more realistic, we hope this has given you options no matter what type of shaders you're looking for.
This is all for the best Minecraft shaders.
FAQs
Can you use Minecraft Shaders on a low-end PC?
If you have a low-end PC, you can simply use a lite version of the shaders. This feature ensures that the Sildur's Shaders are adaptable to any kind of PC and helps to rework the lighting, textures, and materials.
How hard will it be to run a Minecraft Shader?
A lot of people have trouble using Shaders. The GPU needs to be really powerful to use Shaders. Sometimes, even a GeForce MX150 with weaker specs can’t make it work. But the CPU is fine and so is the RAM as long as you have at least 4GB installed.
Can Minecraft be run on a low-end PC?
While the visuals in the game might not be the best, it still gives a stunning view of its game world. Due to having an almost infinite map, Minecraft can be surprisingly heavy, especially on low-end PCs.
Read some of our other guides:
The Best Minecraft Clients in 2022
Top 3 Rich Roblox Characters
Is Battlefront 2 Crossplay in 2022?
Red Among Us Character – Crazy Myths
Sparkling Cookie Toppings Build & How To Get
The Top 10 Games Like Summertime Saga in 2022
0 notes
Text
Minecraft brgihter dynamic light

Minecraft brgihter dynamic light install#
Minecraft brgihter dynamic light update#
Minecraft brgihter dynamic light full#
Minecraft brgihter dynamic light portable#
This section is actually a bit counterintuitive. In vanilla Minecraft your render distance maxes at 16 chunks. Setting indicates how far the Minecraft engine renders the game, in chunks, from the player’s current position. This setting is an enhanced version of the one in vanilla Minecraft. For use with traditional red-blue 3D glasses. If you want to make the game more difficult and more moody, adjust the fog closer so you see less of the world around you.įound in vanilla Minecraft. Whereas toggling the state of the fog will actually have a small impact on performance, adjusting the Fog Start (how near or far the fog from the player the fog begins) distance is a cosmetic change like adjusting the brightness. Allows you to adjust the fog render quality as Fancy, Fast, or Off.
Minecraft brgihter dynamic light full#
Moody makes caves very dark whereas full brightness allows you to see without torches. No effect on performance, simply a gamma-style adjustment of in-game light levels. If you’re playing on a very large monitor and find the GUI to be too small, you can fix it here. Again, the performance boost here is minimal so only decrease the percentage if you’re looking to squeeze out an FPS boost on a very low-spec machine.Īdjusts the onscreen display (e.g. This setting is introduced by Optifine and allows you a finer level of control over how the Smooth Lighting is applied. It has a very minimal effect on performance we suggest leaving it on because toggling it to the lower settings is pretty ugly (and you gain very little FPS boost in return). This setting is identical to vanilla Minecraft. Switch to “Fast” to disable the effects and increase FPS. “Fancy” is more resource intensive it turns on shadow rendering, dynamic water, volumetric clouds, and transparent leaves, among other things. Several settings are present in both regular Minecraft and Optifine we’ll note when they are and explain what’s different. Let’s take a look at each setting one by one, working out way first through the single toggles on the main Video Settings page (those items that have no sub-menus) and then looking at the sub-menus individually.įor ease of reference we’ll use a table with the setting on the left-hand side and the explanation on the right. It’s really easy to get lost in the Optifine configuration menu, despite the pretty well developed hover-tips that appear when you mouse over a given button or option. Configuring Optifine: A Point-by-Point Breakdown If you already have a modded copy of Minecraft and Optifine installed, continue onward. If you’ve stumbled upon this article without reading the previous Minecraft modding tutorial, we’d strongly urge you to jump back and give it a solid read over before continuing. Let’s take a look at the guts of the Optifine menu and break down what the options found therein do.
Minecraft brgihter dynamic light install#
While we can’t promise that level of improvement, we have yet to install Optifine on a machine and not see either the concrete FPS rise and/or the overall performance improve. With Optifine on the default settings it will play Minecraft at 15 FPS with additional tweaking it will play Minecraft at 24-30FPS or so. Without Optifine the computer renders vanilla Minecraft at 3-6 FPS and the game is choppy and unplayable. The ultrabook was made for great battery life and a slim form factor, not serious gaming.
Minecraft brgihter dynamic light portable#
Great battery life, great portable profile, but not so great in the GPU department. One of our laptops, for example, is a super slim ultrabook from a few years back. Not only is Optifine great for all computers running Minecraft (Mojang, as much as we love Minecraft, has been a little sloppy with their GPU and graphic optimization code), it can take a computer that barely renders Minecraft and provide a playable experience.
Minecraft brgihter dynamic light update#
Now the glow squid have dynamic lighting around them! Update 1.0.3ĭynamic light was added to the sea lantern Update 1.0.While we wouldn’t devote an entire lesson to a single gameplay-tweaking mod, we can’t stress enough how great Optifine is and why you should install it and seriously configure it. Now when you drop items with lighting they will light up around New items were added which have dynamic lighting! These items have been modified so that they can be equipped in the off hand Things Added in Update 1.0.1 Having a lava bucket or torch will light up around you Having a soul torch will light up moderately Having a redstone torch in hand will illuminate little Well if so this addon is for you adding dynamic lightingĭynamic lighting consists of having an item, be it a torch or an item that can give light like a lava bucket, by having these items in hand, it lights up around you Tired of searching for coal and making stacks of torches to light a cave?
0 notes
Text
Optifine minecraft 1.12.2

Optifine minecraft 1.12.2 full#
The individual settings in this sub-menu can all be toggled to provide a very small performance boost by decreasing the load on the GPU. Turning the clouds off offers a very minor increase in performance. There’s no risk in turning it on (if you don’t have the right GPU, nothing will happen). Only works on machines with GPUs that support OpenGL 2.0+ helps increase FPS by only rendering what is visible to the player. When on, the players head bobs slightly while walking when off, the view is stable. Some users, however, do report better results with Optifine by setting their framerate to Max. Your computer cannot display a frame rather higher than the refresh rate of monitor so limiting it to the refresh rate of your monitor (30, 60, or 120hz) is recommended. This section is actually a bit counterintuitive. In vanilla Minecraft your render distance maxes at 16 chunks. Setting indicates how far the Minecraft engine renders the game, in chunks, from the player’s current position. This setting is an enhanced version of the one in vanilla Minecraft. For use with traditional red-blue 3D glasses. If you want to make the game more difficult and more moody, adjust the fog closer so you see less of the world around you.įound in vanilla Minecraft. Whereas toggling the state of the fog will actually have a small impact on performance, adjusting the Fog Start (how near or far the fog from the player the fog begins) distance is a cosmetic change like adjusting the brightness. Allows you to adjust the fog render quality as Fancy, Fast, or Off.
Optifine minecraft 1.12.2 full#
Moody makes caves very dark whereas full brightness allows you to see without torches. No effect on performance, simply a gamma-style adjustment of in-game light levels. If you’re playing on a very large monitor and find the GUI to be too small, you can fix it here. Again, the performance boost here is minimal so only decrease the percentage if you’re looking to squeeze out an FPS boost on a very low-spec machine.Īdjusts the onscreen display (e.g. This setting is introduced by Optifine and allows you a finer level of control over how the Smooth Lighting is applied. It has a very minimal effect on performance we suggest leaving it on because toggling it to the lower settings is pretty ugly (and you gain very little FPS boost in return). This setting is identical to vanilla Minecraft. Switch to “Fast” to disable the effects and increase FPS. “Fancy” is more resource intensive it turns on shadow rendering, dynamic water, volumetric clouds, and transparent leaves, among other things. Several settings are present in both regular Minecraft and Optifine we’ll note when they are and explain what’s different. For ease of reference we’ll use a table with the setting on the left-hand side and the explanation on the right.
0 notes
Text
Why wont my shaders work with wurst 1.12.2

#WHY WONT MY SHADERS WORK WITH WURST 1.12.2 INSTALL#
#WHY WONT MY SHADERS WORK WITH WURST 1.12.2 MODS#
#WHY WONT MY SHADERS WORK WITH WURST 1.12.2 PC#
Download a PBR texture pack of your choice.
Drag and drop the shader file (.zip) to the Shaderpacks folder inside your Minecraft directory.
#WHY WONT MY SHADERS WORK WITH WURST 1.12.2 INSTALL#
Download and install Optifine mod and run Minecraft at least once.To properly use this pack, you must follow the steps below.
#WHY WONT MY SHADERS WORK WITH WURST 1.12.2 MODS#
How to install Wisdom Shaders?īefore using the wonderful Wisdom Shader Pack, you must have the prerequisite mods installed, as well as use a PBR texture pack. Then you might want to tone down the visuals to make the game playable. If you have a unit with low or medium specs.
#WHY WONT MY SHADERS WORK WITH WURST 1.12.2 PC#
If you have a high-end PC or laptop, then you will definitely enjoy this pack. However, it does boast one of the nicest graphics and visuals making it on par with the most popular Shader packs like the SUES. The default setting of the Wisdom Shader is set on High profile and is very heavy on the system. Intel HD Graphics 4400 / 5500 or better.For laptop: Intel i7 or better is recommended.On top of all of its features are the series of advanced Shader effects that are added to the pack including volumetric lighting, atmospheric scattering fog, realistic natural boom, emissive mapping support, and more. You can also experiment with the pack’s exposure adjustment option and use it for video recording and taking wonderful screenshots. The Wisdom Shaders also has a selection of After Effects Filters like a Black & White filter, Modern Light Tone, Noise and Grain Filter, Prime Rendering Filter, 8-Bit Filter, and so much more. This make the pack scale well with Intel HD Graphics and support high-end Nvidia and AMD cards. The creator of the pack did not compromise between performance and graphics and instead created a pack that is very optimized for low-end and high-end devices. It also automatically converts specular packs to PBR packs so everything would look nice and even. The pack use PBR (Physics based rendering) for water, metal, glass, and other shiny objects to simulate real life light reflection and refraction. Users can freely tone down or up the setting as they prefer. Despite the high-end graphics, the creator did not sacrifice the performance. The creator of the pack optimized the Shader to be able to run on integrated Intel Graphics card and made it compatible with Mac, Windows, and Linux.īobcao3’s Wisdom Shader Pack features stunning graphics which stimulates a slightly faded-out realistic lighting and effects which will make your Minecraft look like it came out from a movie. Created by username Bobcao3, pack aims to provide wonderful graphics while maintaining the highest performance possible. Get impressive graphics for your low-end and high-end devices with Wisdom Shaders mod 1.12.2 & 1.11.2! See the world of Minecraft in a more realistic yet vibrant light! Experiment with the filter options and have fun making wonderful videos and playthroughs.
0 notes
Photo

Beautiful map by Ragnar le Rouge. I really like volumetric light.
#minecraft#minecraft shaders#minecraft bslex#bslex#shaders#minecraft screenshots#minecraft stay true#stay true#minecraft volumetric light#minecraft morning
46 notes
·
View notes
Text

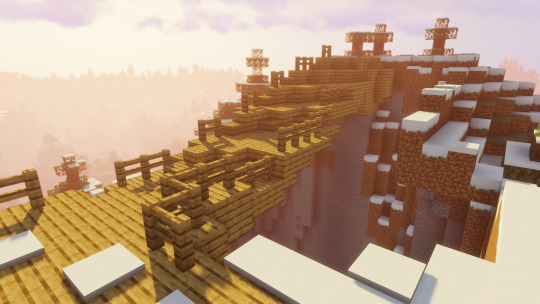
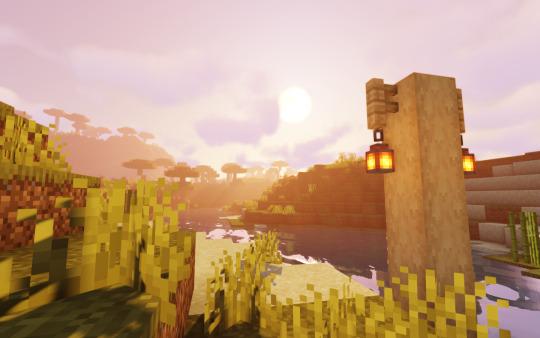
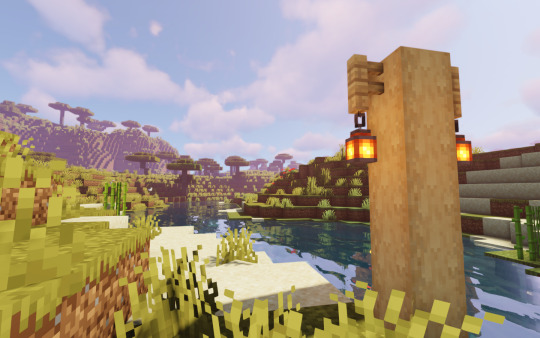
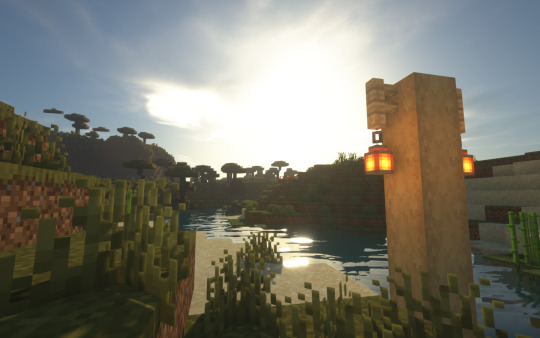
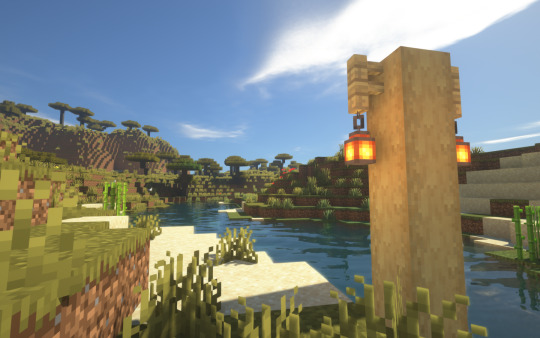
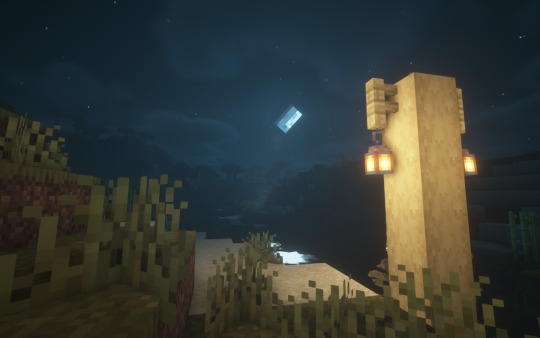
#minecraft#mineblr#minecraft screenshots#*mine#resource pack: personal pack based on summerfields#shader: sildur's vibrant shaders extreme volumetric lighting
13 notes
·
View notes
Text
'Minecraft' Looks like an Entirely new Game With NVIDIA's RTX Ray Tracing
When you think of Minecraft you might think of blocky graphics and simplistic textures. But the recent beta launch of ray tracer support for NVIDIA's RTX graphics card transforms it into a completely different game. To put it simply, ray tracing enables more realistic lighting, reflections, and shadows. It's like the jump from grainy VHS tapes to HD.
Although I'm forced to admit that I've not spent a lot of time with Minecraft however, I am a fan of it as a fun tool for kids. 35eng It was partly because I didn't have enough patience to play an unstructured, large-scale game. Also, I didn't like how it looked. The aesthetics matter a lot when you're going to be spending hours in the virtual world (this is the reason I didn't get into World of Warcraft). Ray tracing makes Minecraft more immersive.
The difference is evident the first time you load up one of the six environments that comprise NVIDIA's Ray Tracing Worlds pack, all of which were created by master Minecraft builders. When I first started Aquatic Adventure I was stunned by the reflections of water and the clarity of crystal blocks. We've seen similar visual effects from big budget titles such as the Assassin's creed series, but they've always felt like an approximate representation of the real world. Minecraft's water blocks, mirrored although flat and immobile seemed a little closer to looking at an actual lake.
The rays of sunlight also provide the game with the appearance of a warm glow. It's almost like feeling the sun's rays on your face. These are volumetric light scattering effects that mimic the way that sunlight shines through clouds. Although they can be overused for example, like the way J.J. Abrams flings lens flares at everything, it was amazing to witness god rays through ray tracing. The diffuse light was so natural that I was unable to believe it was real-time rendering, no matter if I was in the water or not.
Although it could appear that I am giddy about the beautiful graphics after having spent hours in the Minecraft beta I am more enthusiastic than ever about how Ray Tracing will alter the way we experience games. Remedy's Control, for example utilized ray tracing in an unorthodox way, where it worked in conjunction with traditional rendering techniques. Going full tilt in ray tracing is something that we've only presented in the past with this Minecraft beta and NVIDIA's RTX enabled Quake 2 demo.
Ray tracing is similar to HDR in that it's a new method to add depth and texture, regardless whether it's rendered in 1080p or 4K. I've always found the rush to 4K to be a bit reckless. That's an enormous amount of processing power utilized to crunch more pixels, though you may not notice a huge difference compared to 1,440p or 1080p -- especially from your couch. As TVs and monitors move towards higher refresh rates, I'd expect that many gamers will put more emphasis on framerates and noticeable visual improvements such as HDR and ray tracing above 4K rendering. (But of course, the ultimate goal is to hit all of those benchmarks at some point.)
My main takeaway from the Minecraft RTX beta? realistic lighting is a huge help. It makes everything appear more real and immersive when light comes from the place it's needed to, when shadows respond in a realistic way, and reflections appear like you'd expect. It's the difference between feeling like you're playing a video game, and feeling like you're in an actual world.
Unfortunately Ray tracing is incredibly power hungry, and inaccessible to most gamers. My test rig is powered by a Core i7 8700K processor and an RTX2080 Ti. Minecraft slows down to 53 FPS at 1080p when the ray tracing feature is turned on. And the hit is even greater on the less expensive RTX 2060, which drops to 30 FPS according to NVIDIA's benchmarks. This is where the company's DLSS technology comes in. It uses AI powered rendering to produce better quality results from lower resolution images. After I switched that on, Minecraft was able to run at 93FPS in 1080p. NVIDIA promises to give the struggling RTX 2060 GPU an additional 53FPS.
Performance is worse on RTX laptops which aren't as powerful as their desktop counterparts. NVIDIA claims that its RTX 2080 Max-Q machine like Acer's Triton 500, will hit 57 FPS in Minecraft with ray tracing and DLSS enabled. You can expect things to be slower with RTX 2060 or 2070 machines because this is the top-of-the-line mobile GPU.
With these limitations, I don't think that many games to fully embrace Ray Tracing anytime sooncertainly not in the manner we've seen in Minecraft. I'd also bet the PlayStation 5 or Xbox Series X will face similar issues managing the performance of ray-tracing. It's enjoyable to see developers experiment with this new technology. Don't get caught up in the rush to 4K. We'll be judging future games based on how they incorporate Ray Tracing and other graphical upgrades that you'll actually see.
1 note
·
View note
Photo

first project on this new machine is an ancient-desert-turned-coastal port town featuring some chonky shaders
4 notes
·
View notes
Photo

#1.#Chocapic13 Ultra#2. 3. 4.#Sildurs Vibrant Shaders: Extreme Volumetric Lighting#minecraft#shaders
1 note
·
View note
Photo


I decided to test out the three shaderpacks I have running for minecraft and compare them since I can’t decide which one i like better. I’m running no mods or texture packs on minecraft 1.16.4 java edition.
The first line is Sildur’s Vibrant Extreme 1.28.1 with Volumetric Lighting. The colors are much more vibrant and colorful, although the nighttime is very bright. Light sources aren’t especially bright here because I disabled bloom lighting. Bloom combined with the volumetric lighting doesn’t seem to play well for me (and also the bloom is a little over-saturated for my taste)
The second line is SEUS Renewed 1.0.1. Very dark nights and very realistic light effects. This one might make some people’s PCs chug, but not much more than Sildur’s extreme would.
The last line is BSL 7.2.0.1. A little easier on the computer than the other two and it’s a bit more faithful to vanilla minecraft in terms of lighting.
They’re all about the same load as I have everything set to ultra or best quality. Average out about 30-45FPS that dips to 25 when loading large chunks. My GPU is a Nvidia Geforce GTX 1060 3GB. I think my personal preference is SEUS but BSL also looks very nice. Sildurs isn’t quite my cup of tea but it looks like it would be especially good on modded or fantasy servers.
Some of these you have the option of going in and changing the color light values for them but that’s something I don’t think I’ll be messing with anytime soon.
80 notes
·
View notes
Text


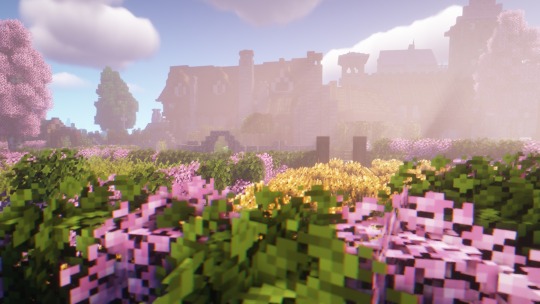
Rainy Minecraft cottage aesthetic 🌧
Server: Craftyn Retro (play.craftyn.com)
Texture pack: Mizuno’s 16 Craft + Invisibile Item Frames + CIT
Shader pack: Sildurs Extreme Volumetric Lighting
#minecraft#minecraft buildings#minecraft house#minecraft servers#mizunos 16 craft#mizunos cit#shaders#sildurs shaders#craftyn#my build
253 notes
·
View notes
Note
what minecraft shader are you using?
I use Slidur's vibrant shaders and optifine! I have the Extreme - volumetric lighting version and all settings set to highest quality in both the shader options and optifine options. It requires a really powerful computer, but I really recommend it!
1 note
·
View note
Last Seen Blogs

shireyishunjian
湿热一瞬间 / shireyishunjian - 众筹互免分享

pie-bean
Magpie from Toe Bean

imswimmingback
absolute fool about it

skylarkatherine
I feel most alive inside my mind

wildboysafloatbrisbane
Untitled