#not an edit
Text
👀

69 notes
·
View notes
Text
Edits out of context but taken from the sims: A collection.


104 notes
·
View notes
Text
#not an edit#poll#atla#avatar the last airbender#atla katara#atla suki#atla yue#atla toph#atla azula#atla mai#atla ty lee#radical feminists do touch#radfems do interact#radfems do touch#radfem safe#radfem polls#radical feminists please touch#radical feminist
357 notes
·
View notes
Text
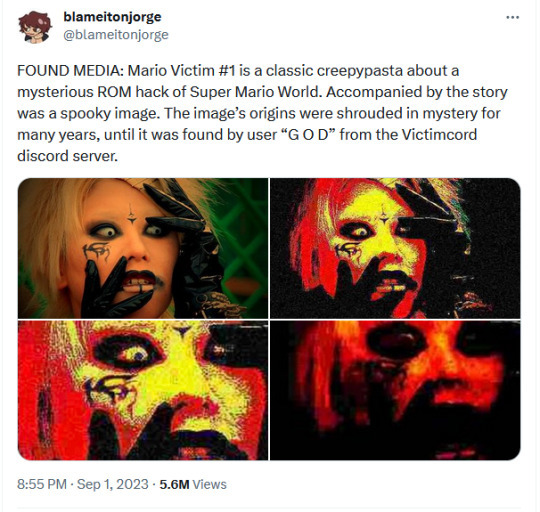
so how does everyone feel about the super mario world creepypasta victim being a deep fried kyo cosplay
109 notes
·
View notes
Note
when will my Low Quality Homestuck edits return from the war
when i get my keys out of my fucking car
87 notes
·
View notes
Text

This is old scarameow concept art from the mass leaks a month or so ago and I can't believe that like. I've seen nobody talking about it seeing as it's adorable as fuck lmao, I'm not even a big scara fan and it's still just so damn cute. Even the text is cute seeing as he calls himself sanmiao in some of them, which is a pun on his chinese name (sanbing) and, well, you can guess miao. Also birb Dottore and Niwa fox.
#genshin impact#not an edit#scaramouche genshin#wanderer genshin#genshin#gi#genshin leaks#last tag is just in case even tho its pretty ood
55 notes
·
View notes
Text
the feminine urge to have your wealthy husband perish under mysterious circumstances so you can descend the staircase in your finest cashmere robe to answer the door for the police, dabbing lightly at your eyes with a gold embroidered handkerchief you just bought with your late husband’s money
121 notes
·
View notes
Text
I hate my art
#interlacrimas#Hm....idk what to say#Not an art#Not an edit#Not anything that youre waiting me to post#:3#My art sucks
15 notes
·
View notes
Text
uh oh

Gif
86 notes
·
View notes
Text
*GOOFY AHHH TUTUORIAL*
lesson 2: getting started on psds!!
hit "read more" if interested!
** NOT ALL PSDS ARE FILTERS, PSDS ARE USUALLY BASES THAT YOU CAN OPEN UP. PSDS ARE PHOTOSHOP FILES THAT YOU CAN OPEN UP AND EDIT WITH ALL OF THE LAYERS. THIS IS A TUTORIAL FOR A FILTER PSD (aka, making your OWN filters) **
hey there!! welcome to lesson 2. you don't need to tune in on lesson 1 to understand this, because it was just about finding editing programs and finding tutorials and motivation, so if you already know about all of that, you are basically prepared for this lesson.
this is a tutorial for PHOTOPEA, idk if this works anywhere else. also, this is INTENDED FOR A COMPUTER. (ex: dragging and dropping files and all of that stuff)
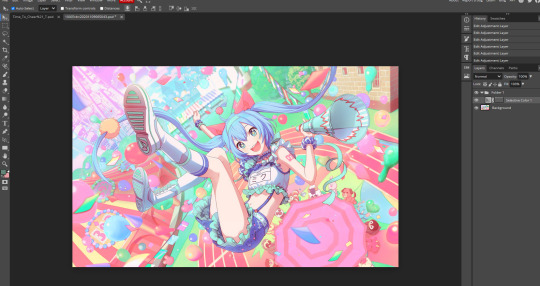
STEP 1: the first thing you may* see when going into photopea is this screen:
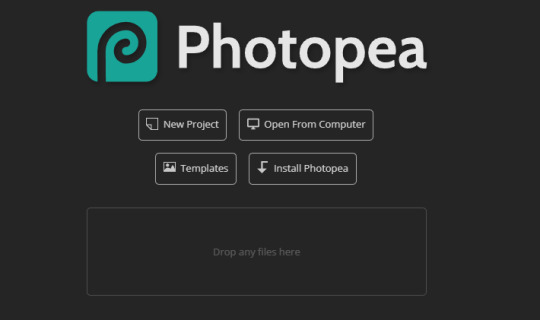
drag any image into the box that says "drop any files here" if you are a noob and don't know how to drag and drop files you can find a tutorial here. anyways, like i was saying drag and drop any image.
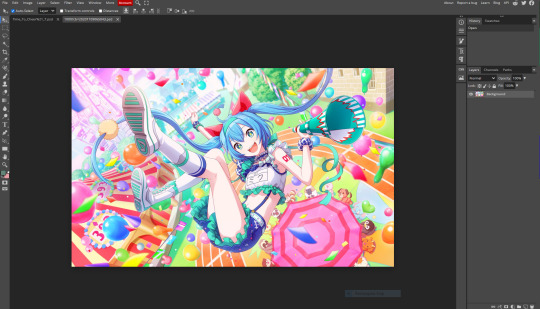
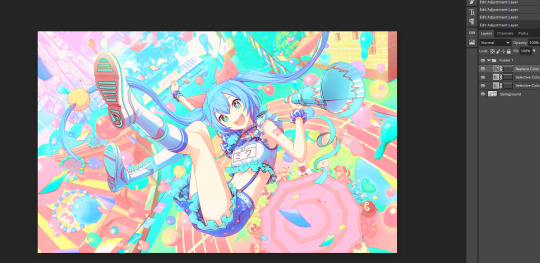
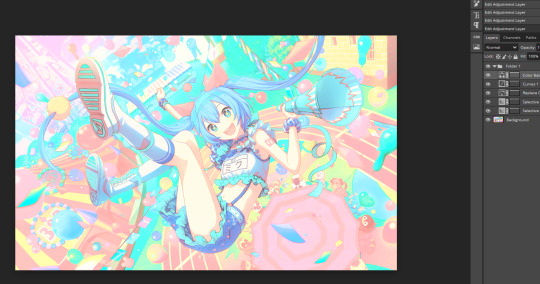
now it should look something like this (but instead of the hatsune miku image its the image that you prefer):
STEP 2*****: now that you have your image, look at the symbols at the bottom right corner. you should see this folder image (folder is circled in red)

you should click the folder button. now you have created a folder. this is going to be the filter.
now that you have the folder down, before proceeding further make sure that its HIGHLIGHTED
go a little bit above the corner, and you folder should be highlighted like this
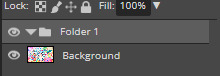
if its not, just click on it.
now that its highlighted go back to that right corner and click this half circle button that i circled in red

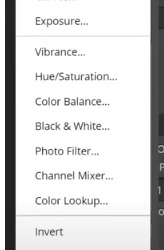
once you click it, this should pop up

i usually hit the "selective color button" first
it usually presents you with this:

at the top of the image, you should see the "colors" button, thats the color you are editing. click it and choose the color you want to edit. you can edit how much a certain color is in a color lol. if yk what i mean.
now i spent a little bit of time editing the selective color, and you can see that the image looks a little different. scroll up to the original image on stop one to see what im talking about! you can add many selective colors until your satisfied!
as you can see, i've added another selective color!

now, right below selective color, (back in the half circle menu) you can see "replace color" this is what it looks like (i've already edited it but you get the idea)

you can choose a color to make FUZZY** and after you do that, you can change the hue, saturation, and lightness to your liking.
here is what my miku image looks like after FUZZINESS**, not a big difference but u can still kinda see it.
STEP 3*****: after you've done that, go back to the half circle menu and close to the top but not all the way, you can see "curves". they look like this:
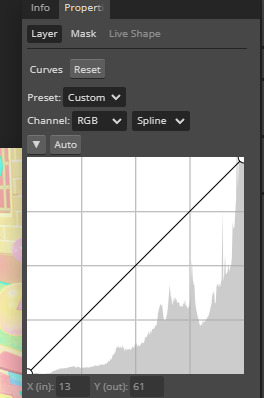
now you can bend them and destroy them to your liking.
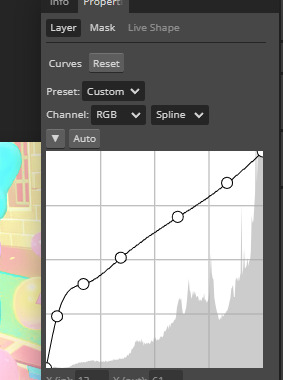
(the higher UP you make your curve go, the lighter it gets, the more LOW you make your curve go, the darker it gets. it also does some other stuff too***. just keep on breaking and bending it to your liking.)
now this is what my filter looks like

STEP 4*****: after your done with abusing and breaking lines now go back to half circle menu and find "color balance". it should look like this
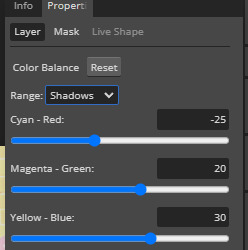
its already edited but whatever (everyone thing should start at zero) but just move the circle more towards the color that you want there to be more of. also hit the range thing to effect more then just the shadows.
now heres what it looks like:
the difference is VERY small****, but you can see that theres more green and cyan + blue when you look closer.
Step 5*****: near the curves thing, you should see "brightness/contrast" you should probably hit that. and it should look like this
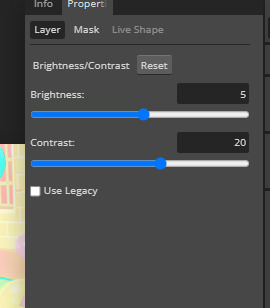
adjust it to your liking! its already been adjusted in the image as you can see but still.
Step 6*****: now if you hit the half circle button and look a little bit BELOW curves you should see "vibrance" it also has a saturation button but just drag the circle to your liking.
Step 7*****: next is "photofilter" its in the half circle button in the middle. if you want more of a certain color, click on the orange box to change it. here is what it should look like btw:

also the "density" is how much the color effects the image.
step 8: also, near the "photofilter" in that middle row a little bit above it, there is hue/saturation. its pretty explainable what it does, but just adjust the circles to your liking.
i have been editing this for the last hour, i hope atleast ONE person finds this post helpful. if you are currently reading this, thank you! if you used this tutorial, PLEASE send me the PSD you made!! (through the "request" button on my blog or @ me in a post!!) /nf
IF YOU FOUND ANY OF THE * SYMBOLS, THIS IS WHAT THEY ALL MEAN:
.. * i HOPE your photopea looks like that, it SHOULD. if it doesn't look like that your PROBABLY not on photopea.. your probably on some alien website or something. ** I honestly don't know what "fuzziness" means yet so i'm just as confused as you are. *** other stuff being: change of colors, making the image more red (making it look like it took place in hell!) interverting the image, making the colors more gray. **** honestly a lot of the options make the difference very small ***** you don't need to use ALL of these options if you don't WANT TO. i honestly don't use photo filter for most of my edits.
127 notes
·
View notes
Note
I just wanna say thank you for the "good idea Kenny" post. It started something with me and my friends. All because I showed one of them that image. Somehow, it evolved into... the Kenny cult. We worshipped Kenny. We started an entire club based around Kenny. We WERE Kenny. I'm pretty sure Drew would have been beyond done with all of us. Because Kenny. Kenny got the attention and not him.
...Yeah, it really happened, it was disturbing, it was awesome, and we can't ever look at Kenny in the same way again. Without saluting him and hailing him as our king. So, yeah. That's all I wanted to say...
I need you to understand that this is my favorite ask I have ever received. It left me with questions. It left me with reverence. It left me curious and awestruck and slightly concerned about my legacy on the internet. To think, I started this blog to shitpost with like 6 or 7 friends and now here we are, a year and a half-ish later and almost a thousand posts later with a KENNY CULT (?????????). Genuinely a this-blog heritage post in the making, right after 'shuckle' and 'pee'. real ones remember pee.
Feel free to tell me more, please. This is glorious.
22 notes
·
View notes
Text

Source: The Witch & The Beast [2024]
13 notes
·
View notes
Text
Thank you to the MBAV fandom. I've never received so much love, or any love at all, for my edits. Y'all the MVPs.
9 notes
·
View notes
Text
This was brought on by the fact that I was looking at the medic layouts I made but genuinely editing for tf2 is the most unserious ever. In the still banner he's talking to his bird about killing a guy BECAUSE HE HURT HIS BIRD. in one of the icons he's talking to miss pauling about how blood types are the least of their concerns because HES BEEN GATHERING BLOOD WITH HIS UNDERWEAR???? and every time I edit for tf2 I have to go through the comics again and just absorb more batshit insane scenes and then also get gut punched irt sniper and scout dying and their relationships with their parents it truly is a thankless job
#🌈🔥mod pyro#not an edit#had to get this off my chest. you might just have an aesthetic image of medic talking about blood in his underwear as your tumblr icon
9 notes
·
View notes
Note
youre so cool and i love your things <3 they brighten my day <3 <3

98 notes
·
View notes
Last Seen Blogs