#patch diy
Text

How to make badass patches when you can't paint or freehand a straight line to save your life
Materials:
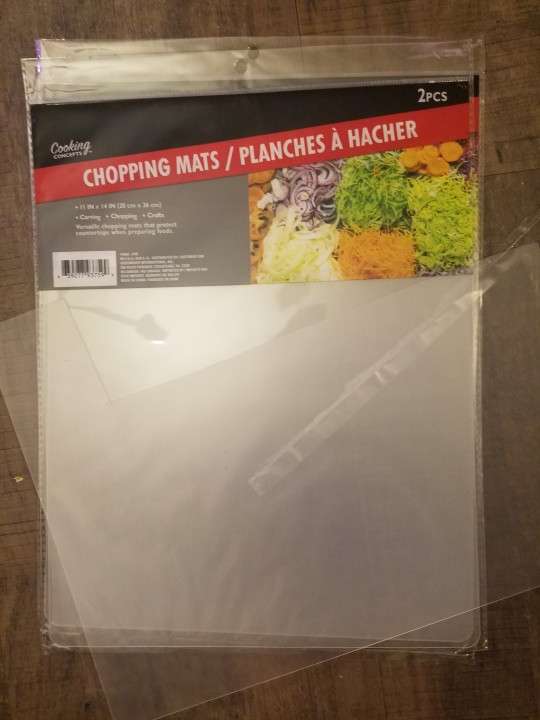
Thin but rigid clear pastic sheets like the ones pictured below
Washi or masking tape
Fine tip permanent marker
Graphing paper
Pen (optional)
Pencil
Scissors
Exacto/ razor knife
Fabric for patches
Acrylic paint
Sponge (make sure it is a small grained foam)
Safety pins (to attach the patch to clothes if so desired)
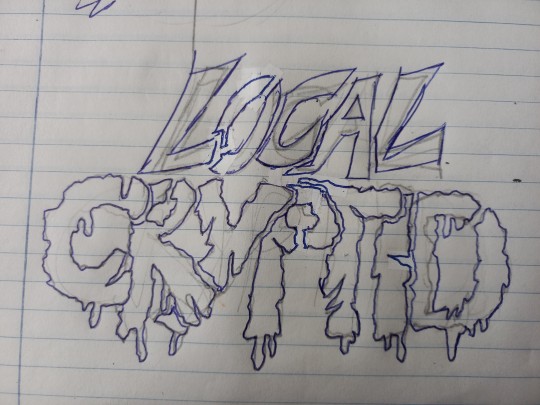
Step 1: draw in pencil on graph paper, making a really cool design. Know where your positive space and negative space is, and think in your head what will happen when you cut it out. Make sure you will not have any islands that'll fall out of your stencil, or be prepared to mimic those spaces with masking tape
Step 2: outline darker with pen
Step 3: cut out a size of plastic that is equal to your design
Step 4: attach plastic to paper with your tape
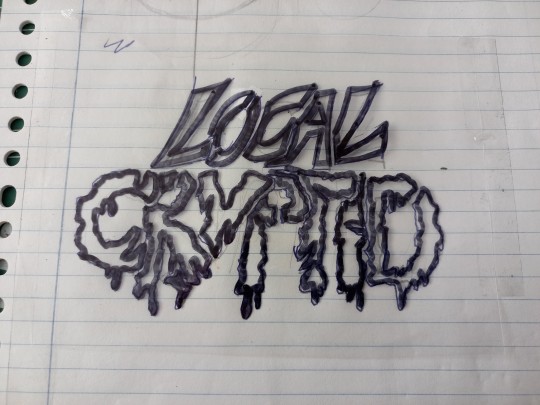
Step 5: trace your design with your permanent marker

Step 6: detach tape (pulling it along its line as close to the paper as possible, peeling, can usually save your paper)
Step 7: gently carve along the lines with a razor knife until they are loose (it is best to do this on top of something you do not care about, such as garbage cardboard)
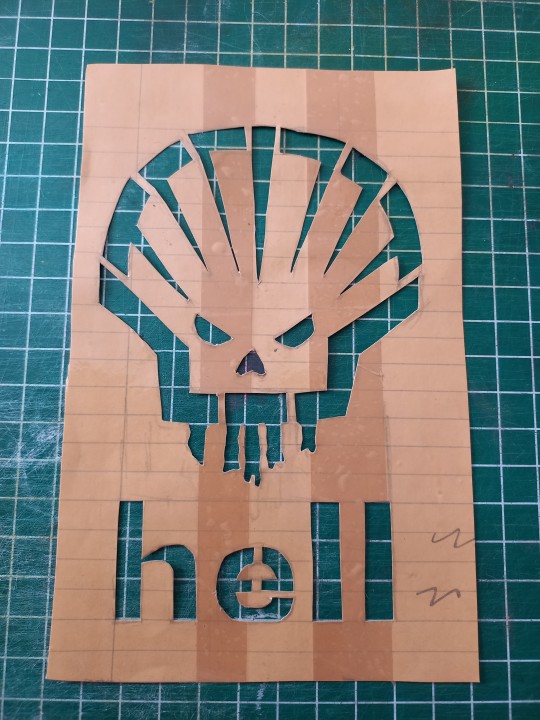
Step 8: carefully carve the corners of your design with your knife until the shape can be removed. You now have a stencil.
Step 9: secure stencil to fabric
Step 10: cut a piece of your sponge so it is a good size for blotting (I prefer 1" by 1" by 2" shapes), and prepare a quarter sized puddle 9f paint to blot from
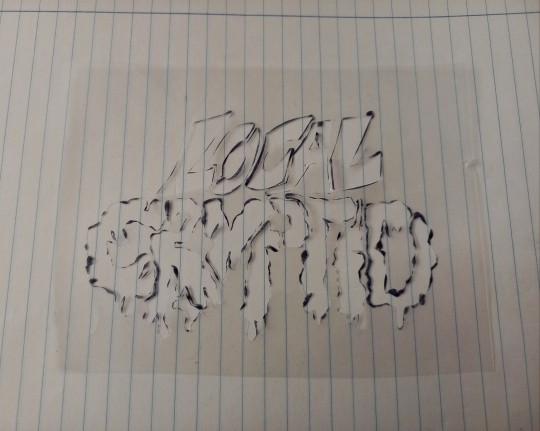
Step 11: blot the design, using as little paint and as little force as possible. It takes awhile to get a solid coverage, but you will. You do it this way because a large amount of paint or paint pressed in too forcefully will slip under your stencil and produce strange blobs
Step 12 (optional): outline patch with permanent marker to cover up any blotches
Final product:


Don't be discouraged if any of these steps do not turn out as you envisioned them: I've been refining my technique here for awhile. It's something that takes a lot of practice to be good at.
Happy crafting!
88 notes
·
View notes
Text
streetlight patch idea ramblings under the cut bc this got long
i have an idea cooking in my brain for a somewhere in the between back patch that i think would be fucking wicked
unfortunately all my fav streetlight lyrics are SOOOOO LONG i worry it would make for an awkward patch like. most lyric patches i see have like 2 line lyrics and im out here like i cant cut any lines off these lyrics or it wouldn't HIT THE SAME !!!
like fr all my cool streetlight patch ideas are so long im worried itll be awkward or not look right with all the words but like !!!!!!! i need them. the quotes
i wanna do the sitb chorus
"so you were born, and that was a good day,
someday you will die and that is a shame
but somewhere in the between,
you lived a life of which we all dream
and nothing and no-one will ever take that away"
im thinking that with like a baby deer corpse with mushrooms growing out of it would be neat or something like that bc i am a mushroom freak
the other one i rly wanna do is a the hands that thieve chorus quote
"I dont care if i lose, because my heros did too,
they shouted court should be adjourned because the jury are fools
and the judge can't decipher
his left from his right
or his right from his wrong"
like MAN what a baller quote that would be for a back patch
anyways lmk if anyone has suggestions or input on this hehe
5 notes
·
View notes
Text
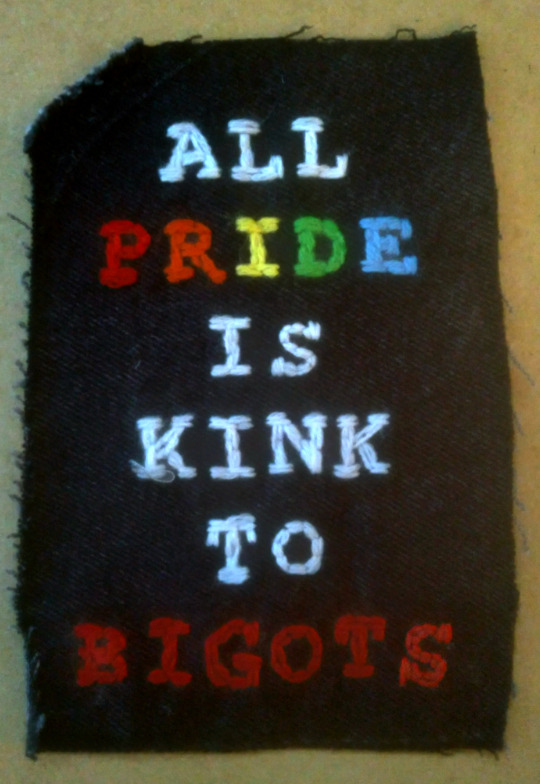
Pride month vest project, a patch a day #14: All Pride is Kink to Bigots
#all pride is kink to bigots#pride#gay#lgbtq#queer#pride patch vest#embroidery#battle jacket#diy punk
38K notes
·
View notes
Text
Had a few folks interested in how I made the patches I posted for Solarpunk Aesthetic Week, so I thought I'd give y'all my step-by-step process for making hand-embroidered patches!

First, choose your fabric and draw on your design. You can use basically any fabric for this - for this project I'm using some felt I've had lying around in my stash for ages.

Next, choose your embroidery floss. For my patches I split my embroidery floss into two threads with 3 strands each, as pictured. You can use as many strands in your thread as you prefer, but for the main body of my patches I prefer 3 strands.
Next you're going to start filling your design using a back stitch.

First, put in a single stitch where you want your row to start.

Poke your needle up through the fabric 1 stitch-length away from your first stitch.

Poke your needle back down the same hole your last stitch went into so they line up end-to-end.
Repeat until you have a row of your desired length (usually the length of that colour section from one end to the other). Once you have your first row, you're going to do your next row slightly offset from your first row so that your stitches lay together in a brick pattern like this:

Make sure your rows of stitches are tight together, or you'll get gaps where the fabric shows through.
Rinse and repeat with rows of back stitch to fill in your patch design.

When you're almost to the end of your thread, poke your needle through to the back of the fabric and pull the thread under the back part of the stitching to tuck in the end. Don't worry if it looks messy - no one's gonna see the back anyway.
This next step is fully optional, but I think it makes the patch design really pop. Once your patch is filled in, you can use black embroidery floss to outline your design (or whatever colour you want to outline with - it's your patch, do what you want). I use the full thread (6 strands, not split) of embroidery floss to make a thicker outline.

I use the same back stitch I used to fill the piece to make an outline that adds some separation and detail. You could use most any 'outlining' stitch for this, but I just use back stitch because it's just easier for me to do.
Once you're finished embroidering your patch, it's time to cut it out!

Make sure to leave a little border around the edge to use for sewing your patch on your jacket/bag/blanket/whatever, and be careful not to accidentally cut through the stitches on the back of the patch.
If you have a sturdy enough fabric that isn't going to fray, you can just leave it like this. If not, I recommend using a whip stitch/satin stitch to seal in the exposed edges (I find that splitting your embroidery floss into 3-strand threads works best for this).

And then you're done! At this point you can put on iron-on backing if you want, or just sew it on whatever you wanna put it on. Making patches this way does take a long time, but I feel that the results are worth it.
Thanks for reading this tutorial! I hope it was helpful. If anyone makes patches using this method, I'd love to see them! 😁
#solarpunk aesthetic week#sewing#tutorial#sew on patch#punk diy#diy punk#punk aesthetic#handmade#solarpunk#handcrafted#embroidery#embroidered patch#how to#how to make a patch
17K notes
·
View notes
Text


Not the "people before profit" patch jacket being $449, fast fashion is fucking beyond satire at this point
#460 is without the discount#diy#punk#folkpunk#folk punk#patches#diy patches#crust pants#patch pants#crust punk#crustpants#patchpants#diy punk#ajj#days n daze#battle vest#battle jacket
23K notes
·
View notes
Text
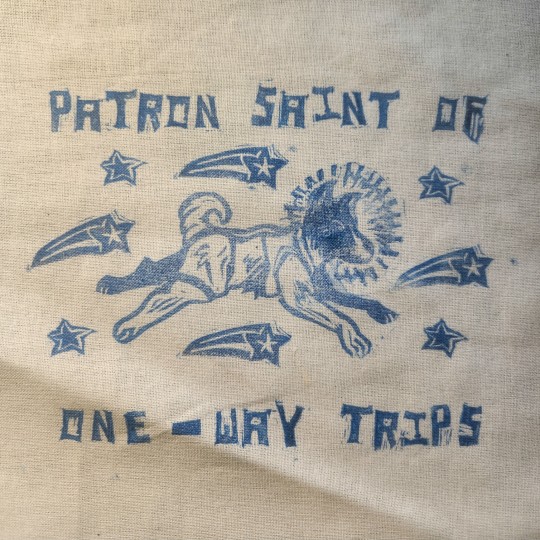
Still needs to be ironed and the edges finished but here's my laika patch inspired by this post by @manywinged !
#james if you see this i hope you dont mind being tagged#anyway the print came out smudgy but it covered up some of my mistakes in the original cut so im ok with it#laika the space dog#linocut#diy patches
16K notes
·
View notes
Text
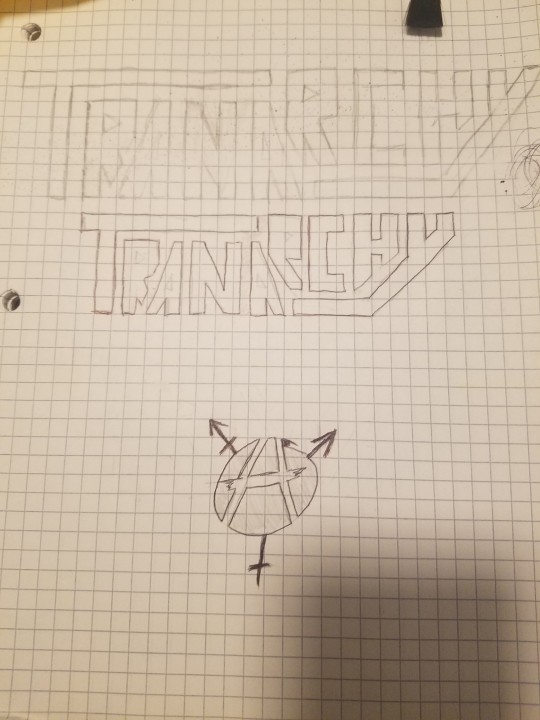
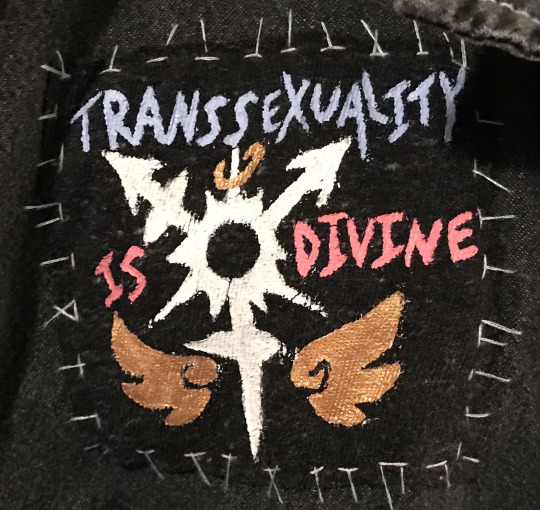
made some transsexuality patches for my jacket >:3
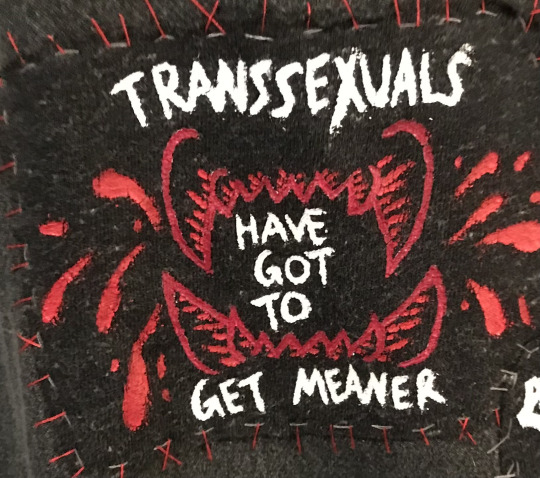
"transsexuals have got to get meaner" is a phrase I like from @sweatermuppet 's designs but I had an idea and wanted to make my own patch design based on it!!
and "transsexuality is divine" is a design/phrase I made myself inspired by sweatermuppet's transsexual designs as well!
#I might post my full jacket eventually but there's not many patches on it atm so I thought I'd just share my couple favourites :)#also lmk if the alt text is sufficient this is my first time trying to describe some images#my art#uh. I don't usually ever post irl art#what do I tag this as#sew on patch#transsexual#transgender#queer#queer art#punk#battle jacket#punk patches#diy punk
12K notes
·
View notes
Text
I'm seeing a lot of people say that punk fashion is expensive and inaccessible, which is very wrong. here is a list of some ways you can make punk fashion easier, cheaper and more accessible for you, since that's... kinda the whole point.
others are encouraged to add onto this!! (just don't recommend corporations like amazon. not cool.)
1. patches!! you don't need to buy them. DIY patches are not ugly or boring. in fact, they are encouraged here!! DIY, in my opinion, is always the best thing to do when it is an option and is safe to do so.
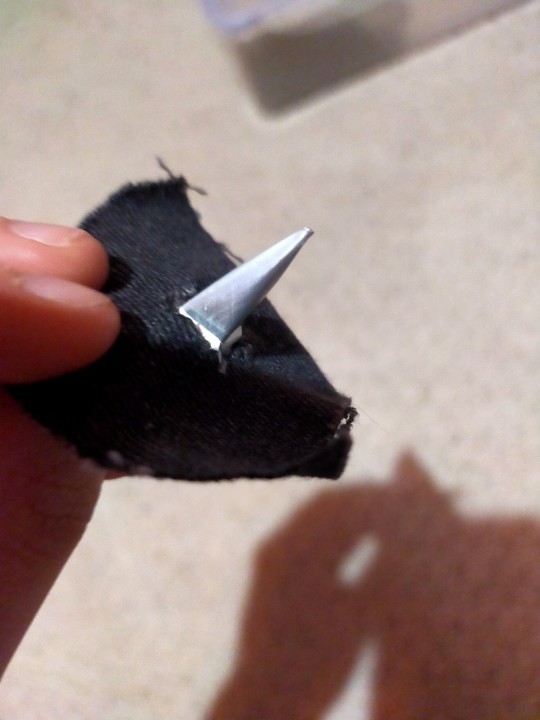
2. speaking of DIY, spikes!! you can make them!!
cut the top and bottom off of an empty can. cut down the middle of the cylinder and flatten it, so it's just a flat rectangle of metal.
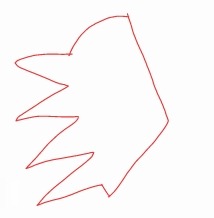
cut out a shape that is kind of a third of a circle, but around 3/4 of the curved edge is taken up by triangle shapes. (I'm not very good at describing, so here's a badly drawn picture)
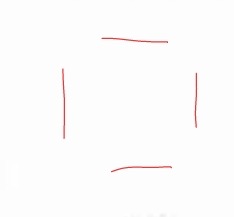
roll it into a cone, leaving the 4 triangles sticking out at the bottom. this bit is optional, but you can fill it with hot glue to make it more sturdy, just be careful touching the hot metal. I tend to hold the cone by one of the triangles with a bit of fabric wrapped around my fingers for this bit. cut 4 small holes in your fabric in this kind of shape:
and put the spiky bits of triangle through the holes. fold the triangles in on themselves to secure the spike in place. boom. spike obtained. this is one I made and attached to a little piece of fabric to test this method out:
3. battle vests!! (like the base jackets). the best places to buy these are charity shops and second hand websites in my opinion, but if anyone else knows any better options, please reblog with those!!
a good trick I find works well on eBay is to filter search results to your country (or state? can you do that in the US? idk) so that a: fast delivery because local, and b: all the sellers of everything that shows up are in YOUR TIME ZONE.
why is this important? when people sell something for really cheap, it goes FAST. check eBay at like, 2am or something. all the scalpers in your area are asleep. grab the cheap stuff while they can't.
4. sewing!! want patches, but can't sew for whatever reason? I've heard of a lot of people with joint conditions like arthritis complain about the inaccessibility of patch stuff, and that does sound extremely annoying, however:
safety pins!! while they are still a little fiddly, they're much less work so you don't have to fiddle about for long. if you can, you could even ask a friend to help, since it doesn't take long at all I'm sure someone will be willing to help out!! (I know I would, but that's just me, and I love this kind of thing). safety pins on clothes are also widely considered to be a symbol of solidarity, so if anything, you're adding some extra love and meaning to your patch pants/battle jacket.
if that's still too fiddly, fabric glue is always an option. unfortunately this means you won't be able to remove/reposition patches, at least without leaving a massive patch of residue, but if you're ok with that then fabric glue is probably your best bet.
for people who prefer sewing: as for where to get the thread, I've heard a lot of people recommending dental floss, as it's apparently much cheaper and works just as well. I haven't tried this myself so can't confirm that, but I thought I'd share it regardless.
5. where to get fabric!! old clothes. rip em up. you don't need any kind of fancy fabric from the craft store. my patches are made of old jeans that I grew out of.
don't have any old clothes and you don't want to waste any good ones? I'm not sure about other countries, but in the UK, as long as you're not on private property (trespassing), dumpster diving is perfectly legal.
I definitely ;) do NOT encourage ;) trespassing rich people's land ;) to steal from their dumpsters ;)
or tbh it doesn't matter too much how rich the person is, since it's all going to landfill anyway. if it's in the bin, it's free game, but you didn't hear that from me. ;)
please add onto this where you can!! and if I missed something or got anything wrong, add that on too!!
#diy punk#patch jacket#battle vest#patch vest#punk vest#diy patches#punk battle jacket#battle jacket#punk patches#patch pants
7K notes
·
View notes
Text
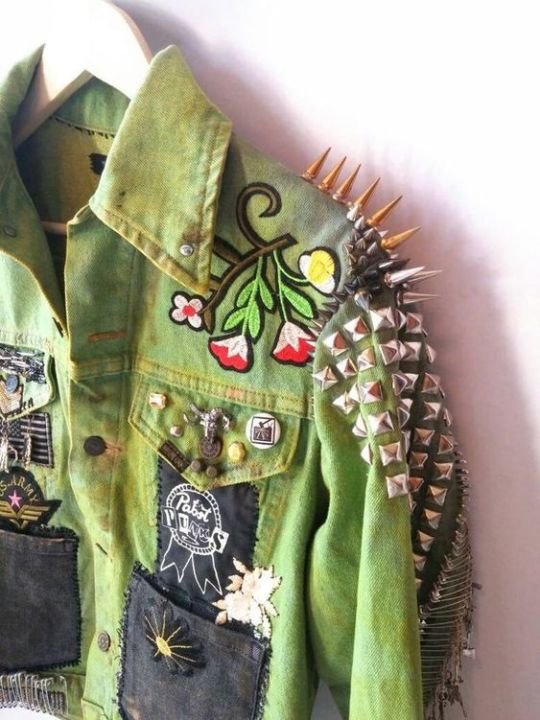
#punk#punk rock#punx#punk aesthetic#punk fashion#punk jacket#punk patches#punks#studded#patch jacket#diy patches#diy punk
1K notes
·
View notes
Text
diy!
#altfashion#punk fashion#diy punk#punk aesthetic#diy fashion#punk#crust punk#crust pants#patch pants#emo fashion#sewing#diy patches#patches
2K notes
·
View notes
Text

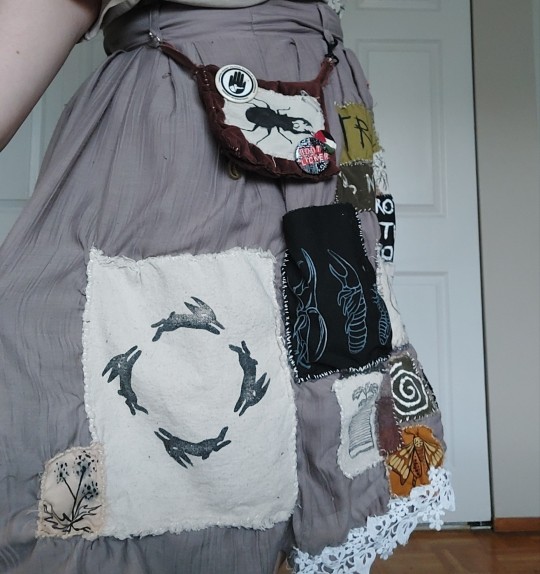
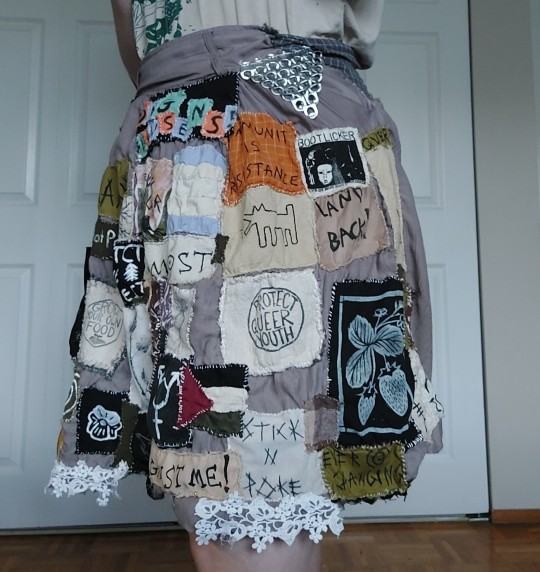
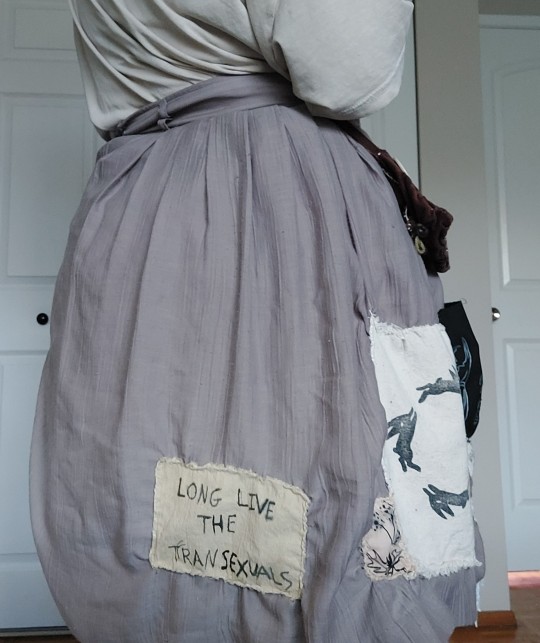
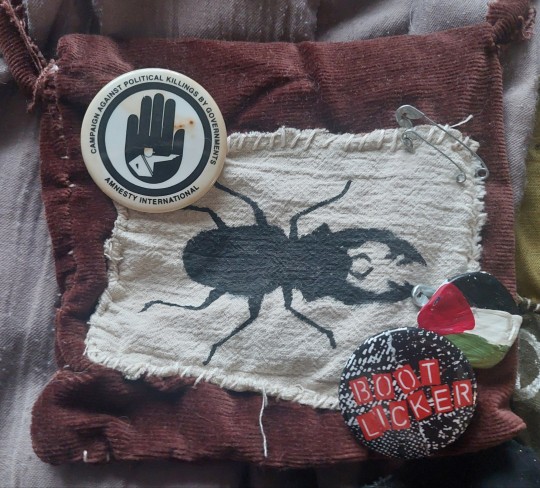
my patch skirt! a hefty boy. ive been working on this for over two years now!! most of the patches are handmade, and the little brown pouch with the beetle is handsewn as well.
1K notes
·
View notes
Text

Pride month vest project, a patch a day #16: We Stay Silly :3
4K notes
·
View notes
Text
I think a lot of people, esp younger people and those newer to the scene, kinda don't understand what "punks dress punk" actually means
It's not some kinda elitist thing, and it's not 100% mandatory if doing so isn't accessible to you for whatever reason
What "punks dress punk" means is that we dress for ourselves and in a way that deviates from societal norms/what is typically "employable" and "acceptable" because that's what punk is about, it's about deviating from what is expected and what is palatable
#i hope this makes sense/comes accross right lmao#punk#alternative#queer punk#diy or die#diy punk#cripple punk#punk diy#punk patches
1K notes
·
View notes
Text
DIY advice for making punk clothes while poor
#folkpunk#diy#folk punk#patches#crust pants#punk#patch pants#diy patches#crust punk#diy punk#days n daze#battle vest#ramshackle glory#ajj#goth#emo#punx
17K notes
·
View notes
Text


outfit pics i guess
746 notes
·
View notes
Note
Patch making tutorials?
and here i am once again, with a patch making tutorial
how to make stenciled patches:
i'll post a part two in the future which will cover freehanding and stamping ur patches
-
first some general info that might be useful:
i get my patch design inspo from pinterest, etsy, and tumblr. if sell your patches make sure you arent ripping off another artists patch design when using etsy for inspo. anarchostencilism also has tons of stencils both on deviantart and reddit which are free to use.
i use acrylic paint for my patches, but if you can afford it id advise fabric paint. to seal paint into the fabric iron the patches, it helps em last longer. some acrylic paint survives very well in the washing machine, but wash your stuff by hand the first time to see how well it holds up.
if you make your patches multiple colors, dont first make the whole patch one color and then paint over it with the other colors. if the paint starts cracking the base color will show through. (if you like that however then dont mind this)
i paint my patches on jean fabric, cause it makes the patches sturdy yet flexible. but shirt fabric or canvas both work very well too. anything except really plasticy/slippery or textured fabric can be used
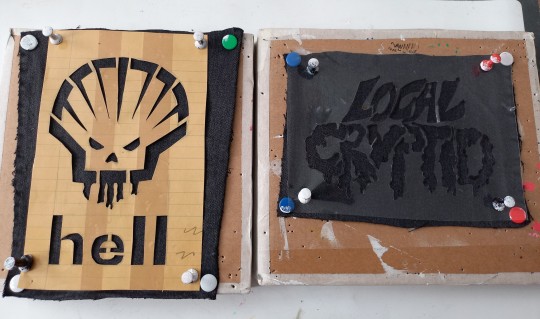
i pin my patches down with pins onto multiple layers of taped together cartboard, to prevent the fabric from moving around and distorting the print
-
there's two ways in which i make my stencils
1. with paper covered in tape
2. with the plastic folder you put in your binders
-
option 1:
draw out your design onto some paper, make sure there arent any "loose" parts in the design that will get lost when cutting out the stencil

cover the paper in tape front and back, make sure you can still see your design through the tape
cut out your design, i use scissors and an exacto knife
-
option 2:
draw out your design (you can also draw the design directly onto the plastic folder)
cut a piece of plastic out of the folder big enough to cover your drawing and tape it down.
trace the design onto the plastic with pen or marker (any mistakes can be wiped out)
cut out your stencil
-
continuation from both option 1 and 2
after finishing your stencil you can pin them down on some fabric
dap on your paint with the point of a big brush or a sponge, depending on the paint it'll take 2-3 layers.
make sure your previous layer dried completely before adding the next one

after the paint has fully dried you can carefully take off your stencil.
!!dont unpin the patch before it fully dried, or the drying paint may cause the fabric to warp!!

thats it, questions are always welcome, now go and make stuff!!
#punk diy#diy fashion#punk#queer punk#diy punk#punk clothes#punk style#punk patches#patches#tutorial#my stuff
2K notes
·
View notes
Last Seen Blogs

definitely-ellie
Ellie's Fortress of Fae Magic and Yuri

tr1pled1p
kiki♡

musicplaylist
Anime Music & Songs

meita716
¡Meeeta!

highqualityfashion
شركة نقل عفش بجدة عمالة فلبينية