#diy cat project
Text
We're doing a workshop for the King County Library System Makerspace! ( Washington State )
This Saturday from 11am-1pm at the Federal Way Library!

We'll be showing Flower Crowns and Horn Sculpting for cats to use in pictures!
#cat cosplay#cats#cosplay#cats in costumes#halloween#Halloween ideas#diy#diy projects#do it yourself#makerspace#king county library makerspace#federal way#aww#cat costume
316 notes
·
View notes
Text

Saul Goodcat & Kim Meowxler
23 notes
·
View notes
Text
ID (also in Alt Text): clipboard holding a print out of a multi layer reusable mask pattern (with a pocket for adding more protection!) on top of the pattern is a patchwork mass of fabric covering the mask shape.
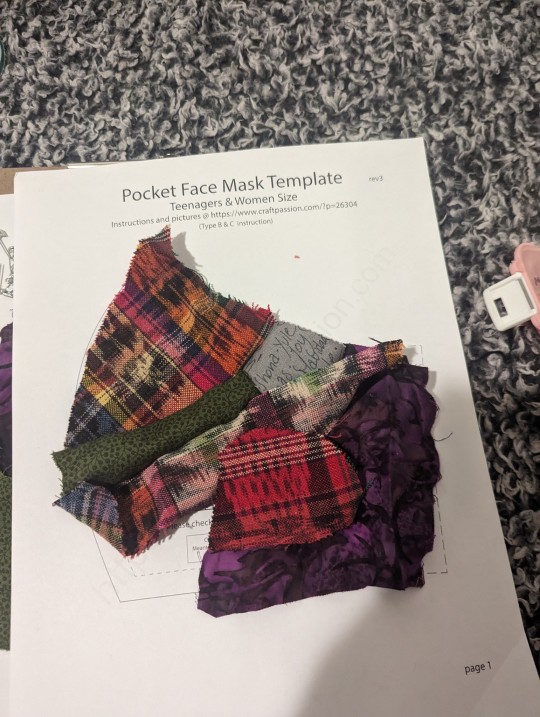
Craft posting pt two !! I'm making a reusable mask (w/ pocket to put in Better Masks and things that work to protect better than plain fabric (bc. You Know,,, That's Not Enough.) bc I'm running out of disposables and have no money to buy more :') and I go to a. College campus every day and them thangs is POPULATED
So yeah! I scavenged these fabric bits from around the school and I think I have enough to make two or three, which will be Extremely helpful for when I'm low on spoons or forget to wash them the night before (which is all the time, also I don't have a dryer so if I forget, washing in the morning isn't an option) :') but! It's worth it to me to keep masking! It makes me feel safe, I prefer to conceal my face, and I love knowing I'm doing my part the best I can to protect others and myself!
This is the pattern I'm using! If you're interested but don't have a printer hmu and send me a tip over $app or Ven (name in my bio) and I'll print it out for you and mail it :)
#the tip will go to helping me affor the stamps and envelopes to send them :'))#and the extra will go to my wheelchair fund and feeding my cats!#chronic illness#diy punk#solarpunk#diy projects#punk diy#covid isn't over#covid masks#craft posting#diy craft
47 notes
·
View notes
Text

Wierdo. 🤣 The sweater isn't tight at all. I put it on him only when I notice he's trying to sit directly on the heater. He had surgery as a kitten and his fur didn't grow back very thick on his chest. I make pet coats by commission, they're made exactly to your pets measurements & with your preferences. Msg me to order.
10.27.23
#artists on tumblr#handmade#queer artist#commisions open#crafts#photooftheday#diy#crochet#finished project#pets#cats of tumblr#pet clothes
21 notes
·
View notes
Text

#dogs of tumblr#fashion#sewing#dogs#cats#pets#upcycle#diy#diy punk#diy projects#diy craft#crafting#diy fashion#handcrafted#arts and crafts#embroidery#photooftheday
19 notes
·
View notes
Text
Crochet cat/bear basket
Here's another cute gift idea: a small crocheted basket with animal ears.
This beginner-friendly project requires the basic crochet stitches, and knowing how to work in the round.
You can find this pattern for free on Ravelry and on Móhu's blog. It comes with an option for bear ears and one for cat ears.
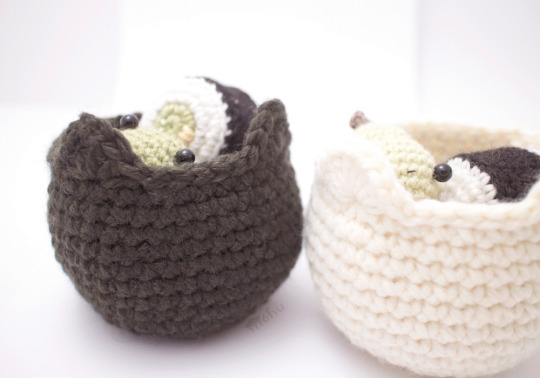
(Image source) [ID: two small crocheted baskets in front of a white background. The dark brown basket has pointy cat ears while the white basket has round bear ears. Each basket is filled with small crocheted plushies.]
#wasteless crafts#tutorial#how to#diy#crafts#fibre crafts#fibre arts#basket#animal ears#cat ears#bear ears#pattern#crochet#crochet pattern#easy crochet project#beginners project#Móhu#ravelry#gift idea#gift pattern#cat#bear#home decor#gift#decor#container#stash buster
200 notes
·
View notes
Text
painted a shirt!!! ~
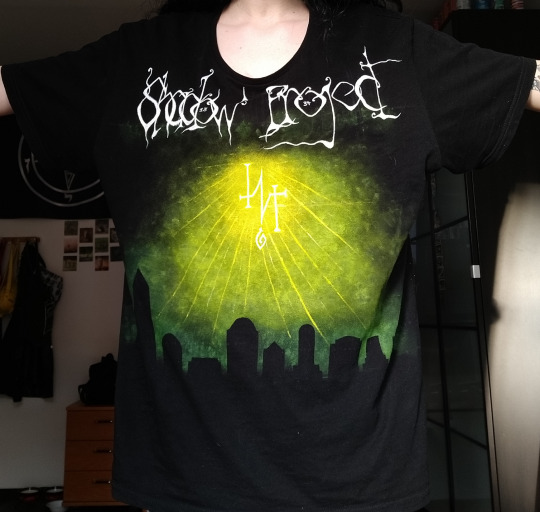
#aaah im so proud of this one actually#accidentaly poisoned my cat making it#she drank a bit of the paint water#so i rushed her to a vet eight away and then again to the ar at like 3am#she is fins but was exhausted from the meds they gave her#poor thing couldt even blink and peed herself and could get up#shes fine now just took her a day and a half to recover#and i was watching her like a hawk#so anyway new shirt#and from now on i only paint in the kitchen with the doors closed#my stuff#my crafts#diy#craftblr#crafts#gothblr#gothgoth#goth subculture#goths of tumblr#shadow project#rozz williams#eva o#deathrock
15 notes
·
View notes
Text
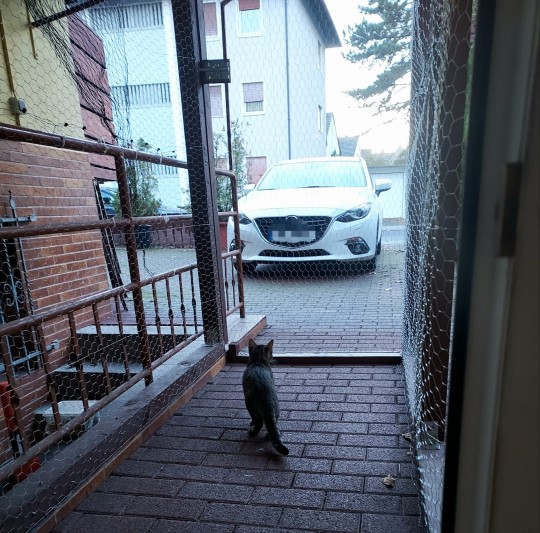

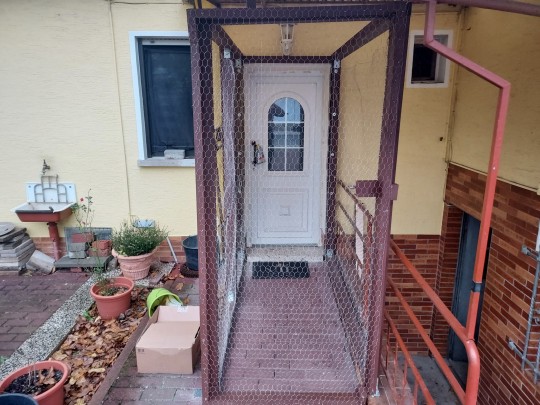
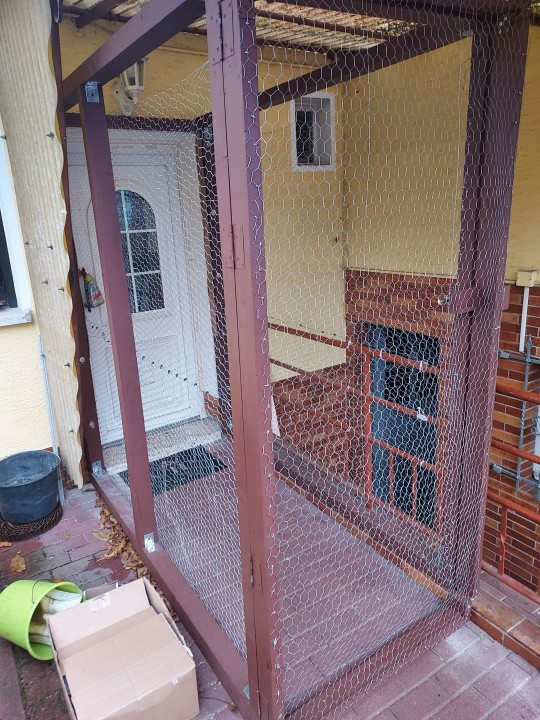
Finally, my Cat cage is almost complete.
9 notes
·
View notes
Text
youtube
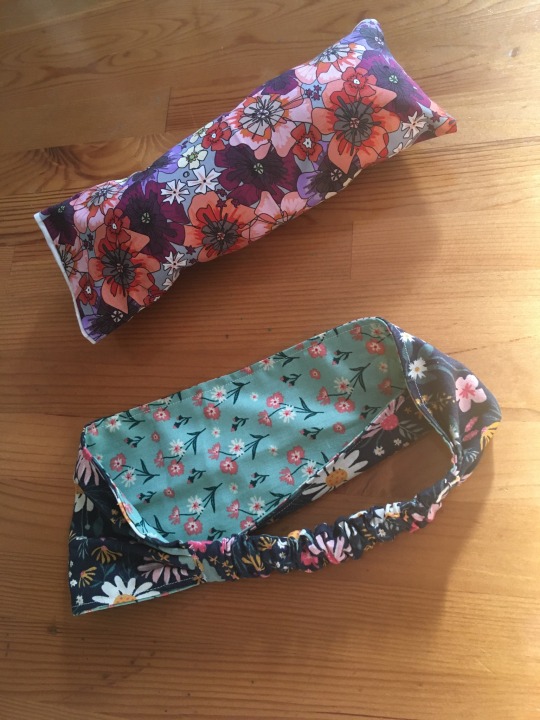
I got a sewing machine! I made a headband that is way too wide and a refillable catnip toy that doesn’t quite keep the catnip in. But they’re pretty! And I learned stuff! Eeeee!
#excited#new hobby#sewing#cat toys#diy cat toy#catnip toy#refillable catnip toy#headband#reversible headband#learning#fat quarter projects#handmade#finished project#Youtube
7 notes
·
View notes
Text
Mom and daughter cats


Hi Christina,
I made the rainbow cat pattern because I wanted to try to make a very no sew pattern. I wish I made the arms and tail longer and bigger. I’m not sure what pattern my mom use for the brown cat but I did added the tail. I like them both and I think it’s cool that I can share common hobbies with my mom!
CC
2 notes
·
View notes
Text


8 notes
·
View notes
Text
WIP CAT MASK (diy thing)
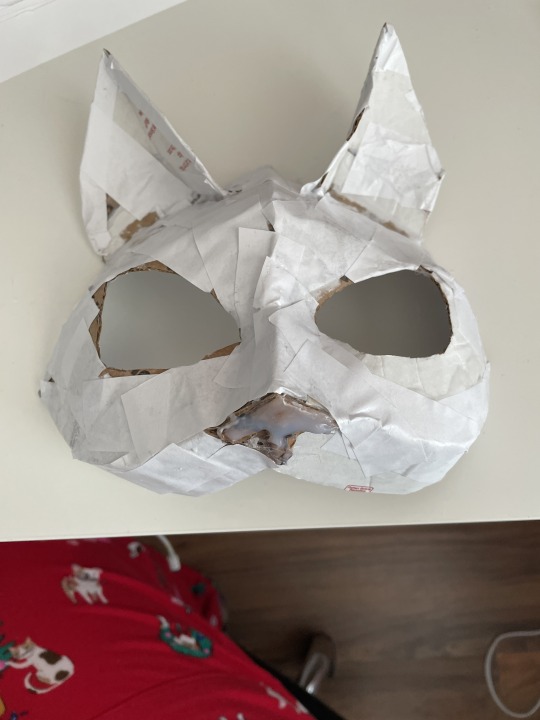
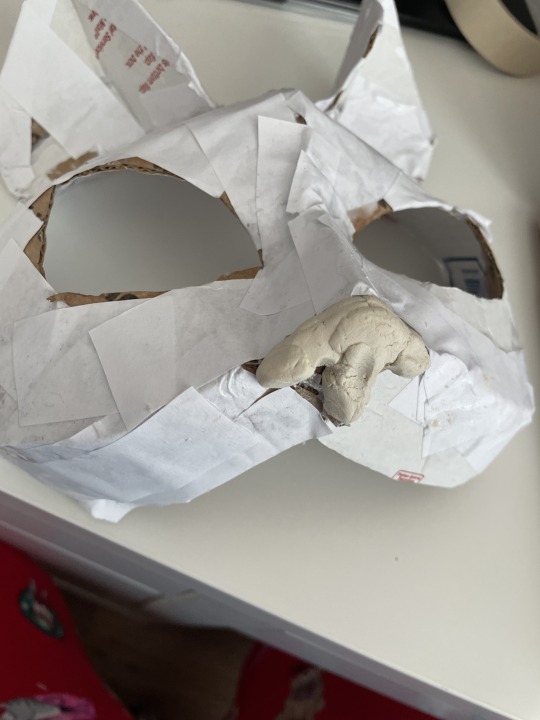
it's kinda uneven, it looks a lot better than the first cardboard prototype tho :3
im probably going to paint it into an orange cat once everythings dry #sigma
pattern pieces i used below if you wanna trace/copy

all pieces are duplicated except the nose, also the triangle goes into that cut in the ear to help with the shape (you can decide to not do that if u dont wanna)
2 notes
·
View notes
Text
I have a lot of scrap materials. Scrap wood, foam, fabric, and god knows what else. Just, a lot of leftovers from previous projects.
So I figured I could try to MAKE something out of them, just to put those materials into use so they could become something instead of just sitting around uselessly, taking space and collecting dust.
I thought making a footstool could be a fun, easy-ish project for me to do this winter.
So here, come along with me on this journey of making a wonky, scrap footstool
So key thing here is that I very specifically wanted to avoid buying ANYTHING for this project. I did end up buying two things, a pullsaw (which is a general tool I can use in other projects, so I figured I could get away with it), and one itty bitty thing that ended up costing like, what, 2€?
But yes, my goal was to use things I already have and give them a purpose, not accumulate any MORE scrap materials. This is important because through out this project I ended up using many Unideal Methods For Doing Things, mainly because I didn't have enough material to do it The Ideal Way.
This is not a tutorial for efficiency, this is my journey to repurpose garbage. Just wanna be clear about that. There are better ways to build a footstool.
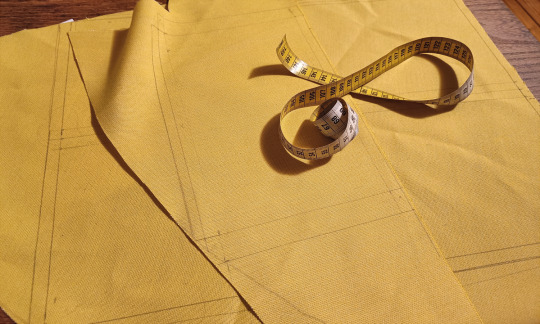
Anyway, I started the project from arguably the weirdest part; figuring out how much fabric I had from the chair project
The thing was that I wanted to make the footstool as big as I possibly could with the material I had, so I had to start this project by figuring out the maximum size I could do with the fabric I had.
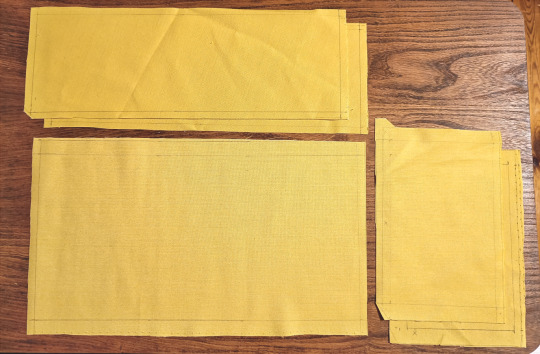
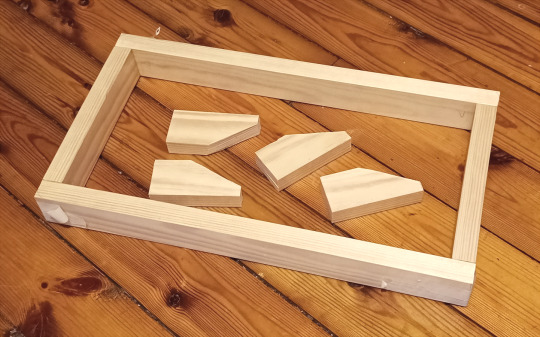
So I figured out the dimensions I could do (even cut the fabric pieces while I was at it), and then using those dimensions as a guide, I went off to figure out the wood pieces I would need for the frame of the stool, as well as the feet. Once I had things measured out, I cut the pieces and boom
Wood pieces obtained.
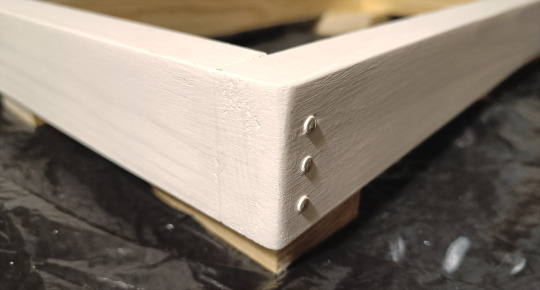
Sidenote, yes, a 90 degree angle on the corners would have looked much prettier than what I did, I just figured that this would be easier to cut (I cut those pieces before I bought my new pullsaw), also, I wasn't sure how I would perma-attach the pieces if the corners were done like that. Like, with these corners, I could fortify them with dowels or nails or whatever, but clean corners at an angle? I have no idea how to pull that off, and I don't have the energy to to try anything fancy, man, I wanted this to be semi-easy
(There was no way in hell I was gonna attempt somekinda dovetail joint here, I didn't have enough wood to work with (there was a point where I was actually worried I wouldn't have enough wood to build the frame at all) and god knows I'm nowhere near good enough at wood working to pull something like that off)
Anyway, I did originally intend to attach the wood pieces with dowels, since they'd be hidden and look neat (by not being visible at all), but when I drilled the first hole for the first dowel, I realized that 1) I didn't have a drill bit large enough for the dowel to fit in, and 2) I did not have it in me to actually do it. Like, to make sure the wood pieces would allign correct I would have to make sure I was drilling Very Straight into the wood, not once, not four times, but 16 times (since I was planning on using 2 dowels at each joint). If I didn't drill the dowel holes perfectly straight and perfectly aligned, the frame wouldn't come together, and I did not want to risk fucking that up, man, no
So I took the easy way out.
Nails.

I do kinda regret picking these nails, I should've used less obvious ones OR waited until the wood was painted before nailing them together because these are kinda pretty nails, so it ended up being kind of a waste to use them (since there was no way I was gonna AVOID these nails while painting the wood). IDK I was worried the glue alone wouldn't hold the wood strong enough while I was working with the frame or something and chose poorly here. But it is what it is. (On the plus side, we seemed to have exactly 12 of these nails, which was the exact perfect amount)
Anyways, yes, I chose to paint the frame because I have leftover paint (and primer) from the previous project so I figured I might as well use it up. Even though I hate this fucking paint so much
Two or three coats of primer, a gentle sanding after them, the wood was perfectly smooth and lovely
Then came the paint and it looks like shit, just like last time


I did like. What, four coats of paint. Sanding between the coats. Dilluting it so it wouldn't be so thick. And yet. And yet it looks like shit. Just like last time, with the chair I refinished. I mean I knew it was gonna turn out like ass but I'm still kind of shocked by how bad it turned out.
Anyway. Ideally you'd probably make a cushion onto some random piece of plywood (or something similar) that you would slot into the frame of the stool. I did not have any plywood pieces, nor did I have enough wood to make a small, thinner frame to slot into the main frame. So.

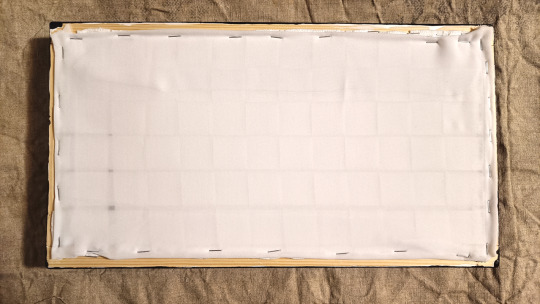
To create a bottom I used this ribbon that I have an entire fuckload of (since I bought it for that fucking lamp before realizing I couldn't use it and couldn't return either, literally have nothing better to do with it so here it goes) to weave a bottom onto the frame. And a bit later I attached a piece of fabric on top of the weaving (another leftover from the lamp project), as this would be what I'd glue the cushion onto.
But first, I had to make a cushion!
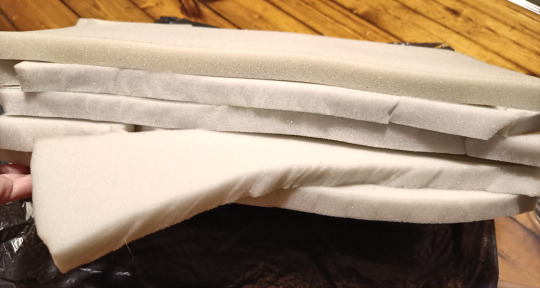
As you can see, I have a lot of scrap foam
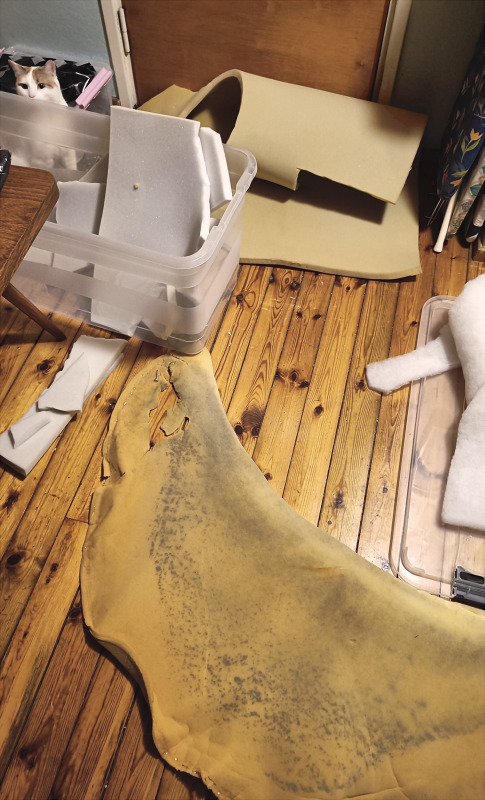
(Yes I've kept the original foam from the styrofoam chair, I did cut it down to get rid of the damaged edges (after taking this photo) but otherwise the foam is fine, shhhhhh) (Also the white foam is what I bought for the chair project, the yellow foam is something my mom had bought years ago that we've had laying around for ages)
I wanted the cushion of the stool to have some height to it, but I didn't have any thick pieces of foam, so I figured I could just make a thick foam piece from the scraps I had, with some help from the foam glue I have (the same stuff I bought for the styrofoam chair but wasn't able to use since it melted the styrofoam).

Started by figuring out the rough dimensions of the foam piece I'd need (from the biggest, cleanest piece I had)
And I got started making a Foam Sandwich
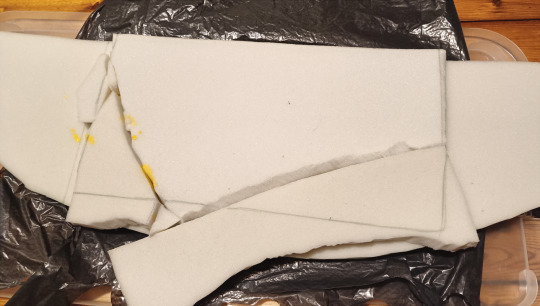

Let me tell you my hands were an absolute mess during this whole process, I was essentially washing my hands with fucking nail polish remover (I just noticed the foam glue smelled like nail polish remover and realized it would probably get rid of the residue on my hands, which it did, thank fuck), it was nasty
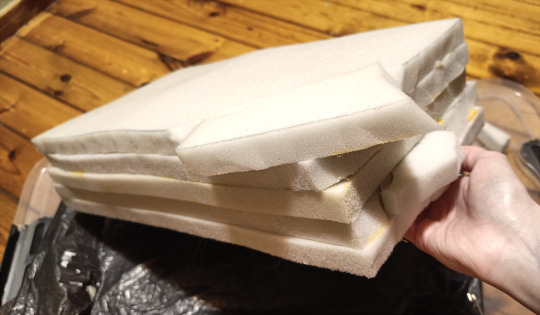
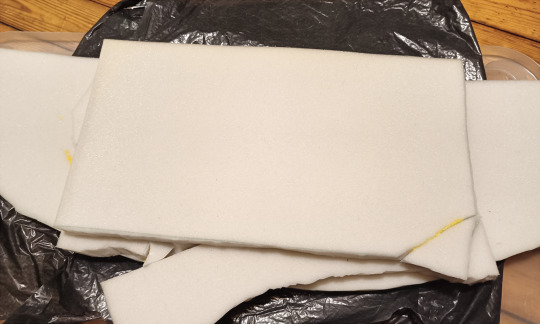
But yes, Big Foam Sammich. I did start lowkey cutting it WHILE I was building the cushion, since my goal here was to not waste materials so. Y'know. I tried to make sure I wouldn't waste materials.
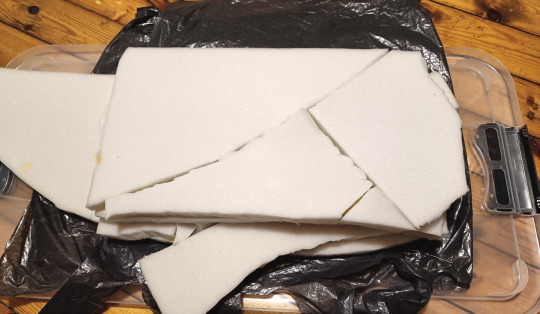
After the cushion was formed, I let it dry for a good while before I went in to shave the edges and cut it down. After that I used this floofier scrap foam to cover the sandwich. I could have glued it on, but I figured I had killed enough of my braincells while making the foam sandwich and breathing in the glue fumes that I decided that sewing would be good enough.
Two flooffy foam pieces were enough to cover the cushion, I just sewed them together on top and sewed them to the bottom of the cushion. It was quite easy indeed.

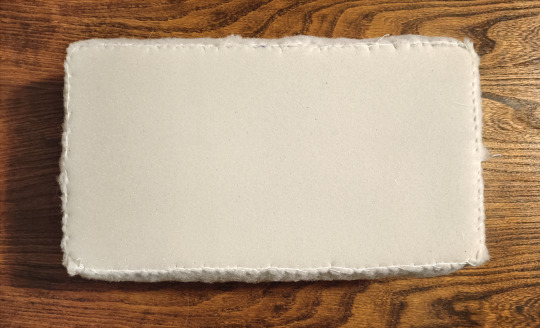
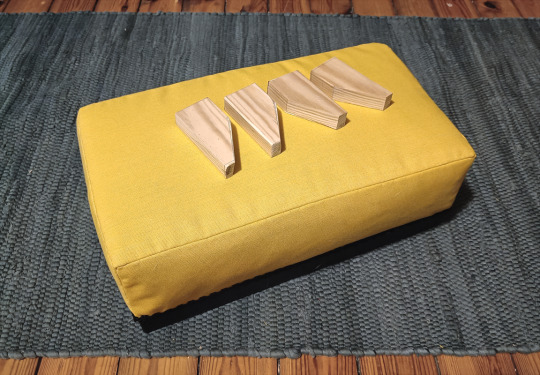
With that all done, I could attach the finished cushion onto the frame!

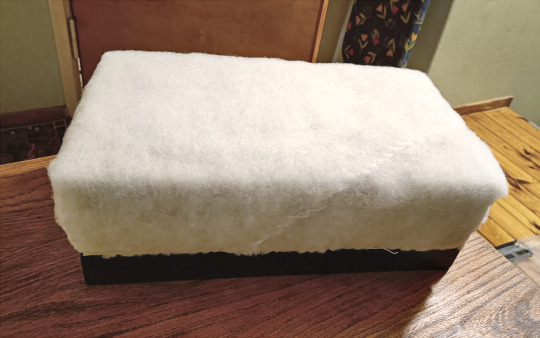
Brought the glue back out so I could just glue the foam onto the fabric that was stapled onto the frame, and I allowed it to dry (upside down, with some weights)
And yes, ideally you would staple the foam down onto a separate piece of wood, but since it was going directly on top of the frame and I didn't want to staple it onto the frame, I didn't. I wanted the wood (and my shitty paint job) to be visible, and the fabric would need to be stapled onto the frame anyways, so the glue just had to do the job here.
ANYWAY, UPHOLSTERY TIME
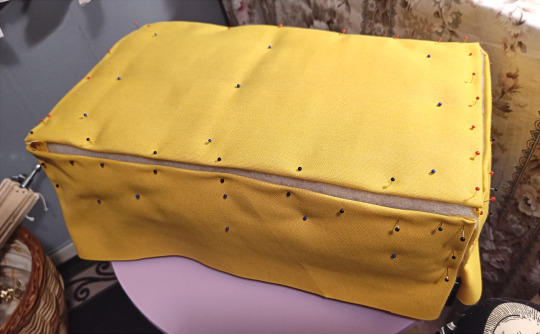
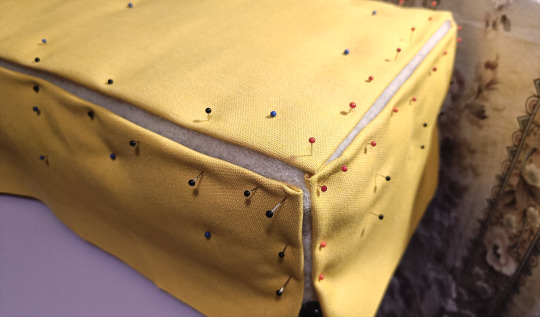
Since the fabric pieces were long done, I could just get straight into it. I pinned the fabric pieces down and handsewed the whole thing. I do admit I regret not ironing the fabric before I started though, I forgot and by the time I realized it was too late, and there was no way I was going to lift the fabric off the stool at this point. I learned my god damn lesson with the styrofoam chair, I know there would've been no way for me to put the fabric back down as neatly as it had been before, it was not worth it.

Anyway, I sewed the fabric and to finish things off I stapled the bottom of the fabric down, onto the frame. And yes I did a wonky ass job, shush
And here comes the one thing I ended up buying for this project, the thing that cost me like 2€
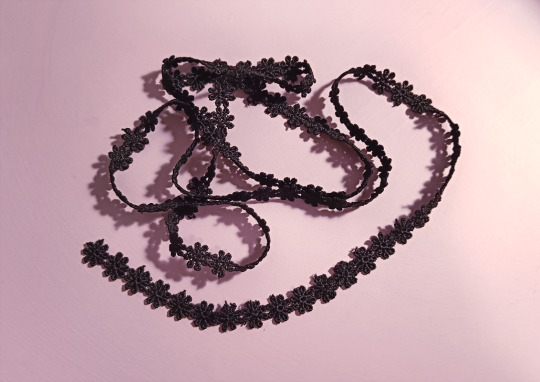
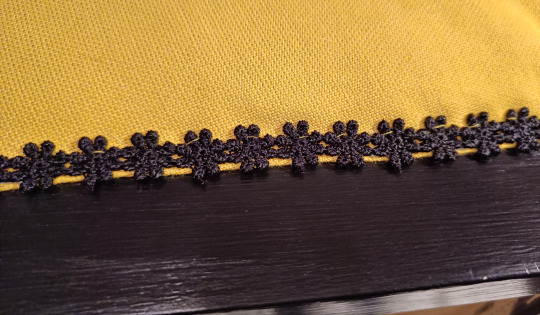
Decorative ribbon to hide the staples! Since I couldn't think of any other way to hide the staples.
And y'all, I understand now why people normally just glue this shit on, it took me like FIVE FUCKING HOURS to sew the ribbon onto the stool!! Mainly because my smallest upholstery needle was WAY too big for this job, and my thinner straight needless were too hard to use for this. My fingers were hurting so bad even the next day, like I understand what thimbles are for now, holy shit
Also. I did not have black sewing thread. So I ended up using yellow thread and then gently went over it with a black (waterproof) marker so the thread wouldn't be visible over the ribbon. (I didn't take photos of it so you'll just have to take my word for it)
So yeah. Shit took forever, I wish I had a hotglue gun but I don't, so it just had to be done the hard way. All things considdered though, it worked out alright, and the ribbon is nice and secure on the stool.
Now, you might've noticed that I haven't mentioned doing anything to the feet of the stool. That's because I haven't finished them.
It's the middle of winter. It's cold. I can't be bothered to go outside to stand the cold for hours to finish the feet of the stool. I need to shape them, I need to sand them, I need to make sure they're all the same lenght etc, all this before I can even prime and paint them and attach them to the frame. But since I can't access our patio, I can't use my orbital sander to speed things up. And I can't be bothered to do all that word by sanding the wood by hand. I am far too lazy for that man, nah
So I'm going to finish this project when the weather gets nicer and our patio isn't covered in a meter of snow.
I'll finish the feet of the footstool later.
So there will probably be a follow up to this post later
But yeah, here's my unideal, imperfect footstool, made almost entirely out of scrap materials.
It looks like ass, but hey I've never tried to build a piece of furniture before, give me a break, I'm a comic artist not a furniture maker
#Mine#Refinish Diary#DIY#Like I've had issues through out this project but all things considdered this has been quite enjoyable#Also yes my upholstery still looks like shit but. It's better than the chair okay#And hey the stool can now Match the chair not just in color and fabric but also the wrinkles!#You can't tell from the photos but the cushion I made is actually wonky like#One side of it is very straight while the other bulges out gently#But honestly the only way you'd notice is if you looked at it closely from a very specific angle#Which you'd normally never look at it from anyways#So it's fiiiine. But yeah I definitely understand why upholsterers tend to staple foam onto the wood directly#It would have made for a much cleaner end result. But hey I'm learning and that's the important part#'Cause I still have a fuck ton of foam left and fabric and other shit (but no wood) (Well. A little wood)#And I've been wanting to build my cat a tiny sofa for a long time now lmao#It'd be so fun#But I have a million other projects I should tackle first so that ain't happening any time soon
3 notes
·
View notes
Text

#natalinidesign#cute cats#photoshooting#cats#embroidery#home diy#fashion#photooftheday#sewing#diy#diy projects#diy punk#diy craft#diy fashion#upcycle#crafting#handcrafted#arts and crafts#diy ideas#nsk#addiction#sewing accessories
3 notes
·
View notes
Text
DIY cat zipper pouch
Love cats and looking for a stash buster? Check out this cat-shapped zipper pouch tutorial by Heather Handmade.
The tutorial comes with a pattern, but you could easily draft your own and customise it however you want.
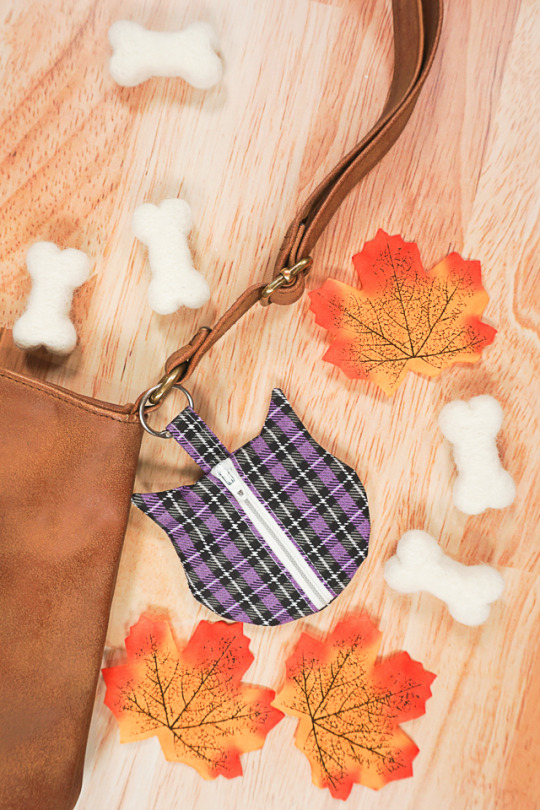
(Image source) [ID: a zipper pouch shaped like a cat's head hanging from a brown purse strap. The pouch is made from black, white, and purple tartan fabric and has a white zipper in the middle.]
#wasteless crafts#diy#tutorial#how to#pouch#cat#zipper#fabric scraps#stash buster#crafts#sewing#sewing project#easy sewing project#diy gift
179 notes
·
View notes
Text


Here is some basket for you. I did put this down to work on my third baby blanket. So I'll finish it eventually.
#i made a cat bed because i ran out of yarn for a basket#so i started on Christmas baskets because i didnt want to start something new#and scrap baskets dont count as new stuff#i dont make the rules#anyway heres some tags#crafts#yarn crafts#wip#crochet#crochetting#crochetblr#scrap yarn#scrap projects#diy craft#diy#wip wendesday
10 notes
·
View notes
Last Seen Blogs

acestuffs
☆ acestuffs

princessof-pink
My pink blog

outcastsketchbook
Outcast's Art Blog

shuichiexe
Currently In Persona 5 Hell

chrono-the-babe
hello ya big babe