#crochet wig tutorial
Text

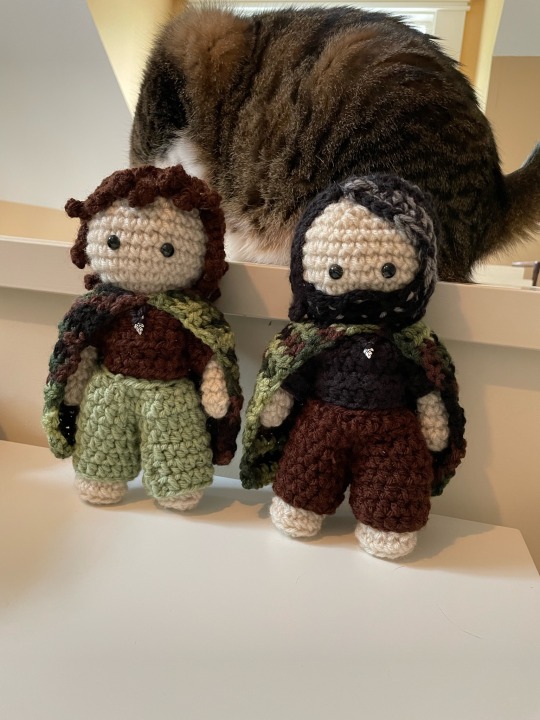
One grouchy father figure, as requested (plus my cat who wanted to be included). The beard was tricky but he looked like an emo preteen without it. Pattern stuff for Halt is below.
This is probably not very helpful, I've never made one of these before and don't really know what to put. Please let me know if something is confusing!
4.25 mm hook, weight 4 yarn, 9 mm safety eyes.
I used this tutorial for the body, minus the wig cap.
Beard:
Ch 13
Row 1: 12sc
Row 2: 4 slst, ch 4, slst in last 4 (to make a little gap)
Take a long strand of grey yarn and weave it randomly in and out to get the speckles.
Pants:
Ch 14, slst into a ring. Hdc around until the desired length (the photo has 5 rows). Make another one. Mimic tutorial to join and make the waist potion.
Shirt:
Ch 10, 5 rows of Hdc. Make another. Sew the two squares together, leaving 2 rows unconnected. I use the tails to tie the tops together. Hdc in the ring to make sleeves, I end up with about 9 stitches. Hdc around until desired length (picture has 3 rows)
Cloak:
Ch 23
Rows 1-13: Hdc across.
Tie two corners together.
Hair is strands of single crochet glued down. I recommend using bobby pins to mess with the placement before gluing and leaving this for last. Most of the strands are 14 stitches long, getting slightly shorter or longer depending on where they are on the head.
84 notes
·
View notes
Text
Today I practiced shell stitch, had to redo the swatch several times as the tutorial video didn't specify to always start/end a row with either a single crochet or 3 double crochets. I like the shape much more than the 3 of a granny stitch, it somehow looks more polished. Video tutorials are really helpful but I'm just not yet at a point where the stitches are neat and easy to count and 'spaces' aren't really obvious. Being limited to 45 minute sessions means that it's over right as I'm starting to get into the groove. You know when it starts to seem intuitive?
I've had crochet stitching appear in my dreams so at least you know some of it is getting written to the hard drive. 😁
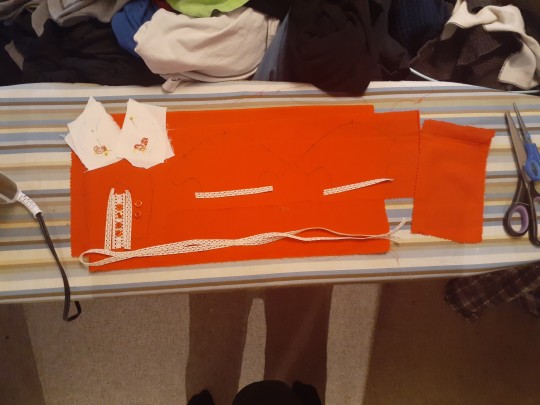
Fixed a cute red top (beads had been ripped off around the v-neck and I had just the right amount of ric-rac in silver) and I'm wearing that now. Accepting that a wardrobe change is inevitable would be easier if mail order clothes shopping wasn't full of really ugly tops. The moment you're XL in France, which for me was at 16 when I was just curvy not overweight, you're cut off from anything nice. You can get the brown-grey 'taupe' , the leopard print or shapeless sack of business carpet print. 🙃 I really want basics: 95% cotton, some stretch, long torso, v-necks in black white and blue. Seriously considering ebay UK and its import fees for some M&S classics. Maybe even the infamous Shein.
Finally got my bloods done! There was a backlog over the holidays. Must have been a mug full. We're looking for another intestinal opportunist and checking on the anemia and diabetes. The anti-fungal in december did something, I was able to actually taste christmas dinner and that was amazing. The cotton mouth isn't pain but it's been months of eating what feels like cardboard in varying textures. 😑
I've been busy sorting files: dumping stuff in folders instead of naming it properly came back to bite me. I used to have multiple freeware programs for renaming & making thumbnails and they got lost in the windows reinstall or just don't work any more. *Rename Master* is a freeware gem (all sorts of insert, replace and numbering options) . I really need to find a right click to autogenerate thumbnails program again.
Also been sorting out the to-do lists, gradually working down my massive 'keep' notes and bookmarks to create a document of things I'd like to watch, tagged all the 'reading' and 'listening' notes.
I'm putting together just pay postage bundles. $8 for A5 letter size, $30 for a big shoe box kilogram. Less in the EU. Stuff's on the website: the vintage heads, reroots that need paint, a bunch of incomplete imperfect monsters. Just let me know. I can also include fur wigs, glittery stretch fabrics and various small findings.
The plan is to wait for test results and go from there, continue slowly tidying and destashing, try size 46 tops for size, with doll projects to look forward to. Try to stay sane. 😂😘
3 notes
·
View notes
Note
I have COMPLETELY overestimated my ability, and have no idea how to fix this, so I am sending out this SOS message.
I am uncomfortable with the texture of plastic doll hair, and I especially thought that Kaya would do best with natural fibers. I took the original (frizzed) wig off with a craft knife, which was a bad idea -- she now has a crown of flat divot shapes. There was only one skein of non-polyester wool available at the craft store, but...now I don't know how to attach the yarn, or what to do next. I've thought about crocheting strands to look somewhat like braids, but I'm not certain. It seems like I've already made several poor choices to begin with.
I'm so sorry to hear that! Doll customization can get tricky sometimes. If you're okay with a little bit of extra effort, you can make her a wig from the fiber you've got. Here's a video tutorial:
youtube
2 notes
·
View notes
Text
Get the Look With an ET Toddler Costume tifa lockhart cosplay
The 1982 sci-fi classic features an adorable alien who befriends a young boy named Elliot. Get the look of the character with this toddler costume inspired by the film.
Elliott and Michael sneak their alien friend out of the house dressed as a ghost, and Mom mistakes him for Gertie. Then, they load him onto their bike and head into the forest.
Product Description
Whether you are looking for a complete costume or just a small part, our team can help. We offer the best quality products at reasonable prices with fast delivery. We strive to provide a high level of service and are always available to answer any questions you may have.
We have a dedicated Costume Supervisor to ensure all costumes are ready for the next production and that they arrive in time to meet filming schedules. They are also responsible for organising crowd fittings, ensuring all costumes and equipment required for each shoot are in place, and preparing the costumes for their return to our warehouse.
This iconic alien and boy duo from the 1982 sci-fi classic E.T. the Extra-Terrestrial is a timeless look. Easily recognisable by the round eyes and tubby tummy, this ET costume is simple to put together with a bed sheet cut into a body shape, face makeup and brown wig.
Product Specifications
ET is arguably the most iconic alien in the history of Halloween costumes. This classic look is easy to replicate with a red sweatshirt and denim pants, face makeup that includes grey-black face paint with red around the eyes, and completed with a brown wig.
Crochetverse user elisabethpokorny took four days to crochet this version of the famous movie character, which features a tubby body and bulbous blue eyes. Pokorny used "regular worsted weight yarn, held double stranded, namely Red Heart Super Saver Jumbo in Cafe Latte."
This adorable costume is the perfect choice for your little one this Halloween. The head is made of polyfoam, which makes it lighter than a cardboard constituent and comfortable to wear for long periods of time.
Product Images
If you have the time and skills to crochet, a costume like this one can be yours for under $20. Crochetverse user Pokorny whipped up the look for her son Jack out of regular worsted yarn held double stranded, completing the look with a brown wig and gray-black face paint. Check out her tutorial here. (Image credit: Crochetverse)
This is the top rated item for this category. It's a great product with an amazing price.
Product Videos
If you're short on time and cash, this ET costume is for you. It's a bed sheet with two holes cut out for the eyes, and the look is completed with brown wig and clown shoes.
Crochet enthusiast Pokorny designed this cute E.T. outfit using "regular worsted weight yarn held double stranded," and her son Jack served as model. She says it took four days to crochet the suit, which features long fingers and a tubby tummy.
The Sailor Duck costume is pretty simple, requiring only a blue traditional sailor's outfit and a plastic rubber ducky mask. You'll also need a dark brown tunic and a lightsaber if you want to go full-on movie-inspired. These costumes are often swapped between cosplayers to recuperate the expenses they incurred assembling them.
1 note
·
View note
Text
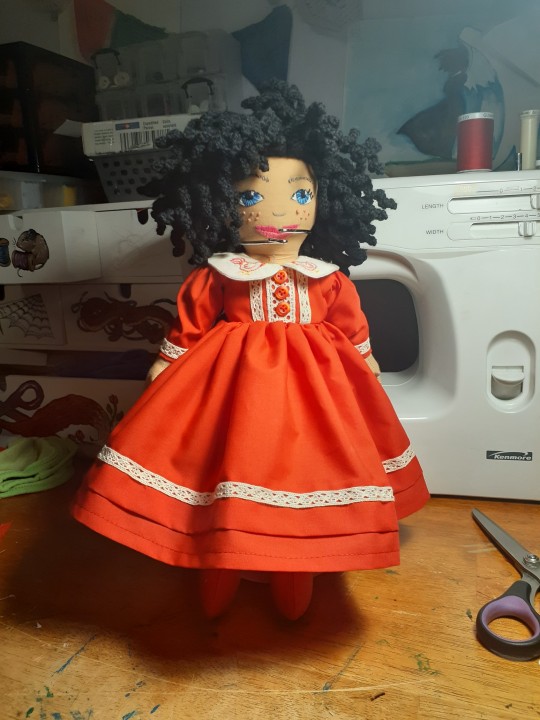

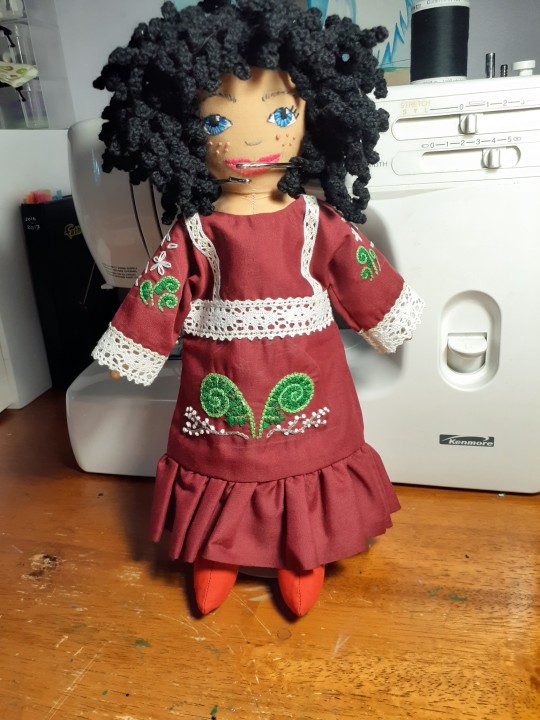
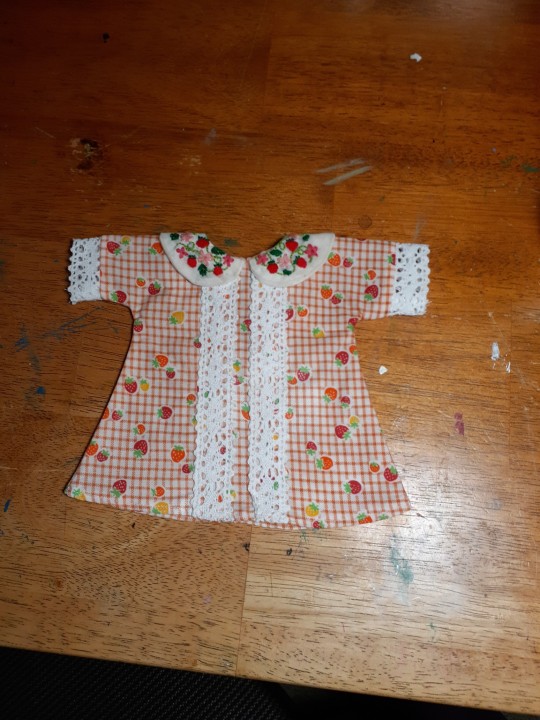
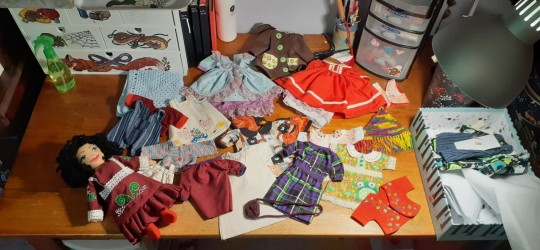
So years ago I found a blog with a free cloth doll pattern that I fell in love with. This pattern is the reason I learned to crochet so that I could do that wig caps. At this point this will be the 6th of these dolls that I have made and I love how every one of them have turned out. Thank you again to Beth at by hook by hand. Her blog is full of beautiful patterns and tutorials. That was a great place for me to learn how to crochet in particular.
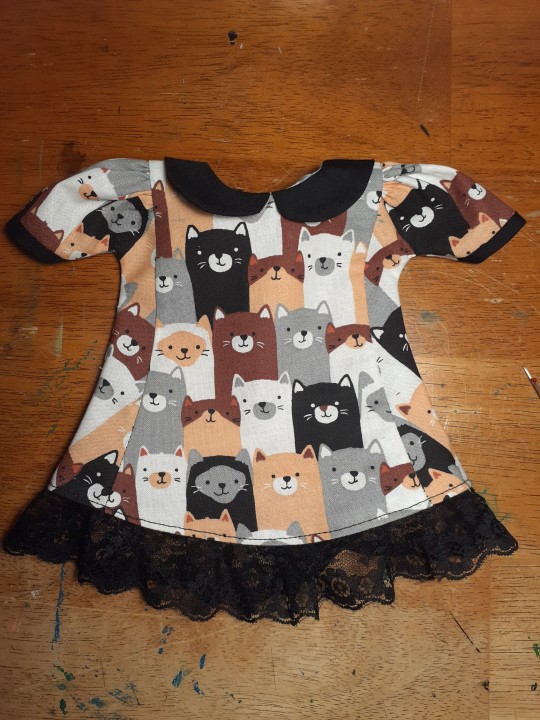
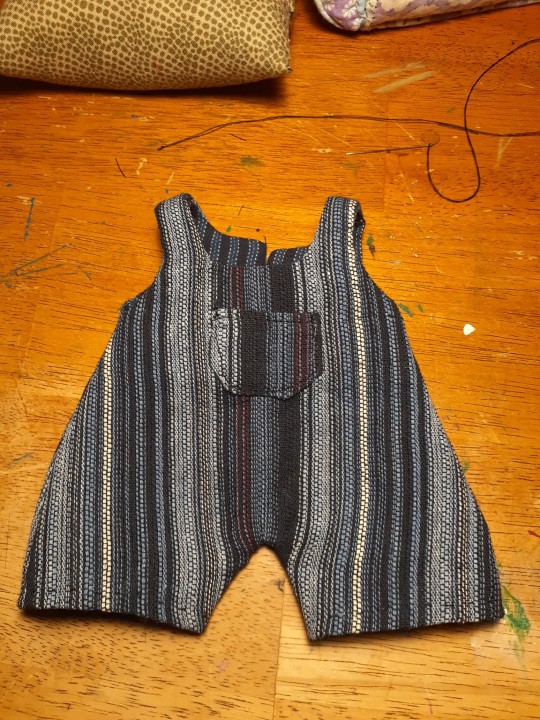
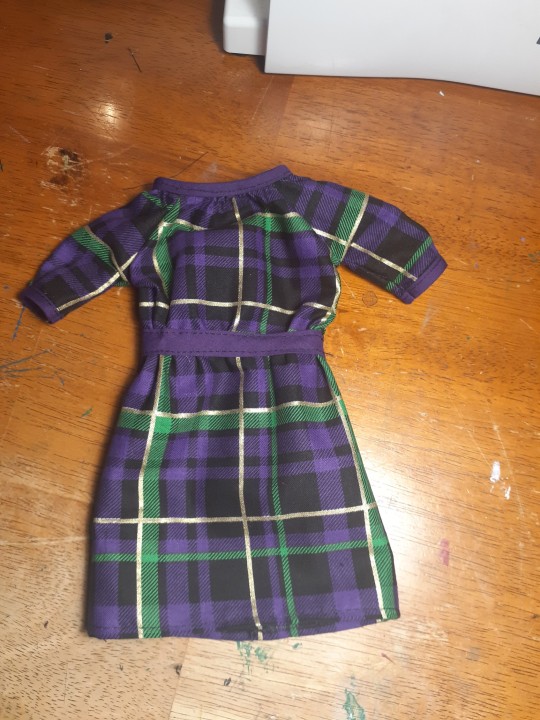
So as I don't personally have girls, my sons aren't interested in playing with dolls though they have been offered, and my best friend had two daughters. I decided instead of worrying about making a doll for my boys that they would want or that they would want as an heirloom. I decided to make a doll and wardrobe set for the girls when they turned five. So now that my youngest niece had turned five, it was time to make her her dolly. I had a lot of fun putting this together. Little girl loves chicken so I had to make sure that they were chickens all over everything. And of course anything that she got that was different patterns than what her older sister got. I also made copies for her older sister for her set. My hope is that these girls will love these toys for a long long time and that maybe their daughters might like them too. Having a doll like this with the big wardrobe and all contained in a little box and all of these things was something that I really wanted as a young girl.
I found as a young girl baby dolls and Barbies were fitting what I wanted out of a doll ,unfortunately I was not able to communicate what I wanted out of my toys to my parents at the time (though knowing my mother, she wouldn't have cared anyway as the fact that I wasn't conforming to wanting baby dolls and Barbies was already an indication to her that I didn't like dolls at all. Fast forward to 30 plus years of doll making and a vast collection of dolls and toys that I have made myself to try to fill that niche of what I tried to explain to her as a 4-year-old as what I wanted out of a doll and out of my toys)
0 notes
Text
Watch "HOW TO MAKE A HEADBAND WIG USING CROCHET HAIR (UNDER $15) || HEADBAND WIG TUTORIAL || OCEAN WAVE" on YouTube
youtube
#crochet braids#hairbyjess30#jessicabebrave#youtube#headband wigs#headband wig tutorial#how to make a wig#wig tutorial#crochet wig tutorial#crochet wig#ocean wave wig#janet collection#ocean wave crochet hair#crochet hair#ocean wave#curly hair wig#how to make a headband wig#curly headband wig#headband wigs 2020
4 notes
·
View notes
Text
It's been a year since I made my first crochet lace front wig using xpression kanekalon hair. I learned this technique from a Youtuber name Sandy. I've been in love with it every since.
Here's my lil intro video don't mind me I'm a lil extra sometimes lol
Thanks beauties for the love and support xoxo
youtube
#crochet#crochetwig#diy tutorial#diy#diy ideas#wigmaker#wig#wigunit#lacefrontal#lacefrontwig#braidinghair#braided hair#beauty#braidideas#chicago#hairstyle#blue hair#affordable#selftaught#creative#creativetomakeup#beautyblogger
2 notes
·
View notes
Link
1 note
·
View note
Photo

Grwm featuring one of my custom Crochet Wigs Feel free to use any makeup that u have on hand. I use the same products often, and I customize my lippies, by what I have. Thanks for watching luv bugs. source
0 notes
Photo

Want some new and easy-to-make hair accessories for casual every day wear or even to accent your cosplay or costume? Halloween is coming up! Learn how to make these cute curls with this super detailed tutorial! https://www.youtube.com/watch?v=i5W84W669yY&feature=share #halloween #cosplay #costume #hair #extentions #wigs #easy #stepbystep #crochet #pattern #tutorial https://www.instagram.com/p/CEsc-Uegne3/?igshid=1ahcs984j55x7
0 notes
Video
youtube
Braidless Crochet Tutorial
12 notes
·
View notes
Text
I decided to do more length retention focus since my hair is getting healthier, so I did a crochet style myself last night
This was the braiding pattern I definitely forgot to take a picture of.
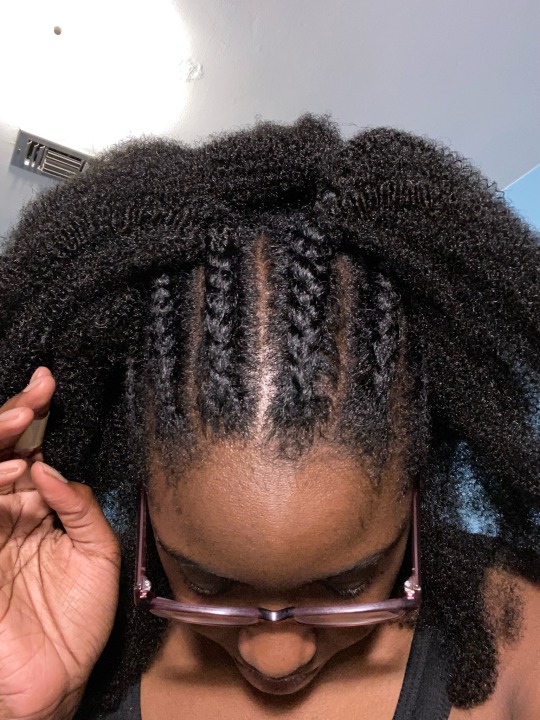
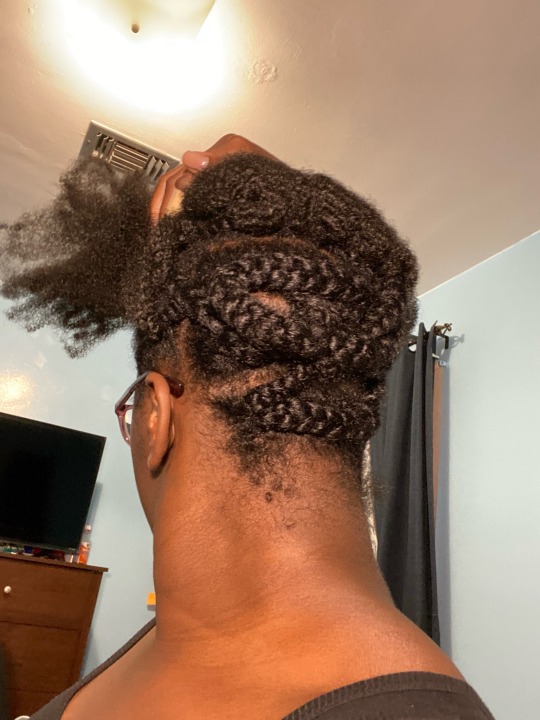
The pattern was inspired by this YouTuber Seun Okimi
I didn't do the cornrows, but I did follow the video on how to do the crochet. It's my first time ever doing it myself, and I've only done crochet hair like one other time in my life. So it took me about 2 hours in total. I was also stopping a lot but I didn't fill my entire head. I focused on the top, side, and the very bottom of the back; from there I added to the middle where needed.
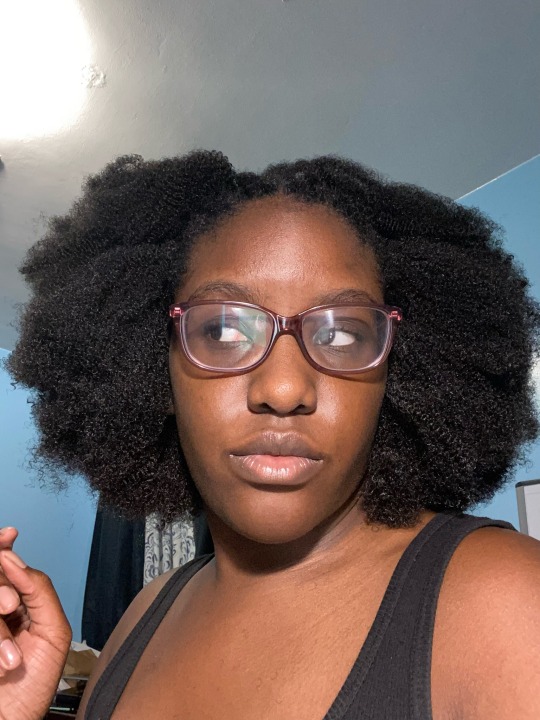
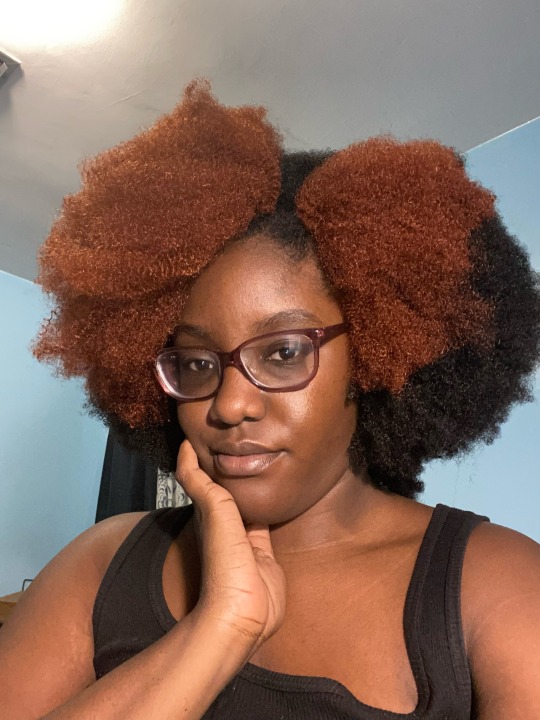

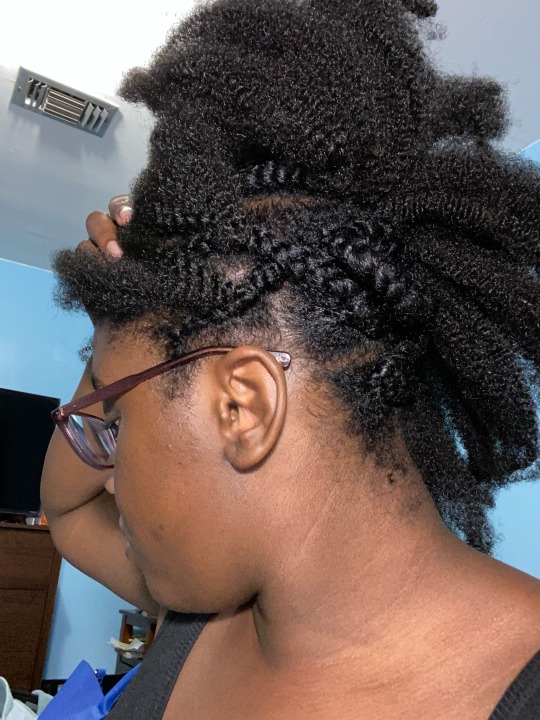
I cut the ends to have it look like an afro (yes like the wig 🤣). I did use the same brand, just 1B and Copper for colors. For the very front, I back-combed them too help them blend better as if I dyed right before my roots
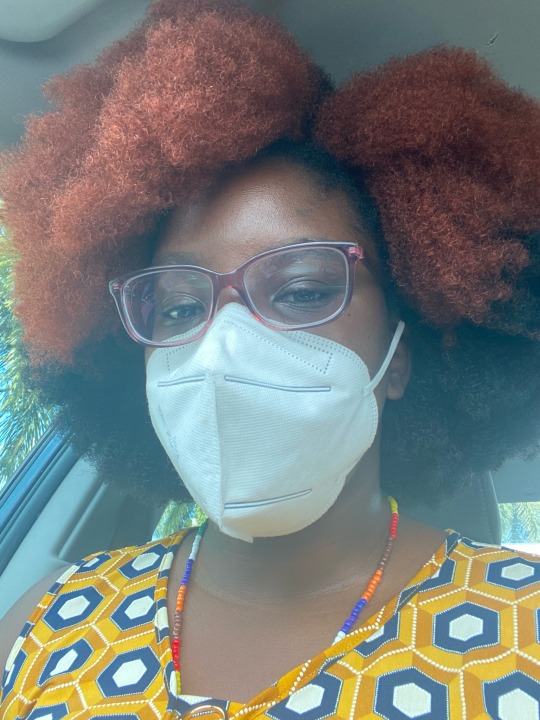
I went with two-toned because I was never allowed to dye my real hair any color [or rather anything but a dark brown but technically not even that]. So this style is both a protective style and a loophole.
It's still lightweight, definitely blocks out the sun (with that Florida heat right now? Lifesaver), and feels pretty cool. Getting to experiment with hair that looks natural without touching my own hair is 💙
Tumblr won't let me put the link (🙄) but Seun Okimi is the channel and the title is along the lines of detailed natural crochet hair tutorial
#crochet hair#4c hair#4a hair#4b hair#3c hair#natural hair#natural hair journey#natural hair care#afro#crochet afro#crochet hairstyle#natural crochet hair
53 notes
·
View notes
Video
youtube
For the Love of Fashion and Cosplay - Anime Style -
Sailor Moon Wig tutorial
0 notes
Note
Hey! If you don't have the time/spoons, but in case you do:
I'm working on a fairly sizable amigurumi project, and putting the hair on in proving to be intimidating.... You wouldn't happen to have any tips or resources or favorite tutorials for methods of attaching hair for amigurumi? (Facial hair included if possible)
Yours always look so nice!! Anyway cheers and I hope you have a good one, please don't feel obligated to answer this if you're not up for it, and thanks either way! 🧶
I always have enough spoons for answering questions! Hair. It can be a pain, and it does tend to take a while. I have done hair in four different ways.
Regular, usual way: I call it the latch hook method. I take a crochet hook and just pull through strands like you would doing a fringe or a latch hook. It takes time, and you waste some yarn because it's too hard to work with the length you probably want. I end of giving haircuts. I usually start at the bottom and space out the strands thinly. As I go up the head, I'll skip a couple or three rows and stagger the strands. At the top of the head I will make sure that the hair is stranded closely enough that no unwanted scalp shows through. If I think ahead, sometimes I will knit the top of the head the same color as the hair so that if a little scalp shows through no one will notice. Then I stand my guys in a pint glass and give them a haircut with sharp scissors. The method does sometimes end up bulky, and you may have to go back in and thin or thicken areas to get the desired result. Sometimes I wet the hair and press it down to smooth it. Overall, patience is the key word.
Shortcut for short hair: If you have a character with short wavy hair, sometimes you can knit them a wig. Jean Greenhowe uses this way a lot, which is where I learned it, and you have to do a bit of shaping to make sure it fits.
Sideburns and short hair: To do the very short hair someone might have for sideburns, the nape of the neck, or beards, I use Swiss darning. Normally for Swiss darning, you go over one stitch. I will usually go up two or three stitches to save time and give a more natural look.
Scruff: Again, I do Swiss darning, but I might only cover one leg of one stitch as I go along just to give the appearance of scruff. It's usually the left leg on the right side of the face and the right leg on the left side of the face, so the hairs angle in.
I hope all this makes sense and that it helps! Please let me know if it's confusing. I can clarify and may be pushed to show a picture.
Everyone else please chime in. There are faster ways to do hair, sewing it on etc. This is just my way.
22 notes
·
View notes
Note
Do you know how to make the costumes and wigs? If you do could you please upload some video tutorials on how to make them here please?
I don't know how to make wigs or leg/arm warmers, but I did paint & fluff my own bodysuit and craft a tail and collar. I don't have any footage of myself working on these though and I don't have the funds nor desire to craft a totally new costume, but there are some videos on youtube that might help you out! This one for example.
For my tail in particular(because there's different tail styles out there people do) I basically took a long piece of rope and tied strings of yarn around the length of it in several layers and then cut them to the length/fluffiness I wanted, and attached it to a belt piece of rope that I tie around my waist. My collar was a regular spiked collar bought from amazon that I hot glued some craft store gems to. And my bodysuit was painted just using screenshot refs with a mixture of fabric paint and then acrylic for the sharper/more detailed lines. Then I cut out a bit of fabric to act as the base for the shoulder fluff, hot glued feathers to that, and glued it to the appropriate spots on the suit. Wasn't too hard overall, just took time. The shoes are dance shoes I got on amazon and painted with acrylic.
I got my wig commissioned from @pixiedustjellicle who also offers full costumes btw if you don't want to try your hand at it yourself, and I got my legwarmers from someone on instagram, though you can just as easily search for them on etsy, or knit or crochet them yourself if you know how. I suck at both of those, hence the commission.
Hope that helps, good luck!
5 notes
·
View notes
Last Seen Blogs

mukky-world
Mukky's World

missmakayla4ever
inthemindofMHS:]

texanfury
The Stars at Night are Big and Bright...

fixitinthemic
Fix It In The Mic - AEA Blog

spdigitaldiaries
Digital Diaries