#sometimes you can also just test upload to a side account to see how images will look before you post them as well
Note
um, what size do you make your canvas for tumblr? for landscape & portrait. and what size do you make it for instagram? i’m a bit confused on what size to use…
i’m probably the worst person to ask since I usually work at about 5000x5000px (give or take) and then just crop as needed…. lol… I know there’s specific dimensions that are “optimal” for each social media site but I don’t really pay much attention to that since most sites will REALLY compress your images anyway
#my vague answer is as long as it’s not too tiny it should be okay#if you upload at a raw 5000x5000 that would be WAY too much#sometimes you can also just test upload to a side account to see how images will look before you post them as well#im the LEAST technical about this i just draw and post and disappear i’m sorrryyy#anon#asks#personal
3 notes
·
View notes
Text
Geometry Club

©Dave Mullan

©Adrian flickr
“Embrace nature’s brutal perfection” Boyd Rice
Research the Narrative
The research required for this brief is simply to gather inspirational images from other practitioners. Add this to your blog/workbook with clear information as to where the images were sourced and who the copyright belongs to.
Tell the Story
Shape and form in environmental photography underpins the overall aesthetic, considering the underlaying composition of an image allows the photographer to explore the subject in new and exciting ways and help you see the photograph as a unique representation of the subject you choose.
Simple geometry can be found everywhere, the shapes formed by the play of light, structures intertwining, objects passing each other… training your eye to look out for strong shape to compose your subject is an important part of constructing strong, bold photographs. Waiting for the correct moment to press the shutter release is a skill in finding the right moment.
Look around your environment to find strong geometric images. Shoot 100 photographs with the main focus being on strong geometric shape, within an outdoor environment.
Edit and refine: Complete worksheet
Make a contact sheet of the best images.
Study and ‘mark-up’ the contact sheet, making aesthetic decisions on your final selection.
Optimise your best TEN images Describe your decision-making process.
Submit: Series of TEN images on ONE A3 canvas 300ppi. Upload to my city.
Geometry Club Research
What Makes a Great Fine Art Architectural Photograph?
JUNE 22, 2018 · SHARON TENENBAUM
Every person you ask might have a different answer to the question, what makes a great fine art architectural photograph? However, in my experience, there are a few key factors that are necessary for transforming a good image into a great one.
Great architectural images often follow these 3 features:
· Composition. In architectural photography, you need to use the language of geometric lines and shapes. These elements must create a harmonious balance within your frame. Without this component, not much can be done to salvage an image.
· Simplicity. Once the shot is made, ask yourself: “What elements in the image are not adding to the story?” In other words, try to simplify your scene by eliminating unnecessary details.
· Post-processing. Once the two factors above are covered, the work on post-processing begins. If you are familiar with my work, you might be aware that I’m a strong advocate of ‘creating’ an image and not ‘capturing’ one. This means accentuating and exaggerating the compositional elements mentioned above, and creating depth, volume, and balance through selective lighting.
Image 1 – BEFORE: cluttered, unprocessed and without a person in the frame. Even though the compositional foundation is present, there is still much work to be done on decluttering and gradient lighting.

Image 2 – AFTER: ‘cleaning’ the image of unnecessary details and implementing gradient lighting.

Until recently, this is where my creative process stopped. I don’t want to elaborate too much on the features listed above; instead, I want to talk about an element in architectural photography which I’ve only lately begun exploring.
Creative Shift
As architectural fine art photography is my passion, it’s been the subject of my images for over a decade now. My path of creating this body of work was a path of self-discovery. Even though some of my earlier architectural images are stellar and I would not have done anything different with them today, in my newer work, I am embarking on a creative shift. This shift is taking my architectural images in a different direction, so now, they are not just about celebrating form, but also about human interaction with the architectural environment.
Architectural structures, by their nature, are designed to serve a purpose for people. By eliminating people out of the composition, the photographer is celebrating the art of geometry and engineering above anything else. As magnificent as the design might be, by including a human element in the composition, the image takes on a new (and different) life form. The benefits are three-fold:
First, it adds a sense of life and warmth to an otherwise cool scene. An architectural image is naturally cold, comprised of concrete, steel and/or wood. By including even a single person in the image, we are warming up the scene and crossing the boundaries from the inanimate to the animate.
Second, it gives a structure a sense of scale and comes closer to the architect’s original intent in design, which is serving people for a specific purpose. For instance, Middle Age Gothic churches were designed to dwarf the scale of a human in comparison to the House of God they were entering. A church was designed to be of an enormous scale to give the parishioners an ‘otherworldly’ experience. If you walked into a Middle Age church and did not get that feeling, then the architect did not do his job right. This was done with the intention of making one feel small in the presence of the Almighty God. Likewise, an image of a church that depicts the sense of scale by including a human reference would convey that concept whereas the image without one would not.
Lastly, by adding a single person, we are giving the viewer’s eye a resting point. The psychological reason for this I can’t say, but it’s a fact. We tend to first spot the person in the image and use the rest as a background. That makes the image more intriguing on a few levels. First, as the photographer/artist, you now have the power to direct the attention of your viewers. You are saying to them: “Start here.” Second, it helps to simplify a scene that otherwise can be too busy with lines and shapes (as in the image below). Third, and maybe most important, it adds asymmetry or shifts the ‘center of gravity’ of an image to create a more intriguing composition.
Looking at the image below, we can see all the points I stated above exemplified, as the image without the cyclist is lacking warmth, a sense of scale and a resting point.
Image 1: With Cyclist

Image 2: Without Cyclist

Sharon Tenenbaum teaches Fine Art Architectural Photography Workshops around the world. To learn more about Sharon’s work and details about her upcoming workshops, please visit: SharonTenenbaum.com
Source: https://www.thephotoargus.com/what-makes-a-great-fine-art-architectural-photograph/
Matthias Heiderich
A self-taught photographer, Matthias Heiderich (b. 1982) explores urban environments, finding surprising angles and colours within cityscapes. His shots are framed in a distinct way, focusing on corners, sides and small sections of buildings. Consequently, he does not just record what he sees; rather he transforms the ordinary into dream-like spaces that suggest a futuristic universe. The minimalist images bring attention to symmetry, lines and patterns prevalent in the urban landscape. Primarily working in the realm of fine art, his pieces have also appeared in architecture and travel publications, such as Wallpaper* and Cereal. Since 2011, Heiderich’s images have been exhibited at galleries in Berlin, Barcelona, San Francisco, St Petersburg and Zürich. In 2014 Spektrum Berlin was published with the Parisian publisher Editions Intervalles. The images selected are an overview, illustrating how exploring lines, structures and space rejects the banality of city scenes, reforming them into an awe-inspiring collage of geometric shapes. www.matthias-heiderich.de.


Source: https://aestheticamagazine.com/geometric-architecture/
Architecture photography corner – in pictures
In 2014, Sheffield-based photographer and graphic designer Dave Mullen Jr started Geometry Club, a collaborative Instagram project in which people submit images of buildings forming carefully composed triangle shapes. Mullen is now creating an app to simplify the meticulous formatting process, and says the project is “a test of building an audience based on curating the same thing”. The account has attracted more than 25,000 followers and welcomes contributions by professional and amateur photographers. “I quite like the fact that sometimes you look at the photos and it’s not obvious that it’s architecture straight away,” says Mullen.
Photograph by @grg_mlll (US).

Photograph by @ferrypasschier (Netherlands).

Photograph by @mismaria (England).

Photograph by @davemullenjnr (England).

Photograph by @jagamac266 (Singapore).

Photograph by @marcclish (Scotland).

Source: https://www.theguardian.com/artanddesign/gallery/2017/jan/28/architecture-photography-corner-in-pictures
7 Tips to Spice up Your Photography Using Geometry
MARCO DE GROOT
October 9, 2017
Finding yourself in a photographic rut? Add value to your images by keeping these geometric principles in mind.
SYMMETRY
Symmetry lies at the heart of the laws of nature. It’s calming and pleasant to the eye when an image features a symmetrical composition. But a photo doesn’t necessarily need to be split directly down the middle to successfully incorporate symmetry. When an image feels balanced, you can achieve the same (and sometimes more interesting) result.
Look around on your next trip; you can find symmetry everywhere.


SHAPES
Using shapes is another way to creatively frame the subjects in your photos.
Squares and rectangles suggest conformity and order. Keep an eye out for these shapes and use them to enhance that feeling.


On the other hand, the circle represents unity, completion, and perfection. When used in an image, circular shapes can help draw the eye inward and keep the viewer’s attention on the subject.


Finally, triangles are a good way to focus attention toward a certain point. And, depending on the way a triangle is angled, it can evoke a calm or energetic feeling for the viewer.


CONVERGING LINES
Converging lines can be used to add depth and guide the viewer’s attention in a specific direction. These lines don’t need to be physical, per se, but can be created using a pattern that directs the gaze forward.


PARALLEL LINES
The use of parallel lines evokes order and rhythm in photography. Parallel vertical lines give the illusion of growth, while horizontal lines give the impression of calmness or tranquility.


INTERSECTING LINES
Diagonal or angled leading lines can make an image seem more dynamic. By highlighting these lines, photos become more active. Depending on your angle, intersecting leading lines can also help connect more than one subject or add depth to a photo.


PATTERNS
Patterns are a useful tool for both framing and composition in photography. When a frame is filled with shapes it can add to a photo’s drama or, when aligned, its order.
You can find patterns in window arrangements in buildings, shapes of tiles, pebbles on a beach, bricks on a wall etc.. When you know what to look for, you can find them all around you.


PERSPECTIVE
Sometimes, even a perfectly-composed shot can end up looking a bit boring. If that’s the case, try changing the perspective by flipping or rotating the image to find the view that makes it most intriguing.


Source: https://passionpassport.com/spice-up-your-photography-with-geometry/
Shoot 1 Contact Sheets


Contact sheets marked up with images chosen for optimisation

I feel the above selected images could work well when optimised as they contain strong and repeating geometric patterns. The images are high contrast and colourful, while the ones chosen from the contact sheet below contain intricate patterns in the shadows created by the strong sunlight.

Most successful optimised images from shoot


Marked up contact sheet from 2nd shoot

Most successful optimised images from shoot


1 note
·
View note
Text
Why Is My Macbook Pro Sierra Download So Slow On The Internet

How many times have you seen the spinning beachball lately while browsing Safari on your Mac?
I have been seriously struggling with my WiFi every morning in my new office and could not figure out why. Speedtest was 'very slow' on my Macbook Pro 2015 and super quick on iPhone 8, it has been painful and driving me nuts!! It usually got quicker throughout the day, but unbearable in the morning. So how to fix a slow Mac. All Macs begin to slow down with age — MacBook Pro, iMac, it doesn’t matter. Performing several heavy tasks at a time, your Mac may get slower, and it’s okay. Although, when you’re facing unresponsive windows and slow load time more often these days, your Mac definitely needs a boost. Why is my Mac running slow? Actually, Mac becomes slower and slower with the age you use it, no matter it is MacBook Pro, Air or Mac mini. To speed up your Mac, you had better find out the reasons why Mac is so slow. In this article, we will show you 5 reasons that explain why Mac is running slow and give you corresponding advice to. Check your Internet connection. For many Mac users, a slow Internet connection is synonymous with a slow computer. That’s because almost everything they do—from surfing the Web to checking. From app downloads to emails, a lot of Mac’s performance depends on the network connection — a slow Internet can spell trouble across the board. I live in The Middle of Nowhere, where the maximum speed I can get is 4 Mbps, so I need to make sure my MacBook isn’t bringing that speed down even more.
For example, Safari is slow loading pages, it stops loading halfway with text strewn across the screen and images in the wrong place. Or some webpages are loading forever before you’re able to actually read the content.
Other times, it may be just that Safari runs extremely slow after Catalina update (remember the pitfalls of a shiny new macOS?)
All of these behaviors are typical symptoms related to Apple’s signature Internet browser. While Safari is a light-weighted browser optimized for use on all Mac machines, issues like above might force you to resort to third-party browsers (perhaps Chrome, stay away from Firefox) that tend to be faster.
But for those of you who are real fans of Apple and decide to stick to Safari, we’re going to help you get to the root of your Safari issues in this guide, starting with the possible reasons why Safari is slow.
Hopefully, you’ll have Safari back to normal in no time, and be able to use the browser flawlessly.
Note: if Safari is not just slow, but keeps freezing and crashing, read this post instead for more troubleshooting tips.
Important Tips
It’s normal for Safari to run slow on certain websites – By certain websites, we mean “heavy” sites that are loaded with flash or video ads on the pages you browse. Worse yet, some even auto-play without you clicking on. They tend to have your MacBook heat up quick. The best option is to close those pages immediately when you finish reading the content on it, or you could install AdBlock Plus (Safari compatible) to block the ads from displaying.
Stop excessively multitasking – You’d be surprised how much better 90% of programs work when you don’t try and use them at the same time as a dozen other apps. It seems like a simple solution, but it is often the best one.
Take care of Safari – Some methods are a matter of habit, such as regularly clearing your cache or making sure the app is up to date. Imagine your computer as a car that needs regular maintenance to run well.
Don’t neglect the computer – Macs are not immune to viruses, despite the common perception. They also aren’t immune to file corruption or errors. Make sure you haven’t picked up anything unwanted while browsing that could be affecting Safari’s performance.
Below are some common causes directly or indirectly related to those Safari performance issues. Also, we’ll show you how to fix it step by step.
Possible Cause 1: Overworked Cache
The cache is a location on your Mac’s hard drive where Safari temporarily stores data that you use frequently. Macbook pro download folder more info. The cache allows Safari to reference this information quickly and therefore execute actions such as loading a specific page more quickly.
However, if the cache becomes full then Safari cannot add newer, more relevant material and is forced to use slower methods to respond to your demands.
Here’s how to erase the data in the cache so that Safari can work smarter rather than harder:
Start by erasing your history from Safari by navigating the menu bar along the top and choosing HISTORY > CLEAR HISTORY AND WEBSITE DATA.
Once you click this, you’ll be shown a small pop-up window. Choose “All History” from the bottom of the drop-down, and then Clear History.
The next thing you can do is clear the cache using a more advanced method. First, go the Safari menu and open Preferences.
On the preferences panel, choose “Advanced” and then look for the checkbox at the bottom of the page that says “Show Develop Menu in Menu Bar”. Make sure this box is checked, then close Preferences.
You’ll notice a new tab has been added to your menu bar, called “Develop”. Click on this, and then choose “Empty Caches” from the list. You won’t be given any confirmation, but it will clear the cache and you can restart Safari and see if this has solved your problem.
Possible Cause 2: Bad Extensions
Most people are aware that Apple doesn’t play well with Flash, but this isn’t the only plugin that could be causing Safari to lag. Any extension or plugin that is outdated or not correctly optimized could be the “culprit”, and you should disable or remove as many as possible.
The easiest way to do this is to use CleanMyMac X, go to Extensions > Safari Extensions (the screenshot below), here you just select these unwanted plugins, and click the “Remove” button at the bottom to clean them all at once.
Of course, you can also get this done manually, though the process will be a bit time-consuming if you have a list of extensions to disable or remove.
First, start by opening Safari, and then navigating to SAFARI > PREFERENCES
In the preferences menu, choose “EXTENSIONS” icon. You’ll be shown a list of all your extensions.
If you don’t use an extension, you should uninstall it with the button on the right side. If you use it but infrequently, simply uncheck the “enable” box. This should significantly speed up Safari, especially if you have been running a lot of extensions in the background.
Possible Cause 3: Outdated Version of Safari
Because Apple makes Safari, it usually receives updates when macOS has a new version released or when there is a necessary patch. If you’re running an old version of Safari, this could be part (or even all) of your problem.
If you aren’t on macOS Sierra or higher, your Safari is definitely in need of an update (all MacBook Pros made after 2009 are compatible with at least macOS Sierra). To check what you’re running, go the Apple Menu in the top left corner and choose “About this Mac”.
If you’re on an older version, your window will look something like this, displaying the version of OS X you’re running:
If you’re already on macOS Mojave, it will look like this instead:
If you aren’t on the latest macOS yet, open the App Store from Finder, and navigate to updates. There will be at least one software update available, which you can expand. This will show you the update for Safari, which you can update separately or with any other updates you may have available.
Issues Related to your Network or Computer
Possible Cause 4: Your Network
You might argue that the problems inside Safari are simpler to deal with, but sometimes it’s surprising that Safari isn’t necessarily the “culprit”. Your network can have a significant impact on Safari’s performance.
To find out whether your Mac has network issues, the best way is to use this app called Advanced Network Care — run a quick scan and it’ll display the network issues (if they exist). Vmware fusion free download for mac.
To test the Internet speed, you can also use Google Fiber. First, open the link on your Safari browser, then press the blue “play” button, and watch as your internet speed is tested. The site will first test your upload and then your download speed.
Once you have your results, you can compare them with this link, which contains charts detailing what you should expect based on the connection type. If your results are below expected, it might be time to contact your Internet Service Provider (ISP), especially if speeds fall far below what you’re paying for.
Note: if speed seems normal and falls in the expected ranges, then this probably isn’t your problem, and you should try some of our other solutions.
Possible Cause 5: Your User Account or Mac Drive
Sometimes the issue runs a bit deeper than just a full cache- you could have a corrupted user account or your macOS version isn’t operating correctly. To determine if this is your problem, start by creating a second user account on your MacBook. Fl studio mac os catalina download.
On the new user account, open Safari and try using it as you normally would. If Safari suddenly runs faster, it’s time to repair your normal user account.
Use spotlight (top right corner of the screen) to search “Disk Utility” and open it.
Inside Disk Utility, select your account’s disk and make sure you’re on the “First Aid” tab. Then select “Repair Disk” from the bottom right corner (if this is unavailable, choose “Verify Disk” first).
Note: if your MacBook Pro is with 10.10 Yosemite or earlier, you have two buttons to click on like below.
However, if your MacBook Pro is with 10.11 El Capitan or later (including latest 10.15 Catalina), just click “First Aid” and run it to check and fix any issues it may find.
The Disk Utility will repair any problems with your account. If it isn’t capable of fixing the problem, reinstalling macOS is always an alternative if a bit tedious to do.
Final Words
No one enjoys staring at the colorful loading pinwheel when they just want to browse the web or access an important page for work. Hopefully, you won’t be experiencing the Safari slow issue anytime soon with our solution guide.
Still not able to solve your problems even after using the methods we’ve outlined? A good resource is the Apple Community forum, where you can get advice from other fellow Mac fans. You may also find bug reports and similar questions from other users.
Why Is My Macbook Pro Sierra Download So Slow On The Internet Download Manager
Alternatively, if you’ve already fixed the Safari problem, write a comment and tell us about it below.
0 notes
Photo
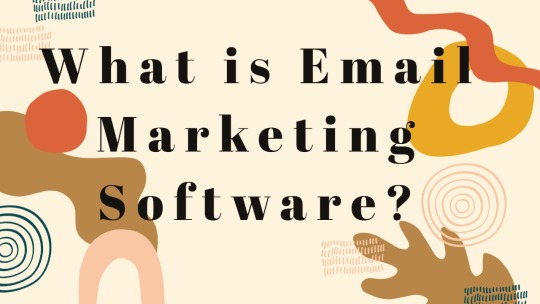
Email marketing software can manage your contact lists, help you design and send compelling emails, and track whether these were opened and read. The good news is that it does not cost much to get started with email marketing, nor is it a very difficult undertaking. Many of the solutions in this roundup have affordable initial plans and some even offer onboarding services for new customers. The 10 products we've chosen also have a gamut of self-serve support and knowledge-base articles to help overcome common issues.
As email marketing solutions go, we see a range of options from text-based template solutions that marketers can quickly make their own to more complex HTML or JavaScript templates. Leveraging email for marketing can take several forms, for example, some businesses might decide their most effective marketing tactic is a value-add newsletter delivered to a gated community of subscribers. Others might want to tie their emails directly to their product and sales engines, providing special offers and deals to recipients.
Each approach requires different tools when it comes to creation of the source email, dissemination to specific recipients, and integration with other back-end systems, notably the accounting system, the customer relationship management (CRM) system, and possibly even the inventory management system.
Businesses can manage contacts by keeping a list of names and email addresses, or they can create a complex database full of subscribers segmented by demographic slices and engagement levels. Which method they choose really just depends on how much budget is allocated towards the email marketing software solution.
Important Trends to Consider in 2020
(Image credit: Statista)
Various older email marketing solutions were designed to suit desktop and PC-based email clients, and as such the templates, as well as the entire design to click-through experience, has been refined for larger screens. While various email marketing vendors have also enabled viewing emails and newsletters on mobile devices, the shift to a mobile-first strategy has been slow considering smaller screens should not be an afterthought. According to market research firm Statista, for the US in 2020, mobile internet traffic made up a total of 50.51 per cent of all internet traffic (see above graphic).
More users are interacting with email on mobile devices, which means they can access emails throughout the day and wherever they are. Consider that smartphones have also evolved as mobile payment solutions and enable mobile purchases thanks to solutions like Apple Pay and Google Pay integration. This makes it even more vital to market on mobile by offering direct links to sales.
Squeezing desktop emails to fit on smaller screens is a sure way to get a dreaded unsubscribe request. Savvy marketers don't only embrace myriad opportunities to launch their campaigns, they should also learn the rules of creating effective emails for smaller screens. Creating effective templates aimed at mobile users shouldn't be that hard since websites and blogs have had to make the jump towards 'responsive' mobile designs, which look equally good on desktops or smartphones, or face the wrath of critical Google algorithms ignoring their sites completely.
Understanding how consumers use their mobile devices and the popularity of infinite-scroll experiences like photo and video sharing services Instagram or TikTok proves that consumers value images with impact and engaging animations over long streams of text. While text is still necessary, it is best to keep it short, sweet, and to the point. Email marketers now have the opportunity to create new sales opportunities as well as to tell cohesive brand stories across multiple platforms and they can kick these off with a well-timed email marketing salvo.
Marketers should also consider designing for Dark Mode, which has become a popular user interface (UI) convention adopted by desktop and mobile operating systems. Dark Mode mutes bright colors and makes text and images easier to read thanks to dark backgrounds, there is also a battery saving component to Dark Mode which makes mobile devices last longer by lighting up fewer pixels.
Finally, integrating social media links, elements, and hashtags in emails and newsletters can build a more cohesive marketing campaign that make email marketing the perfect launchpad for sales and customer relationship management activities.
The Role of AI
Artificial intelligence (AI) continues to be a major feature at the disposal of many email marketing solutions. AI improves email marketing mechanics such as A/B testing and smarter audience segmentation. This can have immediate benefits in terms of using machine learning (ML) to improve the efficiency of your marketing strategies for different customers and sending the right content to the right people.
Deployed properly, AI helps personalize email content right down to the individual customer level, depending on how much information you can feed it from your CRM and sales systems. AI delivers strong capabilities, which means determining exactly how a potential email marketing service has implemented AI should be key criteria for most marketers before purchasing.
In our email marketing software review roundup, we test the top email marketing tools available based on how easy it is to create emails, build subscriber lists, set autoresponders, and pull in other communication-based tools, such as social media management, and web analytics software. To that end, we selected Campaigner and Mailchimp as the best pure-play email marketing services for their focus and feature sets. If you need a more complex tool that can build comprehensive workflows designed to automate the email marketing process, then we recommend HubSpot and Salesforce Pardot, which are better served as complex marketing automation solutions.
The difference between them is quite profound. One-off communications versus prolonged, email-based interactions. For example, email marketing tools are excellent for one-off communications. You can use these tools for the one time you'd like to send someone an automated email response when they join a subscriber list, on their birthday, or when you promote a new product or service. But marketing automation tools are better suited for prolonged, email-based interactions or drip campaigns. This can include tracking the customer journey and tracking the various touch-points from contact to closing sale. Marketing automation tools offer tremendous capabilities whenever you want to guide someone from a subscriber list to a product purchase.
Email marketing solutions themselves are evolving and expanding into wider ecosystems. Products like Zoho Campaigns already feed into a larger range of services that include CRM, automation, and even social media integration. Editors' Choice selection Mailchimp has built on its success as an email marketing juggernaut to expand into domain and website hosting to offer a complete marketing solution infrastructure to subscribers. Salesforce Pardot similarly enjoys the advantage of funneling into the larger Salesforce ecosystem. Consolidation within a larger landscape of marketing solutions is a definite trend we've seen for a number of years. This means selecting a solution shouldn't be based purely on its capabilities as a suitable email marketing tool, but also how it can extend to cover a businesses' overall marketing needs.
Surveying the Range of Solutions
The email marketing services we reviewed range from about $3 per month to send out 500 emails per month in Zoho Campaigns to as much as $1,250 per month for up to 10,000 contacts in Pardot. Many email marketing plans include unlimited email sends each month and bill you based on the number of subscribers. If you have a small list, then look for a company that offers a free plan, a low-cost plan for several hundred subscribers, or even a pay-as-you-go plan. On the flip side, many of these services also offer high-volume plans with up to 100,000 or more contacts. Sometimes this requires a custom plan that has to be arranged directly with a sales rep. If you're willing to commit, then look for the companies that offer discounts if you pay yearly rather than monthly. A few also offer money-back guarantees.
Getting started shouldn't be daunting. Generally, you'll know right away whether you like a user interface (UI) or not, and most of the contenders we reviewed offer free trials so you can poke around before dropping any cash. Luckily, most of these services have modern-looking graphics and uncluttered layouts. These are not the complex business software UIs of yesterday. Be careful, though, as some free trials require a credit card. This means you need to be sure to cancel your trial before you're billed if you're not happy with the service.
Be sure to look at the tech support offered by each of these companies, as many weren't as available as we would have liked. You'll find that some offer 24/7 phone support, live chat, and email help, while others leave you to rely on online documentation and limited live support hours. The best services offer a combination of self-serve help resources—where you can search FAQs and articles to find your own answers—as well as live support via chat or phone when you can't solve an issue yourself. We cover all of these concerns in our reviews, plus you can get an overview in the feature chart above.
SMBs just getting started with their email marketing might pony up the extra bucks for a white glove onboarding process which might be well worth the price for getting things set up quickly and properly the first time around.
Campaign Creation and Subscriber Management
Whether you already have an existing list of subscribers or are starting from scratch, email marketing services can help organize these contacts. All of the services we cover let you add contacts manually using copy and paste or by uploading CSV or Microsoft Excel files. Some integrate with third-party software enabling you to import Gmail and other webmail contacts, Salesforce and other CRM data, or other software where you might have contacts stored. Depending on the size and location of your list, third-party integration could be key. Verify whether you can export contacts as well (and how easy it is to do so) should you leave the service. Managing users who unsubscribe should also be easy so you're not accidentally contacting anyone who has opted out of your newsletters.
Next up is building an email newsletter. The best services offer several ways to do this; you can import your own HTML, start from scratch, or use a predesigned template. Most of these services have drag-and-drop UIs that let you choose exactly the elements you want to include, as well as image libraries in which you can store assets such as your logo or company photos. Tools that let you test your emails for spam are also essential since there are some seemingly innocuous terms that may send up red flags and drop all of your hard work into your subscribers' junk folders or, worse, get your emails banned before they ever reach their recipients.
Email Responders and Campaign Tracking
Beyond sending basic newsletters, the best email marketing services offer custom autoresponders, which help you stay in touch with your contacts with automatically generated emails based on special occasions (such as their birthday or anniversary), welcome emails for new subscribers, or thank-you emails for recent purchases.
The most advanced email marketing services offer custom workflows where you can specify triggers based on actions (such as opening an email or making a purchase) or on inaction (such as ignoring emails). With these services, you can also set up a series of emails (such as tutorials) to be sent to segments of users, and you can pause or stop a campaign at any time. You can also move contacts into new segments once they have completed tutorials.
Of course, sending out campaigns is no help to your business unless you can track your successes and failures and make adjustments based on your learnings. All of the services covered here offer some level of tracking, whether it's simple open and click rate data, color-coded charts and statistics, or even integration with Google Analytics.
As a growing business, you may also be looking for a CRM solution, and you'll find that the more advanced email marketing services have begun to crossover into CRM. It makes sense: Both types of software deal with managing and communicating with customers. A handful of these services are one-stop shops, either offering both email marketing and CRM out of the box or as add-on services.
In addition to A/B testing, many email marketing packages now offer multivariate testing, which involves using multiple variations of a campaign to test which one performed best. These features help marketers better shape future campaigns for success. Services that offer this feature include Campaigner and Mailchimp. Search engine optimization (SEO) is another factor to consider when implementing marketing campaigns for your organization. The right keywords can lead your subscribers from their email platform onto your website.
Whether you're looking or a simple email marketing solution or one with full automation and advanced marketing capabilities, there's never been more in terms of range and selection not just in terms of pricing but also for value added features and wider ecosystem integration. This makes email marketing one of the more exciting and dynamic segments of business solutions software and marketing tech today.
#email marketing#email hosting#how to makemoney#how to make money 2021#make money as an affiliate#make money today#make money 2021
0 notes
Text
THE DIRTIEST DATA
TARGET FOR TORTURE
A TRUE ACCOUNT OF
DOMESTIC VIOLENCE VICTIM
September 2020
Contributor: Jana Daniel
Grassroots Guardians of Truth
UPROOT a DV Movement
The goal was to torture me through my own account that way no trace.. I did it to myself because I'm insane. Covert ops in a time where technology is impressive but vulnerable to data corruptions and lack of understanding especially in the legal arena where a firm understanding is needed the most. I was researching and running pilot programs to discover ways to truly keep women who make it out safe without cutting them off from society. This experience has proven that I'm a textbook case with tenure. Everything happens for a reason and my advocacy and philanthropy pursuits are far from over. The following is a percent of what occured and what I saw, technology throughputs allowed manipulative imagery and allowed changes to text photos before sent. The need is abundant whether we are ready or not.
Amazing what a year can do. I've learned an excessive amount of information now that I've acclimated to the happenings. By now, everyone has heard of predictive text and I'm sure it comes in handy. However, my experience was quite different. The global keyboard uploaded without my prompt, by a second individual who accessed my account on a seperate device and through the Google Play Store selected and downloaded the app. As my phone updated around 3 am the keyboard app uploaded and would change automatically while typing. I write a lot, so this became problematic and prevented me from continuing my endeavors until a solution is found. It would be another 7 months little did I know, before my life was my own again. A virtual kidnapping essentially the best way to describe this systematic, continual abuse and crime against a person. It's killing me faster than the physical abuse because I couldn't identify the perpetrators.
Deep-thinking and clear understanding of what is occuring and where protections and oversight will be needed. Automated decision making isn't a human function and nor what we're accustomed to. In less than a year due to the reality that someone or something is communicating data to me, i began to rely on the predictive guideline set before me just as an officer would be able to predictively policy enforce. But that in fact is exactly the point, there is a violation of human, civil, and individual rights to not be infringed upon. For my own pursuits in life I try to maintain a secure system and in doing so through my ordinary course of business I conduct certain procedures. One being, data mining, another being continued education, pilot programs when available, etc. I had experienced a different breach around December and I began seeking the identity of the criminal.
Initially, unsupervised or monitored only, (permission not given for either) coded script played out on my screen. After I reported, the game changed. Suddenly, an advasarial context is all that I'm receiving and I'm suddenly the victim of targeted surveillance that I'm very well aware of. Let's face it, you normally wouldn't know that you are being placed under surveillance. I now know that this in fact was, an example of Deep learning of general advasarial Neuro network a GAN with a generator and a discriminator being put against each other. Understanding that what your brain fires on it wires on as well. They fed the deepfake scenarios to me each with enough truth or probability that I had no choice but to seek the remaining info that they failed to disclose and that is described as (mask) words. It took a lot of time initially but I became more efficient as I continued to learn.
As protected individuals by order of a domestic violence protective order, to have the Thomas Co Sheriff Dept. And the Pelham PD testing my ability to decipher the information, realizing that I see what is happening and being further disrespected and even asked to park and contact an ambulance to let them know that I need help finding the right person, who at the time someone was insinuating that my deceased father was alive. The cops didn't even investigate.. couldn't get more obvious they violated my constitutional rights and mine and my children's rights as victims of DV. My children, by the way, utilize the phone as well, the constant changes to the screen and location of the apps was noticed first by my son. No matter what I did they had control of the content in the phone. Using face recognition to identify if I'm telling the truth and constantly surveilling me. My vehicle too, equiped to note my every move. Taunted by my home devices such as the ring light that would switch off when I needed the lights on. I haven't had moment's peace since the leave. I'm to blame according to the Sheriff Dept. Odd doesn't seem reasonable but okay, I have to use the healing process to investigate.
I wish I could say that is where it ended, far from it actually. Social engineered to stop trusting in everything, creating discord with people I'd just began to connect with after years of isolation. Then in state of grieving the loss only father, vulnerabilities exploited, cognitive dissonance attempted to create an unstable demeanor because who could possibly explain that cards- Google search pages- are leading to videos that contain AI image alterations so that what you see is familiar. Someone was available twenty four hours a day and when I wasn't seeking the information, someone was threatening me predictively and also implemented sounds that at first I didn't distinguish as just sounds. This would occur throughout the night sometimes. I honestly believed that we were in danger. I fell from the healthy state that I had just had a glimpse of into a sickened, deregulated state that would continue for months. Words uncommonly used by myself such as Tactically, vie, omniscient, etc. would flash and storyline would clearly be laid before me. Other tactics were used such as Fuzzing, quasi-imperceptible, emotional extortion at it's finest. It will be blamed on AI technology, but they failed to understand the identifying bits of info that I detected and categorized chronologically and per device or paper that they derived from.
I will be blamed for not seeing my children who were removed due to DV. I'll take the blame because it was a decision I was able to make due to the fact that I was being encouraged to have all four of the children together in order to get the money. Seemed like a ploy so I went alone to Rundown the people who had become increasingly more than I expected. Conspirators, bribe takers, and there's us… Collateral damage. It seemed to have turned into a game where death was the intent. I held on because I knew that someone has been made aware and I had reported to different agencies and to my trusted friends. Time lingered, and three months became six and suddenly they were threatening to arrest someone else. Realizing that they've violated our rights and worked diligently to destroy the security that I had worked so hard to establish after escaping DV with the belongings in my vehicle. They still were far from done. I had been forced to live without AC and the plumbing problematic after an attempted repair by the landlord left my room flooded. The Corona Pandemic began the same time, also the first and last time that my spouse had paid child support. After three months, they came to collect the rent. It now June, I demanded the air be fixed to no avail. I then had all repairs done myself. I spoke with him expecting a negotiation and then received an eviction notice. Upon filing a response and counterclaim, I was ordered an extra month rent above the amount petitioned for… I received no credit for the repairs that I had just had made, and I had seven days to vacate. I did not mention that the entire three months of No child support, no AC, no response from the landlord, that I had been receiving predictive context stating… “We built a prison just for you” forced to sleep with our windows open, remain outside during the day.. in a matter of no time, our happy home had become our misery. I offered the landlord the full judgement amount cash in hand, he denied to take it , he said he prefered that I move out. I didn't get my appeal in because I had confirmed that our family land has been sold under the premise of an invalid will and just as ten years before, heritage stolen from us all. Seven days came quickly and I didn't have but one who I still trusted at that point. I was granted a couple days and demeaned in the process. On that last day I left with my children who were unaware that we no longer has a home. We hadn't enjoyed any of the summer so I took my children on what they knew as a vacation. I was a nervous wreck managing them and their little hands, don't touch, don't breath, the virus! As I searched for options within my budget and tried to predict the next time that he networks and deprives. I decided that I will use the land that I own and homestead. No one can ever put us in that situation again. Now how can I make this work? I haven't built the house yet due to the lengthy divorce and the other intentionally created variables. Without revealing everything, I made it work and the house will be built soon.
After all of that, if it were a LAN network and the neighborhood and city were to blame then it's over… The worst has yet to come. My lawyer dropped the ball, so there was no contempt hearing, meaning no support from the abusive spouse. The final divorce scheduled for Monday August 24th. On Thursday prior, I advised my attorney that I wasn't a lamb being led to slaughter and neither are my children. I am not impressed with her demeanor seemingly in defense of the opposing side and reiterated that she needs to advise me of what the correspondence is rather than knowing everything they're saying and leaving me in the dark. She said that was mailing a check for $1500 of the $5k he owes. I explained how I intended on explaining everything to the judge with physical example of two clean devices in which he could type a sentence structure and I across the room could in fact with acceptable accuracy through mining relay his message… I was placed on hold, then she was going to return my call. I received an email the next day stating the hearing had been cancelled. I guess I was close enough to cause cleanup on DiVorce-20. I couldn't make up the incompetcy if I tried… it's been over a year and she let my protective order expire when she let the scheduling fail the kids and I. She's knowingly prolonged everything working an agenda.
Meanwhile, I'm mining data, and see threatening communications about my mother being the price that I will pay. For two days and there was even a signature of 4umud:\3 I had seen threatening messages all the while through, they wanted me to harm myself, so I didn't realize the gravity of the situation until the morning of August 27th, when they told me she had passed away. I am trying to hold it together, my heart is broken into pieces. In the last year and a half I lost my father, escaped DV so I thought, pandemic, bought a household full of furniture, got evicted after being tormented, burned most if the furniture that I had bought just a year ago, and then have to accept my mother's passing after being told of it prior to. How? I write sometimes into the night… Only to wake up and see everything has been deleted or modified to look like jibberish.
The plan was to make me appear alone and unstable. Then with a signature they could get the rest of what I have. The Underwoods made everyone think that I had a big check, that's so they would attack me and funny how I said to him.. your plan isn't going to work… He said they have a new one and the two days before my mom died he didn't call.. he has and did call every single day but those two days. So no, I don't believe that anyone has been here to help there is no reason that I could. The full story would take forever to explain a hundred different things … Deep learning of how sick these people are. That statement is inclusive of some judges, some lawyers, some landowner, some banker, some ex's, some banker, and some evils.

Regarding the factual basis for my findings… an advasarial context targeted at DV Victim and At some point to gain a new level of trust an observer weighed in - ALL CAPS- it appeared to be but this is stalking and Harassment using the same protocol as a guideline. Being that I worked for the Baldwin's and the quantity of equipment, servers, and technology couples with security… I'd say that BYOD could have easily attached to any device that I've had especially if someone made the mistake of hacking the email that I had as a corporate address. Quasi-imperceptible as everything in convulsion is nearly impossible to figure out. Casual reasoning nearly out the window now that I've used the Ai tech inappropriately due to the advasarial context intended to disrupt and destabilize.
Disquis was an app that he or someone loaded to my account and I did go back and test most of the apps I saw because I needed to know what info was obtained and how to prevent in the future. Red team, that's me. ResGN to reinforce the learning and GPT-2 is quickly being replaced by GPT-3 a natural language system that whether forward or back will remember the context of the usage of the specific word. Cryptography circles implemented initially to create a trustless environment. Deepfake tech that I've lived for ten years without the fancy assigned label's. Ultimately the same as always… Doubt your reality and make sure everyone doubts your capabilities because how else can they suck the soul out if you. If you see me and don't recognize me… Know it's because he is wearing my reflection… If I take it back he is the one who looks like an empty shell. I am not empty.. I have a flicker.
I hope this helps you understand that I'm capable of handling the delivery of proof and facts that will assist others to understand that this is a very sophisticated form of technology and weaponry all the same when abused and causes one to harm another or one to harm themselves then I'd say the prosecution rate will increase significantly. Once recognized for the heinous malfunctioned personality that takes the time and devotion to harm another in such a way that is worth what I just endured teaching myself because the law and legal representation failed to do anything to help ... Oh except drop the contempt, postpone the final, and my protective order expired too.
"If you really have to do something ... Go alone!" generations of wisdom... William Kirby Daniel
0 notes
Text
New Post has been published on Strange Hoot - How To’s, Reviews, Comparisons, Top 10s, & Tech Guide
New Post has been published on https://strangehoot.com/10-hidden-facts-of-whatsapp-you-should-know-whatsapp-facts/
10 Hidden facts of WhatsApp you should know - Whatsapp Facts

Here is a list of 10 hidden Whatsapp facts, before this let’s look at what is Whatsapp? WhatsApp is an American communication-based freeware application that allows you to chat and call anyone around the world with just an internet connection and a smartphone.
It allows you to connect with people with private chats, group chats, video and voice calls, posting stories, status. WhatsApp features updated with time and made it more handy and useful.
WhatsApp was founded in 2009 by Brian Acton and Jan Koum, former employees of Yahoo!. it was first made for apple users only but the idea was to provide everyone with this app having a smartphone.
WhatsApp features have evolved with many features over the period of time. It becomes the first preference of everyone to use texting apps. Many competitor apps came in the way as we chat and telegram but whatsapp features never fell off with its updates. WhatsApp features with the need of the hour.
Within few years it was being used by billions of people across the world. It connected many people with very less cost of only data charges. Earlier, calling international was an expensive affair but now with WhatsApp’s features it just takes data connection in your smartphones.
In 2014 Facebook acquired WhatsApp in US$ 19 Billion valued of US$ 1.9 Billion. Voice calls were announced in progress just after 3 days of Facebook collaboration in whatsapp features.
In recent times during his pandemic of coronavirus, Whatsapp features with the World Health Organization and UNICEF in march 2020 to provide messaging hotlines for people to get information on the virus. Until 2017, WhatsApp’s features were for personal use between two connections of users.
This helped businesses to connect with their customers, but not on a large scale. So solving this problem, WhatsApp announced that they were building and testing two new tools for businesses in September 2017; A free WhatsApp features of the Business app for all the small companies and Enterprise Solution for bigger companies with worldwide customer bases, such as airlines, retailers and banks, who would be able to offer customer service and conversational commerce (e-commerce) via WhatsApp chat, with the help of live agents or chatbots replying from the particular business or company’s side.
WhatsApp features were officially made available for PCs through a web client, under the name WhatsApp Web, in late January 2015 through an announcement made by Koum on his Facebook page: “Our web client is simply an extension of your phone: the web browser mirrors conversations and messages from your mobile device—this means all of your messages still live on your phone”.
The WhatsApp user’s handset must still be connected to the Internet for the browser application to function. WhatsApp features Web’s user interface is based on the default Android one and can be accessed through web.whatsapp.com Access is granted after the users scan their personal QR code through their mobile WhatsApp application.
Some of the common WhatsApp features/ WhatsApp facts are:
Personal and group chats
Voice and video calls
Customized notifications
Web whatsapp
Wallpaper of chats
Deleting chats
Sending pictures, emojis, location, GIFs, videos, audios, stickers.
Uploading status story which will be visible to all of your contacts for 24 hours only.
Webcast
Restricting data charges
Backup of data
Changing phone number without losing data
Last seen visibility of other contact
Here are some unknown WhatsApp facts/ WhatsApp features:
1. Want to know exact number of messages with a particular person?
Yes, you can know how many messages in total, data used, photos and videos, locations, stickers, audios, documents, GIFs to date you have sent and received by a particular person and with whom you chat the most and the least accordingly with whatsapp features. Many of us do not know about this but WhatsApp is a versatile app and lets you know the number of messages.
For that open WhatsApp> settings> data and storage usage> storage usage. Then a list of your contacts shows up in decreasing order of most to least. For detailed information about single contact click on their name in the list and you will get it all in whatsapp features.
Also, it allows you to use whatsapp features like delete all texts, images, audios, locations, etc from a single chat by selecting check boxes you want to delete and select clear space option.
2. Hear audio messages without earphones or keeping speaker near your ears as a whatsapp feature
Often people have tendency to hear audio messages by placing the speaker near their ears and try to listen.
It looks odd in public places but there is a whatsapp feature which most of us do not know which is just play the audio and place the phone in a way you are talking to someone on call, the audio automatically gets a transfer to hearing speakers on the upper side of the phones just as you are listening while calling. It does not look odd and nobody else gets to hear it except you.
This is a very less known feature and need of the hour in places where you can not behave like that and need to hear important audio.
3. Read messages without letting them know you have read it and without blue ticks.
Well, it has 2 ways in whatsapp features and both are different in a way you want to use as per your situation.
You can always go to settings> account> privacy> switch off the read receipts. Now with this turned off blue ticks are off that means you can read messages and other person will not see the blue ticks but it has a drawback that with off receipts you will also not see the blue ticks of the person. That is if you reply to a double tick message then you can also not see if they have seen it or not also they might will know you have turned off the receipts if you reply because they will see that their message has not turned blue. It might put you in trouble. That is why there is this second full proof way.
Come to the home screen of your phone. Long press anywhere on the screen and open widgets option that will appear on screen, from that find and select WhatsApp features and place it on empty slide of the screen. Adjust it according to your screen. From this widget you can scroll and read messages without turning off receipts and letting them know that you have read it. Just do not click on the message, whatsapp feature will take you to the chat screen and then it will be considered seen. It is very useful and without any loophole way.
4. Use words in bold, italic and strike-through in chats
You can make look your message more attractive and effective using whatsapp features by pointing out the main idea or line of your text by making it bold and look unique. Just add a ‘*’ before or after the words you want to highlight. For example- *how are you?*
In this it will appear as how are you?
You can also add strike through by applying ‘~’ to before and after the texts. For example; ~how are you?~, it will appear as how are you?
You can also make your text look in italic font by adding ‘_’ in your message.
For example; _how are you?_
It will appear as how are you?
5. Pin a chat
You can get rid of finding a single chat on the list with the help of whatsapp features of an important person.
And if you don’t want to miss a text from them in case you receive a number of messages and the chats go down with every new message in the list.
You can always pin someone’s chat on the top of the screen and receive and see their messages first in the list no matter how many messages you receive. Long press the chat you want to pin-up and select the pin icon symbol on the top of the screen.
6. Archive a chat
If you want to hide chats from displaying in the list and do not want to see it. There is a whatsapp feature for it and you can archive the chat by long-pressing the chat the select option of archive envelope on screen.
With this whatsapp features the chat will be hidden and if you wish to see the archived chats and wish to read it.
Open the list of chats and scroll down till the end, there you will see the archived chats option by clicking that you will see a new list of all archived chats.
7. Star important texts
If you wish to remember or come back to a particular text after some time and are tired of scrolling and searching in chats.
There is a whatsapp feature that lets you mark an important text as a star and view all the starred messages. Sometimes we do not remember the keyword to search in chat and it creates a problem.
For situations like those whatsapp features of starring, message is made to come back to. Select a message you want to star , long press it and the select star option shown on the right corner of the screen.
Then afterward if you wish to see all the star texts you can go to the list of texts, click the three dots option displayed on the right corner of the screen, from the drop-down menu select the starred messages options and it will take you to all the starred texts.
8. Add through QR code
QR code stands for a quick response which is a type of bar code which when scanned by other devices takes us to the website or application that bar code belongs to. QR code contains data for a locator, identifier, or tracker that points to a website or application.
Whatsapp features include this new update and lets user connect with another user by using this QR code. Earlier people had to add the contact in the phone book by asking for the number and then refresh the contacts in whatsapp contact list and then search new contact by the name you have saved it. But now whatsapp features have shortened this process by introducing this feature.
Go to whatsapp settings, click the QR code icon displayed in front of your name. Then if you are adding a contact, scan code of other person’s device or show your QR code to another person’s whatsapp scanner to scan.
Or you can send your QR code to any contact if they want to send it to anybody else to add you. Then you will be added in their list in easy steps. It takes less time than the previous way.
9. Delete message after sending on WhatsApp
Sending messages to a wrong contact or sent a message with error or forgot something to add. Many situations like these arise and one feels the need of undo the message so they would not know what was sent if they have not seen the message yet.
Whatsapp features comes with this option too to cover your mistakes. Select the messages you want to delete and select the dustbin icon on the right corner of the screen then it will show three options to delete for me which means message will be deleted from your chats only, cancel to exit the process and delete for everyone to delete text from both the ends.
However, this option in whatsapp features was firstly allowed for seven minutes only after sending the message but with a new update of whatsapp features. It is now available for one hour eight minutes and sixteen seconds.
But it will show a line of messages deleted displaying this text is deleted so that other people will know that something is deleted.
10. Mute a chat or group
Daily we get many messages and group texts which seems to be unnecessary and we get irritated by loads of those messages and every time getting a notification for that is very annoying sometimes.
Whatsapp features provide us with of muting a chat or group which allows you to not receive notification or vibration for that muted chat and you will not be disturbed. Only when you will open the whatsapp you can see the messages of that chat or group.
Read: How To Read Whatsapp Message Without An Open Message?
Visit Whatsapp Official page: Here
0 notes
Text
Four Easiest Way To Money Online.

Become a Writer
With a growing interest in content promoting , more brands are searching for great writers to produce content. The key to success as a writer is to be a specialist in a market. A lot of writers attempt to be generalists, writing for a wide range of categories from food to tech. However, having a niche focus as a writer allows you to write better content. Whenever you have experience in the niche, you can provide a different perspective to a part of content. That means you're not only saying the same thing as every other article online. And that's what brands really want to cover. Your thoughts, experiences and inside information in their niche.
If someone asks for a marketing writing sample, then send them advertising writing samples. Do not send a finance article. Or a fitness one. It is hard for a hiring manager to understand how well you understand the market's industry if they can't observe a relevant writing sample. Apply to opportunities suited to a skillset and expertise. Furthermore, if your pitch doesn't have a listing of links to writing samples, it is going to have discounted.
You can make money online on sites like these:
Problogger
Craigslist
Blogging Guru
Freelance Writing
Media Bistro
Flex Jobs
Be a Freelance Blogger
2. Produce Side Gigs
Side gigs are able to help you make money online as you maintain your full-time occupation. If you're unemployed, unwanted gigs may not be enough to hold you . If you're just looking to make an extra couple hundred bucks per month, this is a great idea.
Use platforms like Fiverr to make gigs. When you're new to Fiverr, you're going to want to concentrate on offering a low price so that you might get your very first inspection. I'd recommend getting a friend to buy your gig to leave your very first review so you can get started quicker. See to the buddy like a customer and really deliver a final product that you could feature on the stage in your portfolio. The matter with Fiverr is that it's also a game. When you look at high Fiverr users, you will notice that they have multiple gigs available. The more gigs you've got the more likely you will be found.
If you do not need to get paid Fiverr prices, it is possible to turn to platforms such as Craigslist to find unwanted gigs. Under their jobs department, you can seek out contract or telecommute opportunities. The great thing about the telecommute chances on Craigslist is that you may apply to them for almost any city on the planet. Craigslist has a number of unwanted gigs from composing, company, design, accounting and more. So if your talents do not match up with anything else on this list of profitable ideas, you may want to try a side gig from Craigslist, and begin earning money on the internet. Apply to multiple chances to land some small side gigs.
3.Do Translation Work
Should you need to make money today, translation work is a rather underserved niche. You will want to be fluent in at least two languages to do this successfully. Therefore, if you are bilingual or majored in a popular language in school, this may be a great rewarding thought that you try .
You will need to show proof of your capacity to interpret so in case you've got a language diploma or experience translating text, you need to show samples of your portfolio. Most companies will require a translation test. Remember you will need to be fluent in the languages you're applying to be a translator for. That means you can't use translation tools.
Websites Where You Are Able to make money on line include:
Upwork
Individuals Per Hour
SDL
Gengo
Pro Translating
Translators Base
4. Sell Your Stuff
When you're desperate to earn money today, sometimes the only choice is to sell your stuff. If you are unemployed and struggling to find work, selling your possessions is a fantastic way to make money quickly. You can make money online using the links below or you can visit a pawn shop. Bear in mind the shipping costs associated with selling online. Be sure to charge the buyer for it if you are shipping products internationally.
Most people immediately consider selling their junk like novels, DVDs, and CDs. But most people do not wish to purchase those items. It's 2019 -- are you really going to buy a CD? Probably not. So don't waste your time trying to market it. When you are considering how to earn money quickly, focus on things of worth like notebooks, TVs, telephones, furniture, designer handbags or clothes . Try selling the same items on multiple platforms. By way of example, you may try selling your merchandise on Facebook groups and Craigslist instead of just one of them. In the event you sell your stuff anywhere there is a possibility of someone finding it.
Be sure to take amazing photographs and edit them. An internet retailer doesn't upload images as is. They employ a photographer to shoot great photos. Images are improved. The background is often removed. Approach your merchandise post like an internet retailer. Avoid taking photos of products on tables. If a product is on a table, remove the background to allow it to be white. After you've run out of things to market online, begin your own online store utilizing Oberlo. You've shown that you've got what it takes to be an internet retailer. So, you can now start making money from home.
15.Become an Online Tutor
You are able to produce a lot of money online, and choose your own hours, by simply being an online tutor. From the guide, you will learn how he made built up his customers through word of mouth, visibility, and fantastic group rates. While sciences and maths often have a higher demand for tutoring places, you'll also find English to become popular amongst international audiences. If you're an expert on a topic, tutoring could be the right platform for you to make money quickly.
Possessing a degree or experience in a speech is vital this kind of task so showcase your level, high-grade average in a class or other proof that you are capable to tutor that subject. If you have spoken at a seminar or event concerning the topic, you might also be considered for an internet tutoring, teaching or mentoring position. Concentrate on tutoring in your area of expertise. If you're not the greatest, you likely shouldn't be tutoring in that particular topic.
0 notes
Text
Resume Genius Review
You’re on the job hunt once again. This time, it’s serious: whether you’re going for a promising side hustle or your first professional job, you want to land this more than anything else. The problem is that you’re only great at the job, not at resume writing. Resume Genius supposedly takes the guesswork out of resume-building, but does it live up to the hype? We delved deep into the Resume Genius business model to find out. Read on for an honest Resume Genius review.
What’s Resume Genius?
Resume engines are pieces of software that automatically add your information to a resume. This isn’t a hard task for a computer because all resumes contain a few basic elements:
Your name
Your contact information
Work experience
Good skills that you can bring to an employer
Information about your previous jobs
Educational experiences you’ve had
As long as a resume engine has this data, it can arrange it on the page any way you’d like.
Image from Pixabay
Of course, you could accomplish this too as long as you had the tech skills; resume building from scratch is partially a matter of how well you can use the ruler function in your word processor. The reason that resume engines like Resume Genius exist is that many people don’t feel comfortable formatting a document by themselves. Formatting is the process of making computerized text look a certain way. It can involve bullets, tabs, indents, and tables in Microsoft Word, LibreOffice, or another word processing program. Resume Genius and other tools of its type do all of that for you.
Resume Genius isn’t a writing service. That is, it doesn’t create the content of your resume, generate a persuasive essay, or adapt your cover letter, resume, and CV based on the business profiles of the places that you want to work for.
Resume Genius Services
The basic purpose of Resume Genius is to format a clean, modern resume based on your information. The site’s advertising also suggests that Resume Genius generates an unusually professional resume. While this is debatable, Resume Genius accomplishes what it sets out to do.
Making resumes
Resume Genius gives you a wide variety of templates to choose from. They’re generally quite plain, featuring the standard array of your name, contact info, and points, but you can sometimes change font colors or page structures. The Taj Mahal template, for example, shows your contact information on the side of the page rather than at the top. To help you decide on a template, Resume Genius shows you samples, resume examples that stand as typical specimens of what you’ll customize with your info.
You’ll start making your resume before Resume Genius asks you to make a free account with Facebook or Google. The default format that this service uses is the reverse chronological resume – that is, your most recent job and education information will appear first on the page. (A chronological resume would begin with your oldest work and proceed to your most recent.) If you’re not a user of either of these services, you’ll need to slog through an email signup process. This part is free, but don’t be fooled. Resume Genius will want money from you immediately after you write a resume.
Image from Pixabay
Once you’ve made an account, ResumeGenius asks you a series of questions about your education and experience. When you give it information about a job you have or had, it will give you the chance to add bullet points or use premade ones that are relevant to the job. For example, if you indicate that you want to create a sales associate resume, the service would offer you a list of stock objectives and accomplishments relevant to that career. The material for a housekeeper resume would look different. The process of creating a resume can take as little as ten minutes if you already know what you want on your resume. After that, the billing begins.
The subscription plan
This is where using Resume Genius gets significantly dicier than we like. This service is a subscription. Even if you go for the 14-day $1.95 trial, it won’t give you your resume unless you give it your credit card number first. Furthermore, there’s a huge “gotcha” built into the low-cost trial. After those first two weeks are up, your Resume Genius subscription will start renewing itself automatically for the low, low price of $39.95 per month.
Screenshot from Resume Genius
After you pick your jaw up off the floor, consider the people who might fall for this business model:
People without strong computer skills, like older people and people with limited educational experience.
Rattled job seekers who are nervous about being on the market again.
Young people who have never made a resume and are desperate to do it “right.”
We assume that job seekers who find work quickly using Resume Genius’s services would cancel their subscription tout suite, ideally before the trial period ran out. But what if a job seeker’s search drags on for longer than two weeks? There’s a significant danger of forgetting the subscription. Even if you watch your expenditures like a hawk, it’s easy for a Resume Genius subscription to slip through the cracks.
But at least on the 14-day trial plan, you can cancel any time. The $7.95 monthly plan comes out to $95.40 per year, and according to Ripoff Report, they may refuse to refund you the advance payment if you decide you don’t like the service.
To a stressed-out job seeker or someone who’s not too computer-literate, that two-week trial period looks like a good deal. Some people might even mistake the $1.95 “most popular” trial price for a one-time resume download fee.
What you get for all of this rigamarole is just a functional resume. In the screenshot above, you can see a sample that the writer of this piece cooked up in five minutes. Employers won’t complain, but it also won’t blow your hiring manager’s mind. If you feel you can’t write a resume by yourself, that might look impressive, but the most advanced thing that Resume Genius did for this example was to add a line below the address. The rest of the formatting was accomplished with bold, capitalized, and centered font.
Image from Pixabay
What else do you get for the price?
If Resume Genius only offered resumes, then it would be difficult to recommend it for the price. However, while resumes are what made this service famous, resumes aren’t all that it provides; it also claims to offer resume reviews and personalized job searches. The fact that Resume Genius offers reviews might be the more valuable service. Job searching is an anxious time, and if you don’t have many friends or family members willing (or able) to give you good advice about your career, then you may wonder if you’re doing everything right. Resume Genius apparently provides this service through one-on-one career counselors available online.
That said, many schools provide this service, too. Career centers at colleges and universities often welcome alumni, and even high school career counselors will sometimes make time for alumni. If you’ve never had higher education, you could even try reaching out to a community college. As public institutions, they may be either willing to help or to point you toward someone who can.
Although Resume Genius addresses curriculum vitae in a blog post, it doesn’t appear that it helps you create your own. If you’re applying for work in Europe, this might not be the tool that you want to choose. If you need to use a CV template, there are free, Word-compatible ones available for download on CV Template Master. (Just watch out for the banner ads!)
Letters, cover and otherwise
Resume Genius also provides some free information covering letter writing. You don’t need a subscription to see their thoughts on how to write a cover letter. Templates and sample letters are available for free download, and surprisingly, there are no apparent gotchas attached. The free templates are particularly useful. If you’re not comfortable using a template, you can also base your cover letter on the sample they provide in the post. There are no full application examples available on the site, but even a complete newbie to the world of job searching can usually cook up a cover letter for resume based applications after reading through a few posts.
The only caveat to this otherwise valuable gift is that using the provided samples without changing them is likely to damage your reputation with a hiring manager. Even if you’re not a confident writer, it’s always better to submit a thank-you in your voice. Anyway, you can’t risk running into someone else who is aware of Resume Genius and has seen their sample business letters! For the surest route to success, download the templates, which you can edit in either Microsoft Word or its free clone, LibreOffice, and follow the instructions.
Image from Pixabay
Resume Genius doesn’t necessarily help with more specific requirements of your job search. For example, if you needed to write an essay to secure a job at a particularly desirable position, Resume Genius probably couldn’t help you. In that case, writing ability may be one of the job skills that your employer wants to test you on anyway.
Look for links to Resume Genius’s letter-writing posts at the bottom of their main page.
Terms and Services
If you’re going ahead with a Resume Genius subscription, you’d better know what you’re signing up for. Here are the key points.
Copyright
Resume Genius considers its site’s content its intellectual property. This is reasonable and normal, but it does include the resume designs and the canned text that you can use to populate your resume points. As long as you’re not using Resume Genius to sell resumes to other people, this shouldn’t be a problem.
Your resume is their resume
According to section 6 of Resume Genius’s terms, any resume that you upload or make using this site is actually the property of Resume Genius.
Screenshot from Resume Genius terms of service
That means that Resume Genius could theoretically use your resume for their marketing purposes. They could even sell it to someone else if they wanted. Technically, according to these terms, it’s not your resume; it’s theirs. Later in the same section, Resume Genius confirms its right to sell, copy, reproduce, retitle, and archive anything you put on the site, including forum posts, at its discretion. That includes your name and your company’s name, cover letter samples, resume points, and anything else you write on Resume Genius. Yikes. The reasons for this probably have to do with Resume Genius’s ability to sell you your own resume at a tremendous markup, but it’s still a bit creepy.
Resume Genius roundup
Strengths
Resume Genius seems to do an adequate job of formatting a standard resume. Its templates are bland but produce perfectly acceptable outcomes. The service itself presents testimonials, glowing reviews, and boasts about client placements in Fortune 500 companies. That, combined with their glossy and attractive website, might woo customers who would otherwise balk at the expensive, spring-it-on-you subscription model.
Resume Genius is easy to use. That may be its most attractive quality. If you want a resume made fast, then this offer might look tempting. However, we can’t recommend it.
Weaknesses
It’s easy to imagine a situation where a desperate, anxious job searcher, newly laid off, logs onto the Internet to get a quickie resume and ends up accidentally hooking themselves on a monthly payment that they can’t afford. Resume Genius takes this imaginary scenario and brings it to life. The fact that Resume Genius charges almost $40 per month (!) to people who may well be out of work (!!) and does so in such a sneaky way (!!!) suggests that they’re more interested in parting you from your money than they are in helping you out. If you’ve ever been sucked into a subscription you don’t want, then you know that disentangling yourself can mean calls to customer service and several repeated attempts.
Image from Pixabay
Why do people use this service?
There are a few ways that people might find themselves with a Resume Genius subscription.
The Resume Genius “free” account trick initially makes them think they’re going to get something for nothing.
They don’t know of any other services that offer resume help.
The job search process feels intimidating to them.
They don’t realize that they’re signing up for the subscription instead of just buying a copy of their resume.
They assume that they’ll remember to cancel before they have to pay the monthly fee.
Granted, the Resume Genius cover letter help is a great resource. It’s a little surprising that this company, which otherwise seems intent on parting you with as much of your money as possible as quickly as it can, gives away cover letter samples for free. That said, it is a great draw and maybe a way that Resume Genius tries to entice people to sign up for its service.
College students who have never had a “real job” before may be at risk of falling for Resume Genius and services like it. If you’re a student or a recent grad, be aware that you may not be as experience-less as you might think! We’ve written before about how simultaneous work and study can boost your resume. Click over to find out how entry-level jobs can make you shine for future employers.
Should You Subscribe to Resume Genius?
Image from Pixabay
Even though it offers one-on-one resume consultations, Resume Genius probably isn’t worth the cost for most people. This honeypot of an online service only looks good until the first monthly payment disappears from your account, and as we all know, it’s too easy to forget about subscriptions during stressful life changes. Even if you don’t forget, do you need one more thing to do on top of your job search? You have better things to worry about than a resume service sucking your bank account dry. Plus, there are some cheaper alternatives out there that you should look into first.
Resume Genius Alternatives
Resume Genius has some competitors that offer similar services for a vastly smaller amount of money. Many operate on a similar gotcha subscription model – that is, they let you make a resume, then charge you a monthly fee for the privilege of downloading it. You don’t need that headache. We found some better resume builders that are free and make better, more interesting resumes.
Cypress Resume
Image from Cypress Resume
This resume builder is one of the best-kept secrets in career counseling. It’s 100% free to use if you access it through a public library, provides users with two clean, generic resume formats, and lets you customize a wide range of prewritten resume points for a broad selection of careers. You can also buy a $10.99/month individual subscription. (This is the cheapest rate we’ve found so far for resume subscription services on the Internet.) While it’s not the flashiest-looking tool out there, it gets the job done. Like Resume Genius, Cypress won’t let you make a CV.
Canva
Image from Tech Crunch
You might know Canva as the freemium web-based graphic design service, but it also makes some very stylish, out-of-the-box resumes. These range in style from minimalist to ornate. To use the templates, you’ll need a Canva account and a good artistic eye. Remember, a retailer or standard BBB business won’t necessarily be interested in a flashy resume, just like a web designer might look for one with extra pizzazz.
Canva downloads are free, giving it an edge over Resume Genius from a dollars and cents perspective, but it does require more tech skills to use. If you’re artistically inclined and computer-savvy, you can even create a resume from scratch using the many graphic design tools available on this site. Try Canva if you want to approach your resume creatively.
Microsoft Word and LibreOffice Templates
If you have Microsoft Word already, then you’re in luck: there are free resume templates available online for you. Just follow this link and download the one you like. The tricky formatting is all done for you, and your only job is to fill in the information. There are free LibreOffice resume templates available too. Just download them, open them, and fill in the necessary data.
Like using Canva, this strategy is probably best for people who feel OK about their ability with technology. You don’t need to be a hacker to use a template, though. If you want some free tech help, consider calling your local library and seeing if they have an expert available to guide you.
Schools, Libraries, and Community Centers
We’ve mentioned a few times that schools will often help alumni with their resumes. If you don’t have that option or don’t like it, consider hiring a graduate student to assist you. Even if you pay them $20, that’s less than Resume Genius would charge you for the same service. You’ll get a deal, the student will get a meal, and everybody will come away happy.
Image from Pixabay
While you’re calling libraries about Cypress Resume, ask if you can get a person on staff to help you with your resume. Librarians are often computer-literate and often happy to help with resume formatting for free. Make sure to call and tell them what you need. Be prepared to save your resume electronically to a cloud drive or a USB. It’s fine to have one printout of your resume, but you should be updating it with every job, so having a digital copy is important too.
If you live in an area with a community center, reach out to them and see if they have a career or resume day. (We’ve written about resume writing as one of many ways to give back to your community!) If they don’t, they may know of organizations that do.
Look for YouTube tutorials
There is a lot of good help on YouTube. If you’re completely lost and have no idea how even to start your resume, look for tutorials on this subject. Here’s a good one to get you started.
The Final Word
Don’t waste your time with Resume Genius. Even among other resume engines that charge a monthly subscription fee using a similar model, Resume Genius is one of the most expensive services that you can choose. Even if you don’t care about the money, consider that what Resume Genius offers is fairly straightforward. You can get it less expensively from one of its competitors, from Canva or a free Microsoft Word template.
If you’re out of work now or otherwise not in a position to afford a subscription whose annual cost would be more than $400, then please avoid this product. There are better ways to get a resume that don’t involve sapping your finite funds. You don’t know how long you’ll be out of work, but you can probably think of something better to do with $40 every month rather than spend it on an unnecessary resume service.
Don’t subscribe to Resume Genius. Instead, check out Cypress, Canva, your local public library, or the free templates we linked above.
Source: http://www.thebudgetdiet.com/resume-genius-review
0 notes
Text
Google Secrets to Make Money With Affiliate Marketing
Now that you have seen the Keyword Research Tool, we can discuss the importance and role of keywords to the level of your achievement. It is also important to decide on a niche, so you know which direction to take. Direction is so much more important than speed because 97% of affiliate marketers are going nowhere fast. The only difference is that the 3% built their Online Empire with Keywords as the foundation. You are looking for keywords with a high search volume and a low competition within your niche.
There are three kinds of Primary Keyword Research Steps known as;
Short Tail Keywords – Are single keywords and often referred to as Primary Keywords. These are the keywords that you want present in your domain name, but be objective and precise. Let’s use the Dieting Niche for demonstration. Good Short tail keywords will then be Health, Diet and Weight. These three particular keywords get searched around 982,000 times on Google Per Month. That’s almost a Million Searches, can you see where this keyword thing is going?
Long Tail Keywords – These are normally no more than Three Keywords making up a Keyword Phrase. Within the Niche we’re using for demonstration, lose weight, losing weight, lose weight fast, and fast weight loss are excellent Long Tail Keywords. They are searched around 564,100 times on Google Per Month. But you will have to research the keywords relevant to your niche, which means your results will be different. Long Tail Keywords are being used in your Site, and Posts Title. It works really well if the Long and Short tail Keywords are combined.
Anchor Text – These are Longer Keyword Phrases and refer to the phrase someone will type into their browser to search a specific interest. The kind of search someone would enter when they are much more likely to buy. For this demonstration, how to lose weight, how to lose weight fast, and want to lose weight are great examples. Anchor text is what must be present on your site’s home page, the Google Spider love seeing this and it helps with ranking. These anchor texts are searched 852,300 times on Google Per Month. Now combine the results of the three tests we’ve just done.
Yes, 2,398, 400 Searches on Google Per Month for the three search categories combined. By now you must realize the potential of proper keyword research, and why the 3% get to make those disgusting amounts of money online! This article will Simplify the Basics of SEO, what to include in Headers with Titles and even Categories, Tag Lines and Single tags. There is also the Site Map within Google Search Console.
Identifying the H1 Heading – May sometimes also be a Post or Blog Page Title but this usually refer to the Blog, Site or Video Title. The H1 Heading is where you include the Primary Search Phrases you wish your Site or Video to Rank for in Google within 15 – 65 Characters. It is important to preferably keep the H1 Heading within 60 Characters, because the H1 Heading will appear at the top in Google Search Result pages. Make the H1 Heading both Easy to Read and to Remember.
Identifying the H2 Heading – This is usually the Blog Post Title and once again the desired Search Phrases and Keywords need to populate this Heading. Numbers play a huge role with H2 Headings, and strangely enough uneven numbers have a more striking effect, combine this with a “Reason Why” kind of suggestion and you have a winner H2 Heading.
Identifying the H3 Header – Post Titles often also make up the H3 Header, along with Widget Descriptions within the Blog Side Bar. When you use the Text Widget to load HTML code, then the “Alt=” Attribute usually appear as an H3 Header.
A Blog post Title also appears as an H3 Header when you use an SEO Plugin like “All in One SEO Tools” and your Blog Post Title appears after the forward slash (/) to the Primary Domain. Using an SEO Plugin will allow you to submit all your individual pages, posts, tags and categories as individual site maps.
Identifying the H4 Header – This can be defined as something like the Tagline to you Blog Title Tag or H1 header. A Logo image is also often accepted as an H4 header within certain Plugins which may display a logo icon.
The Site Map Description – Your Blog Site Map is extremely important, and for this you simply install the Plugin “Google XML Site Maps”. This Plugin will share an updated your Blog Site Map to the Google Search Console each time you make changes, but the changes may take a while (Normally 2 – 3 Weeks) to show up in Search Results.
It is however important to manually check for the Site Map Acceptance from inside the Google Search Console, even with the Google Site Maps Plugin Activated. There may be times when certain errors occur with your Blog Site Map inside Google, which means Google cannot find your Blog.
You have to then test the site map with the tools provided from within the Google Search Console, fix the errors found from inside your Blog C-Panel and test the Site Map again. When the results return with Zero errors found, you simply delete the old site map and upload the new site map.
Accessing the Google Search Console you will need a Google account, as with all the Free Tools Google gives you and it’s a Lot. You simply need to look in the right places and then take your time getting to know how to use the tools. Simple Search your Browser (Preferably Chrome) for the search phrase “Google Search Console” and simply follow the instructions after opening the link on the search result page.
The Blog Site Map is what Search Engine Spiders use to Crawl your Blog so it can be categorized correctly, sending the right visitors your way. This is why the presence of Keywords and Search Phrases are so important throughout all content on your Blog, just the right ones in the right positions.
Source by Deon Christie
from Home Solutions Forev https://homesolutionsforev.com/google-secrets-to-make-money-with-affiliate-marketing/
via Home Solutions on WordPress
from Home Solutions FOREV https://homesolutionsforev.tumblr.com/post/186882555960
via Tim Clymer on Wordpress
0 notes
Text
Google Secrets to Make Money With Affiliate Marketing
Now that you have seen the Keyword Research Tool, we can discuss the importance and role of keywords to the level of your achievement. It is also important to decide on a niche, so you know which direction to take. Direction is so much more important than speed because 97% of affiliate marketers are going nowhere fast. The only difference is that the 3% built their Online Empire with Keywords as the foundation. You are looking for keywords with a high search volume and a low competition within your niche.
There are three kinds of Primary Keyword Research Steps known as;
Short Tail Keywords – Are single keywords and often referred to as Primary Keywords. These are the keywords that you want present in your domain name, but be objective and precise. Let’s use the Dieting Niche for demonstration. Good Short tail keywords will then be Health, Diet and Weight. These three particular keywords get searched around 982,000 times on Google Per Month. That’s almost a Million Searches, can you see where this keyword thing is going?
Long Tail Keywords – These are normally no more than Three Keywords making up a Keyword Phrase. Within the Niche we’re using for demonstration, lose weight, losing weight, lose weight fast, and fast weight loss are excellent Long Tail Keywords. They are searched around 564,100 times on Google Per Month. But you will have to research the keywords relevant to your niche, which means your results will be different. Long Tail Keywords are being used in your Site, and Posts Title. It works really well if the Long and Short tail Keywords are combined.
Anchor Text – These are Longer Keyword Phrases and refer to the phrase someone will type into their browser to search a specific interest. The kind of search someone would enter when they are much more likely to buy. For this demonstration, how to lose weight, how to lose weight fast, and want to lose weight are great examples. Anchor text is what must be present on your site’s home page, the Google Spider love seeing this and it helps with ranking. These anchor texts are searched 852,300 times on Google Per Month. Now combine the results of the three tests we’ve just done.
Yes, 2,398, 400 Searches on Google Per Month for the three search categories combined. By now you must realize the potential of proper keyword research, and why the 3% get to make those disgusting amounts of money online! This article will Simplify the Basics of SEO, what to include in Headers with Titles and even Categories, Tag Lines and Single tags. There is also the Site Map within Google Search Console.
Identifying the H1 Heading – May sometimes also be a Post or Blog Page Title but this usually refer to the Blog, Site or Video Title. The H1 Heading is where you include the Primary Search Phrases you wish your Site or Video to Rank for in Google within 15 – 65 Characters. It is important to preferably keep the H1 Heading within 60 Characters, because the H1 Heading will appear at the top in Google Search Result pages. Make the H1 Heading both Easy to Read and to Remember.
Identifying the H2 Heading – This is usually the Blog Post Title and once again the desired Search Phrases and Keywords need to populate this Heading. Numbers play a huge role with H2 Headings, and strangely enough uneven numbers have a more striking effect, combine this with a “Reason Why” kind of suggestion and you have a winner H2 Heading.
Identifying the H3 Header – Post Titles often also make up the H3 Header, along with Widget Descriptions within the Blog Side Bar. When you use the Text Widget to load HTML code, then the “Alt=” Attribute usually appear as an H3 Header.
A Blog post Title also appears as an H3 Header when you use an SEO Plugin like “All in One SEO Tools” and your Blog Post Title appears after the forward slash (/) to the Primary Domain. Using an SEO Plugin will allow you to submit all your individual pages, posts, tags and categories as individual site maps.
Identifying the H4 Header – This can be defined as something like the Tagline to you Blog Title Tag or H1 header. A Logo image is also often accepted as an H4 header within certain Plugins which may display a logo icon.
The Site Map Description – Your Blog Site Map is extremely important, and for this you simply install the Plugin “Google XML Site Maps”. This Plugin will share an updated your Blog Site Map to the Google Search Console each time you make changes, but the changes may take a while (Normally 2 – 3 Weeks) to show up in Search Results.
It is however important to manually check for the Site Map Acceptance from inside the Google Search Console, even with the Google Site Maps Plugin Activated. There may be times when certain errors occur with your Blog Site Map inside Google, which means Google cannot find your Blog.
You have to then test the site map with the tools provided from within the Google Search Console, fix the errors found from inside your Blog C-Panel and test the Site Map again. When the results return with Zero errors found, you simply delete the old site map and upload the new site map.
Accessing the Google Search Console you will need a Google account, as with all the Free Tools Google gives you and it’s a Lot. You simply need to look in the right places and then take your time getting to know how to use the tools. Simple Search your Browser (Preferably Chrome) for the search phrase “Google Search Console” and simply follow the instructions after opening the link on the search result page.
The Blog Site Map is what Search Engine Spiders use to Crawl your Blog so it can be categorized correctly, sending the right visitors your way. This is why the presence of Keywords and Search Phrases are so important throughout all content on your Blog, just the right ones in the right positions.
Source by Deon Christie
from Home Solutions Forev https://homesolutionsforev.com/google-secrets-to-make-money-with-affiliate-marketing/
via Home Solutions on WordPress
0 notes
Text
Google Recommendations: Are they Helping or Hurting my Paid Search Strategy?
Let’s face it. There are plenty of rabbit holes to dig into when going through your Google Ads account.
Collecting data, recognizing the trends for optimization and other paid search strategy efforts often do not come as quickly as we’d like. The problem? As digital marketers, time is not always on our side. We are expected to bring in results in a timely manner but some factors are slightly out of our control.
Cue in Google, who offers time-saving options, courtesy of their massive amounts of data. But do these options actually improve our campaigns?
Here are some experiences I’ve seen during my time working with various Google Ad accounts at Directive, a search marketing agency focused on B2B and enterprise. Let’s break them down together.
Targeting Tools
Setting up proper targeting is a crucial paid search strategy for your Google Ads campaigns. With search, you can control targeting through keywords you bid on as well as the match types you utilize.
With display, it is through the audiences you build or the ones available in the Google Ads platform.
See below:
Each campaign type also has options that allow Google to increase your targeting range.
With search campaigns, you have the option to show your ads to Google search partners. This extends the reach of Google search ads to hundreds of non-Google websites. These also can extend to YouTube and other Google sites.
Choosing this option includes a notification that informs you that “most advertisers include their ads on Google search partner sites.”
See below:
After auditing an account, we found a client of ours did indeed decide to include search partners and saw the following results:
We do see a large spike in conversion volume from search partners, but also a much higher cost-per-conversion.
Additionally, there is a 90.25% impression share from Google search, meaning there is still room to show ads there. Had more budget gone to Google search and a bit less to search partners, this client would have obtained conversions at a cheaper cost, and ultimately a lower cost-per-conversion in this campaign.
While setting up a display campaign, you can boost your reach through automated targeting.
See below:
Looks pretty great right? One of our clients set up a remarketing campaign using the above settings. Here was the overall performance:
Something did not seem right here!
By targeting users who are already familiar with your brand, you should have a better conversion rate than .25%, right? So what happened? Well, when looking at how the site visitors performed we saw the following:
And in comparison, this is how the set of conservative automation performed:
We see a massive difference here in performance. Even at “conservative” automation, 82% of the budget went towards automation, despite it performing much, MUCH worse.
Proper targeting is the foundation for success in your campaigns! Please keep this at the forefront of your mind.
If your goal is lead generation, avoid opting into automated targeting until you feel you are capped out. Even then, do not set and forget; you could be wasting spend on audiences you have no control over.
If your goal is awareness, these options are an excellent way to expand your reach, get more exposure, and drive more users to your site.
Bid Builder
If you’ve got a lot of keywords in your account, manual bidding can be quite a pain. Google’s smart bidding can alleviate the time-consuming chore of keeping track and adjusting your keyword bids. Additionally, they provide multiple options to fit the campaign’s needs:
Target CPA: Sets bids to get the most conversions possible while reaching your average cost-per-acquisition (CPA) goal.
Target ROAS: Sets bids to help you get the most conversion value while maintaining your target return on ad spend (ROAS).
Maximize Clicks: Sets bids to help you get the most clicks within your budget.
Maximize Conversions: Sets bids to help you get the most conversions within your budget.
Target Search Page Location: Sets bids to help you get your ads to the top of the page or on the first page of search results.
Target Outranking Share: Sets bids to help you outrank another domain’s ads.
Enhanced CPC: Adjusts your manual bids up or down to help you increase conversions.
Target Impression Share: Automatically sets your bids to increase your ads’ chances of appearing in the search page area you select.
These can all be beneficial options depending on your campaign goals. One of our clients had a campaign rich with conversion data, averaging around 200 conversions a month.
The more conversion data, the better, as Google’s algorithm can learn quicker and begin producing more “bang for your buck” in a shorter amount of time. We decided to run an experiment here testing out max conversions against the manual strategy and saw some pretty interesting results:
After a few weeks, we were not seeing much difference in terms of volume or conversion rate. The big difference here was in the costs associated with each strategy:
Using the automated strategy, our CPC’s went up a whopping 63%! So while conversion volume may not have grown, our CPA certainly did! We ended up ending the experiment and sticking with manual bidding.
This isn’t to say automated strategies are always going to be wasteful. We’ve used this strategy on many clients and have seen it deliver the best volume and lowest CPA one of our client’s campaigns had ever seen.
We’ve seen the Target CPA turn around performance and improve account level CPA. We have keywords that we want showing 100% of the time due to their value, and Target Impression Share worked towards accomplishing that goal.
The lesson here? Always experiment before switching over. We’ve seen varying results depending on the industry, offer, and branded vs. non-branded keywords. Personally, I’ve seen these strategies work best after the campaign has been running for a while and is well optimized. After it’s been up, experiment with Smart Bidding to get your campaign to reach that next level.
Creative Collaboration
So, everything we’ve talked about thus far has been on the backend, but what about the creatives your customers see?
Google has an answer for that as well in the form of responsive search and display ads!
With responsive search ads, you can input multiple headlines and descriptions and have Google mix and match to find a winning combination. Ideally, this frees up time from creating tons of different ad variants to try and find the winning combination of copy. Let’s take a look at one:
We can see a superb click-through rate, but not so great CPA. What is more troublesome is the inability to find out what exactly is wasting spend. If you click on the “view asset details” outlined above, you’ll be met with the following:
We can see the different combinations and the percentage of times they showed, but impression numbers are all you get; no conversion numbers, conversion rates, or cost-per-conversions associated with the combinations.
This prevents us from being able to double down on what is working, and pause what is not.
Responsive search ads could potentially be a game changer if each piece of copy had the previously mentioned stats to accompany, but without them, we cannot really analyze the copy winners and losers.
A certain combination served may get you a lot of clicks, but may not resonate with your landing page compared to another combination receiving fewer clicks. There’s just no way of knowing for sure at that moment.
On the display side, you can work with responsive display ads.
Rather than manually creating different banner ad sizes, you just upload an image and a few lines of copy to accompany. Then, Google is able to fit your ads in more placements and create various combinations like responsive search ads.
We tested one of these against our standard banner ads and got some excellent results. The top row shows the entire ad group’s metrics, while the bottom shows the responsive display ad’s:
The ad was responsible for more than half of the ad group’s conversions, despite being less than a quarter of the spend. Automation seemed to perform well here. Like responsive search, however, there is no way of understanding what is working or not. In this case we ended up just pausing the manually built display ads, and testing the responsive against another responsive to try and get a better grasp.
All in all, responsive ads can save you a chunk of time in the creative process but lack the insights to dive into what messages seamlessly transition users from ad to landing page and then to the desired conversion action.
These ads are worth having in your back pocket though, so test them out against your current ads and see how they perform for you!
Overview and Recommendations Refresh
Have a big account? Don’t know where to start?
These tabs within Google Ads give you general insights into various campaigns, ad groups, and keywords.
See below:
This tool helps you gain a high-level understanding of trends or abnormalities going on within your Google Ads account. For example, in the Overview section, we get insight into some words that triggered our ads, without having to dig through search terms:
If you’re seeing a lot of irrelevant terms here, it is a good indicator you need to go in and clean up your search terms and add some negative keywords. In the example above, we’ve outlined a word used in a search, which triggered our ad to show. This word is not relevant to our services, and therefore we would add this as a negative keyword.
Removing these types of words is crucial for reducing wasted spend and prevents your ads from being triggered by searches that are not related to what you offer.
The recommendations tab offers advice on where you should boost spend or expand your campaigns. Take the advice here with a grain of salt. Sometimes the recommendations may not have your campaign goals in mind.
For example, we were running a video campaign and were met with the following advice:
Seems pretty obvious that adding more money into our daily budget will earn us more video views, right?
But what about engagement metrics? Are these users actually making their way to the site? If they do, are they bouncing quickly? If they don’t, how many pages are they visiting?
The whole point of this campaign was to spread awareness for one of our client’s products and see if video ads enticed users to travel to the site. We cared more about how our audience was performing and whether they were making their way to the site to learn more after a teaser clip, than just showing a video to the masses.
The above recommendation does not provide those insights, only how to increase your cost and views. Click-through-rate, bounce rate, and pages per sessions are a better way to understand your goals and should be considered before adding more money to your daily budget for more views.
Again, take everything on these pages as simply suggestions. Use them as a roadmap, as they can be good indicators of areas to dig into within your account. However, make sure you follow the breadcrumbs and investigate before blindly adding more funds.
More spend simply for visibility does not necessarily mean better account performance.
Final Focus
Setting up a Google Ads account to ultimately benefit your paid search strategy can be time-consuming and requires strategy and research.
With so much to do within the account, it is tempting to let Google take over and run on autopilot. However, taking shortcuts early on can provide subpar performance and wasted spend on your PPC campaigns.
But isn’t automation built to learn, adjust, and improve our search marketing efforts? To quote one of the most frequently used phrases in Directive’s pay-per-click department, “it depends.”
While these options are available to make your life easier, they are not guaranteed to work. Should you try them out? Absolutely. Optimize, then test, but keep a close eye on what is happening within your account. Do your due diligence and ensure there are no holes in your search marketing campaigns that allow automation to hemorrhage your paid search budget.
from RSSMix.com Mix ID 8217493 https://www.ppchero.com/google-recommendations-are-they-helping-or-hurting-my-paid-search-strategy/
0 notes
Text
12 Best Chrome Extensions for Power Users in 2019
Google Chrome is the most widely-used web browser, with Safari, Firefox and others so far behind it they may never catch up. With so many add-ons available in the Chrome web store, you can customize your browser in countless ways to help you work more efficiently and build better websites. We’ve rounded up the best Chrome extensions in four categories: productivity, web development, web design and WordPress.
Best Chrome Extensions for Productivity
1. Evernote Web Clipper
Source: Chrome Web Store
Evernote is one of the most robust and accessible note-taking tools you’ll find, and the Evernote Web Clipper extension for Chrome makes saving web page clippings a breeze. Clip part of a web page (including your emails) or highlight text from an article, then send it to Evernote, organize it in one of your notebooks and add a tag for easy finding later on. You can highlight the text, too, so you’ll know exactly which parts to pay attention to when you’re ready to review.
Get the Evernote Web Clipper Chrome extension
2. Start.me
Source: Chrome Web Store
With Start.me, you can bookmark websites to add them to your personal dashboard, which will open whenever you open a new Chrome tab. Add RSS feeds and widgets (calendar, email, to-do lists, etc.), then organize them however you want. You can embed web pages, photos or videos in the start page, too. Your Start.me dashboard can be shared with the rest of your team so everyone follows the same structure.
Get the Start.me Chrome extension
3. Tab Resize
This is a shot of my desktop using Tab Resize
Tab Resize takes a little getting used to, but if you often have a lot of tabs open that you need to arrange side-by-side, it provides several excellent shortcuts. Since you’ll only resize the tab you’re currently on and those to the right, you can choose which tabs to resize and which ones to leave alone. Choose your tab layout, automatically open several resized tabs with the same web page (like if you want four separate Google search pages) and organize your desktop to work more efficiently.
Get the Tab Resize Chrome extension
Best Chrome Extensions for Web Development
4. Checkbot
Source: Chrome Web Store
Checkbot lets you analyze both the optimization and the safety of your website. Google takes website security into account when ranking, so you can’t ignore safety and still expect to have a well-optimized website. Checkbot tests hundreds of web pages at once for SEO, security and speed to find broken links, duplicates, invalid code, unsafe password forms and more. The free version will check 250 URLs and you can upgrade to check 10,000 URLs.
Get the Checkbot Chrome extension
5. Check My Links
Source: Chrome Web Store
Sometimes the best tools do one thing and do that one thing very well. Check My Links may sound similar to Checkbot at first, but it narrows its focus to just find broken links. Once you’ve finished developing a website or web page, you’ll want to do one final scan to ensure all links are working correctly. This extension will highlight the problematic ones in red (and the good-to-go ones in green) so you can fix them.
Get the Check My Links Chrome extension
6. Speedtest
Source: Chrome Web Store
Again, just like Check My Links, Speedtest does one thing super well. Access it right from your toolbar to test how well your web page is performing. You’ll measure how fast a website loads as well as ping, download and upload speeds. The pop-up dashboard is nice looking and easy to read, and it shows up right over the web page you’re on so you don’t have to click anywhere else.
Get the Speedtest Chrome extension
Best Chrome Extensions for Web Design
7. Design Grid Overlay
Source: Chrome Web Store
Design Grid Overlay displays grids that can be customized to fit your specific design needs. Using a grid makes it easier to achieve aesthetic harmony across all of your visual content and website, which is especially important if you’re showcasing a number of products, like in fashion retail. Set grid specifications and then display the grid during the design stage for better, more perfect alignment on the web page.
Get the Design Grid Overlay Chrome extension
8. Mobile/Responsive Web Design Tester
Source: Chrome Web Store
With the Mobile/Responsive Web Design Tester you can test different mobile pages and responsive web designs at the same time. The extension mimics commonly-used devices so designers can see how their web page will appear no matter how it’s viewed. For each device, you can test in portrait and landscape mode.
Get the Mobile/Responsive Web Design Tester Chrome extension
9. PicMonkey
Source: Chrome Web Store
Professional website designers are probably not relying on PicMonkey to create graphics. If you have to make simple editing tweaks to all of your web page images, though, this is one of the best Chrome extensions you’ll find. It’ll grab all the images from a web page and automatically open them in PicMonkey to edit. You can then make whatever changes you need, from cropping to adding effects or overlays.
Get the PicMonkey Chrome extension
Best Chrome Extensions for WordPress
10. Scan WP
Source: Chrome Web Store
If you’re just starting to build your WordPress website or you’re ready to give it a design overhaul, Scan WP will clue you in to the themes and plugins that the websites you admire use. Once you’ve installed the extension, just click the orange WordPress button in your browser to find out theme and plugin information about the site you’re on. By heading over to the extension’s website, you can find additional information about the domain, including traffic, ranking and competitor info.
Get the Scan WP Chrome extension
11. WordPress Admin Switcher
Source: Chrome Web Store
With the WordPress Admin Switcher, you can move between the front end and admin screens with shortcuts. The extension also speeds up the log in process, saving you the trouble of having to type in the “wp-admin” part every single time. If you’re viewing a page on your website and then you log in, you’ll be directed to the edit page for the page you were viewing.
Get the WordPress Admin Switcher Chrome extension
12. WordPress Keyboard Shortcuts
This is what the extension looked like after it was installed
If you do a lot of work on your WordPress websites, efficiency is everything. The WordPress Keyboard Shortcuts extension is super simple and highly useful. You just click the button in your browser and the shortcuts screen pops up over your web page.
Get the WordPress Keyboard Shortcuts Chrome extension
Wrapping Up
The best Chrome extensions for you should make your life easier and your work better. If an extension seems to get in the way of your workflow, it doesn’t matter how many features or five-star reviews it has. Pick and choose the extensions that mesh well with how you work so that you can get online, get the work done and get back to the rest of your life.
Want to personalize your Chrome even more? Check out our article about 15 Google themes for designers and creatives.
The post 12 Best Chrome Extensions for Power Users in 2019 appeared first on Elegant Themes Blog.
😉SiliconWebX | 🌐ElegantThemes
0 notes
Photo

New Post has been published on http://simplemlmsponsoring.com/attraction-marketing-formula/website-traffic/how-to-start-a-coaching-business-and-look-like-a-pro-from-the-get-go/
How to Start a Coaching Business and Look Like a Pro from the Get-Go

So. You want to start coaching.
Why wouldn’t you?!?
You get one-on-one insights from your audience that you can use
to make your blog more interesting, and you can make some money
without creating an entire e-course from scratch.
Offering coaching on your blog is a smart business decision.
But how do you do it?
Like, how do you collect payment? Or get people to schedule a
call time without sending 15 back-and-forth “when is good for
you” emails?
And when you do get people on the phone, what do you say?
Today we’re going to walk you through all of that:
How to create a coaching offer people can’t say no to
How to set up your coaching biz so people can easily buy and
schedule sessions
How to structure a one-hour coaching call and make sure it’s
valuable for your clients
This is where the rubber meets the road—and if you stick to
it, where your blog meets everything you’ve ever wanted it to
have: dedicated readers, profit, and influencer status.
Sounds good, right?
So without further ado, here’s how to start your own coaching
business:
#1. Create Your Mouthwatering Coaching Offer
The best way to get readers to want to hire you as a coach is to
give them something to look forward to as a result of your session.
Yes, “coaching” means they’ll get to talk to you and pick
your brain, but most readers will want a little more than that.
So to create your first offer, start with the end result someone
will get after coaching with you.
Are you a business coach who will help them decide on their
pricing? Are you a web designer who can give them ten ways to
optimize their website conversions?
Decide on an outcome that will be for the benefit of the reader,
and build an offer around that.
Here’s an outline to help you:
Identify what you know is a big pain point for your audience
that you can solve quickly.
Outline what parts of it you’d easily be able to tackle in a
30-minute or one-hour phone call.
Identify the deliverables the customer gets and can use at the
end of the call.
If you feel creative, come up with a fun name for the package.
(Just don’t get too cutesy to the point of confusion.)
For example, one of my “coaching” offers is called an
“On-Site Copy Teardown.” During the one-hour call, I walk
people through their website copy and review any on-site data with
them. We find ways to improve their copy so they can get more
conversions instantly, without a page redesign.
#2. Set Up Your Coaching Biz and Make it Run Smoothly
**rubs palms together vigorously**
All right, let’s get you set up to advertise, book, get paid
for, and deliver your first coaching sessions. We’ll cover:
How to set up your sales processing system so people can
purchase your coaching
How to set up a booking system so people can make appointments
on your calendar
How to create a sales page so readers can find your offer
It’s a lot of little of steps, but it’s something you can
tackle in one afternoon.
Note: I’ll be showing you a free way to get everything set up,
but you can easily use a service like SimplyBook.me which is relatively
inexpensive and makes setup and booking even more streamlined.
Also, I’m using WordPress, but most of this can still be applied
if you use another content management system.
1. Set Up a Way to Get Paid
When someone buys your coaching offer, two things need to
happen:
The buyer needs to receive an email or PDF with a link to your
calendar, so they can schedule a session.
You need to receive the payment in your bank account.
For the first, you need to have an e-commerce platform. And for
the second, you need a payment processor like Paypal or Stripe.
For the e-commerce platform, we’ll use Payhip.
I use Payhip to deliver some miniature e-courses that I sell
because it specializes in digital downloads, but I’ve also used
it as a free way to sell one-hour Copy Teardowns and 30-minute Copy
Review Sessions to my students.
First, go to Payhip and sign up for a free account:
After you log in, click on “Account” in the upper left-hand
corner, then click on “Settings.”
Click on the “Payment Details” tab, and you’ll see a
prompt to connect either your PayPal account or your Stripe
account.
You can use PayPal (or PayPal and Stripe) if you like, but I
prefer Stripe because it makes
credit card payments much easier simply because that’s the only
option. People don’t get confused with the additional options of
paying with a PayPal balance or hooking up their bank accounts to
send an e-check, like PayPal sometimes presents.
Stripe’s got a super-easy-to-follow setup process. If you
don’t have an account yet, go to Stripe’s home page and click
the “Create Account” button, and you’ll be ready to go before
you know it.
2. Set Up a Way for Clients to Book Sessions
Now that you’ve got a way to collect payment from people, you
need a way for them to book coaching sessions with you.
For which Calendly is
perfect.
First, go to Calendly’s home page and click on one of the
“Sign Up” buttons to register for a free account.
After signing in, choose Event Types in the main menu bar.
Choose whether you want to open 15-minute sessions, 30-minute
sessions, or 60-minute sessions by clicking the “on” switch in
the appropriate event type box.
Then, click in the center of the event type box to edit the
options for it.
First, select which times you are available for coaching
sessions.
Then, in “Invitee Questions,” add any questions you want
people to answer before the call. (You might also ask for their
Skype username here, or their phone-number if you plan to call by
phone.)
And finally, integrate with Google Calendar to add the booking
to your calendar and to have an invitation sent to both of you.
3. Create and Upload Your Coaching “Product”
Now we’re going to create the “product” that you’ll
sell.
And yes, you’ll technically be selling a coaching session
rather than a digital download, but in order to use Payhip, you
will need a digital “deliverable” that people will download
instantly after purchase.
My download is nothing more than a PDF instruction sheet on how
to schedule the coaching session they’ve just paid for, and
instructions on what to do in the booking process.
Here’s what it looks like:
Very simple and straightforward, but it gets the job done.
The important part, though, is to make sure this document
includes a link to your Calendly page so that people can book
sessions with you. After that, include any other instructions you
feel are necessary based on the coaching offer you’ve set up.
Then, go to your main Payhip dashboard, and click on the “Add
new product” button:
Upload your PDF, give it a title, and set your price.
PayHip will also ask you for a cover image. If you have a blog
logo, you could simply use that. Otherwise, Canva lets you create simple but
good-looking graphics that are more specific to your offer.
Then you’ll need to add a product description. Most people who
get to this page will come from your website or email list and
already know what they’re buying. But this is a great place to
reiterate the benefits of what you’re offering and what’s
involved in your offer.
After that, all you have to do is select a relevant category and
click “Add Product.”
And you’re done! You offer is officially for sale!
4. Publish Your Sales Page So People Can Find Your Offer
Phew. Almost there.
All you need now is a sales page so people can actually find
your offer and buy a session with you.
Ideally, you want to create a distraction-free page for this.
(Meaning no menu, no sidebar, and no buttons that lead to anything
other than your coaching offer.) This gives page visitors two
options: buy or leave.
Fortunately, many WordPress themes come with a
distraction-free landing page template. (You’ll have to check and
make sure, especially if you’re using a free theme.)
Go to your WordPress dashboard, find Pages in your left-hand
menu, and click on Add New.
On the right-hand side of your content editor, look for a widget
called Post Attributes and see if it offers a landing page
template.
Note: If you don’t see this option, it
might mean that your theme doesn’t offer a landing page template,
or it might mean that it has a different method for creating
landing pages.
Google [name of your theme] “landing page” to find out. But
if you discover your theme doesn’t have a landing page option,
don’t worry.
You can try an online app like Leadpages or a plugin like
Thrive Architect
to help you build and publish the landing page. (Yes, they cost
money, but they also have pre-built templates that have been tested
for high conversion rates.)
Now that you’ve set up your page as a landing page, give it a
name, adjust the URL if needed, and add your sales copy.
And once the sales copy is written, of course, you need to add
the buy button.
To get the code for this, go back to your Payhip dashboard and
click on the Share/Embed button that appears next to your product
listing:
A window will pop up, and you’ll click on the “Embed
Button” tab in that window.
You’ll see the embed code right away, but before you copy it,
click on the “More Options” text below the embed code.
This drops down an entire menu of settings where you can adjust
the button text, the size, and the display options until it all
looks the way you want it to.
After you’ve adjusted the button’s looks to your
specifications, copy the code and go back to WordPress.
Click the Text tab in the upper right-hand corner of your
content editor, and paste the button code where you want it to
appear on your page:
Now, publish the page and add it to your main menu.
First, click “Publish” on the right-hand side of the page
editor.
Then go to “Appearance” in the left-hand menu, and click on
“Menus.”
Then add a check in the box next to your new page, and click on
“Add to Menu.”
And that’s it!
You’ve now got a coaching offer for sale.
(Congratulations!)
Hint: Rather than stopping at putting the
page in your website menu, drive traffic to your offer in other
ways, too. Your website sidebar, social media profiles, mentioning
it in your blog posts, and sending information to your email list
about your offer are all great ways to get attention to
it.)
#3. Run Your First Coaching Calls Like a Seasoned Pro
With figuring out your offer and adding it to your website,
you’ve already done most of the work.
But then you get the first booking for your first ever coaching
call . . . and if you’re like most bloggers who like blogging
because it means you can sit behind a screen and not be in the
public eye 24/7, you start to get a little nervous. Maybe even
sweat a bit.
And allll these insecurities start coming up:
How can I coach people when I’m not perfect at this
myself?
What if they hate what I have to say?
What if no one follows my advice and they shame me on the
Internet?
What happens if I end up on a call with someone for two hours
instead of one? Should I send them an invoice for double the price
or just leave it be?
What if I don’t have enough material to fill the hour they
paid for?
Which is why it’s important to remember that you do have
something special to offer. If you’re passionate enough to
start a blog and write regularly on a topic, chances
are you know more than at least 80% of people about that topic.
It’s also important to remember that when people pay for
something, it means they’re putting their skin in the game and
will be invested in your advice. They’re not expecting you to be
perfect—all they need is your advice to get them to the next
step.
And while some people will want to just talk and talk and talk
about their problems, you’re the coach here, so you’ll need to
rein in the conversation and keep it focused on the outcomes you
want to deliver within that one-hour conversation.
With time, you’ll become more practiced and discover what
works best for you as you do more coaching sessions. But to start
out, here’s a great timeline to guide the conversation that keeps
everything neatly inside of one hour, and makes sure your client
feels heard.
Use This Coaching Call Timeline to Schedule Your Talking Points
Talking Point and Time
Estimate
Time Elapsed
3-5 minutes: Exchange hellos and
small talk, and ask client to talk about their pain point.
5 minutes
5-7 minutes: Client talks about
their pain point and you ask clarifying questions to make sure
you’re on the same page.
10-15 minutes
5 minutes: Pick out three major
areas to talk about and run them by client to see if they’re on
board. You’ll allocate 15 minutes to each point, and can move on
to more at the end if you have time left over. This serves as your
45-minute warning.
15 minutes
15 minutes: Talk about and give
advice on Point 1. Make sure it’s conversational and that
you’re asking the client questions like, “Does that make
sense?” and “Does this seem doable?” to keep them
engaged.
30 minutes
Give 30-minute warning and transition to Point
2.
30 minutes
15 minutes: Talk about and give
advice on Point 2. Make sure it’s conversational and that
you’re asking the client questions like, “Does that make
sense?” and “Does this seem doable?” to keep them
engaged.
45 minutes
Give 45-minute warning and transition to Point
3
45 minutes
10-12 minutes: Talk about Point 3.
(It’s usually the least crucial of all three points.) Again, keep
things conversational.
55 minutes
Give a 3-5 minute warning and ask if they have
other questions you can answer.
55 minutes
5 minutes: Quickly answer
questions or, if the client doesn’t have any questions, give a
recap of the points you went over and talk about how you’ll
follow up after the call.
60 minutes
Honestly, I know 15 minutes might sound like a lot of time to
talk about one point, but it’ll go surprisingly quickly. You’ve
got a lot of knowledge in your head about your particular topic
area, and 99% of the time, clients who pay to get on the phone with
you will eat it up and ask all sorts of questions.
If you find yourself in the position of a client having a
million more questions and you’re at the 58-minute mark, try not
to worry too much. Politely tell them you’ve only got time for
one more..
Read more: smartblogger.com
0 notes
Last Seen Blogs

awsumm1-blog
HuggeeKissee

speakerok
C миру по нитке...

chuleame
Chuléame

sweetcreatureflyinghome-blog
Just tell me

game-net
Situs Slot Gacor Online