#tuserose
Text


impawsters in the backyard today
#🤔🤔#userdahyun#tuserose#useranusia#aleksbestie#useryukuz#the first cat is the one my dog keeps trying to play with but the second is new 🤗 hey#I tagged the resident cattuals#OH AND#usershinaryu
17 notes
·
View notes
Text


JAEMIN ✩ BROKEN MELODIES
for @lee-minhoe ♡
#na jaemin#jaeminsource#kpopedit#nct dream#tuserose#meltracks#uservince#nctinc#nct#i know i have other mutuals that like nct but for the life of me i can't remember who </3#jaemin
102 notes
·
View notes
Text

*caption not found*
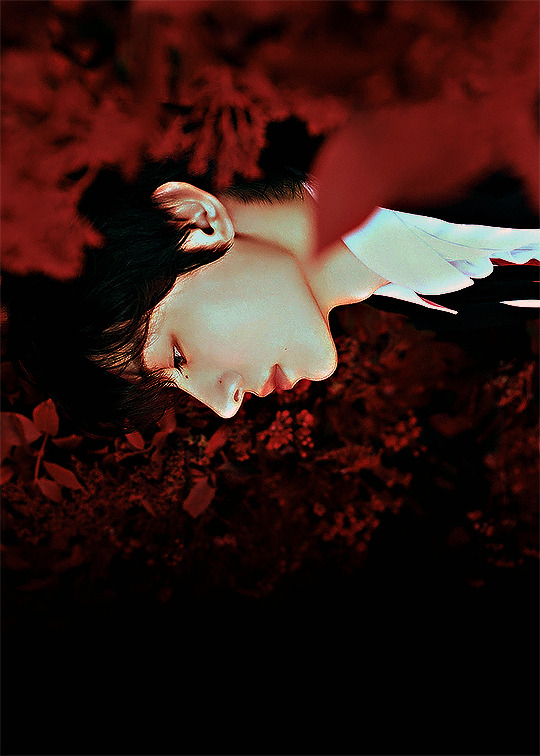
#this deserved to be a gif on its own ok <3#userfairy#tuserchrissy#tuserose#melontrack#isaishi#creations#hwang hyunjin#stray kids#skz gifs#I. AM. WEAK.
316 notes
·
View notes
Photo


for @jeonwonwoo and @hannietual 🖤
#jeonghan#svt#svtsource#dailyjeonghan#tuserose#ocora#marieblr#rosieblr#isaishi#useroro#userfairy#userzaynab#hanatonin#cheytermelon#heychenleyah#flash tw#monets gallery
166 notes
·
View notes
Note
hi! again. 😊 Please excuse my bad explanation; I'm new to PS and still learning what things are called. My question was about how you manage to combine pngs images with gifs in such a cool way. As seen in this beautiful HOTD edit, for example. /post/698703305504882688/i-should-not-be-left-to-my-own-devices-anti-hero It would be awesome if you have time to explain how you do this for all of us newbies, but if not, I am thankful that you took the time to answer my ask. Best wishes. 😊
— hii no omg thanku for being so nice with your ask </333333 and i'm more than happy to share how i did it (that set was so long ago 😭 i don't have my hotd files rn but i'll just make do with an example)
this effect technically can be very simple to-do and all you need is a base background and a png to go on top! but if you want to recreate that effect exactly as it was in this set then prior to the png you need:
— two gifs, ready and coloured + blended together
— a transparent png with a clean outline
— basic knowledge of overlays (but really it's more of a learn-as-you-go thing so its fine 😭)
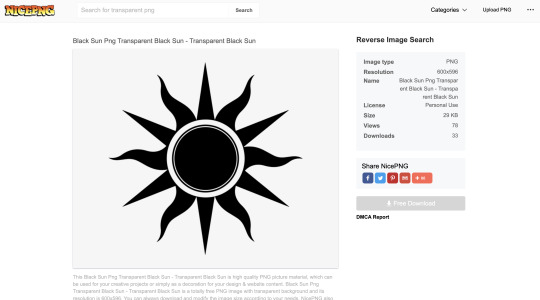
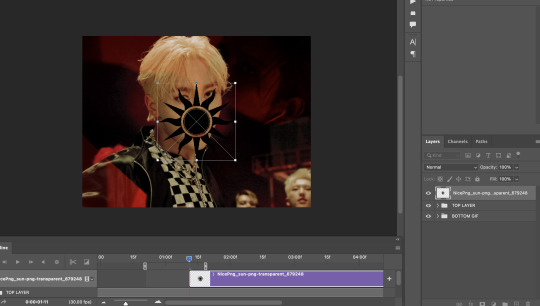
#1 — so first i wanted to find the png i was going to use. just search up ____ (whatever you're looking for) png transparent online and you should be able to find heaps of good, and free to use options! my go to site is nicepng but there are sooo many places you can look!!
what's important to remember is that for a cleaner result, you want to find a png with smooth outlines - aka nothing that is really rough or jagged in its edges.
so i chose this sun png and it has plenty of black space in it (as this will play a key role in how the colour shows through the png later) but it isn't a solid block of black either!
#2 — so i have my two gifs ready, coloured and blended with each other. remember that the gif choice underneath will also affect how the png's colours show through [whether the gif has a lot of pure white/black can really change the effect!]
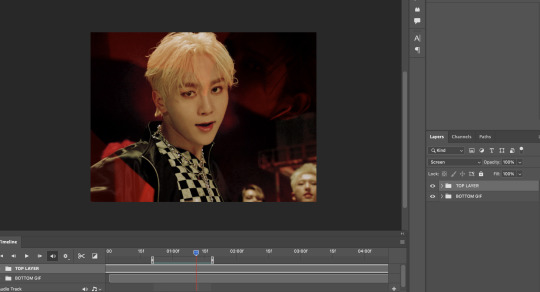
#3 — so now i've just inserted the png onto the gif and you can position it anywhere you want on the canvas!
#4 — i'm not sure on the technicalities on why you need to do this (😭) but the png typically is black right, but you want to make it white so make sure to invert the png so it shows up white!! you can invert through adjustments or by pressing command + i or ctrl + i to do this!
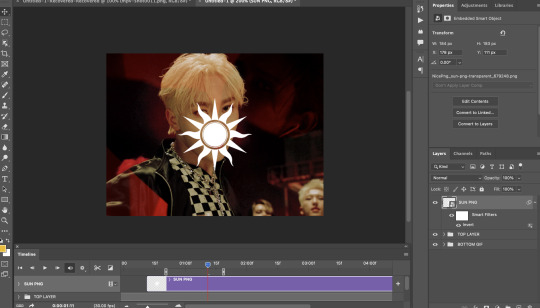
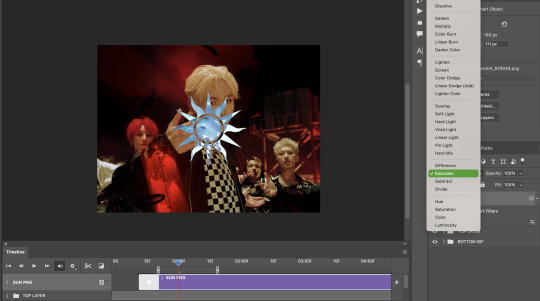
#5 — now go to the blending mode of the png and set it to EXCLUSION. i think you can set it to difference as well but i'm no expert in that and i think they give the same result. your white png should turn sort of blue-ish translucent!! now we're ready to add colour <3
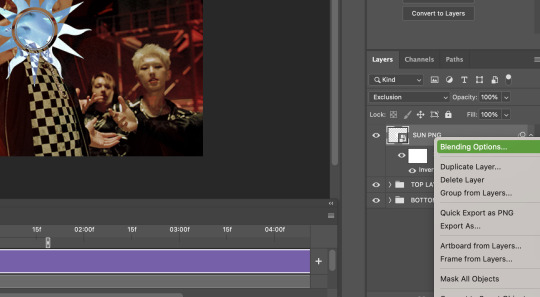
#6 — now right click/double click etc on the png and go to blending options here!
#7 — this is an optional step but if you want the outline of your png to appear a little more against the gif (say as the majority of the background in mine is mostly dark) then you can add a shadow to your liking! these are just my typical settings nowadays :D
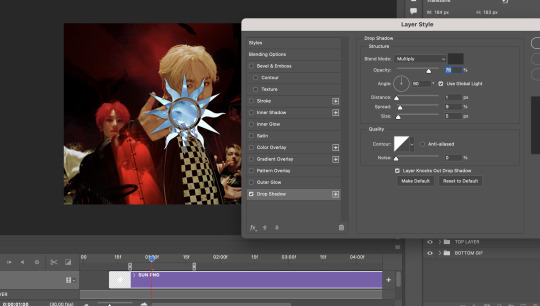
#8 — head over to gradient overlay and choose a colour gradient that you would like! there are heaps of easy presets that i often default to (like plenty of blue/green/purple options) <3 and make SURE you set the blend mode of the gradient overlay to EITHER:
— multiply (shows up pretty dark which can be useful at times!)
— hard light (which shows up pretty bright, i'm going to use that in this gif because bright is what i need!)
— colour (shows up more light/white and works well on lighter backgrounds imo)

#9 — finish up by adding your typography however you would like! i added the same gradient effect to 'SEVENTEEN' at the bottom of the text for a little more pop of colour!
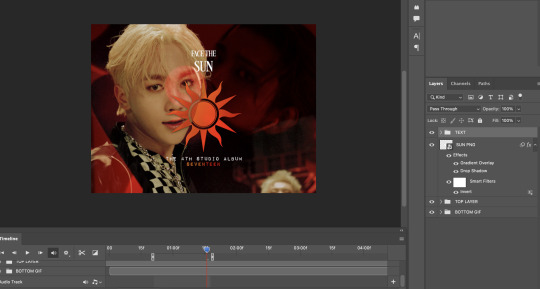
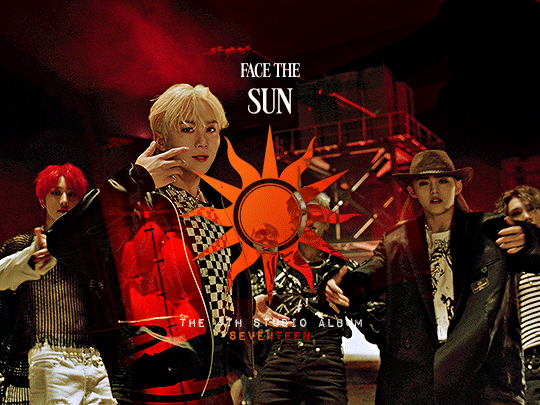
and there you have it!!! that's your finished gif (or at least the same principle behind the hotd/anti hero set!) and here's the finished result <3 i hope this helps!!
i've gone through these similar steps in this tutorial as well! i learnt this from this great tutorial by @anya-chalotra 🧡
#hope that helps :D thanku for being so kind!#ps help#anyway i hope people don't mind the tag 😭 so this doesnt flop#tuserose#isaishi#userfran#userjoanna#heavensyun#cheytermelon#annietrack#hanatonin#userngocchi#uservince#tuseral#userchoi#answered#shuaria
104 notes
·
View notes
Photo


ENHYPEN <DARK BLOOD> Concept Photo (NEW Ver.) - SUNGHOON
#enhypenet#enhypen#park sunghoon#sunghoon#tuserose#hijaehyukkies#userjoanna#userfairy#*myedits#dearestmillie#m:enha
101 notes
·
View notes
Photo


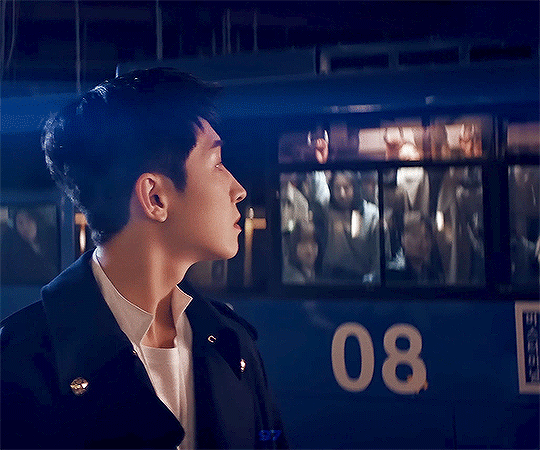


SEVENTEEN
F*ck My Life : Life in a minute
#seventeen#svtsource#svtcreations#kpopco#tuserose#usermeeseung#marieblr#tuseral#forbelleseyes#eritual#dearestmillie#noablr#*posts#*gifs#flashing tw
277 notes
·
View notes
Text
“yeah i raised her … she’s my child” — rose ( @lee-haechan ) out of context ( 8 / ? )
2 notes
·
View notes
Photo


COLORING BEFORE & AFTER TAG
i was tagged by @digitalgirls ♡ thank you so much for the tag 💕 i’ve been a fan of your gifs for a while now :)
i am tagging @allegoriest @caratonce @iloveziont @haechsan @heistmovie @kangseulqi @kyungiil @psyoungs @seulggi @taeyeonissm @twise @venompinks @yenasolo @yjunies and anyone who wants to do this
#tag game#thankfully i have a few psds saved#idk how to describe my colouring but here it is :)#isaishi#tuserose#userjoanna#usermolly
36 notes
·
View notes
Video
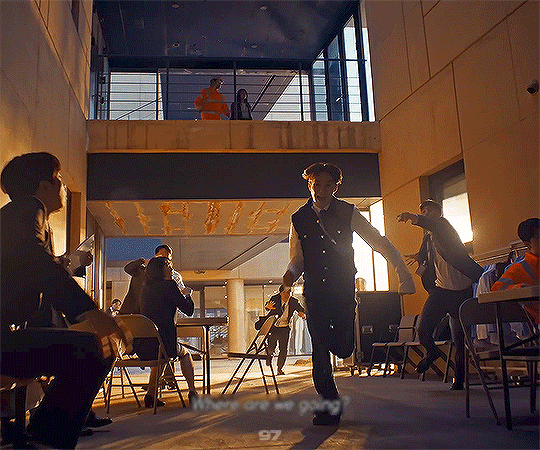
i havent been able to get super x kung fu panda soundtrack out of my head so.
#anyway im sticking to gif making from now on!! im not the strongest soldier here <3#seventeen#isaishi#tuserose#noablr#emification#dokyelvblr#usermeeseung#usersemily#okay bye im embarrassed now#creations
29 notes
·
View notes
Text


ryujin dancing to likey by twice for @useryujin <3
#*#tuserose#ryujin#itzy#shin ryujin#formidzy#userlgbtq#femadolsedit#femaleidolsource#femaleidolsedit#k-archives#kgoddesses#ggnet#useratz#usermeeseung#userzaynab#userfairy#usersunny#isaishi#usershinaryu#rose 🌸#usermau#i love her sm
146 notes
·
View notes
Last Seen Blogs

nickireadstfc
Nicki Reads 'The Foxhole Court'
losterthanlost
lost things

johnpork1
Untitled

warriorcatsamino
Warriors Amino
lumosatnight
lumosatnight