#vornoi
Text


"Gameplay:
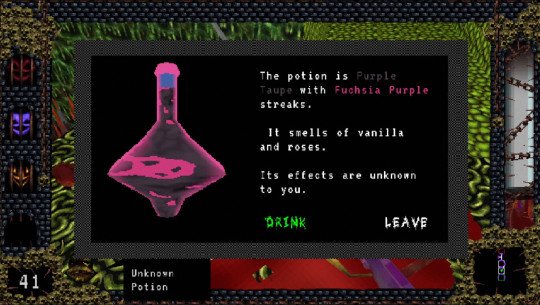
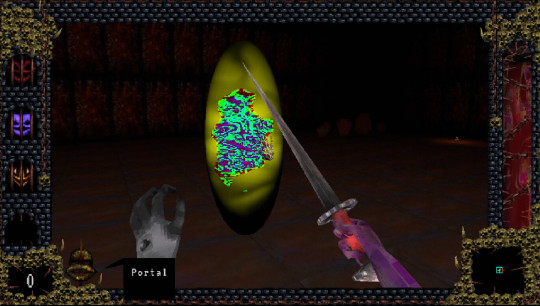
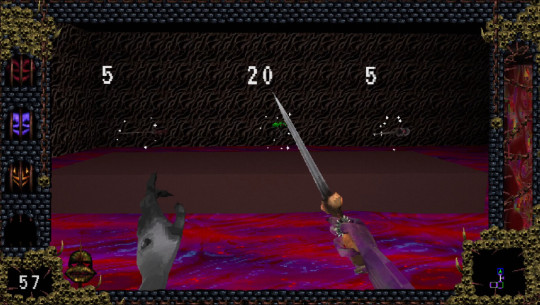
Dungeons of Blood and Dream is a randomly generated dungeon crawler with roguelike elements in which the player will wield an array of bladed weapons and harness wondrous spells to fight through hordes of skeletons, zombies, slimes and other disgusting creatures that dwell in the dungeons. No two playthroughs are the same!
Features:
- Procedurally generated dungeons filled with enemies, treasures, traps and secrets;
- Over 20 cursed rings with unique powers. Some effects change depending on what finger the ring is on;
- 20+ unique weapons, each with different effects;
- Randomly generated potions with effects varying from one playthrough to another; "
Dungeons of Blood and Dream (Steam - coming soon)
#dungeons of blood and dream#steam#coming soon#game#games#video game#video games#roguelike#procedural#dungeon crawler#dungeon crawlers#fantasy#lori vornoy#rpg#low poly
3 notes
·
View notes
Text

this shit is so scary oh my god... oh my god...
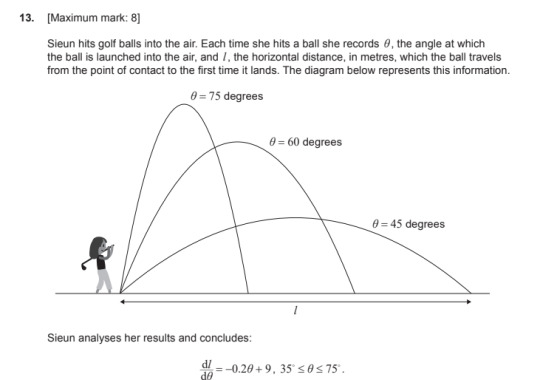
#I DONT KNOW ANYOF THIS#i can. MAYBE do the vornoi diagram one bc we recently reviewed it but waht the fuck what the fuck is the last one#i dont know how im gonna even remotely pass this math exam#its THIS FRIDAY
1 note
·
View note
Text
Going Live 02 - More 3D Tests
After learning the basics of achieving a flatter outlined style in Blender I went on to explore texture and increasing stylisation.
I started off by making a second version of the cat tree model. I wanted to explore a way of introducing more texture by diffusing the colour gradation with noise.
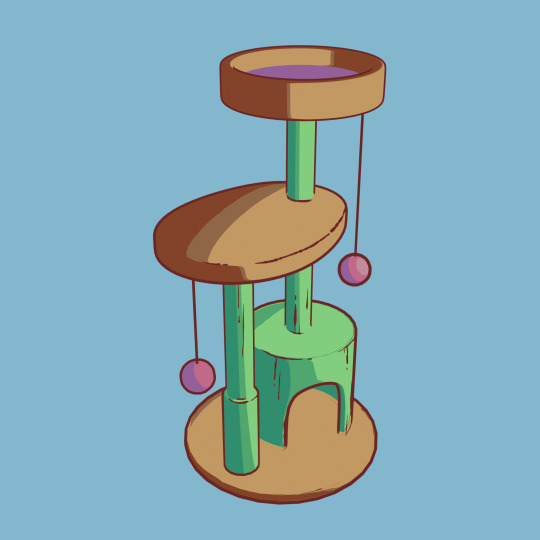
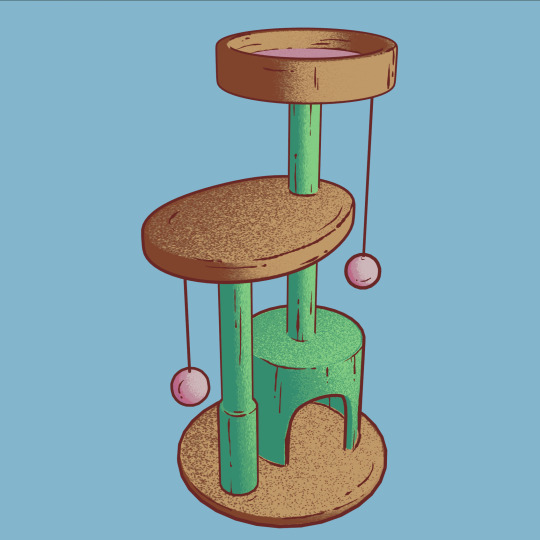
The way I achieved this effect was by mixing the 'gradient texture' node with the 'vornoi texture node and adjusting the scale.

The tutorial that helped me understand how to achieve this was this one by Kevandram:
youtube
After this I created another quick test scene to test out white lines against darker colours.
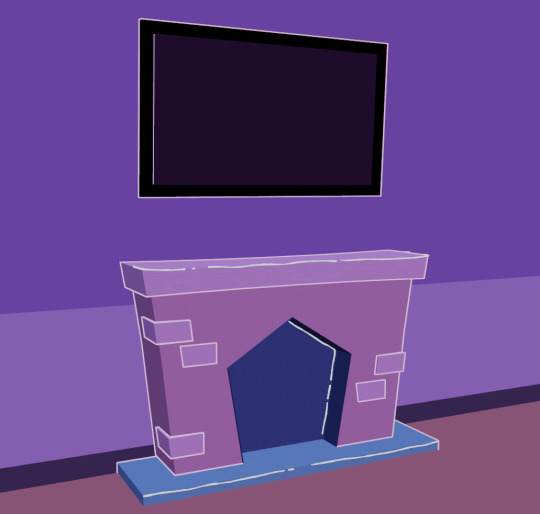
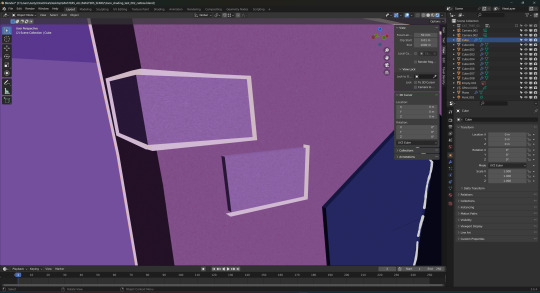
Using the solidify modifier to create outlines that appear from all angles presented one major challenge, which was that the line art effect would not show if separate meshes intersected each other. This was especially noticeable in the bricks that stick out of the fireplace. To fix this I adjusted the brick meshes by modelling them wrapping around the main fireplace, instead of making them solid cubes. Below, the lower brick mesh intersects with the fireplace, while the higher brick wraps around it.
1 note
·
View note
Text
#phone case design#phonecase#iphone#iphone cover#phonecover#findyourthing#redbubble#blender#illustration#colors#cool art#abstract art#abstract#art#artwork#printdesign#concept design#drinkware
0 notes
Photo
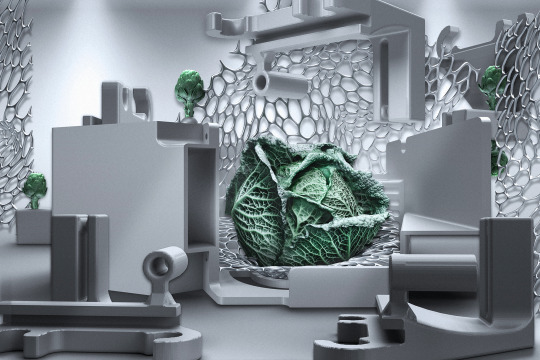
A nice little house for a well behaved cabbage.
1 note
·
View note
Photo

Generally #form through #parametricism. Conceptual form development for a store front. #blender3d #shaders #nodes #vornoi #art #nft (at Dehra Dun, India) https://www.instagram.com/p/CTWbj8bhWxc/?utm_medium=tumblr
0 notes
Text
Okay so we got are displacement sorters however the thing is we need more control of it before the active material comes in so for that I need to make the ocean texture scale able depending on the object and to do soh I would have to ummm this knowledge is after doing some research I can add the value node and then add the math nodes to the scales of each vornoi texture and basically I added one math node changed it to multiple and then connect one slot to the value node I added

started of with the idea of a absorption where you usually see in tropical water where deeper the water the more saturated and darker the color gets
Absorption in my opinion is like when there is a larger concentration of liquid the more saturated and darker the color is it’s very common with most liquids and that’s wht I wanted and I did some research of how to get that look and now imma do what I can with the knowledge I have :3
And in my research on figuring out how absorption works found out that there’s a science behind and for absorption there this thing called beers lawn in which there is a formula that describes absorption which is

The one where the mouse pointer is close to ends with this thing I can’t really type on my phone but let’s break it down slowly in blender where I think I can recreate this formula in blender cycles
So I went into blender and I started of with the regular Susan head and I added a new material got rid of the diffuse shader. So the formula I have to recreate is

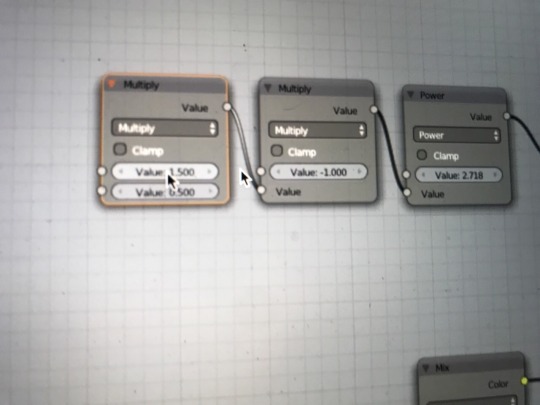
So I started off with the “e” to do so I need to make a math node. So when it comes to the formula the operation is e to the power everything else so I went and added the math nose and changed it’s operation to power so for the upper value in my research I learnt that if u type “e” onto the upp value it changes to the exact number so then we need to multiply so basically multiply the Greek letter by one (this is mee after fully understanding a video on how absorption needs to work in blender) ANYWYS here are my hides for now

I changed the value in the multiple times node to - one and then added it to the bottom value of the power node and then duplicated the multiply node and I wanted to mess around with this one because it’s a variable value therefore for starters I put the upper value to -1.5 and added it to the other multiply node
So then we need this node for how light passes through is and this is basically the curvy “l”

To do that I need to add a light path input and connect the ray light to the multiply node and finale the “N” this is basically to understand the thickness of out geometry so that the set up knows is the water is deep or not that’s the slight basis Of it and todo so I added a geometry input node and to add both the light paths and geometry in out I duplicated the multiply node and it looks like this

and bam you got yourself sphere with depth to show what it does I added a translucent shader and the to increase the. Intensity to an visible amount I added a color-ramp so it’s easier to mess around with

So because of the color ramp white black I can now use this as the factor in which my colors works like dark blue to light :D
I added a mix rbg node and put that inbetween my translucent and color ramp and added the color ramp to the factor of the mix rbg so then like the black can be one color and the white can be another( gawd so much effort for an ocean I haven even made yet) hopefully the rest would have some type liquid in them like a little later or something okay so becuase glass contains refraction in it imma use one of those shaders and see if that could help it look more like deep water however the glass node alone for me isn’t bright enough for some reason it’s not pure white therefore I am gonna try and and increase its value by adding a value node and setting it to about 1.5... which works. And then get the value node to be a part of the mix rgb I added just now and it looks like this rn

0 notes
Video
vimeo
Test: 066 Plumbing from 10 Kilo on Vimeo.
Some RnD using some booleaned Vornoi chunks, flow vectors, for loops and lots of curves.
Rendered in Mantra.
0 notes
Video
vimeo
Test: 066 Plumbing from 10 Kilo on Vimeo.
Some RnD using some booleaned Vornoi chunks, flow vectors, for loops and lots of curves.
Rendered in Mantra.
0 notes
Text
:]] its dumb but i got a 100 on my math test that i was stressing about, and its like the first time ive scored 100 on a test in math since like 2nd grade so like JFDUGFHDFUGFDUHGDFG
#IM SO HAPPY WTFFFF....#i dont have to do corrections too!!#theres LITERALLY nothing to correct!!!!#WAhHSDHIUHG#im just :]]]]]]#not listening to spanish too busy feeling proud of myself for not fucking failing#and it was VOrnoi diagrams or wahtever fucking hate those#i swear i thought i messed it up so bad but :]]]]]]]#i usually score d's or c's and then do corrections and get a passing grade#but hrngnjgfgfuggdfd#just HAHSUIHFGH#im just DHUG stimming hapynhfuig sitkrifjjsfdgfij#fgfgjkfdiu
18 notes
·
View notes
Text
#phone case design#phonecase#iphone#iphone cover#phonecover#findyourthing#redbubble#blender#illustration#colors#cool art#abstract#abstract art#art#artwork#concept design#printdesign#drinkware
0 notes
Text
Now to work on the water ocean stuff I want more my animation
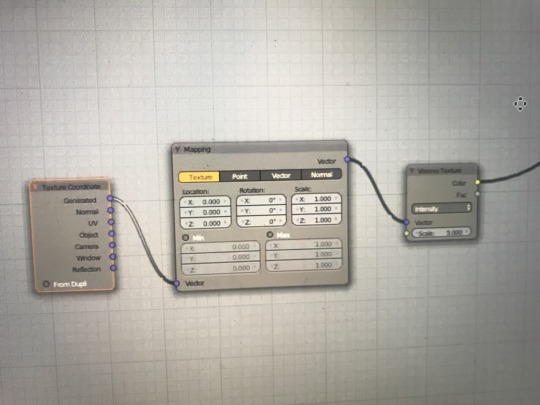
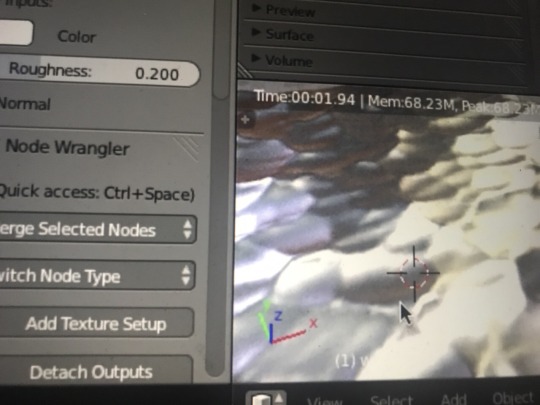
When it come to the ocean shader I first needed displacement to make it look like the water has waves and all that and to do so I would save up on data and add. The displacement right to the material out put and for that I started with a vornoi texture and then attached the Bronx texture to a texture coordinates input node and then using my node wrangler which allows me to see what the texture is as a material unplugged it in to the materials surface output and my side here is to layer a lot of vornoir texture and then added a mapping node in-between the texture coordinates and the voronoi texture
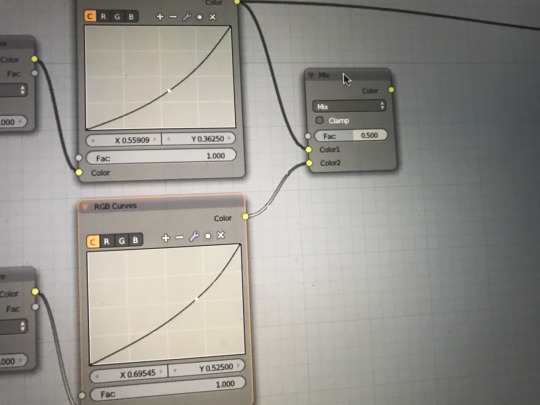
And I wanted to see what I does to the geometry so I added it to the displacement and then added a converter math node to control the strength of it and yeah it’s way to strong so I reduced it a bit however obviously the shape of it is now a wave shape but a gem flat hard surface thingy so I then need the ness around with the texture and to do so I used a rgb curved node so that we can create the curve of an ocean wavy
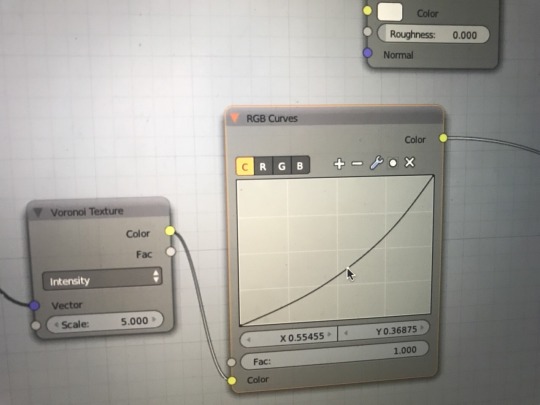
And yeah this is re curve shape and it’s very subtle and it didn’t give a good look so I changed the figure surface bsdf to a glossy to get a better look and then increased the strength of the displacement through my multiple node and yeah it is going somewhere

And see in ways it more horizontally stretched than just been stretched in an even amount through out and to do so I need to goto my mapping node and reduce the scale in the x axis to 0.500 which makes it feel more like wave And now for what other layers. So for them I am gonna start by duplicating the cornice texture nodes including the rgb curve and mapping node while still having the connections

Okay now to make changes to this to make the ocean look more wavy so the changes I made with this one is that I got the rgb curve slightly higher and then scale of the voronoi texture I am gonna double to get fiber ripples like thingys and then attach them to the displacement by adding a mix rbg before the math node
And then attach that to the math node and yeah we get a more wavy result
The waves are looking goood and more wavy and then the next layer which the third one I did the same thing as before duplicated while keeping the links in check
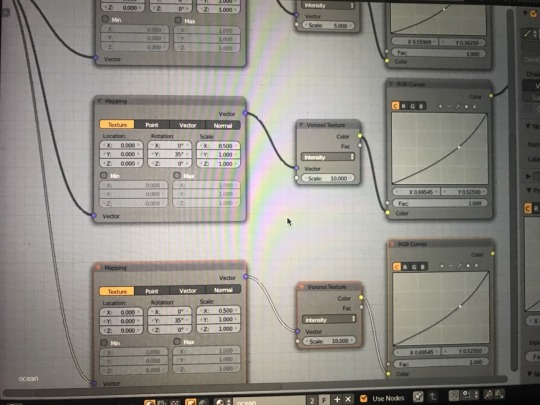
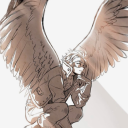
And change the scale on the voronoi texture to 40 to create really fine waves and then change the rotation value just to create a natural randomness and I set the rotation to 200 and the scale in the x axis to 0.300 and also change the above vornoi layers x axis scale to about 0.400 just to create a difference and for the curved I just wanna kinda soften the curve and for that I changed the curve on the rgb curve node to like an s curve. And to mix them together to add it to the displacement I added a mix rbg node and changed it’s blend mode to overlay and then I want it to be very subtle so changed the factor to about 0.200 and connected mix rgb from the other two texture to this

And yeah I mean it is a very intense version but the detail is really good. Like a very windy ocean to be honest. Okay so one more layer and for this layer of texture it’s for the purpose that when u see a large ocean you would be able to notice that the ocean had all these tiny tiny waves and then these random large scale waves which are like the ones that crash into the beaches so to create that I need to make one more layer, and again I duplicated the textures one more time so the rgb curved the voronoi texture and the mapping node while still having the the links.

Then I duplicated it by four while keeping the value link and then changed the value of each bottom slot to the one on the texture so the first one is 2.000 and then the second texture is five the third texture is 10 and then forth texture is forty and then I need to plug each of these to the appropriate scale value so the first one that has 2.000 to the first scale value it the Voronoi texture

And now if I want the change the overall scale of the texture displacement I just need to change the value and bam made this material a very flexible one yay we got a displacement for the waves okay now for the actual material we have
And decrease the wave value to about 2 to make the texture much large and to add this to the displacement I want it to be an add blend because then the added texture will still have the detail from the other texture so like before the math node I added a mix rbg node changes it to action and had the last overlay mix rgb connected to one a lot and then connect the other node to the other slot and reduce the factor down to 0.400 and then let’s render it

0 notes
Last Seen Blogs
drunk-cryptic-witch
What Lies In The Forest Is Doom…and Pizza

dolkal-blog
bandarq
academe-queen
une écrivaine

1-800-fei
spencer
