#diycrochet
Text
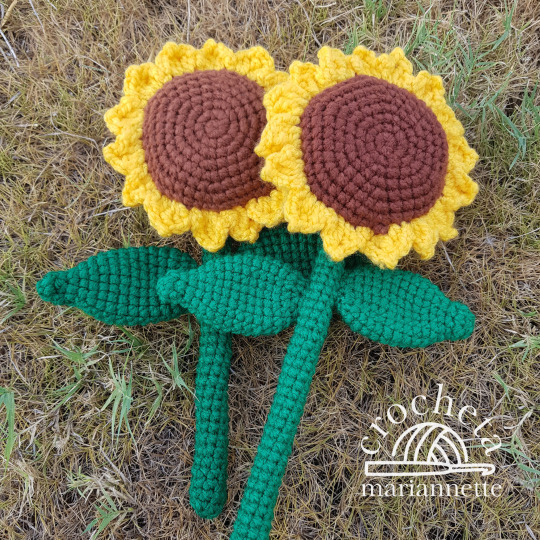
Regala una flor que nunca se marchita
#crochet#tejidos#crochetting#crochetaddict#amigurumis#handmade#handmadewithlove#diy#diycrochet#flowers#girasoles#girasol#knitting
7 notes
·
View notes
Text
#CrochetDuckPatterns#AmigurumiDucks#CrochetCreativity#HandmadeDucks#YarnArt#CraftyDuck#CrochetLove#DuckAmigurumi#DIYCrochet#CrochetDesigns#Ducklings#CrochetAddict#YarnCrafting#CuteCrochet#HomemadeDucks#CrochetInspiration#CraftingWithYarn#CreativeCrochet#DuckPattern#CrochetForFun
0 notes
Text

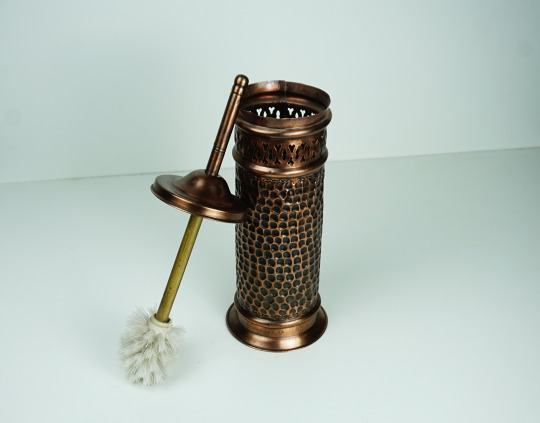
Toilet Brush Brass Patina Engraved . Black Antiaque Brass Toilet Brush
Our luxury aged brass toilet brush will put a touch of elegance in any bathroom. Replace your current one with our Antique brass bathroom brush.
The clean design is perfect for home or commercial use and will fit any style decor. Made from aged brass that provides a durable rust resistant coating.
Our luxury black toilet brush is the perfect accessory to spruce up your home or business bathroom
Your order will be carefully packed to ensure that it gets you in excellent condition.
𝐅𝐫𝐞𝐞 𝐄𝐱𝐩𝐫𝐞𝐬𝐬 𝐒𝐡𝐢𝐩𝐩𝐢𝐧𝐠 (DHL/UPS)
#diycrochet#upcycled#lovediy#scrapwood#handcrafted#diytutorial#diycraft#diyprojects#diyproject#doityourself#etsyhandmade#bathroom#copper#handmade#architecture#interior design#design#art#diy#craft
1 note
·
View note
Text
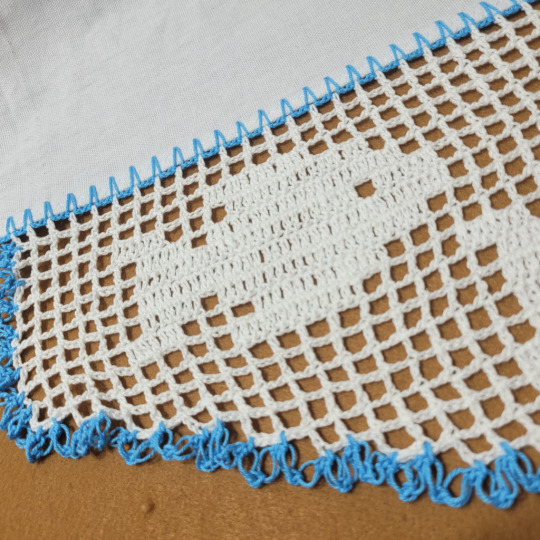
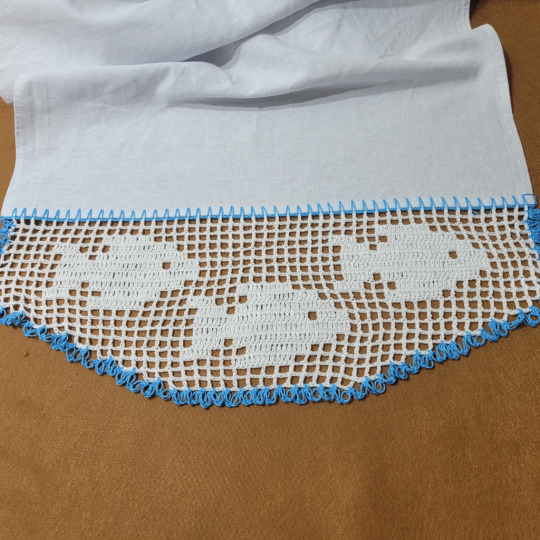
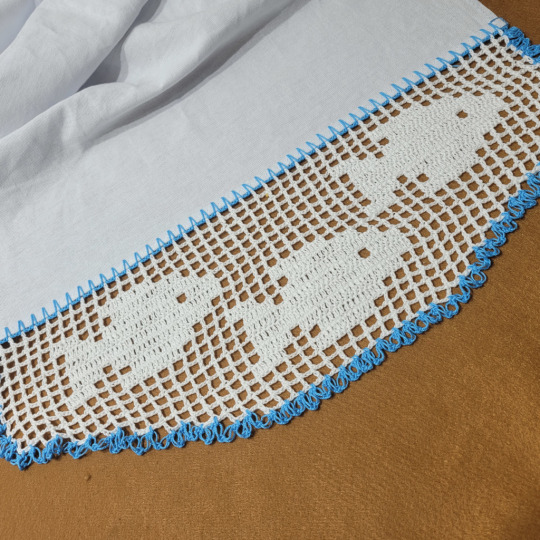
Barrado de Crochê para Pano de Prato com Peixinhos:
Crochê Filé e Barrado de Crochê para Pano de Prato com Peixinhos - 706 - YouTube
#barradinhodecroche#auladecrochê#barradecroche#artesanatoemcroche#crochenistasdobrasil#crochepassoapasso#crocheparainiciantes#biquinidecroche#arteaos4ventos#passoapasso#bicodecroche#crochê#croche#diycrochet
0 notes
Photo
Montagem no capricho!✔️🧐 #kombicamper . . . . . #diycrochet #upcycled #lovediy #scrapwood #handcrafted #diytutorial #diycraft #diyprojects #diyproject #doityourself #vwbus #kombihome #airmighty #vwt1 #classicvw #oldvw #vwkombi #aircooled_society #kombilovers #kombilife #antigosporai (em Campinas, Sao Paulo) https://www.instagram.com/p/Cev35SMuoAT/?igshid=NGJjMDIxMWI=
#kombicamper#diycrochet#upcycled#lovediy#scrapwood#handcrafted#diytutorial#diycraft#diyprojects#diyproject#doityourself#vwbus#kombihome#airmighty#vwt1#classicvw#oldvw#vwkombi#aircooled_society#kombilovers#kombilife#antigosporai
0 notes
Video
youtube
🇺🇲 DIY : Adjustable Knitting & Crochet Loop Ring / Golden Opening Finger...
0 notes
Text
Cute easy crochet flower pattern
#crochet #crochetpattern #crochetflower #cutecrochet #DIYcrochet
Cute easy crochet flower pattern
More free patterns at the FREE PATTERNS COLLECTION
Easy cross stitch designs Tango Stitch
Find Tango Stitch Cross Stitch patterns at Creative Fabrica and Design Bundles.
Free cross stitch patterns

View On WordPress
#DIY projects#flower free pattern#Flowers#free crochet pattern#free japanese pattern#japanese crochet pattern#japanese handcraft#japanese pattern#japanese pattern ebook#knitting ideas
17 notes
·
View notes
Text
These two posts showed up in succession on my dash, and it seemed a little magical

But I’m not a visual art person, so I can’t really put my finger on why
@petersolarz @diycrochets 
4 notes
·
View notes
Note
A lizard for you! https://at.tumblr.com/misterghostfrog/diycrochets-this-bearded-dragon-is-crocheted/uje6yfsr7kzs
holy SHIT i love this. i love this guy. what the fuck. what t he fuck they just made him. wow. wow. life is good.
1 note
·
View note
Photo
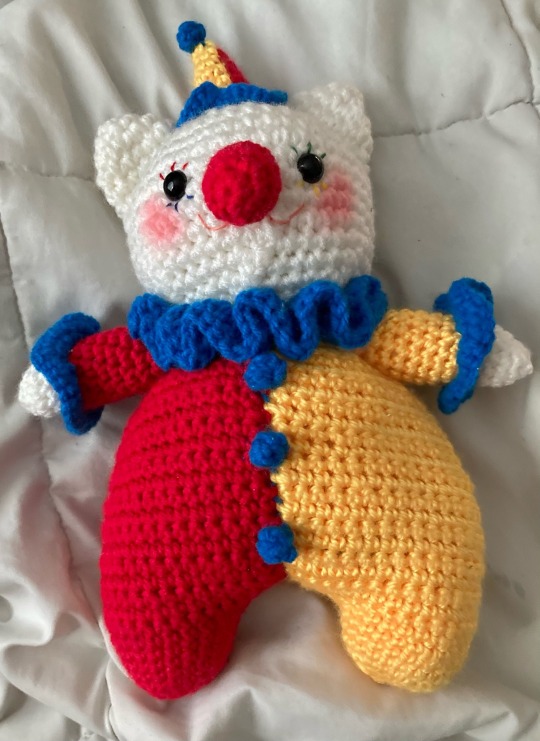

Clown Cat Crochet Pattern Listed Below!
Full disclaimer, this pattern has not been tested by anyone but me yet. I haven’t had the chance to make a second clown cat and take pictures of the process yet. I only have the pattern written for a bi-color hat and body for now but it would be pretty easy to convert to once color. Feel free to message me if you have questions about any part of the process and I can hopefully explain a little better!
*instructions listed are specifically for a cat, but the ears, face, and tail can be altered to be a different animal. crochet the head as instructed below, embroider your desired face, and find a good pattern for ears you want. just make sure to use two strands of yarn and an H hook so the size isn’t off.
Materials:
- 2 balls of yarn in chosen head color (white)
- 1 ball of yarn in color A (½ main colors. I chose red)
- 1 ball of yarn in color B (2/2 main colors. I chose yellow)
- 1 ball of yarn in color C (1/1 accent colors. I chose blue)
- Tiniest amount of yarn for nose (I used red for that classic clown nose look)
- safety eyes (I used 12 mm, you can also embroider them or use buttons)
- stuffing/wadding
- H/size 8/5.00 mm hook
- F/size 5/3.75 mm hook
- bell (optional, for nose)
- pompoms or buttons (optional, for body and hat decoration. I opted to make my own tiny pompoms because I didn’t want to buy any. Instructions are listed in this pattern)
- embroidery thread (optional, I used thread to embroider eyelashes and mouth)
- makeup or fabric paint + clean brush to apply (optional)
Abbreviations (US Crochet Terms):
ch - chain
sl - slip stitch
sc - single crochet
dc - double crochet
inc - increase
dec - decrease
fo - finish off
st - stitch
Special Terms/Techniques:
Intarsia/Mosiac/Jacquard crochet - used for hat. Daisy Farm Crafts’ gingham blanket patterns explain the technique really well. Here’s a link! You have to scroll a bit to find the explanation.
Popcorn/Bobble stitch - used to make pompoms on hat and body
Ladder Stitch - Used to stitch parts together, join halves of body, and minor tailoring of the “hip” area.
Head (head color) x1:
*Use H hook
**Head is worked using two strands of yarn at once
Worked in the round. Start with a magic ring
sc 6 in magic ring (6)
*sc inc in next stitch* repeat 6 times (12)
*sc inc, sc in next stitch* repeat 6 times (18)
*sc inc, sc in next 2 stitches* repeat 6 times (24)
*sc inc, sc in next 3 stitches* repeat 6 times (30)
*sc inc, sc in next 4 stitches* repeat 6 times (36)
sc in each stitch (36)
sc in each stitch (36)
sc in each stitch (36)
sc in each stitch (36)
sc in each stitch (36)
sc in each stitch (36)
sc in each stitch (36). Place your eyes between between rows 9 & 10, about six stitches apart.
*dec, sc in next 4* repeat 6 times (30)
*dec, sc in next 3* repeat 6 times (24)
*dec, sc in next 2* repeat 6 times (18). Embroider the rest of the face and begin stuffing.
*dec, sc in next stitch* repeat 6 times (12). Finish stuffing.
*dec* repeat 6 times (6). FO and stitch shut, leaving a long tail to attach head to body later.
Ears (head color) x2:
*Use H hook
**Ears are worked using two strands of yarn at once
Worked in the round. Start with a magic ring.
sc 4 in ring (4)
*sc, inc* repeat once (6)
*inc* repeat 6 times (12)
sc in each stitch (12)
sc in each stitch (12). FO, leaving a long tail.
Flatten into triangle and stitch to top of head. I positioned the ears between row 3 & 4 of the head and sewed down the side.
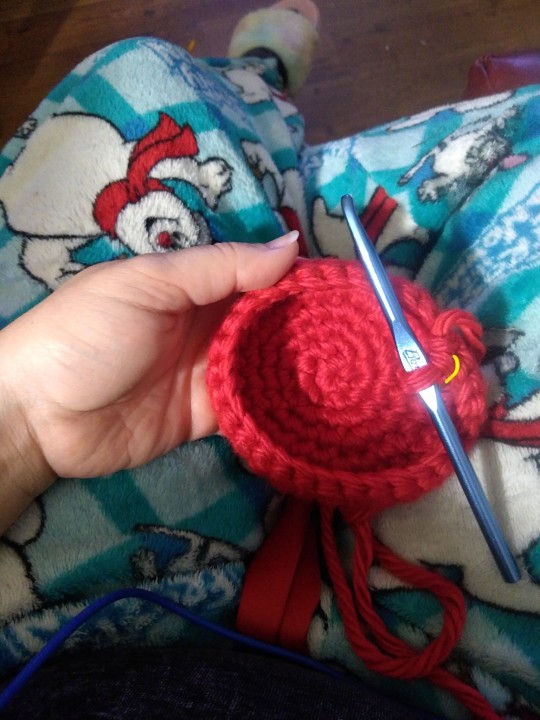
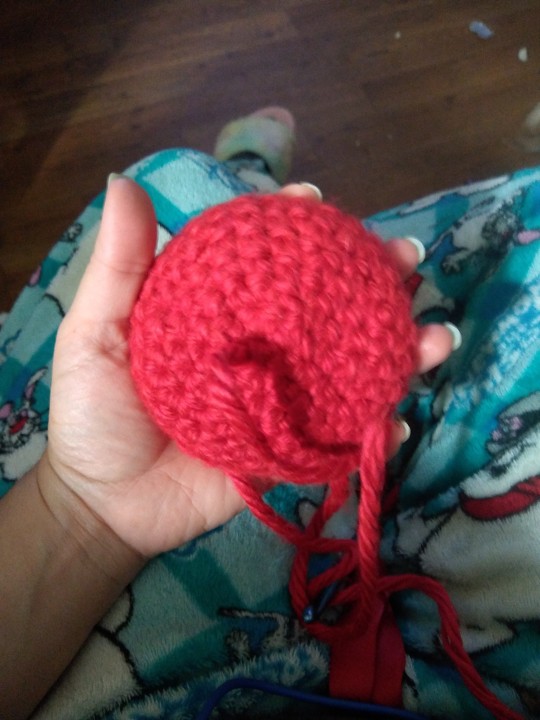
Nose x1:
*use f hook from this point on
**use one strand of thread at a time from this point on
Worked in the round. Start with a magic ring.
sc 6 in magic ring (6)
*sc inc in next stitch* repeat 6 times (12)
sc in each stitch (12)
sc in each stitch (12). If you’re using a bell in the nose, add that now.
*dec* repeat 6 times (6). If you’re using stuffing, add that now.
*dec* repeat 3 times (3). FO and stitch shut, leaving a long tail.
Sew one or two rows below the eyes, directly between them.
Hat (colors A, B, and C):
*Intarsia/Tapestry crochet is used for this piece. A link explaining how to use this method is provided under “special techniques.” Brush up and practice if you need to!
Using color A, start with a magic ring.
sc 2 in color A. Switch to color B. sc 2 in color B. (4)
sc inc, sc in color A. Switch to color B. sc inc, sc in color B. (6)
*sc inc* repeat 3 times in color A. Switch to color B. *sc inc* repeat 3 times in color B. (12)
sc in first 6 stitches with color A. Switch to color B. sc in last 6 stitches with color B. (12)
sc in first 6 stitches with color A. Switch to color B. sc in last 6 stitches with color B. (12)
sc in first 6 stitches with color A. Switch to color B. sc in last 6 stitches with color B. (12)
sc in first 6 stitches with color A. Switch to color B. sc in last 6 stitches with color B. (12)
sc in first 6 stitches with color A. Switch to color B. sc in last 6 stitches with color B. (12). Switch to color C.
*sc inc* repeat 12 times. (24)
*sc inc* repeat 24 times (48). FO leaving a long tail.
Weave the end of color C towards the center of the hat, between the space where the hat ends and the ruffle begins. Sew the hat to the head, adding stuffing to the hat to make it stand. Pompom will be added later.
Because the hat is worked in the round, the colors may create a kind of swirl instead of a true half and half look. I chose to block my hat out by dampening it with warm water and twisting it until I was happy with the way the colors sat.
Arms (head color, A or B) x2:
*work first arm in color A, second in color B. Ruffles are worked separately in color C and sewn on
In Head Color, start with magic ring
sc 6 in magic ring (6)
*sc inc* repeat 6 times (12)
*sc inc, sc* 6 times (18)
sc in each stitch (18)
sc in each stitch (18). Switch to color A or B.
sc in each stitch (18)
sc in each stitch (18)
sc in each stitch (18)
sc in each stitch (18)
sc in each stitch (18)
sc in each stitch (18)
sc in each stitch (18)
sc in each stitch (18)
sc in each stitch (18)
sc in each stitch (18)
sc in each stitch (18)
sc in each stitch (18)
sc in each stitch (18). Stuff and FO leaving a long tail. Stitch the top shut and leave a long tail to attach to body later.
Arm Ruffle (color C) x2:
ch 18, join to make a circle
1. sc inc in each chain (36)
2. sc inc in each stitch (72). Sl in next stitch and FO. Sew onto arm where body color meets color A/B.
Body (color A or B) x2:
*body is worked in halves and stitched together
**body is worked in rounds for feet, then rows for chest/belly
***the “hips” of the body are angular due to decrease; I ladder stitched over the angles after stuffing and constructing to make the body look smoother on the sides
In color A or B, begin with a magic ring
sc 6 in magic ring (6)
*sc inc* repeat 6 times (12)
*sc inc, sc* repeat 6 times (18)
*sc inc, sc in next 2 stitches* (24)
sc in each stitch (24)
sc in each stitch (24)
sc in each stitch (24). Chain 5. Body is worked in rows from this row on.
sc in 2nd ch from hook and next 3 ch. sc in next 24 stitches. sc 4 in other side of ch spaces (32). Ch 1, turn.
sc in each stitch (32). Ch 1, turn.
sc in each stitch (32). Ch 1, turn.
sc in each stitch (32). Ch 1, turn.
sc in each stitch (32). Ch 1, turn.
sc 14, sc dec twice, sc 14 (30). Ch 1, turn.
sc 13, sc dec twice, sc 13 (28). Ch 1, turn.
sc 12, sc dec twice, sc 12 (26) Ch 1, turn.
sc 11, sc dec twice, sc 11 (24) Ch 1, turn.
sc 10, sc dec twice, sc 10 (22) Ch 1, turn.
sc 9, sc dec twice, sc 9 (20) Ch 1, turn.
sc 8, sc dec twice, sc 8 (18) Ch 1, turn.
sc 8, sc dec, sc 8 (17) Ch 1, turn.
sc 7, sc dec, sc 8 (16) Ch 1, turn.
sc 7, sc dec, sc 7 (15) Ch 1, turn.
sc 6, sc dec, sc 7 (14) Ch 1, turn.
sc 6, sc dec, sc 6 (13) Ch 1, turn.
sc 5, sc dec, sc 6 (12) Ch 1, turn.
sc in each stitch (12) Ch 1, turn.
sc in each stitch (12). FO and weave in end.
Stitch the halves of the body together with a ladder stitch. Stuff the feet to desired firmness. You should have about 24 total stitches at the top of the body where the “neck” is – it’s okay if you’re missing a stitch or two though. The neck ruffle will be worked directly to the top of the body and will be made in the round.
Join color C to neck.
sc inc in each stitch (~48)
sc inc in each stitch (~96)
dc inc in each stitch (~192). Sl in next stitch. FO and weave in end.
Tail (head color) x1:
*tail can be made longer or shorter. add or subtract repetitions of row 3 to desired length
**i chose not to stuff the tail but you can if you’d prefer to
start with a magic ring
sc 6 in magic ring (6)
*sc inc* repeat 6 times (12)
sc in each stitch (12)
sc in each stitch (12)
sc in each stitch (12)
sc in each stitch (12). FO and leave a long tail.
Pompoms (color C) x4:
*regular fuzzy pompoms or buttons would work just fine for this project but in case you don’t have access to either of those and don’t want to buy them, here’s a fast lil tutorial. it’s basically just one single popcorn stitch tacked into a sphere shape.
ch 3
in 3rd ch from hook, dc 5 (5). remove hook from loop and reinsert in the top of first dc. insert hook in loop and pull through. ch 1, FO and leave a long tail.
Sew your popcorn stitch into a sphere. I sewed the top of the stitch to the bottom chain, then the side of the first dc to the side of the last dc. Play around with tailoring your popcorn until it looks like a pompom.
Construction:
At this point, you should have a head (stuffed with eyes and mouth), nose, hat, two ears, body, two arms with ruffles on the wrist, a tail, and some pompoms.
If you haven’t already, stitch the ears, hat, and nose to the head.
Attach the head to the body using the long tail left after FO. Finish stuffing as you sew. I used a ladder stitch and aligned row 15 of the head to the neck opening since both have ~24 stitches. It’s okay if part of the neck ruffle is tacked to the head.
At this point, I tailored the “hips” of the body to be smoother. Originally it was pretty angular. I used a ladder stitch to hide some of the “extra” fabric on the hips. You can leave it if you choose, of tailor it to whatever hip shape you like.
Attach the arms to the body. I, of course, used a ladder stitch. The arms are sewn to the side of the body, right underneath the neck ruffle.
The tail is sewn to the back of the body. I chose to place mine towards the bottom, where color A and color B meet.
Sew pompoms onto your clown cat. I put one on top of the hat, then three on the center of the body like buttons.
Finally, add makeup. You can do any design you like! I’ve used fabric paint before but I don’t like the texture it has, so now I use cheap makeup and brushes. (Because I sell/gift plushies, the pallet and brushes I use have never touched human skin and are consistently cleaned but if you’re making a plushie for yourself, you can use whatever you have. Finish off with a little scotch guard if you want to protect the makeup or leave as is. Of course, if the plushie is being gifted to a pet or a child, don’t put makeup on it – embroider or use non-toxic paint instead).
That’s it! Now you have your very own clown cat (or other animal, if you decided to use a different head pattern).
Again, this pattern has only really been tested by yours truly and I haven’t had a chance to take pictures to go with these instructions, so if you run into any problems, go ahead and reach out to me! Happy crafting!
This pattern is available for free here because I don’t believe in gatekeeping crafts but if you’d like to show me some love, support my yarn habit through kofi!
992 notes
·
View notes
Text

Santa Tejido a Crochet fácil de Tejer, YO te enseño cómo y GRATIS!!
#santa#papanoel#santa claus#navidad#holiday#december#amigurumi#crocheters of tumblr#crocheta#crochet#crochetersofinstagram#crochetting#handmadewithlove#handmade#easy#diy#craft#diycrochet
2 notes
·
View notes
Text
#CrochetDragonGloves#DIYCrochet#DragonCrafts#HandmadeGloves#CrochetPatterns#CreativeCrafting#CrochetProject#DragonFantasy#DIYFashion#CraftyHands#CrochetInspiration#HandmadeAccessories#YarnCraft#DIYGifts#CrochetDesign#FantasyCrochet#EasyCrafts#CrochetMagic#GlovesPattern#DIYDragon#CrochetForFun#CraftingIdeas#CrochetAddict#DragonLover#HomemadeGloves#CreativeCrochet#CrochetTutorials#FantasyFashion#CraftyCreations#HandmadeGifts
0 notes
Text


Commissions are open! DM for more!
#crochet#crochetaddict#crochetlife#crochetersofinstagram#crochetlove#diy#diycrafts#diycrochet#lgbtq#crafts#commissions#crochetcommissions#commission
4 notes
·
View notes
Text
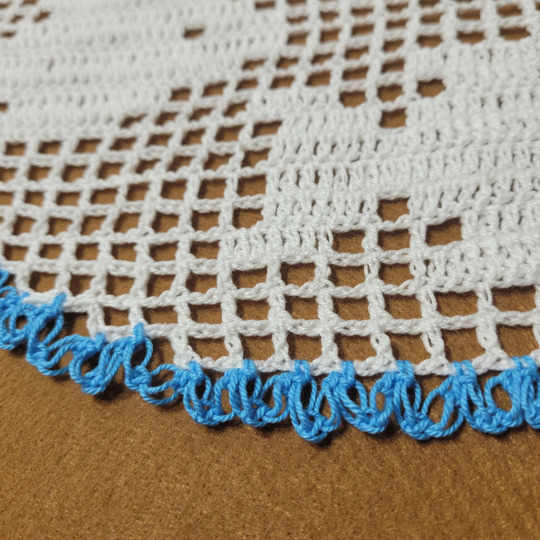
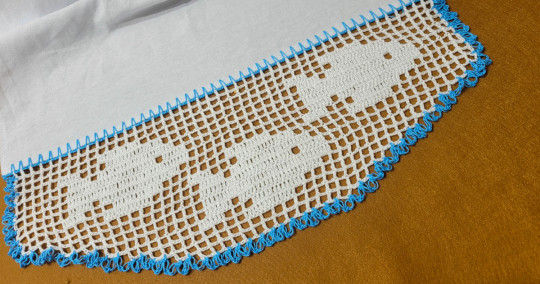
Aula de barrado de crochê para pano de prato fácil de fazer e muito bonito, pois é um bico de pano de prato diferente. Hoje é dia de aumentar a nossa coleção de barrados de crochê para pano de prato simples com bichinhos em crochê filé! Consegui este formato e adaptei para podermos fazer mais de um motivo no pano ou toalha de banho. Esses não estão apaixonados. Estão apenas passeando juntos….. A confecção é super fácil e você não terá dificuldade em executar! E vai ficar muito feliz com o resultado final.
#barradinhodecroche#auladecrochê#barradecroche#artesanatoemcroche#crochenistasdobrasil#crochepassoapasso#crocheparainiciantes#biquinidecroche#arteaos4ventos#passoapasso#bicodecroche#crochê#croche#diycrochet
0 notes
Text

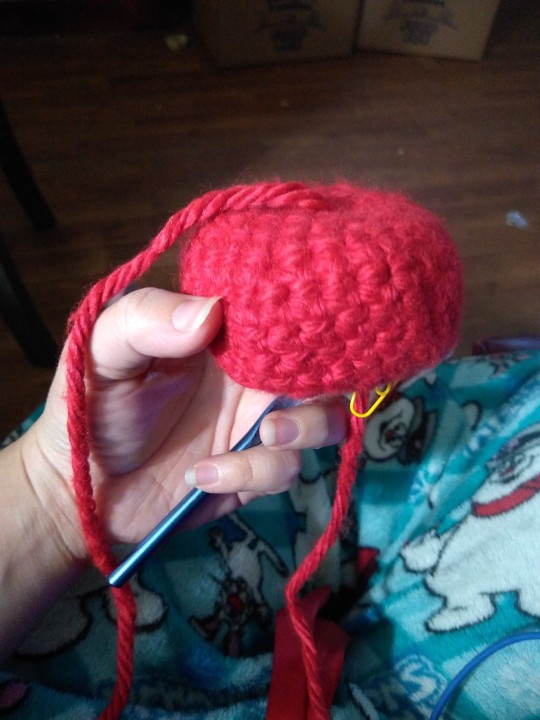
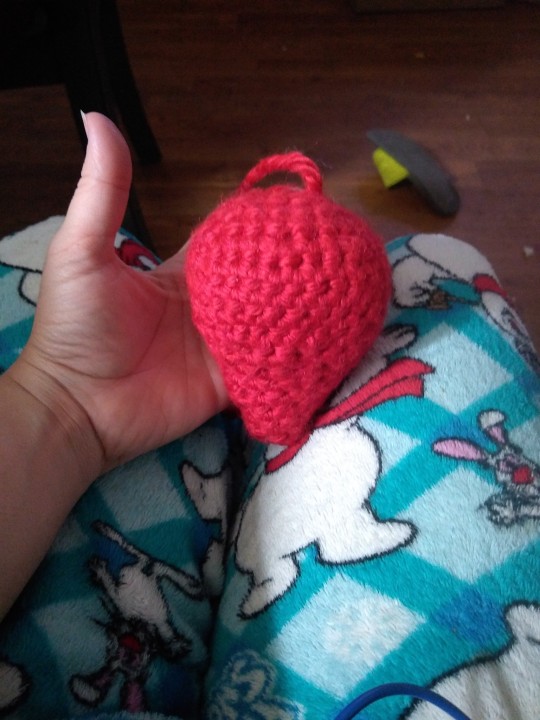


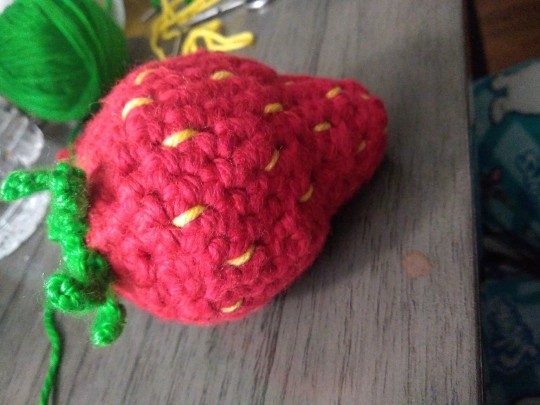
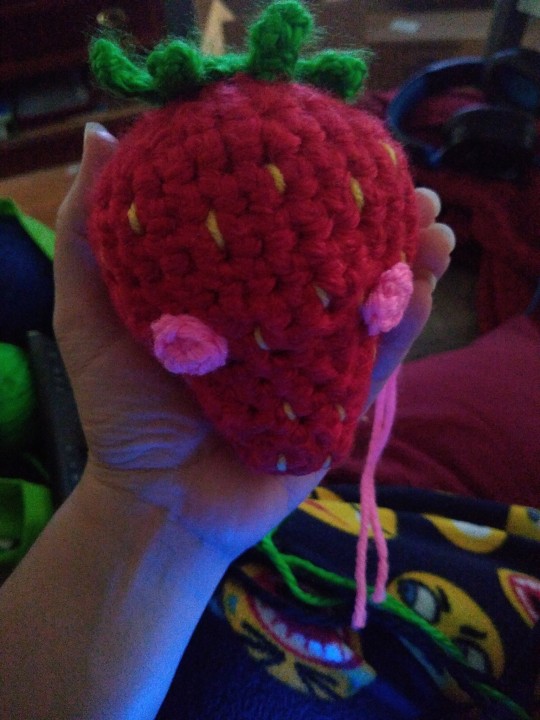
#crochet#handmade#women#Amigurumi#Amigurumis#strawberry#diy#diycrafts#diycrochet#diyamigurumi#diy amigurumi#diy crafts#diy crochet#plushies
9 notes
·
View notes
Text

Hello!
This triangle bandana is a thing I want it to try. It was cool to made, but it need some improvements. 🧶
On the other side, I’m finishing the new beanie. Hope you like it!
#crochet#crocheting#crochetbeanie#crafts#diy#diycrochet#needlework#work#workfromhome#bussinessmotivation#bussinessowner#business#tb
4 notes
·
View notes
Last Seen Blogs
cookie-crumblr
welcome to my little garden

ohlovejoy
ohlovejoy

catboyfisky
Fisky's CatboyFarm

ypdesign
DESIGN75

nakanosorami
まほいく