#diy crochet
Text
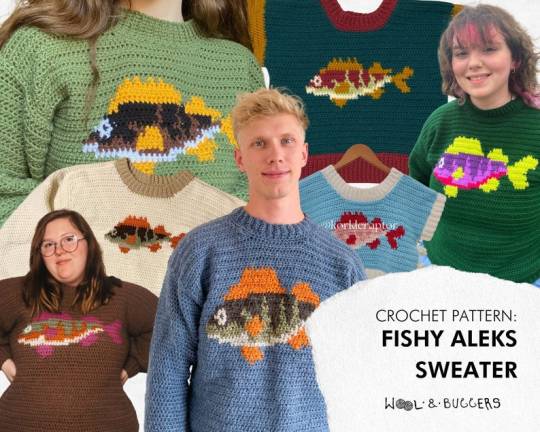
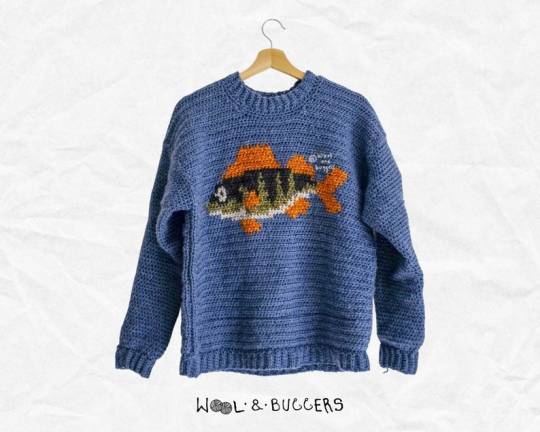
Fishy Aleks Crochet Sweater – ** PATTERN ONLY ** by WoolandBuggers
#crochet sweater#sweater pattern#sweater pdf#sweater diy#diy crochet#crochet pattern#craft#craft pattern#diy#fish sweater#sweater pattern pdf#pattern download#pdf download#WoolandBuggers
1K notes
·
View notes
Text
Sharing my 2023 wellness project, please, and wishing a Happy New Year, All! 🧶🎉

Wonky as it be, this stashghan helped me manage some fairly blah times. ❤
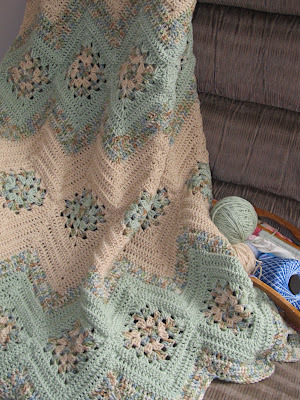
The project was inspired by a notoriously uncredited pinterest pic (below left*) which - somehow - led me to recall a long ago dream project (right) and was then encouraged by my precious friend @shesanearthgirl 🦋
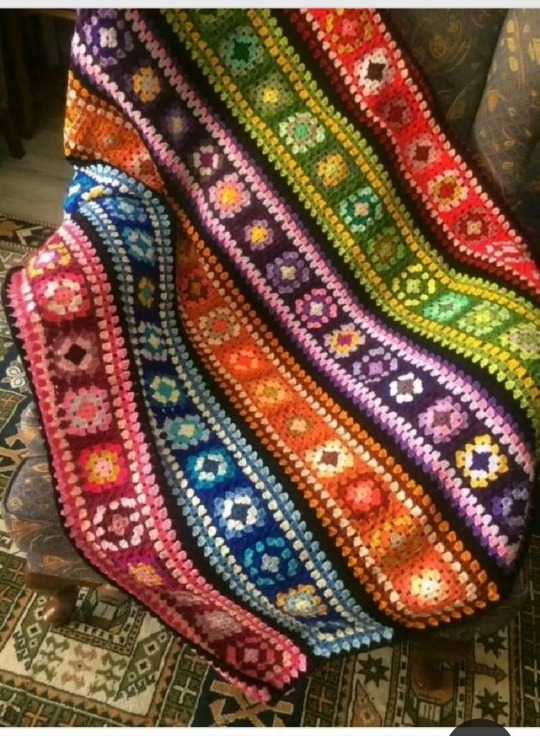
I found some crochet charts and tutorials to lead me with making a granny square ripple. Next, I sorted yarn stash color groups to have five shades in each: four colors for a mix of 3-round squares; and a fifth color to use for a fourth jayg (join-as-you-go) round connecting the squares point-to-point.


Each 'diamond' band of squares was edged on either side with a row of white granny stitch ripple followed by a couple random colors from the squares, and then finished with a black row.**
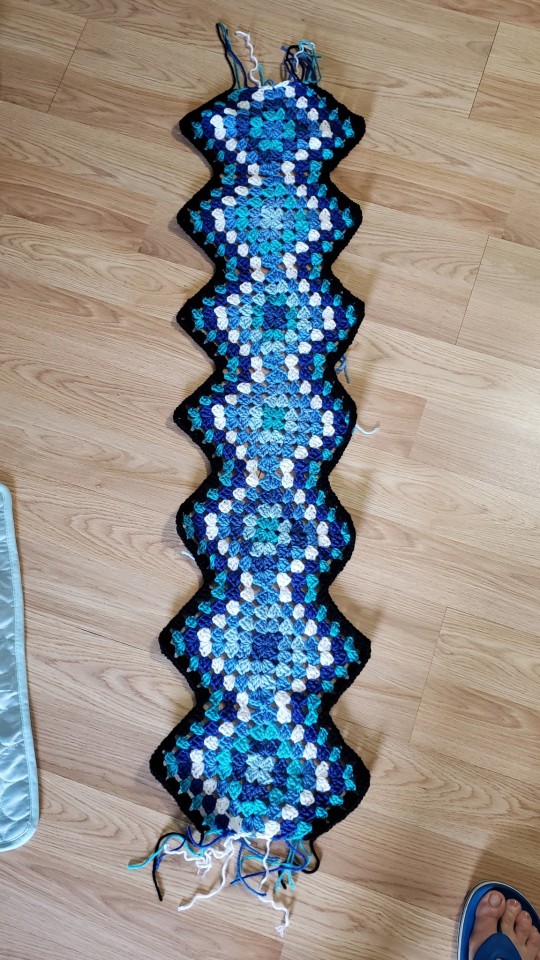
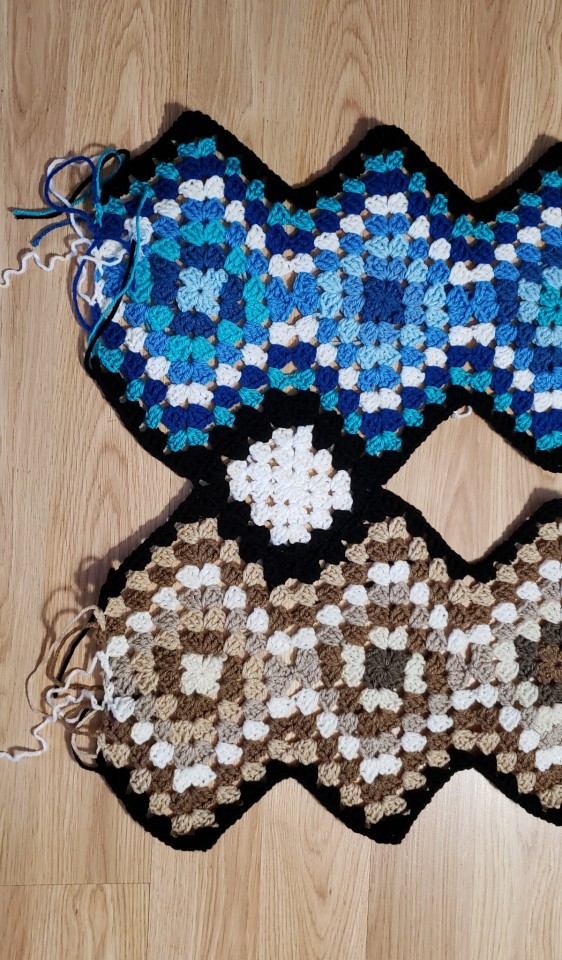
I made a couple color bands and then tested my plan to connect them with a black-edged white diamond. THIS (above right) was my pure happy moment for sure! 😁🧶
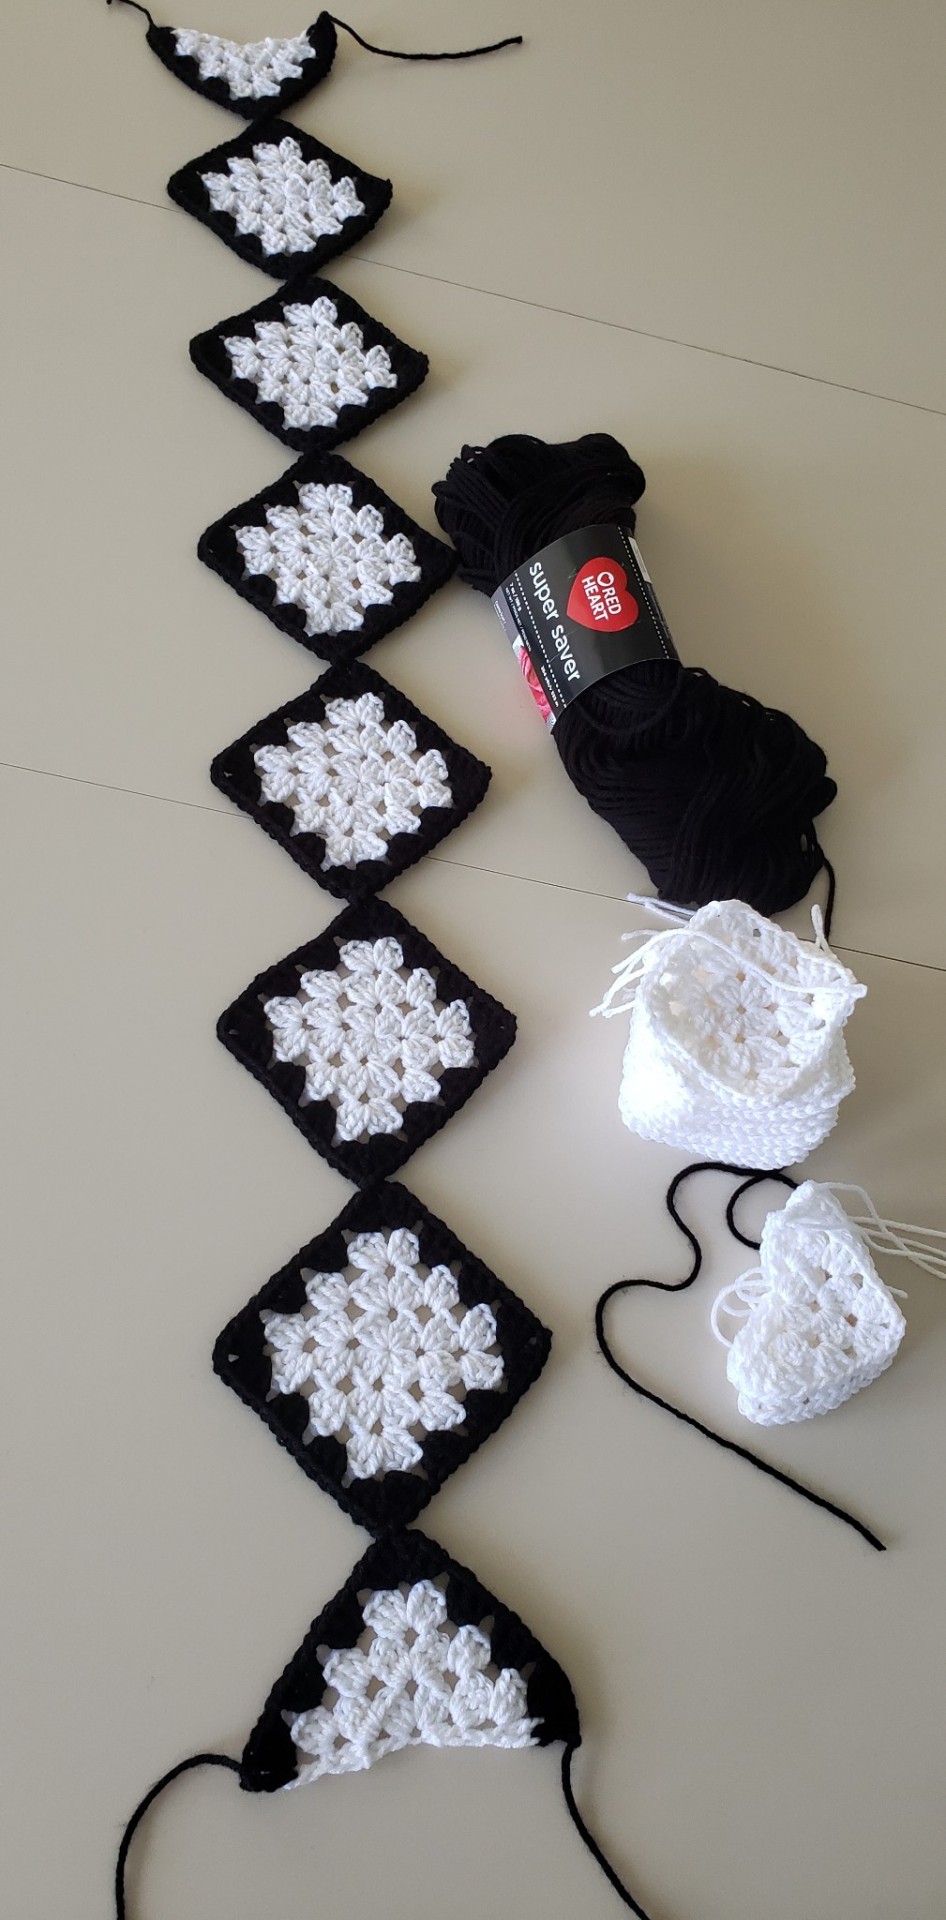
Next step was making 3-round granny squares in white and connecting them with a fourth row in black jayg.
The real beauty of this overall project turned out being the ability to lay the color bands and adjust with a visual before committing to the stitched sequence.

Ideally, I would have made six color bands. As it happened with five bands, the throw ended a bit short so I needed to add white diamond bands to either end. It's not awful, but I think it would have been better to cap the ends in the larger color blocks.
The End... and happy forever! 🎉🧶🍻
* if you are able to track the rightful maker of this crochet, please share so I can credit as due
** I realized in hindsight that it was better to make the color bands WITHOUT the final row of black, and rather make that final black row of the color bands in jayg connecting to the black row of the white diamond bands.
#crochet#my crochet#stashghan 2023#HookedAtWeiss#diy crochet#regrets for not having credit to the original inspiration pic#the maker deserves sooo much credit for the work#and my li'l bestie always going above and beyond to help me from my maker voids
227 notes
·
View notes
Text
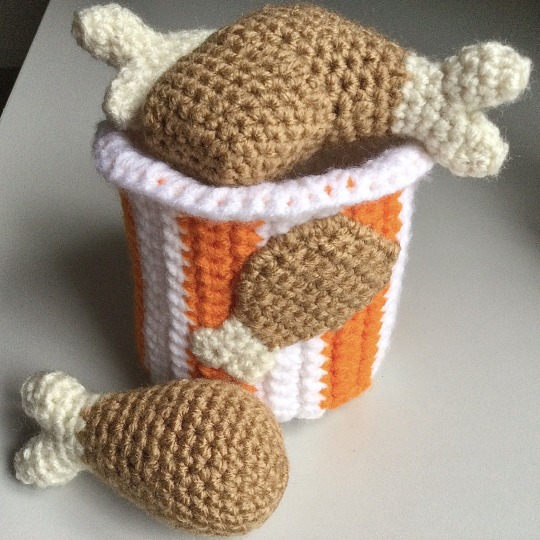
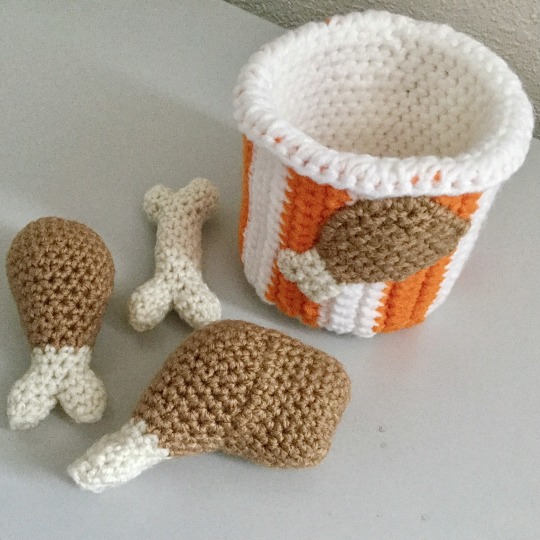
Chicken bucket pattern set includes directions on how to crochet the chicken leg, thigh, a bone, a drumstick appliqué and the bucket itself.
Etsy | Ravelry
#crochet#chicken#foodie#play food#amigurumi#pattern#crochet chicken#chicken pattern#crochet food#crocheting#doll#plushie#toy food#crochet pattern#diy crochet#amigurumi pattern#food pattern#amigurumi toys#crochet designer#jbcrochetwizard
11 notes
·
View notes
Text
26 Best Free Crochet Patterns Amigurumi
25 notes
·
View notes
Text
Fighting the urge to crochet these little pocket things and add them to every single top I own

#cottagecore#aesthetic#vintage#diy#mori girl#mori lifestyle#diy crochet#crochet#lace crochet#lace#dress with pockets#diy culture#sewing ideas
28 notes
·
View notes
Text
youtube
Fall Crochet Projects for beginners!
#crochet#crochet project#easy crochet#diy#diy crochet#bolero#beanie#bag#granny square tutorial#follow#Youtube
11 notes
·
View notes
Text
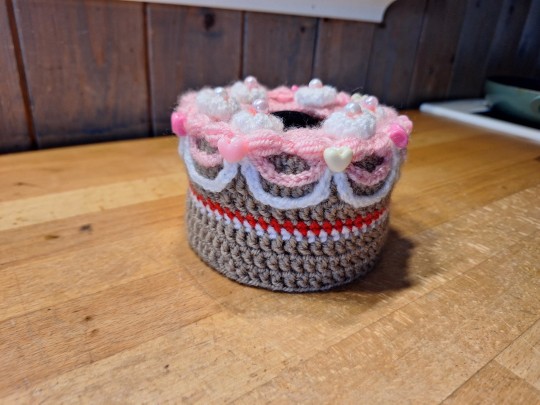
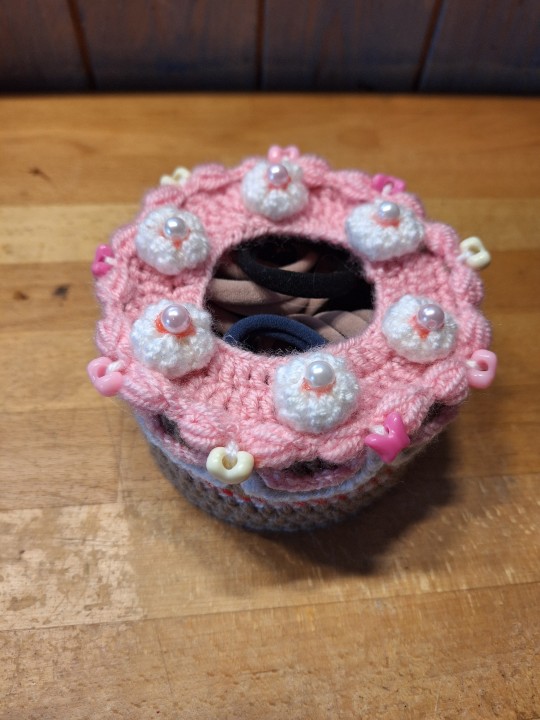
I had this box of hairties on my desk and the box was plain and ugly + the ties kept falling out so i made a cute little crochet cake to glue over the box :3


#crochet#diy craft#diy#diy crochet#cute decor#fiber art#i think more people need cute decor#I'm also working on a sweatervest so I'll post that too when I'm done with it ( ^ω^)
2 notes
·
View notes
Text
If you're part of a community that appreciates those tranquil moments scrolling through your phone, immersing yourself in creative and inspirational images, I've got some exciting news. I'm thrilled to share something equally inspiring within our cozy ...
#crochet#diy crochet#crochet beginners#beginners crochet#home craft#homemade#mindful crafting#simple crochet#crochet enthusiast#crochet project#cozy creation#art of crochet#Therapeutic Crafting
2 notes
·
View notes
Photo

long time, no see! i’ve been knitting a lot more lately, so i spent some time over the holidays making some little plush friends to get back into the swing of crocheting. here’s cinnabun, bunana pudding, and strawbunny shortcake!
they’re freehanded so no official patterns for them, but i used the mushroom pals pattern as a base :3 happy crafting!
#crochet#crochet pattern#diy crochet#handmade#diy craft#crafts#crafting#crochet plushie#plushie#crochet toy#bunny#rabbit#mushroom#fungi#cottagecore#cottageblr
14 notes
·
View notes
Text
Hello friends!!
Here Rainbow Stars (Patricia), a Crafter passionate about Crochet, although I also love cross stitching and knitting... well and many other arts and crafts activities.
I hope you like the content I share in this small space that I just created and that we inspire each other.
I'm looking forward to seeing what you share!
XOXO
#diy#artists on tumblr#crochet#crocheters of tumblr#crocheter#crafts#crafter#handmade#etsy#etsyseller#etsyshop#small artist#small business#crochet love#crochetlove#inspiration#diy crochet#handmade doll#aesthetic#Spotify
4 notes
·
View notes
Text

Flowers, Birds, and sometimes, Cats: Small Crocheted Accessories by CozyCraftCafe
130 notes
·
View notes
Text
Please allow me to introduce my Tiffany turtle. 🥰 🐢

Sooo, I recently had this reblog to grace my dash with an awesome crochet 'stained glass square' by Cookie Snob Crochet.

The square was still floating through my daydreams when the dock turtles (yellow belly slider terrapins) arrived for their afternoon snack.


I really couldn't NOT do the crochet, right? I mean, just crochet the stained glass circle part and then cap it for a shallow bowl shape.


My Tiffany's feets were fashioned after the 'baby sea turtle' by Whistle and Ivy. I think they worked perfectly for this project.

Tiff's belly was made flat and stitched with a wide hem on her front side to better display her signature 'yellow belly'. 🐢
Thank you! 😁
#crochet#my crochet#Tiffany turtle#HookedAtWeiss#diy crochet#stained glass#crochet turtle#crochet lake#my stuff#amigurumi#plushy
3K notes
·
View notes
Text

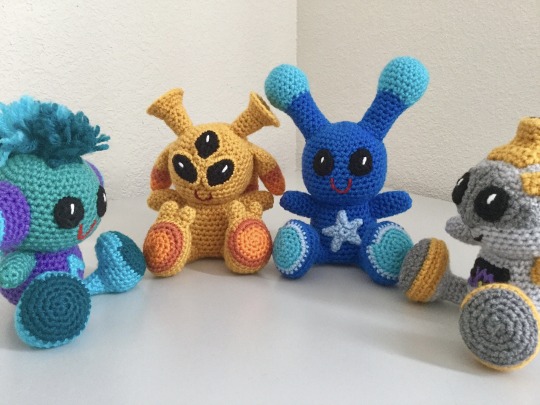
This amigurumi pattern bundle includes on how to crochet four 6-7” dolls of a Mohawk, Alien, Space Bunny and Robot.
Etsy | Ravelry
#amigurumi pattern bundle#robot#alien#crochet pattern#amigurumi#scifiart#crochet#diy projects#yarn crafts#crochet stuffie#art dolls#crochet ideas#doll community#doll maker#fiber artist#jbcrochetwizard#amigurumi designer#pdf patterns#diy crochet
8 notes
·
View notes
Text
29 Unique Crochet Techniques to Try
18 notes
·
View notes
Text
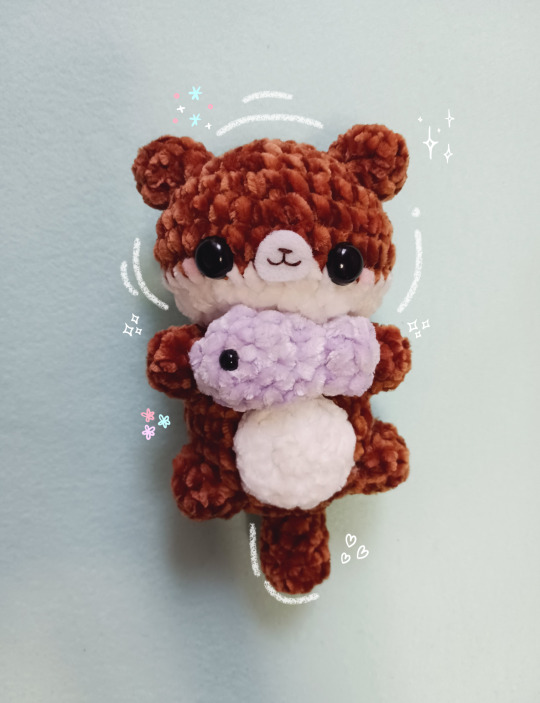
• otter amigurumi! 🦦 🌊~
• pattern by loretta's loops :)
#crochet#amigurumi#cute animals#otter#otterlove#fish#fypppppppppppppppppppppppppppppppppppppppppppppppppppppppppppppppppppppp#fyp2023#fyp#fypシ゚viral#crochet yarn#yarnblr#yarn crafts#custom plush#plush maker#cute plush#diy#crafts#hand crafted#diy crochet#diycrafts
6 notes
·
View notes
Text
How To Make A DIY Face Cream With Skin-Protecting Essential Oils
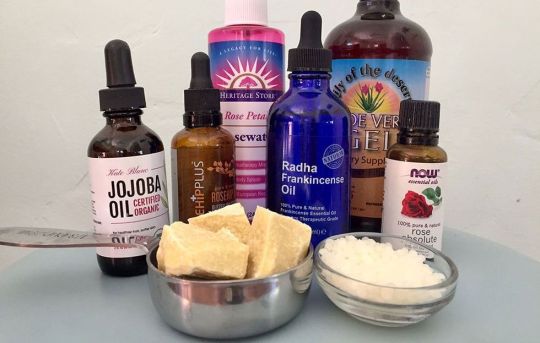
First, the ingredients
Natural doesn’t mean wimpy. You don’t need chemicals to hydrate, even out skin tone, and smooth fine lines; plant-made ingredients can be super potent. “The beauty of using natural ingredients is many of them are easily absorbed into the skin and sometimes way more concentrated,” says Holistic esthetician Daron Hope, founder of EarthTonics Skincare.
Of course, in the beginning, stocking up on all of these skin-nourishing supplies to make your own skincare products can be a little pricey—but if you're committed to going natural, investing in these ingredients will absolutely save you money in the long run, since they're extremely versatile and can be used in everything from DIY body butters to lip balm to beeswax candles to soothing muscle salves.
Here’s a rundown of what ingredients are in the DIY face cream recipe below and why they're so great for your skin…
Shea butter: The super-rich moisturizer softens skin and locks in moisture.
Aloe gel: Healing, calming and antibacterial, aloe helps repair skin and replenish lost moisture.
Rose water: A skin soother that reduces redness and inflammation.
Jojoba oil: A potent skin repairer and anti-inflammatory with plumping powers.
Rosehip seed oil: Superstar anti-ager loaded with antioxidants that quenches dry skin.
Beeswax: A hydrator and emulsifier that helps bind water and oil together.
Frankincense essential oil: A natural healer that can erase wrinkles and hyperpigmentation while increasing elasticity.
Rose essential oil: A proven emollient and anti-inflammatory with hydrating, moisturizing and skin-softening powers.
DIY Skin Smoothing Face Cream
Makes 8 ounces
1/3 cup shea butter
1/8 cup beeswax
¼ cup jojoba or rosehip oil
1/3 cup rose water
½ cup aloe gel
15 drops Frankincense essential oil
15 drops rose essential oil
-------GET A FREE 500 BATH AND BEAUTY RECIPES EBOOK HERE-----
Directions:
1. In a double boiler, melt shea butter and beeswax together. After oils are melted allow them to cool slightly.
2. While shea butter mixture is melting, combine jojoba or rosehip, rose water, and aloe gel in a large glass measuring cup. Warm up the liquid in a double boiler (this will help it combine with the oil mixture).
3. Using an immersion blender or hand mixer, blend the heated aloe mixture until mixed completely (it will turn milky) and continue to blend while you stream in the melted shea butter mixture.
4. Blend for a few minutes until cream starts to emulsify and becomes thick and fluffy.
5. Add the essential oils and mix until combined.
6. Using a spatula, transfer cream into a large freezer bag or piping tube. Cut the tip and pipe into sterilized glass jars (four 2-ounce glass jars). Cap jars and store cream in fridge for up to one year.
7. Slather over face and luxuriate in the heavenly scent and natural ingredients.
...................................KEEP READING--------------------
#diy ideas#diy craft#diy crochet#diy#diyetteyim#body cream#cream recipe#beauty products#packaging#nutrition#makeup#beauty parlour#beauty girls#beauty youtuber#beautiful model#classy#hairstyle
2 notes
·
View notes
Last Seen Blogs
thehedgehogboy
Im Literally Just Using This To Post My Uni Comic

bachkhoaseoweb
Sans titre

d3o-arts
Lol lol not my main acc anymore!

paskariu
water bottle deposit

rodgerslibraryexplorers-blog
Explorers at Rodgers Memorial Library