#screenshoting the paint tool bar
Text
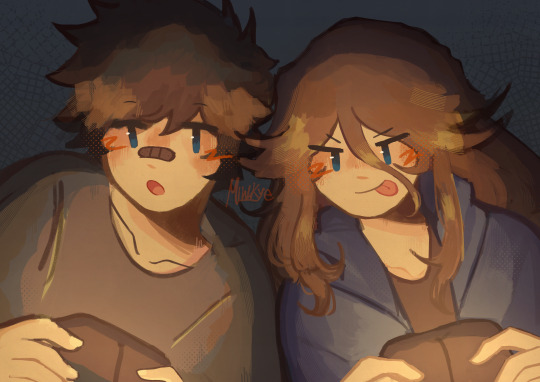
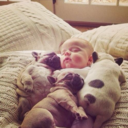
Playing games at 1am with your girlfriend (Olya hasn’t come back yet)
What are they playing???????? Doesn't matter, pretty sure they suck anyways

#my art#pafl#parties are for losers#ferry#anya beletskaya#anya pafl#dmitry pafl#dima pafl#do their ship have a name?????#hmmmmmm#dimanya#anyadima#both sound wierd#anyway#here i do the thing all mspaint artists do#screenshoting the paint tool bar#its a need#also i want a relationship just like theirs#goals#save me straight couple.......#save me......
520 notes
·
View notes
Note
ohh my goodness can you pls pls pls do a brush tour?? i love ur art so so much its so cruncy >:]
Yes I can, I appreciate your interest!! I use paint tool sai 2 which is kind of archaic, but I've been drawing on a wacom pen and touch small + using paint tool sai since 2012 and I'm too stubborn to move onto something better. I actually only use three brushes so I've made a little drawing where I only use one brush per character to show the differences:
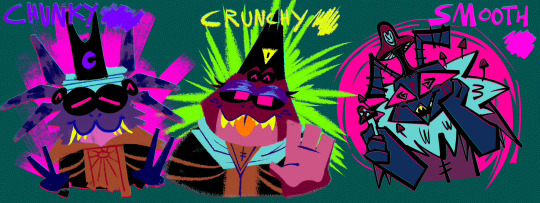
Gonna put the screenshots of the brush settings below the cut cause it got longer than I expected:
I drew my three big faves cause frankly I am sick of looking at kallamar and narinder's smug faces lmaoooo ANYWAY. GOING FROM LEFT TO RIGHT, WE HAVE THE CHUNKY BRUSH. I use that brush for messily coloring things in, doing big blocky background shapes, or just adding texture to a drawing. It's my favorite brush to paint with but I have not....finished a painting for this blog yet...

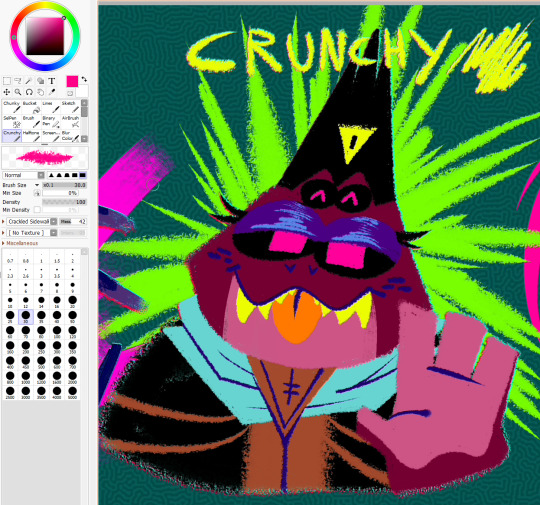
Then for the crunchy brush, it's a tool I use half for lineart and half for coloring. I use it for stuff like changes in fur color/markings, drawing all the lines in the backgrounds I do, and finer details the chunky brush can't handle. It's also the lineart tool I use for my drawings where the lines are all on the inside of the chararacters but not the outside!
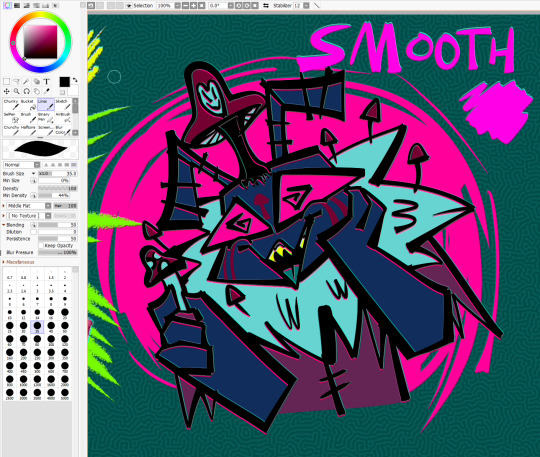
As for the smooth brush, this one only ever gets used for lines but it was created when I was so bored of my lineart tool I stopped drawing for a while. I wanted a calligraphy pen and had to work around SAI's limitations, so while it doesn't have that thin-thick angular effect that calligraphy pens have....I manually apply the pressure and it looks passable enough. I hope.
The brush settings are visible in the pics but uNFORTUNATELY I DO *NOT* remember where I got my stupid brush pack from. I literally downloaded the files before I was even a teenager but I *do* remember they're from deviantart. If anyone is for some reason kicking and screaming to acquire this ancient, crusty brush pack I'm sure I could throw it in a google drive
I have other useless information about my process if any of this is remotely helpful: for the anaglyph effect on my lines, I literally take a full 120 seconds to copy+paste two copies of my lineart, color it red and cyan, and then slightly move them up+down beneath the black lineart to get that 3dish effect. My flat backgrounds are just another sai preset texture, usually the checkerboard one cause it's swag. The rest of my brushes are just for utility or to fill in the gaps, that scroll bar leads to a bunch of empty space. They're not worth showing off just because they don't ever get used, or it's just like. The bucket tool. The select tool. A binary pen I never use. And lastly, for my usual lines, I actually go back and mess them up myself to get them to look more chaotic...my lines are usually smooth + even but it's so boring to look at and time consuming that I'm trying to unlearn that.
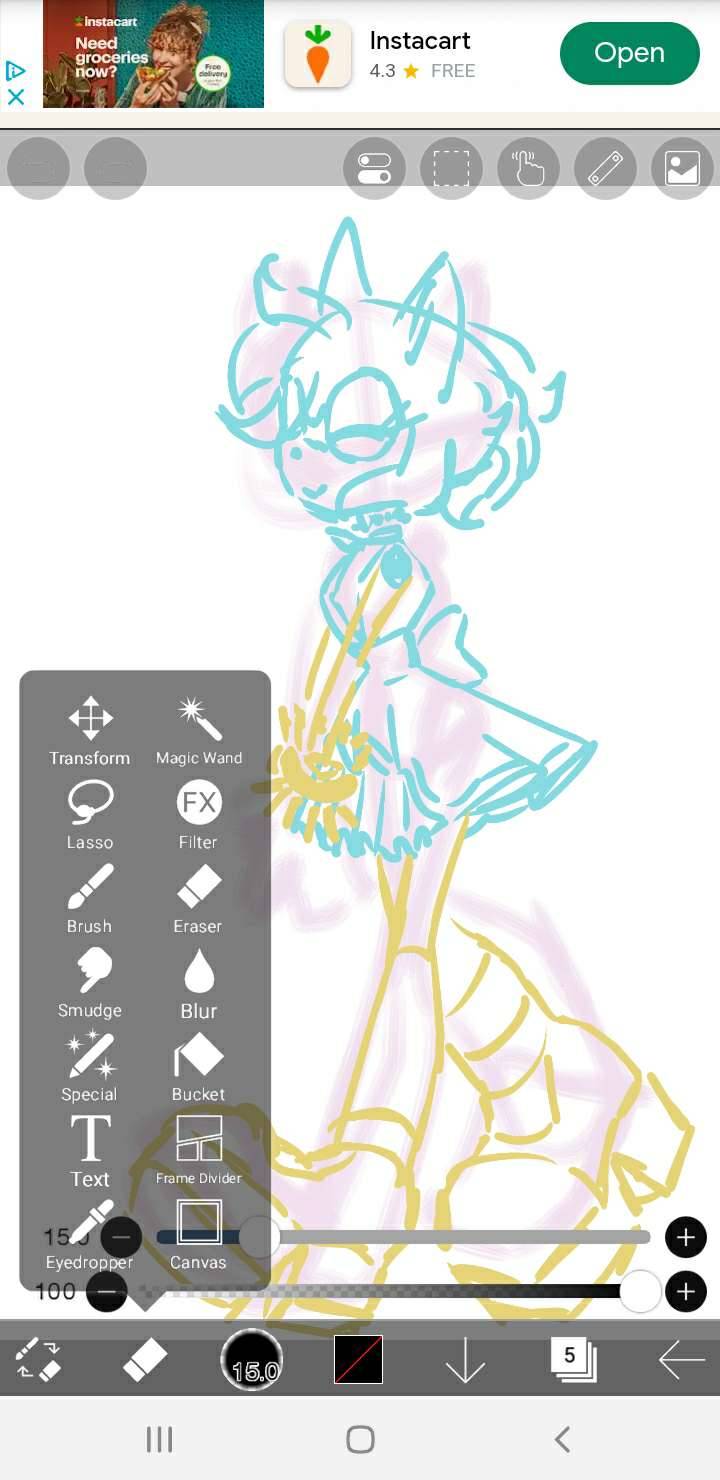
here's a wip of what my lines USUALLY look like with the smooth brush. You can see for the background I mostly used the chunky brush for shapes and then the crunchy brush for the finer lines! But yeah it takes forever to do smooth lines because I have nerve damage in my arm (it's why my stabilizer is maxed out...) and I refuse to use the line tool. In a professional setting I definitely make sure my lines are polished but this is just my goofy fanart blog and I want everything to look like it's been laced with crack.
I HOPE ANY OF THIS HELPS?? OR JUST SATES YOUR CURIOSITY, I try to not gatekeep the way I do my art so I have literally no secrets tbh
74 notes
·
View notes
Note
Any chuuya icons in a soft pink and can you recommend tips on how to start making rentrys

sure thing!! i’ll put your request up top, but the tips can be found under the cut!!

♡ — posted !

so there’s a few components to making rentries!! here’s a few of the bigger ones. if you need any specific details on anything let me know!!
finding inspo : pinterest is one of the best places for this!! just search “rentry inspo” and you’ll get hundreds of results!! i also post some rentry/sntry inspo on @holybunnie (as well as some of my own psds) if you wanna check it out!!
image masks : for image masks for graphics, i recommend searching “rentry image masks” on pinterest, or checking out my png board. this carrd has some realli neat masks as well!!
pngs : as for little cute pngs to add to your graphics, i recommend picsart stickers!! pull up a transparent background in the app (it should be titled “blank”) and search for whatever you want in the sticker tool search bar! for the best results, i recommend searching “color png”!!
creating your graphic : photopea (free website version of photoshop) and ibis paint x (app) are your best friends!! i recommend ibis paint x for beginners, while more advanced editors may appreciate photopea for its ability to, well, behave much like photoshop would in the photo editing department! for me personally, i used to use ibis paint x (see @digichu) while now i primarili use photopea!! to make a very simple graphic, import your mask and whatever image you want for your graphic. then (assuming the background doesn’t need to be removed or you alreadi did so) use a clipping mask!! your image while now adhere to the shape of your image mask! isn’t that neat?
gif-ing your graphic : if you’d like to give your graphic more pizazz ezgif (website) is another one of your friends!! there are two types of gif graphics you can make in ezgif. you can select the “crossfade frames” option in the animated gif maker to have multiple images fade into one another, or you can hit the “don’t stack frames” option to have a png appear to move! to have the second effect in your graphic, you’d need to save two of the same graphic, with the only difference being one of the accent pngs is rotated a bit.
finding pixels/dividers/etc : there’s a ton of resources out there for finding these. some of my personal favorites would have to be my resources blog (@digitalita), my resources discord server (which has a ton of masterlists and resources rentries within), my resources rentry, and pixelprism!!
putting it all together : the age old saying realli is true, practice does make perfect!! my first rentry (which i don’t think i still have screenshots of or anything) was realli, realli bad. the graphic wasn’t even a graphic, it was literalli just a cutecore edit of strawberri cookie i found on pinterest. there was no image masking, no gif-ing, and certainli no psd-ing. if you’re feeling silli, look at my templates from @digichu compared to the ones i make now!! the difference is wild right? i feel like those were only made like a year ago at most. don’t beat yourself up about not having the perfect rentry. if you need more specifics about anything i said here, please let me know.

64 notes
·
View notes
Text
what armins phone looks like

• phone in military time
• argues that it is better for some odd reason
• like okay we get it you want to be different so bad😒
• phone theme is blue
• like a beach/ocean theme
• his phone icons being jellyfish or waves
• and each icon isn’t just blue themed- they’re all blue tinted too
• 100% blue
• big widgets he has spotify, weather, and clock
• that’s it
• he never deletes apps
• he still has among us
• it’s just too much worrkk :(
• only social media he has is instagram and youtube
• argues that instagram reels are just as good and doesn’t need tiktok
• his lock screen is a watercolor painting of the beach or flowers
• blue of course
• on his lock screen he has his shared calendar notifications that he shares with eren and mikasa, spotify, and his battery percentage
• every one in a while he switches out the battery with life 360
• his life 360 that he shares with eren and mikasa
• he organized his home screen once and hasn’t updated it since
• he downloads an app and doesn’t take it off the home screen
• so he has one page thats half filled with random apps
• he has his text on his phone small
• only has a few settings on his control center
• light and dark mode, battery saver, wallet, clock, calculator, screen record, camera, and accessibility
• yk the basics
• on the bottom of his screen in the little tool bar he has messages, phone, safari
• slides down to search for an app
• thinks its easier for some reason
• light mode user
• could be 2 in the morning and he’d be texting the group chat phone all the way lit, and his face so white you could see every feature he has
• password is 6 numbers
• uses spotify
• he always has his bluetooth off because he’s scared it will randomly connect to anything, anywhere
• do not disturb automatically turns on at 10pm
• he’s got to get a good night sleep some how
• put screen time on his apps HIMSELF
• goes on and on about how social media is an addiction
• like yea okay but at least you aren’t doing dr*gs
• he made a voicemail in 7th grade and still hasn’t changed it
• he’s forgotten about it
• h-hi this is armin arlert. if you’re hearing this im probably too busy studying or gaming but i’ll get back with you as soon as possible!
• in his little 7th grade boy voice
• his instagram account is private but he doesn’t post anything or have any highlights so what’s the point?
• his ringtone is the auto one
• but it doesn’t matter because he never has his ringer on
• or his vibrate
• he loses his phone and no one can even call it because it won’t vibrate or ring
• notifications on for his games, messages, duolingo, and his email
• his camera roll is all screenshots from his games, pictures of him with his friends, and scenery
• so many contacts
• has people from group projects in freshman year still in his contacts
• watches streamers
• jerma, charli, sinjin drowning
• has 5 tabs max on safari
• the only thing on his phone he ever clears out
• and his phone tabs
• never leaves any open besides music
• rarely ever on his phone
• screen time is a good 3 hours a day average
• he likes his computer better
• he has a 2 year streak on duolingo
• its either french, german, spanish, or hebrew
• i can see him learning a european language
• has a list in his notes of recipes, movies, books
• does he ever cook, watch, or read any of them?
• no
• but he will some day
• and that’s all that matters
#aot x you#armin x reader#aot fluff#aot headcanons#aot#aot fandom#armin arlert#armin headcanons#armin attack on titan#armin aot#armin x you#armin fluff
74 notes
·
View notes
Text
So I’ve had an anon in my drafts for like a year now asking how to get better at being fast at art since I can be a bit speedy (I used to be faster but I’ve slowed down in some areas to take my time BDBDS)
Anyways, I have been thinking abt it constantly since then and decided to just make a video about it, but Vegas cONSTANTLY crashes on me and when I was doing it, I couldn’t upload it anyways due to my terrible internet and the length
SO I’ve decided to just say a summary of it, cuz like, ultimately it’s a lot of things but the primary thing is:
Keyboard shortcuts (and tools)
Fr, you can get super fast at digital art just by navigating your program efficiently. You don’t even need to be fast at the art thing itself (that part is just practice unfortunately). If you learn and apply shortcuts in your program (sorry mobile users I can’t help u there rn) then you can easily become a LOT faster without even needing to get better at art itself.
For example:
We already know ctrl-Z, ctrl-Y (or ctrl-shift-z for some programs), ctl-X, ctrl-v, ctrl-c
But some other shortcuts I use (this is in Paint Tool SAI, so you can look up your program’s as it might overlap!) are:
Holding space: bro this shit works for like every single program i swear. hold space and click and drag to move the canvas around, a lot faster than going to the scroll bars or using the preview (unless you want a large movement)
Ctrl A: this will select everything on your canvas, it won’t select all layers though but in conjunction with ctrl-x, ctrl-c, or your fill shortcut (ctrl-f for me) it means you’re lightning fast to do what you’re doing without having to use magic wand tool or selection tool. ctrl-a + ctrl-c + ctrl-v is super fast to just, select it all, copy it, and paste it.
ctrl-alt: idk abt other programs, but holding ctrl-alt on SAI brings up the brush size wherever your mouse is. you can adjust the size on the spot itself without going to brush tab

ctrl f: i don’t even use the bucket tool i just use this. it’ll fill anything in your selection (or the entire screen if u don’t have anything selected)
alt: holding this down while using a selection tool will make it deselect. no need to use a deselection tool or anything if u just hold this down (really good in conjunction w magic wand tool). I use this to go even faster by being sloppy with my selection tool, going to my lineart, holding alt and deselecting the areas that go out of the lines. a lot faster for me than trying to get the perfect selection right away.
ctrl d: deselects
c: this auto selects the invisible/eraser setting for any tool you’re using, so I just use this when using a pen or something to erase instead of the actual eraser tool
v: this swaps between the primary colour selected and the secondary one
ctrl-e: merges selected layer w layer below it
ctrl-shift-e: merges all layers (can get funky w folders, but if you select the very top layer it should work) this is esp useful if you’re sharing art by pasting it into stuff like discord, ctrl-shift-e, ctrl-a, ctrl-c, all copied, no need to screenshot it at all.
right click: eyedropper tool, you can hold alt as well but i use right click
there’s even more than these (pretty sure there’s one u can hold to rotate the canvas for example but i never use it). honestly, half the battle w digital art is getting used to your program. if u have access to keyboard shortcuts, using them will allow u to just go ham once u have them memorised (note that these took years for me to figure them all out, i def didn’t memorise them all in one week or anything. over steady application to my habits i got them down)
here’s a fast tutorial on filling in lineart stupid quickly!: https://aibouart.tumblr.com/post/182793937136/using-the-magic-wand-tool-to-try-and-fill-every
filling in ur colour now becomes as easy as click, click, click, invert, ctrl-f. u may need to clean some corners but otherwise it’s basically instantly filled. if ur program has magic wand tool it’ll prolly do this
https://gyazo.com/a5efd8695e7e0bda6667063168612823 (really quick example of selection tool, magic wand tool, alt, ctrl-f)
#anyways sorry it's so long#the ask i had in drafts had a bunch of like visual examples#but i was like this is basically rivaling do u like the colour fo the sky post length#text#tut#not art
22 notes
·
View notes
Note
Hello! I was wondering if u wouldn’t mind sharing a tutorial on how u making ur icons?
Hi sure thing! This is long and screenshot heavy so the tutorial is below the cut :)
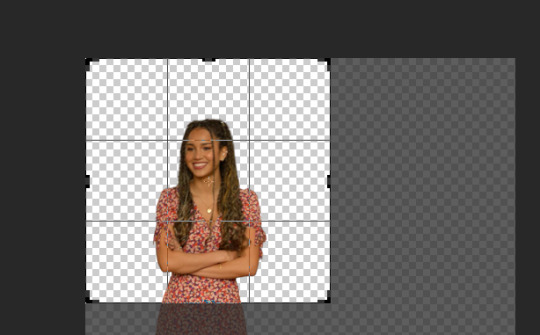
First I find a shot of the character I want for the icon and take a screenshot of it. Typically I look for shots where the character isn't obstructed by anything/anyone and make sure nothing is cut off in the cap
Then I put the screencap into this website and it removes the background for me. This works pretty well for most images :)
Then I open the image with the removed background into photoshop and crop it into a square.
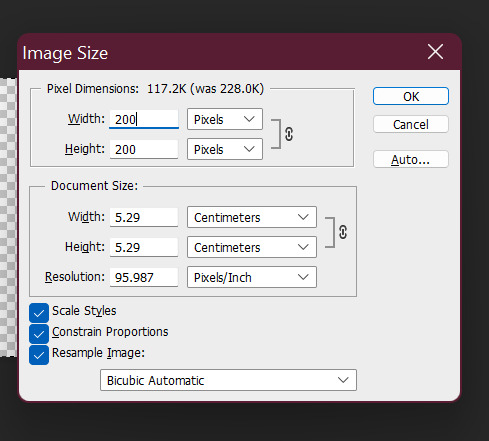
after cropping I resize the square to 200 x 200 pixels
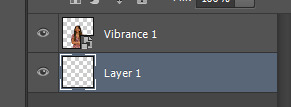
after resizing I run my sharpening on the image so it becomes clearer.

After sharpening, I colour the image with curves and vibrance (as per my basic gif tutorial)

I then select all the layers and Convert to a Smart Object - this step isn't necessary but I just find it is easier for me.

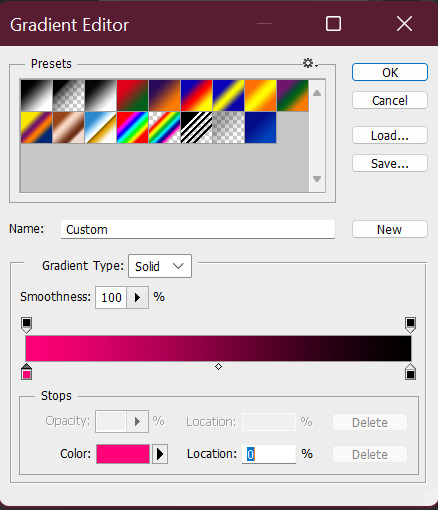
After that I create a new layer underneath for the background and I use the gradient tool to add the background in.

^ that is the gradient tool - if you can't find it right click on the paint bucket and you should be able to switch to it.
The settings for the gradient look like this. To change the colour click on the coloured gradient bar.

After clicking the gradient you will get a dialog box like this:

basically just click on the little colour tabs on the gradient bar to change your colour. Typically with my icons I like to go from the colour to black or white.
For this icon I am doing pink :)
After you have picked your colour click the ok button
To draw you gradient click and drag a line on your canvas

This gives you comething like this:

I prefer the dark spot to be on the bottom of the icon so I'm going to redraw over it in the opposite direction

this gives us something that looks like this:

did it a couple of times to end up with this:

I like the colour background of my icon to match the clothes (I just think it's cute). So I'm going to use a bit of selective colour to make Gina's dress more pink.

So I create a selective colour layer (the one I've hovered over with the two triangles).

After making the layer I right click on it and select "Create Clipping Mask" so that the layer only changes the colours on Gina and not the background. Yow will know this has worked because there will be a little arrow pointing down.

Given Gina's dress is red I will be changing the reds in this image. When changing reds and yellow you have to be careful because they are the undertones of skin tones (why I chose this one as an example). As you can see below Gina's skin has changed with the dress and we obviously don't want that.

To fix this we use a layer mask so only the dress changes colour. The layer mask is the white square that shows up next to the layer name Selective Colour. We basically just grab a black paint brush and draw over the parts we don't want changed on the selective colour layer.

Then basically the icon is ready to be saved as a png for use!
If you want to make different colour versions of the same icon what I like to do is add another selective colour layer on top (no clipping mask this time) and change the colours again :)
So for example to turn this icon purple I adjusted the Magentas in the image like so:
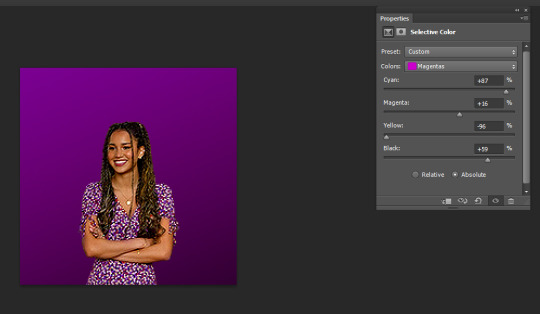
To turn it more of a blue-purple I added another Selective Colour on top and adjusted the Magentas again like so:

and basically I just play around until I get the colours I like :)
You can also add textures on top of the background if you like - typically I will just google something like "grunge icon texture" or "cute icon doodles" or whatever I might want to put on top and find one I like and use it.
So I copy and paste it and put it on top of our gradient layer and adjust the blending mode of the layer as I see fit. This is the texture on top without the blend mode adjusted.

Here I've changed it to Exclusion, which I like - but usually I just play around with the blend modes until I find one that looks good

Here's a heart one I found and put on. For this one I used the magic wand tool to remove the white bits of the background and then set it to Exclusion.

And that's my basic process - I hope it makes sense :)
#asks#resources#ps help#usergif#allresources#yeahps#completeresources#resourcemarket#dailyresources#tutorials#photoshop tutorial#*mine#ok hope this helps :)
57 notes
·
View notes
Text
Why does taking a screenshot from a social media for x reason and having one or two options that are in your native language/not English feel like making a drawing in ms paint and keeping the tool bar in the screenshot
#Don't the fuck ask me what I even mean by this I have no idea either#The thought appeared and wouldn't go away unless I made a dumb post about it ok#random post
3 notes
·
View notes
Text
Making this since some people have trouble with drawing plaid patterns on digital works (specifically when it comes to making the pattern in one layer) & I have this method that, while is a smidge slower & requires some layering tricks, causes less grey hairs for me. (& while this is specifically to help out @staledirt87 this is advice for really anyone who wants to go about using some tricks to make drawing plaid patterns less strenuous.)
So to start off, I wanna bring up that (despite the user appears to use IbisPaintX while I commonly use Clip Studio Paint) I do know enough about the software to know that the Magic Wand Tool and the Multiplier Layer Effect for this method exists across both software's.

(holy shit these screenshot quality suck-)
Because I do use Clip Studio more often the rest of the example is gonna be shown through there.
I start off by selecting where I want the plaid to be (most easily done with the Magic Wand Tool as it’s easier for selecting specific colors), for the sake of the example (& so if I want the first section of lines to also be a multiplier layer I won’t have to manually translate it into a different layer later)

This next step can really be done as either horizontal or vertical lines (or even 45 degree angle lines/ curved to fold with the fabric) just as long as it starts with lines.
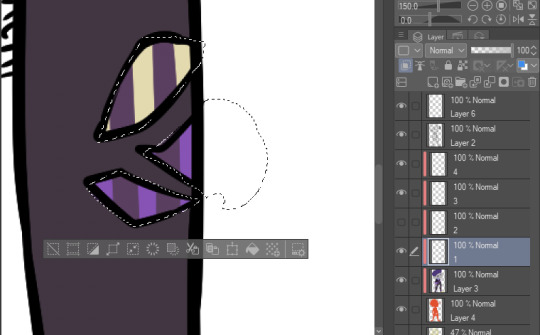
Then on the next layer you make the lines cross over the lines from before.
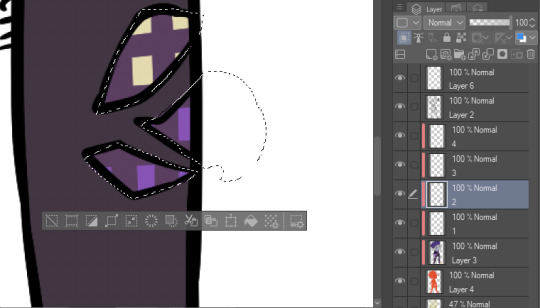
from there you then make that layer some form of darkening layer. Darken, Multiply, even Hard Light or Overlay options can work depending on how dark you make the base lines.

On the third layer I added the pencil-thin light lines, with these ones you can forgo adding a darker spot if one desires, but if one does want color there, because of how thin the line is leaving a dot in the middle point works just fine.
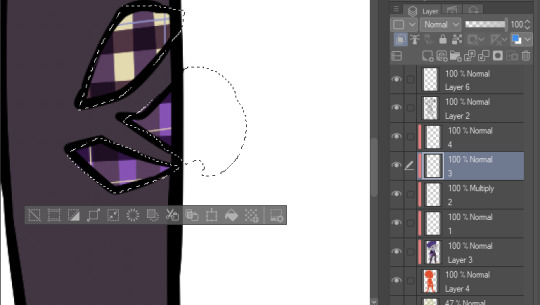
this mentality also works just fine in the context of additional plaid bars with varying widths, but for the sake of the example I decided to forgo that in favor of making this simpler.
2 notes
·
View notes
Text
Capture the Moment: Learn How to Screenshot on Your Laptop Easily
Capturing a screenshot on your laptop is super easy! Here are the methods depending on your operating system:Windows:Print Screen (PrtScn) button: This classic method captures the entire screen and copies it to your clipboard. You can then paste it into an image editor like Paint or directly into applications like Word.
Windows logo + Print Screen: This captures the whole screen and saves it as a PNG image in the "Pictures" > "Screenshots" folder.
Snipping Tool: Open the Start menu and search for "Snipping Tool." This tool allows you to capture specific regions of your screen (rectangular, freeform, window, etc.) and save them as PNG, JPG, or GIF files.
Game Bar (Windows 10 and 11): Press Windows logo + G to open the Game Bar. Click on the camera icon to capture a screenshot. It will be saved in the "Videos" > "Captures" folder.
Command + Shift + 3: This captures the entire screen and saves it as a PNG file on your desktop.
Command + Shift + 4: This allows you to choose a specific area of the screen to capture. Press Spacebar to capture a specific window. Use Shift to capture only a rectangular area. The screenshot will be saved as a PNG file on your desktop.
Command + Control + Shift + 4: This captures a video recording of your screen. Choose the area you want to record and click on the record button.
Read the full article
0 notes
Link
#ai#AImastery#ainews#aitools#ArtificialIntelligence#Cases#chatgpt#chatgpt4#ChatGPT#chatgpt4vision#chatgptexplained#chatgptplus#chatgpttutorial#chatgptvision#ChatGPT4#computervision#DeepLearning#FutureTools#Futurism#generativeai#gpt4#gpt4vision#gptvision#gptvisionusecases#gpt4v#howcanyouusegpt4vision#howcanyouusegptvision
0 notes
Text
Windows 11 Version 23H2: What's New and How to Get It

Introduction
Microsoft has officially launched Windows 11 version 23H2, introducing a host of new features and enhancements to the operating system. In this article, we'll delve into the key takeaways, new additions, and how to get this update. Let's explore what Windows 11 version 23H2 brings to the table.
Key Takeaways
New Features and Changes
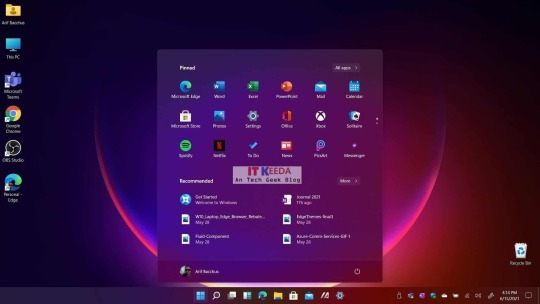
The most noticeable change is the removal of the Chat button for Microsoft Teams. In its place, Windows 11 now includes a standard Microsoft Teams (Free) app pinned to the taskbar by default. This new app provides a slightly improved experience, featuring a "Mini mode" for Teams. This Mini mode offers the same functionality as the Chat panel but can be summoned at any time from the main window and moved around the screen for greater convenience.
System Components Apps Enhanced
Apps considered system components are now clearly labeled as such in the Start menu. Furthermore, they have their dedicated section in the Settings app, specifically under a new page titled "System components." This includes apps like the (Xbox) Game Bar, Microsoft Store, and Phone Link. While some of these apps can be deleted, it's important to note that doing so may affect certain features of the operating system. Microsoft's decision to label them more clearly aids in user control.

What Else Is New
Copilot: AI-Powered Assistance
The flagship feature of this update is "Copilot," powered by AI and based on Bing Chat. It's available in select markets and is designed to replicate web-based tasks on your desktop, offering convenience and new capabilities. Co-pilot can perform tasks like changing system settings (e.g., enabling dark mode) and initiating a focus session.
File Explorer Redesign
This update showcases a brand-new design for File Explorer, offering a refreshed user experience for managing files and folders.
RGB Lighting Controls
Windows 11 version 23H2 includes built-in controls for managing RGB lighting, allowing users to personalize the lighting on compatible devices.
USB4 and Thunderbolt Device Settings
A settings page dedicated to USB4 and Thunderbolt devices has been added, streamlining the configuration of these peripherals.
App Updates
Numerous apps have also received updates. For example, Paint now supports layers and features a background removal function. Photos can blur the background to focus on the main subject, and the Snipping Tool can recognize text in screenshots and assist in redaction.
How to Get the Update
- Enable Latest Updates Toggle: In the Settings app, enable the toggle that allows you to receive the latest updates as soon as they become available.
- Automatic Updates: Microsoft will commence the auto-updating process "in the coming months." Once enabled, your system will automatically install the update when it's ready.
Why the Automatic Update?
The reason behind the automatic update is that it follows the same approach as monthly cumulative updates and shares the same code base as version 22H2. Microsoft anticipates no compatibility issues with these new features since it's essentially the same code, and both versions will receive identical updates in the future. Embracing this update not only ensures you have access to the latest features but also extends the support period for your PC.
In conclusion, Windows 11 version 23H2 is a significant update with a range of new features and improvements. By enabling the latest updates toggle, you can ensure that your PC remains up-to-date with the latest enhancements, making your Windows 11 experience even more enjoyable and productive. Don't miss out on the exciting additions this update brings to the table.
Read the full article
0 notes
Text

•Assignment name: #09Scene
•Tools: Medibang Paint, Aseprite, Unity
•Description: A screenshot of the itch.io build of my game "Dead Heat" with sprites that were made in Aseprite.
•Self-evaluative feedback: I first pictured how the game would look like on screen, based on the fact that this game is planned to be a 2D side-scroll platformer with shooting elements. Thus, besides obvious elements like health bar, ammo bar and the character on the right, I've also included the "GO!!" with the arrow on the right to emphasize that this is a 2D side-scroller. I've also included an ammo box and a timer below the health bar to make this still image of a game that doesn't exist yet feels like a real game with gimmicks.
0 notes
Text
SmartCapture Crack v3.17 + Serial Key [Full Download]

SmartCapture Crack users often use the PrintScreen keyboard for creating images from specific applications or documents. However, SmartCapture Crack will not save the image. Instead, you will need to save it with another program such as Paint. SmartCapture and the free Applet will function as Windows photographers. This program will allow you to capture specific areas, such as a portion of the screen, the desktop, the entire screen area, or the window. SmartCapture, a powerful yet simple-to-use program that allows novice users to capture high quality images from their computer screens, is easy to use and very user-friendly.
SmartCapture Crack Download
SmartCapture Crack Free download is a screen monitor that's professional and easy to use for Windows! It is easy to use and has powerful features that make it the perfect program for anyone looking to capture content from Windows computers. You can capture entire screens, tools, windows or rectangles. Additionally, you can also collect pixels from scanning devices, digital cameras and other imaging devices. SmartCapture Serial Key allows you to crop the images and adjust the color depth to suit any graphic. The smart capture feature is a very handy tool for capturing and storing screenshots.
SmartCapture Key allows for easy cropping and can be adjusted to any color depth, monochrome or not. Snapshots can easily be saved and copied to the clipboard. They can also be sent to email recipients, MS Word or to any other image editor. SmartCapture Crack Full Version Download supports all major image manipulations, including resizing, flipping, rotate, color replace and invert. You can resize, flip and rotate, color replace, color invert, optimize color palettes, dithering, and more. You can get more from your video display unit with full automation, leverage assistants and capture profiles. Multi-level undo is also available. SmartCapture full has a simple and intuitive interface.
SmartCapture Serial Key Free
Users can create profiles to save screenshots easily. Each profile can have its own hotkey for activating Smart Capture. The screenshots can be printed and saved, or transferred into other programs or opened in a picture editor. The user interface is also highly customizable. You can choose to capture a custom rectangle, an active window, a mouse cursor, or an active area. You can also set a time delay before capturing a screenshot. The interface is simple and straightforward. The main window can be customized using the graphical interface. In the menu bar, you can customize the image with different colors.
SmartCapture Full Version
You can save the screenshot as a jpeg or edit it in any image editor. SmartCapture allows users to set up profiles. These profiles are used to set up a unified form and rules design system. In this way, you can export your rules into other systems and print the screenshots. You can also save screenshots as PDF files to be used in Word and other applications. This software is easy to install and has an extensive user guide that will walk you through the process. The program is free and has no installation requirements. SmartCapture is a lightweight, easy-to-use application that supports all major file formats.
SmartCapture Serial Key is an easy-to-use program that allows users to take screenshots without the need for an expensive video card. The program has a small executable, which makes it compatible with any Windows version. It also has a simple interface with buttons and menus. The user interface is similar to a typical screenshot interface. It is compatible with most Windows versions, and is compatible with Linux and Mac OS. It's free for a 30-day trial. Another great feature of this tool is the ability to customize the screenshots. You can crop images, copy them, or paste them. You can also customize the name for each screenshot. You can export the screenshots to other file formats or open them in a word processing program.
Key Features
- Each task can be assigned a profile that is user-definable
- Zoom in and out on the image to adjust the transparency of main panel.
- Photos can be imported from other devices or favorites.
- This program allows you to crop, change color modes, invert effects and more.
- Freehand patterns can be drawn with a pen. Insert arrows or rectangles.
- You can adjust the brightness, contrast and saturation.
Download Links
Read the full article
0 notes
Text
Negative image converter

Negative image converter full#
Negative image converter windows#
Left-click and drag the cursor around the inverted image to the desired size.Click New in the toolbar, resulting in your screen looking foggy and your mouse arrow cursor changing to a cursor.
Negative image converter windows#
Click Start or press the Windows key, type snipping tool, and press Enter.
Use the Windows Snipping Tool to crop your picture to the desired size and look.
Right-click the image file, select Open with, select your browser, and click OK. Then, open the Screenshots folder and find the inverted picture as a thumbnail.
To open the inverted picture, open the Pictures folder on your computer.
Once you've taken the screenshot, you need to revert the screen back to its normal coloring by pressing Ctrl+ Alt+ I again.
Using the Windows key+ prtSc shortcut automatically saves this screenshot to your Pictures folder.
Take a screenshot of your inverted screen by pressing the Windows key and the Prt Scrn key (often named PrtSc or Prt Scrn on the keyboard) at the same time.
Now, invert the colors of your screen by pressing Ctrl+ Alt+ I ( Ctrl key, Alt key, and letter I key).
Negative image converter full#
Also, ensure Full screen is selected under Views. Make sure the magnifier percent is set to 100.
Next, open the Windows Magnifier by pressing Windows key and the = key.
Steps five through eight do not work without turning on the Magnifier. Select the browser of your choice and click OK to open the image in a browser window. Scroll down and choose More apps until you locate a browser option. If there isn't one displayed, click Choose another app.
Look for an Internet browser, such as Chrome, Firefox, Internet Explorer, or Edge.
Right-click the image file and select Open with.
Find the location of the image you want to convert to a negative.
Invert the image by pressing the shortcut key Ctrl+ I.Ĭreating a negative without an image editor.
Open Adobe Photoshop and the image you want to convert to a negative.
Use one of the alternative methods mentioned on this page. You cannot convert an image to a negative in Word 2000. Select the Negative option, which adjusts the image to invert the colors. Click the Recolor button and find the Color Modes setting. In older versions of Microsoft Word, like Word 2003, add a picture to the page by clicking File > Insert > Picture in the menu bar.ĭouble-click the image with your left mouse button to display the image editing window.
Again, in the menu bar, click Image and select the Invert Colors option to change the picture to look like a negative.
Select a picture you want to convert to a negative and click the OK button.
Open Microsoft Paint, then open a picture by clicking File, then Open in the menu bar.
Right-click the image and select the Invert color option to change the picture to look like a negative.
In the toolbar at the top, click the Select button, then click the Select All option.
Open Microsoft Paint, then open the picture you want to convert to a negative.
Creating a negative without an image editor.Ĭreating a negative in Microsoft Paint Windows Vista and later users.
Creating a negative in Microsoft Paint.
0 notes
Text
Qt dialog background color ui

QLinearGradient buttonGradient(0,0,0,ui->listWidget->height()) Put together we insert right after the line ui->setupUi(this) : end color the relative position and the end color.start color the relative position and the start color.the coordinates to tell the painter where to start drawing the gradient.In order to create a linear gradient we need at least three bits of information: Seems like we need some more actors on the stage.Įnter QBrush, QLinearGradient and QPalette The items are now painted using the default style (on my system the GTK-Qt-Style is used). Well, we have items, we have icons and we can select but we are still missing the promised fanciness. Running our sample application with these modifications results into this: set the icon from the resources we already added.create a new QListWidgetItem and pass the list widget from the ui object as the parameter so that it gets added automatically.Item3->setIcon( QIcon(":/network.png") ) QListWidgetItem *item3 = new QListWidgetItem(ui->listWidget) QListWidgetItem *item2 = new QListWidgetItem(ui->listWidget) QListWidgetItem *item1 = new QListWidgetItem(ui->listWidget) MainWindow::MainWindow(QWidget *parent) : In the constructor the method setupUi is called what initializes the from the included ui_mainwindow.h header file which is in turn created by the uic (User Interface Compiler).Īfter the initialization we can access the list widget and add some items: In the mainwindow.cpp we find a constructor that creates the user interface ( Ui::MainWindow) if you didn't change the default name. The project wizard created some cpp and header files we just need to modify. Now it's time to add some items to our tab bar. Since we don't need a tool bar, status bar and menu bar we get rid of them by right-click - 'Remove', either on the item directly or in the object inspector: The form designer opens the empty main window. Open the Forms folder and double click the. We start by modifying the mainwindow.ui form. Follow the Wizard steps and we should end up with a project skeleton containing a form, header and source for the main window. So lets create a new project by calling 'File' - 'New File or Project' and select 'Qt Widgets Application'. To make our life easy and get results fast we use QtCreator along this tutorial. QListWidget We make use of the flow property to make the items flow horizontally.So we need to make use of color roles and a customized QPalette QPalette Qt has no direct way for setting colors to particular widgets, except using stylesheets, but as far as I know there is no support for gradients yet.QBrush For creating the gradient we make use of QLinearGradient that is assigned to a QBrush.Resource System The icons you see in the screenshot are loaded via the Qt Resource System.QToolbox is just not conforming! Please let me know if I am doing things the wrong way.This tutorial makes use of different features and techniques provided by Qt: this->setStyleSheet("QToolBox ") Ĭorrectly applies a transparent background to just the QLineEdit element. Stylesheet settings I have tried that result in the first dialog image The dialog was done in Designer and contains one QTabWidget that contains one QToolbox, whose first page has a QLineEdit and a QPushButton. I have made a very simple dialog application to demonstrate the issue.
0 notes
Last Seen Blogs
urvismistry-blog-blog
Parenting
jadehiacynthperalta-blog
Hia Py

islandtimes
Island Time

youngreviewmilkshake
Untitled

thehelixrose
Hello,