#sewing video
Photo

Hey everyone! If you're looking for a beginner-friendly sewing tutorial, you're in the right place! In this video, I'm going to show you how to sew two types of reversible tops using the burrito sewing method. It's a great method for sewing linings and creating reversible garments.
For this tutorial, I used a jersey cotton fabric with elastane and lycra. I also provide a free pdf pattern for the tank tops in 7 different sizes, which you can easily hack to create tops with different necklines. In my last video, I showed you how to hack this pattern to make 14 different styles of necklines, so be sure to check that out too!
The possibilities are endless with this pattern. You can make the top shorter or longer, narrower or looser, with sleeves or without sleeves. And the best part is, it's beginner-friendly and very easy to follow.
Don't forget to give this video a like and share it with your sewing friends. And if you're new here, be sure to subscribe to my channel for more sewing tutorials and DIY projects!
youtube
#sewing tutorial#beginner sewing#sewing tips#DIY fashion#reversible#top#burrito method#free sewing pattern#free pattern#sewcialists#sewingcommunity#sewing project#sewing video#modern sewing
19 notes
·
View notes
Text
A month and a half after I made the shirt, I finally finished the video about making the shirt 😅
75 notes
·
View notes
Video
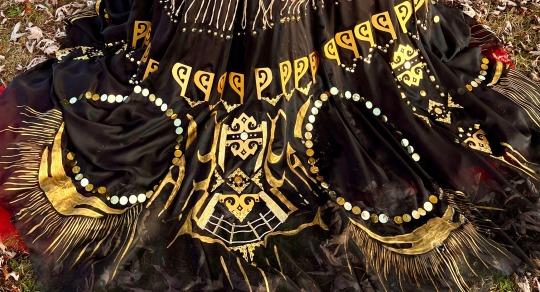
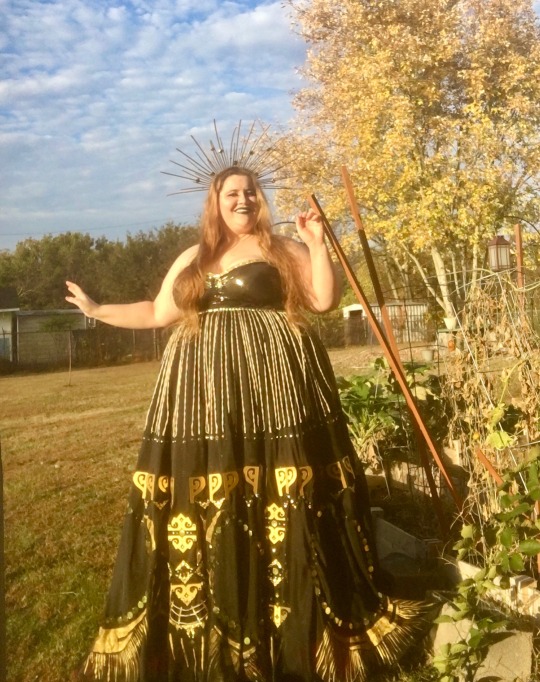
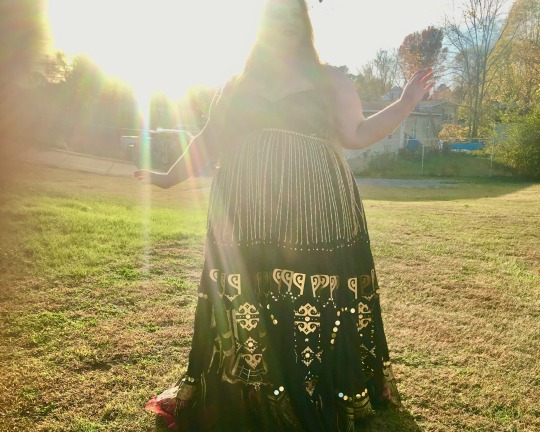
I have a million commission videos to share, but whatever, I’ll start with a progress vid! How I did Azula’s sleeves! I love hand painting on costumes!!
#azula#cosplay commission#cosplay progress#sewing video#sewing#seamstress#sewist#commissionsbyamazonmandy#amazonmandy#atla#avatar the last airbender#Azula cosplay#video#cosplay video#cosplayvideo
14 notes
·
View notes
Note
Any tips on learning to make buttonholes? I've been putting it off for.... *checks notes* like three years.... but better late than never and all that. I don't have any fancy machines so I gotta do it by hand but that seems right up your alley.
Thanks!
It IS up my alley, yes, I do most of my buttonholes by hand!
I'm actually part way through filming an 18th century buttonhole tutorial, but I expect it'll be a few more weeks before I finish that and put it on the youtubes, so in the meantime here's the very very short version. (The long version is looking like it'll probably be about 40 minutes maybe, judging by how much script I've written compared to my last video?)
Mark your line, a bit longer than your button is wide. I usually use a graphite mechanical pencil on light fabrics, and a light coloured pencil crayon on dark ones. (I have fabric pencils too, but they're much softer and leave a thicker line.)
You may want to baste the layers together around all the marked buttonholes if you're working on something big and the layers are shifty and slippery. I'm not basting here because this is just a pants placket.

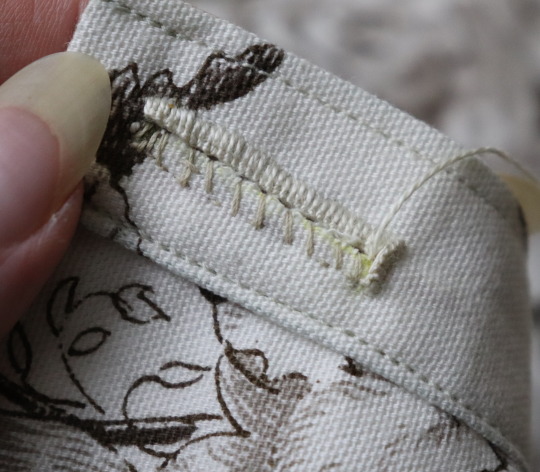
Do a little running stitch (or perhaps a running backstitch) in fine thread around the line at the width you want the finished buttonhole to be. This holds the layers of fabric together and acts as a nice little guide for when you do the buttonhole stitches.

Cut along the marked line using a buttonhole cutter, or a woodworking chisel. Glossy magazines are the best surface to put underneath your work as you push down, and you can give it a little tap with a rubber mallet if it's not going through all the way.

I'm aware that there are some people who cut their buttonholes open using seam rippers, and if any of them are reading this please know that that is abhorrent behaviour and I need you to stop it immediately. Stop it.
Go get a buttonhole cutter for 10 bucks and your life will be better for it. Or go to the nearest hardware store and get a little woodworking chisel. This includes machine buttonholes, use the buttonhole cutter on them too. If you continue to cut open buttonholes with a seam ripper after reading this you are personally responsible for at least 3 of the grey hairs on my head.
Do a whipstitch around the cut edges, to help prevent fraying while you work and to keep all those threads out of the way. (For my everyday shirts I usually do a machine buttonhole instead of this step, and then just hand stitch over it, because it's a bit faster and a lot sturdier on the thin fabrics.)

I like to mark out my button locations at this point, because I can mark them through the holes without the buttonhole stitches getting in the way.
For the actual buttonhole stitches it's really nice if you have silk buttonhole twist, but I usually use those little balls of DMC cotton pearl/perle because it's cheap and a good weight. NOT stranded embroidery floss, no separate strands! It's got to be one smooth twisted thing!
Here's a comparison pic between silk buttonhole twist (left) and cotton pearl (right). Both can make nice looking buttonholes, but the silk is a bit nicer to work with and the knots line up more smoothly.

I've actually only used the silk for one garment ever, but am going to try to do it more often on my nicer things. I find the cotton holds up well enough to daily wear though, despite being not ideal. The buttonholes are never the first part of my garments to wear out.
I cut a piece of about one arm's length more or less, depending on the size of buttonhole. For any hole longer than about 4cm I use 2 threads, one to do each side, because the end gets very frayed and scruffy by the time you've put it through the fabric that many times.
I wax about 2cm of the tip (Not the entire thread. I wax the outlining/overcasting thread but not the buttonhole thread itself.) to make it stick in the fabric better when I start off the thread.
I don't tend to tie it, I just do a couple of stabstitches or backstitches and it holds well. (I'm generally very thorough with tying off my threads when it comes to hand sewing, but a buttonhole is basically a long row of knots, so it's pretty sturdy.)

Put the needle through underneath, with the tip coming up right along that little outline you sewed earlier. And I personally like to take the ends that are already in my hand and wrap them around the tip of the needle like so, but a lot of people loop the other end up around the other way, so here's a link to a buttonhole video with that method. Try both and see which one you prefer, the resulting knot is the same either way.


Sometimes I can pull the thread from the end near the needle and have the stitch look nice, but often I grab it closer to the base and give it a little wiggle to nestle it into place. This is more necessary with the cotton than it is with the silk.
The knot should be on top of the cut edge of the fabric, not in front of it.

You can put your stitches further apart than I do if you want, they'll still work if they've got little gaps in between them.
Keep going up that edge and when you get to the end you can either flip immediately to the other side and start back down again, or you can do a bar tack. (You can also fan out the stitches around the end if you want, but I don't like to anymore because I think the rectangular ends look nicer.)
Here's a bar tack vs. no bar tack sample. They just make it look more sharp, and they reinforce the ends.

For a bar tack do a few long stitches across the entire end.

And then do buttonhole stitches on top of those long stitches. I also like to snag a tiny bit of the fabric underneath.

Then stick the needle down into the fabric right where you ended that last stitch on the corner of the bar tack, so you don't pull that corner out of shape, and then just go back to making buttonhole stitches down the other side.
Then do the second bar tack once you get back to the end.

To finish off my thread I make it sticky with a bit more beeswax, waxing it as close to the fabric as I can get, and then bring it through to the back and pull it underneath the stitches down one side and trim it off.


In my experience it stays put perfectly well this way without tying it off.
Voila! An beautiful buttonholes!


If you want keyhole ones you can clip or punch a little rounded bit at one end of the cut and fan your stitches out around that and only do the bar tack at one end, like I did on my 1830's dressing gown.

(I won't do that style in my video though, because they're not 18th century.)
Do samples before doing them on a garment! Do as many practice ones as you need to, it takes a while for them to get good! Mine did not look this nice 10 years ago.
Your first one will probably look pretty bad, but your hundredth will be much better!
Edit: Video finished!
youtube
And here's the blog post, which is mostly a slightly longer version of this post.
#ask#buttonholes#sewing#hand sewing#sewing tutorial#I've been procrastinating on the video this week#I want it done! I don't want to work on it I want new projects! I want to cut out more gloves!#currently forcing myself to do the last few buttonholes on these pants and then maybe I can cut out new gloves? as a treat?#but I hope I get some filming done tomorrow too
3K notes
·
View notes
Text
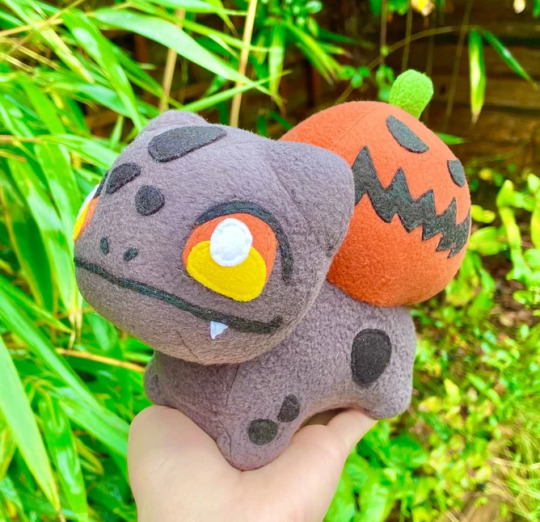
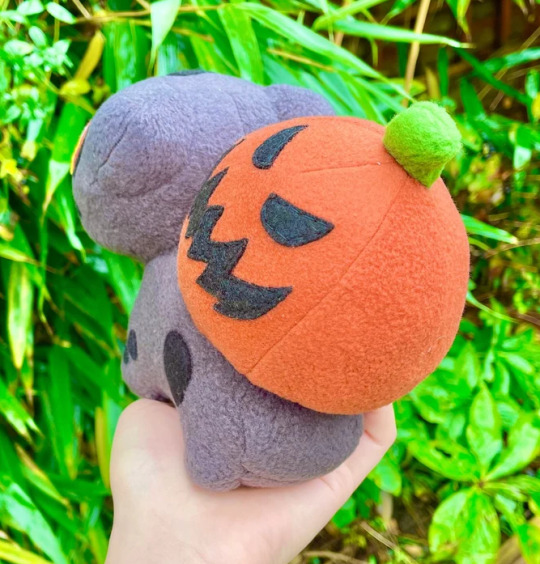
Handmade Halloween Bulbasaur Plush made by FawnWithTheWind
#pokemon#fall#halloween#autumn#bulbasaur#pumpkin#gaming#video games#spooky#plush#sewing#art#crafts#starter pokemon#gameboy#pokemon go#pokemon let's go#switch#nintendo switch#pokemon scarvi#plushies#stuffed animals#cute#kawaii#gifts#merch#etsy#handmade#handcrafted#retro
2K notes
·
View notes
Text


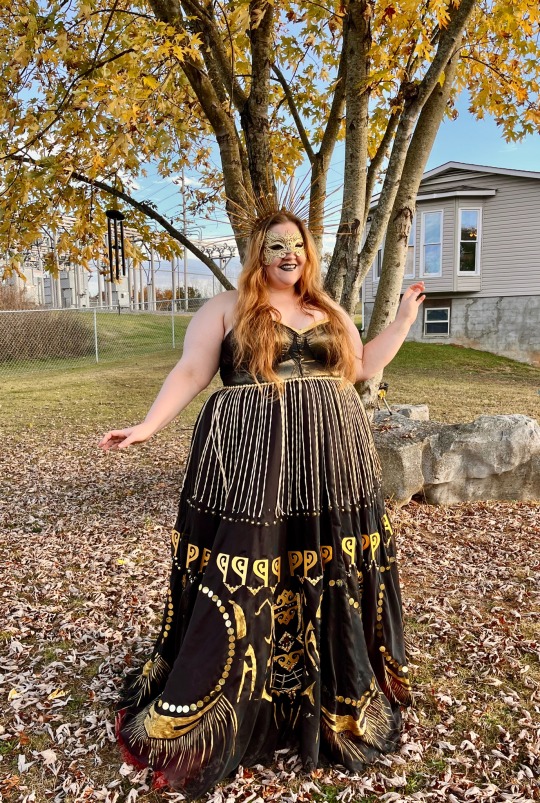


This year for Halloween I was Azems summoning circle. Immensely proud of how this turned out and that I get to summon my friends from around the world on a regular basis.
#ffxiv azem#azem#ffxiv#final fantasy xiv#final fantasy 14#summoning#my face#video#nekobore#nekos cosplay saga#halloween#Nyth’iana Songsteel#sewing#I’ll do a costume breakdown in a reblog#so many hours and so much labor and I could still do more but I’m so proud of it#warrior of light#wol#final fantasy cosplay
2K notes
·
View notes
Text
youtube
Another video of sewing and some Moscow forest :)
#russia#sewing#sewing blog#fashion#handmade#diy#cats#youtube#moscow#forest#camping#woods#nature#pine#hammock#video#sewing video
1 note
·
View note
Text
theres this thing i encounter a lot as a textile artist, where I'll be giving a gift/showing my latest project and people immediately decide that they will never make something like that. that maybe i figured it out but there's a limited # of people who can learn how to crochet and they just didn't make the cut. and it's kinda pissing me off. a lot of these trades are starting to fade away (death of older artists, industrialization, etc etc) and it upsets me that some people are willing to let their opportunity to make things they want to make go just because they don't know how yet.
i taught myself embroidery from youtube and Pinterest. i taught myself how to sew and draft patterns and tailor. i taught myself how to follow crochet tutorials on youtube and eventually how to read the books. I'm not some blessed prophet of the gods sent with natural skills to create. (hell I'd even say im a beginner at most of the things i do, but we're getting there) and trust me there are PILES of scrap fabric and projects from when i didn't quite know what i was doing and just. fucking tried anyways.
moral is. if you want to make something i swear to god you can figure it out. youtube is your best friend. books. google. people around you, people you know. just don't give up before you've even started
#textiles#sewing#embroidery#crochet#if anyoen wants some video tutorials i used for embroidery or crochet I have them!!!
6K notes
·
View notes
Text
Novice sewing pattern: Cut out shapes. Line up the little triangles on the edges. Stitch edges together. We've also included step-by-step assembly instructions with illustrations.
Novice knitting pattern: yOU MUSt uNDerstANd thE SECret cOdE CO67 (73, 87, 93) BO44 (63, 76, 90) 28 (32, 34) slip first pw repeat 7x K to end *kl (pl) 42 * until 13" (13, 13, 15) join new at 30 pl for 17 rows ssk 27 k2tog mattress lengthwise BO and sacrifice a goat to the knitting gods. WHAT DO YOU MEAN YOU WANT "INSTRUCTIONS," I JUST GAVE THEM TO YOU
#knitting#no it's not a real pattern but I can't write one that makes sense because I have no freaking clue what any of that means#How do you make things that aren't basic rectangles#Why has every knitter I've asked for help just said 'patterns are easy; you just have to know how to read them' & then refused to teach me#Where do I even find a goat to sacrifice#How do I join the pattern cult#I am so confused#I've been knitting for almost a decade but I can only make scarves and potholders#I learned one (1) stitch by watching a YouTube video and none of my friends or family knit so I have no IRL resources#And nobody I meet seems to want to take the time to explain the rest to me#I taught myself to sew through trial and error but that doesn't really work with knitting because error is pretty much just... Unraveling?#Anyway sorry for the tag rant I'm just frustrated that I see pretty things I want to make but the instructions are in an alien language#And the gap between 'absolute novice' and 'intermediate' seems to be about 20 years of experience and formal instruction
578 notes
·
View notes
Photo
youtube
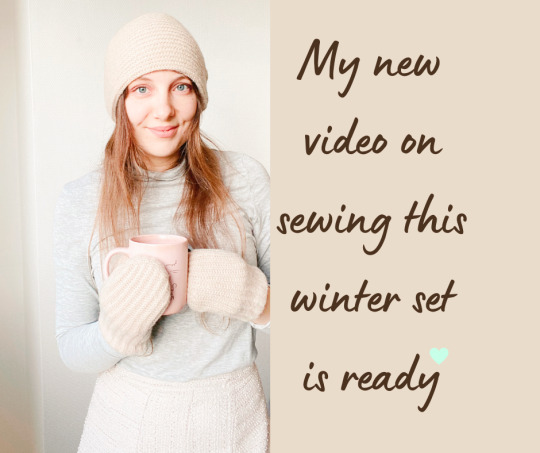
Check out my free pdf pattern for mittens with tutorial how to sew them ... and winter hat 🤗💖
#winter set#winter hat#mittens#gloves#diy fashion#upcycling#recycling#thrifting#modern fashion#modern sewing#modern sewing patterns#free sewing pattern#pdf sewing pattern#mittens pattern#sewing tutorial#sewing for beginner#sewing video
0 notes
Text
youtube
No-one asked for it, but here it is anyway, and, of course, it rambles 🎃
58 notes
·
View notes
Video
Sewing a Cosplay Commission: Nero of Fate Grand Order
For a commission of your own, message me on www.facebook.com/CommissionsByAmazonMandy
Other social media: Instagram, twitter, tiktok: AmazonMandy
Webpage/FAQ: AmazonMandy.com
#cosplay commission#commission#nero#nero cosplay#fate#fate grand order#fate cosplay#cosplay progress#sewing#sewing progress#sewist#sewing video#i sell videos#amazonmandy#video
5 notes
·
View notes
Text


I've always wanted a plush of the cat from Ghost Trick! so when the Switch port was announced, I decided to go ahead and make one for myself! ...and then didn't think to post it until now, for some reason! I modified BeeZee Art's sitting kitty pattern to get the right shapes; he was made with many mistakes, but also much love. 🐈⬛
(everybody go play Ghost Trick, it is my favorite video game of all time! if you like unique puzzles and a really fun mystery, then you will probably also enjoy it! and as you can see, it has a cat!)
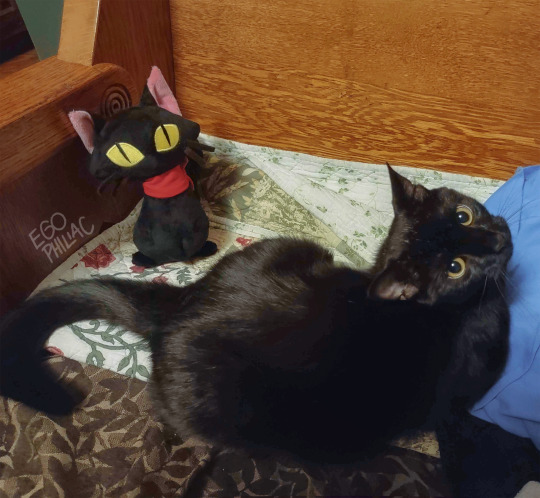
(it was very hard to get a picture with Niko that didn't look like this:)

#ghost trick#toys#cat#sewing#it also has a dog!#describing ghost trick as 'it has a cat and a dog' feels like the biggest understatement of all time though#honestly the best pet characters in video game history#i feel confident making this statement#but i will say no more because ghost trick is 10000% better if you go in spoiler-free#the twists are SO good#the story is SO good#please play ghost trick
2K notes
·
View notes
Text
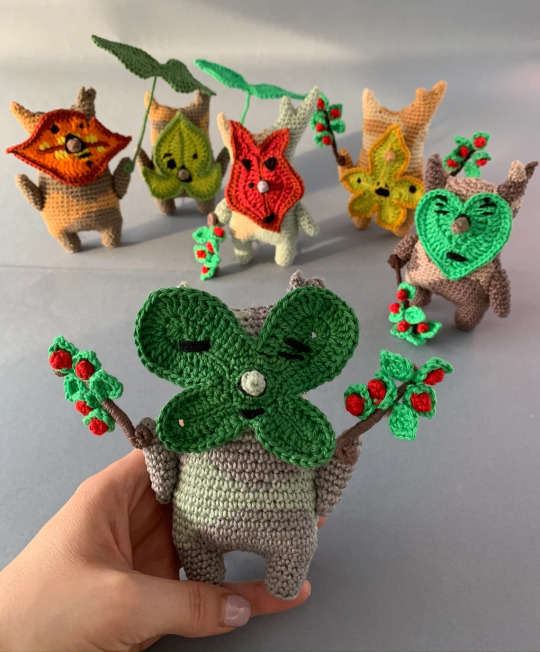

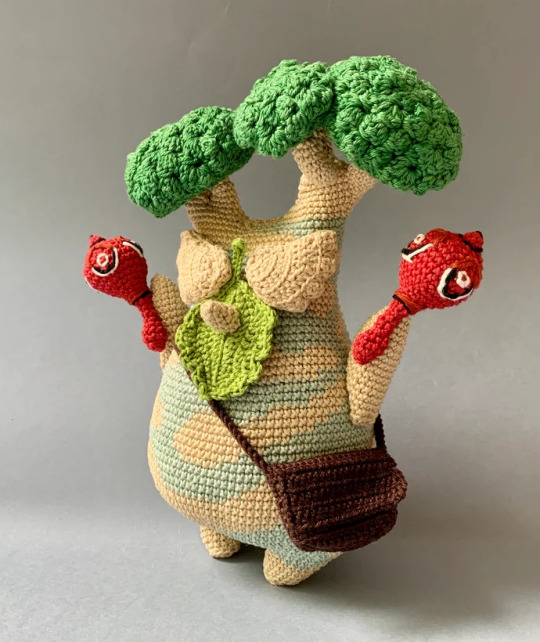
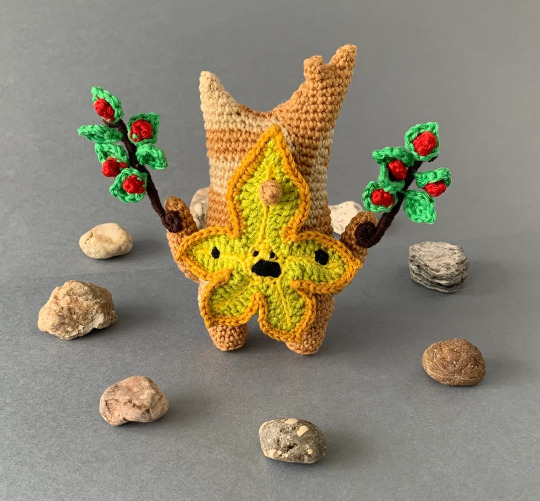
Crochet Koroks made by ElizettaCrafts
#zelda#nintendo#koroks#crochet#art#crafts#legend of zelda#tears of the kingdom#tok#breath of the wild#botw#switch#nintendo switch#cute#gaming#video games#sewing#plushes#plush#plushies#gifts#merch#artists#korok seeds#loz
1K notes
·
View notes
Text
I forgot to make a short video with bits from my long youtube video like I usually do, so here is one, two entire weeks late. (I mostly do this because the facebook and instagram algorithms love videos but hate links, but may as well post it here too.)
For anyone who missed it, I draft a glove pattern, paint stripes and a dragon on a pair of late 18th century gloves, then sew up a pair of plain 1760's ones with a facing because I was worried the stripes would give people eye strain. It's a lot of stuff to cover, so the video is just about exactly one hour long.
Thank you so much to everyone who left nice comments! I really was not expecting such high praise on my dry informative sewing video, especially not from people who don't sew!!
(Music is Stepping Stones by Megan Wofford, from epidemicsound.)
844 notes
·
View notes
Text
This Tiktok sound was so perfect I had to use it.
3K notes
·
View notes
Last Seen Blogs

kurtzandblumpllc
Kurtz & Blum, PLLC

istechkin
Digital Me

soilem
just a confused human

pintersfecdfo
minoki

thwl76
THWL