#Jenny Cameron test reviews
Text
Kate is not your drama queen Her self-possession drives people wild - Jenny McCartney UnHerd.

Just over a decade ago, the late novelist Hilary Mantel delivered a lecture to an event at the London Review of Books and triggered national outrage. In the course of a talk on “Royal Bodies”, which ranged widely across royal women from Anne Boleyn to Marie Antoinette and Princess Diana, she had made what many perceived as disparaging remarks about Kate Middleton, then the Duchess of Cambridge. The Duchess, she said, appeared to have been “designed by a committee and built by craftsmen, with a perfect plastic smile and the spindles of her limbs hand-turned and gloss-varnished”. Indeed, Mantel said, Kate “seems to have been selected for her role of princess because she was irreproachable: as painfully thin as anyone could wish, without quirks, without oddities, without the risk of the emergence of character”.
At this, the newspapers were soon in uproar. The prime minister David Cameron called the comments “completely misguided and completely wrong” and the Labour leader Ed Miliband agreed they were “pretty offensive”. Mantel doggedly refused to back down, saying that her remarks had been twisted out of context, and that she was in fact writing with sympathy about the perceptions that are forcefully projected on to royal women, the cage in which they are held to be goggled at. That was true, but also perhaps not the entire truth, for there was still a perceptible trace of authorial vinegar in the portrait: which of us would be happy to learn, even in sympathy, that we were held at low risk for “the emergence of character”?
Royals are public as well as private figures, of course, and authors are free to hang intellectual ideas on them to try out, as designers do with clothes. Yet while much of the lecture was sharply perceptive, I didn’t agree with the portrait of Kate. That word “selected” had rendered her passive, when in fact her behaviour thus far had suggested both an active intelligence and an unusual degree of self-discipline. The context of her entry into “The Firm” was different from that of other royal brides. Unlike Diana, who had barely emerged from the fractured chrysalis of her troubled aristocratic family when she first met the much older, more worldly Prince Charles, Kate was a contemporary of Prince William’s at the University of St Andrews. Her family background, which appeared warm and supportive, was comfortably middle-class. She seemed generally cheerful and unruffled, even when the press was at the barbed peak of its “Waity Katie” hysteria, trying to goad Prince William into a proposal or abandonment.
After the wedding, in her approach to royal duties, she clearly took the role she had inherited with marriage seriously. The royal whose attitude her own most resembled was the late Queen Elizabeth II, who had long understood the essential nature of the job: to turn up to public events looking the part, intuit precisely what was needed — gravitas, fun, consolation or reassurance — and deliver it while keeping one’s personal emotions on the back burner. This is what a monarchy demands, and the ability to act as an impeccable interpreter of the public mood, year after year, is a particular and testing art. A few have a natural aptitude for it, but most of us do not, and would quickly find its scrutiny and restrictions intolerable.
Grace under consistent pressure is an admirable quality. Were a ballet dancer to execute a string of flawless performances, or a pilot to conduct numerous flights without incident, it would not be deemed evidence of an absence of character: quite the opposite. Yet in Kate — especially for those who increasingly conduct their lives online — serene self-possession seems to drive a proportion of onlookers insane: what lurks behind it, what dark secret is waiting to destroy it, how best might it be disrupted? The uncomfortable truth is that what many people deeply crave in a young and beautiful royal wife and mother is not competence, but crack-up
The increasingly bizarre treatment of Kate, or the idea of Kate, is connected to the most dominant phenomenon of our age: a cultural prioritising of drama over duty. The supply of drama has spilled beyond the confines of the novel, theatre, cinema or television to become a commodity on which our public figures are judged. When Mantel spoke of Kate’s apparent absence of emerging “character” she was assessing her primarily through the hungry eyes of a novelist. In books, central female characters often generate dramatic tension by chafing against their circumstances, by the intensifying dazzle of their discontents, something that Kate refused to transmit. In contrast, Mantel described Diana as a “carrier of myth”: Diana, publicly trapped in the disappointments of her marriage, certainly carried more plot twists than any author had a right to expect. Unfortunately for her, the final one was her shockingly premature death.
Set against this artistic conception of “character” — distinctive qualities or flaws that, one way or another, deliver drama — is the societal judgement “of good character”, meaning someone who is broadly reliable and respected in relation to their behaviour to others. In recent years the electorate, in line with Neil Postman’s warning in his 1985 book, Amusing Ourselves To Death, has proved increasingly ready to select the former over the latter, even to the marked detriment of our civic health. The former prime minister Boris Johnson instinctively understood it as his job not to deliver the detail of workable policy, but to satisfy the public’s appetite for story: “People live by narrative,” he once told UnHerd’sTom McTague. In the US, Donald Trump — that relentless generator of low mockery and high fury — is now running for a second term as president, after his first one ended in his supporters storming the Capitol building.
Men are often permitted to survive the frantic generation of drama: it is everyone around them who suffers. Yet women — in art and life — have a greater tendency to be destroyed by it. There is no strutting female equivalent of the male “hellraiser”, but rather a woman who, soaked in the crocodile tears of the tabloids, is tragically “causing concern” among friends. Art and its audiences have always relished the restless struggle and disintegration of female characters who are, or become, unmoored from the harbour of marriage and children. Flaubert’s Emma Bovary — her imagination inflamed by reading novels — is bored with her marriage and disenchanted with motherhood; she seeks solace in affairs and excessive spending, the consequences of which hasten her suicide. Zola’s Nana, a courtesan who ruthlessly captivates Parisian society, has her beguiling face eaten away by smallpox. Janis Joplin and Amy Winehouse, immolated on their blazing talent, are hung posthumously high in the musical hall of fame, next to Sylvia Plath in the poetry section and Marilyn Monroe in cinema.
In Jean Rhys’s Good Morning, Midnight,a middle-aged English woman called Sasha Jansen, mourning an unhappy marriage and a dead child, finds herself in Paris, a vulnerable drifter seeking solace from stray men. Rhys herself, who died at 88 after a precarious but surprisingly long life, had much in common with her literary creations. As the writer and editor Diana Athill crisply put it: “Jean was absolutely incapable of living, life was just hopelessly beyond her. When she was young, she floated from man to man in a hopeless way… by the time she was old, she floated from kind woman to kind woman.”
In Rhys’s latter years — hard-drinking, irascible and impoverished — Athill and a small group of female friends formed what they called “The Jean Rhys Committee” which met regularly to ask “what should we do next?”. Rhys’s claim to such loyalty, I suppose, was the weight of her literary talent, her ability to exert an odd kind of fascination, and the fortunate soft-heartedness of her friends. The dramatic collided with the dutiful, and was kept alive by it.
From what I can see, the Princess of Wales exists at the opposite end of the feminine spectrum from Jean Rhys. Pinned firmly in place by her royal obligations, her wealth, her marriage and three children, she belongs to the realm of the respectable and dutiful rather than the erratic and dramatic. She is not a “character” in the artistic sense, nor does she desire to be, but both a survivor and upholder of an institution: hers is the territory of the prompt thank-you note, the kept promise, the commitment to public service, the uncomplicated pleasure in children, the stoic endurance of difficult times in the hope that better ones will come along soon. The public senses an emotional solidity in her, and it is partly why she is held in broad esteem. In this age of insistent self-definition, duty to others might be an unfashionable concept, but it is nonetheless one that keeps families and institutions from chaos and collapse.
With the advent of the internet, however, anyone with a keyboard can become a form of author, with the freedom to insert a toxic form of drama into real-life situations. What was extraordinary, during the Princess of Wales’s recent health problems, is how speedily and carelessly such speculations overrode the bounds of decency. It was already known that she had undergone major abdominal surgery, and was taking time to recover. And yet — egged on by the participation of silly celebrities and malicious US comedians — conspiracy theories about cosmetic surgery and affairs and nervous breakdowns spread like knotweed. According to social-media researchers, these were also vigorously introduced and amplified by fake accounts set up on Twitter and TikTok, some associated with Russia-linked disinformation eager to spread the termites of mistrust and doubt in Western institutions. Only the Princess of Wales’s revelation of cancer, which carries a testing drama all its own, served to shut up the majority of them.
Unlike these callous gossips, Mantel recognised her own complicity in dehumanising royalty. Upon encountering the late Queen, the novelist said: “I passed my eyes over her as a cannibal views his dinner, my gaze sharp enough to pick the meat off her bones.” The Queen looked back at her, she said, briefly hurt. Mantel warned of the way in which “cheerful curiosity can easily become cruelty” precisely as it has done in recent weeks. Her talk concluded with a prescient instruction for those who comprehend monarchy mainly as a source of entertainment: “I’m asking us to back off and not be brutes.”
In the midst of treatment and recovery, the most hitherto stable of royal women could be forgiven a keen sense of injustice: her job description, it seems, must now include the ability to weather the online public’s fits of brutish mania for drama. With its contempt for duty, and its savage appetite for story, it is hungry to chew up far more than just the Princess of Wales.
71 notes
·
View notes
Text
Evaluation- Haida Interchangeable Magnetic Variable ND filter on wide- angle lens.
Evaluation- Haida Interchangeable Magnetic Variable ND filter on wide- angle lens.
Introduction.
Testing for optimal sharpness, tonality, vignette, bokeh, X-pattern issues, design, functionality, accuracy of stops & colour shifts. Including in-camera video and real time experience from my home in the north of Scotland.
What comes in the box?
One cardboard box with two separate plastic boxes each with internal moulded foam insert to keep your filters protected ..Box (1) One…

View On WordPress
#2-5 stops ND#6-9 stops ND#82mm filter ring#Adobe creative cloud#canon 16-35mm Lens USM L#Canon 5d mark iv#China#field test#Haida#Haida Filter#Haida Interchangeable Magnetic Variable ND#image sharpness#Interchangeable#jenny cameron#Jenny Cameron test reviews#landscape#landscape photography#landscapephotography#long exposure#magnetic attraction#magnetic filters#Nano-pro#ND filters#no light leakage#Photography#videography#wide angle lens#X-pattern#YouTube
1 note
·
View note
Text
Launch of Haida M10 filter holder mark (ii)
Launch of Haida M10 filter holder mark (ii)
Introduction
Introducing the latest filter holder from Haida- M10 mark (ii). I cannot begin to tell you how excited I am getting my hands on this beauty. Hot off the shelves from Haida! Right now as I type it’s not even been launched which is something I’m very proud of.
Location– Various areas in the Scottish Highlands, UK- during the summer of 2021.
Equipment used for testing – Canon 5d mark…
View On WordPress
#education#field test#Filter holder evaluation#Haida Ambassador#Haida Filter#haida filter holder new#Haida filter M10 filter holder mark (ii)#Haida M10 Filter Holder#haida m10 filter holder mark (ii)#Haida M10 filter holder mark 2#haida M10 light-barrier#Haida M10 round "drop-in" CPL#Haida NanoPro-ND_kit-for_Mavic-2-Pro#Haida ND & CPL combi#Haida new#jenny cameron 2021#Jenny Cameron landscape photography#jenny cameron photography#Jenny Cameron test reviews#landscape#landscape photography#Landscape-collection#landscapephotography#learning#M10 filter holder mark (ii)#nature#Photography#photography accessories#photography tutorials#photography&039;s
0 notes
Text
Launch of Haida M10 filter holder mark (ii)
Launch of Haida M10 filter holder mark (ii)
Introduction
Introducing the latest filter holder from Haida- M10 mark (ii). I cannot begin to tell you how excited I am getting my hands on this beauty. Hot off the shelves from Haida! Right now as I type it’s not even been launched which is something I’m very proud of.
Location– Various areas in the Scottish Highlands, UK- during the summer of 2021.
Equipment used for testing – Canon 5d mark…

View On WordPress
#education#field test#Filter holder evaluation#Haida Ambassador#Haida Filter#haida filter holder new#Haida filter M10 filter holder mark (ii)#Haida M10 Filter Holder#haida m10 filter holder mark (ii)#Haida M10 filter holder mark 2#haida M10 light-barrier#Haida M10 round "drop-in" CPL#Haida NanoPro-ND_kit-for_Mavic-2-Pro#Haida ND & CPL combi#Haida new#jenny cameron 2021#Jenny Cameron landscape photography#jenny cameron photography#Jenny Cameron test reviews#landscape#landscape photography#Landscape-collection#landscapephotography#learning#M10 filter holder mark (ii)#nature#Photography#photography accessories#photography tutorials#photography&039;s
0 notes
Text
Haida NanoPro Magnetic ND 1.8 & NanoPro Magnetic Polariser test review
Haida NanoPro Magnetic ND 1.8 & NanoPro Magnetic Polariser test review by Jenny Cameron in the Scottish Highlands.
Introduction
Welcome to my test review– Haida NanoPro Magnetic ND 1.8 (6 stops) and a Haida NanoPro Magnetic Circular Polariser (CPL). Testing for sharpness, magnetic attraction strength, ergonomics, vignette, colour cast and practicalities.
As a landscape photographer– Over the years I’ve learnt the importance of investing in a good quality filter set if you truly want to hone in on your…

View On WordPress
#China#construction#Ergonomics#features#filters#Haida CPL#Haida evaluation#Haida Filter#haida filters#Haida Jenny Cameron#Haida magnetic flters#Haida NanoPro#Haida NanoPro magnetic CPL#haida nanoPro magnetic ND#Haida NanoPro Magnetic ND 1.8#Haida NanoPro magnetic polariser#Haida NDs#haida test reviews#jenny cameron#jenny cameron 2021#Jenny Cameron equine fine art#Jenny Cameron Equines#Jenny Cameron Haida#Jenny cameron landscape fine art#Jenny Cameron photography fine art#Jenny cameron scotland#Jenny Cameron test reviews#Jenny Cameron workshops Scotland#magnetic attraction#magnetic filters
0 notes
Text
Test review- Haida NanoPro ND kit for DJI Mavic 2 Pro.
Test review- Haida NanoPro ND kit for DJI Mavic 2 Pro.
“Test review of Haida ND filters for DJI Mavic 2 Pro ~for not only photography but also videography”by Jenny Cameron.
Introduction.
Welcome to my test review of the Haida NanoPro ND kit. Designed specifically for use with DJI Mavic 2 Pro. The pack includes four solid neutral density (ND) filters (3,4,5 & 6 stops).
DJI Mavic 2 Pro with Haida ND filter attached.
This is all very new to me…

View On WordPress
#180 degree shutter angle rule explained#aerial photography#aerials#Ardvreck#Ardvreck aerial#Ardvreck castle#ardvreck in snow#Cameron#cinematic#cinematography#DJI#DJI-mavic2Pro#drone#drone evaluation#drone footage#drone footage scotland#drone workshops#drones-nd-filters#evaluation#fineart#Haida#haida filters#Haida NanoPro-ND_kit-for_Mavic-2-Pro#how to use nd filters for video#how to use nd filters on drone#Jenny#jenny cameron#landscape photography#long exposure photography#long exposures
0 notes
Text

“As a landscape photographer I have learnt how invaluable a great filter system is to my arsenal of tools. It’s something you can buy a bit at a time to build up your collection, but choosing the correct brand is the tricky part. Thankfully for you I’ve made the mistakes and now ready to share my thoughts from the past twelve months of using the Haida M10 filter holder system for the 100mm filter series. Such a genius method and design.”
Included in the Haida M10 filter holder kit
Filter holder, Circular Polariser, light-barrier, one adapter ring which can be purchased to fit most popular lenses in sizes 49, 52, 55, 58, 62, 67, 72, 77 and 82mm. Housed in a smart black eco-leather zipped storage case, with a handy carabiner attached to the top which can be neatly clipped onto your tripod or belt for ease of access, internally lined with a lovely grey velvety fabric with a net pocket for storage, including a handy screwdriver, extra pair of filter holder slots and gaskets to provide a third slot on the front of the Holder ) which I’ve left on permanently).
This slideshow requires JavaScript.
Constructed from aviation grade aluminium and PC materials for super strength and is lighter in weight than its predecessor. Its genius design makes it exceptionally user-friendly, with super fast set up, and effortless to change and remove filters. Simply clip the M10 filter holder onto the M10 adapter ring by using the red push-and-release (spring clip) locking lever (see video & photos below). The innovative design gives a very secure and solid connection, and at the same time the ability to rotate 360 degrees. The non-slip spongued coating on the bottom of the filter holder provides a good grip whilst rotating which I think is a nice touch.
It’s designed to take up to three filters ( 100 x 100mm or 100 x 150mm @ 2mm thickness, compatible with other brands at the same size ) on the front of the holder if you wish to stack, and one filter slot at the rear closest to your camera lens where the new round “drop in” M10 filters are used. Boasting a choice of neutral density filters ( 3, 6, 10 and 15 stops), circular polariser (included in the kit), clear-night (light pollution filter), graduated neutral density filters ( 3 and 4 stops) and ND + CPL ( 3 and 6 stops). But only using one at a time which is the only downside if you like using several ND/s and a CPL together. If you don’t wish to use any of the round “drop- in” filters, you must use the M10 “drop in” light barrier (see photo below) which is a simple and easy to use sealing ring to prevent any light leakage (also provided in the M10 filter holder kit).
This slideshow requires JavaScript.
Optional extra filter storage case
During 2019 Haida also released a very useful filter case for their M10 filter series or other branded filters of the same dimensions; either 100x100mm &/or 100x150mm. Holding up to nine filters including Haida M10 filter holder, adapter ring, cleaning cloth & memory cards. This has been with me on my adventures for every shoot, Id truly be lost without it. If you’d like to see more about this case please take a look at my test review showing photos & video here.
All Haida filters are assembled in their own optical workshop located in the beautiful Port City of Ningbo, China. If you like to visit their website &/or Facebook .
I hope this provides you some useful information. Please feel free to ask me any questions.
If you would like to see more of my work;
500px, Facebook, Viewbug, Instagram
“All rights reserved” © Jenny Cameron 2020
Haida M10 filter holder system including light- barrier
#100mm x 100mm#2mm thick filters#adapter ring#adventures#art#Camera#China#education#evaluation#filters#Haida#Haida Filter#haida M10 light-barrier#Haida M10 round "drop-in" CPL#haida round drop in filters#jenny cameron#landscape#landscape photography#learning#M10 filter holder system#M10 Filter Holder System Review#nature#Photography#questions#Review#test review#Testing#thoughts#travel#Tutorials
0 notes
Text
Welcome to my test review of the Haida Red-diamond Reverse Graduated neutral density 0.6 (2stops) filter. Using a Canon 5d mark iv ( full frame camera), Canon 16-35 mm USM L lens, Haida M10 filter holder, Gitzo tripod and ball head.
Over the past three weeks I’ve really put this filter through its paces especially on the beach with sand blowing around & enjoyed every single minute with it. My first shoot was on the remote Scottish island of Lewis in the Outer Hebrides & then finally back on the mainland in the northern county of Caithness. I really wanted to spend time to see how versatile this filter really is. Both these locations were ideal as the island has countless seascapes & Caithness is very flat which suits the filter as nothing to break the horizon line, ie ..mountains, trees etc.
First impression
The filter was presented in a sturdy metal tin with foam insert for protection & lovely chunky cut out which makes it easy to open even with gloves on. One thing I must not forget to mention is how every piece of equipment from Haida, whether its a glass filter or simple adapter ring that I own is always first class, thoughtfully designed & perfect partner for the discerning photographer. Even the smallest of detail, having the particular filter type etched on the top so when their all in your filter case it’s easy to see which filter you wish to select.
This slideshow requires JavaScript.
What’s the difference between a graduated neutral density filter & a reverse graduated neutral density filter?
A graduated neutral density filter is dark at the top where you would place over the sky & gradually reduces its density towards the bottom. Whereas a reverse graduated neutral density filter works on the principle when shooting sunrise/sunset, the highest luminance is near the horizon line. Therefore, the filter needs to be the darkest in the centre region resulting in more detail of the highlights & providing excellent exposure control.
As you can see in the image below, the bottom of the filter is totally clear and the top of the filter comes with a smooth/ gentle transition between the dark & clear areas of the filter which gives a natural balanced exposure & better quality/cleaner image. This would be difficult to replicate in Lightroom with the use of a gradient filter as you need it to be graduated in both directions. I could bracket my shots but it’s much nicer achieving it as near perfect in camera than having to sit at my computer all day.
This slideshow requires JavaScript.
Where to position the filter?
Positioning the filter is imperative, you need to be quite precise by placing it just over the most highlighted areas around the horizon line. Thankfully having it sized 150mm on its longest edge gives more scope & easy to use as you can move it up or down very smoothly till your satisfied with the correct position, as shown in the video below.
youtube
Downside
One major potential problem when using the Reverse graduated ND filter is anything that seriously breaks the horizon, be it some headland, mountain, building or tree is going to get very dark quickly, because the darkest part of the filter is right on the horizon transition area. However for many seascape purposes where the horizon is often flat out to sea this is perfect harmony & a feast for the eyes.
Red-diamond series
The Red Diamond series is my favourite of all Haida filters, the quality is second to none, not that the other Haida series aren’t, it’s just something about Red-diamond that I favour & suits my style. This particular filter I’ve tested is a Reverse graduated ND filter, made from K9 optical glass which is double the strength of normal glass, including an ultra-thin Nano multi coating for extra protection. Along with being shock/scratch resistant, waterproof, oil and fingerprint proof. This made my job at the beach with sand blowing all over the filter very easy to wipe off with a microfiber cloth.
Oftentimes with some filter brands you can get strange colour transitions whereas with this filter there was absolutely no evidence, revealing nothing but true colour & neautraly. You may think with all these features within the glass that optically the sharpness will be compromised, let me assure you and see for yourself from the raw files provided every image is pin sharp from corner to corner with excellent light transmission qualities.
Rectangle in shape 100mm x 150mm, 2mm in thickness providing more flexibility to move the filter up or down. The M10 filter holder geniusly rotates independently, in effect you could turn the filter sideways for more creativity, which I demonstrate in this video.
Also compatible with the Haida 100-Pro filter holder and other brands the same size. I use the Haida M10 filter holder whereby the Red- diamond series of filters are slotted into the front section. Not to mention the added touch of the R5 rounded corners makes it easier to slide in and out of the filter holder, no sharp corners to cut your fingers. You may have seen online the Haida Red Diamond drop test video? Where it’s thrown onto a concrete floor and no sign of damage to the filter. If you are accident prone this would be the perfect filter series for you.
Conclusion
I have tested this filter at different focal lengths & found the image quality second to none. Fundamentally I’m besotted, its now my secret weapon of choice & will always have a forever home in my filter case.
Images below showing straight-out-of-camera (Canon 5d mark iv and Canon 16-35mm USM L Lens) @20mm -With-without-M10 round “drop-in” reverse graduated neutral density filter. No post processing on either.

Without filter = ISO 100, F8, 1/2 second – With Haida Red-diamond reverse graduated neutral density filter 0.6 = ISO 100, F8, 2 seconds @20mm.
Finally post processed in Adobe Creative Cloud

Sunset over Caithness, mainland Scotland.
Images below showing straight-out-of-camera (Canon 5d mark iv and Canon 16-35mm USM L Lens) @21mm -With-without-M10 round “drop-in” reverse graduated neutral density filter. No post processing on either.

Without filter = ISO 100, F11, 1/250 second – With Haida Red-diamond reverse graduated neutral density filter 0.6 = ISO 100, F11, 1/60 second @21mm.
Finally post processed in Adobe Creative Cloud
Isle of Lewis, Outer Hebrides. Scotland.
Images below showing straight-out-of-camera (Canon 5d mark iv and Canon 16-35mm USM L Lens) @30mm -With-without-M10 round “drop-in” reverse graduated neutral density filter. No post processing on either. Location; Caithness, mainland Scotland.

Without filter = ISO 100, F11, 1/15 second – With Haida Red-diamond reverse graduated neutral density filter 0.6= ISO 100, F11, 1/4 second @20mm.
Finally post processed in Adobe Creative Cloud

Sunset over Caithness, mainland Scotland.
I hope this provides you some useful information. Please feel free to ask me any questions. More information & my test reviews on Haida’s website.
If you would like to see more of my work;
500px, Facebook, Viewbug, Instagram
“All rights reserved” © Jenny Cameron 2019
Haida Red-diamond Reverse graduated ND 0.6 filter Welcome to my test review of the Haida Red-diamond Reverse Graduated neutral density 0.6 (2stops) filter. Using a Canon 5d mark iv ( full frame camera), Canon 16-35 mm USM L lens, Haida M10 filter holder, Gitzo tripod and ball head.
#beach#caithness#China#education#filters#harris#hebrides#landscape#learning#M10 Filter Holder System Review#M10 round "drop in" Filters#Mountains#outdoors#Photography#photoshop#questions#Red Diamond#red diamond series#Scenery#scotland#Testing#travel#UK#water#west coast
0 notes
Text
Introduction
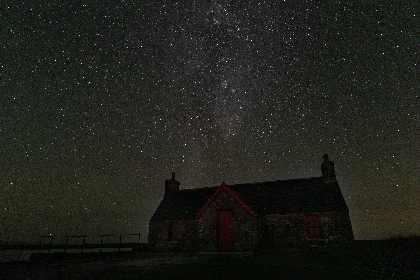
I’ve been curious for some time now – If I’m being honest slightly skeptical if the Clear Night filter actually worked & wanted to find out for myself if this filter really did what it claimed. Initially, I questioned why can’t you simply change the white balance in post production, what’s all the fuss about? Let me walk you through my honest, hand on heart evaluation of the Haida M10 round “drop-in” clear night filter.
Haida M10 round “drop-in” Clear Night filter
Haida M10 round “drop-in” Clear Night filter in protective box
Let me start by explaining a little bit about the M10 round “drop-in” filters which were released on the market in January 2019. They come in a wide range of sizes to fit most popular lenses in sizes 49, 52, 55, 58, 62, 67, 72, 77 and 82mm. Boasting a choice of neutral density filters ( 3, 6, 10 and 15 stops), circular polariser (included in the kit), clear-night (light pollution filter), graduated neutral density filters ( 3 and 4 stops) and ND + CPL ( 3 and 6 stops). Inserting the filter into the M10 filter holder couldn’t be easier, it simply drops between the holder and lens creating a perfect seal from any stray light with its in built light barrier. If you’d like to learn more about the Haida M10 filter holder please feel free to read my in depth test review & video here. It’s almost like gravity does the work for you, so effortless – once you hear the click it’s locked in place. If you don’t have the M10 filter holder but would like to try the Haida Clear Night Filter you can purchase the different options below.
Nano Pro 100 series Clear Night filter 100mm x 100mm, 2 mm in thickness. (Compatible with many of the most popular 100mm filter holders, including the Haida 100-Pro Filter Holder, and the Lee FK Foundation Kit Filter Holder) more information
Nano Pro round Screw-in Filter more information.
Haida M10 round “drop-in” filter range
Haida M10 round “drop-in” Clear Night filter in protective box
Haida M10 round “drop-in” Clear Night filter
Location
This test review was based on a shoot at a remote loch in the county of Caithness in the Highlands of Scotland. Using my Canon 5d mark iv ( full frame camera), Canon 16-35mm USM L lens, Gitzo tripod and ball head. Although I was in a remote area, over 100 miles from the nearest City of Inverness there was still small villages dotted around which caused slight light pollution. My main goal in testing any filter will always be for neutrality & sharpness. I want it to replicate what my eyes see without any strange colour casts which has been an issue for me in the past with a couple of other filter brands.
My photography journey started in 2015 predominantly landscapes but never tried night photography as I’ve always loved my bed too much & staying up till midnight never really appealed to me. Living in the far north of Scotland I knew the milky way & aurora was rocking on whilst I was enjoying my sleep..I guess I took it for granted. After my cancer treatment finished last month its given me a new lease of life, wanting to push my personal boundaries a little more & decided to give this years milkyway season a bash. As a brand ambassador for Haida filter they happily offered me the opportunity to evaluate their M10 round “drop-in”clear-night filter. A few days after it arrived I packed my rucksack & headed north. First night the conditions on a few of the popular apps looked great but ended up in reality too cloudy. The stars were barely visible, I was extremely disappointed to say the least. Im not a defeatist & refused to let this beat me. The following night I returned to the same location with sheer determination, after spending the afternoon & beautiful early evening/sunset thoroughly scouting the location, experimenting with different focal lens & compositions, eventually I settled on a simplistic scene.
Planning
Experience from my previous night taught me this particular location was extremely dark. My question was how would I remember exactly where to place my tripod? I came up with the idea of placing some stones enabling me to find the exact location for the tripod in the dark. The clouds started to roll in as the sun was setting, the barometer on my watch dropped, I was convinced it would be another cloudy night & went to sleep feeling deflated. About 2am I peeked out the window, to my delight the stars were popping off the sky! Adrenaline kicked in, it was exhilarating & I couldn’t wait to set the tripod on my strategically placed stones.
After keeping a close eye on the histogram & checking the images on the LCD display I wasn’t too convinced & felt yet again a sense of disappointment. What had I done wrong now? How do others make it look so easy & great? Why does it look a flat muddy yellow colour? I decided to try the Clear Night filter, exposed for around 26 seconds & boom …I was smiling from ear to ear. Instant clarity, almost like a polarising effect which replicated what I was actually viewing, incredible true to life colours & rid of the horrible warm tones which you can easily see in the raw file below. The sky appears clearer & stars intensify with the filter on. It significantly improved the colour & quality throughout the whole image. I was back on a high, couldn’t have felt more elated. This was great & super easy to use combined with the Haida M10 filter holder which is a dream to use.
The filter made a terrific improvement in its job;
Blocking light rays in the spectrum of sodium lamps & mercury arc lamps between approximately 580nm & 610nm which eliminated the yucky yellow/orange casts, providing a lovely cool tone which is something I prefer to portray for my nightscapes.
True to life colours.
Unbelievable sharpness.
Improved optical clarity & contrast.
Blocking the yellow sodium-vapor light often generated from light pollution in the night sky.
The blue area of the filter has a 100% transmission rate, green area approx 50% & red area around 90%.
Not to mention, made my post processing super easy & fast.
Design & construction
I particularly liked the design of the plastic holder that the round glass sits in, making it ultra easy to drop in and remove from the filter holder without any disturbance to the composition even with clumsy gloves on. Constructed from high quality optical glass identical to the Red Diamond series and feature the same NanoPro multi anti-reflective coatings on both sides which not only produces excellent image quality, total colour fidelity, shock-proof, resistant to dirt/scratches. It helps with condensation from the cold dark night, as any water particles literally bead up & roll off, then any excess is easily wiped off with a microfibre cloth. As with all of the M10 filter range it has a built-in light gasket which seals to the M10 Holder & prevents any unwanted light leakage.
Raw files
Images below showing raw files (Canon 5d mark iv and Canon 16-35mm USM L Lens) @21mm with no filter and with Haida M10 “drop-in” Clear Night filter. Same white balance on both (auto). Demonstrating how the filter has retained every bit of sharpness & made the stars pop straight off the night sky with stunning cool tones.
Without filter ISO 6400, F4, 18 seconds . With Clear Night filter ISO 6400, F4, 26 seconds. Both have same white balance @ 21mm. As you can see in the comparison exif data I have lost around one third of a stop & shows no evidence of any vignetting.
Finally post processed in Adobe Creative Cloud
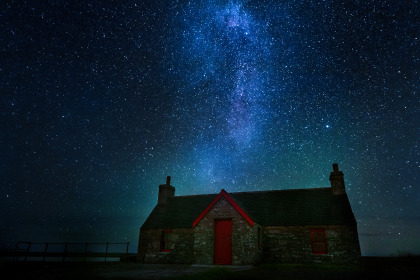
Caithness, Scotland.
Where are the filters assembled?
All Haida filters are assembled in their own optical workshop located in the beautiful Port City of Ningbo, China.
Conclusion
Overall this will remain in my filter case & used in absolutely every night sky I shoot. Im super impressed the way it added a further dimension to my night photography & would highly recommend to any friends. I now have the dark night sky addiction, already have a few locations planned for when the conditions are good again & will add more images to this review. The M10 round “drop-in” Clear night filter is the perfect companion for night skies, don’t leave home without it. Thank you Haida for saving the day yet again for me.
All the equipment I’ve mentioned above can be purchased direct online from Haida’s European distributor Haida Germany shop for excellent service.
I hope this provides you some useful information. Please feel free to ask me any questions. More info & my test reviews on Haida’s website.
If you would like to see more of my work;
500px, Facebook, Viewbug, Instagram
“All rights reserved” © Jenny Cameron 2019
Goodnight …Evaluation of Haida M10 round “drop-in” clear night filter. Introduction I've been curious for some time now - If I'm being honest slightly skeptical if the Clear Night filter actually worked & wanted to find out for myself if this filter really did what it claimed.
#Adobe creative cloud#before & after#caithness#Camera#canon 16-35mm Lens USM L#Canon 5d mark iv#China#clarity#Clear-Night Filter#dark night#education#email#equipment#evaluation#filters#honesty#inspirational#jenny cameron 2019#landscape#learning#light pollution#M10#M10 "drop-in" light barrier#M10 round "drop in" Filters#milkyway#nano multi-coating#nature#NDs#outdoors#Photography
0 notes
Text
Introduction
Welcome to my test review of the Haida round “drop-in” Circular Polariser and Neutral Density 1.8 (6 stop) combination filter and Haida Red-diamond soft graduated neutral density 1.2 (4 stops).
If you enjoy landscape photography I cannot stress the importance of investing in a good quality set of filters. Im well aware of what it feels like having a restrictive budget and fears of making the wrong decisions buying new gear. This is where I hope I can help by providing my hand on heart honest opinion. Haida are not the cheapest filters on the market but by no means the most expensive for the optical quality achieved, you really do get a lot of bang for your buck! We all strive to buy the best lenses so why scrimp on a cheap filter and ruin optical quality, it makes no sense to me.
Haida M10 round “drop-in” CPL+ND 1.8 (6 stop)
When Haida offered me the opportunity to test their M10 combination-filter with built in light barrier I was intrigued to say the least, questioning myself what the downfalls if any would be. Whilst stacking filters can work and something I do regular, however this practice is not optimal for a couple of reasons;
Forcing light to traverse through more elements, therefore more likely to get slightly refracted, possibly resulting in softness or even chromatic aberration.
Increased risk of light flares.
The more I thought about it the more I couldn’t wait. Initially I planned waterfalls for this particular test. Although I could see it being very useful after a midday rainstorm which happens a lot here in Scotland when the sun bursts out it’s great to slow down the exposure a wee bit and allow the filter to do the work. Rainfall hasn’t been great the past few days so I headed to the beach at sunrise instead.
Inserting the filter into the Haida M10 filter holder is incredibly fast, it simply drops between the holder and lens creating a perfect seal from any stray light. Oftentimes in the past I’ve struggled with the issue of light leakage and had to resort to putting hats or cloths over the gap between filter and lens, not an ideal situation unlike any of the Haida M10 round “drop-in” filters such as this combi filter which have a built in light-barrier.
Inserting filter into the rear of M10 filter holder
This is a ND 1.8 filter meaning it will lose six stops of light. But don’t forget it has the added CPL which generally loose between 1-2 stops of light, collectively this will provide a total of almost eight stops. For me personally, I like a six stop ND for moving water as it doesn’t blur everything to oblivion like say a ten stop would. A six stop shows slight movement which I prefer to portray. A neutral density filter should be exactly what the name suggests “neutral” in every which way and let me tell you all the Haida NDs I’ve ever tested are all neutral, no crazy coloured undertones, no vignetting and no loss of sharpness from corner to corner. What you see is what you get.
If your not wanting the polarising effect you can simply rotate the small dial (three gear linkage design ) on the mount independently, very smoothly to reduce or completely remove depending on the scenario of the scene. Once you start turning, you’ll instantly see the polarisation intensify on your live view screen. I tend to always rotate a CPL 360 degrees first to check the availability of contrast, saturation, and reflection. The strongest effect takes place at an angle of 90 degrees from the sun, ie make sure your line of sight is perpendicular to the direction of the sun. The filter is easily removed or exchanged by gently squeezing the red plastic tabs on the top and lifting it out without disturbing your composition. The choice is all yours and easily very adjustable.
Image of raw file with filter on, zoomed in 100% in Lightroom to demonstrate maximum sharpness of the rocks. Its clear to see the quality is second to none, excellent detail even in the darkest of shadows at blue hour.
For this very demanding scene above with the bright sunrise and dark foreground you need the best support from your gear. Let me tell you this filter made my job very easy, provided excellent control over the whole dynamic range, ultimate sharpness, no color cast or vignette, and really made me smile. Constructed from high quality optical glass the same as the Red Diamond series, each filter has ten layers of anti-reflective coatings, shock-proof and scratch-proof, provides the best clarity, includes the famous nano multi-coating to reduce reflection, waterproof (meaning any droplets of water literally roll off like beads, no ugly smears) and the dreaded fingerprints wipe off easily with a soft microfibre cloth.
The M10 round “drop-in” filters are available in a selection of: ND 0.9, 1.8 3.0, 4; CPL; Clear-night; GND-0.9 1.2; ND+CPL 0.9 and 1.8.
Images below showing straight-out-of-camera (Canon 5d mark iv and Canon 16-35mm USM L Lens) @19mm -With-without-M10 round “drop-in” CPL+ND 1.8 combi. No post processing on either, other than lens correction in Lightroom.
Without filter = ISO 100, F14, 0.6 sec – With Haida M10 round “drop-in” CPL+ND 1.8 combination. = ISO 100, F14, 30 seconds @19mm
Finally post processed in Adobe Creative Cloud

This slideshow requires JavaScript.
Haida Red-diamond soft GND 1.2 (4 stops)
Earlier this year I tested the Haida Red-diamond medium 0.9 (3 stops) read review which totally stole my heart, since then it’s rarely been off my lens and I can’t wait to tell everyone how thrilled I am in using it. My love affair with this series only intensified, I had to try the Red-diamond soft graduated neutral density 1.2 (GND 4 stops) filter. Packed my kit and off I went to Aberdeen for sunrise to see how the soft grad stood up to the medium and let me tell you I was not disappointed.
The main purpose of a GND filter is to balance exposure in an image that contains a bright sky and darker foreground. As you can see from the photos below this filter is rectangle in shape and sized 100mm x 150mm, providing flexibility to move the filter up or down within the filter holder for ultimate control. Providing such a beautiful soft progression from dark at the top where you would place over the sky to clear at the bottom in a neutral manner and achieving endless creative possibilities.
What makes this series stand out from its predecessor and other brand filters are listed as follows:
Shock resistant, low risk to any accidental damage.
Scratch resistant, the perfect partner in demanding weather.
Zero colour cast.
Waterproof, oil and fingerprint proof Nanopro coated surface.
Improved optical glass.
R5 rounded corners – makes it easier to slide in and out of the filter holder, no sharp corners.
K9 optical glass.
True colour.
Ultra-thin nano multi coating.
Easy to clean.
Double the strength of other glass filters whilst at the same time retaining ultimate sharpness.
Still retaining 2 mm in thickness making it compatible with the Haida 100-Pro filter holder and other brands the same size.
The Red Diamond series is double the strength of a normal glass filter. You may have seen online the Haida Red Diamond drop test video? Where it’s thrown onto a concrete floor and no sign of damage to the filter. If you are accident prone this would be the perfect filter series for you.
Images below showing straight-out-of-camera (Canon 5d mark iv and Canon 16-35mm USM L Lens) @35mm with no filter and with Haida Red-diamond soft GND 1.2 (4 stops). No post processing on either other than lens correction in Lightroom. As you can see the soft GND significantly transforms the quality of the image.

Without filter = ISO 100, F10, 1/20 – With Haida Red-diamond soft GND filter 1.3 = ISO 100, F10, 0.8 seconds @35mm.
Finally post processed in Adobe Creative Cloud
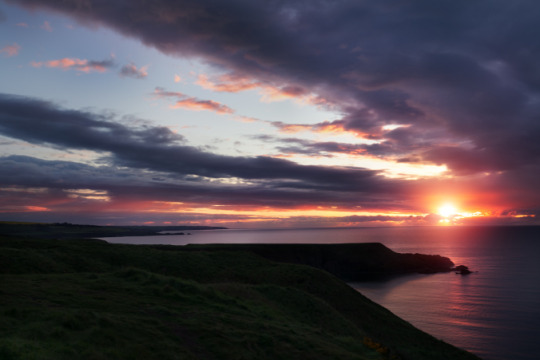
Sunrise over Stonehaven, Aberdeenshire, Scotland.
This slideshow requires JavaScript.
All Haida filters are assembled in their own optical workshop located in the beautiful Port City of Ningbo, China.
Conclusion
My overall conclusion is both filters are superiorly optically and I have absolutely no hesitation is recommending to anyone whether beginners or advanced and using for my own portfolio.
I hope this provides you some useful information. Please feel free to ask me any questions.
This slideshow requires JavaScript.
If you would like to see more of my work;
500px, Facebook, Viewbug, Instagram
“All rights reserved” © Jenny Cameron 2019
Jenny Camerons test review of Haida Red-diamond soft Graduated neutral density 1.2 (4 stop) & M10 round "drop-in" Circular Polariser and Neutral density 1.8 (6 stop) combi in the north of Scotland. Introduction Welcome to my test review of the Haida round "drop-in" Circular Polariser and Neutral Density 1.8 (6 stop) combination filter and Haida Red-diamond soft graduated neutral density 1.2 (4 stops).
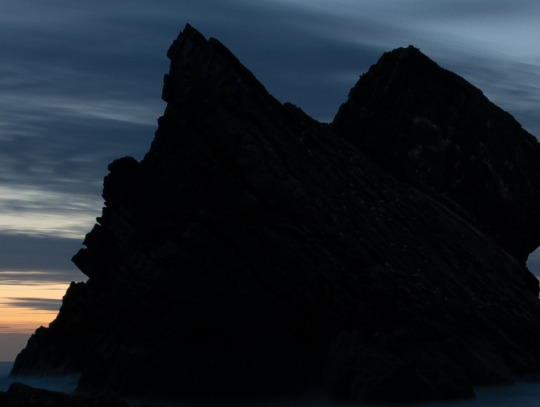
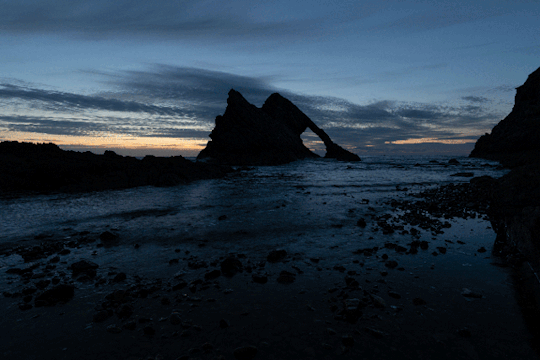
#100mm x 150mm#4 stop#6 stop#Adobe creative cloud#Bow Fiddle Rock#Camera#canon 16-35mm Lens USM L#Canon 5d mark iv#China#education#filters#GND#Haida#Haida Filter#Haida ND & CPL combi#honest opinion#jenny cameron#K9 Optical Glass.#landscape#landscape photography#learning#Lightroom#long exposure#M10 round "drop-in" filter#Moray coast#nano multi-coating#nature#NDs#North Sea#On Location
0 notes
Text
Welcome to my test review of the Haida filter case for their M10 filter series or other branded filters of the same dimensions; either 100x100mm &/or 100x150mm. Holding up to nine filters including Haida M10 filter holder, adapter ring, cleaning cloth & memory cards.
When I first started using filters I never had a case to keep them in which meant using individual tins or cases they arrived in. As my collection increased this really started to annoy me having to faff around often in cold, wet, windy conditions routing through my rucksack searching for the correct filter, this drove me insane! For me personally, landscape photography is a calming influence. I enjoy taking my time & slowing down from “life”, I needed to refine this stressful situation as much as possible. Eventually, I purchased the Lee filter field pouch which stayed with me for a few years as there was no other option available from what I found online here in the UK. It had several filter slots but no space for the holder which meant I had to start adapting & let me tell you sewing is not my fortay. Sure it worked but became very cramped & not ideal.
I’ve been an Ambassador for Haida filters for almost two years now & always mentioned my frustrations regarding a filter case. To my joy this year they released their M10 filter case. This was music to my ears, just what I’ve been searching for all these years. One thing I will say about Haida is they listen to their customers & are photographers themselves which provides them with a better understanding of reality in the field.
Which would you rather have?
All the tins & cases clattering around, not knowing what filter is in each tin? Or, the whole lot in one neat accessible filter pouch? All Haida filters have the name of the particular filter etched on the top, making this super easy to simply flick through & make a selection of your choice.
This slideshow requires JavaScript.
Different ways
It fits onto your rucksack waist belt with a super strong wide velcro strap & a small clip for added security. Or, if your like me & don’t want the added weight of carrying your rucksack around all the time you can attach it to your trouser belt. Another way, if you don’t wear belts you can easily thread a long strap through & wear it loosely across your body. Final option, simply hang it on your tripod & secure with the small clip. It really is very versatile.
This slideshow requires JavaScript.
Construction
Externally the pouch is made from a strong nylon type fabric making this waterproof, moisture proof & extremely durable. There are two easy to grip red zippers externally, one for the main compartment where your filters are housed is made from a soft fleece fabric, ensuring your filters are kept safe from any scratches or knocks. Within this compartment there is a small red zipped section where I keep my memory cards. The second external zipper on the front of the pouch is a padded pocket where I keep a large lens cleaning cloth as seen in the video & photos below.
youtube
This slideshow requires JavaScript.
Conclusion
In a nutshell I’m thrilled with everything about this pouch. As always with Haida equipment, quality never fails & well thought out. A great solution for any outdoor photographer at an affordable price.
Purchase direct from Haida’s European distributor Haida Germany shop for excellent service.
I hope this provides you some useful information. Please feel free to ask me any questions. For more info & my test reviews on Haida’s website.
If you would like to see more of my work;
500px, Facebook, Viewbug, Instagram
“All rights reserved” © Jenny Cameron 2019
Filter case for Haida M10 100x100mm & 100x150mm filters Welcome to my test review of the Haida filter case for their M10 filter series or other branded filters of the same dimensions; either 100x100mm &/or 100x150mm.
#100x100mm#100x150mm#belt loop#Camera#China#education#equipment#european stockist#filter case#filter holder#filters#Gitzo#gitzo rucksack#Haida#haida filters#Hiking#jenny cameron#landscape#landscape photography#learning#M10#Mountains#nature#outdoors#Photography#protection#questions#Review#rucksack#scotland
0 notes
Last Seen Blogs

ansabamusic
ANSABA

thcangriestboy
it wears a human face...

middletonbookconversion
Middleton Book Conversion

tsyunuo-blog
北京ts雨诺

angelplayground-blog1
Playgrounds For Sale - Indoor Playground Equipment Manufacturer|