#starmy speaks
Text
the bells and snow are cute thankyou tumblr :)
1 note
·
View note
Text
youtube
ok here is my final battle in mt battle!! the big blurry rectangle at a few parts blocks when the reflection of me is too clear/visible lol sorry about that
i kinda wish i had recorded some earlier battles cause this definitely wasn't my best play ajsoifdfsd i was excited for this to be over and nervous about recording my screen so i think i wasn't thinking as clearly. unlike the battle where i defeated all three of the legendary beast trio without taking a single HP of damage... u just gotta trust me on that one because i didn't record it </3 many such cases of me kicking ass
anyway, just some notes about this fight:
i had no idea which mon ludicolo was gonna fake out first turn, so i just protected both to avoid any stupid shit from it
in speaking of ludicolo, i was focused on taking it out as soon as possible because quagsire had ice beam for salamence and i didn't want it to be vulnerable to a giga drain
i swapped quagsire into ampharos expecting ludicolo to giga drain!! whenever the opponent can take out quag with a grass move it almost always happens and i was really surprised when it didn't? idk how colo's AI works especially in doubles, i was just going off of what i've learned by playing lol. it didn't end up mattering because hydro pump missed, though i don't think it would have KO'd anyway? not 100% sure on that it very well could have
the turn where i protected umbreon was another failed prediction - machamp went for the earthquake KO on ampharos instead of the cross chop KO on umbreon, but that ended up fine bc of the free switch into espeon lol
the end is where i play particularly messy - the battle is basically won because i have quagsire in the back to take out salamence, who is paralyzed even, but i keep attacking it instead of starmie because...?? idk what was going thru my head at the time, if i were to redo this battle i would have fully focused on just KOing starmie and then quag could clean up at the end. but WHATEVER
but uh anyway yippee sorry about the bad camera angle btw it's the best i could do with my phone at the time lol
#kiki was here#kiki.txt#kiki plays games#coloxd#ik my reflection is still just barely visible at the end but that's like nothing so dw about it#Youtube
7 notes
·
View notes
Text
Okay!! I finally wrote out some hcs for the mer AU for Colress and Faba—
-Both Faba and Colress are royalty (princes) but of different kingdoms.
-Colress’ kingdom lives in deeper, darker and more open water and therefore mer living there dress more defensively than Faba’s clan does, putting practicality above aesthetics. They’re used to being on the look out for and wrestling with larger predators such as Gyarados. Colress has the ability to discharge electricity from his tail and uses it to defend against these predators as well as aid in his inventions. Lantern’s electricity also helps with this- and lights up the dark. Speaking of! Colress has some bio luminescence markings on his tail which constantly emit a soft glow.
-Meanwhile Faba’s kingdom lives in warmer, shallower water— they’re more used to the sun and less used to dealing with predators, so dress to impress with little armour. If any Pokémon become aggressive, Faba has poisonous spines which come in useful to either get them to back off or kill them outright. Against the large predators that live around Colress’ kingdom however, his spines are close to useless. It takes time and a very harsh lesson for his ego to realise this, however. (Bro gets nibbled)
-There are a few other kingdoms dotted around nearby as well… but to be honest I haven’t given them much thought. Maybe Team Skull could be hanging around somewhere in the depths— although they’d be less of a kingdom and more of a band of bandits or something. At least, they definitely wouldn’t be living in palaces lol. More like… a cave.
-In this au Pokémon aren’t kept in Pokéballs, and just sort of… live with their trainers, coming and going as they please. Faba has a few companions: Bruxish, Starmie, Seadra and occasionally Primarina. Colress has Lanturn, Relicanth, Lumineon, and occasionally Empoleon. Empoleon in the mer universe are among the most highly revered Pokémon, and when he discovers Colress’ family has earned the favour of one, Faba is soooo jealous.
-Relations between Elios (Faba’s kingdom) and Achromas (Colress’ kingdom) are tense. A marriage is arranged between the two of them to avoid war, strengthen trade routes, and generally keep the peace.
-Faba appreciates Colress’ respectfulness towards him, but on their wedding night makes it very clear their marriage is in name alone and he has no intention of taking Colress as a mate. Colress is just mildly amused by this strange little man and how defensive he is even though Colress hasn’t made any moves on him, but respects Faba’s wishes for space. All the space in the world can’t save Faba from Colress’ relentless curiosity and endless questions about him and life in shallower water though. They end up agreeing to allow one another three questions a night, for the sake of Faba’s sanity.
-Faba refuses to share a nest. They have to travel between their two kingdoms fairly regularly to fulfil their duties, but always build and sleep in separate nests no matter whose palace they’re staying in. Faba prefers a soft bed of sea grass, and Colress, being more accustomed to the scarce plant life of the depths, prefers sand with perhaps a tiny bit of sea grass to soften the texture. Also, living in an area with so many predators he tends to build the walls of his nest quite high, and constructs a little alcove for himself to make for a more concealing resting place. Not that he needs to- he’s in a well-guarded palace- but instinct, y’ know?
-Colress’ species are hermaphrodites (can either carry or help another conceive young— I rlly hope I got that title right lol), so there isn’t much variation in body types aside from fat level. As a result gender isn’t really a thing in his kingdom, although most mer tend to pick a pronoun and stick with it for convenience. Colress being Colress, isn’t one of these mers. He uses any and all pronouns/royal titles: e.g. Prince, or Princess… although her servants usually just refer to her as ‘Majesty’.
-Colress is responsible for inventing most of the technology within her kingdom. She’s well liked for her inventions, but also her polite disposition.
-Faba on the other hand is despised for his rude attitude and sharp personality.
-Colress is the only mer who can make Faba laugh. At first it frustrates him, but he quickly becomes endeared. Colress likewise is endeared to Faba, because they think he’s so fun. I’ve said it before in vanilla universe hcs, but Colress does like spicy personalities~
-Their marriage was only in name, but eventually Faba finds himself wanting to actually take Colress as a ‘true’ mate. But he’s too stubborn to admit it. Colress is also beginning to feel that way as well, but remembering Faba’s very adamant stance on not wanting to become actual mates, keeps their pining to themselves.
-After Colress saves Faba from a Gyarados attack and sticks with him even after his debilitating injuries (tail fin shredded poor guy, swimming long distances is now exhausting for him), he finally does feel secure enough admit his feelings though.
-Colress eagerly accepts when Faba asks, of course.
4 notes
·
View notes
Text
Okay but speaking of Dick having a Magikarp, I'm now obsessed with the idea of his Magikarp not having evolved by the time the Teen Titans start up.
So, yeah, maybe Dick's a little jealous of Wally and his Jolteon or Garth and his Starmie. Maybe he's a little sad that Magikarp doesn't show him much affection like Donna's Emolga does. Maybe he's a little frustrated that he can't even leave Magikarp in the open water without worrying that Magikarp is going to randomly start jumping around and get snatched up by a Pidgeotto.
But Bruce gave him Magikarp because he believed in him dammit. He believed that Dick had what it took to help Magikarp evolve into Gyarados, and Dick does! He does, he does, he does! He's not going to disappoint Bruce. He's not going to give up on his floppy friend who no longer fits in Bruce's bathtub. He's going to keep working with Magikarp until he evolves! Dick tells himself this constantly, strengthening his resolve.
And then the unexpected happens...
The Teen Titans HQ is attacked. The Titans and their Pokemon jump into action. Well, all of the Pokemon except Magikarp who's swimming around in the river next to the HQ.
The roof of the HQ gets blasted to bits. Donna and Emolga take to the sky. The other Titans run outside to help and a battle ensues. Garth gets surrounded and Dick jumps in to help him. He sees a blast meant for Garth and he pushes Garth out of the way. The impact of the attack sends Dick sprawling through the air and into the river with an almighty splash.
The churning water tosses him around in its cold depths. Arms aching, Dick scrambles to swim back towards the bank. He reaches out to snag a rock but misses when an all-consuming light fills his vision, making it impossible for him to see. He falls further and further until something snags his cape, and Dick chokes at the sudden pressure around his neck. It makes it harder to breathe and Dick panics. His hands instinctively reach up to try and alleviate the tension, but before he can even try and unclasp his cape, he's being yanked out of the water and back into open air.
He sputters and chokes until he's dropped on solid ground like a wet blanket. Without warning, a loud, guttural growl cuts through the air, causing goosebumps to ripple across Dick's skin.
What the fuck was that, he wonders as he instinctively rolls out of the way to protect himself from whatever threat is behind him. He looks up at where the sound came from, and when his eyes lock on the dragon-like face above him, he swears his heart stops beating for a moment.
"Magikarp?" he mouths to himself in disbelief.
Magikarp—no—Gyarados spares Dick a look as if making sure he's okay before he lets out another angry roar and turns towards Dick's attackers with a ball of light already forming in his mouth.
#okay but what if dick names his magikarp guppy#so then when it evolves into gyarados he's like ''guppy i choose you!'' and his enemies think a pathetic water pokemon is going to show up#but then it turns out to be motherfuckin gyarados#Dick Grayson#Magikarp#Pokemon AU
197 notes
·
View notes
Text
★WIP POLL GAME UPDATE ★
Starting from the least voted 🤭
[Banners/post-dividers by @/cafekitsune]

#4th Place (1 Line): Medieval Fantasy-ish AU (TyHil/Pokeshipping), Currently untitled
This seemed to be a cause of concern to him as well because, during the past few hours that Hilary had spent with the two, Misty had brought up Ash’s lack of physical prowess as a teasing point more than a few times.

#3rd Place (5 Lines): Fake Dating AU (TyHil), Currently untitled
“I’m sorry, I really am, but you owe me!”
The alley he had barged into turned out to be a dead end, Tyson cursed under his breath and came to a halt. Spinning on his feet to face the brunette who had surprisingly followed him all the way here from the hotel, he fixed her with an intense glare, hoping to scare her off but she had stopped a few paces ahead of him, keeping a respectable distance between them as she folded her arms across her chest and stared back at him with a passive gaze of her own.
“An apology for the kiss? Yes.” Tyson gritted his teeth as her words rang in his ears, pointing in the direction of the hotel they had just come from, he added in a bitter tone, “But whatever that was, hell no!”
#2nd Place - Tie - (7 Lines): Intimacy Series (Pokeshipping), Strawberry Kisses on AO3, yet to be uploaded on FFN
She wanted to squeeze her eyes shut and let out a loud scream, if she couldn’t even make up her mind over something like this, did she even deserve to win?
Feeling lost and confused, Misty’s eyes searched the stands for a familiar face and it didn’t take her too long to find him.
Ash was sitting in the second row from the front, not too far from where she was standing on the battle ground. He had been observing Starmie too but when their eyes met, Misty felt a new surge of energy rush into her veins. He didn’t smile, he didn’t give her an encouraging nod, he didn’t even look like he wanted to cheer her on. No, Ash’s face was lit up with an intensity of a raging fire, one that wanted to be at the centre of the ring and wouldn’t be contained until it got what it wanted. His jaw was set and his brown eyes bore into her, as if to say that if Misty didn’t see this battle through, he’d come down from the stands to finish it himself.
#2nd Place - Tie - (7 Lines): Regency Era (Mimato), In This Life and the Next on AO3/FFN
The rush she had felt when Sora first suggested the elaborate plan to her that night, had long since faded and Mimi was starting to doubt her ability to keep the story straight in front of Lord Stonefield. Her father always told Mimi, that she was not a good liar and thus she should refrain from even attempting to do so. And she diligently followed that advice, owning up to her mistakes whenever necessary, always speaking the truth to her father and her friends, even if it hurt their feelings often. However, Sora had not only managed to convince Mimi to go ahead with this ruse but dragged even her own husband into it, who was best friends with the man they were going to fool. Things did proceed smoothly at the beginning, Mimi pretended to stay sick so she would not run into the Earl as often at the Sunnyhill Manor while Sora and Lord Tai attempted to make him believe the lie they had cooked up. Sora informed her very brightly that Matt had walked right into the trap, perhaps things were easier with Tai helping them, and while that did relieve Mimi slightly, she still did not feel courageous enough to meet his eye until the morning they were meant to depart for his estate.
Once left alone in the carriage as it slowly waded its way to their destination, Mimi had no choice but to face him head on and keep up the lie all by herself, without the reassuring smiles of Sora or timely interruptions of Lord Tai to keep her company.
#1st Place (8 Lines): Soulmates AU (Mimato), Pieces of You and Me on FFN/AO3
Mimi awoke with a start.
Even as her eyes struggled to open wide, her hands felt the mattress beneath her and she knew instantly that she was in a stranger’s bed. The realisation gave her some strength to pull herself up and keep her groggy eyes open so she could take in her surroundings. The room was too minimalist for her tastes, Mimi thought as she scrunched up her nose at the dull grey colour of the bedsheet and blankets around her. Curtains of a similar dull shade covered the windows on the opposite side of the room, blocking the sunlight from entering the room and filling it with some life. Next to the bed was a small table on which a black, digital alarm clock rested along with a glass and a bottle of water. She wondered if the water was meant for her, and as if on cue, she was aware of her throat feeling parched so without a second thought, she reached forward and poured herself a full glass. While gulping down the water, she even became conscious of the headache that ailed her, almost as if someone had dropped a whole lot of bricks on top of her.
#writing#tyhil#mimato#pokeshipping#wip updates!#next weekend i'm home for 4 days so at least one of these is getting picked and updated#i'm leaning towards regency era mimato#but we'll see
3 notes
·
View notes
Text
Golisopod for Pokemon Unite!
Season 1
Prev: Torterra - Scrafty - Starmie - Luvdisc - Boltund - Tinkaton - Rampardos - Bronzong - Delibird - Polteageist - Falinks - Hariyama - Clawitzer - Salazzle - Ariados - Dubwool - Pyukumuku - Togekiss
The deep sea is one of the least explored areas of our planet. We actually know more about what goes on in space than what we know of our own ocean. Is it because we yearn for the infinite knowledge that space has to offer? Or is it because we’ve seen the face of the abyss down below?
Residing in the trenches of the deepest recess of the sea, Golisopod dwells. Its body has been honed by the immense pressure of the deep sea, having sharpened its claws fighting for the limited resources down below. And now it makes landfall on Aeos Island, ready to claim the rank of mastery.
Let us see if it can carve out something for itself in Pokemon Unite.
(also huge shoutout to @sunglasses-kitaro for uploading THE COOLEST Golisopod gif I’ve ever seen I just love every second of it)
-
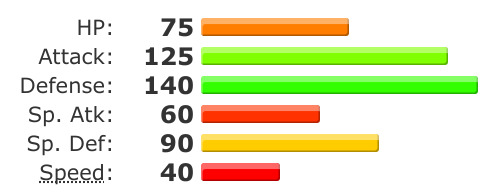
Right off the bat, Golisopod’s stats are monstrous. Sky high Defense coupled with a relatively high Attack stat makes this pokemon well suited to tanking hits and hitting back just as hard. The rest of its stats paint a pretty picture of a pokemon specialized in close combat, using its bulk to block any attack and using the opening to counterattack. Because of its low Speed and Sp. Attack, Golisopod is limited to using its bulk in this way. And thus, with its playstyle speaking for itself, Golisopod has been established to take on the role of a...
Speedster
Wait WHAT?! Speedster?! Are you out of your mind?! Look at the defenses of this thing! Speedsters are supposed to be frail and capable of extremely high burst damage to compensate for that frailty. Why is Golisopod a Speedster?
Well, as it turns out, Golisopod as a Speedster is a hard to use, hard to master Pokemon, which will become apparent as the post goes on. Because Golisopod gets most of its power from hitting the weak spot of the enemy, it uses its defenses to bide its time, waiting for the opportune moment to inflict a devastating counterattack. It employs feints and proper positioning to fully maximize the damage it can deal, and for that reason, it’s a Speedster.
Besides, there is another bulky Speedster named Zeraora that also employs proper positioning and mastery of its moves to get the most damage. It has lesser burst potential than, say, Gengar or Zoroark, but it has the ability to take a couple of hits better than them. Golisopod is in the same boat in that, in order to deal the most damage, you must understand every aspect of the pokemon, from its ability to its moves.
Let’s start with the basic attack.
Basic Attack - Melee/Attack
The user charges directly forward, slashing with a claw. Charging the move extends the dash distance and damage, damaging multiple enemies. Releasing the attack button at the right moment drastically boosts damage dealt to all enemies. While charging, the user can change direction.
Without any charge, the basic attack is a cutting dash attack that sends Wimpod and Golisopod a short distance forward. At full charge, the dash attack reaches far enough to nearly cover the distance between the first and second Goal Zone.
If no input is held, Golisopod will start the attack aiming at a nearby enemy and will attempt to turn and follow them as they move. If no enemies are nearby, Golisopod will charge and face directly forward.
It takes 1.75 seconds to reach full charge. Without any charge, the basic attack deals 1x your Attack Stat. Fully charged, it deals 2.5x. If the attack button is released within 5 frames of being fully charged, It deals 4.5x damage. A frame later and the damage is reduced to 2.5x.
The chance of dealing a critical hit applies to the attack as a whole, not with each enemy damaged. This basic attack allows the pokemon to dash through walls.
The pokemon’s turning speed is reduced greatly while charging. The basic attack charge can be held for as long as the button is held, but the maximum damage caps at 2.5x.
The charge can be interrupted if the pokemon receives a hindrance. Blocking the hindrance with Full Heal or other protection will allow you to continue charging the attack. However, the attack itself can be interrupted with a hindrance.
With fancy swordplay, Golisopod (and Wimpod) employ the powerful sword draw technique called Iaido for its basic attack. Of course, lacking in an actual sword, Golisopod uses its claws as a substitute to similar success.
No ability to gain a boosted basic attack means that this ability can be a bit on the slow side. And using the move recklessly does little to cover the distance or deal much damage to your enemies. To get any mileage out of this sword draw, you have to anticipate a fight or charge the attack from a safe distance. That’s easier said than done, as there are slight nuances with using the move effectively. Namely, your ability to turn and better aim at enemies is reduced, making it difficult to catch and cut down agile enemies.
The timing is what you should be worried about. There is a ‘sweetspot’ timeframe where releasing the button at near the moment it is fully charged causes a drastically boosted damage output. Fully charged normally, it deals 2.5x your Attack damage, but if released within 5 frames of being fully charged, the damage comes out to 4.5x. 5 frames is 1/12th of a second, and it’s easy to miss that timing. You may be more focused on hitting that frame just right, but it won’t be so easy landing it in the heat of battle.
There’s also the slight issue that this attack sends you diving right into the fight, which can be problematic if you didn’t prepare properly for confrontations with the enemy team. The attack can be stuffed by hindrances, but then again what move doesn’t? This is where you would use your natural bulk to tank a couple of hits and get out of there, as you being a Speedster means the enemy is most worried about you getting a cheeky 4 KO streak and will respond to your presence with extreme prejudice.
And they should be worried. If you train yourself to hit the 5 frame window of this basic attack consistently, you’ll have the ability to deal constantly high damage to the enemy with every encounter, and there’s very little counterplay to that barring every single hindrance in the game.
Thankfully, both Wimpod and Golisopod come with a natural escape plan, for when things go really, really bad.
Ability: Wimp Out/Emergency Exit
Wimp Out (Wimpod)
When the pokemon’s HP reaches half or less, it gains a massive speed boost for 4 seconds and invincibility for 2 seconds. However, until the speed boost ends, the user cannot attack or score a goal. This ability is refreshed when the pokemon fully regains its HP.
Emergency Exit (Golisopod)
When the pokemon’s HP reaches half half or less, it gains a massive speed boost for 5 seconds and invincibility for 2.5 seconds. However, until the speed boost ends, the pokemon cannot attack or score a goal. Afterwards, however, the user gains a massive attack boost for 7.5 seconds. The ability is refreshed when the pokemon fully regains its HP.
Both Wimp Out and Emergency Exit activate when the pokemon’s HP reaches 50% HP or less.
Wimp Out grants a 60% movement speed boost and 2 seconds of Invincibility when activated. Emergency Exit grants 75% movement speed and 2.5 seconds of Invincibility. The pokemon cannot attack, use moves, or attempt to score a goal until the ability wears off, but the invincibility grants the pokemon immunity to debuffs and passive hindrances such as opposing Speed Flux Zones. Battle Items can be used and the pokemon can still receive effects from its teammates.
Emergency Exit grants Golisopod a 50% Attack boost for 7.5 seconds after the Invincibility wears off.
Both Wimp Out and Emergency Exit reactivate when your HP is fully restored. The ability icon will be displayed on the lower right hand corner when it’s active.
All pokemon are vulnerable to high burst damage, even the sturdiest Defenders and All-Rounders can’t sustain loads of damage all at once. So it’s really surprising that a Speedster of all things has a built in protection against such burst damage. And that ability is called strategically running away.
Both Wimp Out and Emergency Exit activate when your HP reaches 50% or less, which then grants not only a major speed boost, but also temporary invincibility as well. The ability to become invincible is something very few pokemon in Unite can utilize at will, such as Glaceon’s Snow Cloak or Cinderace’s Feint or even Mew’s Mystical Mirage. While they use it offensively, being Attacker’s and all, Golisopod uses it defensively, because they’re a brave coward. No, seriously, when the ability activates, both Wimpod and Golisopod cannot attack or score until the boost wears off, forcing you to use this ability to strategically reposition yourself and run away from the scary pocket monsters.
Well, Wimpod uses it to retreat, Golisopod uses it to make a bold play. After the boost wears off, another one activates, granting it a massive Attack boost for 7.5 seconds. For the brief 2.5 seconds of Invincibility, you have to identify which pokemon on the opposing team is going to cause you and your allies the most trouble. Get into position and then use the attack boost to knock their lights out. Of course, if it’s just two or three enemies, you can afford to go in, but do be careful about the follow up attacks their teammates will throw at you. Squaring up against the entire enemy team is doable, but not advised, as a KO trade between you and your target won’t benefit your team all that much. Unless you are absolutely sure you can take two or three enemies with you, use the ability to run away and regroup.
For what it’s worth, this ability is really handy for stealing the secure on Regieleki or Rayquaza, but you’ll have to time it just right because you can’t do anything for the 2.5 seconds of Invincibility. Also, this ability can only be reactivated by refilling your HP back to full. If you want to use Emergency Exit again right away, either retreat to the base or have a Supporter top you up at an Ally Goal Zone. The same goes for Wimp Out.
Oh, speaking of which, since Wimpod can only use the movement speed boost and ability, it’s actually a pretty decent method of sneaking into the opposing team’s Central Area and stealing their EXP. Since you can use your timely basic attack to deal a lot of damage, you can get away with nabbing one of two Baltoys or even an Accelgor. I say basic attack because...well, see for yourself what moves poor little Wimpod starts out with.
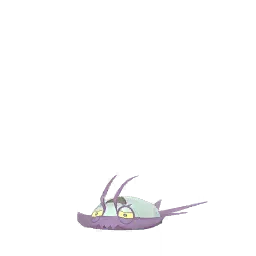
At the start of the game, Golisopod will start out as Wimpod. You can choose between Struggle Bug and Sand Attack as your first move. By Level 3, you will have learned both.
Move 1: Struggle Bug
The user sprays fluids all over, damaging nearby enemies and reducing the attack power and movement speed for 3 seconds. 6s cooldown.
All enemies damaged by this move have their attack power reduced by 35% and movement speed decreased by 30% for 3 seconds.
Struggle Bug inflicts a debuff that can be cleared with Full Heal or other protections.
Bug Type pokemon are weird. A lot of them have a pathetic movepool that limits their early life, starting off with 3 or 4 moves, if they’re lucky. Wimpod is one such example in that, listed here, this is over half of the moves it can learn all by itself.
Another point of contention is Wimpod’s weak stats in comparison to its evolution. It lacks a lot of attack power, defensive potential, and very low HP, favoring higher speed to help it search for scraps. This is all reflected in its early game, as Wimpod has very little going for it with its moves.
Struggle Bug attacks everything around it, dealing damage and lowering their attack power and speed for a short while. The low cooldown makes it easy to keep applying these debuffs to the enemy, but Struggle Bug is to be used to cover your butt as you steal EXP from the enemy or make a retreat. The low damage you deal with Struggle Bug doesn’t help much, but reducing their attack power makes it easier for you to swoop in and steal the last hit of HP off of wild pokemon.
At least, that’s the plan in general. You’ll want both Struggle Bug and Sand Attack before making a bold play such as stealing the enemy’s EXP farm. Spoiler alert though, it only helps a little.
Move 2: Sand Attack
Huff up sand everywhere in front of you while retreating backwards. Enemies hit by the sand will have their vision impaired for 1.5 seconds. 4s cooldown.
Sand Attack will not damage enemies. However, their vision becomes impaired similar to that of Greninja’s Smokescreen and Gible’s Sand Attack. This effect lasts for 1.5 seconds.
This attack sends Wimpod backwards a fair bit upon use. This move counts as a hindrance and a dash ‘attack’.
Pocket sand, they never see it coming.
While Sand Attack cannot deal damage, it can blind the enemy temporarily, limiting their ability to target and attack enemies from far away. It helps a lot with escaping as well, as using the move sends you reeling backwards. The very low cooldown of the move makes it very easy to frustrate your enemies repeatedly, though you’ll have to be mindful of hindrance protection the opposing team can employ.
That’s about it for all of the benefits of Sand Attack. Realistically, you can follow up Sand Attack with a properly charged basic attack to deal surprise damage, but Wimpod’s base power is very weak until it evolves.
And that’s where the skill ceiling of Golisopod comes into play. You have to train up to Level 8 in order to evolve Wimpod into Golisopod, which is an agonizingly long time farming. It can be more difficult if the opposing team stifles your own ability to farm, as you’ll be dead weight until you can actually reach that level. While you may be able to shorten that with a peaceful romp in the Central Area at the beginning of the game, you may need a Supporter running EXP Share to help close the Level gap. The sooner you do it, the better.
Once you hit Level 8, Wimpod’s full power is unleashed, quite literally.
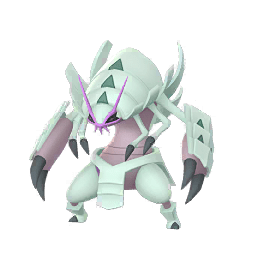
At Level 8, Wimpod will evolve into Golisopod. At the same time, Struggle Bug becomes either First Impression or Razor Shell and Sand Attack becomes either Iron Defense or Swords Dance.
Move 1a: First Impression
A head long charge that hits fast and hard, tackling and throwing enemies. If you are under the effects of any boosts, those boosts end after dealing damage but the cooldown of this move is reset afterwards. 15s cooldown.
At Level 12, First Impression becomes First Impression+.
Knocking Out an enemy while Iron Defense or Swords Dance is active resets the cooldown of First Impression+.
Enemies caught in the attack are Shoved up to the end of the attack. At the end of the move, all caught enemies and any nearby are Thrown.
First Impression can be stopped by hindrances.
If a boost is active, it ends prematurely after dealing damage. The cooldown of First Impression is reset afterwards.
Any and all boosts are lost, including the Invincibility granted by Emergency Exit. However, First Impression can be used with the Invincibility of Emergency Exit as it can be forced to end due to the move’s effects.
All effects of a boost are lost when First Impression is used, including auxiliary boosts, such as the shield and speed boosting effect of Hoopa’s Trick.
All boosts have their duration paused when First Impression is used, making it possible to use the move to its full effect at the last second of the boost duration.
You can use a Battle Item to strategically reset First Impression’s cooldown after it has been reset.
If First Impression will have it’s cooldown reset when it is used, an exclamation point graphic appears over the Move Icon to signify this.
First Impression deals damage equal to 5x Golisopod’s Attack Stat.
Talk about a massive power spike! Not only do your stats skyrocket, but both of your moves get upgraded at the same time! This can become a dilemma really quickly as you’ll have to decide what set you’ll be running for the rest of the game right here and now, instead of adapting to the opposing team’s strategy as the match progresses. First and foremost, you ‘ll need an idea of what your moves do.
First Impression is a charge attack that shoves and damages enemies along the way, similar to Dodrio’s Run Away boosted Drill Peck. By itself, that’s all there is to it, but First Impression is one of the strongest attacks in the game (well, it would be if it weren’t for Zacian...) in that it deals so much damage, it can OHKO some Attackers and put a massive dent in the HP of Defenders. With all of that power, there’s very little in the way of protecting yourself from Golisopod when it comes charging at you, but then you look at the huge cooldown timer. 15 seconds is 1/4th of a minute, which means you’ll only throw out 4 of these every minute once you’ve evolved. Well, that’s if you use the move suboptimally.
If you have an active boost, it’ll go away when First Impression is used and deals damage successfully. This could be any boost, either a speed boost or an attack boost or even a defense reduction boost granted by a Supporter. However, in exchange for that boost, First Impression gets its cooldown reset, allowing you to use the move again! You can use up a boost and deal heavy damage twice over with First Impression, which is a great way to use up the last couple of seconds of a boost that’s about to fade away. If you’re bold enough, you can even forfeit the Invincibility of Emergency Exit!
Now, I lied a bit when I said that you can’t do anything while Emergency Exit is active. You actually can use First Impression to sacrifice Emergency Exit to deal surprise damage, but this is a desperation attack as you’ll be at half HP and diving into the opposing team. However, because First Impression forces a boost to ‘end’, it causes Emergency Exit to segue from the Invincibility and movement speed boost into the Attack boost, which you can also sacrifice to recycle First Impression. This results in you being able to use the powerful First Impression up to 3 times in quick succession, but this sacrifices your escape options and ability to reposition yourself freely around the opposing team. However, the burst damage is worth it as you can deal great damage to opposing Defenders and All-Rounders. The problem is what happens when you miss.
First Impression processes the boost being sacrificed upon successfully dealing damage, so if First Impression misses, the boost remains...but then the cooldown comes on. This makes 1-on-1 fights a bit of a cautious endeavor as, if the enemy baits out your First Impression and dodges it, you’ll be stuck waiting out the cooldown timer with only your basic attack to fight back with. Engaging groups of enemies might make it easier to use First Impression and its recycle effect, but it also makes you more vulnerable to burst damage as a counterattack in response. It’s very likely you’ll activate Emergency Exit as a result of tanking those hits, but if the entire enemy team is in the know in how to deal with First Impression, they’ll also back off and wait for you to spam First Impression. This might sound like a good idea, but remember, sacrificing Emergency Exit means sacrificing your Invincibility, which makes you vulnerable to their follow up attacks.
When all is said and done, however, you’ll have likely decimated the opposing team with successful volleys of First Impression. You’ll be free to score a load of points or steal EXP, but it’s important to look at what you’re left with. 15 seconds of cooldown along with an exhausted Emergency Exit that has to be refilled at Home Base makes it very dangerous to be caught out in the open all by yourself. Should any survivors of the opposing team roll up, there’s very little you can do but retaliate with First Impression when it comes back off of cooldown, but then you’ll have no boosts to sacrifice and reset the cooldown of the move.
Also there’s no guarantee that you’ll completely wipe out the opposing team with volleys of First Impression. The move doesn’t make you immune to hindrances, so you’re still vulnerable to crowd control effects like Venusaur’s Sludge Bomb or Tsareena’s Trop Kick, not to mention the stuns opposing Supporters can inflict such as Mr. Mime or Wigglytuff. Worse yet is contending the opposing team while an enemy with the ability to sustain themselves is mixed into the crowd, like Trevenant or Buzzwole, stifling your attempts at dealing burst damage with well timed hindrances and attacks.
If you’d prefer to keep your distance, Razor Shell is the ideal move for you.
Move 1b: Razor Shell
Launch a blade of water directly forward. The attack can be used repeatedly until the move ends or the pokemon receives a hindrance. Your critical hit rate increases while Iron Defense or Swords Dance is active. 10s cooldown.
At Level 12, Razor Shell becomes Razor Shell+.
Knocking Out an enemy while Iron Defense or Swords Dance is active resets the cooldown of Razor Shell+.
Razor Shell has two active hitboxes, the water blade projectile and the water blade itself. Both can damage an enemy at the same time if the enemy is close enough.
Razor Shell is active for 5 seconds and will launch the attack in the designated direction or directly in front of Golisopod when the move is used.
The attack comes out faster if Golisopod isn’t moving. Aiming won’t affect the attack speed.
The critical hit rate of Razor Shell increases by 50% if Iron Defense or Swords Dance is active.
Razor Shell increases the area of damage of your basic attack as well. Golisopod will swing the water blade as it cuts through enemies. The boosted critical hit rate also applies to the basic attack if Iron Defense or Swords Dance is active.
Ok, first off, this move sounds a lot like the new Aqua Cutter attack introduced in Gen 9. However, Golisopod isn’t in Gen 9 yet at the time of this writing, yet it is clearly capable of such a technique as observed in the GIF I’ve used heading the post. I’ve no doubt that Golisopod can learn Aqua Cutter, but for the moment, it’s called ‘Razor Shell’ here. Just pretend it’s Aqua Cutter if that’s your fancy.
Anyway, Golisopod takes pressure washing very seriously, having mastered the flow of water to the point where it can literally cut things apart with its water blades. It’s so good at this, the water cuts through the air as a projectile each time it swings. Razor Shell gives Golisopod some much needed range, as it gives it the ability to deal damage from afar and avoid risking serious dents to its HP.
That is to say, Golisopod can very easily handle things up close if it wanted to, as the blade itself isn’t just for show. Actually, if any enemy is foolish enough, they’ll be cut up by both the water sword and the blade projectile as it comes out, and this isn’t some flimsy water either. Since you can learn either Iron Defense or Swords Dance at the same time you learn Razor Shell, you can boost the critical hit rate of this move by buffing yourself up before drawing your blade.
Now, you’ll only have 5 seconds of cutting time when Razor Shell is active, but if your fingers are fast enough, you can definitely mash out a lot of water blades. However, if you calm down and hold your stance, you’ll find that launching Razor Shell is faster when you’re standing still. Sure it might be nice to be able to launch sharp water blades while on the move, but if you really need the damage, just pick a spot and make like a potato and mash.
A slight problem is that Razor Shell ends if you get hit with a hindrance, so maybe don’t expect standing still to work all the time. If you know the enemy is trigger happy with their crowd control, try to stay out of range and stay on the move. Of course, this sacrifices your ability to deal high damage, but surviving is always the better deal.
Unlike First Impression, Razor Shell doesn’t have any fancy effects tied to it that allows it to reset itself by sacrificing a boost or anything like that, not until it gets upgraded at least. It does power up your basic attack slightly by expanding the range of the attack, but considering that charging this up cuts into the time available to you to use Razor Shell, it’s not that big of a boost. It’s handy to have if you need to secure a KO that Razor Shell can’t do. ...I can’t think of a situation where it call for that, though...
Razor Shell provides consistency over First Impression, and that’s amplified by the critical hit rate boost gained while Iron Defense or Swords Dance is active. As you can imagine, First Impression would sacrifice those boosts as well, making that move all about inflicting burst damage repeatedly with just one attack. Razor Shell has more safety and ease of use over First Impression and is useful in just about all situations, but it pales in comparison to the sheer burst potential of First Impression. If you can master either move, you can expect to secure a KO with each encounter.
Since you learn two new moves at once, there’s a lot pressure on choosing the right build. So let’s break down the other half of your plan of attack.
Move 2a: Iron Defense
Hardens your shell, making you immune to damage and hindrances for 6 seconds. Receiving damage and hindrances shortens the duration of this move. 10s cooldown.
At Level 13, Iron Defense becomes Iron Defense+.
Your basic attack throws enemies on hit while Iron Defense+ is active. Charging with your basic attack prevents damage and hindrances from shortening the duration of Iron Defense+.
Iron Defense grants immunity to damage by setting all received damage to 0. However, receiving damage and hindrances decreases the duration of Iron Defense by 0.5 seconds for each infliction.
If an attack inflicts damage and a hindrance at the same time, it decreases the duration of Iron Defense by 1 second.
The duration of Iron Defense is visualized with a shield graphic that fades out in a clockwise pattern. Both you and the enemy can see how much time Iron Defense has left.
Iron Defense+ makes your basic attack throw enemies on hit. In addition, receiving damage and hindrances will not shorten Iron Defense+ if you were damaged while charging the basic attack.
Goliopod’s ability to become Invincible is limited to its HP bar and comes with caveats. When activated, it makes you immune to damage briefly, but then you can’t attack or score until the speed boost wears off. This can be very troublesome if it kicks in right as you were about to KO an enemy, as you can’t finish off the enemy, nor can the enemy deal damage to you, forcing a temporary stalemate. If you’ve learned First Impression, you can circumvent this by sacrificing the Invincibility, but if the move was on cooldown or you learned Razor Shell instead, the enemy can actually decide to retreat. Giving chase in this scenario is not advised, as you will likely get jumped by the opposing team with only half of your HP to work with.
Iron Defense fixes this problem before it becomes an issue. For 6 seconds, you’re immune to damage and hindrances. This can be a big help in preventing Emergency Exit from activating too early or saving your skin from an untimely KO. The crazy part is that you can still attack, which has all sorts of useful applications in combinations with your moves, aside from the obvious ones.
For starters, your basic attack becomes much easier to use with the protection of Iron Defense, meaning that if you’re really good at aiming and charging your basic attack, you can use Iron Defense to deal a critical hit against even a stun spamming enemy like Dodrio or Delphox. If you’ve learned First Impression, the damage and hindrance immunity gets sacrificed, but you’ll keep the protection until after damage is dealt successfully. Razor Shell is a projectile that’s better used while you’re standing still, but it ends when you receive a hindrance. Well, Iron Defense resolves that by allowing you to send water blade projectiles outward with reckless abandon, granted impunity with the damage and hindrance protection. It’s just an all around great move, especially for a Speedster.
However, there is always a catch to these sorts of boons. While you are immune to damage and hindrances, the duration of your protection is whittled down when an enemy tries to hit you anyway. Half a second shaved off of your protection may not seem like much, but even the weakest hit reduces the duration of Iron Defense. Multiply that by 5 members of the opposing enemy team, and you’ll lose 2.5 seconds of Iron Defense. It goes without saying that, against hardheaded enemies, the Iron Defense won’t hold out for long, especially if the enemy is very bold.
Also, if an attack deals damage and a hindrance at the same time, it’ll take away 1 second instead of half a second. It gets dropped for each hit you receive, meaning some multihit moves will really wear away your Iron Defense protection. If an enemy Crustle hits you with all 3 hits of X Scissor, you’ll have lost half of Iron Defense in one move. Imagine dealing with multiple hindrance inducing attacks the enemy team is packing.
This doesn’t make Iron Defense the wrong choice, though. It really depends on the situation and the matchup. As Iron Defense blocks any hit, no matter how strong, it improves your ability to fight certain pokemon 1 on 1, such as Urshifu or Buzzwole. Some enemies will make Iron Defense useless due to their ability to throw a lot of hits really fast, like Razor Leaf Decidueye or Petal Dance Venusaur, so it’s important to understand the enemy’s battle plan before deciding on what move to use. Iron Defense+ improves things a bit by improving your basic attack in that, while charging it up, receiving hits and hindrances does not reduce the timer of your protection, making it a great attack. The Throw effect also helps.
Speaking of straightforward, Swords Dance provides a great yet simple boost.
Move 2b: Swords Dance
Sharpen your blades, boosting your attack and movement speed dramatically for 6 seconds. Your basic attack also charges faster. 10s cooldown.
At Level 13, Swords Dance becomes Swords Dance+.
Your basic attack becomes easier to aim and attack with. The attack distance also lengthens.
Your Attack is boosted by 50% and your movement speed is boosted by 40% as well for 6 seconds.
Your basic attack charges twice as fast. This also affects the sweetspot timing, bringing it down to 0.87 seconds. If Razor Shell is active, Golisopod slashes with two blades of water, but this is just a visual effect.
Swords Dance+ makes it easier to turn while charging the basic attack. The direction can also be buffered by holding a direction at the end of the attack and charging the basic attack again. The attack distance is increased by 1.5x.
A move that’s can be boiled down to a built in X Attack and X Speed boost. There’s nothing simpler than that.
Ok, there’s a little more going on there with the boon it grants to your basic attack. Since it halves the time it takes for your basic attack to become fully charged, you can use it much faster than normal. This doesn’t affect the turning speed though and it does mess with the sweetspot timing, forcing you to relearn the frames of a Swords Dance boosted basic attack. If you can get it right, though, your efforts will be greatly rewarded. Swords Dance boosts your attack by 50% and your movement speed by 40%, so you don’t need to aim and turn with your basic attack if you can just run and reposition yourself to a much more favorable spot.
Combining the Attack boost with the sweetspot of your fully charged basic attack can bring the damage up to as much as 6.75x damage in a single hit! And that’s not even including extra boosts from X Attack or increased damage granted to you by a Supporter. Of course, you have to learn how to actually hit the sweetspot, as Swords Dance halves the charge time, but it’s so worth the effort, especially if you can learn to hit it consistently. There are people out there who play competitive games with much stricter timing than that, so I’m sure you can manage.
Swords Dance+ upgrades your basic attack even further when you activate it. See, your basic attack is aimed directly in front of Golisopod when you use it, whether or not you are holding a direction. It’s a lot like Dodrio in this way in that Golisopod has to aim with its face in order to properly use its basic attack. Swords Dance+ fixes this by allowing you to quickly snap to a direction when you use your basic attack. You can even buffer a direction and have Golisopod snap directly behind itself after attacking. This makes you capable of attacking back and forth, like a manual version of Zoroark’s Feint Attack. Coupled with the increased charge speed, you can deal a lot of damage up to 6 times in quick succession if you’re good enough.
Your other moves get a pretty big boost as well. Razor Shell gains increased critical hit chance while Swords Dance is active, making it capable of dealing insanely high damage along with the attack boost you gain. However, no hindrance protection makes you vulnerable to getting stuffed, which is one thing Iron Defense has over Swords Dance. First Impression uses up all of the boosts of Swords Dance to reset itself, but if you manage your boosts smartly, you can reset the cooldown ad nauseam until Swords Dance comes back online. Just make sure you don’t miss or get stifled by, sigh, another hindrance.
Hopefully I’ve drummed up a convincing set of reasons as to why Golisopod is a Speedster, as while it can deal big heavy damage, it takes a bit of mastery to use efficiently. Even when played optimally, there are threats and situations to watch out for, which can be repelled by using your defenses and your ability.
Golisopod is a Speedster that employs hit and run tactics, just like other pokemon of its class. The difference is that it comes equipped with multiple safety measures and escape plans to afford a big screw up every now and then. However, running away in order to save itself costs the team a lot of time and opportunity to deal damage, so you must learn how to master all of your moves and abilities.
And what better way to create an opening than its Unite Move.
Unite Move: Shell Splitter
The pokemon ceases movement and readies an attack for 10 seconds. When an enemy moves within the attack’s range and lingers for 1 second, the pokemon will deliver a lightning fast cutting attack that halves the HP of all enemies caught in the attack, stunning them for 1 second, and increasing the damage they receive for 7 seconds. Alternatively, holding the Unite Move button delays the attack, unleashing it when the button is released.
Upon activation, Golisopod will face the designated direction while holding a ‘sheathed weapon’ position. While the Unite Move is active, Golisopod is immune to hindrances.
When an enemy enters the range of attack and lingers for 1 second, Golisopod will unleash a dash attack and halve the HP of the target and all other enemies nearby. This HP halving is counted as piercing damage and the amount of damage dealt is a set number for each target, exactly half of their HP.
If the target leaves the range, Golisopod will hastily attack early, attempting to damage the enemy before they leave. This attack can miss if the enemy uses a dash attack or other such move that makes them hard to hit.
The player can manually control the timing of this attack by holding the Unite Move button and releasing the attack at their discretion. Tapping the button on reaction to the enemy entering your range is faster than waiting out the 1 second delay.
Alternatively, delaying the attack makes it possible to catch multiple enemies in one attack. Coordinating an ambush is the easiest way to do this.
The Unite Move ends after 10 seconds, even if the player is holding the Unite Move button.
Enemies are stunned for 1 second and they receive 50% more damage for 7 seconds afterwards.
Wild Pokemon will not have their HP halved. Instead, they’ll receive 10x damage and reduced defenses for 7 seconds.
I don’t know if it’s obvious to you, but Golisopod gives me the vibe of a heavily armored samurai, so proficient with their blade that they can move like lightning and cut down enemies before they’ve even realized it. As such, I’ve decided to make its Unite Move invoke that same feeling of a fast blade cutting through gaps in the armor of the opposition and inflicting lethal damage.
Upon reaction to an enemy entering its line of sight, Golisopod moves quickly, cutting through enemies and exposing their weak spots. Not only does this attack halve the HP of all enemies you cut down, it also reduces their defenses, making them more vulnerable to damage and possibly being KO’d by your next move. This HP halving attack also counts as piercing damage, as it guarantees a 50% reduction in the opposing pokemon’s HP.
By the way the description is written out, it seems that Golisopod can only damage one enemy with this Unite Move. While it makes for a great ambush move, it can actually be used against multiple enemies with some manual override. See, holding the button overrides the automatic version of the attack, allowing you to hold and unleash the attack at your own discretion. You might do this because there’s an opportunity to cut down more than one enemy and letting the move attack automatically would spread less damage. To deal damage with the attack manually, just hold down the Unite Move button and release whenever you feel like it.
Landing the hit is gonna be the tricky part. Once you use the Unite Move, Golisopod will take on a power stance and just...wait. You can’t change direction or cancel the Unite Move barring the manual override, and if the enemy can see you in this position, they can avoid entering your range, unless a teammate of yours knocks them into it. Aside from that, you are immune to hindrances, so you can use it in the middle of a fight with impunity, but ranged attacks can still target and damage you.
Everything about these limitations screams ‘ambush attack’ and that is accurate, as the attack is most effective when the enemy cannot see it coming or what direction you’re aiming in. But the thing about ambushes is that you have to know the opposing team’s next move and where they’re going. There are some ways to glean this by contextualizing the condition of the map and the flow of battle. For instance, if the opposing team is behind on EXP, you can expect a desperate rush to the Bottom Lane when the RegiTrio spawn in. If your Top Lane is very weak or has been completely broken apart, securing Regieleki when it spawns in will guarantee their lead, so they’ll likely fight for Top or die trying.
Even knowing this, the 1 second grace period before the Unite Move activates isn’t enough time to guarantee damage to multiple enemies, so if you see the enemy coming and they’re bringing back up, hold your breath and get ready to draw your blade. And by ‘hold your breath’ I mean ‘hold the Unite Move button’ as the manual override is imperative to damaging multiple enemies in one hit.
After dealing damage, you’ll have reduced the opposing enemies’ HP by 50% of their current HP as well as reduced their defense, making them very susceptible to an easy KO, either by you or an ally. Even so, do not expect things to go your way, as hitting multiple enemies with Shell Splitter is very hard. Getting away with one or two cuts is the norm, so you should adapt to the situation depending on which enemy got cleaved in half. Opposing Attackers and Speedsters will be easy pickings while Supporters will immediately back off, but this is easy to do without using up your Unite Move. Cutting down a Defender or an All-Rounder is the best case scenario, shortening the time it’ll take to deal with them. Do be ready for the followup volley of hindrances, though, as this attack is a dashing cut attack, which will land you in the middle of the opposing team.
Golisopod has spent years in the depths of the ocean, mastering the flow of water and fighting off the pressure of the deep sea. Liberated from these limitations, it unleashes its full force on its enemies upon dry land. Just as long as they don’t hit back too hard, Golisopod will not be forced to make a strategic retreat.
Holowear
As a big and scary deep sea monster, Golisopod has its own flavor of appeal. Rather than try to subtract from that, we should focus on holwear that accentuates its big tough guy facade that it likes to put on. You know, make enemies not want to pick a fight, win the battle before it even begins, that sort of stuff.
First off, there’s Honorable Style, a full body suit of plates and fancy frames that make Golisopod look like a high ranking samurai, even including a sword strapped to the hilt that it can’t actually draw because Golisopod doesn’t have hands, also because it’s holographic. Then there’s Punk Style, decorating Golisopod with black spiky braces and a leather jacket and even giving it some punk hair like a mohawk. Chef Style suits up the big bug in a grand white cooking suit and apron, and even gives it a chef’s hat, along with a belt strapped with all manner of knives that Golisopod doesn’t need to mince vegetables. Dark Hero Style puts Golisopod in a mask and some colored clothing, along with a big flowing cape that really emphasizes its Anti Hero nature. Lastly, Captain Style equips Golisopod with a tricorn hat and a fancy blue naval suit, along with a popgun strapped to its holster, although Golisopod is much more well versed in swordplay than cheap shots.
Also, any Legendary Holowear will give Wimpod the appropriate hat in relation to the overall holowear. Kinda cute seeing a beach roomba skit around with a hat. Heh.
Strategy
The hardest part about playing Golisopod well is getting enough EXP as Wimpod really quickly. Because it evolves at Level 8, you’ll be spending more than half of the match playing as a pathetic little scavenger, desperate for scraps and feeding on whatever you can find. In order to have the most impact on the game, you’ll have to minimize the time you are stuck playing as a Wimpod.
The easy answer would be to claim Central before the match starts, as it’s the safest way to get to Level 5 without fighting any opposing pokemon. It’s safe, but slow, as Wimpod doesn’t have a lot of power in its moves and basic attacks. If you are really good at hitting the sweetspot frame of your fully charged basic attack, it’ll speed up the farming significantly, but not everyone has good timing. Maybe if a Supporter joins you in the Central Area carrying an EXP Share, you can get a lot more levels that way, but that’ll compromise your team’s ability to fight in either Top or Bottom Lane. Maybe it would be better to let an Attacker have Central Area and you go to the Bottom Lane with an EXP Share Supporter for faster grinding. After all, once you hit Level 3, you’ll have learned both Struggle Bug and Sand Attack, two moves that can really annoy your enemies.
Struggle Bug reduces the attack power and movement speed of enemies it hits, making it a great disruption against enemies that challenge you. It’s even more beneficial for your Lane Partner as the power difference might be enough to turn the tables and score a KO, getting EXP for you and your teammate. Of course, you’ll have to be in range to actually hit the enemies with Struggle Bug, but your basic attack is a cutting dash, which makes it easy for you to get in with a big hit, then spray bug juice all over the enemy. Gross. You can then immediately follow up this combo with Sand Attack, obscuring their vision and retreating with the move’s backward dash. The blinding effect doesn’t last long, but Sand Attack has very fast cooldown, allowing you to bind the enemy repeatedly if necessary. This comes in handy in stealing EXP from the enemy, as being unable to see any enemy, wild or otherwise, means they cannot target anything with their moves or attack unless they aim manually. This also means you can get away with scoring a few points if you’re bold enough, which is worth the effort as scoring points also grants EXP. Any little bit helps.
When you hit Level 6, you’ll start falling behind in fighting power assuming everyone else is leveling up equally as well. If you’re really behind, you should avoid fights altogether, even it means abandoning your teammates when they could’ve really used the help. It’s unfortunate, but at the end of the early game, getting KO’d won’t help you or your teammates as waiting out the respawn timer means missing out on EXP farming. It’s super important that you hit Level 8, as evolving into Golisopod will really turn the tables on your enemies. If your allies understand your conundrum, they’ll have to let you farm in peace and play defense or even help you out so that you can gain enough EXP to evolve. Playing with uncooperative teammates can make any round insufferable, but moreso if you’re playing as Wimpod, as you need that EXP more than anything. Once you’ve made it to Level 8 though, you’ll have to pay back your allies with some hard hitting moves and sick sword skills.
Learning First Impression means you’ll be able to inflict burst damage repeatedly and often, provided you are capable of amassing boosts to sacrifice. Emergency Exit gives you two freebies if used properly, at the cost of the ability and an easy escape. However, the move isn’t as easy as aim and shoot, as First Impression doesn’t have any hindrance protection. Utilizing both Iron Defense and Emergency Exit gives you the ability to reuse the move repeatedly with enough protection to muscle through most crowd control, but then you’ll have to wait out the cooldown of Iron Defense and must refill your HP to reuse Emergency Exit. Missing First Impression is also devastating, as the boost won’t get sacrificed, but the cooldown of the move comes on in full effect, forcing you to wait all 15 seconds. It is your best option at dealing with the multitude of stuns and hindrances the enemy can throw at you, and is a great response to teams built around holding their enemies down with crowd control, like Sableye, Mr. Mime, Buzzwole, Trevenant, Mamoswine, and Slowbro. First Impression and Iron Defense is best used against such sturdy teams.
Razor Shell, on the other hand, offers safer and more consistent damage up close and further away, and even has increased critical hit chance if you’ve got Swords Dance or Iron Defense boosting you up. Since First Impression is less effective against nimble enemies like Cinderace or Absol, Razor Shell offers extra range and lethal damage from any position. The move has greater DPS (damage per second) if you’re standing still, but the move is vulnerable to hindrances and can be stuffed by such moves. Iron Defense protects you from such effects, but wears down quickly if it takes too many hits and hindrances, but the extra damage is worth it. Speaking of extra damage, Swords Dance drastically boosts your attack power and movement speed, allowing you to move and attack with Razor Shell much more efficiently. It offers no other protection, but the idea is to KO the enemy before they can stop you, and it’s a very good plan.
By evolving, your damage output increases tremendously, but it’s dependent on your skill level. You’ll have to learn when is the best time to recycle First Impression, as doing so at every opportunity can cause you to miss out on some big damage later on it the fight. Razor Shell is easier and safer to use but not as effective, as the damage output is reliant on throwing out as many hits as possible, which you can only maximize by standing still. It can easily KO some enemies, but others can tank the hits and close the distance, damaging you enough to activate Emergency Exit and forcing a retreat. Plus, popping both Razor Shell and either Iron Defense or Swords Dance will cause both moves to go on cooldown at the same time, leaving you without any move to defend yourself with other than your basic attack.
At Level 12, both First Impression and Razor Shell have identical upgrades which causes the cooldown of these moves to reset when Iron Defense or Swords Dance is active. Because of the volatile nature of using your moves to challenge the enemy, being able to get a freebie by scoring at least one KO is a greatly appreciated upgrade. It also makes using these moves a lot more forgiving, as you can afford to split up the application of an attacking move and a boost. For instance, if you use Razor Shell+ to take out an agile Attacker or Speedster, it’ll go on cooldown by the time you engage a melee Defender or All-Rounder. Popping Iron Defense or Swords Dance will even the odds against them, but if you manage to score a KO against a weakened enemy with the boost still active, you’ll get Razor Shell+ back to wreak havoc on the rest of the opposing team. This is really good if you’re used to manipulating the cooldown of First Impression, as nabbing a KO with Swords Dance means you’ll get to sacrifice the boost right away after missing First Impression. Think of these upgrades as a sort of reward for cracking the code on playing Golisopod well.
From the depths of the sea, the terror of the deep has risen, set out to make a long lasting First Impression with its Razor Shell. Its Iron Defense is impenetrable and its Swords Dance lets it flow freely and unrestrained, slicing and dicing as it mows down its opponents. With proper mastery, none can withstand the Shell Splitter that is Golisopod.
-
And that’s Golisopod for Pokemon Unite! I’m not all that used to making posts featuring pokemon with a high skill ceiling since, you know, there’s no way for me to test any of this stuff without a lot of time and hacking talent. Hopefully this stuff is a lot more balanced if something like this actually makes it to Pokemon Unite.
Next up, we’re coming up on the end of Season 2. Wow! We’ve come a long way, but we’re going to end things off with a dazzling light show. Who will it be? Follow and find out!
5 notes
·
View notes
Text
I replayed and finished Pokémon Y in three days and here are some random thoughts | this is really long
Why doesn’t Blastoise have a secondary type? Venusaur and Charizard have secondary types, but he doesn’t. Blastoise could totally be a Water-Steel type
Similar note: Florges isn’t a Grass type… why? Florges is literally made of flowers, and she isn’t a Fairy-Grass type? Pure Fairy? Kinda lame.
Similar, Similar note: It would make so much sense for Goodra to be a Water-Dragon type. Goodra is associated with rain and swamps, so it makes sense that he would be a Water type. Sometimes I forget Goodra isn’t a Water type.
I have gone too long underestimating the beauty of items. I made an effort to collect as many as I could and ended up destroying my opponents. I gave Lucario either a Black Belt or Soft Sand depending on the battle, Charcoal or Odd Scent for my Delphox, and the Lucky Egg was my saint when one of my Pokémon was under-leveled.
The amount of things you can receive by just talking to random NPCs is amazing. I love walking into every house I see so I can talk to every person in the house, then I get a new item or move or something valuable to sell
Calem/Serena should’ve gotten a more fleshed-out story. It’s kind of implied throughout the game that they feel inadequate to you, the player, but I think it’d be pretty cool if it was developed more.
I also think Shauna had some potential. When she appears at the Team Flare Secret HQ, and she says that thing about how friends need to stick together, it made me think how it would be cool if Shauna had a little development where she’s actually quite dismissive of her friends, more focused on “perfect memories” than actually enjoying the moment.
Trevor and Tierno are completely useless. They offer absolutely nothing to the plot or the game, and I was honestly peeved that they were at the award ceremony at the end of the game. What did they do? They didn’t help storm the base, they didn’t unlock the door that had the legendary Pokémon, they had barely any part in the whole thing.
Sycamore is so gay for Lysander, I’m sorry. The way he talks about that man, even after he loudly says that the world is filled with scum, is the words of a man who is ignoring all the red flags.
Mega Evolution is so underused. The gym leaders after Korrina all should’ve had a Mega Pokémon, and the same goes for the Elite Four. It’s especially more frustrating because they (remaining gym leaders excluding Ramos) all have Pokémon that can already Mega Evolve!
Continuation of last point: give Ramos a fourth Pokémon that can Mega Evolve (they would have to create a new one, as the only Grass type Megas are Venusaur and Sceptile), evolve Clemont’s Magneton to a Magnezone, Valerie has a Mawile, Olympia has a Slowking, and Wulfric has an Abomasnow
For the Elite Four three of them already have Pokémon who can Mega Evolve, but I think it would be cool if they had Megas that don’t exist. I have some opinions:
Malva should have a Mega Chandelure OR Talonflame. Wikstrom already has a Scizor but a Mega Aegislash would be awesome. Drasna already has an Altaria but Mega Noivern would be just as cool. Finally, Siebold has a Gyarados, but since Lysander already had a Mega Gyarados, it would be better if one of his other Pokémon had a Mega; I would say Starmie, as to bring more attention and love to an easily forgotten Pokémon.
The gym leaders had some weak teams. I feel like Ramos, Clemont, Valerie, Olympia, and Wulfric should’ve had bigger teams.
Speaking of bigger teams, I think it took Calem/Serena way too long to expand their team. I feel like a rival should get one new Pokémon for every battle, or every other depending on how many times you fight them, until the final battle where they have a full team. Your rival fights you with three Pokémon a little longer than I find believable.
I really like the gym puzzles, I’ll be honest. Pokémon is obviously a children’s game so the puzzles aren’t going to be particularly hard for adults, but I just find them entertaining. I like how they incorporate the gym leader’s interests (Grant with rock climbing and Korrina with roller skating), or I just like the vibe.
Going off the previous point, I like how the gym leaders aren’t just gym leaders. This is done with other gens, and I love it, but I especially feel it in Kalos. They all have something to them: photography, rock climbing, roller skating, gardening, inventing, fashion, psychic… stuff, and even Wulfric, probably the least developed gym leader, is shown to have a special bond with the Pokémon in the Pokémon Village.
I wanted more interactions with Diantha. I’m using ORAS as an example: I really liked Steven in that game because I felt like he was a character to care about. He was more than “the Champion,” and I felt like he actually cared about Hoenn and made an effort to stop the evil teams. I wanted to feel connected to Diantha, wanted to see her make an effort to help. She’s the Champion, after all.
The starters should’ve had Mega Evolutions! I like having the Kanto starters, and I like their Megas, but how are you going to have the game that introduces Mega Evolution, puts such a big emphasis on it, not have starters with Mega Evolutions?
You would be rewarded with the Mega Stone for your starter after defeating Team Flare at the Power Plant; Sycamore expresses that he’s impressed with what you’ve done, that you’re exceeding his expectations, and that he feels you deserve a reward for your deeds.
Here’s one I really like
I love all the things to do in Lumiose City; there’s battle restaurants, there’s an art museum to learn a little lore, you can work at a hotel, and there’s so many different cafes to explore. Best part is that it all pays off: doing all this gets you style points, which lets you into the Lumiose Boutique and unlocks new hairstyles
I do find it funny that there’s a restaurant that will kick you out for not being famous enough, even when you’ve become the Champion.
AZ and his backstory is so interesting. I love the story he told about how he built the Ultimate Weapon, how the Pokémon he loved so much left him, and I am not ashamed to admit I still tear up when his Floette finally returns.
Lysander is weirdly unbothered by the player - a literal child - sweeping his organization. When you get the elevator key and go to see AZ in the cell, Lysander is so calm. “Oh, you got the key? Got the key that one of my strongest members had? Dope. This is AZ, btw.” SHOW SOME FRUSTRATION, DUDE
There really should be an option to remove the skates. I hate when I have to stop using the Slide Pad for the D-Pad to make sure I don’t accidentally run in front of a trainer I’m not prepared to fight.
It’s great that you aren’t forced to use too many HMs, just the ones you expect to need (surf, fly, waterfall). Not being forced to use Rock Smash, which is a disgustingly weak move, was such a relief, and even though there are a lot of chances to use Strength and Cut, it isn’t required.
There are so many things to discover by just exploring. You can find so many useful items or medicine in caves or on routes, and it’s always fun to go through pushing some boulders and cutting some trees to get that TM you’ve been searching all over for.
Being able to turn off Experience Share is a luxury I will never take for granted again. Being able to keep my team at the same level was super helpful and it got rid of the process of having to take Pokémon out of my team just so I can level up another Pokémon by a few levels.
The post-game needed to be way better. They should’ve done something with Zygard, or added a new legendary Pokémon. I just wish there was more to do after defeating Team Flare and the Champion.
The Battle Château is super dope but I wish I didn’t have to wait a full day to fight a new batch of trainers. I understand why they did it, but I just wish it was easier to grind using the Battle Château.
I’ve been complaining about how difficult Grant is but really I just wasn’t training properly. Once I started actually fighting trainers, wild Pokémon, and I did the trade of Luvdisc for Steelix, Grant was a walk in the park.
The games are surprisingly easy to finish in a short amount of time. I never realized when I was younger because I was a kid and didn’t understand how to properly play the game, but I literally finished everything in three days. Another reason why I want a better post-game.
There should be some type of Pokémon Contests in the game. They’re such a big thing in the anime, as well in previous games, so you would think they would have something similar to it. Even if it was just what they have in ORAS, I would be more satisfied.
2 notes
·
View notes
Text
Pokemon Journeys Episode 140 Review
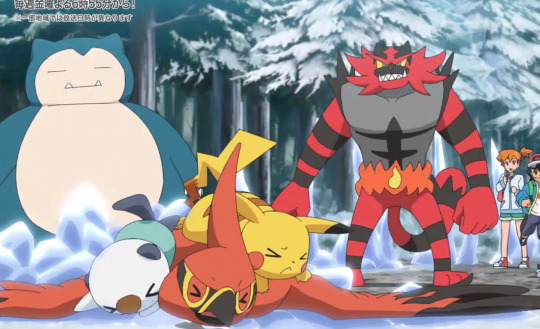
Pokemon Journeys Episode 140. Let’s review:
This episode was pretty cute.
The whole plot is kinda just your basic “Ash Caring For Wild Pokemon” route, but it still works out, especially when it has its great moments. Like for one, Ash’s rotation is pretty sweet. Got to see Oshawott’s lovable personality again and even a more mature side of him in having him support and mentor Beartic, Talonflame’s loyalty, Incineroar finally getting some action after so long, and some Snorlax as well. Snorlax did had to be pushed aside due to the cold which makes him feel more left out compared to the other mons, which kinda sucks when you consider how minimal his screen time was. I mean, it still could’ve work, just have his ability be Thick Fat so he could have some small resistance to the cold, just nothing compared to Talonflame and Incineroar.
Speaking of rotation, was cool to see Misty’s Starmie and Brock’s Forretress as well (despite the latter’s inaccurate Pokeball), so hopefully this will lead the door of the two them using reserves as well, especially when they have forgotten Pokemon like Horsea and Ludicolo.
The overall story was pretty sweet. Again, it’s basic, but still enjoyable. The Beartic had a pretty wholesome personality and you can definitely feel how more attached he got to Ash and his Pokemon as the episode went on. My only small gripes are Snorlax not getting enough focus (as I’ve already said), Incineroar not joining in to help train Beartic like how Lycanroc did for him as a Litten, and Ash giving up too easily when he, Pikachu, Oshawott, and Beartic get trapped underground, especially with the sappy sad music playing in the background. He’s been in tougher scraps than this and kept continuing forward, c’mon guys.
But anyways, I’ll give this episode a 9/10. (please don’t let Charizard look weak next episode, anipoke)
#pokemon#aim to be a pokemon master#pokemon journeys#anipoke#pokeani#ash ketchum#pikachu#snorlax#oshawott#talonflame#incineroar#misty#starmie#brock#forretress#beartic#latias
6 notes
·
View notes
Text
Chapter 6

AAAAA
Couldn’t have picked a better title myself.
A’ight, I did the best I could to limit the screenshots, but this is a long chapter so I need to expand onto another post. Click here for Part 2!

Trial by fire, G O!

In an effort to save space, I ultimately cut Andrea saying, “Wait, haven’t we seen them before?” But I just wanna say, it’s always baffled me that the partner couldn’t recognize them right away. I imagine the robbing of such a precious item would be a memorable event. Especially because it’s the night you met your best friend for life? Anyway, I digress.

The Return of Team Water Meanies! 💀 💧 But we beat them once before, we can totally do it again.

...Uh... I think...
If it’s a legendary, we’re screwed.

WAIT-
AHAHAHAHAHAHAHAHAHAHAHAHA! 🤣
I was hoping for a water type to fit the “Water Meanies” motif but you know what? I’ll take it. This is way too funny. Mob boss Kricketot.
Anyway...

I don’t wanna know how he makes the stink cloud though.

Atta girl ❤️️

Finally!
There’s a lot of new Pokemon to introduce here and, yes, I’m calling out each one. It’s just how I do things. Friendly reminder that if you’re having trouble keeping track of who’s who, I have a master guide listing every character replacement, including NPCs! I update it after every chapter is posted 😊
But first-

I love these three already. Although Rotom losing his arms kinda freaks me out... it’s just... a floating tack
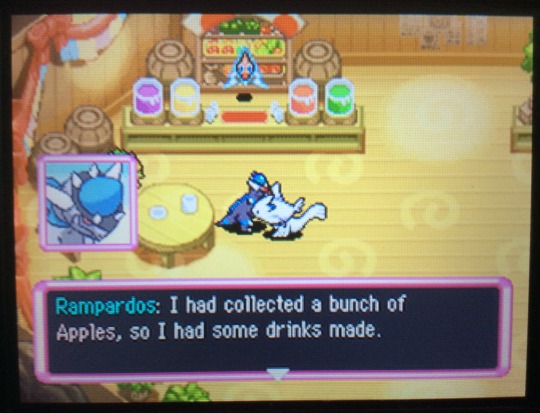
Rampardos -> Octillery

Grotle -> Pachirisu
Thank you Yellow Gummi reference
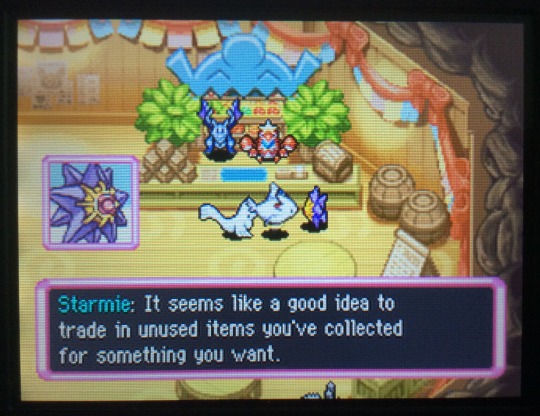
Starmie -> Mr. Mime
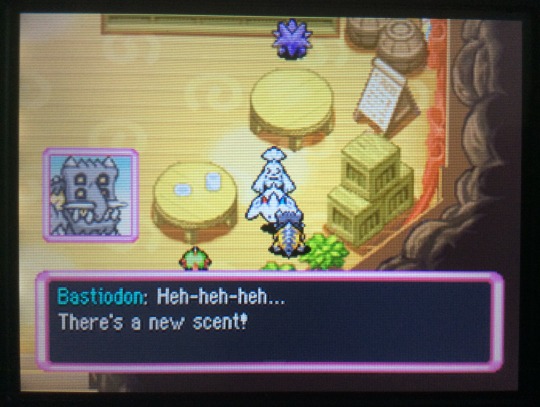
Bastiodon -> Zigzagoon
...Get away from me, old man
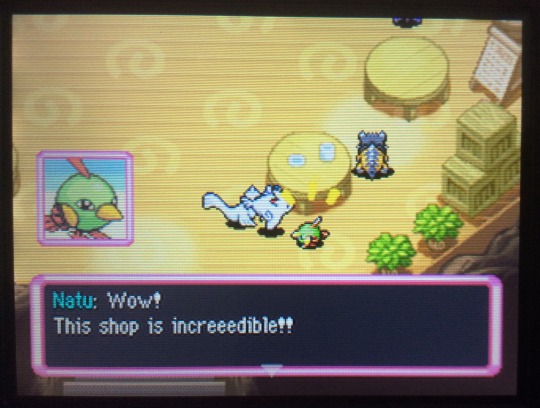
Natu -> Heracross
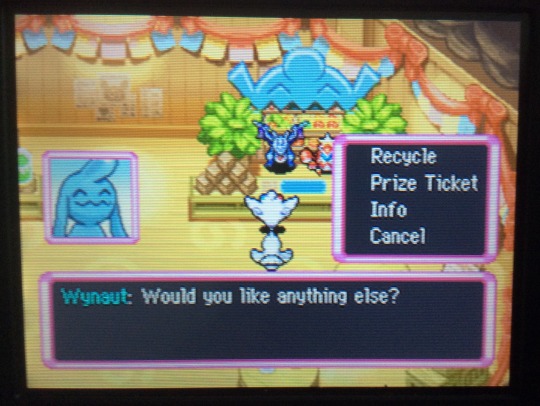
So I should have taken a picture at the beginning of the interaction for consistency’s sake, but. This is Wynaut, as would be expected since I had to toggle off NPC UI portrait downloads. Then I went to redeem our two prize tickets...
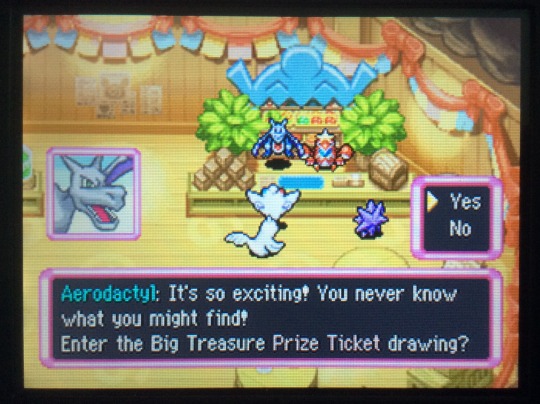
Yeah. What’s up with that?
On the second ticket pull (I believe it was a Silver Ticket), I actually managed to win the grand prize. Which I was NOT expecting to happen so soon, but hey, I’m not complaining. I mean, look at this entourage-

I can’t even come up with a quip for this one. It’s just... priceless.
(By the way, the grand prize was a Sitrus Berry.)

We know Team Glee already, but this moment made me realize I messed up in a previous post. In Chapter 3, I said that Nuzleaf was (probably) Ledyba and Carvanha (probably) Politoed. With this dialogue hint, it’s obvious that they are swapped. My apologies!
Remember when Finkecleon let me have a Wonder Gummi for free in the same chapter? I saw another opportunity with the Golden Seed below...
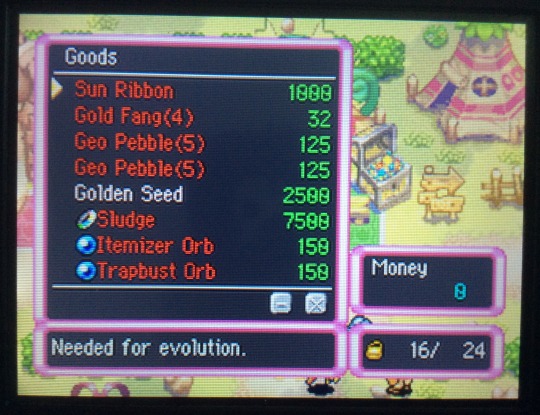

But no dice this time. I guess this glitch only works for specific items? Who knows.
(Nothing remarkable happened after this so we fast forward a day or two...)
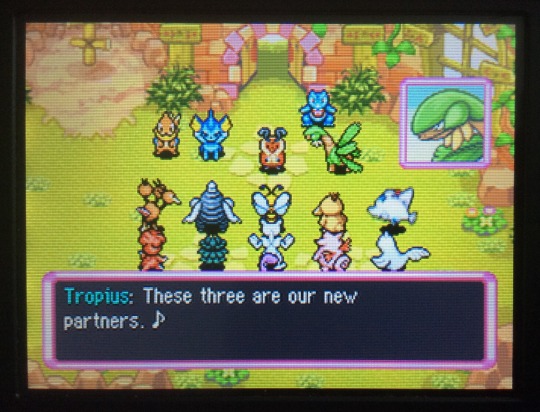

This speaks for itself XD
Unfortunately, I couldn’t get any good shots of the Guildmaster’s near meltdown. (Trust me, the shaking effect made the ones I got an eyesore.) Don’t worry, though, we’ll see it later!
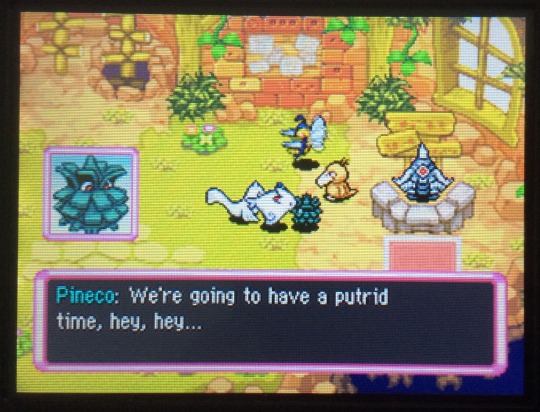
I’m including this for no other reason than this being perhaps my favorite line in the entire game.
...Okay, maybe that’s hyperbole, but it’s certainly one I vividly remember.
(Nothing remarkable happens again today.)

🤦♀️ Here we go.
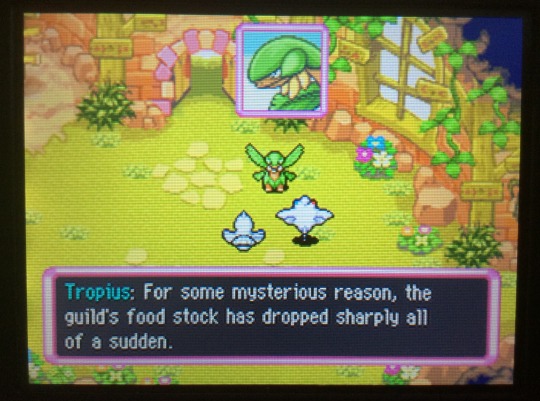
Some “mysterious” reason, huh? *raises hand, speaks in a dull tone* Pick me, pick me! I know why...
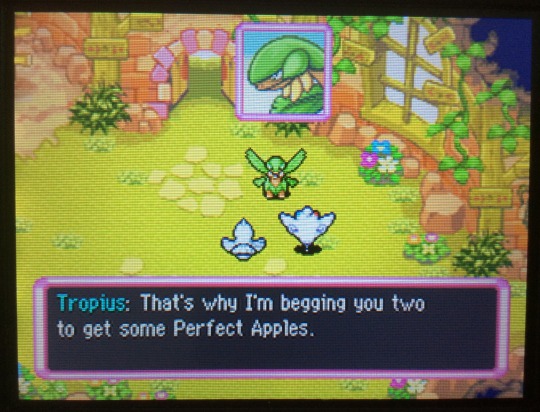

Apple Woods is known here as Laughable Sanctum. Probably because Team Water Meanies is gonna laugh their butts off at their upcoming prank 😒
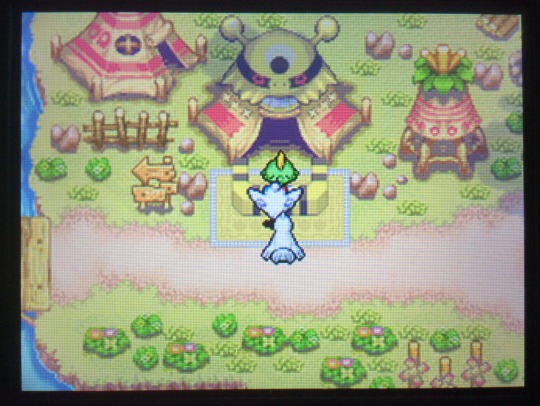
Before departure, we found Gulpin finally at his station! It’s... uncanny that the randomizer picked the previous game’s merchant for the link shop. What are the odds?

Interestingly, the first floor of Laughable Sanctum is always one giant room.
Okay so it did take me a few tries to get through here. I gained a Skorupi recruit... then fainted on the next floor. On the next attempt, I recruited what was honestly an OP Cherrim: she had Psychic, Skull Bash, Dragon Pulse, and Softboiled. But then I lost her too 😔
My successful run was arguably the wackiest one. For starters, I stumbled upon a Secret Room!
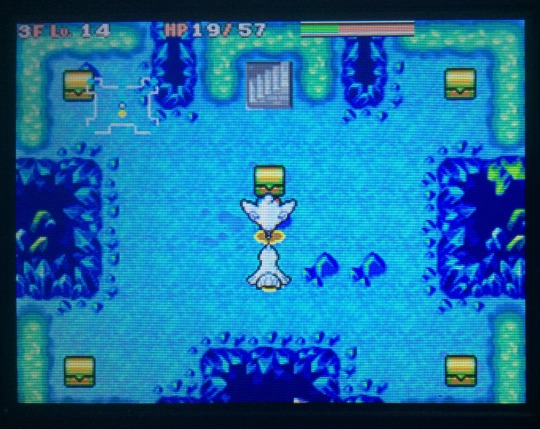
We can’t open any of these yet, so whatever is inside is a mystery... for now.
Now, picture this, if you will (since I failed to capture the moment visually): We’re traveling through 11F, finally drawing near the dungeon’s end. We enter a room and... Monster House. I swear softly under my breath - I already used my single Foe Hold Orb on another Monster House earlier on. My thumb hovers over the power button as I wonder whether it’s worth giving up when I’m so close.
Well, at least look at your bag again before giving up, I thought. So I reluctantly open the menu to see what I can work with.
An All Mach Orb... A Slumber Orb... Hmmm... I take in the room again to pinpoint any possible escape routes. There’s none, really, except the hallway we just came down.
And then I have a crazy idea. It’s a long shot at best, but what the heck. I didn’t have much to lose.
I slam down the Slumber Orb, then the All Mach. Then I change Andrea’s Tactic to “Get the hell away from here.” I attack an empty tiles for a turn so we don’t swap spots. Then I book it after her. Not a moment too soon, since enemies are already waking up.
I have no real plan after this, except to follow Andrea and pray she takes us to the stairs somehow. We go through a room or two, and I’m starting to get nervous. What if the others find a way around and cut us off?
But no. Andrea did her job to a tee: she literally ran onto the stairs tile in the next room. Again, not a moment too soon as enemies emerged from the other hallway.
Cue me laughing in relief at this absurdity, and then again when I see we spawned right next to the stairs on our last floor. I still can’t believe that actually worked!
Ah, but with every victory comes a price...

I can tell you how, Andrea, but unfortunately it involves getting physically walloped and spiritually downtrodden.

Hmph. You’ll never be the real Team Skull. Long live ya boi Guzma!
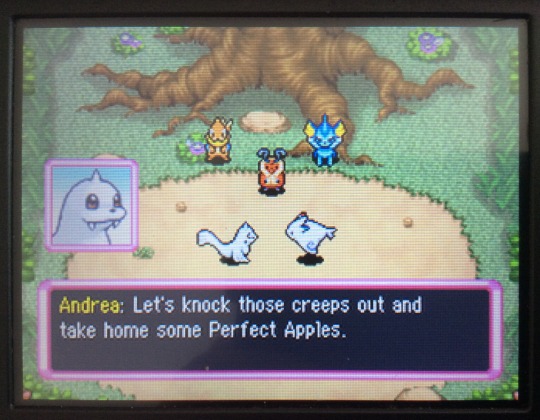
In theory: great idea! In practice:


Over ten years later and this still makes me so mad smh.
So we go without dinner. And then...

*plops face first into pillow* I can’t... I can’t do this. He looks so cute here. I can’t upset this little guy.

Totodile’s Law: You can look blue, but don’t feel blue.
Now, the progression of faces that follows here is real nice- and I honestly don’t think this scene could have been done as well with any other ‘Mon (besides the other starters.) He goes from the sad face (not shown) to teary-eyed, then straight up bawling as it gets more and more intense.
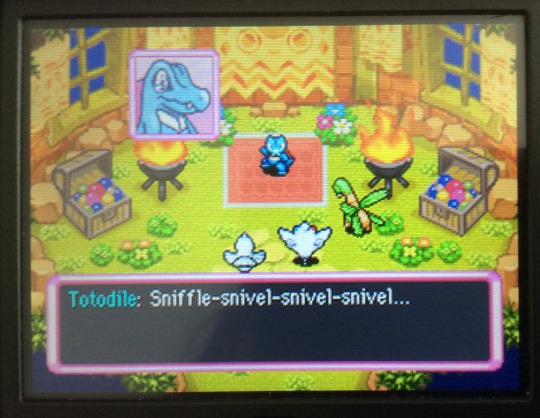
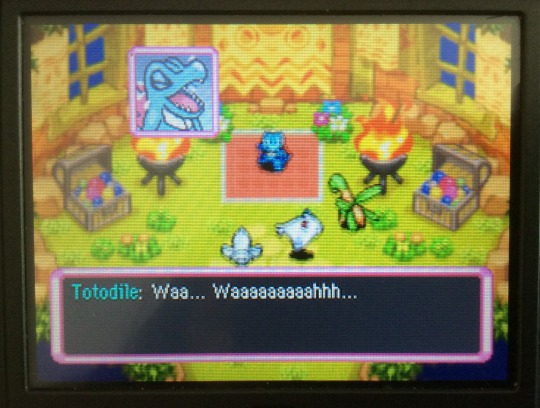
(Last one is a bit of an eye strain, sorry.)
I want to draw your attention to his sprite in the first shot, though. At first, I thought this was his typical pose - the one done by the hero and partner on various occasions, etc. But actually, it’s a frame of one of his attack animations! (Shout-out to @tzhaar-rayne for helping me figure this out!)
Which really makes me think: we got blessed to have a starter as Wigglytuff. Anyone else, and the sprite would probably just be walking in place. (Or maybe it just rips another attack animation, idk. But still, the point stands.)


*clenches teeth* They’re friends all right - friends of my fists. (Or wings, I guess.)
Click here for the rest of Chapter 6!
23 notes
·
View notes
Note
how many book emojis r there .uhh 📒📓📔📕📖📗📘📙📚 (this is for that ask game im not just randomly sending book emojis .tho tbf id do that too) (kinda random but?????? i want an axolotl emoji when will they add an axolotl emoji they r my second favorite animal (first is bunnies 🐇) and i want to show them off .where is it when will i get an axolotl emoji‼️ i can accept not having emojis for like my fav bunnies n for my other fav animals thats FINE but no axolotl? actually crime wada hell)
waough first off: axolotl emoji would be fire, but you know what emoji we really missing? chocolate cake.
ALL of the cake and cake-adjacent emojis are vanilla, where's the love for my fudge lovers???
anyways, because you've got me going on pokemon now, fuckin obligatory pokemon au.
mumscarian because i love those guys:
Mumbo: Pokemon Lab Technician
Electric/Steel/Dragon/Normal/Flying
Magneton (heheh gear go brrrr)
Electrode (heheh orb go brrrr)
Dragonair (he deserves one elegant-looking pokemon. as a treat)
Steelix (YA METAL GUY WHOOOO)
Porygon (what a lil weirdo. i love porygon)
Noctowl (obligatory low-level starting area pokemon that he got emotionally attached to and now bullies him when he's up late)
Scar: Retired Gym Leader
Normal/Fairy/Psychic
Meowth (obligatory jellie insert)
Togetic (raised it from an egg!)
Clefable (happy lil fella who Double Slapped scar into next week the first time they met)
Espeon (also raised it since it was an eevee!)
Alakazam (abras are so fucking annoying to catch but goddamn he did it)
Girafarig (ehehe spooky 2-faced pokemon)
Grian: Aspiring Champion
Bayleef (only one with an actual starter lmao)
Pidgeot (best flying pokemon i'm right btw)
Vulpix (lil fire fox.....)
Misdreavus (goofy ghost pokemon? perfect for him)
Starmie (pretty gem need i say more)
Eevee (untapped potential!!!)
i picture this as grian being the usual pokemon protag trying to beat the elite four except he gets wayyyyyy too carried away with the side quests
mumbo works in a pokemon containment facility meant to observe and rehabilitate hostile/abandoned pokemon (either via adoption or relocation to the wild) and is in charge of keeping the servers running and making sure the database is up to date, which it frequently is not.
grian tries training against mumbo often, but you can only battle the same trainer so main times before memorizing his movesets and using the same battle strategy over and over again, so mumbo gives him scar's number and suggests grian train with him instead.
scar's only been retired a few years so he tends to have to shoo away rookie trainers from his front porch all the time, but grian instead offers to run favors for him (entirely by accident. scar's reputation FAR precedes himself, and was known for knocking trainers flat on their ass countless times when facing his team. plus, being one of the youngest professional gym trainers in the area, it's hard to get some peace and quiet.)
scar finds this hilarious and decides to give grian a stupid amount of tasks to do, ranging from grocery shopping to weeding his garden, until grian finally caves and admits why he's really here.
grian fully expects to be sent away, but scar is swayed by grian's persistence and complete dedication to the, objectively speaking, pointless tasks he was given, so scar agrees to help train grian's team.
misc. notes here: mumbo is the oldest of the three at about 26, with grian being 22 and scar 25. i think it's weird that pokemon just lets children run off and be trainers so let's assume that's not common practice here
mumbo has a handful of badges, mostly so that his pokemon will listen to him. nearly all of his pokemon (minus the noctowl and the porygon) were gifted to him, so they're a little unruly at times.
scar raised all of his pokemon either from eggs or newly born. (if i weren't working with gen 2 he would 100% have a sylveon)
grian's eevee was actually a gift from scar, given to grian as an egg that he took great care in watching over.
2 notes
·
View notes
Text
Wonders of Spira: Mt. Spira

There is no secret that Mt. Spira is the highest point of all of Spira. One can see it from any location in the region, granted one is in a place that has a clear view of it. In ancient times, it has been known to be a place of ceremony, as there are already plenty of ruins that litter the foot of the mountain, itself, with several more on one's way up to the summit.
With a height of 40,000 feet, along with its unique, spire like shape, it is often also known for several other names, such as The Throat of the Cosmos.
Even back in the ancient times, the Ancient Spirans already have a profound connection to the cosmos, as at the very peak would reveal ruins. Ruins that suggests both a temple and an observatory, perhaps the first observatory to ever be built on Spiran soil. A dual purpose, so to speak. A site of worship, and of knowledge.
Cosmic energy is profoundly rich around Mt. Spira, with the potency ever increasing as one would scale the mountain, yet scaling such is easier said than done.
Several Pokémon connected to the cosmos or believed to have descended from the cosmos can be found here. The likes of Lunatone, Solrock, and Minior are a common sight, as well as Cleffa, Clefairy and Clefable. Elygem and Beheeyem are also some of the residents that inhabit the mountain. Interestingly, Staryu and Starmie can also be found here, and unlike its brethren that are oft seen on the seas, the Staryu and Starmie of Mt. Spira are more intricately connected to their cosmic origin, thus imbued greatly with cosmic energies, and as such are more powerful than their now seaborn brethren. Interestingly, the Dragon/Electric Spiran Gible, Gabite, and Garchomp can also be found here, the former two located on the lower sections of the mountain, while the latter one can be found in the higher echelons of Mt. Spira, close to the peak.
At the very peak, one can often encounter swarms of Unown still inhabiting the temple and observatory ruins of Mt. Spira, and from within the observatory ruins would be what seem to be a cradle. A resting place for the Wishweaver, now made vacant as it was relocated somewhere else, somewhere safe and secure, due to the events that had have transpired over two years ago.

To this very day however, one can sometimes see the peak of Mt. Spira expel out large quantities of cosmic energy out into the cosmos. The reason for this is unknown. However, one visual note to it is the intensification of the aurora borealis that can be observed around its site during the evening. Based from retrieved pieces of ancient text, Ancient Spirans believed that this was Mt. Spira's way of "breathing". As it is condensing and absorbing cosmic energy from the sea of stars, it too would eventually return said energy out into the cosmos, rinse and repeat. This also led Ancient Spirans to believe that the mountain itself is "alive" at some capacity.
Scaling Mt. Spira is easier said than done, as it would be nigh impossible to many, as the cosmic energy, the strange phenomena said energies manifest, as well as the strength of the Wild Pokémon themselves tend to be overwhelming the higher one would scale. Only the most determined individuals are known to have ever managed to scale the top, and return back down in one piece, both in mind, body and spirit.
It is said that the current Champion of Spira decided to take the climb shortly after becoming Champion as well as reach its peak, something that not even the previous Champion was able to do.
All in all, Mt. Spira is a place of celestial wonder, and reveals just how deep the idea of Cosmicism runs in Spira's history.
1 note
·
View note
Text
MISC OC'S
various oc's. some have nothing to do with my mainverse while the fankids are here until they get large enough to be split off into their own page. also, if i ever do more with that coordinator story, adrian will be moved there.
☆MISC OC'S☆
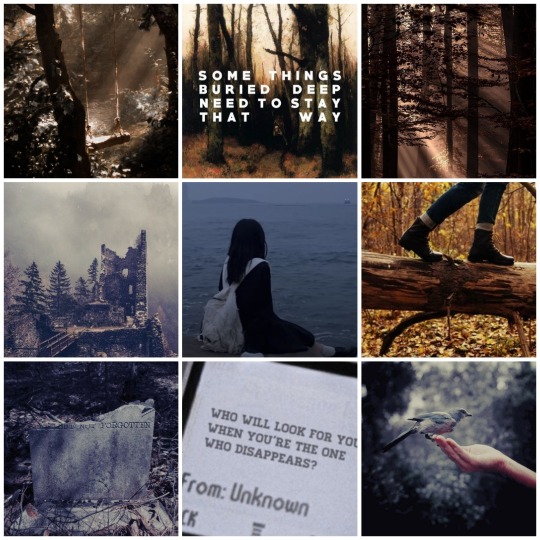
GIRL
11 / Solaceon Ruins?, Sinnoh / she/her
A young girl with the ability to speak to Pokemon after being raised by them. Close to her Papa Entei and Auntie Giratina.
Befriended Pokemon: Entei (shiny), Unown (K), Garchomp, Blissey, Chimecho, Giratina
(in her own verse)
THE CAT
?? / ?? / ??
24 / Mesagoza, Paldea / they/them
An internationally wanted thief who only cares about money. Has left their past behind.
Owned Pokemon: Meowscarada, Rotom, Zoroark, Klefki, Delibird, Dragonite
(in their own verse)

ANNETTA
33 / Lumiose City, Kalos / cis bisexual woman / she/her
A coordinator who does her best trying to popularize Contests in Kalos. Old friends with Diantha.
Owned Pokemon: Florges
(mainverse)

ADRIAN
13 / Sootopolis City, Hoenn / she/her
An apprentice to Wallace in the duties of guarding the Cave of Origin. Looks up to him greatly and plans to be both a master coordinator and trainer like him.
Owned Pokemon: Wingull
(mainverse)
☆FANKIDS☆
Steven/Wallace
ESMERLADA (EMMY)
Sootopolis City / she/her
Poor oppressed goth girl in a family of preps. Hates that people think she's magically fantastic with Pokemon just because her parents are former top trainers.
Owned Pokemon: Clefairy
MICA
Sootopolis City / he/him
Lapis' twin, an incredibly chillax bro. So go with the flow, he became a Water type specialist.
Owned Pokemon: Wailord, Starmie, Jellicent (male), Ludicolo, Gyarados, Azumarill
LAPIS
Sootopolis City / she/her
Mica's twin, a quiet girl who likes learning. Interested in both Mega Evolution and Sootopolitan history.
Owned Pokemon: Mawile, Glalie, Magnezone, Relicanth
Wallace/Annetta
TYPHA
Sootopolis City/Lumiose City (AU dependent) / she/her
A sweet girl who likes fashion and the ocean. Very kind but very forgetful.
Owned Pokemon: n/a
Ivy/Brendan/Lisia
FLORENCE
Verdanturf Town / he/him
An unfortunate fellow with poor health. Decided to make the best of things and became a poet.
Owned Pokemon: Budew
HAVEN
Lilycove City (Verdanturf Town) / she/her
She's been a lot of things: an 8 badge trainer, a decent coordinator, a pop idol. She likes being an idol the best.
Owned Pokemon: Altaria, Crobat, Ninjask, Azumarill, Vileplume, Skarmory
#verse: main#for some of them#oc: girl#oc: the cat#oc: annetta#oc: adrian#oc: emmy#oc: mica#oc: lapis#oc: typha#oc: florence#oc: haven
1 note
·
View note
Text
Team Infinity Higher-Ups Part 2: Past Companions
Misty
The Gym Leader of Cerulean City who specialises in Water-type Pokémon. She was Ash’s first companion, and she formerly had anger issues, but had since gotten therapy. Her main Pokémon are Gyarados, Starmie and Lapras.
Brock
A Pokémon Doctor who used to be the Gym Leader of Pewter City. A former hopeless romantic, he has since entered a relationship with Pike Queen Lucy. He is also quite wise and brotherly. His main Pokémon are Steelix, Forretress, Toxicroak and Blissey.
May
A Coordinator from Petalburg City in the Hoenn region. She is quite interested in travel, and has quite the interest in cuisine. Her main Pokémon are Blaziken, Venusaur and Blastoise.
Dawn
A Coordinator from Twinleaf Town in the Sinnoh region. Quite adept at fashion, she has a bond with the Legendary Pokémon Mesprit. Her main Pokémon are Empoleon and Lopunny.
Iris
The Champion of the Unova region. Hailing from the Village of Dragons, she is quite a wild girl. She is also known as ‘the girl who can connect with the hearts of dragons’. Her main Pokémon is Haxorus.
Cilan
A former Gym Leader of Striaton City and a Pokémon Connoisseur. A chef who tends to speak in food metaphors, he is quite a delight to have around. His main Pokémon is Simisage.
Clemont
The Gym Leader of Lumiose City and a Hero of Kalos. An inventor by trade, he is quite a genius, though his stamina leaves a lot to be desired. His main Pokémon are Heliolisk and Luxray.
Serena
A Pokémon Coordinator from Vaniville Town in Kalos. Very fashion-oriented, she is also quite an athletic girl. Her main Pokémon are Delphox and Talonflame.
1 note
·
View note
Text
Orange League, Episode 11 - Goodbye, Psyduck! Come Again, Golduck?
Filler Archipelago's pretty big, so the group stops for a break on Hassaku/Kinnow Island. Misty makes a friend here: Tsubaki/Marina, a fellow Water-Type specialist. Marina observes that Psyduck's ready to evolve!
(Speaking of Water Types, I haven't mentioned this before but I just want to note that Team Rocket's budget crisis is hilarious. It's a recurring plot point that Jessie and James have had their funding cut and are desperately trying not to be fired from Team Rocket; To that end, their Gyarados submarine has had to be downgraded for a more budget-friendly Magikarp. XD)
Misty and Marina agree to a friendly battle, which becomes surprisingly catty very fast. This is going to be rough on Misty since she left her ace Starmie at the Cerulean Gym. Her team roster right now is pretty shit: Goldeen, Staryu, Psyduck, and Togepi.
Marina uses her Tentacruel. Tentacruel's Poison subtype makes Psyduck a strong choice for Misty, but she opts for Goldeen instead.
Round 1: Goldeen vs. Tentacruel
Stat for stat, Tentacruel trashes Goldeen in every category. However, this isn't entirely hopeless. Tentacruel excels particularly in their 120 Special. Their special stat is so high it nearly rivals the Legendary Bird trio!
However, Tentacruel and Goldeen's mutual resistance to Water hinders Tentacruel much more than it does Goldeen, who's built around physical Normal moves like Horn Attack. Goldeen's more comfortable in this Type Mirror Match. Still, one good hit from Hydro Pump could be the end for them.
Marina uses Wrap, but at 85% accuracy, that's a miss. Misty swipes the Speed advantage with Agility, then goes for Horn Attack. Marina, however, has a trick up her sleeve: Poison Sting for the KO!
The point Marina makes here is that Tentacruel's stronger for having access to non-Water STAB moves, but it doesn't really work. Tentacruel's stronger for having WAY better stats, but Poison Sting has 15 Power. G1 Poison moves are pretty trash.
Round 2: Staryu vs. Tentacruel
Misty goes for Staryu next. Staryu's in the same boat as Goldeen in stats, but they have some decent status moves. Minimize and Recover make for a potentially vicious combination.
But Misty goes for the frontal assault and hits with Swift, KOing Tentacruel. She counters Marina's earlier point, asserting that Move Type is just as important as Pokemon Typing. Which might hit harder if she hadn't just used a Normal move, which is the same thing Goldeen tried and failed to do earlier.
Kinda takes the wind out of her sails. This bit would work better if she'd used the Thunderbolt TM Move to sink Tentacruel.
Round 3: Staryu vs. Psyduck
This is much more even. Psyduck's stats are very evenly distributed, all falling between 48 Defense and 55 Speed. Staryu, on the other hand, is built for Special - But there's that mutual Water resistance again.
In natural abilities, Psyduck holds the edge here. They can hit harder with Normal moves than Staryu can, and their Confusion gives them the ability to use their Special stat against a fellow Water Pokemon.
But Staryu's status shenanigans are pretty strong, and there are all kinds of powerful Special moves in Staryu's TM learnset that Misty could pull out here. Depending on how well she's built her Staryu, this could be a walk in the park.
Misty... goes for Water Gun, the worst possible decision she could have made. It's not very effective. Psyduck slams Staryu with Confusion. KO.
Goddammit, Misty. You don't get to talk shit about Ash's mediocre play ever again.
Round 4: Golduck vs. Starmie
Team Rocket interrupts and Psyduck evolves into Golduck offscreen, but before long, Misty and Marina are back at it.
Starmie's about as powerful as Tentacruel, but trades some points in HP and Special for tankier Defense and quicker Speed. Between their Psychic subtyping, powerful status moves, and variety of available damage Types, Starmie is easily one of the most formidable non-Legends in G1.
This match should easily be Marina's, especially if she has Thunderbolt for coverage. But this time it's her turn to play poorly.
Marina uses Bubblebeam, mirroring Misty's worst possible choice of Water Gun with her Staryu. Misty then goes for Hyper Beam, but Marina gets one of those anime freebie turns to set up Light Screen.
Marina is ahead of her time. Hyper Beam is a Physical move right now. So Light Screen accomplishes fuck-all, and Starmie gets wrecked. This fight was hers to lose, not Misty's to win, and lose she did.
Misty Wins!
I mean. Kind of. Golduck vs. Psyduck got interrupted, so technically Misty won 2 out of 4 matches but it still counts, I guess. Tragically, Golduck turns out to not even be her Pokemon. Completely misunderstanding. Psyduck's still Psyduck. That was just a wild Golduck passing through that likes to look cool and impress human girls. Whoops!
So Psyduck is still Psyduck. All that stuff about being near evolution was... eh? It literally gets brought up just to shrug it off. And also, as Ash points out, Misty's 2-of-4 "victory" kinda needs to be revoked since that wasn't even her Pokemon.
It's a bad day to be Misty.
1 note
·
View note
Text
Soul Silver Gyms 4,5 and 6!
April 13th
Ok more gyms to go none of these are an issue. First I have to deal with the powerplant. So I race over start the side quest. Chase down the goon. Get the item and bring it back. Now I unlock the Poke flute from lavender city so I can remove the snorlax (I use theif to gain the left overs from it) head through diletts tunnel to Pewter city.
Brock
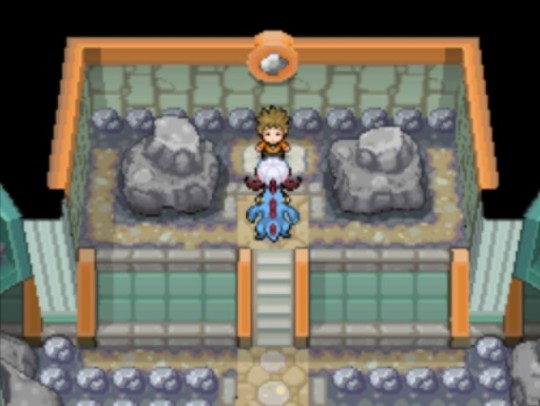
This gym has the lowest levels its honestly sad how weak it is. They could have at least given him golem or aerodactyl or something. I lead feraligatr and use a swords dance while taking an earthquake. I use waterfall to OHKO the graveller. Next in is Kabutops. It can use giga drain but wierdly chooses not to so I waterfall. He heals as I swords dance again then waterfall to OHKO. The rest of his pokemon aren't even worth mentioning as none pose a threat. A Grass type would be even more effective but yeat its a slaughter.
Erika
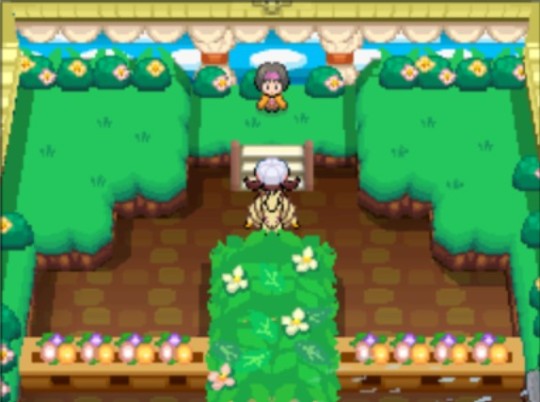
Speaking of Slaughter next up is Erika. I start ninetails against Jumpluff and use nasty plot. Erika makes the silliest mistake of her life and uses sunny day! needless to say I cause a forest fire in the south of Celadon that will be remembered in Kanto for years. Which means I use +2 sp atk sun boosted flamethrower on the rest of her pokemon and destroy her.
Misty
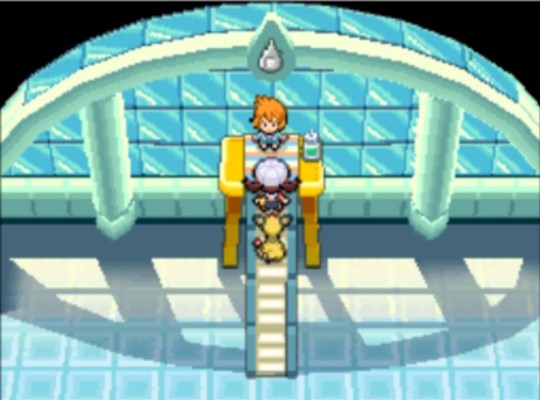
I was a little nervous for Misty because I though she had a gyarados... Turns out she doesn't. So I lead ampharos and start. Golduck goes down to 1 thunderbolt. Quagsire is next so I switch to Stantler who has rindo berry powered natural gift. It takes Quagsire to the red which procs a heal so I then wear quarsire diwn with a mix of confuse ray and Zen headbutt. Next in is Lapras. I set up a light screen and switch back to ampharos. From I spam thunderbolt to slowly wear down lapras (it heals a few times). I do fall asleep and take a fair amount of damage from ice beams fortunately last is Starmie. I switch to Feraligatr swords dance up and use crunch to finish the job.
Turns out she was the most challenging but not a massive fuss. Theres two gyms left and the Mt. Moon rival fight which I will do next time. The level cap raises significantly to 60 so I will have to do a bit of grinding first.
Gym badges won: 54
Pokemon used: 122
Pokemon defeated: 28
0 notes
Text
Starmie for Pokemon Unite!
Season 1
Prev: Torterra - Scrafty
As far as Gen 1 pokemon go, Starmie is actually one of the better designed pokemon based off of a ‘real world’ object. There are many ways to design a starfish pokemon, but giving it a gem heart at the center of its body certainly adds to the aesthetic of a mostly immobile bottom feeder.
And yet it’s this simplicity that allows Starmie to endure as a well designed pokemon. I doubt we’ll be seeing regional variants of this pokemon anytime soon simply because of how iconic it is. But will that help it out in Pokemon Unite? Let’s take a closer look.
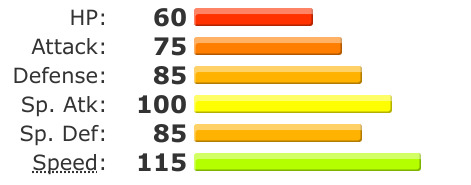
Back in my day, these were the numbers of a fast special attacking sweeper, but nowadays, these numbers tend to underperform. High Speed is unusual for a starfish, but with the ability to spin its body around like a shuriken, it’s got some definite speed to it. That said, Starmie uses its speed to fire off cosmic rays and waves of water, and for that reason, Starmie is best suited to the role of an...
Attacker
Basic Attack - Ranged/Sp. Atk
Lock onto a single target, then fires off a particular beam that focuses on the enemy for 5 seconds, dealing damage constantly. If any other enemies cross paths with the beam, they will also receive damage.
Staryu and Starmie attack by firing a psychic beam from the gem in its core. It does this by floating horizontally, with the gem pointed to the sky, allowing it to fire its beam at any enemy from any angle. The beam attack ends when the target is KOd.
It is possible for the attack to end early because the target moved too far out of range. However, the limited range of this attack extends well beyond the visible screen.
The basic attack will only target those in range, like a regular basic attack. Once the beam is locked on, it will continue to deal damage to the enemy and any other target that crosses paths.
The rate of damage is affected by the basic attack speed, which can be modified. Unlike most other Special ranged attacks, Starmie’s basic attack utilizes solely its Sp. Atk stat.
This goes without saying, but Starmie/Staryu cannot score while your basic attack is active, which is optimal, as they cannot effectively score with enemies nearby considering your frailty.
The basic attack can be cancelled by hindrances. If Full Heal is used at the right time, the attack will not be interrupted.
Oh, how dazzling! With all of that psychic power concentrated in its gem, I guess we shouldn’t be surprised at its ability to fire off deadly laser beams. Speaking of psychic power, this is how Starmie (and Staryu) are able to lock on to enemies and harass them with psychic damage, making it difficult for enemies to escape. And by that I mean the range of this attack reaches very far, requiring the enemy to retreat well beyond screen in order to break the attack.
That said, Starmie needs the enemy to be in range in order to set off the beam in the first place, and that means getting a visual on the enemy the old fashion way. Once you’ve got a bead on the target, though, you should hang back, pull out of sight, and let the beam deal with the enemy. Not only does it put the hurt on the target, but any enemy in between will also be damaged. Paired with a teammate that has great push potential, like Block Snorlax or Drill Peck Dodrio, and this beam can be really stretched out, greatly expanding its potential area of damage. (Some moves, like Talonflame’s Unite Move, Flame Sweep, are a little TOO good at pushing enemies away, and can end up breaking off the beam attack, forcing the attack to end)
But because Starmie is hyper focused on attacking, it cannot score while the beam is active. It’s not a good idea to try and score while enemies are nearby anyway, because of how squishy Starmie is. A couple of solid hits will put Starmie down, sporting the same defensive prowess of pokemon like Cinderace or Absol. Even so, this makes it very difficult for Starmie to make a bold score in the early game, fishing for those stacks to power up its Aeos Cookie or Sp. Atk Specs.
This is where Starmie comes into its own and utilizes a rare playstyle in Pokemon Unite called Kiting. The gist of Kiting is that a player stays out of range of their opponent’s counter attack options while still staying in range themselves to attack. Starmie isn’t just built to do this, it HAS to play like this due to its low defenses and HP. But thankfully, all of its moves are tailored to this specific playstyle, starting with its ability.
Ability: Illuminate
Reveals enemies hiding in tall grass when nearby. Your basic attack deals more damage the more enemies there are in the path of the beam.
The range of Illuminate is the same as your basic attack. This is because you need a viable target to start using the basic attack, and would normally fail to lock on to an enemy hiding in tall grass.
Hidden enemies will also be revealed to teammates and will also show up on the minimap.
The damage multiplication effect of Illuminate applies instantly. Will not apply if an enemy is unstoppable or otherwise unable to be targeted, such as when they are in the middle of scoring a goal.
The damage multiplication effect of Illuminate is weaker than you’d expect, but it applies to enemies and wild pokemon. There is no damage cap for the boost.
Thought you could hide from this bright star? Think again! Because Starmie’s basic attack requires a target to lock on to, hiding out in tall grass would normally be an effective stopgap to its ability to start dealing damage. This ability is meant to help itself rather than its teammates, but they will also be able to see enemies revealed by Illuminate. Best case scenario, a teammate hiding out in the tall grass becomes privy to enemies hiding in another patch of tall grass nearby as Starmie approaches, foiling an ambush.
Aside from that, it also has the bonus effect of dealing multiplying damage to multiple enemies. Because it requires proper positioning to get the most damage, you’ll find yourself circling around team fights trying to line up for that perfect shot. This is normal fair when you need to make multiple hits in one shot, such as with Spirit Shackle Decidueye or Hyper Beam Dragonite, but for Starmie, it needs to keep that position constantly. Because Illuminate boosts damage for each extra target caught in the beam, not only do you need to have the perfect line up, you also have to stay out of trouble and keep an eye on the fight so you don’t get one shot by a stray Pyro Ball or Solar Beam, and you have to do this focused for the duration of the attack. It’s not an easy task.
The effort is worth it, though, as enemies will be run ragged by the relentless rays of the raging tides. That said, it does make Starmie a little anxious to engage in one-on-one fights, as the damage takes a while to build up whereas enemies will have no qualms with expending both of their moves to secure a KO on a problematic attacker. Not to worry, though, as you have moves to handle such engagements.

At the start of the game, Starmie will start out as Staryu. You can choose between Rapid Spin or Swift as your first move. By Level 3, you will have learned both.
Move 1: Rapid Spin
Starts spinning horizontally at a very fast pace for 5 seconds. While spinning, your movement speed is increased and your basic attack will fire constantly until the move ends. You also deal weak damage constantly to nearby enemies. 8s cooldown.
When Starmie/Staryu use their basic attack normally, they float on their backs, with the gem side pointed up at the sky. When using moves like Rapid Spin, they start spinning in this position.
Rapid Spin effectively adds 5 seconds to the amount of time your basic attack runs for, allowing it to deal damage for more than 5 seconds. If you use your basic attack during Rapid Spin, the move ends first but your basic attack will continue firing for another 5 seconds.
If an enemy is KOd while Rapid Spin and your basic attack is active, the basic attack ends but Rapid Spin will continue to spin. Another enemy can be targeted in this time, but Rapid Spin will still run out after 5 seconds and any leftover time is added to the basic attack.
The move can end early by pressing the button again. Staryu cannot score while using Rapid Spin, just like Blastoise.
Something something bay blades, anyway. As one of the original pioneers of the move, Staryu spins with great effect. Rather than blow away stray hazards, Staryu spins to focus its psychic power, augmenting its basic attack even further. There will be moments where your basic attack runs out of time at the worst moment, or that the enemy managed to run away, even with your expanded range. Rapid Spin solves both of those problems by not only giving you a speed boost, but it also adds extra seconds to the run time of your basic attack. Not only does this make it more effective at chasing down your enemies, it also increases your agility, letting you circle around crowds faster, looking for that perfect line up. The high cooldown is a bit of a bummer, though, but that just means you shouldn’t be hasty when it comes time to spin.
One upside though is that, as a starting move, it lets you reach the middle of the lane a lot faster than other pokemon. But that’s not a very appealing prospect as that just means you’ll run into your enemies faster. It’s also an OK move against wild pokemon, as the attack actually does have a small hitbox that can damage enemies up close with all of that spinning. And let’s be real, there’s no way you’ll get away with dealing weak damage to actual players up close.
Move 2: Swift
Send out a flurry of star shaped projectiles, each one homing in on any number of targets. The number of stars that home in on each target is random. Deals more damage to enemies being targeted by your basic attack. 6s cooldown.
The move cannot be used if no viable targets are within range.
When multiple enemies are present, a random number of stars will target the viable enemies. 5 stars are launched as a Staryu, whereas 10 stars are launched as a Starmie. The star projectiles are distributed randomly among targets, meaning it is possible for an enemy to avoid damage by chance.
Maximize damage by using Swift on a single enemy targeted by your basic attack.
It cannot be overstated just how iconic Swift is to pokemon like Starmie. Not only is it the most common starting move, it’s also literally in the name, as Swift in the literal Japanese translation means ‘Speed Star’. And oh look, that’s what Starmie is.
Back to Staryu, although it starts out with this move, this would be the first time the move is actually treated as a sure-hit attack (Espeon and Sylveon both can learn Swift as a starting move in Pokemon Unite, but both moves can miss). That said, it comes with some caveat in exchange for accuracy (metaphorically, and literally). For starters, Swift cannot be used if there is no valid target. This also includes enemies that are unstoppable or otherwise untargetable, as the move cannot recognize them as a valid target. Not only that, for a flurry of stars, the attack is very weak, which makes it very inconsequential for enemies if they are in range, and the resulting damage isn’t anything to worry about.
Of course, this is Pokemon Unite, where most of the Water Types in the game use Surf in their own unique way (even including Mew, which isn’t a Water Type at all, but rather uses Blastoise’s method of attack rather than coming up with their own spin on the move). For each pointy bit of its body, Staryu launches 5 star shaped projectiles outward. If there is only 1 viable target in range, those stars will all deal damage to that one target. When Staryu evolves into Starmie, Swift shoots out 10 stars, one for each point on its body, but it still follows the same formula. Of course, it’s all up to chance where each projectile hits, and it’s even possible for an enemy to avoid damage altogether just by chance. The way it goes is that each star chooses a random target as the move is used, and that’s the only rule. If there are 2 viable targets, there’s an extremely low chance all stars will target the same enemy, and those odds lower even more when Staryu evolves.
That said, the move is still very weak, and is best used when multiple enemies are weakened with your basic attack. Oh, right, Swift has one more boon going for it, and that is that each star projectile deals more damage to an enemy being damaged by your basic attack. If Swift is used while there is only 1 viable target, and you are using your basic attack on that specific one, the projectiles will each deal double damage, drastically boosting your overall damage output. This increases even further when you evolve into Starmie, boosting the number of projectiles launched. In a sense, if everything is set up correctly, Starmie can really put the hurt on a singular enemy, making them much better at taking on objectives like Regieleki or one of the Regis by themselves.
But now it’s time to talk about the real star of the show, me. As in, Starmie. Heh, get it? Haheh, eh...well, Starmie’s name in Japanese is the same, so I think the joke still works...
At Level 6, Staryu evolves into Starmie. At the same time, Rapid Spin will become either Surf or Cosmic Power.
Move 1a: Surf
Summons a torrent of water and ride the wave, increasing your movement speed for 6 seconds. Enemies will be damaged, shoved, and stunned when they get too close. Your basic attack will deal more damage to enemies the closer they are and it will fire constantly until the move ends. If you KO an enemy with your basic attack and Surf is still active, you will automatically attack the next viable target. 9.5s cooldown.
At Level 11, Surf becomes Surf+.
KOs extends the duration of the move by 1.5 seconds.
Starmie uses the same animation as Rapid Spin, but with a visible rush of water underneath.
When an enemy is KOd with your basic attack while Surf is active, the next viable target will be chosen and attacked. If no viable targets are within range, the basic attack ends.
The basic attack deals more damage when enemies are close by, but can be pushed back by Surf’s shove effect. This is intentional as Starmie is capable of stun locking an enemy and dealing maximum damage. However, this is very risky as you hyper focus one enemy and are vulnerable to being attacked by their teammates, but very good for dealing with objectives like Regieleki or Rayquaza.
The max damage range of Surf’s boosted damage for your basic attack is near Surf’s active hurtbox, and the shove effect moves enemies past that.
In contrast, the minimum damage output is further out, the same range as your basic attack’s targeting range. The attack doesn’t get any weaker if enemies are damaged at or beyond this range.
Just like Rapid Spin, Surf can be cancelled by using the move again.
Surf improves upon everything that Rapid Spin does and more. Not only does it damage enemies, it will also push them away on hit, helping to remedy Starmie’s problem dealing with melee attackers. Actually, this attack does a lot to help with that front, as Surf further increases the damage you deal to enemies that are very close by. While it does seem to conflict with the push effect, Surf will also stun enemies on hit, and with the added movement speed boost, you can splash against these enemies repeatedly, all while burning a hole through them with your basic attack.
Not only that, Surf has a bonus effect where it will automatically target a new enemy if your basic attack KOs the original target. Sure, it’s only 1 second more than Rapid Spin, but this one little change makes it very easy to handle multiple enemies, especially if they’re on the frail side. Now, if the enemy has resistance or immunity to hindrances, that can be bad news for you, as they can get up close and wallop you without fear of being pushed back. However, the bonus damage dealt to enemies up close still applies, and is much stronger against opponents within this close range. Because Surf typically pushes enemies away, the bonus damage multiplies to a crazy high level, but only because they aren’t supposed to be that close in the first place. No matter what they are doing, you’ll be able to deal massive amounts of damage, possibly more than they can deal to you.
It seems like there’s nothing bad about this move, and there generally isn’t. However, please keep in mind that Starmie is a frail Attacker, typical of the archetype. Starmie can take 2 or 3 hits while Surfing, but it’s meant to be used defensively rather than diving in. Not only that, you are still vulnerable to hindrances, which can cancel your basic attack, leaving you defenseless. While you are faster, this move does little to improve your matchup against other ranged Attackers, especially if they have the ability to stun and shove, like Decidueye or Gardevoir. Do not get carried away just because you’re shredding those waves.
Move 1b: Cosmic Power
Gathers up star power and fortify your defenses for 8 seconds. The pokemon is protected from stat reducing effects and passive damage moves left behind by the enemy team. The next time you use your basic attack, it will deal damage for an additional 3 seconds and the attack will fire constantly, even while the pokemon is affected by hindrance. 10s cooldown.
At Level 11, Cosmic Power becomes Cosmic Power+.
KOs extend the duration of your defense boost and protections by 1 second.
Protection from stat reducing effects include the Slow Smoke item and Speed Flux zones on the enemy’s side of the map. Passive damage protection includes moves like Duraludon’s Stealth Rock and Charizard’s Fire Blast.
The basic attack boost provided by Cosmic Power will be confirmed with a visual of small stars where the basic attack boost bar would normally be.
Unlike Surf and Rapid Spin, Starmie will only flash upwards at the sky for a second. This is a visual indicator to your teammates and enemies that Cosmic Power is locked and loaded. The spinning effect during your boosted basic attack will be accompanied by glittering stars instead of water.
If Cosmic Power+ is used while you are already under the effects of boosted defense and protection, it will add to the timer of those effects by another 8 seconds. It is possible to gain this amount with KOs through Cosmic Power+.
The basic attack empowered by Comsic Power will continue to fire even while the pokemon is being shoved around and affected by hindrance. Even Charizard’s Unite Move, Seismic Slam, will not stop this attack.
Rather than focusing on speed and mobility, Starmie leans to the other side of the spectrum with Cosmic Power, granting it not only more defense, but also immunity to passive effects. Not only that, it also adds another 3 seconds of time to your basic attack, which is actually a lot less than Rapid Spin or even Surf. However, what Cosmic Power lacks, it makes up for in granting you a basic attack that cannot be turned off, even while under the effect of hindrances. If your build is optimized for maxing out the damage of your basic attack, or if you see that the opposing team will be carrying a lot of crowd control, Cosmic Power is the way to go.
Now, the defense boost won’t do much for a frail Attacker like Starmie, as it allows it to take maybe an extra hit or two. But the point of Cosmic Power is to allow you to keep attacking and not get done in by a stray hit while you’re circling the mosh pit. It keeps you from getting one-shot by Decidueye’s Spirit Shackle or Venusaur’s Solarbeam, allowing you to keep up the offensive pressure from a safe distance. Not only that, but the defensive boons allow you to completely ignore effects like Slow Smoke or Sludge Bomb. Granted, you really shouldn’t linger in these effects for long anyway, as it’s hard to keep track of the duration of Cosmic Power in the heat of battle. The whole point of the move is to make it easier for you to Kite while launching your basic attack nonstop. To that end, Cosmic Power does come with the same weaknesses as Rapid Spin, in that if the enemy is KOd, those extra 3 seconds you got are wasted. Thankfully, Cosmic Power+ does grant you extended protection with each KO, but then it comes down to your own skill. Do you target a Defender to get the most out of Cosmic Power’s extra 3 seconds of attack, or do you focus on an Attacker that’s protected by shields?
Between Surf and Cosmic Power, it’s a matter of mobility versus security. Surf let’s you ride around dealing fast damage, while Cosmic Power protects you from interruptions and passive effects. Choosing one depends on figuring out which issue will be harder to handle without it. That’s why Staryu evolves at Level 6, to give you enough time to figure this out, and to ensure that you are leveling up properly against the opponent, as solid Kiting will give you lots of EXP really fast.
At Level 8, Swift becomes either Psybeam or Power Gem.
Move 2a: Psybeam
Fires a beam in a straight line, damaging multiple enemies. Afterwards, any enemy damaged will be marked. The next time you use your basic attack, an additional ray beam will be fired and damage the marked enemy, even if they are out of range. Your basic attack can target another enemy in range. Both rays can target a single enemy. 8s cooldown.
At Level 13, Psybeam becomes Psybeam+.
If an enemy is KOd while your basic attack is firing multiple beams, the remaining beams deal increased damage.
The mark is a graphic of a pink psychic eye. Enemies with this mark will be damaged by an additional laser, even if they are out of range of your basic attack. The mark lasts for 5 seconds.
A marked enemy can be targeted initially by your basic attack, dealing increased damage to that enemy.
The extra beams can be forced to end early if the enemy moves too far out of range, just like your basic attack normally.
The multiple beams can be cancelled by inflicting a hindrance on Starmie. If an enemy becomes invincible or unstoppable while being targeted by the beam, the attack is cancelled.
If an enemy is targeted by your beam while out of range, your basic attack can be used again if another viable target is within range. Both beams have an independent timer of duration.
The multiple beams all deal base damage equal to your basic attack’s damage output. Psybeam+ will deal extra damage to remaining enemies if marked enemies are KOd by this attack.
Psybeam+ will not deal increasing damage if a marked enemy moves too far out of range and forces the beam to disappear.
Like a well lined cue ball in a game of pool, Starmie makes a clean shot, hitting multiple enemies in one go with Psybeam. Although the damage isn’t all that great, the followup more than makes up for it, as it turns each target into a separate receiver of your basic attack. If an enemy gets hit, they have no chance of escaping, as even moving out of range of Starmie’s basic attack doesn’t save them from getting lasered. And not only that, the damage doesn’t get compromised at all, as each beam deals damage running off of your basic attack’s normal damage output, meaning it can be increased with X Attack or Muscle Band.
And keep in mind that Illuminate is still boosting the damage output of your basic attack when you’ve got multiple enemies lined up in the laser. Now, it doesn’t boost the damage just because you’ve got multiple enemies on the receiving end of all of these lasers, but if there are any targets stuck in the path of even one of these beams, the entire network of lasers gets the attack boost, so it’s no big deal if you miss an opponent or two from the initial beam.
Now, Psybeam still has the same learning curve as your basic attack, in that you’ll need to line up more than one target in the heat of battle to fully abuse this attack. You’ll be in big trouble anyway if you run into more than one enemy, especially if they’re a high damage Attacker or Speedster. Starmie benefits a lot from competent teamwork, with teammates distracting the enemy, allowing you to fight from the edge of battle, taking the lucky shot with Psybeam, and then circling around the scuffle like a snooty satellite recording the fight on their phone. For all of its boons, Starmie is still a frail Attacker, and is vulnerable to getting one shot if you’re not careful or prepared. The beams can still be cancelled by hindrances, so you’ll want to be extra wary of stray attacks.
That said, Psybeam+ has a really great upgrade that makes handling hordes better. If even one enemy gets KOd from Psybeams multiplying beams, the remaining beams get stronger. This is meant to handle the typical 3 Attackers per team structure that’s been popping up more often, and is especially handy if the enemy has already been worn down by a Defender or All-Rounder. More often than not, though, the opposing Defender will be the last one standing in these crowded team fights, which is something to keep in mind when all of your moves are on cooldown.
The only weakness to this attack is if the crowd of enemies is backed by a competent Supporter, as they can either heal more damage than you can deal, or shut you down with any number of hindrances at their disposal. That’s kind of embarrassing, to be honest...
Move 2b: Power Gem
Launch a stone made of light directly forward. Afterwards, the enemy will be marked and your basic attack will target this enemy only, allowing you to target this enemy even if they are out of range. Upon attacking, the beam will split off and deal constant damage to the target and all other enemies near the initial target. The less enemies there are, the greater the damage. 9.5s cooldown.
At Level 13, Power Gem becomes Power Gem+.
Increases damage. Extends the duration of this moves’ effect on the marked enemy when an enemy is KOd by the split beams.
The marked graphic is that of a pink stone much like Starmie’s central gem.
The mark wears off after 7 seconds, whether you deal damage to the enemy or not.
Power Gem+ extends the duration of the mark by 1.5 seconds for each KO.
The range of the split beams is the same as your basic attack. The split beam deals 150% of your basic attack’s damage and decreases the more enemies there are, to a minimum of 100%.
If the marked enemy is too far out of range, the attack will fail.
The split beams deal more damage than your basic attack’s base damage, but otherwise can be affected with items such as Muscle Band and X Attack.
See, light refracts when it shines through bright gemstones, creating a rainbow effect. The same principle applies with Power Gem, as you hit an enemy with a gemstone, bedazzling them with it, then shoot them with a beam that causes the light to splinter and damage all nearby enemies. The result is a beautiful fractal light show of death and destruction.
Where Psybeam rewards skillful alignment, Power Gem is a decisive shot that picks an enemy to become the center of attention. On hit, your basic attack will only hit that target, which can be a problem if they move too far out of range, robbing you of an attack to defend yourself with. On the upside, Power Gem is a great answer to pick apart team compositions that like to stay together, hunkered closely with their Defender or Supporter. Pick your target and shoot, preferably a bulky enemy, then start the light show. The resulting split beams damage any nearby enemy, forcing the group to disband or perish. The beams deal more damage the less targets there are, which help deal with invincible duos like a Supporter and an All-Rounder. Speaking of which, you’ll want to target a Defender or an All-Rounder for this as, if you end up KOing an Attacker you had marked with Power Gem, the whole attack ends early, greatly diminishing your return.
Not only is this move great for dealing with crowds, it’s also a great spearhead for a push in either lane, with proper kiting, of course. Weakened enemies will be forced to retreat, leaving the marked enemy alone to fend for themselves. Power Gem+ exacerbates this even further, as KOs extend the duration of the mark. Combined with Surf or Cosmic Power, you’ll be firing a never ending stream of rainbows at the opponent.
However, just like with Psybeam, Power Gem does have its own share of weaknesses. If an enemy realizes they’ve been marked, they can simply move out of range for the attack to fail, as your basic attack will be locked on to only the marked target. Also, while the spread damage is great, it does get weaker the more it splits, but it will never fall below 100% of your basic attack’s normal damage output. If the entire enemy team decides to rush in, you’ll more than likely find yourself getting KOd before you can deal any meaningful impact on the opposing team’s HP. Not to mention, you’re still vulnerable to hindrances, as they can cancel the attack. But unlike Psybeam, the mark doesn’t wear off just because you get knocked silly, and you can resume attacking right away if you’re able to.
With all of that said, there is one glaring caveat to these moves. While they do deal great damage, the moves serve to augment your basic attack and little else. As a Special Attacker, Starmie can make great use of items like Muscle Band or Scope Lens, but cannot utilize Shell Bell or Choice Specs. That’s because the basic attack is powered by items that boost basic attack damage, whereas items like Choice Specs only power up the pokemon’s moves. The Sp.Atk boost they provide do power up the damage of your lasers, but that’s it. The only Sp.Atk boosting item that Starmie would be able to use is the Sp.Atk Specs, as the stacking scores power up the damage of your basic attack, spreading the damage even more if the moves target multiple enemies.
Unite Move: Sea of Stars
Summons a beautiful swirl of sparkling sea water that whirls around the pokemon. For 8 seconds, the swirling water slows down the movement speed and basic attack speed of all enemies within range. When enemies are damaged by your basic attack, a glowing beam is cast from the target, dealing damage to all nearby enemies.
The Unite Move’s range fills up nearly the entire screen.
Reduces movement speed and basic attack speed of affected enemies by 50%.
The damaging glow deals damage using your Sp. Atk, and can be increased with modifiers like X Attack and items like Muscle Band.
The movement speed and basic attack speed is reduced even further when enemies are affected by the damaging glow effect of your basic attack. The reductions multiply when the damaging glow effects overlap. However, this is a weak multiplier, meant only to increase the effects by a low 8% or such.
The damaging glow only affects those within range. Can be combined with Psybeam or Power Gem to spread damage.
You are still vulnerable to hindrances.
With a dazzling light show like this, I think I can see why Starmie is part psychic, as such a mesmerizing bath bomb like this is mind blowing. Eh? Get it? Because, the mind... never mind.
Anyway, this Unite Move is meant to patch up all of Starmie’s issues when engaging in enemies, and that’s to handle the dangerous attack power of just about the entire enemy team. Just by getting swept up in the attack, enemies will have their attack speed reduced by 50% and their movement hindered similarly (they can still dash around). While it certainly helps your team pick up KOs, it also greatly augments your basic attack, as the laser causes a damaging glow effect on contact with the enemy. This glow is half as powerful as your basic attack, but the damage racks up when these glowing auras overlap with moves like Psybeam or Power Gem. When used strategically at objectives like Regieleki or Rayquaza, it greatly boosts your team’s ability to fend off the entire opposing team.
The weakness of this Unite Move is the same, though, as you are still weak to hindrances. Getting knocked silly will also end the duration of Psybeam or Power Gem’s spread damage, which will drastically reduce your overall damage. Not only that, but if you’re getting stunned into next week, you’ll find yourself KOd soon after, even with a Buddy Barrier active. Sure, you can use Cosmic Power to survive a hit or two, but it won’t be as effective if you’re putting yourself in the middle of the team fight. Just like I’ve stated before, Starmie plays extremely well when fighting from the edge of battle, kiting around opponents and staying just out of reach of their counter attacks. It may seem like a waste to kite while using your Unite Move, and it is. The best way to use Sea of Stars is to pop it when the entire enemy team has been weakened by your moves or by your teammates, as the reduced HP makes it easier to KO multiple enemies.
Stars die quickly when they’re the center of attention. You’re just as influential from the sidelines, don’t forget that.
Holowear
While Starmie doesn’t wear clothes normally, clothing can be a bit of an issue due to its penchant to, well, spin all over the place. To amend this, we have to decorate Starmie like an ornament rather than fit it with some clothing, especially if they look better while Starmie is spinning. First up is the Glitter Style holowear, where small little star clips of various sizes and colors have been tacked on to its body and arms. Then there is Storm Style, outfitting Starmie with a large black cloud on its back and lightning bolt cutouts taped to its arms. How about Bow Tie Style, decorating Starmie with lots of bows and ribbons of different colors, making it look very hypnotizing when it spins. Lastly, there’s Fireworks Style, giving Starmie a lit sparkler on each arm and little firecrackers strapped to its body that go off when the pokemon spins, perhaps this can be a Legendary skin due to all the effects it emits.
Strategy
Now, as I’ve stated multiple times, Starmie has to kite to survive and play effectively in Pokemon Unite. Just as a quick refresher, Kiting means to play by staying out of an enemy’s counter attack range but staying just close enough to keep attacking, which Starmie excels at thanks to their basic attack. This is exacerbated greatly with Starmie’s low HP and defenses, forcing it to rely on smart positioning and social distancing.
At the start of the game, Starmie can go into any area, but picking top or bottom requires a competent early game attacker that can complement your kiting game plan when you run into enemies. Staryu will have some difficulties KOing wild pokemon until it evolves, so having a teammate that can share EXP can give you a good head start. In a weird sense, you’ll be gaining more EXP from defeating the enemy rather than farming wild pokemon, which means you’ll have to take kiting very seriously.
When you do level up and evolve, choosing between Surf and Cosmic Power is a matter of responding to the enemy team’s composition. If they have plenty of troublesome melee All-Rounders or Speedsters, Surf can be very helpful in keeping your distance, as it knocks and stuns enemies that get to close, while also providing a speed boost. If the enemy has a troublesome Defender or Attacker that will gladly crowd control you into submission, Cosmic Power would be the better option, as it protects you from hindrances and debuffs the enemy will throw at you. Neither of these moves will be all that helpful in fending off the enemy alone, so don’t test your luck when you’re surrounded.
Power Gem and Psybeam are both moves that can help handle hordes of enemies that like to stick together, operating in their own way. Psybeam requires getting that lucky shot with multiple targets, but is extremely rewarding. Power Gem, on the other hand, requires great accuracy in singling out a bulky target, making them the center of the followup attack that greatly damages their teammates. While both are useless against single enemies, it’s a given that most teams will have a reliable Supporter or All-Rounder that they’ll rally around (and if they don’t, they aren’t likely to win the game either way). The attacks really pay off when it comes time to engage at map objectives, Regieleki and Rayquaza, as you’re guaranteed to run into multiple enemies contesting for that final hit (and if they aren’t, well, Illuminate sniffs out enemies hiding in the tall grass waiting to snipe). It all comes down to how well you’ve mastered these attacks, and how solid your execution is.
As mentioned, your Unite Move, Sea of Stars, is best used to continue your kiting scheme, keeping your distance from enemies, moving inward when the enemies have all been weakened, and racking up those KOs to secure the objective. However, do not forget that you are still vulnerable to hindrances, and can be easily one-shot by a stray Solar Beam or Spirit Shackle.
When it comes down to your loadout, you must be wary of items that boost the power of your moves like Choice Specs. Surf, Cosmic Power, Psybeam, and Power Gem, they all augment your basic attack in some way, but do not deal as much damage by themselves, rendering the boost from Choice Specs moot. You should ultimately rely on items like Scope Lens or Muscle Band, as they do influence the damage and attack speed of your laser, including the split beams of Psybeam and Power Gem. Not to mention, the laser uses Sp. Atk to deal damage, so powering up the stat greatly increases the overall damage even further. As for battle items, X Attack also increases the attack speed and damage of all of your lasers, while X Speed increases your ability to chase enemies down. Because of the sheer range of your basic attack, items like Slow Smoke are not as effective for you as they do little to improve your matchups. Full Heal might be worth running to escape a hindrance, especially if you can anticipate it. Lastly, Fluffy Tail can help Starmie level up more reliably, especially if you’re running Surf to damage objectives like the Regi Trio.
Now, even if you are a master of kiting, do expect to get KOd a lot, as Starmie’s defenses are rather pitiful. On the flip side, if the enemy has a lot of frail Attackers and Speedsters, you’ll be reward with a 4 KO or even a 5 KO streak with smart positioning and kiting, especially if you have a reliable teammate distracting them for you.
You’re a star, but you can only shine so bright with great costars by your side. Never forget that.
-
And that’s Starmie for Pokemon Unite! Fitting that I’d get this out 12 days before Christmas, and that’s NOT because I’ve been lazy. I’ve just...been having trouble getting the urge to write, is all. This happens, especially if I succumb to my disastrous sleep schedule.
Anyway, enough of all that. Next up, we’ve got a Supporter coming. Hopefully I get this one out sooner than later. Thanks for reading!
6 notes
·
View notes
Last Seen Blogs

ilovenamuya
WOODWORKER, WOODCRAFTSMAN

inwen
Inwen's Musings

lovelylife00
Untitled
inwen
Inwen's Musings

mewsartworld
Mew's Art World