#baking101
Text
Baking 101: Advice for Perfecting Your Cakes, Cookies, and Pastries

Hey there, baking enthusiasts!
Are you looking to take your baking game to the next level? Look no further than this comprehensive guide on how to perfect your cakes, cookies, and pastries!
First and foremost, one of the most important things you can do is to invest in quality ingredients. Using fresh, high-quality ingredients can make all the difference in the taste and texture of your baked goods. Additionally, make sure to measure your ingredients carefully to ensure accuracy and consistency.
Another important factor in successful baking is proper mixing techniques. Be sure to mix your ingredients thoroughly but don't overdo it as it could lead to tough baked goods. It's also important to not overwork your dough when rolling it out or shaping it, as this can cause your baked goods to become tough.
When it comes to cakes, it's important to preheat your oven to the correct temperature and bake your cake for the appropriate amount of time. A common mistake is overbaking your cake, which can cause it to dry out. Additionally, make sure to cool your cakes properly before icing or decorating them.
For cookies, pay attention to the texture of your dough. If it's too soft, add more flour. If it's too dry, add a little more liquid. When shaping your cookies, make sure they are all the same size to ensure even baking.
When making pastries, be sure to use cold butter and work quickly to keep the dough from getting too warm. Don't be afraid to use a little flour on your rolling pin and work surface to keep the dough from sticking.
Finally, don't forget about presentation! Decorating your baked goods can be just as fun as making them. Try out different techniques and don't be afraid to get creative.
So there you have it, folks! With these tips and tricks, you'll be well on your way to perfecting your cakes, cookies, and pastries. Happy baking!
If you want more advices and tricks, feel free to check our website!
#Baking101#PerfectingBakedGoods#QualityIngredients#MixingTechniques#Cakes#Cookies#Pastries#BakingTips#BakingTricks#CreativeBaking#BakingEnthusiast
0 notes
Link
Check out this listing I just added to my Poshmark closet: Newclassic, LTD Easter Cookie Cutters 4 Pc-chicken, bunny, tulip & butterfly NIB
0 notes
Photo
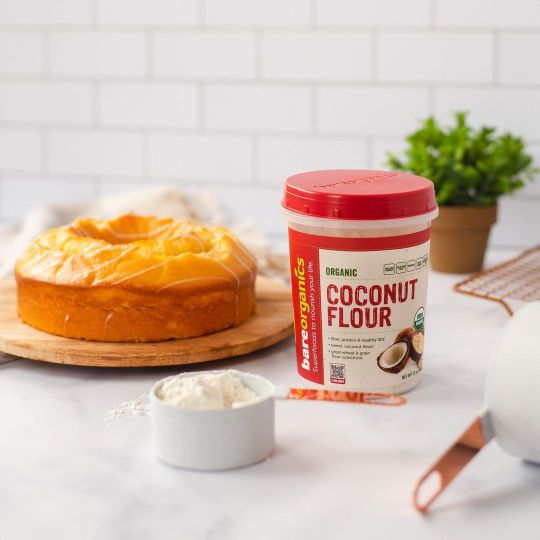
🥥Coconut flour is a unique alternative to wheat flour. It’s popular among low carb enthusiasts and those who have gluten-related disorders. In addition to its impressive nutrition profile, coconut flour may offer several benefits when enjoyed as part of a healthy diet. Coconuts are first cracked open and drained of liquid. The coconut meat is then scraped out, rinsed, grated, and strained to separate the solids from the milk. The solids are then baked at a low temperature until dry before being ground into flour. The resulting white powder looks and feels similar to flour made from grains such as wheat. Its flavor is mild. . . . . . . #baking #bakingtime #recipes #flour #bakingday #bakingclass #coconutflour #bakingsoda #bakinglife #bakingbread #bakingtools #bakingwithkids #bakingblog #bakingcookies #bakingwithlove #bakinglover #BakingSupplies #bakingcakes #bakingtherapy #bakingisfun #bakingislife #bakingporn #bakingaddiction #bakingfromscratch #baking101 #bakingqueen #bakingmom #bakingaddict #bakingandpastry #bareorganicssuperfoods (at San Diego, California) https://www.instagram.com/p/Cg2D87gr5Nh/?igshid=NGJjMDIxMWI=
#baking#bakingtime#recipes#flour#bakingday#bakingclass#coconutflour#bakingsoda#bakinglife#bakingbread#bakingtools#bakingwithkids#bakingblog#bakingcookies#bakingwithlove#bakinglover#bakingsupplies#bakingcakes#bakingtherapy#bakingisfun#bakingislife#bakingporn#bakingaddiction#bakingfromscratch#baking101#bakingqueen#bakingmom#bakingaddict#bakingandpastry#bareorganicssuperfoods
0 notes
Photo
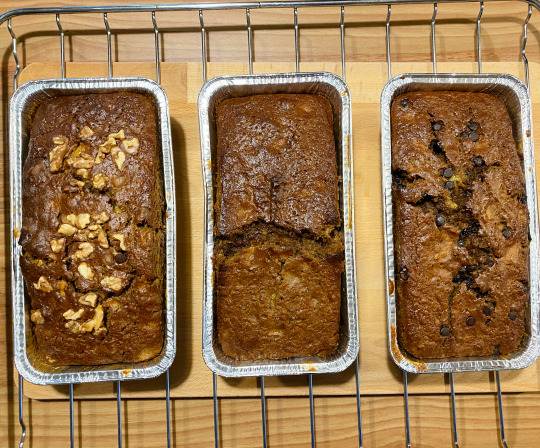
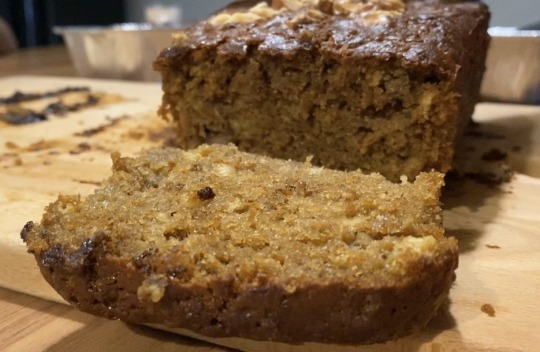

My first ever banana bread, and it was AWESOME!
I was bored, hungry and have nothing else to do, so I thought of baking a banana bread. :D
You can try this on your own, it is perfectly easy to do. It's sweet, moisty, and flavourful! You can enjoy this plain bread, with chopped walnuts or you can even add choco chips. Perfect for dessert or should I say perfect for every meal!
So I just didn't make plain banana bread on my first try, but with chopped walnuts and dark choco chips! I never thought that it will taste so great! But I will still keep on baking this bread so I can experiment more!
Baking Banana Bread
youtube
Ingredients:
Wet
- 1 stick unsalted butter
- 6-8 small bananas (4-5 large bananas) mashed
- 4 large eggs (beaten)
- 1 small tin can of pineapple juice (optional)
- 2 tsp vanilla extract (or lemon)
- 1/2 cup milk
Dry
- 3 cups all purpose flour
- 1 tsp baking soda
- 1 tsp baking powder
- 1 tsp salt
- 2 cups brown sugar
Servings: 3 loaves
Steps:
Brown the butter on medium heat for 10-15mins.
Stir the butter occasionally and don’t let it burn.
Cool before mixing it with other ingredients.
Pre-heat the oven to 180°C.
Mashed the bananas.
In a mixing bowl, whisk together the dry ingredients: flour, baking soda, baking powder and salt.
Mix the wet ingredients in a big bowl: melted butter, brown sugar.
Mix in the eggs, vanilla, milk and pineapple juice. Make sure to mix well after each addition.
Add the mashed banana and mix until fully combined.
Combine wet and dry ingredients.
Fold the batter lightly. Make sure not to over mix the batter.
Stir some choco chips or chopped walnuts. (optional)
Brush the bread pan with melted butter.
Pour the mixture evenly into the baking pan.
Bake for 50-60 mins. or until a toothpick inserted into the center comes out clean.
Remove from the oven and allow to cool for 10-20 minutes. Remove the bread from the loaf pan and transfer to a wire rack and allow to cool for another 10 minutes.
Time to EAT!
Comment below when you try out this recipe! :)
#iinstagramo#food#foodpics#banana#bananabread#banana bread#foodie#foodpost#baking#baking101#bananabreadsociety#banana bread recipe
8 notes
·
View notes
Video
Satisfying. . . . . . . . . . . . . . . . #bake #baking #pastries #cake #cakestagram #cakesofinstagram #desserts #igpastries #goodgrub #bundtcake #baking101 #foodstagram #foodie #foodgram #tasty #foodstagram #foodphotography #foodporn #buzzfeed #f52gram #foodgram #goodeats #yahoofood #cooksoninstagram #truecooks #yummyph #whattoeat #wimyummy #bakersofinstagram #daenaskitchen https://www.instagram.com/p/B_kiD2QH2wP/?igshid=xe9b8wd1tylh
#bake#baking#pastries#cake#cakestagram#cakesofinstagram#desserts#igpastries#goodgrub#bundtcake#baking101#foodstagram#foodie#foodgram#tasty#foodphotography#foodporn#buzzfeed#f52gram#goodeats#yahoofood#cooksoninstagram#truecooks#yummyph#whattoeat#wimyummy#bakersofinstagram#daenaskitchen
3 notes
·
View notes
Video
I've made CUSTARD DOUGHNUTS for the 1st time without any mishaps!!! 😎😎😎 They taste as good as they look.👌🏼 #littlebeginnings #achievement #iwontoday #baking101 #followinginstructions #perfect #custard #doughnuts #custarddoughnuts #cheaperversion #heaven #sweets #sweettooth #instalike #instadaily #instagood #igers #igerscebu #food #foodporn #foodwhore #snacking #dessert #cuteandtasty #twentytwenty https://www.instagram.com/p/CDYu1x2AH8E/?igshid=133xkmvi5chgp
#littlebeginnings#achievement#iwontoday#baking101#followinginstructions#perfect#custard#doughnuts#custarddoughnuts#cheaperversion#heaven#sweets#sweettooth#instalike#instadaily#instagood#igers#igerscebu#food#foodporn#foodwhore#snacking#dessert#cuteandtasty#twentytwenty
1 note
·
View note
Text
Baking our first bread!
Yay! Finally got time to bake. Was only imagining making our own bread before. Watched a lot of baking vlogs wondering when I can do mine too.
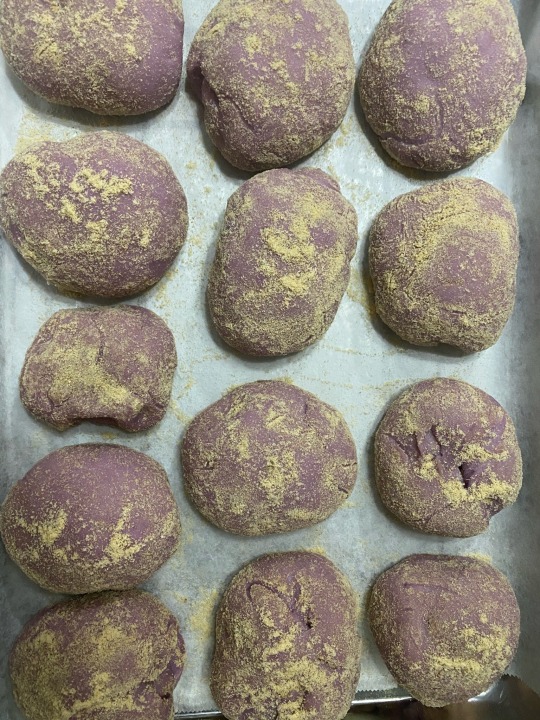
Tadah! The day has come 😂 Was actually afraid of baking breads because I don’t really know how to deal with yeast or dough or kneading. But there’s always a first time for everything, right? So here it is! Our first ube cheese pandesal.
Dough:
1 cup warm milk
1 tbsp white sugar (to activate the yeast)
2 tsp yeast
1 tsp salt
1/2 cup white sugar
1/2 cup vegetable oil (I used corn oil)
2 cups all purpose flour
1 cup bread flour
1 tsp vanilla essence
3 tsp ube flavoring (the more the merrier?😂)
2 tbsp ube jam (optional)
1/2 cup bread crumbs (just add if more if needed)
Filling:
Quickmelt cheese (regular cheese will do)
Ube jam
Steps:
1. On a separate bowl, mix the warm milk, 1 tbsp sugar, and yeast. Set aside for 5-10mins until the yeast is activated.
2. Mix the dry ingredients in a separate bowl. Add in the all purpose flour, bread flour, salt, and 1/2 cup sugar. Mix them well.
3. Check if the yeast is already activated so we can mix it with our dry ingredients.
Apparently, I was not able to mix well as seen here hahaha. But hey, the yeast was pretty much activated. Look at those tiny bubbles and foam.

4. Once your yeast is good to go, make a little crater at the center of your dry ingredients. Pour and mix in your milk/yeast mixture.
5. Add the vegetable oil, vanilla essence, ube flavoring, and ube jam. Mix well until the color is already well-combined and the texture is dough-like.
6. Dust your table/counter top with flour and transfer your dough for kneading. Didn’t use the electric mixer for kneading because I wanted to try kneading with my hands 😂 Experience points++
7. Knead the dough for about 10mins or until it’s smooth and not that sticky anymore. You can also do the window pane test wherein you get a portion of the dough and check if it stretches well. Continue kneading if your dough still breaks easily upon the test. After that, it’s now ready to rise!
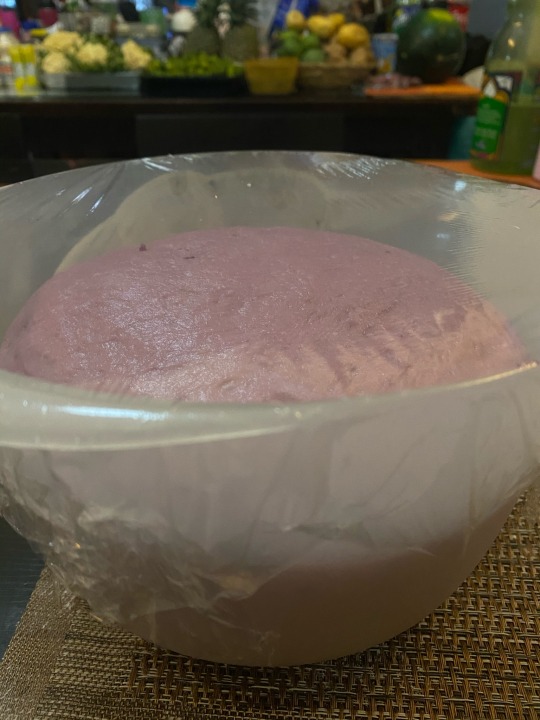
8. Grease your bowl and dough with oil. Cover the bowl with a cloth or cling wrap. Let the dough rise for about 2hrs.
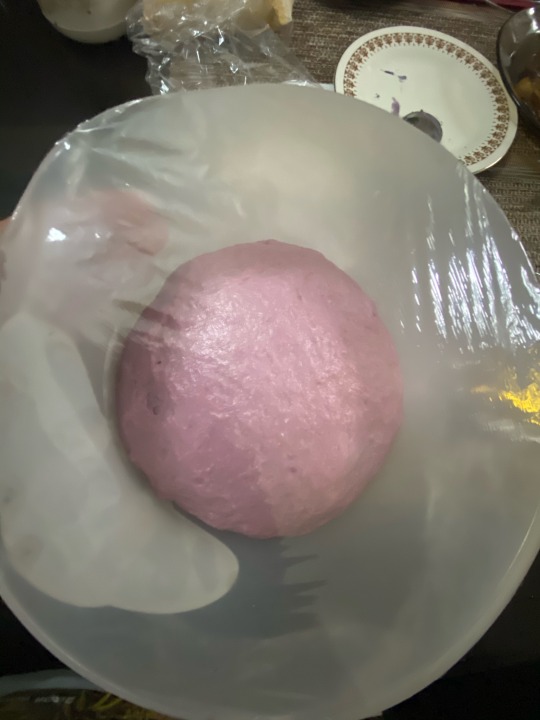
Got curious right here. Haha. So I kept on checking my rested dough from time to time, amazed with the rising that’s happening.
Finally, after two hours... (it actually has risen higher than this one. Just wasn’t able to document it 😅)
9. Gently give your dough weak punches to release the air
10. Dust the table with a bit of flour again and transfer your dough to the table.
11. Time for cutting! Roll your dough and cut into your desired partition. I cut mine into half first so it’s easier to manage. Partitioned it into six smaller chunks. Did the same for the other half.
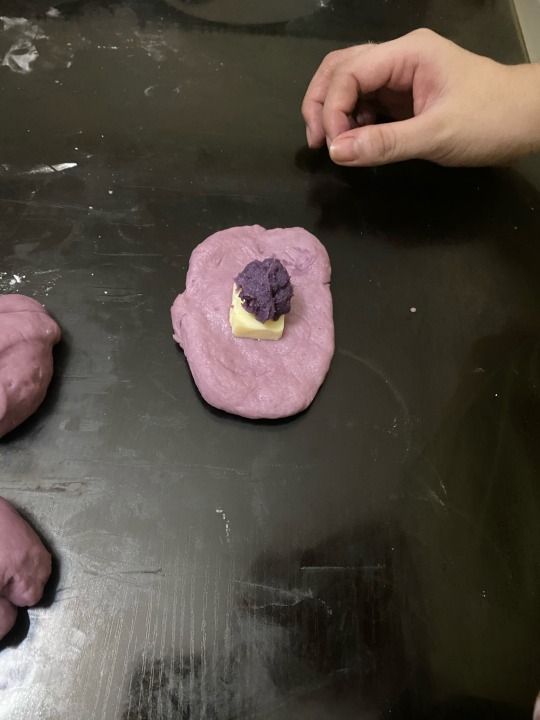
12. Get a piece of chunk, flatten in and add in the cheese and ube jam for the filling.
Actually didn’t use a rolling pin, I just flattened it with my hands. Haha.
13. Seal the dough
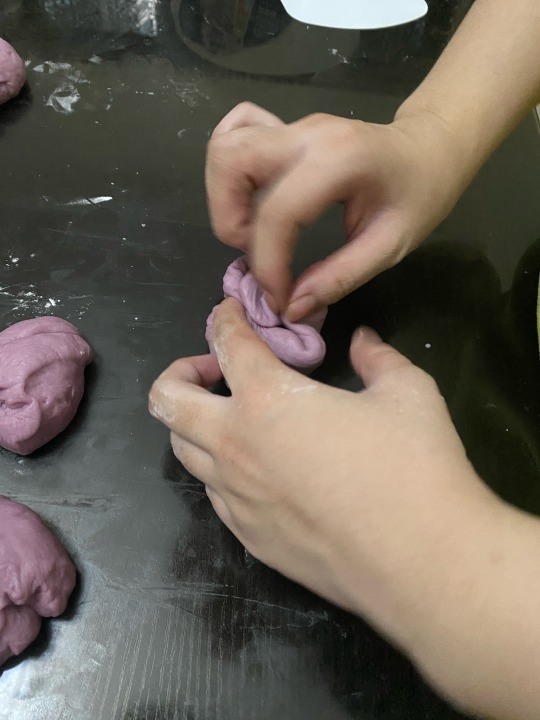
14. Roll it to cover the flaps of the seal we made.
15. After you’ve finished adding the filling in all your chunks, roll them on the bread crumbs, and lay on a tray.
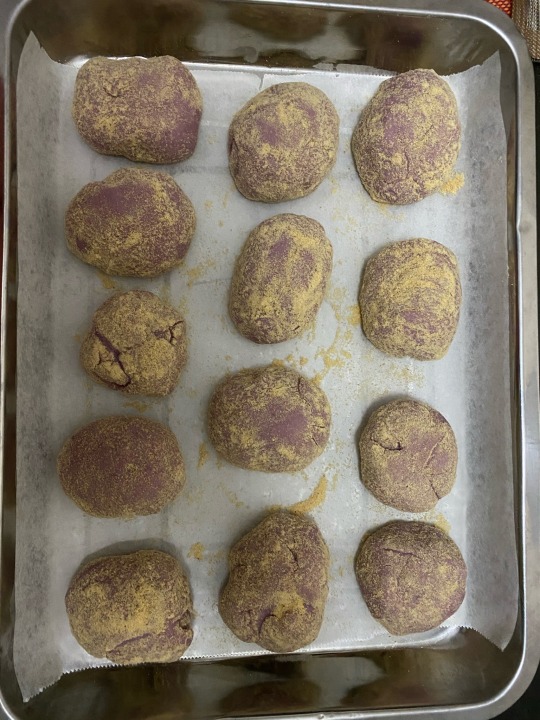
Haha. Please don’t mind the differences in sizes 😂 Was able to produce 13 instead of 12 because there was a piece we find too big and ended up splitting it. Also, it would be better if there are no cracks on the dough.
16. Cover with cloth and rest for another 30mins.
17. After 30mins... the dough should still expand a bit
18. Time to bake! Don’t forget to pre-heat your oven. Bake for 20mins at 180C
19. Time’s up!! Time to get our pandesals out of the oven!

Love the aroma of a freshly baked bread! Yum! Did you notice that the color is not that purple? Well, it’s because we didn’t add purple food color. We thought the ube flavoring is enough since the packaging said “ube flavor and color”. Hence, we didn’t buy additional food color. Hahaha! Anyway, the inside has a pale purple color nonetheless. Here it is, our first ever ube cheese pandesal. So proud and happy because it was a success!

I really love that it’s soft and chewy just like how I wanted it to be.
It’s so fun, fulfilling, and relaxing to bake your own bread! Also tests your patience because there’s a lot of waiting time when dealing with yeast.
But I’m already used to waiting, so who cares. Haha!😏
3 notes
·
View notes
Photo

Chocolate and Hazelnut, the perfect combo. Get it @breakfast.at.sulimays in Fishtown. . . . . #cakeoftheday #lovecake #layercake #delicious #thebakefeed #kingarthurflour #eatsagram #foodiegram #nomnom #bakefromscratch #baking101 #sweetlife #desserts #bakedgoods #cakelove (at Sulimay's Restaurant) https://www.instagram.com/p/B5KucD-lDCY/?igshid=1j57y368x0rm0
#cakeoftheday#lovecake#layercake#delicious#thebakefeed#kingarthurflour#eatsagram#foodiegram#nomnom#bakefromscratch#baking101#sweetlife#desserts#bakedgoods#cakelove
1 note
·
View note
Photo
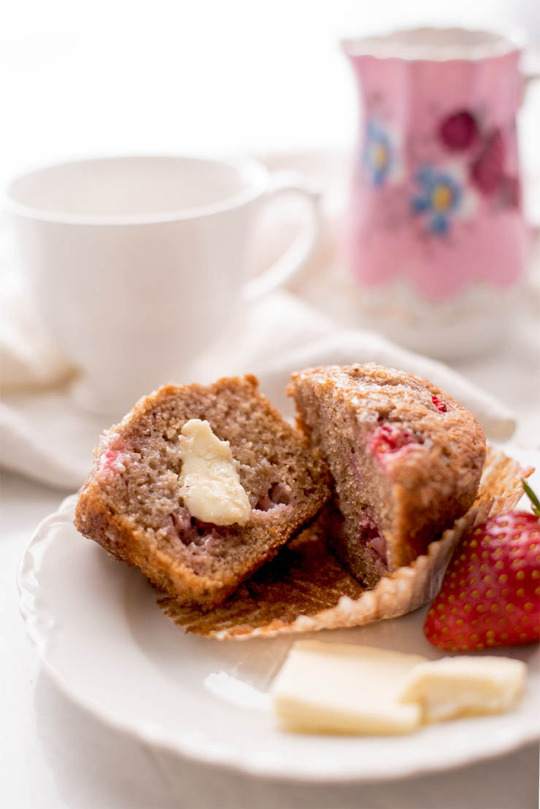
Bakery Style Strawberry Muffins
#strawberry#muffins#breakfast#baking from scratch#baking101#baking recipe#eeeeeats#yummyinmytummy#morning vibes#bakery style#omnom
12 notes
·
View notes
Photo

Chef RV Manabat's House of Cake Rolls baking class Stepped out of my comfort zone today and tried something new. Let's see where this would take me. #baking101 #newskillalert 🐷😍 https://www.instagram.com/p/BvHVYyonyUC9MRw7r1O3_xUuFF_77np7jucN_40/?utm_source=ig_tumblr_share&igshid=lutvgi2j94o5
1 note
·
View note
Photo

Okay guysss... I'm obsessed with chocolates and oreos so i decided to throw another dense and devilishly rich version of brownies... So this is dark chocolate oreo truffle brownie with loadz of oreos and chocolate inside and out... Gonna derive you insane hahahaha... Have a look please xD🍫🍫 . . #oreos #brownies #chocolate #oreotrufflebrownies #oreotruffles #dessertporn #baking101# desserttime #desserts #dessertphotography #eeeeeats #nomnomnom #lifeloveandsugar #foodphotography #chocolatelab #chocoholic #dessertlover #chocolate🍫 #feedfeed #thebakefeed #foodie #desserttablejkt #dessertmasters #dessertgasm #wilton #nerdynummies #foodandwine #wimfdt #homemade #baking #mybakingaddiction #bakefromscratch #treatyourself #sweeeeets #kitchenbowl #tastingtable https://www.instagram.com/p/Bsykw7pHM7Z/?utm_source=ig_tumblr_share&igshid=isl0cd94b4au
#oreos#brownies#chocolate#oreotrufflebrownies#oreotruffles#dessertporn#baking101#desserts#dessertphotography#eeeeeats#nomnomnom#lifeloveandsugar#foodphotography#chocolatelab#chocoholic#dessertlover#chocolate🍫#feedfeed#thebakefeed#foodie#desserttablejkt#dessertmasters#dessertgasm#wilton#nerdynummies#foodandwine#wimfdt#homemade#baking#mybakingaddiction
1 note
·
View note
Photo
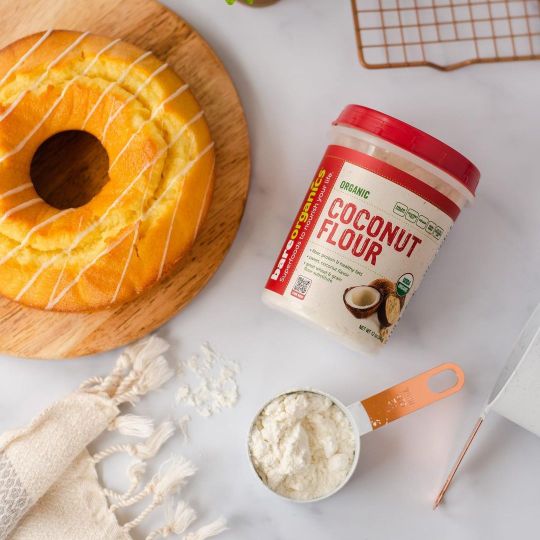
Coconut flour is a gluten-free flour alternative made by grinding dried coconut into a powder. It can be used to replace some of the wheat flour in a recipe, or it can be combined with other gluten-free flours to make a gluten-free flour blend. It has a soft, powdery texture and white color, as well as a distinct flavor and aroma of coconut. That means it might work in certain recipes where the flavor of coconut will be acceptable, but not in others. Also, when cooking with coconut flour, you can't expect it to behave in the same way as a conventional wheat flour, or even a gluten-free flour. That's because ordinary flours, whether they're made from wheat or some sort of gluten-free grain like rice, sorghum, or corn, are all primarily starch, so they absorb liquid like starch, gelatinize like starch, and bind with proteins such as eggs in more or less the same way. Coconut flour, on the other hand, is a starch-free food, though it does contain carbohydrates and fiber. Just because something isn't a starch doesn't mean it can't be used in baking. Low-starch nut flours, like almond flour, for instance, are often used in gluten-free baking, sometimes up to 50 percent of a recipe. Coconut flour, on the other hand, is best limited to about 25 percent of a recipe's total flour. That's mostly because of how much liquid it absorbs. When cereal grains absorb water, the starches gelatinize, but when coconut flour absorbs water, it simply turns soggy. That liquid is eventually cooked away, but because it soaks up so much liquid, it essentially deprives the other starches in the recipe from absorbing their fair share, so the overall recipe turns out denser and heavier than you might like. #baking #bakingtime #bakingvideo #bakinglove #bakingday #bakingclass #bakingfun #bakingsoda #bakinglife #bakingbread #bakingtools #bakingwithkids #bakingblog #bakingcookies #bakingwithlove #bakinglover #BakingSupplies #bakingcakes #bakingtherapy #bakingisfun #bakingislife #bakingporn #bakingaddiction #bakingfromscratch #baking101 #bakingqueen #bakingmom #bakingaddict #bakingandpastry #bareorganicssuperfoods (at Solana Beach) https://www.instagram.com/p/CeolnF1pgtj/?igshid=NGJjMDIxMWI=
#baking#bakingtime#bakingvideo#bakinglove#bakingday#bakingclass#bakingfun#bakingsoda#bakinglife#bakingbread#bakingtools#bakingwithkids#bakingblog#bakingcookies#bakingwithlove#bakinglover#bakingsupplies#bakingcakes#bakingtherapy#bakingisfun#bakingislife#bakingporn#bakingaddiction#bakingfromscratch#baking101#bakingqueen#bakingmom#bakingaddict#bakingandpastry#bareorganicssuperfoods
0 notes
Photo


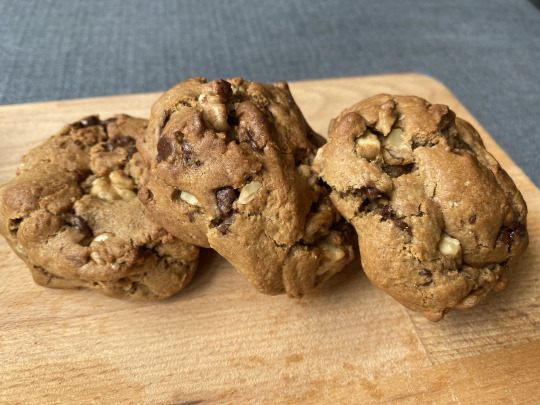

Soft, chewy and gooey Cookies! I really loooooove cookies, so I decided to bake and try different types and recipes of cookies! Based on what I’ve tried, I’ve come up with these 2 super delicious recipes. First is the soft and chewy cookies! So if you’re a fan of mrs. fields cookies or chips ahoy chewy, you better try this recipe! Second recipe is the giant gooey cookies which is inpired by Levain cookies! You must try this on your own as well, it’s super duper delicious! Soft and chewy cookies Ingredients Servings: 18-21 cookies - 1 cup unsalted butter (melted)
- 1 cup dark brown sugar
- ½ cup white sugar
- 1 egg + 1 egg yolk (room temp)
- 2 tsp vanilla extract - 2 cups Bread flour
- ¾ cup All-purpose flour
- ½ teaspoon table salt or 2 tsp Kosher salt
- 1 tsp baking soda
- 1 cup unsweetened choco chips RECIPE In a bowl, sift the bread flour, all-purpose flour, salt and baking soda. Set aside. Melt the butter over medium heat, in my case i microwave the butter for 30 secs and let it cool a bit. In a large bowl, mix the brown and white sugar and butter. Cream together until light and fluffy Same bowl, add vanilla extract, then mix. Add the egg, mix again before adding the egg yolk. Slowly add the dry ingredients into the mixture. Make sure not to overmix. Add the choco chips or any add-ons of choice. Create a cookie balls and place them on a tray. Cover up the cookie balls and leave it in the fridge for 2 hours or overnight Baking the cookies Pre-heat the oven to 180°C Place the cookie balls on a cookie sheet. Bake for 9-10 minutes or until the cookies are golden brown on the side. (It depends on the size of the cookies) DO NOT OVER BAKE, make sure to observe the cookies. Remove from the oven and let them cool on the pan for 10 mins and then transfer to cooling rack. Gooey cookies (Levain cookie inspo) Ingredients Servings: 8-10 cookies - ½ cup unsalted butter (softened)
- 1 cup dark brown sugar
- 1/2 cup granulated sugar
- 2 eggs - 2 ½ cups of All-purpose flour
- 1 ½ tsp baking powder
- 1 tsp baking soda
- ½ tsp salt
- 1 cup chopped walnuts (or more!)
- 1 cup (or more!) semi-sweet chocolate chips (I used Hershey’s chocolate chips) RECIPE In a bowl, mix the butter, dark brown sugar, granulated sugar for 2-3 minutes or until creamy. Add the first egg, then mix until fully incorporated. Then add the second egg and mix. In a separate bowl, add and sift all the dry ingredients: All-purpose flour, baking powder, baking soda and salt. Slowly add the dry ingredients into the butter mixture. Make sure not to overmix. Add in the walnuts and chocolate chips. Create giant cookie balls (I used an ice cream scooper) and place them on a tray. Cover the giant cookies balls and leave it in the fridge for 30mins - 2hrs (or overnight). Baking the cookies Pre-heat the oven to 200°C. Place the giant cookie balls on a cookie sheet. Bake for 10-12 minutes or until the cookies are golden brown on the side. AGAIN, DO NOT OVER BAKE! Make sure to observe the cookies. Remove from the oven and let them cool on the pan for 5-10mins. Transfer to cooling rack. Time to eat!!!!
#cookie#cookierecipe#cookies#how to bake#best cookies#chewy cookies#gooeycookies#baking#food#foodlover#baking101#foodstagram
3 notes
·
View notes
Photo

Learn how to easily frost a simple layer cake without any fancy tools or rotating cake turntables! This beginner's guide will show you step-by-step how to quickly frost that cake without the mess or fuss! This tutorial is perfect for home bakers or novice chefs of all ages who need to frost that last-minute cake the easiest way possible!
How To Frost A Layer Cake (For Beginners) https://wp.me/p4UrDz-7G2
#howtofrostcake#howtofrostlayercake#bakers#baking#cake#frosting#veganbakers#veganbaking#glutenfreebaking#bakingforbeginners#baking101#buttercreamfrosting#creamcheesefrosting#layercake
0 notes
Photo
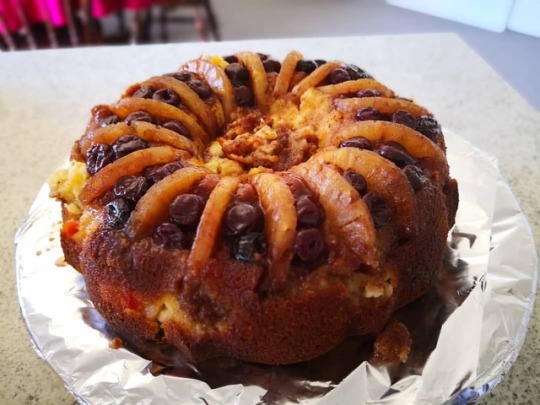
Pineapple upside down cake #baking101 Camera: Huawei Mate 10 Lens: New Leica dual camera Preset: #nofilter ___________________________________________ @Huawei @photography @Huaweibestshot #Huaweimate10 #HuaweiNZ #Huaweiphoto #photography #foodporn #foodie #foodphotography #newzealand #Nz #NZtreasure #Adobelightroom #AdobelightroomMobile (at Auckland, New Zealand) https://www.instagram.com/p/BokflOzhUlK/?utm_source=ig_tumblr_share&igshid=1x2tbkjyc0e0j
#baking101#nofilter#huaweimate10#huaweinz#huaweiphoto#photography#foodporn#foodie#foodphotography#newzealand#nz#nztreasure#adobelightroom#adobelightroommobile
2 notes
·
View notes
Photo
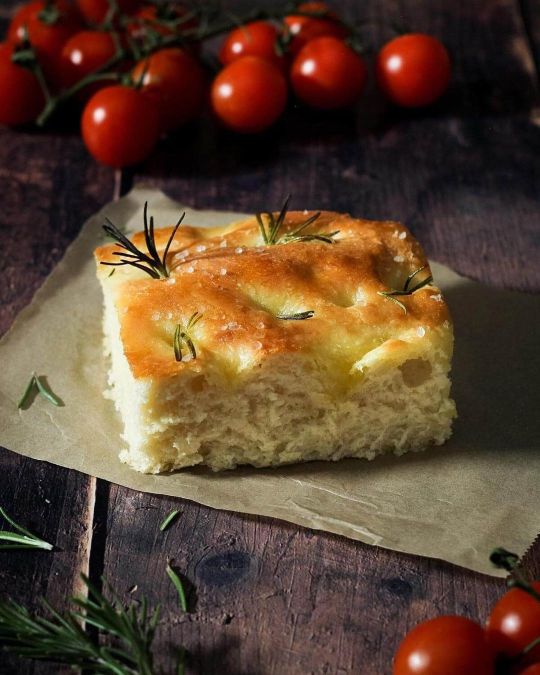
#Focaccia 👉🏼 Just five ingredients. 🍞 Crispy on the outside, soft and fluffy inside. #focacciabread #baking101 #PlantBasedFood #WhatVegansLookLike #VeganStrong #VeganLiving #vegana #dough #crisp #veganfriendly #veganfit #herbivore #veganbaking (presso Milan, Italy) https://www.instagram.com/p/CYemqPzqV8u/?utm_medium=tumblr
#focaccia#focacciabread#baking101#plantbasedfood#whatveganslooklike#veganstrong#veganliving#vegana#dough#crisp#veganfriendly#veganfit#herbivore#veganbaking
0 notes
Last Seen Blogs

tiny-chubby-bird
Chirp Chirp

ropcafe
Rop's Art Station

happyspiralefamily
HSF_SOUNDSYSTEM


hadassahspath
𝓢𝓱𝓪𝓴𝓮𝓷 𝓣𝓸𝓰𝓮𝓽𝓱𝓮𝓻