#looks very cool. i will upload some screenshots too. you’ll see.
Note
Hi! Do you still take Lego ninjago requests? If so, can you do the ninjas + morro with a shy, gamer/streamer, or witchy significant other? I tried asking someone else, but I don’t think they do requests anymore. But you don’t have to if you don’t want to! It’s your page. You should upload whatever kind of content you want! ^^

𝚊/𝚗: 𝚑𝚎𝚕𝚕𝚘! 𝚒 𝚜𝚞𝚛𝚎 𝚍𝚘, 𝚒 𝚓𝚞𝚜𝚝 𝚜𝚞𝚌𝚔 𝚊𝚝 𝚙𝚘𝚜𝚝𝚒𝚗𝚐 𝚛𝚎𝚐𝚞𝚕𝚊𝚛𝚕𝚢. 𝚒 𝚑𝚘𝚙𝚎 𝚢𝚘𝚞 𝚎𝚗𝚓𝚘𝚢! 𝚒 𝚝𝚑𝚒𝚗𝚔 𝚝𝚑𝚎 𝚘𝚗𝚕𝚢 𝚘𝚗𝚎 𝚝𝚑𝚊𝚝 𝚑𝚊𝚜 𝚒𝚖𝚙𝚕𝚒𝚎𝚍 𝚏𝚎𝚖𝚊𝚕𝚎 𝚛𝚎𝚊𝚍𝚎𝚛 𝚒𝚜 𝚗𝚢𝚊'𝚜. 𝚘𝚝𝚑𝚎𝚛 𝚝𝚑𝚊𝚗 𝚝𝚑𝚊𝚝 𝚒 𝚋𝚎𝚕𝚒𝚎𝚟𝚎 𝚒𝚝'𝚜 𝚞𝚙 𝚝𝚘 𝚢𝚘𝚞𝚛 𝚒𝚖𝚊𝚐𝚒𝚗𝚊𝚝𝚒𝚘𝚗 :) 𝚖𝚘𝚛𝚛𝚘 𝚒𝚜 𝚊𝚕𝚒𝚟𝚎 & 𝚑𝚞𝚖𝚊𝚗 𝚒𝚗 𝚝𝚑𝚒𝚜.
𝚜𝚎𝚝𝚝𝚒𝚗𝚐: 𝚛𝚎𝚊𝚍𝚎𝚛 𝚒𝚜 𝚊 𝚙𝚘𝚙𝚞𝚕𝚊𝚛 𝚐𝚊𝚖𝚒𝚗𝚐 𝚜𝚝𝚛𝚎𝚊𝚖𝚎𝚛 𝚠𝚑𝚘 𝚊𝚕𝚜𝚘 𝚙𝚛𝚊𝚌𝚝𝚒𝚌𝚎𝚜 𝚠𝚒𝚝𝚌𝚑𝚌𝚛𝚊𝚏𝚝! 𝚝𝚑𝚎 𝚗𝚒𝚗𝚓𝚊 𝚕𝚘𝚟𝚎 𝚠𝚊𝚝𝚌𝚑𝚒𝚗𝚐 𝚢𝚘𝚞𝚛 𝚜𝚝𝚛𝚎𝚊𝚖𝚜 𝚝𝚘𝚐𝚎𝚝𝚑𝚎𝚛 𝚠𝚑𝚎𝚗 𝚝𝚑𝚎𝚢 𝚌𝚊𝚗.
𝚗𝚒𝚗𝚓𝚊 + 𝚖𝚘𝚛𝚛𝚘 𝚠/ 𝚜𝚝𝚛𝚎𝚊𝚖𝚎𝚛 & 𝚠𝚒𝚝𝚌𝚑𝚢 𝚛𝚎𝚊𝚍𝚎𝚛 𝚑𝚎𝚊𝚍𝚌𝚊𝚗𝚘𝚗𝚜
𝕚𝕟𝕔𝕝𝕦𝕕𝕖𝕤: 𝕜𝕒𝕚, 𝕛𝕒𝕪, 𝕔𝕠𝕝𝕖, 𝕫𝕒𝕟𝕖, 𝕝𝕝𝕠𝕪𝕕, 𝕟𝕪𝕒, & 𝕞𝕠𝕣𝕣𝕠 (𝕚𝕟 𝕥𝕙𝕒𝕥 𝕠𝕣𝕕𝕖𝕣)
𝚔𝚊𝚒
You and Kai follow each other on social media
(you lowkey cyberbully each other)
Still, he loves watching your streams! He has a hard time catching them live considering ninja life, but he’ll always watch stream highlights and such
Games with you when you can and doesn’t mind being featured on the stream
The fans love it when you two are on stream together
They ship you so hard!
You two are super competitive
If he’s viewing your stream live, he’ll donate to you just to make some smartass comment that either makes you cuss him out (with love) or die laughing
Finds your witchy things interesting, but is secretly fascinated by it
Quietly listens to you babble about your interest
He really likes seeing how passionate you are about it
Burning you on a stake would 100% be an inside joke between you two
𝚓𝚊𝚢
Adores your streams and always has them playing in the background while he works on his inventions
Like Kai, he loves to game with you whenever he can
He too likes being featured on stream and always has a blast playing with you
Normally those streams are just chaotic but it’s great
He doesn’t really know a whole lot about witchcraft, but he always watches what you do
Asks you lots of questions. You sometimes have a hard time focusing, but you’ll do your best to satiate his curiosity
𝚌𝚘𝚕𝚎
You are his comfort streamer
Whenever he’s stressed, nervous, or bored, you can bet he’s either tuning into your stream if you’re live or watching some of your stream highlights/youtube videos
Hearing you speak, joke, and laugh just makes him feel better
This amplifies like 12457878% percent if the two of you are separated
You’ll be lying in bed/streaming/doing your thing when he texts you a screenshot of your stream with a bunch of sad emojis
He likes secretly donating to your streams and watching your surprised but grateful expression as you thank his anonymous name
Not really as keen on playing games on VC in front of a live audience, so he lets you handle all that. Is down to meet your online friends IRL though.
I actually envision Cole as a very spiritual guy! He is super sensitive to crystal energy – some crystals soothe him while others have the opposite effect.
He was 100% the kid that collected cool rocks (and still has them because, let’s face it, rocks are epic)
He was super shy to admit that he gave the coolest rocks to his momma
...and he got the box back when she passed. He keeps it in a box with some of her other belongings.
You always just quietly hug him from behind when he looks through them, trying to remain strong for him when you hear him quietly start to cry
Now he has a crystal collection that he shyly displayed to you
You were so excited!! The two of you were so happy to know that you had something in common
Meditating in the forest would so be a thing for you two
Or even just cuddling or chatting in the forest, where both of you feel connected and secure with the earth
Also I can lowkey envision y’all ghost hunting together <3
𝚣𝚊𝚗𝚎
So sweet.
Doesn’t quite understand the appeal of streams at first, but eventually gets into it
He often will tune into streams while cooking or cleaning. He loves the sound of your voice.
Not as into the gameplay but likes that you have fun with it.
Doesn’t understand your witchy things, but he understands that it’s part of who you are.
He gets slightly spooked when you guess a few personal things right about him (using things like runes, tarot cards maybe, stuff like that)
He takes a while to reflect on it after that.
After that, though, he listens to your reasoning behind your practice and develops more respect for it.
A supportive bean who does not understand but says go for it
𝚕𝚕𝚘𝚢𝚍
HE GOT TO DATE HIS FAVE STREAMER!!!! :O
Met you at a convention he was attending one time
Fanboy mode = activated
You thought he was just the cutest guy, immediately entranced by his eyes and sunshine of a personality
Not to mention you were so flattered to hear that the Green Ninja adored your streams!!
The two of you agree to keep in contact and eventually, he asks you out
He loves hopping onto your games occasionally.
It’s kind of healing for his inner kid, in a way? He gets to play with people who are passionate about the games and aren’t concerned with serious stuff. Like training
He makes friends with your online friends
In multiplayer games with voice chat, he always does something nice for the kids that play on there
Donating online currency (think like Robux and stuff like that) to kids to hear their excitement is his favorite thing ever. He knows he would have loved to have something like that happen to him when he was young
You admire how generous he is, always telling him how amazing of a person he is once the stream’s over
He makes donations to you when he can <3 he wants to support your career as best he can
The witchy stuff kind of scares him because he envisions stereotypical stuff
But once he learns what it’s really about, he kind of gets into it?
He likes getting in touch with his spiritual side. It’s a new type of guidance that he feels he’s been missing for a while
𝚗𝚢𝚊
She was a fan of you before the two of you met
She always found you super inspirational. In a majority male streaming world, she admires you and always felt a connection to you because of this
When the two of you met? She was so hyped!! Telling you how much of an inspiration you were, while you’re just there shocked like : My celebrity crush watches my streams o-o
So you immediately tell her the same thing!
Bam, you two are friends!
That escalates after a little while, though!
A few months after the two of you start dating, you begin an all-girls podcast that discusses the issues faced within Ninjago about female leads, and how to spark change
And believe it or not...it actually works!
More girls are inspired to pursue their passions because of you two
Seeing the change you two made brings you so much closer <3
Nya thinks your witchy stuff is kind of cool. The two of you enjoy exploring it further
I think she would even adapt some of your habits herself. She finds a bit of clarity in herself after a brief period of frustration when she thought she wasn’t seeing immediate results, thinking she’d failed
The reality is that, with your guidance, it did so much more for her than she could have imagined
𝚖𝚘𝚛𝚛𝚘
Will never admit it, but he secretly loves listening to your streams. He doesn’t even care about the games, he just finds your voice soothing
Tells you he doesn’t like them
You just roll your eyes like “sure”
(but you caught him watching them one time so you know he’s just being his dickhead self. You still love him though)
Lowkey gets a little jealous of your online friends, though. Sometimes he has to stop watching the streams because a friend of yours will get a little flirty, or show a bit of platonic intimacy
He’ll start to feel bad after he truly realizes how passionate you are about it
Recognizes his dickiness and apologizes
(still gets jealous)
That’s when you tell him that you knew he watched your streams
(he blushes!! >.<)
Gradually begins opening up and showing more support throughout your relationship and chills with the jealousy
He LOVES that you’re a witch
Thinks it’s really cool. In fact, one late night when he’s feeling sleepy and more honest, he admits that he wants guidance in moving past his hatred of Lloyd so that he can reconnect with Wu
You agree to help, and sure enough, he overcomes a few of his demons :)
#ninjagoxreader#reader insert#ninjago x reader#cole x reader#cole brookstone x reader#jay x reader#kai x reader#morro x reader#zane x reader#nya x reader#ninjago headcanons#ninjago x reader headcanons yay
479 notes
·
View notes
Photo


love that backpack.......
#*#oc tag#ravell#ravell img#i have like four separate backpack mods and this one is the newest one and probably my favourite too#that little... bowl and a cup hanging from it 🥺#also found a very epic cloak too#not that visible on a gif but it’s made of feathers :3#looks very cool. i will upload some screenshots too. you’ll see.
32 notes
·
View notes
Text
Tips on creating fun fanfic headers!


i had so much fun writing the fanfic writing tips yesterday and i got a few more questions about header-making, and so i decided to make one more of these! i hope these tips help somebody out there! hope you enjoy :)
p.s. these tips won’t require any hard editing skills or photoshop skills, nor any expensive tablets/apps!
typically i spend around ~5-10 min creating one header, and that’s either after i think of/finish a fic. i have so much fun doing it and sharing it with you that i figured i’d share how i do it!
why headers?
as I talked about in my fic tips, one of the most eye-catching things about fics are headers. when i’m scrolling through a rec page, my home page, a tag, or even someone’s masterlist, i’m immediately drawn to well-made headers. that’s what captures my attention, and then i’m more drawn in by the content. so, you can say that headers is your own version of an ad for your own fic, or an extension of it (like the cover of a novel!)
if you were writing your own book, imagine how much time you’d spend figuring out what you wanted your cover to look like. i try to have as much fun and invest as much time making my own headers because it’s just the cherry on top to my finished product :)
disclaimer: BUT HEADERS ARE NOT NECESSARY/DO OR DIE! if you don’t feel like you want to do this, then keep writing! its ok! this is just a suggestion. i’ve seen plenty of well-written fics without headers at all, so don’t beat yourself up over not having one/not wanting to do one. this is truly just a fun, extra kind of thing, and only keep reading if you want to learn how i do it! :)
tips for people who don’t want to make headers: if you still want something to make your fic stand out, use gifs! i use them in my drabbles a lot! this will at least give ur fic a lil boost!
how to find pictures
I typically use unsplash, which is a free website in which photographers upload their HQ pics for free use. the pics are really high quality, typically stock photos, and don’t have any logos on them like other ones on google. unfortunately, you won’t find any pics of the members or anything, but you’ll find beautiful stock photos of typical scenes like “ocean scene” or “desert scene.” I found the stock photo for cut me open (shown below) on that site by just looking up “medical” or “doctor”.
i used to use google a lot and just use keywords like “desert scene HQ” and edit the search settings to deliver HQ pics, and a minimum # of pixels, but unplash is definitely better in terms of quality, more aesthetic photos, and no logos/watermarks.

on some occasions, i will screenshot some scenes of youtube videos, turning up the quality to 1080p or 4k and zooming in so that the pixelation is as crisp as possible, and then editing it later to look good (which i’ll explain in a second!)
the above photo was a scene from the specific characters from the drama, “100 Days My Prince” that I screenshotted from a youtube video that TvN uploaded, recapping the drama. I cropped it just right so that their faces were left out, which i’ll also mention soon!

things to look for when picking pictures:
you want the picture to reflect a specific motif/theme from your fic! if its a moody fic, then try to find a moody scene that you can edit with filters/lighting to look even moodier; or if the characters’ jobs are a big portion of the fic (like cut me open/doctor theme) try to look for stock photos with that shown very clearly!
make sure its high quality: tumblr really dumbs down the quality of the photo when uploading it, so try your best to find something with a lot of pixels in it so that when you start editing, you don’t sacrifice too much of the quality already
try to look for something simple/clean: a picture with too much subject (ie. people in the background, or too much detail) may end up taking away from the main point of your header, which is your title. so find pics without too much clutter!
try to make sure its landscape: which will help during editing to save some of the quality better.
editing your pictures
now that you have a specific photo you want to use, now its time to edit! I use VSCO CAM (free app) and my own apple photos cropping tool for faster crops.
crop/adjust: if your picture is too large/wide, crop it to at least a 16:9 ratio. i’d say aim for skinnier if you can, so that you don’t take up too much space (especially if you’re planning to add headers to your masterlist). also crop out any faces, any clutter, any unnecessary details, so you have a nice, clean slate to work on when adding text.
contrast/sharpen/clarity/white balance/etc.: i’m not gonna give you a lesson on photography, but i’ll tell you I learned like 80% of everything that i know just by fiddling with it on VSCO! So just try it out and play with the app, see what you can make of it. i’d say a rule of thumb to follow is that you want happier fics with a brighter tone, and moodier/angsty fics with a darker tone so that it can reflect the nature of the fic further, without saying anything!

if you wanna be extra af like me, then go a step further and photoshop your pics. this one is a good example; when i screenshotted this scene from another youtube video for my fic One Year My Love part 2, i was specifically looking for a scene that would showcase the ornate/regal details of their clothing/environment in contrast to part 1′s modest clothing/scene (the first header in this post).
i found this scene, but actually, this scene portrays the Crown Prince and the Princess, not y/n. So, the actors weren’t smiling at all! They were actually frowning at eachother in this scene, to portray the tension between the two characters and their marriage.
So, I took the extra step, adjusting the pic with VSCO so that their shoulders/chins were at the same level, cropped off their faces up until their lips, and then used the adobe photoshop free app to photoshop their lips to be SMILING at eachother!!!! subtle, but important!
call me crazy for taking that much time but i’m so proud of how it turned out and i loved every second of making this one. that way, this scene makes it portray the happy ending for Jungkook and y/n!
adding text to your header
you can use any app out there, but i really like Font Candy! I actually ended up buying the 2$ version of this and never regretted it, but you can actually find a lot of their basic fonts on the free version; I tend to use the fonts: OSTRICH SANS, BEBAS, TREND, and INTRO the most! these are pretty clean-looking, block letters that look good whenever i put them as my titles.

I love this app too cause you can easily control the spacing between letters to make them take up more space, add shadows, or even make them contrast their background using the overlay feature; like this one i made for wildest dreams (see how the text changes depending on what part of the photo its on? amazing! it’s literally with a click of a button!!)
And i’ll always add “written by HAYJEON” or “by HAYEJON”, space it out, and add it somewhere underneath as my own branding.
orrrrrr
if you want to be more creative, you can even go a step further and use whatever you have on hand to enhance whatever you’re trying to portray.

for this one, i ended up finding this amazing photo on unsplash and i thought it would do a create job of portraying the “movie-set” quality of what wildest dreams is going to be about. this stock photo had someone else’s names on it, so i used my ipad, and used instagram to just erase the existing writing with the color of the background, and then wrote in my own title and url with my own handwriting/apple pen!!!
i thought this was pretty cool because it’s like wildest dreams is its own movie/has its own movie set, which, once it’s out, you guys will see that it’s supposed to be!
saving/uploading
this is pretty easy/obvious, but i figured i’d mention it. all the apps i mentioned are available on the appstore, and they will save directly to your photos. after doing that, i’ll just upload them into a special folder i have on my google drive so that when i’m finished writing a fic on tumblr using my laptop, i can easily download the photos without sacrificing quality. easy!
and that way, i can save them forever; even if i have to delete them from my computer, i can always redownload them!
side note: making text separators
i just recently started doing this, but ever since tumblr took down their text separators, i’ve just been cropping the bottom like 5-10 pixels of the header to use as my text separators! (with my laptop)
i saw some other writer doing it and thought that it looked better than what i had used previously (a cropped photo of a random line i found on google); i found that doing this tied my fics together a little better and just looked better aesthetically;
so there it is! hope you enjoyed! :) i would love to see what other tips you guys have been using, feel free to send me an ask or reply to this post; and if you end up using any of my tips, please let me know! I love to hear from you guys all the time <3
lots of love, especially during these times,
hay <3
141 notes
·
View notes
Text
how I organize my DM notes using OneNote
a few people said they were interested in seeing how i organize my notes for the games that i run, and let’s be honest, that’s all i need to make a huge informative post. (to my players, you can look! i’ve crossed out info you shouldn’t have lol)
i use OneNote, which i *think* you can use for free online even if you don’t have microsoft. could be wrong on that though. anyway, details and screenshots are under the cut!
here are the sections i split everything into:

[ID: a menu bar showing different tabs that say Players, NPCs, World, Calendar, Sessions.]
“Players” is the least completed session for my online game because my players have uploaded their character sheets to Roll20 so I got lazy about copying that info over. but normally, this section is split into different pages for each of my players, and will have the player’s contact info, as well as their character sheet, etc. but really, the only important part of the character sheet, for my purposes, is their backstory and passive perception and insight modifiers. I will also note their relationships with NPCs here (as you’ll see in the NPC section), and keep track of their renown with various factions (i do a homebrew renown-tracking thingy to keep track of friends and enemies of the party).
next is NPCs!

[ID: a screenshot of a particular NPC’s page, Z’ress Matyl. A lot of it has been blacked out lol.]
I used to keep track of EVERY SINGLE NPC this way but it got overwhelming fast, so I only put notable NPCs here (either famous ones, ones that i expect will be around a bit, or ones my PCs will fight/fight with). i use this section to quickly remind myself who the NPC is, their class/race/alignment, what they look like, their personality and a short backstory if applicable. you can also see the little table where i keep track of relationships, and that’s how I track PC relationships too. if relevant, i keep the NPC’s statblock here as well. once i’ve created more NPCs for this campaign, i’ll organize the pages into subpages by family/faction, but i’m not quite there yet with this one!
now onto World!

[ID: a screenshot of the World tab, which includes sections titled: Sirona history, Pantheon, Dal Z’har, Iesma Empire, and World notes along with a lot of town names for each of the areas. The main text on the screen is about a small town called Sweetvale.]
as the name suggests, i keep most worldbuilding info here, including detailed info about the towns and cities the PCs visit or have been to. some towns (like Sweetvale!) have more detail than others. i also keep larger world info in this section: world history/conflicts, the pantheon and origin stories of the gods (i have a homebrewed pantheon so that’s why it’s necessary), and overarching themes and shit that are relevant to the campaign. this is also a place where i’d keep maps for my own reference if i were more organized. “World Notes” is where i furiously type ideas as they pop into my head, to later develop. i wish i could show you that section, it’s buckwild and has a lot of exclamation points, but it’s very spoilery.
onto the calendar!

[ID: the calendar tab, showing pages for the months Gelus, Tabeo, Imber, Flos, Lux, Sol, Ardor, Messis, Folium, Stella, Nox and Hiberius, all in 52 AC. The main text on the screen shows the days of the month in a table with notes of what happened on each day. The days of the week are Moonday, Treeday, Waterday, Thunderday, Fireday, Starday and Sunday.]
as you can see, i use a homebrewed calendar because of course i do. full disclosure: i stole most of those week day names from another DM because i love them. but basically the calendar for this world is a 12-month year, 28 day-month, 7 day-week, so it’s kept similar to our IRL calendar. this is where i keep my primary notes of what happens in each session. they’re brief, because 1) i have a pretty good memory for the hijinks the party gets up to, and 2) i put a lot of detail into the plans for each session so i feel like i can go more minimalist here. the most important things i note for each session are: where the party went, if they met any NPCs, the fights they had and if they obtained any special or magical items. i also use the calendar to keep track of full moons, world events and holidays in the world.
next up is Sessions!
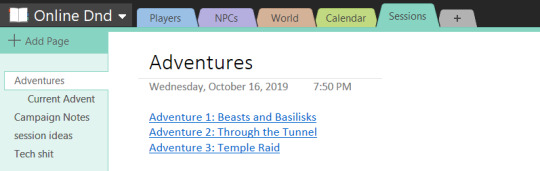
[ID: The Sessions tab, showing a page titled “Adventures” with links to three adventures listed. On the side panel, there are sections called Adventures, Current Adventure, Campaign Notes, session ideas and Tech shit.]
“Adventures” is where I keep all the notes for past adventures (See below). I link to each paragraph (a feature of OneNote) so i can easily click and get to what i need to see. the “Current Adventure” page is where i keep notes for, you guessed it, the current session, just to minimize how much i need to scroll, and at the end of the session i cut/paste everything that we got to into the Adventures section. Campaign notes and session ideas are, again, where i furiously type notes that make no sense and need to be edited and expanded upon, haha. And Tech shit is where I put the order of stuff i need to plug in for my online sessions. i’m kind of a dummy.
below is an example of my session prep notes:

[ID: a screenshot of text showing detailed notes of Adventure 1.]
this is just to give you an idea of how detailed my notes are. they are typically this detailed, if not more so. but i know lots of DMs will basically type out a hook and a resolution and leave the middle blank for notes. it’s really up to you and how you best prep and run sessions. i err on the side of over-preparing because it’s who i am, and when i try to go into a session with less preparation, i feel overwhelmed lol. i occasionally add a few notes here and there as we play in this section, but as i said, keep most of my notes to the Calendar section.
you can also see above how i list NPCs that i expect my players to only briefly interact with. Name, age, appearance, a few notes about personality/motivation, and that’s it. OneNote is cool because you can search for specific words and phrases and it’ll search the whole notebook, so i can easily find these NPCs again if i need to. (note: normally my notes wouldn’t be this....structured? as in, they’ll be less linear than this typically, but this was for the first session where i knew which PCs i’d be introducing first, etc. don’t want you to think i’m a big old wet blanket DM.)
and that’s it! hopefully this is useful for some of you, or at least gives you ideas for how you might organize your game moving forward. IMO the most useful sections are the World, Calendar and Session sections: they’re what i reference and add to the most. let me know if you have any questions!
323 notes
·
View notes
Photo


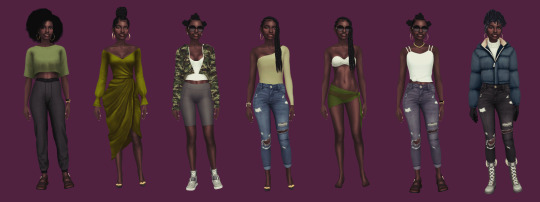


“Love Hair” Family
If your’re not familiar with the Oscar winner short Love Haire PLEASE check it out, it’s so cute!
https://www.youtube.com/watch?v=kNw8V_Fkw28
After seeing Love Hair take the win in the Oscars I felt compelled to make the family as a household in my neighborhood! I tried to follow the color scheme more or less of the characters in game so you’ll notice on some of the outfits similar looks from the short. I also downloaded so many black hairstyles and I love them so much! Big shout out to creators @ebonixsims and @xxblacksims because without them we would have to stick to the horrible maxis hairstyles lol (although I did use a maxis match one for the mother in one of her looks XD)-
You’ll notice several hairstyles for download because obviously the mother is a hairdresser so it made sense to have several looks for both her and daughter. The household surname is “Love” but I did name the characters. I tried to look for their names but found nothing.
Jada Love - Hairdresser and Internet Personality (she would definitely be on the Social media career since she has a youtube type channel in the short)
Her Traits are Creative, Family-oriented and Cheerful
Shaun Love - I picture him as really involved in the environment, so the Conservationist career. Both parents have the Super parent aspiration too
HIs traits are Playful, Family-oriented and Good
Raven Love - Our little star! Her trait is Cheerful and she has the Creative aspiration since she seems to draw a lot in the short. I hope she looks OK and not like a mini adult since a lot of kids look scary with CC lol.
I also included their cat :3 named him Boris. I didn’t upload photo since I reached the limit for a tumblr post, but he’s in the tray files! I made sure to give him his disapproving look lol
——-
Let me know what you think of them and send me any screenshots if you decide to play them! Now onto the mods, there’s a lot! But of course you can simply download the genetics/hairs and dress them as you want.
Note I had to change the dad’s beard from the one pictured because I could not for the life of me find it, but it’s very similar. Same for his gym shorts, I used EA ones.
Tray files here:
http://www.simfileshare.net/download/1617845/
GENETICS (required for sims to look the same as pictured)
Cien No EA Eyelashes
3D Eyelashes V1 by @mmsims
Ms Blue Default Skin
Realistic Lips Rope’s Workshop
Skin Overlay by @pralinesims
FRS Irene Skin Overlay by fashionroyaltysim
DNA Revamped Overlay by @oasisgoth
Male skin 11 Overlay by @remussirion
Female skin 20 Overlay by @remussirion
Caramel Eyes N121 by @pralinesims
Kakao Eyes N155 by @pralinesims
Sweetheart Hand Palms by @pralinesims
Beard Franco by @pralinesims (found in part 5 zip)
Patria Nosemask by @pralinesims
Prestige Eyebrows N21 by @pralinesims
Fake Moles N06 by @pralinesims
TAMO Eyebags Set
GPME Cheek Contour C3 by @goppolsme
GPME Face Countoring by @goppolsme
GPME Eyebrows M2 by @goppolsme
DFJsimbrleen Oracle Brows by @dangerouslyfreejellyfish
HAIRSTYLES
Lemonaide Braids by @ebonixsims
Ledisi by @ebonixsims
Xoe by @ebonixsims
Goddess Bun by @ebonixsims
Trina by @ebonixsims
Estella hair by @marsosims
Halfbound male dreads by birkschessimsblog
Cool Dread Knot by birkschessimsblog
Kinky Curly Hair by @xxblacksims
Child and Toddler Hair Pack by @xxblacksims
MAKEUP
Club Eyeshadow N05 by @pralinesims
Jelly Nails N19P by @pralinesims
TS4 Lustrous Lipgloss by @dangerouslyfreejellyfish
GPME Liner cc20 by @goppolsme
GPME Liner cc09 by @goppolsme
ACCESSORIES
Winter gloves by @imadako
Morina Hoop Earring Trio by @pralinesims
Gemma Earrings by @pralinesims
Countdown necklace by @pralinesims
Spring Day Glasses by @pralinesims
S-Club WM ts4 bracelet 201904 by @sclub-privee
S-Club ts4 WM Glasses F 201801 by @sclub-privee
S-Club LL ts4 watch 201901 by @sclub-privee
Colores Urbanos Basic Ear Plug by @coloresurbanos
Paidato’s Glam Bonnet by paidatosims
Flower Diamond Studs For Kids by feyona
Hriban set by @peachiiesims
CLOTHES
Skinny destroyed jeans by @elliesimple
Classic joggers by @elliesimple
Josie tied tank by @viiavi
Cropped Hoodie by @casteru
One Sleeve Bodysuit by @billsims-cc
Morgana Wrap Dress by @sentateandco
Carrie Jacket by @clumsyalienn
Madlen Giovanni Shoes by @madlensims
Echo Top by @trillyke
Primo sandals by @mmsims
Denim Jacket by darte77
T-Shirt - V1 by darte77
Cargo Jacket by darte77
Docksides by darte77
Pants Merge by @gorillax3 (uses 01 and pant 16)
Split Tank Top by @gorillax3
Vest Suit by @gorillax3
Split Tank Top by @gorillax3
Rob roy jeans by @joliebean
Aviator Hat by @wyatts
Boots by @mmsims
I would appreciate if you share and credit me if you decide to use them!
Also feel free to send me your sim requests! I would love to work from a request to see what I can come up with :)
#TS4#sim requests#ts4cc#ts4 gameplay#ts4 cc#sims4#the sims#sims#mysims#sims4 lookbook#ginnysims#ginnysims4#sims 4 black sims#love hair#gorillax3#joliebean#wyatts#mmsims#darte77#trillyke#madlensims#casteru#billsims-cc#elliesimple#viiavi#sentateandco#sclub-privee#pralinesims#remussirion#goppolsme
46 notes
·
View notes
Text
A Brief Guide to Finding Information on the Internet
Alternative Title: You are literally on the world’s largest repository of information so why are you messaging some rando/taking things at face value/spreading misinformation.
The internet is larger than social media, I promise! You can use it to find the answers to all sorts of burning questions. Here are some tips and tricks from someone who makes a living by becoming a five-minute expert in a great number of random topics:
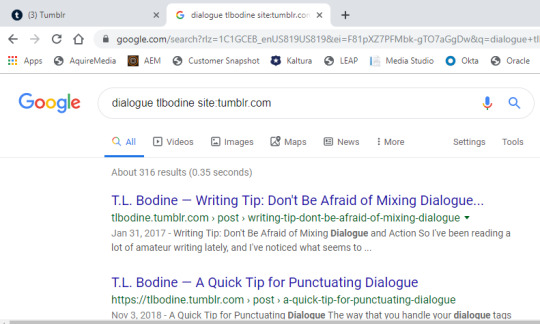
When Googling something, you can specify what site or kind of site you’re looking for by typing site:(whatever) after the enquiry. For example, let’s say you found a screenshot of my dialogue-writing post on Pinterest and want to find the original. You can search “dialogue tlbodine site:tumblr.com” and, like magic, it’s the first result:
Or, let’s say you want to find out information from a reputable source, say for an academic paper. You can search “[your question here] site:.gov” or :site.edu” to search only websites on a government or university domain.
You can also search by images. It’s not 100% perfect, but it’s pretty cool. Find a picture online without any credit and want to know who the artist is?
Go to Google. Click “images.” Then click the little camera icon. There you can paste in the source URL of the photo, or even upload one to find a match. That’ll bring up all of the sites where Google can find that photo in use. This is really handy when you’re, say, trying to be sure that a piece of art hasn’t been stolen and reposted, or that the context of a photo is actually what it says it is in the random social media page you found it on.
How to tell what sites are reputable? It’s tricky for sure, and “reputable” is a slippery slope in the modern era, but you can give yourself a fighting chance. Here’s some things to look for:
Is the site hosted on a domain you’ve heard of before? I’m not saying the New York Times is 100% accurate, but it’s more likely to be closer to the truth than, say, “WePostUnverifiedStories.az” (not a real website, I hope).
Is there an author listed? Or is it someone like “anonymous blog contributor” or no author at all? If there is an author, can you look them up to figure out if their credentials are legitimate? If someone claims to be a doctor, for example, you can find their board certification online. If you can’t find that, you can be suspicious of their claims.
Are there sources listed? Do the sources seem legit, or are they shady? If a story’s only sources are, say, tweets or anonymous blog posts, you’ll probably want to take the info with a grain of salt.
Can you find anyone else making the same claims? If you find some information online, go do a quick check to see if that information lives elsewhere. If you find conflicting accounts, you’ll probably have to dig deeper to figure out the truth.
Can you think of a reason why a certain source may want to lie, omit facts, bend the truth, etc.? A company’s website isn’t likely to give the most unbiased opinions about its products; a partisan political site is going to give its news a different slant to appeal to its reader base.
Websites aren’t a very good source of in-depth information. Sometimes your question can be answered in a quick google search (”How many chromosomes does a chicken have?”) but if you’re trying to really deeply understand a topic, you’ll want to dig deeper -- books, documentaries, scientific journal articles, etc. (and you’ll want to vet those sources, too).
Is the info peer-reviewed in any way? How many people had to look at this before it was published? A single-author blog is accountable to fewer people than a popular wiki. An academic publication should have more vigorous standards than a pop-sci magazine. Not that you can’t learn things from blog posts and magazines — but once you learn about it, you should dig to find reputable sources that confirm what you just learned.
Should I ask someone this question or look it up myself?
Google: Great for getting factual information about a topic.
Asking someone: Great for getting subjective first-hand experience.
For example: “How do I publish my book?” is a huge and exhausting question to expect an author to answer. Before asking, maybe you should ask Google and get an idea of what kind of answers are already out there and what follow-up questions you can research.
On the other hand, “I see you’ve published with these two publishers. Would you recommend one over the other?” Could be a perfectly good question to ask someone (privately, and with understanding that they may be contract bound to answer a particular way). Why? Because you’re asking an expert for an opinion based on their experiences.
See the difference?
When approaching experts, here’s a few tips:
Check to see if the expert has already answered that question. They might have a blog, FAQ page, books on the topic etc with lots of good info. Use the google trick to search their blog for keywords!
Do some research first so you know what question you’re actually asking. The more clearly and succinctly you ask, the better your odds of getting a satisfying answer.
Be sure the expert can legally answer your question. Lawyers can’t give specific legal advice. Doctors can’t give specific health advice. Don’t ask them to put themselves in trouble.
On that note, just as a point of courtesy, if someone does something for a living, it’s really rude to ask them to do it for free. If it’ll take more than five minutes for them to do, it’s not really a “favor” anymore and they should be compensated somehow for their time.
Anyway! Researching stuff online can be complicated, but it doesn’t have to be hard. Hope these tips can help get you started with finding answers to your burning questions.
33 notes
·
View notes
Note
Hey, may I ask how you make your icons (which are really cute btw)? I would love to give it a try myself but I dont really know where to start vor what size they woud need to be. Do you use a specific program? Thank you in advance ❤
Hi again my love!!! ❤
First of all, thankyou so much!! That’s so kind of you to say and I’m honoured that you’d come tome for advice!!! I’m going to put this under a read more because it might getvery long, I hope that’s okay! Also want to say I am by no means an expert - myicon making stems from a lot of trial and error, hahah!
There’s soooo manydifferent ways to make icons! I have seen and read a thousand tutorials, butthe first thing I have to say is it’s got to be what you’re comfortable with.Whatever works best for you is the best way!
When I first started to make icons, I used paint.net, which is free todownload and such a good program! I still haveit because you can download free ‘plugins’ (like added extra features)that people make and they’re so handy!!!! I used to make coloured backgrounds using the gradient feature, and zoom in very closely and use the rubber tool toerase the background of the characters/people I wanted for the icon, whichworks great if you have a lot of time and patience!
Now however, I use photoshop CS5, which I got from here (no idea if the link stillworks but I hope it does!!!) which I find a lot easier now that I know how touse it! For sizing, as long as the canvas is a perfect square you’re generallygood - I usually go for 150px x 150px, but I know a lot of people use 100px x100px or 200px x 200px!
Here are some tutorials that you might find useful to start you off in explaining how to use PS if you’re not familiar with it!! (x) (x)
Once you’ve got that down, usually you want to cut the people/charactersout from the background. There are soooo many ways to do this but I prefer touse the pen tool to draw around them and then erase the background, a tutorialfor that that I like is this one!
For background, I make my own gradients. Generally, you want to pick acolour you like and then find the lighter version of it, so to do that I pick acolour (for example this is a good list of different colours I referto) and then I use the hex code of that specificcolour to find the lighter version of it - so when you click on it, or searchfor it, it gives you the lighter and darker codes for the colours, which youcan put into Photoshop and then use to make gradients! alternatively you cansearch on places like itsphotoshop and find them,which is coincidentally where I get my textures from that I sometimes put onthe background of icons.
The textures are downloaded, and then once you’ve got them, uploaded into PS and usually set to soft light or overlay (I prefer soft light, but it depends on the colours you’re using I think!) in the drop-down menu on the right side of PS, where there’s different tabs (this one is found directly underneath layers!). It looks like this and put it above my colours to get cool effects in the background :-)

For the shapes part, I actually only learnt this really recently (although I’m going to do a demo of how I did my latest icon further down) and this is the method I used to get the shape!!!! Although I didn’t apply it to the icon in the same way that they did, I found an easier way for me!! Haha.
Something a lot of people also do is change the colours of people’s clothes! This is a great tutorial for that and one that I’ve used for my edits, although still learning with icons!
Okay so I think the easiest way to try and tell you how I make icons is just to show you! So, first things first, you’ve got to get your cap - it’s nice if it’s good quality, but it’s not the end of the world if it’s not!
I decided to use this one from the ITV hub, haha:
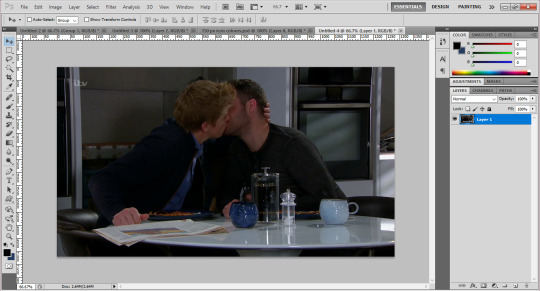
Once you’ve got that, I usually crop it so there’s not as much of the background, but that’s just personal preference. Then, with my pen tool, I go around it and outline the bits of them I want for the icon! (I’ve circled the pen tool on the left just for clarity!)

You’ll also notice the boys look a bit brighter and more defined in the above screenshot - I’ve added a PSD to them, which I’ve made myself. I have an ‘emmerdale psd’ that works quite well forall the characters so I use that as a base and adjust it depending on thescene! But there’s plenty of places to download PSDs too!
Once I’ve got the outline, I join up the dots to the first dot to make a solid line around the boys. Then, right click on the picture and choose ‘make selection’.

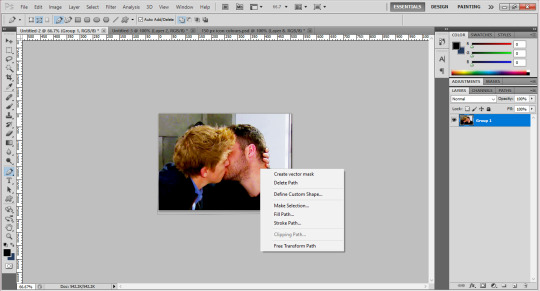
Then you get a pop up box saying if you’d like a little blurring around them - sometimes I do 1px, sometimes I have none, like in this case, depends on the quality of the photo (and sometimes how well you’ve cut out their hair hahah). Once you’re happy, click okay and you’ll get the solid line around them flashing now.

I’m not sure how to do this on a mac, so really sorry if you have one, but you’ve got to invert this line to select the background instead of them, by pressing Ctrl, shift and i at the same time. Once you’ve done that, you can then click the delete button and the background will disappear! Yay! You should get something that looks like this:

After this, you want to go to the menu at the top that says image and click image size, which will present you with a text box like this:

Change the pixel dimensions’ width and height to whatever your icon size is, so in this case 150px - don’t worry if the height isn’t equal to the width, it’s better that the icon is the full width if its not a person’s full body, as you don’t want the picture to take up the full height of the icon anyways! Like this:
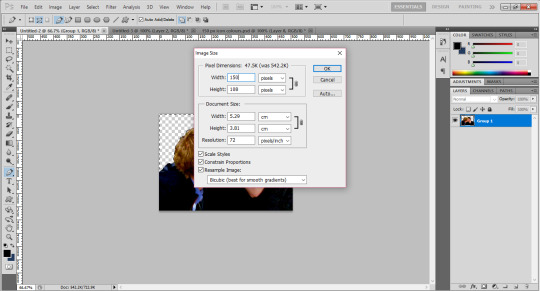
And voila! They are to size. Now, since I’ve made icons before, I have backgrounds already made, so I would drag them onto them. I suggest you make the backgrounds in a separate window and save them for later use (using the gradients for example), meaning you can drag new people onto the backgrounds which will save you time! Once you’ve done that, you’ll get something like this:

Now, you could just leave it there! If you were to do that (I save them with multiple colours for variety!) You might want to go to filter > sharpen > smart sharpen and play around with it until they look more defined, but not overly so!
(Also please don’t judge me - it’s good practice to name your layers informational names but as you can see mine are pretty all over the place, oops.)
For the shape part of the icon, please refer to the link I added above to add a custom shape to your gallery. Once you’ve done that, this is how I added it to my icons!
For now, zoom into your icon and place the shape above the icon and use ctrl and t to make it the size you want, making sure to hold down shift when you’re dragging the sides so it’s in proportion. Once you’re happy with this, press enter to confirm it (its usually best to leave a few pixels between the shape and the edge for the ‘transparent effect’.)
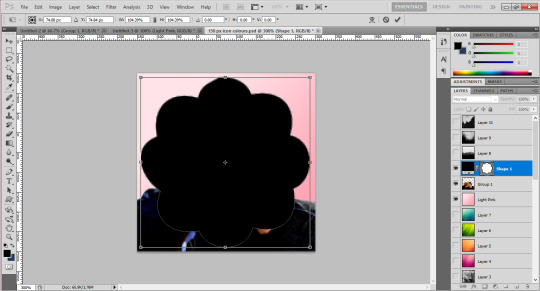
Then, drag the layer down in the bar on the right so it’s underneath whatever colours you want to use for your icon. In this case, I’ve just done a few as an example:
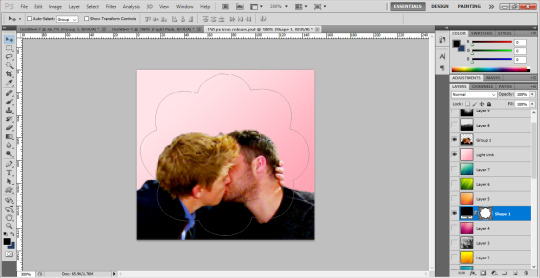
You can see the sort of outline of the shape on them, as well as the background colour. Now, you want to move the boys into the position you want them for the icon, and use something called a ‘clipping mask’.
Right click on the layers at the side and choose ‘create clipping mask’ - the background will then fill into the shape and so will the people once you click it. At this stage, you probably want to use the little eye symbol on each layer to make it visible or invisible, so you can see if this is working or not!
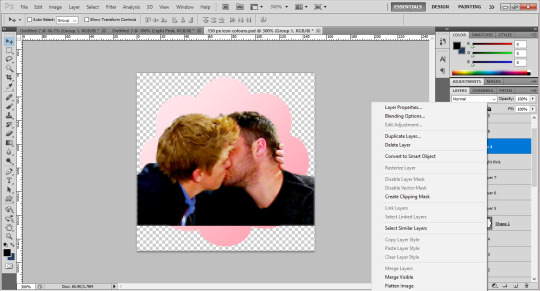
As you can see, there’s a blank bit at the bottom of the icon since I cropped the boys’ bodies there. Luckily as they’re wearing dark colours, I can just paint over this on their layer to fill it in, but you could also resize the original image down to 150px and use a clipping mask on it too! (You can also merge the layers to make sure they’re one layer, by right clicking and using ‘merge down’ which isn’t available in the above screenshot but usually would be!)
Then zoom out, and you should have something that looks like this! (I’ve gone back to the file I made the actual icons on for this screenshot.) Make sure you save the image as .png, not .jpg! Files saved as .jpg can’t read transparency and the edges around the icon will show up as black or white, rather than transparent!

I hope this has been helpful, and that it makes sense, and gives you a good idea of what to do?? If you have anymore questions don’t hesitate to ask❤❤❤
21 notes
·
View notes
Text
Getting Started With Scrivener: A Quick and Dirty Guide
So, this is inspired by a recent conversation with @incandescent-creativity , but honestly, it’s a sentiment I’ve heard on writeblr pretty often. “I want to try Scrivener, but it looks intimidating!” Well, I’m here to (hopefully) make it a little less intimidating, by showing you exactly how I use it. Me, a rather non-tech-savvy person. Please note that I’m using Scrivener 3 on a Mac, but the stuff I’m about to go over should be found on just about any version. I also implore you to try the free trial first, because that’s really the only way you’ll know if you like it or not.
Okay, ready?
Why Use Scrivener?
Why do I like Scrivener so much? There are a few reasons.
All of my documents. In one place. All of my plotting, planning, references, and previous drafts are super easy to call up and organized! It’s amazing!
The split-screen feature makes editing and rewriting a breeze.
Because the chapters each get their own document within the document, there’s less lag and it’s easy to jump around!
THE COMPILE FEATURE IS SUPES HELPFUL WHEN YOU’RE DONE DRAFTING.
It auto-saves, y’all.
Honestly, there’s probably a billion things I’m forgetting, but suffice to say, I really, REALLY love Scrivener.
How do I create a new story in Scrivener?
Maybe I’ve sold you on Scrivener, but you’re still a little wary on how to use it. So, I decided to make this test document to show you what it looks like!

Here’s the dialogue box Scrivener launches when you open it. There are a bunch of cool options, but honestly, most of the time you’re going to be just fine with the “Novel” option, found under the “Fiction” tab.
(Please note that I downloaded some of these templates from the internet, just to see. They were a little involved for me, personally. The built-in “novel” template works just fine.) You’ll get a dialogue box that prompts you to name the file and save it to the location of your choice, aaaaand ...
(Click here if you’re having trouble reading this screenshot.)
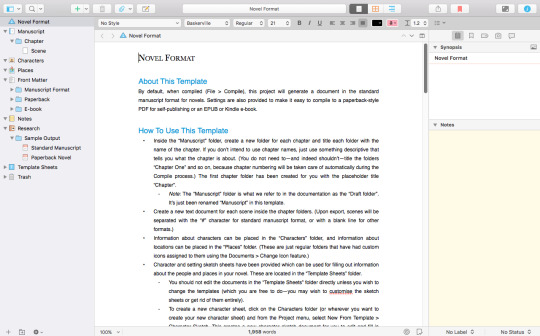
So, this is what a brand-spanking new “Novel” document looks like! As you can see, there’s a tutorial on how to write the thing built right into the document! But if you’re still feeling a little overwhelmed, I’m going to focus in on four aspects, in order of how I use them:
Notes
Characters
Manuscript
Research
Notes - Where The Brain Dumps Go
So, my first step when opening up a shiny new document is to write down my story idea! The “notes” folder is the best place to store this, I’ve found. Simply click the “notes” folder, then the little green plus sign towards the top left. A new document will automatically be created, and you’ll be prompted to name it.
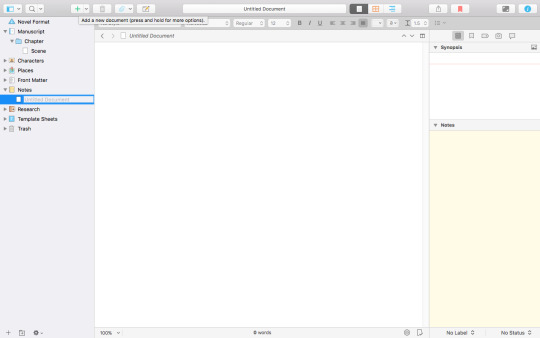
(Click here if you’re having trouble viewing this screenshot.)
At this phase of the game, I’ll usually name this file something like “Brain Dump” or “Plot Vomit” and put all of my ideas into it. Here’s an example of a finished “plot vomit,” from Morning’s Edge, a silly little project of mine. (Ignore the rest of the stuff for now. That comes later!)
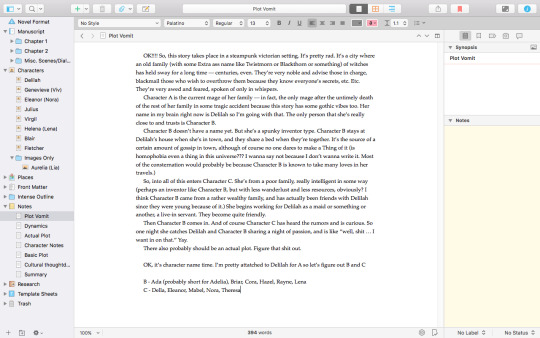
(I’m not including an imgur shot because, let’s be real, you don’t need to read a plot vomit lmao)
At this point you might want to create a more detailed outline and stick that in your notes, too. Or, if you’re like me, you might want to move on to ...
Characters!
Scrivener does this really cool thing where it has a built-in character sheet. When you click the “character” folder and hit the little plus button, it’ll automatically add a character sheet instead of a blank one! To edit what that template looks like, you just have to click “Template Sheets” and go to “Character Sketch.”
(Click here for imgur.)
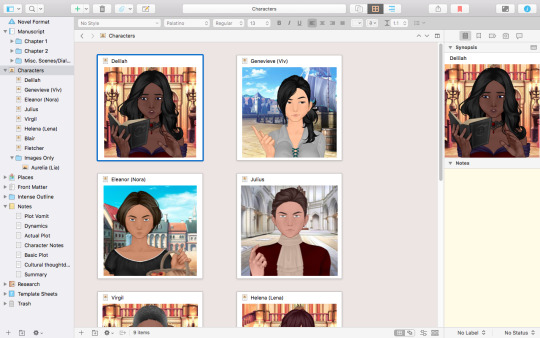
You can add or subtract elements as needed, or replace it with your own! I find their built-in thing to be pretty good, though. Here’s an example of a filled-out one.

As you can see, you can even upload a picture. I personally love using dollmakers for this (Rinmaru’s fantasy avatar creator is a personal favorite), but you can use whatever you want, or just don’t add any, if you prefer! When you click on the “character folder” it will display all of your character images and it’s just ... really satisfying.
So once you’ve gotten your characters and plot all sorted out, you’re ready to move on to ...
Manuscript - Actually writing the thing!
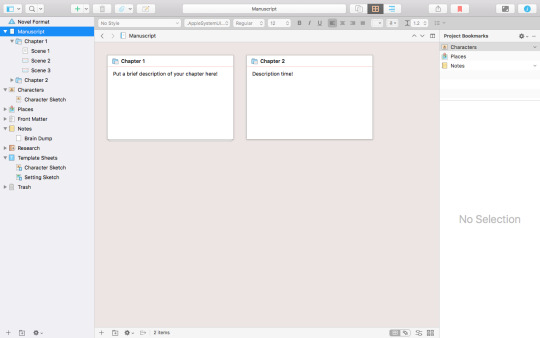
The basic way to explain the Scrivener manuscript is this: each folder is a chapter, and each document inside the folder is a scene. You don’t have to do things that way, of course—you can delete folders entirely and have each document be a chapter, or whatever. But this is a quick and dirty guide, and you can read the more comprehensive tutorial Scrivener gave to figure out other methods.
The first chapter and scene are already created for you. Give the folder your chapter name (if you have one), name your scene document whatever you’d like, pick a font that tickles your fancy, and get writing!

(Click here for imgur. Note the further instruction off to the right.)
When you want to add a new scene, just click the plus button! When you want to make a new chapter, highlight the current chapter folder, press the little arrow NEXT to your plus button, and click “new folder.” (If you accidentally create a chapter, just click-and-drag it to its rightful spot! You can also rearrange chapters and scenes easily by clicking-and-dragging. Another nifty feature.)
It’s worth noting that selecting “Manuscript” will show all your chapter folders with descriptions, and selecting one of your chapter folders will show all of your scene documents! If you don’t add a description, it will display the first few words in the document.

It’s beautifully organized, you guys.
While I’m writing, sometimes I need to refer to something. I dump all of those things right into ...
Research - My Catch-All
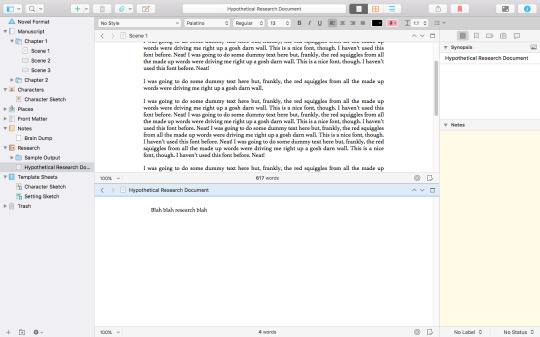
So, I don’t know how everyone else uses the research folder, but this is how I use it.

(Click here for Imgur.)
Anything I need — photo references, old drafts, and things of that nature — tends to wind up in the research folder. Uploading old word docs is easy enough. Just go to File > Import > Files. You can even upload full web pages to reference! (These sometimes lag, though.)

To reference something in your research folder while writing, just click command, option, and = at once. This will split the screen and let you open up two things at once!
Scrivener has a lot of powerful features (including the compile feature, which I’m not touching on here but lets you export your complete manuscript in a bunch of different formats, including ebook), but this is all you should really need while drafting. If you want to learn more about how Scrivener works, Literature and Latte has a lot of very helpful tutorials that you should definitely check out! This is just how I use it.
You can download Scrivener’s free trial here! If you have any questions, don’t hesitate to reach out :) Scrivener lovers, feel free to share your own reasons for loving Scrivener!
207 notes
·
View notes
Text
How I Make My Edits
because @lesterluminous asked
First off, I have the most convoluted process ever because I use free/cheap apps on my phone for reasons. So, I'm not really the best example to follow, but here you go~~~
These are all the apps I use. The pink I use for almost every edit, the blue I use for color correction, and the purple are my go tos to make pics look cool. Everything else I use less frequently and only if I want a specific look
Here’s what I use each for
8Bit Photo Lab: easily my fave app for glitch effects
Afterlight: the best basic photo editing app I’ve found on android. Good if you’re in a hurry and just want like a filter. I rarely use this because I’m rarely in a hurry
Background Eraser: (from handyCloset Inc.) the best app of its kind I’ve been able to find. Very easy to use, minimal ads, and doesn’t lower the quality of your photo. I use this anytime I want to get rid of the background
Facetune: I mainly use this when I’m having trouble getting the coloring of the pic right in snapseed or if I want to color correct only part of the photo. The makers of this app have another one that is phenomenal called Enlight and it’s my absolute favorite editing app, but it’s not available for android
Glitch!: another cool glitch effect app. It can do some things 8Bit can’t, but it’s more random and I like ~control~ I mainly use it for GIFs
Glitcher: this one is ultra random, so I hardly ever use it. But, it’s good it you want a glitch effect, but don’t want to spend much time on it. Again, I mainly use it for GIFs
Layout: sometimes a bitch just needs a basic collage okay???
Snapseed: the first app I go to when making an edit. A lot of times the lighting in the boys pics isn’t great (especially in ig stories), so I use this to color correct and. It has the ability to edit using curves which is the best thing ever once you get the hang of it. It also has a bunch of features I never use, but they look neat. Also, it’s completely free
Autodesk SketchBook: tbh I never get around to playing with this, but it seems like it’d be good lol
ibisPaint: omg this app is sooo underrated. I use it for almost every edit and I also use it for drawing. It’s intended to be a drawing app and not an editing app, but it has so many features that are FREE. You can make a one time payment that gets rid of ads, allows you more layers than you’ll ever need, and gets you more brushes, but you don’t necessarily need that stuff. I’m honestly so shocked it’s free because it’s so, so good. It also has a monthly subscription with more stuff but I aint got a spare $2.99/month
MediBang Paint: I literally only use this to make gradients. I’m sure it’s perfectly good, but I like ibisPaint so much more lol The only thing ibisPaint can’t do that I wish it could was make gradients haha
GIF Maker: (by GIF Maker & GIF Editor & Video Maker) sometimes I make extremely shitty GIFs that may or may not work on desktop. This is what I use. It’s the least sketchy GIF making app I’ve found, has minimal ads, and plenty of features
Cute CUT: (by MobiVio Solutions) this is the best video editor I’ve found on mobile. I sometimes use it for editing video to turn into gifs and sometimes to work around the dumb way other apps do thing that’s too complicated for a basic overview haha
Glitchee: this app is really not user friendly, but it has some cool glitch effects. Good for GIFs because it allows you to edit/save video and not just pictures
DU Recorder: This is the best screen recorder I’ve found. Very reliable, non-invasive ads, etc. I use it to capture video I want to use for a GIF. I also used it to record my M&G
90s: (by ryzenrise) this has a lot of really cool retro and glitch filters, but it ONLY lets you edit video. I hardly ever use it, but it’s good for GIFs. I’ve also used Cute CUT to make a video file out of a picture as a work around
Easy Poser: for drawing, not edits lol
HUJI: for taking dumb photos, not edits
Kuji Cam: my fave for making pics ~aesthetic~ It’s free to download, but worth paying the small amount for full features. The filters are so good and I use this very, very frequently. If I’m still having trouble with color correction after Snapseed and Facetune, this is often my saving grace
Pixel Brush: for drawing, not edits
Spark Post: this seems like a cool app if you want to make edits, but would rather have something simple than mess around with a ton of tools. But, the best thing about it is that it has easily searchable free photos! I just use this to find a photo for the background of an edit then save it so I can use it in other apps that I like better lol
My workflow
So, I am not a good person to emulate if you want to make pretty edits. But, I’ve never claimed to be a good example, so I’ll tell you anyway lmao
To begin with, I have a Galaxy Note8. This is important because 1) the screen is huge af so I can actually see what I’m doing and 2) it comes with a pressure sensitive stylus. I literally chose this phone for these reasons. These combine to make my phone pretty similar to a drawing tablet which allows me to be a lot more precise than if I were just using my finger.
I download pics and video directly off Instagram because I want to know I’m getting the best quality possible I use StoriesIG for their stories and DownloadGram for their pics posted on Instagram (or i download from Twitter if the boys also put it there). I haven’t found a way to download photos from a photo set after the first one besides just screenshotting then cropping them.
From here, I color correct in Snapseed and Facetune, sometimes going back and forth between apps before I get it how I want. Then, I add any filters and/or effects I want. Next, I use Background Eraser to get just the boys. I determine what sort of background I want and I prepare that. I open a new canvas in ibisPaint and add any pics I want. Then, I get all creative combining everything together and making it look pretty instead of just slapped together (unless i want it to just look slapped together for a shitpost or something lol)
As for GIFs, I don't know how people who are actually good at it do it, but I acquire my video, use Cute CUT to up the contrast and saturation and mess with the color a little. Then I chop in into pieces that are about 3 seconds long and save each as its own video. Then, I put those into GIF Maker and maybe mess with the color again in there. Then I save that and pray to the patron saint of editing, Philip Lester, that I got the settings right and my file is small enough to upload. I rarely make GIFs because, using this method, they turn out very, very atrocious :)
And that’s it!
If anyone is curious about how to do specific things or get certain effects or there’s anything else you want to know, feel free to send me an ask or message and I’d be happy to try my best to help
19 notes
·
View notes
Text
CC Creators Questions
I saw this on my dash and got so excited -- a questionnaire for CC makers! :D
1. What was the hardest project you’ve worked on so far?
Y’all have no bloody clue how many unfinished projects I have given up on, and how much time I spend/waste on CC I never even finish. I often have no idea what I’m doing, and once I reach a certain point where the effing thing just won’t come out right, and I don’t know who to ask for help, or I do and never get a response, I just lose total willpower to keep going.
2. How long have you been creating cc?
2010-ish -- that’s when I first started uploading to TSR at least, ider. Early on it was just simple wall art (an effton of murals) but I kept reading the tutorials at BPS & MTS & TSR, and once I figured that out I started trying out rather craptastic conversions that are still up for DL, if y’all wanna point and laugh at me. :P Effing sad. Some of it turned out pretty okay though, IMO.
3. What’s your most favorite thing you’ve created?
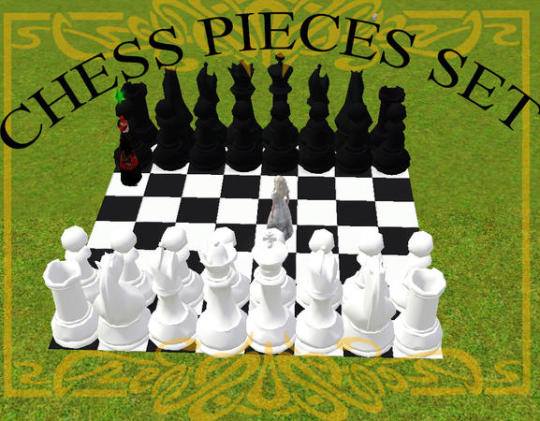
At TSR my favorite CC uploads are the Clutter Bug and LOTR Scribe sets.
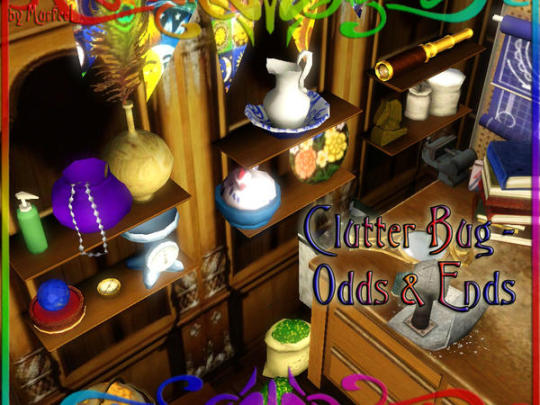
The admins gave me such a hard time when I first submitted this, and I had to throw out like half of the objects included in the set, cuz of the effing UV Maps and blah blah. But the rest of it came out cool.
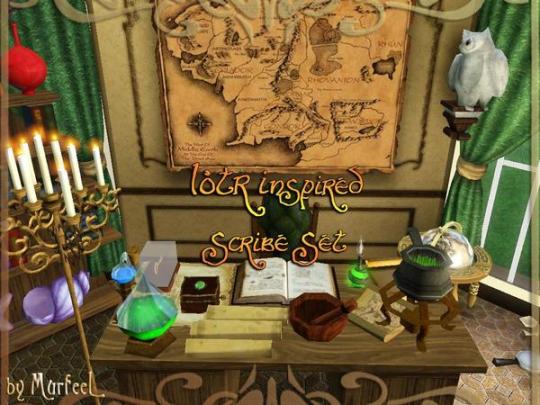
I am constantly using those objects in my lots. Constantly. The LOTR period was also the very first time I learned about making Alpha Channels on .dds textures -- that opened up so many possibilities! Single objects I’m also really proud of over there are the Ivy/Flower Column, and the Vintage Art Collage, which I also use a lot.
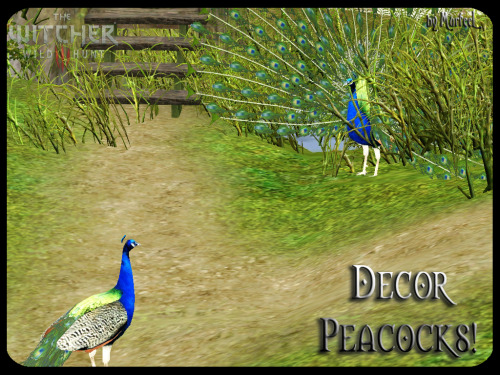
At Tumblr this is a lot harder for me to decide on, since after I came here I could do and make so much more than what was allowed at TSR. I think I had the best time converting from The Witcher 3. I effing love that game. But I also think just the process was the easiest for me, cuz I’ve been doing this crap for a while now and finally knew wtf I was doing -- except the CAS stuff. O_O LAAAAAWD! I gave up on that junk quick fast and in a hurry -- NOPE! Not today, Satan! But yeah, I really like some of the stuff I did from that game, like the Peacocks (duh) and everything I shared for my Lupo Bianco gameplay.
4. What’s your most hated thing you’ve created?
Things I hate don’t get uploaded. XD Y’all think I complain about the crap I DO upload -- that’s cuz I’m being honest when I tell y’all that my work has flaws that I don’t know how to fix, or don’t have the energy to work on anymore. Practically all of my CAS CC is a raggedy amateur mess. I hold on to a lot of crap that I just can’t upload in good consciousness, cuz I know how I react when I install others’ CC and I’m using it thinking wtf, did they upload the wrong file by accident? :P
5. What inspires you to create?
When I first started, it was cuz it was still early in TS3, and the game was still pretty empty, and I didn’t have any of the EPs/SPs/Store CC yet, so I was desperate for content. Then once I started converting, and realized that I could extract stuff from other games myself, I immediately knew that I wanted to recreate my favorite games in TS3. I’m inspired by the fandoms I’m part of, and my style of simming mostly revolves around me trying to create my own extended version of other games and shows I like.
6. What gets you unmotivated to do anything or to delete your project?
Failure. When things start going wrong, I quickly get frustrated and lose patience. I post WIPs sometimes that I don’t even end up revisiting. I just can’t fix the crap, so I rapidly lose the energy or desire or interest in the entire project. I often blame it on laziness, when really I just give up. :\

7. What’s one thing you wish you knew how to do/do better?
I generally just stick to what I know and am comfortable with, which is why y’all don’t see me making build mode stuff, or much functional buy mode cc, or mods/scripts, or creating skintones or poses, or any of the cool stuff I’d love to make but just can’t figure out for the life of me. U_U
8. How long does it usually take you to make something?
Depends on the project, and my motivation to see it to the end. Some stuff will sit on the back-burner for literal years before I finally go back to it. I’ll tell myself I’ll work on it later. Lies, mostly. ^_^
9. Is there a certain schedule you stick to when publishing?
Unless there’s a certain holiday/event going on, where the CC needs to be finished now! now! now! (Halloween & Lunar New Year are my busiest times), I just do what I want. I get so distracted, and often I’m working on a zillion things at once. Sometimes I’m running on pure adrenaline and not sleeping, to make sure I finish the CC on time. I feel bad if I miss something going on that I could’ve participated in, but most times I just tell y’all the CC’s still in beta, and it’ll be ready when it’s ready. :P

10. Your favorite programs to work with?
Crazy as it sounds, Milkshape. :P I effing hate Blender. I don’t understand it -- there are too many buttons and controls and everything’s just a confusing mess. 3DS Max is easier for me! O_O I legit can’t even figure out the frikkin view/camera in Blender! And you constantly have to switch between modes, and everything’s buried under all those effing THINGS on the sides, and I can’t stand it. >_<
11. Who do you look up to (creator wise)?
For CC in general, I worship Sandy/AroundTheSims; always have. Everything they make is just so clean and professional and works splendidly in game. Jelly.
12. How many projects do you have at the moment?
An ungodly number, half of which will no doubt be abandoned before y’all even get the chance to hear about them. :P
13. Screenshot your wips folder (if you have one)
Cute of you to assume I have just one WIPs folder, in one fixed location. XD
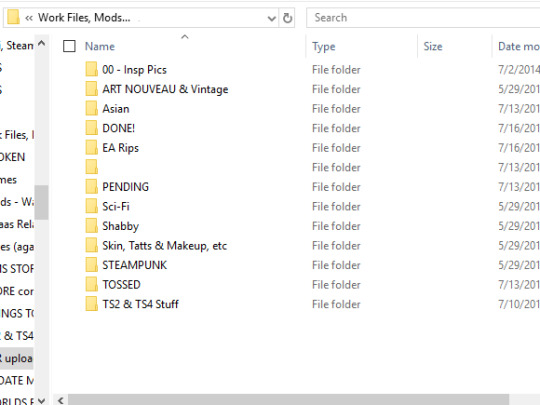
That’s what my backup’s thematic specific folder looks like, but that’s not where I keep any of my other game conversions WIPs -- those are all over the place. I’ve had to restart several projects after my external harddrive broke, and now especially I’m keeping everything in different locations and on different drives.
14. Do you plan on creating for a long time or is there a certain period you know you’ll stop?
Dunno if I’ll ever stop, but I know I’m slowing down; I have been for a while now. I’m tired. I hate making CC. It’s stressful, exhausting, time-consuming, and no dang fun, especially when crap is going oh so wrong and you have to keep quitting the game, doing crap over, loading the game, seeing if it’s fixed, and trying not to cry when it’s not. I do this crap out of desperation, when there’s something in particular that I want that I can't find a good substitute for in the game or community at large. So as long as I’m still simming, I know I’m gonna keep being forced by necessity to make crap. But I doubt I’ll ever go back to the workhorse nonsense I was up to in like 2015/6 or whenever my “heyday” was, when I was still experimenting like mad and learning everything.
15. What helps you keep focus during your creating process?
I play a lot of music, that fits the theme of the CC I'm working on, or is lifting my spirits at the time. I can’t work in silence. IDKY, it just makes me bored and tired.
I tag all y’all who ever made anything for us poor unfortunate souls!

29 notes
·
View notes
Text
the best character creator
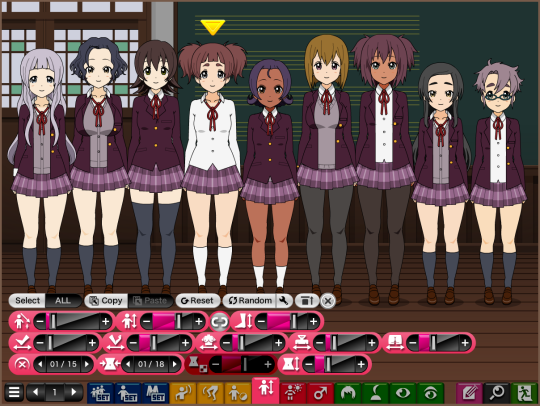
do u want to make characters but cant draw for shit or ur hands are tired of holding a pen?? have you ever raged at character creators bc they only have 10 hairstyles and 5 outfits??? fear no more because here’s Kisekae!!!

the models start like the default girl on the left, but w some effort you can make your husbando, cute gremlins, pokemon gijinka or whatever u want!!!
ok but, what is Kisekae?
Kisekae is a flash game/application that works mostly as a character creator, using a mix of interchangeable parts, bits you can move around freely, and lots of sliders to change sizes and positions. Think of it as the 2D version of the Sims/Spore creators.
ngl it started as a k-on hentai game back in like 2011?? there’s still k-on girls and lewd stuff around but the focus is far from it now.
HERE is the sfw link and HERE is the nsfw one. careful w the hentai ads.
You can also download an offline version from the creator’s Enty site
IF U WANNA TRY IT OUT CLICK THE READ MORE FOR A SMOL TUTORIAL
so u wanna learn about the suffering that is kisekae?? dont listen to people who say it’s the lazy tool for people too lazy to draw
just like drawing, you can make a quick sketch in 10 mins or spend 6 hours adding detail and makin sure everything is PERFECT
so after this disclaimer lets bring it on!!!! click on a link and wait for the randomly generated k-on ocs to load

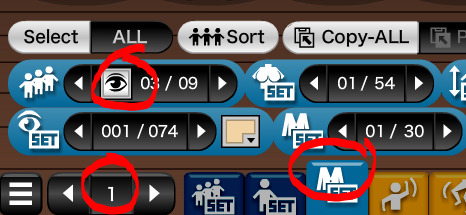
maybe when you open it for the first time, the tabs look like this. THIS IS BAD it means it loaded on the easy mode.

click here to unlock the Expert mode. it sounds scary, but it’s actually been the default mode for years. now you should see a lot of tabs.
LETS TALK ABOUT THE IMPORTANT STUFF FIRST
SAVING.

This is the save tab. “SAVE” and “LOAD” save the entire scene in a .txt (all models, background, items etc).
"Export” shows the codes of the selected models, so you can copy them and store them somewhere. You go to “Import” to paste codes and load characters.
The small pencil button opens a window to save and load entire scenes in the app’s cookies. It’s very handy but you will lose everything if you clear your cookies.
The last two buttons save or load ALL the data you have in the game, aka all the scenes you saved with the pencil button.
KISEKAE DOESNT HAVE AN UNDO BUTTON SO SAVE OFTEN IN CASE YOU MESS UP
TAKING PICTURES

fOR THE LOVE OF GOD DO NOT DARE TAKE SCREENSHOTS there’s a handy way to save better quality pics.
First slider is the zoom. It’ll be your best friend to get closer and edit faces and hairstyles and details and such.
See that 05/05? That’s the PNG quality, so make sure it’s always at 5/5.
The squares button next to the PNG one will make the background transparent when you snap a picture. Very cool, bc kisekae backgrounds are kinda ugly.
The icon on the far right lets you select a region of the screen that’s great too
STOP THE AHEGAO
Next. If you click on the model’s clothes you’ll notice they disappear and they get surprised. The automatic emotions were good when it was a porn game but to actually create content it’s just annoying idk why it still automatically loads like that tbh.

Anyway, go here to set the facial expressions to manual mode. The “Select/All” switch makes you edit all the models at the same time or just one.
(Note: as pochi adds more tabs, they can get moved around and be put in a different group. just keep looking thru the pages until you find the icon you want)
HAVE ONLY ONE MODEL
You’ll most likely don’t need all 9 models at the same time, so you can go here to deactivate them. tbh it’s placed in a really weird place... a year ago it wasnt as confusing idk why Pochi added this update :/
TIME TO HAVE FUN
My recommendation is clicking on everything to see what happens. That’s honestly the best way to learn how to use it. Instead of explaining how to make good looking stuff (i cant do that bc. there’s not a single way of “doing things right” this is artistic expression u do what u do) i’ll jsut give some tips and tricks
1. HOLD SPACE TO GO OVER THE LIMITS OF MOST SLIDERS. It works wonders. Make heads smaller, shoulders broader, eyes thinner, hair pieces larger, bend time and space with the unlimited power of space key.
2. HAIR PIECES ARE NOT HAIR PIECES. BELTS ARE NOT BELTS. RIBBONS ARE NOT RIBBONS. Think of them as shapes to make stuff. Use hair pieces to make capes. Use the lines in the facemark section to draw a new nose. Make entire pieces of clothing out of belts and ribbons. The only downside is that if you move the head, hair pieces and ribbons move with them so making clothes out of ribbons turns your characters into statues
3. CLICK ON CLOTHES TO CHANGE STUFF. If you click on some clothing pieces you can change some things like unbuttoning shirt buttons, opening sweaters, putting sunglasses on their head and removing parts of scarves.
4. THE DEFAULT PALETTE IS UGLY. please do use a custom one
5. YOU RAN OUT OF SLOTS? Use the free floating items on the 3rd set of tabs. You can have extra belts, ribbons, arms, furniture and speech bubbles. Even load external images. But keep in mind extra stuff is not attached to characters, so it won’t move around with them or save in their individual codes.
6. USE OTHER PEOPLE’S EXPORTS RESPONSIBLY. There are lots of people on deviantArt and the Pochi forums (official Kisekae forums) that make character, clothing or hairstyle exports for other people to load and use on their creations (like Sims mods!). However, most dA people have rules if you want to use them on something you upload, so make sure to read each user’s rules!
7. TECHNICALLY THERE ARE NO MALE, MUSCULAR OR BIG BODY TYPES. You can force it out, but we’ve been forever cursed with the hip size being linked to the leg size. So your guys will either have feminine hips or scrawny ass legs. There aren’t any muscle options apart from abs, and the most similar thing we have for chub is a pregnant looking belly. You can always edit it with photoshop later or suffer and make muscles and fat with belts and hairs.
Have fun suffering with Kisekae!!! Feel free to ask me questions on how to do X or Y, or request me to expand more information about stuff like what each tab does.
CLICK HERE FOR THE OFFICIAL GUIDE!! It does explain a bit what each tab does, and also explains the keyboard shortcuts. It’s in japanese, but nothing google translate can’t fix if you need it.
78 notes
·
View notes
Text
On the recent updates
Screenshots to accompany later as we’re having some issues with the tumblr phone application.
1) Message bug - Positive change. The only complaint we have is that this has been a known bug for years. Staff knew a very terrible work around that involved guessing the ID of the message that was unread, which they passed to users having the problem. This should have been fixed 4 or more years ago.
2) Guides forum - Positive change. This helps a little with our complaint that there are too many stickied topics in the forums. It doesn’t entirely fix that particular problem and we still stand by our previous suggestions. This is a great addition for the simple fact that the topic about Premium subscriptions that we had mentioned in our original post about Karlos - and that was mentioned by Krasus/Gren - is now more obviously still available for viewing.
http://www.wolf-haven.com/Forum/Thread/22281
Don’t bother trying to delete it now, Karlos, we took screenshots.
3) Pack Renaming - Positive change, but still another “Why wasn’t this done years ago?”. We won’t harp on this too much going forward because a lot of these changes are going to be ones that should be have been done ages ago.
4) Deleting posts alert - Positive change. According to Meraki aka Laney in the comments of the newest news post, there is now a confirmation alert when you try to delete a post. Great. Quick question? Why wasn’t this in the news post, and why is a member of Art Staff having to put this in the comments? Is it really that hard for Jekyll to edit these news posts? I swear we’ll both scream at the top of our lungs if we find out that news posts can’t be edited after they’re posted on site. At this point we really shouldn’t be surprised if that were the case.
5) Mod applications opened - Oh, boy. We don’t discourage anyone from applying but we would ask that anyone interested keep in mind the things discussed on this blog from former staffers. Our suggestions for anyone that wants to be a mod while being aware of the problems presented are this -
Always stand up for yourself.
Don’t let Karlos, Jekyll or any staff member bully you into things you aren’t comfortable with. Your position as a staff member isn’t worth it. If you feel like disagreeing with something will mean you’ll be demoted, let them demote you. Stand up for yourself and your beliefs.
Always take screenshots.
If something happens or something is said that you feel is inappropriate or unprofessional, screenshot it. Not because we want more content, truthfully. Should anytime in the future you want to confront any of these dimwits about something that was said or done, you need to have proof. Even if you just want to share with others. Make sure you get proof. If you have solid evidence, no one can discount your experience.
This goes double for anything Jekyll says to you, because she apparently cannot remember anything she said two minutes prior. Show her proof it happened so she can’t act like it never did.
Don’t work yourself into the ground.
This especially goes for anyone who becomes a staff artist. You’re not being paid, this is a volunteer position. If you’re dealing with so much as a moderator that you feel stressed about it, you’re working too hard. If no one else on staff is helping you, there is a problem. Leave.
Karlos won’t help you.
It’s very evident from numerous accounts that Karlos, the owner of the website, won’t do jack shit for you. And from what we’ve seen, if it involves Jekyll, Fang won’t stand up for you either. This goes back to the first suggestion - Always stand up for yoursef.
Interesting note that two moderators - Kiev and Faren - have stepped down recently. Their profiles claim this is due to school and finals coming up in the next month and that they might return. This is fine, but we’re curious why they stepped down. In the past and honestly currently, inactive staff members is just a part of Wolf-Haven. We almost never see LunaLuna or Laomi online or actively moderating, but they’ve been steady staff members for years. Now the staff list is comprised majorly of staff members that are usually inactive, which is quite funny. We’re confused why Faren/Kiev didn’t stay on as staff as finals can’t really take up more than two months of inactivity. That’s really nothing compared to the records some staff members hold.
Karlos’s topic on Account Standings
http://www.wolf-haven.com/Forum/Thread/37036
This goes back to a post we made earlier calling Karlos a liar at his opening line -
“I've been messaged by a number of people who are unhappy with how the standing system is set up, the biggest issue seems to be that it's far too difficult to both get back to neutral from a negative standing as well as it being difficult to get a positive standing from either neutral or negative standing. These are fair complaints.” (Can you write a more annoying run-on sentence, might we add. Have you ever heard of commas? Or did you let Jekyll write this for you, Karl?)
Oh, no you have not be messaged by anyone. Except maybe your own staff as they linked you this blog, which you check daily. The only reason you’re bringing this up is because Sheri came and mentioned account standings in her submission, along with us touching on it. Don’t act like you’ve suddenly decided to listen to random users. You’ve got your pride hurt because there is a blog out there, that people actively are reading, that don’t buy your lazy brand of bullshit.
Oh, well. On to the topic contents itself.
1) Negative Standing showing on profiles - Positive change. This needed to happen when negative standing was first put into place. Outside of moderators happening to notice someone with a negative standing trying to sell things, users have no idea if the person they’re commissioning or buying a design from has a negative standing. We imagine this has led to many users being scammed by someone well known for scamming.
2) Negative Standing = Last Warning - Conflicted/confused change. We’re confused because we wonder why this wasn’t already the protocol for moderators. From what we understand, receiving a warning - not a verbal warning, but an actual warning issued by some kind of automation triggered by a moderator - should give a user a negative standing. Do moderators not issue bans already to users in this situation?
The other conflict we have is wondering if a user has a negative standing for art theft, if they are then banned because they did an entirely different rule breaking offense. If so, that’s a bit stupid way to do things. Most websites work on a step system in terms of discipline for rule breaking. Verbal Warning -> Official Warning -> Mute/Suspension -> Ban (set time) -> Ban (longer time/permanent). If you stole art and received a verbal warning, and did it again and got an official warning but then spammed the forums, you should receive a verbal warning for spam. Not a ban. Each offense has its own steps that are followed. This of course may change depending on the situation, and perhaps sometimes a ban would be warranted.
3) Negative Standings have a “cool down” - Positive/conflicted change. Conflicted only because there are no doubt some users that should have a negative standing for longer than the “cool down” period. This is situational and a moderator would need to make a case by case evaluation. No doubt Karlos will not think of this and will not code an override for moderators. We would suggest this on the topic but that would lead to Karlos discovering one - or both - of our identities. We know he reads this blog so he’ll probably see this! If you choose to ignore it, it’ll only be at the suffering of your website, and the buffering of your pride.
4) Negative Standing “cool down” periods are paused during bans/mutes - Positive change. Not much to say about this, it makes sense.
5) Commendations for users - Conflicted change. This goes back to what Sheri was talking about, that staff are too lazy &/or inactive to notice when users do things that should deserve positive standing. This is just Karlos coding the current the nomination topic into the site. This doesn’t fix the problem that roots with staff performance.
The other issue we have is how staff are supposed to validate these commendations. If someone is nominating another user for something they did and it wasn’t public, they could just be lying. Is staff expected to investigate these commendations and make sure they’re real? Do you really expect your staff to put time into that, when they won’t give out positive standings on their own?
6) Users who lose positive standing, will have perks revoked - Neutral change. Removing the profile icon makes sense, removing a custom only fit for a positive standing account we’re iffy on. Customs rules are such a asinine nightmare that something as simple as not having horns cut off in as many emotes, could be grounds to having a custom stripped. Custom rules desperately need to be revamped by someone who isn’t Jekyll before we’d be more on board with this. Removing customs that are very clearly not wolves is an entirely different matter. There are, however, many customs that bend the stupidest custom rules and are so minor that most users wouldn’t even realize it required a positive standing to upload. If this is supposed to be about not visually “promoting” these users anymore, this needs to be done with a great deal more scrutiny.
That’s really it. The positive changes are things that should have been dealt with years ago. They are so few we wonder if Karlos just coded a couple of things in five minutes so it looked like he was doing something. Some of these things are so minor they really should be included in a huge changelog of other small touchups that needed to be done. Alas, as we’ve said many times before, Karlos only cares about his public image. Not his website.
Oh, before we forget, Karlos! Did you know that if you spam click the “## Comments” link under each news post, it drops down several instances of the comments in succession? Maybe something you should consider fixing!
1 note
·
View note
Text
The Secret Guide to VSEO: Video and SEO
Since the Google Penguin and Panda updates, a lot of SEOs finally have realized that ranking a website in the long term is not just about building a large number of links. It’s also about creating high-quality content that will attract links naturally over time.
However, one type of SEO that still is underutilized is VSEO: video search engine optimization. Although a lot of brands are incorporating video content into their overall online marketing strategies, most SEOs don’t place a high priority on it. Usually, they opt for creating various other types of content (e.g., infographics, images, written content, etc.).
If used correctly, video can be an extremely powerful form of content and make a significant contribution to your overall SEO strategy, in more ways than one.
youtube
Avoiding a Common Trap and Defining Your Goals
Although the idea of producing a video might seem like a “nice” idea, it’s important to remember that it must compliment your overall SEO strategy and generate a return on investment (ROI).
If you fail to define your goals in the early stages, not only will the video end up costing you (or your client) a hefty chunk of money, it will be money down the drain that could have been spent better elsewhere.
Failing to clearly define goals is a common SEO mistake and one that often is seen with content such as infographics.
Many SEOs will commission the creation of an expensive, cool-looking infographic without putting enough thought into the overall goal. They get blinded by the idea that “infographics build links” without stopping to think whether they want the infographic to increase conversions, increase high-quality traffic (i.e., visitors who are likely to convert to paying customers), or simply provide off-page SEO benefits (i.e., links).
It’s the same with video content. You need to know what you want to get out of it. Without knowing this, it will be difficult to conceptualize/commission a production that has any hope of successfully captivating the intended audience and leading to your desired goals.
What Are Your Goals?
From an SEO point of view, there really are only two main goals that you possibly could have – to build links and generate social shares or to increase conversions.
Let’s start by looking at the first benefit mentioned above…
1. Build Links/Generate Social Shares
If it’s done well, a video can generate a large number of links for a website; and often from some pretty reputable domains, too. I’m not just talking about a few links, either. I’m talking about hundreds or thousands of high-quality links in some cases.
The problem is there’s so much online video content that unless you create an exceptional video and have a great outreach/marketing plan, its success is going to be limited.
People don’t link to or share any old rubbish these days. So, to get the success you’re looking for, it’s important for you to really think about who you want to share the video and who you want to link to it.
Essentially, your video has to offer something to the viewer. It might make them laugh, educate them, amaze them, shock them, or annoy them (or even a combination of these). The point is it needs to evoke a strong enough emotional reaction that they’ll want to share it, either by clicking the Tweet/Share button or by writing a post about it on their blog/website (with a link back to your site, of course).
DollarShaveClub.com
youtube
Perhaps one of the best examples of a video that generated a massive amount of backlinks is the “viral” video from DollarShaveClub.com (above).
About a year ago, hardly anyone had heard of Dollar Shave Club, but shortly after they produced and marketed the video, that all changed.
Strangely enough, the Dollar Shave Club video wasn’t produced for link building purposes. It was produced with the aim of raising brand awareness. But in the modern world of SEO/marketing, brand awareness and link building are directly related, at least when it comes to online content.
Let me explain with a timeless viral example.
According to YouTube, the Dollar Shave Club video was uploaded on March 6, 2012. Following the upload, it didn’t take long for the video to start going viral. Partly due to a great PR/outreach strategy and, in large part, thanks to its very amusing concept, it started to gain a lot of attention for the company.

Within hours, it was featured on leading news sites across the web, including Mashable (pictured above), The Next Web, Techcrunch, and literally hundreds of others. Within a month or so, it also had been featured on many other leading sites that most SEOs would work extremely hard to obtain links from, such as Forbes and BusinessWeek.
Obviously, this is great for brand exposure, but what has this got to do with link building?
Every single one of those leading news websites mentioned above linked out to Dollar Shave Club in their articles, as did the hundreds of other sites that reported on the video.
In fact, this screenshot (taken from MajesticSEO back in the day), shows just how successful the video was for Dollar Shave Club in terms of SEO.

As you can see, around March 2012 (when the video was uploaded), Dollar Shave Club attracted approximately 18,000 backlinks and has continued to attract relatively large numbers of links every month since then.
If you take a look at the cumulative view of backlinks gained (pictured below) since the video was uploaded (approximately 12 months ago), you’ll see that it has attracted almost 90,000 links to date and the site still is attracting links naturally every month as people continue to write about it (like me).

The reason for this is the video struck a chord with its intended audience, and, as a result, went “viral” and attracted links. It was funny, original, and kept its target audience in mind.
There also was an excellent outreach/PR strategy in place, which was responsible for getting the video off the ground and starting the link building process.
These are all things to note if you’re looking to use video for SEO.
SEOmoz.org Whiteboard Friday
As I mentioned earlier in this guide, videos don’t necessarily have to be funny to attract links. They just have to offer viewers something they want to see. One good way to do this is to create a video that’s educational.
Every Friday, SEOmoz.org posts a “whiteboard” style video on their blog. Due to the regularity of these videos, they’ve become known as the “Whiteboard Friday” videos. These videos not only attract a lot of attention from SEOs around the world, but also attract a significant number of links, embeds, and social shares; therefore increasing traffic for SEOmoz.

According to Open Site Explorer (pictured above), a particular Whiteboard Friday video received 402 links from 37 referring domains and well over 1,000 social shares. Once again, proof that people love video content.
What Should I Learn from All of This?
In both instances above (DollarShaveClub.com and SEOmoz.org), video content has been responsible for successfully attracting a substantial number of inbound links and social shares for the website in question. This proves that, when used correctly, videos really can provide a huge boost to your SEO campaign.
However, both of these videos successfully attracted links for different reasons.
For Dollar Shave Club, it was all about the video seeding/outreach strategy. Mike Dubin, the founder of Dollar Shave Club, came from a video seeding background, which obviously played a big part in the success of the video. No one knew about Dollar Shave Club in the early days, so the outreach process definitely played an important role in getting things off the ground.
With SEOmoz, it’s likely that there was no outreach conducted in order to attract links/social shares, as SEOmoz already has an extremely large, loyal community of followers who are likely to share their content naturally. For them, simply producing a high-quality video targeted at their fan base is enough to attract links.
It’s important to consider this when using videos for SEO because all sites are different, and, therefore, will require a different approach. Ask yourself: Do I have enough high-quality traffic already to attract links automatically, or do I need to conduct outreach? And, if so, how much?
It’s also important to remember that it doesn’t matter how good your outreach plan is if your video isn’t of exceptional quality. If that is the case, it’s not going to attract a large number of links.
It’s tempting to cut corners and produce a sub-standard video in order to keep costs down. But, in the long-run, this won’t pay off. Ask yourself: Is my target audience going to be interested in this? Would I link to this if I came across it? Does it evoke an emotion? If you answer “no” to any of these questions, go back and rethink things before you produce your video.
One last thing: To get the full SEO potential of your videos, consider hosting videos on your own website (instead of Youtube or Vimeo). The reason for this is to get people to link back to your domain, which will help your overall SEO efforts as well. The possible downside would be reduced exposure or shares.
Also, on most video hosting sites you can link back to your content from the video webpage. Don’t forget to do this! It’s a free link

2. Increase Conversions
Although some SEOs might disagree with this, I believe that the job of an SEO isn’t necessarily to increase rankings, but rather to increase online sales/revenue for the client.
Obviously, this is a two-part process: attracting more visitors to a website and then optimizing the website so that more of those visitors convert into paying customers/clients.
Video content can be fantastic for increasing conversions on just about any website. In fact, more brands than ever are using videos on landing pages and on various other pages of their websites to keep visitors engaged and, eventually, convince them to make a purchase.
There are two main ways to increase conversions with video – by embedding a video on a landing page and by making use of rich snippets.
Video on a Landing Page
When a visitor lands on your site, you’ve literally got seconds to impress them and get them engaged with what you have to offer. This is the whole point of a landing page. But these days, people are so used to seeing rich media content on the internet that, quite frankly, text content often doesn’t keep them engaged.
Accordingly, I’m sure it comes as no surprise to you that embedding a video on your website not only will increase the length of time that visitors stick around, but, also, the number of conversions to paying customers, which, ultimately, is what SEO is all about.
Product Videos
Product videos are perhaps the most common way that retailers increase the conversion rate of their website using video content. Hundreds and thousands of retailers are making use of product videos these days, and it’s easy to see why.
According to Invodo, 52% of consumers say that watching product videos makes them feel more confident about going ahead and making a purchase.

Take a look at the screenshot above from the online retailer Zappos. It shows one of their product videos being used on the page for women’s Levi jeans. According to econsultancy, Zappos found that sales increased by between 6% and 30% on products with product videos.
Explainer/Introductory Videos
Obviously, not every business with a website has a product to sell, as some businesses are service-oriented.
For these, you can increase conversions with the use of explainer/introductory videos. There are varying styles for these videos, and, truthfully, there’s no exact science as to what style works best. It’s more about producing a video that explains/introduces a client’s business effectively and in an engaging way.
Dropbox found that they increased their conversion rate by over 10% by adding this video to their homepage. And considering that their homepage receives over 750,000 visitors a month, this means that it increased signups by several thousand every day and no doubt generated a huge ROI.
youtube
This video on the other hand introduces a local mobile bar company by explaining the service, introducing the guys behind the business, and showing their services in action. It’s a similar length to the Dropbox video, but it is presented in a different style. When embedded on the “about us” page of the client’s website, it increased his overall conversion rate by around 7%.
Rich Snippets
Increasing conversions with video aren’t only about what you show the visitor once they land on your website, but also what you show the visitor before they even get there.
If you’ve noticed Google’s search results recently, you have seen a significant increase in the use of something called rich snippets, and, in particular, video rich snippets.
youtube
If you’re new to rich snippets, you can watch Google’s official explanation in the video above. Essentially, though, this is what a site with video rich snippets looks like in the SERPs:
As you can see, Google displays information about the video embedded on the page, letting the Googler know that, should they click through to your website, a video is awaiting them.
To put it simply, video-rich snippets help you stand out from the other nine search results on that particular page, and, therefore, searchers will be more inclined to click your result, which will increase traffic to your website.
You’ll be able to show searchers a thumbnail of your video and the length of your video. Make sure the thumbnail stands out and sums up what the video is about if you want to maximize conversions.
How Do You Use Rich Snippets for Video?
To show rich snippets for your video in the Google search results, you’re going to need to self-host your video. If you’re using WordPress, there is a workaround for hosting your videos with YouTube using the Yoast Plugin, but it’s definitely recommended that you self-host your content, if possible.

There are a number of other SEO benefits to self-hosting your videos as opposed to using a free video host such as YouTube, as documented here.
Once you’ve gotten your video hosted and embedded on your site, it’s simply a matter of informing Google about the video. To do this, you’ll have to add the required Schema.org code to your page and submit an XML sitemap within Google’s Webmaster Tools.
It’s a bit of a hassle, but once you know how to do it, it’s pretty easy to do time and time again. Plus, if you’re already ranking for any high-volume keywords, it is well worth the effort, as the increase in conversions should bring significantly more traffic to your site.
Conclusion
The popularity of online video presents a huge opportunity for SEOs willing to get creative to achieve results. Producing videos isn’t always cheap, but it usually isn’t as expensive as people believe it will be, either. If you’ve commissioned and marketed infographics before, you definitely can afford to produce a video and use VSEO that will generate a good ROI for you/your client.
Remember, quality is just as important when it comes to online video as it is when producing any other form of content.
About the Author: Josh Hardwick is the founder of ShortyMedia, a leading production company specializing in viral, corporate, and web videos. He also is a freelance SEO and loves producing great content and building links.
The post The Secret Guide to VSEO: Video and SEO appeared first on Neil Patel.
Original content source: https://neilpatel.com/blog/guide-to-video-seo/ via https://neilpatel.com
The original post, The Secret Guide to VSEO: Video and SEO, has been shared from https://imtrainingparadise.wordpress.com/2020/09/09/the-secret-guide-to-vseo-video-and-seo/ via https://imtrainingparadise.wordpress.com
0 notes
Text
The Secret Guide to VSEO: Video and SEO
Since the Google Penguin and Panda updates, a lot of SEOs finally have realized that ranking a website in the long term is not just about building a large number of links. It’s also about creating high-quality content that will attract links naturally over time.
However, one type of SEO that still is underutilized is VSEO: video search engine optimization. Although a lot of brands are incorporating video content into their overall online marketing strategies, most SEOs don’t place a high priority on it. Usually, they opt for creating various other types of content (e.g., infographics, images, written content, etc.).
If used correctly, video can be an extremely powerful form of content and make a significant contribution to your overall SEO strategy, in more ways than one.
youtube
Avoiding a Common Trap and Defining Your Goals
Although the idea of producing a video might seem like a “nice” idea, it’s important to remember that it must compliment your overall SEO strategy and generate a return on investment (ROI).
If you fail to define your goals in the early stages, not only will the video end up costing you (or your client) a hefty chunk of money, it will be money down the drain that could have been spent better elsewhere.
Failing to clearly define goals is a common SEO mistake and one that often is seen with content such as infographics.
Many SEOs will commission the creation of an expensive, cool-looking infographic without putting enough thought into the overall goal. They get blinded by the idea that “infographics build links” without stopping to think whether they want the infographic to increase conversions, increase high-quality traffic (i.e., visitors who are likely to convert to paying customers), or simply provide off-page SEO benefits (i.e., links).
It’s the same with video content. You need to know what you want to get out of it. Without knowing this, it will be difficult to conceptualize/commission a production that has any hope of successfully captivating the intended audience and leading to your desired goals.
What Are Your Goals?
From an SEO point of view, there really are only two main goals that you possibly could have – to build links and generate social shares or to increase conversions.
Let’s start by looking at the first benefit mentioned above…
1. Build Links/Generate Social Shares
If it’s done well, a video can generate a large number of links for a website; and often from some pretty reputable domains, too. I’m not just talking about a few links, either. I’m talking about hundreds or thousands of high-quality links in some cases.
The problem is there’s so much online video content that unless you create an exceptional video and have a great outreach/marketing plan, its success is going to be limited.
People don’t link to or share any old rubbish these days. So, to get the success you’re looking for, it’s important for you to really think about who you want to share the video and who you want to link to it.
Essentially, your video has to offer something to the viewer. It might make them laugh, educate them, amaze them, shock them, or annoy them (or even a combination of these). The point is it needs to evoke a strong enough emotional reaction that they’ll want to share it, either by clicking the Tweet/Share button or by writing a post about it on their blog/website (with a link back to your site, of course).
DollarShaveClub.com
youtube
Perhaps one of the best examples of a video that generated a massive amount of backlinks is the “viral” video from DollarShaveClub.com (above).
About a year ago, hardly anyone had heard of Dollar Shave Club, but shortly after they produced and marketed the video, that all changed.
Strangely enough, the Dollar Shave Club video wasn’t produced for link building purposes. It was produced with the aim of raising brand awareness. But in the modern world of SEO/marketing, brand awareness and link building are directly related, at least when it comes to online content.
Let me explain with a timeless viral example.
According to YouTube, the Dollar Shave Club video was uploaded on March 6, 2012. Following the upload, it didn’t take long for the video to start going viral. Partly due to a great PR/outreach strategy and, in large part, thanks to its very amusing concept, it started to gain a lot of attention for the company.
Within hours, it was featured on leading news sites across the web, including Mashable (pictured above), The Next Web, Techcrunch, and literally hundreds of others. Within a month or so, it also had been featured on many other leading sites that most SEOs would work extremely hard to obtain links from, such as Forbes and BusinessWeek.
Obviously, this is great for brand exposure, but what has this got to do with link building?
Every single one of those leading news websites mentioned above linked out to Dollar Shave Club in their articles, as did the hundreds of other sites that reported on the video.
In fact, this screenshot (taken from MajesticSEO back in the day), shows just how successful the video was for Dollar Shave Club in terms of SEO.
As you can see, around March 2012 (when the video was uploaded), Dollar Shave Club attracted approximately 18,000 backlinks and has continued to attract relatively large numbers of links every month since then.
If you take a look at the cumulative view of backlinks gained (pictured below) since the video was uploaded (approximately 12 months ago), you’ll see that it has attracted almost 90,000 links to date and the site still is attracting links naturally every month as people continue to write about it (like me).

The reason for this is the video struck a chord with its intended audience, and, as a result, went “viral” and attracted links. It was funny, original, and kept its target audience in mind.
There also was an excellent outreach/PR strategy in place, which was responsible for getting the video off the ground and starting the link building process.
These are all things to note if you’re looking to use video for SEO.
SEOmoz.org Whiteboard Friday
As I mentioned earlier in this guide, videos don’t necessarily have to be funny to attract links. They just have to offer viewers something they want to see. One good way to do this is to create a video that’s educational.
Every Friday, SEOmoz.org posts a “whiteboard” style video on their blog. Due to the regularity of these videos, they’ve become known as the “Whiteboard Friday” videos. These videos not only attract a lot of attention from SEOs around the world, but also attract a significant number of links, embeds, and social shares; therefore increasing traffic for SEOmoz.

According to Open Site Explorer (pictured above), a particular Whiteboard Friday video received 402 links from 37 referring domains and well over 1,000 social shares. Once again, proof that people love video content.
What Should I Learn from All of This?
In both instances above (DollarShaveClub.com and SEOmoz.org), video content has been responsible for successfully attracting a substantial number of inbound links and social shares for the website in question. This proves that, when used correctly, videos really can provide a huge boost to your SEO campaign.
However, both of these videos successfully attracted links for different reasons.
For Dollar Shave Club, it was all about the video seeding/outreach strategy. Mike Dubin, the founder of Dollar Shave Club, came from a video seeding background, which obviously played a big part in the success of the video. No one knew about Dollar Shave Club in the early days, so the outreach process definitely played an important role in getting things off the ground.
With SEOmoz, it’s likely that there was no outreach conducted in order to attract links/social shares, as SEOmoz already has an extremely large, loyal community of followers who are likely to share their content naturally. For them, simply producing a high-quality video targeted at their fan base is enough to attract links.
It’s important to consider this when using videos for SEO because all sites are different, and, therefore, will require a different approach. Ask yourself: Do I have enough high-quality traffic already to attract links automatically, or do I need to conduct outreach? And, if so, how much?
It’s also important to remember that it doesn’t matter how good your outreach plan is if your video isn’t of exceptional quality. If that is the case, it’s not going to attract a large number of links.
It’s tempting to cut corners and produce a sub-standard video in order to keep costs down. But, in the long-run, this won’t pay off. Ask yourself: Is my target audience going to be interested in this? Would I link to this if I came across it? Does it evoke an emotion? If you answer “no” to any of these questions, go back and rethink things before you produce your video.
One last thing: To get the full SEO potential of your videos, consider hosting videos on your own website (instead of Youtube or Vimeo). The reason for this is to get people to link back to your domain, which will help your overall SEO efforts as well. The possible downside would be reduced exposure or shares.
Also, on most video hosting sites you can link back to your content from the video webpage. Don’t forget to do this! It’s a free link 🙂
2. Increase Conversions
Although some SEOs might disagree with this, I believe that the job of an SEO isn’t necessarily to increase rankings, but rather to increase online sales/revenue for the client.
Obviously, this is a two-part process: attracting more visitors to a website and then optimizing the website so that more of those visitors convert into paying customers/clients.
Video content can be fantastic for increasing conversions on just about any website. In fact, more brands than ever are using videos on landing pages and on various other pages of their websites to keep visitors engaged and, eventually, convince them to make a purchase.
There are two main ways to increase conversions with video – by embedding a video on a landing page and by making use of rich snippets.
Video on a Landing Page
When a visitor lands on your site, you’ve literally got seconds to impress them and get them engaged with what you have to offer. This is the whole point of a landing page. But these days, people are so used to seeing rich media content on the internet that, quite frankly, text content often doesn’t keep them engaged.
Accordingly, I’m sure it comes as no surprise to you that embedding a video on your website not only will increase the length of time that visitors stick around, but, also, the number of conversions to paying customers, which, ultimately, is what SEO is all about.
Product Videos
Product videos are perhaps the most common way that retailers increase the conversion rate of their website using video content. Hundreds and thousands of retailers are making use of product videos these days, and it’s easy to see why.
According to Invodo, 52% of consumers say that watching product videos makes them feel more confident about going ahead and making a purchase.
Take a look at the screenshot above from the online retailer Zappos. It shows one of their product videos being used on the page for women’s Levi jeans. According to econsultancy, Zappos found that sales increased by between 6% and 30% on products with product videos.
Explainer/Introductory Videos
Obviously, not every business with a website has a product to sell, as some businesses are service-oriented.
For these, you can increase conversions with the use of explainer/introductory videos. There are varying styles for these videos, and, truthfully, there’s no exact science as to what style works best. It’s more about producing a video that explains/introduces a client’s business effectively and in an engaging way.
Dropbox found that they increased their conversion rate by over 10% by adding this video to their homepage. And considering that their homepage receives over 750,000 visitors a month, this means that it increased signups by several thousand every day and no doubt generated a huge ROI.
youtube
This video on the other hand introduces a local mobile bar company by explaining the service, introducing the guys behind the business, and showing their services in action. It’s a similar length to the Dropbox video, but it is presented in a different style. When embedded on the “about us” page of the client’s website, it increased his overall conversion rate by around 7%.
Rich Snippets
Increasing conversions with video aren’t only about what you show the visitor once they land on your website, but also what you show the visitor before they even get there.
If you’ve noticed Google’s search results recently, you have seen a significant increase in the use of something called rich snippets, and, in particular, video rich snippets.
youtube
If you’re new to rich snippets, you can watch Google’s official explanation in the video above. Essentially, though, this is what a site with video rich snippets looks like in the SERPs:

As you can see, Google displays information about the video embedded on the page, letting the Googler know that, should they click through to your website, a video is awaiting them.
To put it simply, video-rich snippets help you stand out from the other nine search results on that particular page, and, therefore, searchers will be more inclined to click your result, which will increase traffic to your website.
You’ll be able to show searchers a thumbnail of your video and the length of your video. Make sure the thumbnail stands out and sums up what the video is about if you want to maximize conversions.
How Do You Use Rich Snippets for Video?
To show rich snippets for your video in the Google search results, you’re going to need to self-host your video. If you’re using WordPress, there is a workaround for hosting your videos with YouTube using the Yoast Plugin, but it’s definitely recommended that you self-host your content, if possible.

There are a number of other SEO benefits to self-hosting your videos as opposed to using a free video host such as YouTube, as documented here.
Once you’ve gotten your video hosted and embedded on your site, it’s simply a matter of informing Google about the video. To do this, you’ll have to add the required Schema.org code to your page and submit an XML sitemap within Google’s Webmaster Tools.
It’s a bit of a hassle, but once you know how to do it, it’s pretty easy to do time and time again. Plus, if you’re already ranking for any high-volume keywords, it is well worth the effort, as the increase in conversions should bring significantly more traffic to your site.
Conclusion
The popularity of online video presents a huge opportunity for SEOs willing to get creative to achieve results. Producing videos isn’t always cheap, but it usually isn’t as expensive as people believe it will be, either. If you’ve commissioned and marketed infographics before, you definitely can afford to produce a video and use VSEO that will generate a good ROI for you/your client.
Remember, quality is just as important when it comes to online video as it is when producing any other form of content.
About the Author: Josh Hardwick is the founder of ShortyMedia, a leading production company specializing in viral, corporate, and web videos. He also is a freelance SEO and loves producing great content and building links.
The post The Secret Guide to VSEO: Video and SEO appeared first on Neil Patel.
Original content source: https://ift.tt/3m4L4jm via https://neilpatel.com
The post, The Secret Guide to VSEO: Video and SEO, has been shared from https://ift.tt/2Zn5nit via https://ift.tt/2r0Go64
0 notes
Text
The Secret Guide to VSEO: Video and SEO
Since the Google Penguin and Panda updates, a lot of SEOs finally have realized that ranking a website in the long term is not just about building a large number of links. It’s also about creating high-quality content that will attract links naturally over time.
However, one type of SEO that still is underutilized is VSEO: video search engine optimization. Although a lot of brands are incorporating video content into their overall online marketing strategies, most SEOs don’t place a high priority on it. Usually, they opt for creating various other types of content (e.g., infographics, images, written content, etc.).
If used correctly, video can be an extremely powerful form of content and make a significant contribution to your overall SEO strategy, in more ways than one.
youtube
Avoiding a Common Trap and Defining Your Goals
Although the idea of producing a video might seem like a “nice” idea, it’s important to remember that it must compliment your overall SEO strategy and generate a return on investment (ROI).
If you fail to define your goals in the early stages, not only will the video end up costing you (or your client) a hefty chunk of money, it will be money down the drain that could have been spent better elsewhere.
Failing to clearly define goals is a common SEO mistake and one that often is seen with content such as infographics.
Many SEOs will commission the creation of an expensive, cool-looking infographic without putting enough thought into the overall goal. They get blinded by the idea that “infographics build links” without stopping to think whether they want the infographic to increase conversions, increase high-quality traffic (i.e., visitors who are likely to convert to paying customers), or simply provide off-page SEO benefits (i.e., links).
It’s the same with video content. You need to know what you want to get out of it. Without knowing this, it will be difficult to conceptualize/commission a production that has any hope of successfully captivating the intended audience and leading to your desired goals.
What Are Your Goals?
From an SEO point of view, there really are only two main goals that you possibly could have – to build links and generate social shares or to increase conversions.
Let’s start by looking at the first benefit mentioned above…
1. Build Links/Generate Social Shares
If it’s done well, a video can generate a large number of links for a website; and often from some pretty reputable domains, too. I’m not just talking about a few links, either. I’m talking about hundreds or thousands of high-quality links in some cases.
The problem is there’s so much online video content that unless you create an exceptional video and have a great outreach/marketing plan, its success is going to be limited.
People don’t link to or share any old rubbish these days. So, to get the success you’re looking for, it’s important for you to really think about who you want to share the video and who you want to link to it.
Essentially, your video has to offer something to the viewer. It might make them laugh, educate them, amaze them, shock them, or annoy them (or even a combination of these). The point is it needs to evoke a strong enough emotional reaction that they’ll want to share it, either by clicking the Tweet/Share button or by writing a post about it on their blog/website (with a link back to your site, of course).
DollarShaveClub.com
youtube
Perhaps one of the best examples of a video that generated a massive amount of backlinks is the “viral” video from DollarShaveClub.com (above).
About a year ago, hardly anyone had heard of Dollar Shave Club, but shortly after they produced and marketed the video, that all changed.
Strangely enough, the Dollar Shave Club video wasn’t produced for link building purposes. It was produced with the aim of raising brand awareness. But in the modern world of SEO/marketing, brand awareness and link building are directly related, at least when it comes to online content.
Let me explain with a timeless viral example.
According to YouTube, the Dollar Shave Club video was uploaded on March 6, 2012. Following the upload, it didn’t take long for the video to start going viral. Partly due to a great PR/outreach strategy and, in large part, thanks to its very amusing concept, it started to gain a lot of attention for the company.

Within hours, it was featured on leading news sites across the web, including Mashable (pictured above), The Next Web, Techcrunch, and literally hundreds of others. Within a month or so, it also had been featured on many other leading sites that most SEOs would work extremely hard to obtain links from, such as Forbes and BusinessWeek.
Obviously, this is great for brand exposure, but what has this got to do with link building?
Every single one of those leading news websites mentioned above linked out to Dollar Shave Club in their articles, as did the hundreds of other sites that reported on the video.
In fact, this screenshot (taken from MajesticSEO back in the day), shows just how successful the video was for Dollar Shave Club in terms of SEO.

As you can see, around March 2012 (when the video was uploaded), Dollar Shave Club attracted approximately 18,000 backlinks and has continued to attract relatively large numbers of links every month since then.
If you take a look at the cumulative view of backlinks gained (pictured below) since the video was uploaded (approximately 12 months ago), you’ll see that it has attracted almost 90,000 links to date and the site still is attracting links naturally every month as people continue to write about it (like me).
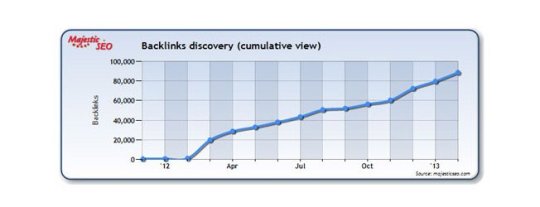
The reason for this is the video struck a chord with its intended audience, and, as a result, went “viral” and attracted links. It was funny, original, and kept its target audience in mind.
There also was an excellent outreach/PR strategy in place, which was responsible for getting the video off the ground and starting the link building process.
These are all things to note if you’re looking to use video for SEO.
SEOmoz.org Whiteboard Friday
As I mentioned earlier in this guide, videos don’t necessarily have to be funny to attract links. They just have to offer viewers something they want to see. One good way to do this is to create a video that’s educational.
Every Friday, SEOmoz.org posts a “whiteboard” style video on their blog. Due to the regularity of these videos, they’ve become known as the “Whiteboard Friday” videos. These videos not only attract a lot of attention from SEOs around the world, but also attract a significant number of links, embeds, and social shares; therefore increasing traffic for SEOmoz.

According to Open Site Explorer (pictured above), a particular Whiteboard Friday video received 402 links from 37 referring domains and well over 1,000 social shares. Once again, proof that people love video content.
What Should I Learn from All of This?
In both instances above (DollarShaveClub.com and SEOmoz.org), video content has been responsible for successfully attracting a substantial number of inbound links and social shares for the website in question. This proves that, when used correctly, videos really can provide a huge boost to your SEO campaign.
However, both of these videos successfully attracted links for different reasons.
For Dollar Shave Club, it was all about the video seeding/outreach strategy. Mike Dubin, the founder of Dollar Shave Club, came from a video seeding background, which obviously played a big part in the success of the video. No one knew about Dollar Shave Club in the early days, so the outreach process definitely played an important role in getting things off the ground.
With SEOmoz, it’s likely that there was no outreach conducted in order to attract links/social shares, as SEOmoz already has an extremely large, loyal community of followers who are likely to share their content naturally. For them, simply producing a high-quality video targeted at their fan base is enough to attract links.
It’s important to consider this when using videos for SEO because all sites are different, and, therefore, will require a different approach. Ask yourself: Do I have enough high-quality traffic already to attract links automatically, or do I need to conduct outreach? And, if so, how much?
It’s also important to remember that it doesn’t matter how good your outreach plan is if your video isn’t of exceptional quality. If that is the case, it’s not going to attract a large number of links.
It’s tempting to cut corners and produce a sub-standard video in order to keep costs down. But, in the long-run, this won’t pay off. Ask yourself: Is my target audience going to be interested in this? Would I link to this if I came across it? Does it evoke an emotion? If you answer “no” to any of these questions, go back and rethink things before you produce your video.
One last thing: To get the full SEO potential of your videos, consider hosting videos on your own website (instead of Youtube or Vimeo). The reason for this is to get people to link back to your domain, which will help your overall SEO efforts as well. The possible downside would be reduced exposure or shares.
Also, on most video hosting sites you can link back to your content from the video webpage. Don’t forget to do this! It’s a free link 🙂
2. Increase Conversions
Although some SEOs might disagree with this, I believe that the job of an SEO isn’t necessarily to increase rankings, but rather to increase online sales/revenue for the client.
Obviously, this is a two-part process: attracting more visitors to a website and then optimizing the website so that more of those visitors convert into paying customers/clients.
Video content can be fantastic for increasing conversions on just about any website. In fact, more brands than ever are using videos on landing pages and on various other pages of their websites to keep visitors engaged and, eventually, convince them to make a purchase.
There are two main ways to increase conversions with video – by embedding a video on a landing page and by making use of rich snippets.
Video on a Landing Page
When a visitor lands on your site, you’ve literally got seconds to impress them and get them engaged with what you have to offer. This is the whole point of a landing page. But these days, people are so used to seeing rich media content on the internet that, quite frankly, text content often doesn’t keep them engaged.
Accordingly, I’m sure it comes as no surprise to you that embedding a video on your website not only will increase the length of time that visitors stick around, but, also, the number of conversions to paying customers, which, ultimately, is what SEO is all about.
Product Videos
Product videos are perhaps the most common way that retailers increase the conversion rate of their website using video content. Hundreds and thousands of retailers are making use of product videos these days, and it’s easy to see why.
According to Invodo, 52% of consumers say that watching product videos makes them feel more confident about going ahead and making a purchase.

Take a look at the screenshot above from the online retailer Zappos. It shows one of their product videos being used on the page for women’s Levi jeans. According to econsultancy, Zappos found that sales increased by between 6% and 30% on products with product videos.
Explainer/Introductory Videos
Obviously, not every business with a website has a product to sell, as some businesses are service-oriented.
For these, you can increase conversions with the use of explainer/introductory videos. There are varying styles for these videos, and, truthfully, there’s no exact science as to what style works best. It’s more about producing a video that explains/introduces a client’s business effectively and in an engaging way.
Dropbox found that they increased their conversion rate by over 10% by adding this video to their homepage. And considering that their homepage receives over 750,000 visitors a month, this means that it increased signups by several thousand every day and no doubt generated a huge ROI.
youtube
This video on the other hand introduces a local mobile bar company by explaining the service, introducing the guys behind the business, and showing their services in action. It’s a similar length to the Dropbox video, but it is presented in a different style. When embedded on the “about us” page of the client’s website, it increased his overall conversion rate by around 7%.
Rich Snippets
Increasing conversions with video aren’t only about what you show the visitor once they land on your website, but also what you show the visitor before they even get there.
If you’ve noticed Google’s search results recently, you have seen a significant increase in the use of something called rich snippets, and, in particular, video rich snippets.
youtube
If you’re new to rich snippets, you can watch Google’s official explanation in the video above. Essentially, though, this is what a site with video rich snippets looks like in the SERPs:

As you can see, Google displays information about the video embedded on the page, letting the Googler know that, should they click through to your website, a video is awaiting them.
To put it simply, video-rich snippets help you stand out from the other nine search results on that particular page, and, therefore, searchers will be more inclined to click your result, which will increase traffic to your website.
You’ll be able to show searchers a thumbnail of your video and the length of your video. Make sure the thumbnail stands out and sums up what the video is about if you want to maximize conversions.
How Do You Use Rich Snippets for Video?
To show rich snippets for your video in the Google search results, you’re going to need to self-host your video. If you’re using WordPress, there is a workaround for hosting your videos with YouTube using the Yoast Plugin, but it’s definitely recommended that you self-host your content, if possible.

There are a number of other SEO benefits to self-hosting your videos as opposed to using a free video host such as YouTube, as documented here.
Once you’ve gotten your video hosted and embedded on your site, it’s simply a matter of informing Google about the video. To do this, you’ll have to add the required Schema.org code to your page and submit an XML sitemap within Google’s Webmaster Tools.
It’s a bit of a hassle, but once you know how to do it, it’s pretty easy to do time and time again. Plus, if you’re already ranking for any high-volume keywords, it is well worth the effort, as the increase in conversions should bring significantly more traffic to your site.
Conclusion
The popularity of online video presents a huge opportunity for SEOs willing to get creative to achieve results. Producing videos isn’t always cheap, but it usually isn’t as expensive as people believe it will be, either. If you’ve commissioned and marketed infographics before, you definitely can afford to produce a video and use VSEO that will generate a good ROI for you/your client.
Remember, quality is just as important when it comes to online video as it is when producing any other form of content.
About the Author: Josh Hardwick is the founder of ShortyMedia, a leading production company specializing in viral, corporate, and web videos. He also is a freelance SEO and loves producing great content and building links.
The post The Secret Guide to VSEO: Video and SEO appeared first on Neil Patel.
The Secret Guide to VSEO: Video and SEO Publicado primeiro em https://neilpatel.com
0 notes
Text
The Secret Guide to VSEO: Video and SEO
Since the Google Penguin and Panda updates, a lot of SEOs finally have realized that ranking a website in the long term is not just about building a large number of links. It’s also about creating high-quality content that will attract links naturally over time.
However, one type of SEO that still is underutilized is VSEO: video search engine optimization. Although a lot of brands are incorporating video content into their overall online marketing strategies, most SEOs don’t place a high priority on it. Usually, they opt for creating various other types of content (e.g., infographics, images, written content, etc.).
If used correctly, video can be an extremely powerful form of content and make a significant contribution to your overall SEO strategy, in more ways than one.
Avoiding a Common Trap and Defining Your Goals
Although the idea of producing a video might seem like a “nice” idea, it’s important to remember that it must compliment your overall SEO strategy and generate a return on investment (ROI).
If you fail to define your goals in the early stages, not only will the video end up costing you (or your client) a hefty chunk of money, it will be money down the drain that could have been spent better elsewhere.
Failing to clearly define goals is a common SEO mistake and one that often is seen with content such as infographics.
Many SEOs will commission the creation of an expensive, cool-looking infographic without putting enough thought into the overall goal. They get blinded by the idea that “infographics build links” without stopping to think whether they want the infographic to increase conversions, increase high-quality traffic (i.e., visitors who are likely to convert to paying customers), or simply provide off-page SEO benefits (i.e., links).
It’s the same with video content. You need to know what you want to get out of it. Without knowing this, it will be difficult to conceptualize/commission a production that has any hope of successfully captivating the intended audience and leading to your desired goals.
What Are Your Goals?
From an SEO point of view, there really are only two main goals that you possibly could have – to build links and generate social shares or to increase conversions.
Let’s start by looking at the first benefit mentioned above…
1. Build Links/Generate Social Shares
If it’s done well, a video can generate a large number of links for a website; and often from some pretty reputable domains, too. I’m not just talking about a few links, either. I’m talking about hundreds or thousands of high-quality links in some cases.
The problem is there’s so much online video content that unless you create an exceptional video and have a great outreach/marketing plan, its success is going to be limited.
People don’t link to or share any old rubbish these days. So, to get the success you’re looking for, it’s important for you to really think about who you want to share the video and who you want to link to it.
Essentially, your video has to offer something to the viewer. It might make them laugh, educate them, amaze them, shock them, or annoy them (or even a combination of these). The point is it needs to evoke a strong enough emotional reaction that they’ll want to share it, either by clicking the Tweet/Share button or by writing a post about it on their blog/website (with a link back to your site, of course).
DollarShaveClub.com
Perhaps one of the best examples of a video that generated a massive amount of backlinks is the “viral” video from DollarShaveClub.com (above).
About a year ago, hardly anyone had heard of Dollar Shave Club, but shortly after they produced and marketed the video, that all changed.
Strangely enough, the Dollar Shave Club video wasn’t produced for link building purposes. It was produced with the aim of raising brand awareness. But in the modern world of SEO/marketing, brand awareness and link building are directly related, at least when it comes to online content.
Let me explain with a timeless viral example.
According to YouTube, the Dollar Shave Club video was uploaded on March 6, 2012. Following the upload, it didn’t take long for the video to start going viral. Partly due to a great PR/outreach strategy and, in large part, thanks to its very amusing concept, it started to gain a lot of attention for the company.

Within hours, it was featured on leading news sites across the web, including Mashable (pictured above), The Next Web, Techcrunch, and literally hundreds of others. Within a month or so, it also had been featured on many other leading sites that most SEOs would work extremely hard to obtain links from, such as Forbes and BusinessWeek.
Obviously, this is great for brand exposure, but what has this got to do with link building?
Every single one of those leading news websites mentioned above linked out to Dollar Shave Club in their articles, as did the hundreds of other sites that reported on the video.
In fact, this screenshot (taken from MajesticSEO back in the day), shows just how successful the video was for Dollar Shave Club in terms of SEO.

As you can see, around March 2012 (when the video was uploaded), Dollar Shave Club attracted approximately 18,000 backlinks and has continued to attract relatively large numbers of links every month since then.
If you take a look at the cumulative view of backlinks gained (pictured below) since the video was uploaded (approximately 12 months ago), you’ll see that it has attracted almost 90,000 links to date and the site still is attracting links naturally every month as people continue to write about it (like me).

The reason for this is the video struck a chord with its intended audience, and, as a result, went “viral” and attracted links. It was funny, original, and kept its target audience in mind.
There also was an excellent outreach/PR strategy in place, which was responsible for getting the video off the ground and starting the link building process.
These are all things to note if you’re looking to use video for SEO.
SEOmoz.org Whiteboard Friday
As I mentioned earlier in this guide, videos don’t necessarily have to be funny to attract links. They just have to offer viewers something they want to see. One good way to do this is to create a video that’s educational.
Every Friday, SEOmoz.org posts a “whiteboard” style video on their blog. Due to the regularity of these videos, they’ve become known as the “Whiteboard Friday” videos. These videos not only attract a lot of attention from SEOs around the world, but also attract a significant number of links, embeds, and social shares; therefore increasing traffic for SEOmoz.

According to Open Site Explorer (pictured above), a particular Whiteboard Friday video received 402 links from 37 referring domains and well over 1,000 social shares. Once again, proof that people love video content.
What Should I Learn from All of This?
In both instances above (DollarShaveClub.com and SEOmoz.org), video content has been responsible for successfully attracting a substantial number of inbound links and social shares for the website in question. This proves that, when used correctly, videos really can provide a huge boost to your SEO campaign.
However, both of these videos successfully attracted links for different reasons.
For Dollar Shave Club, it was all about the video seeding/outreach strategy. Mike Dubin, the founder of Dollar Shave Club, came from a video seeding background, which obviously played a big part in the success of the video. No one knew about Dollar Shave Club in the early days, so the outreach process definitely played an important role in getting things off the ground.
With SEOmoz, it’s likely that there was no outreach conducted in order to attract links/social shares, as SEOmoz already has an extremely large, loyal community of followers who are likely to share their content naturally. For them, simply producing a high-quality video targeted at their fan base is enough to attract links.
It’s important to consider this when using videos for SEO because all sites are different, and, therefore, will require a different approach. Ask yourself: Do I have enough high-quality traffic already to attract links automatically, or do I need to conduct outreach? And, if so, how much?
It’s also important to remember that it doesn’t matter how good your outreach plan is if your video isn’t of exceptional quality. If that is the case, it’s not going to attract a large number of links.
It’s tempting to cut corners and produce a sub-standard video in order to keep costs down. But, in the long-run, this won’t pay off. Ask yourself: Is my target audience going to be interested in this? Would I link to this if I came across it? Does it evoke an emotion? If you answer “no” to any of these questions, go back and rethink things before you produce your video.
One last thing: To get the full SEO potential of your videos, consider hosting videos on your own website (instead of Youtube or Vimeo). The reason for this is to get people to link back to your domain, which will help your overall SEO efforts as well. The possible downside would be reduced exposure or shares.
Also, on most video hosting sites you can link back to your content from the video webpage. Don’t forget to do this! It’s a free link ?
2. Increase Conversions
Although some SEOs might disagree with this, I believe that the job of an SEO isn’t necessarily to increase rankings, but rather to increase online sales/revenue for the client.
Obviously, this is a two-part process: attracting more visitors to a website and then optimizing the website so that more of those visitors convert into paying customers/clients.
Video content can be fantastic for increasing conversions on just about any website. In fact, more brands than ever are using videos on landing pages and on various other pages of their websites to keep visitors engaged and, eventually, convince them to make a purchase.
There are two main ways to increase conversions with video – by embedding a video on a landing page and by making use of rich snippets.
Video on a Landing Page
When a visitor lands on your site, you’ve literally got seconds to impress them and get them engaged with what you have to offer. This is the whole point of a landing page. But these days, people are so used to seeing rich media content on the internet that, quite frankly, text content often doesn’t keep them engaged.
Accordingly, I’m sure it comes as no surprise to you that embedding a video on your website not only will increase the length of time that visitors stick around, but, also, the number of conversions to paying customers, which, ultimately, is what SEO is all about.
Product Videos
Product videos are perhaps the most common way that retailers increase the conversion rate of their website using video content. Hundreds and thousands of retailers are making use of product videos these days, and it’s easy to see why.
According to Invodo, 52% of consumers say that watching product videos makes them feel more confident about going ahead and making a purchase.

Take a look at the screenshot above from the online retailer Zappos. It shows one of their product videos being used on the page for women’s Levi jeans. According to econsultancy, Zappos found that sales increased by between 6% and 30% on products with product videos.
Explainer/Introductory Videos
Obviously, not every business with a website has a product to sell, as some businesses are service-oriented.
For these, you can increase conversions with the use of explainer/introductory videos. There are varying styles for these videos, and, truthfully, there’s no exact science as to what style works best. It’s more about producing a video that explains/introduces a client’s business effectively and in an engaging way.
Dropbox found that they increased their conversion rate by over 10% by adding this video to their homepage. And considering that their homepage receives over 750,000 visitors a month, this means that it increased signups by several thousand every day and no doubt generated a huge ROI.
This video on the other hand introduces a local mobile bar company by explaining the service, introducing the guys behind the business, and showing their services in action. It’s a similar length to the Dropbox video, but it is presented in a different style. When embedded on the “about us” page of the client’s website, it increased his overall conversion rate by around 7%.
Rich Snippets
Increasing conversions with video aren’t only about what you show the visitor once they land on your website, but also what you show the visitor before they even get there.
If you’ve noticed Google’s search results recently, you have seen a significant increase in the use of something called rich snippets, and, in particular, video rich snippets.
If you’re new to rich snippets, you can watch Google’s official explanation in the video above. Essentially, though, this is what a site with video rich snippets looks like in the SERPs:

As you can see, Google displays information about the video embedded on the page, letting the Googler know that, should they click through to your website, a video is awaiting them.
To put it simply, video-rich snippets help you stand out from the other nine search results on that particular page, and, therefore, searchers will be more inclined to click your result, which will increase traffic to your website.
You’ll be able to show searchers a thumbnail of your video and the length of your video. Make sure the thumbnail stands out and sums up what the video is about if you want to maximize conversions.
How Do You Use Rich Snippets for Video?
To show rich snippets for your video in the Google search results, you’re going to need to self-host your video. If you’re using WordPress, there is a workaround for hosting your videos with YouTube using the Yoast Plugin, but it’s definitely recommended that you self-host your content, if possible.

There are a number of other SEO benefits to self-hosting your videos as opposed to using a free video host such as YouTube, as documented here.
Once you’ve gotten your video hosted and embedded on your site, it’s simply a matter of informing Google about the video. To do this, you’ll have to add the required Schema.org code to your page and submit an XML sitemap within Google’s Webmaster Tools.
It’s a bit of a hassle, but once you know how to do it, it’s pretty easy to do time and time again. Plus, if you’re already ranking for any high-volume keywords, it is well worth the effort, as the increase in conversions should bring significantly more traffic to your site.
Conclusion
The popularity of online video presents a huge opportunity for SEOs willing to get creative to achieve results. Producing videos isn’t always cheap, but it usually isn’t as expensive as people believe it will be, either. If you’ve commissioned and marketed infographics before, you definitely can afford to produce a video and use VSEO that will generate a good ROI for you/your client.
Remember, quality is just as important when it comes to online video as it is when producing any other form of content.
About the Author: Josh Hardwick is the founder of ShortyMedia, a leading production company specializing in viral, corporate, and web videos. He also is a freelance SEO and loves producing great content and building links.
The post The Secret Guide to VSEO: Video and SEO appeared first on Neil Patel.
Original content source: https://neilpatel.com/blog/guide-to-video-seo/ via https://neilpatel.com
See the original post, The Secret Guide to VSEO: Video and SEO that is shared from https://imtrainingparadise.weebly.com/home/the-secret-guide-to-vseo-video-and-seo via https://imtrainingparadise.weebly.com/home
0 notes
Last Seen Blogs

experience-identity-blog
The Endless American Experience

evieplaylists
bluevie

maleficent-deity
a sinful blog

peachjamz
Peach Jamz

donttrustthefrench
cabbages