
adiwan
Adiwan's nerdy dungeon
I'm a geek/nerd who likes all stuff that involves to be a geek/nerd.
Retro games, computer science, Dungeons & Dragons, sci-fi, fantasy, animation.
1286 posts
Don't wanna be here? Send us removal request.
Last Seen Blogs

swimmingpruneturkeynickel
Untitled

xlunafrancesx
Luna Frances Henriquez

gyereapahoz
Hungary

doriangray
to define–

franz-depinay
it's Franz
Text
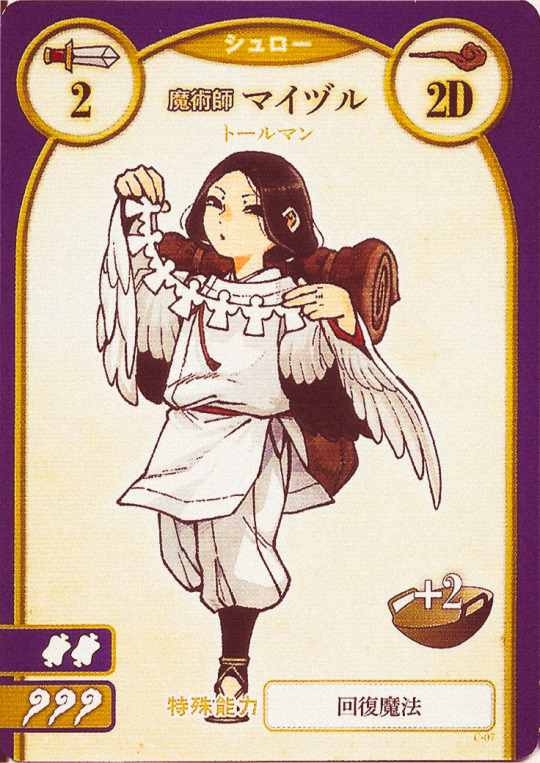


Dungeon Meshi Board Game (2022) - "Shuro's"' Party
266 notes
·
View notes
Text

floating duck 🍑
14K notes
·
View notes

Text
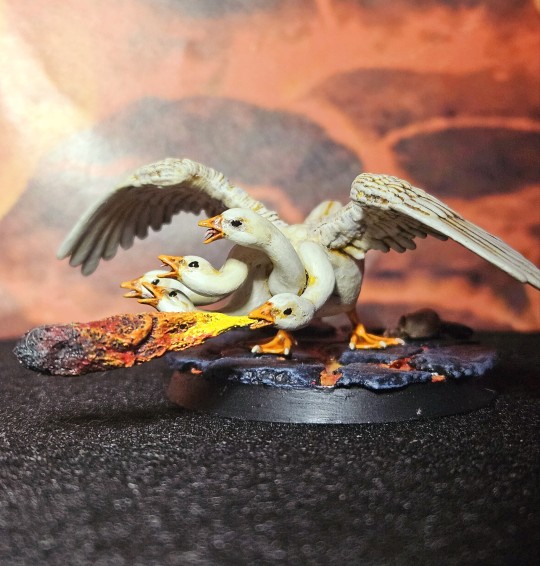
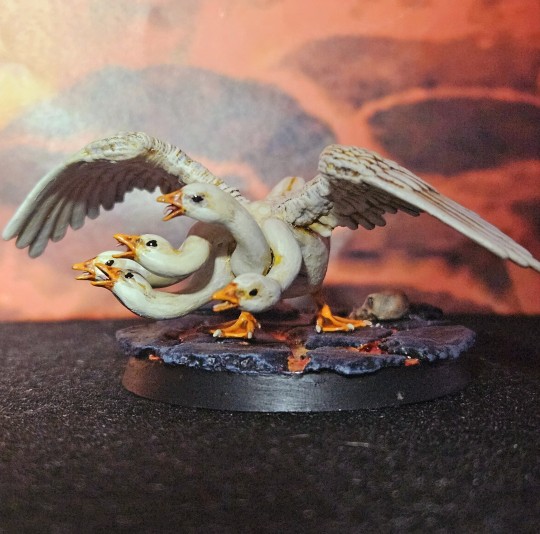
🪿HONK HONK 🔥
Another day, another mini. This time with a handsculpted airdry clay base and a removable fireball made of superglue and cotton wool. This was a commission piece.
55 notes
·
View notes
Text

"I am a tiefling, and I will not suffer without retribution."
2K notes
·
View notes
Text
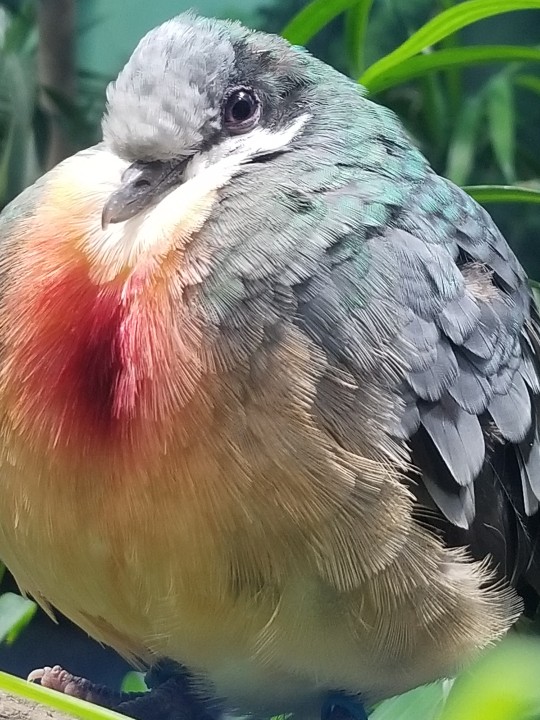
Today's bird is this bleeding heart dove!
2K notes
·
View notes
Text

Star Wars Cargo Box
This one I did a few years ago and I rediscovered this image on my hard drive just now. I made it as a gift for a former colleague and Star Wars fan. It was about 20 cm in length, 10 cm in height and width and filled with candy up to the top.
I modeled it on my own by using reference images from the Star Wars series The Bad Batch. After 3D-printing it in PETG, spraying it with a lot of body fill, sanding it to remove as many layer lines as possible, it was painted with cheap acrylic paints that luckily matched pretty well, especially with some drops of metallic model paint. I weathered it with more metallic paint to give it some scratches (maybe I went a little bit overboard with it) and slathered the box with an oily black wash to make it appropriately grimy. As soon as the paint was dry enough (accelerated with a hair dryer) I varnished it with a matte airbrush varnish from Vallejo.
Seeing this again makes me want to make one for myself to put on my desk.
5 notes
·
View notes
Text
I really love Linux... but sometimes...
... it is hard when it doesn't love you back. I guess the pain is of my own making: I have a Debian installation with experimental packages. Big red flag here. Also it is an old installation that I carry on for almost 12 years. Second red flag. Also I have a ton of developer packages AND i386 packages installed due to Steam, HUGE red flags.
Once in a while I update my system and when I do the changes are BIG.
It took me a good few hours to straighten out over 700 conflicts in a way that doesn't mess up my install too much. The most annoying thing was that my old Thinkpad X201 takes forever to calculate conflicts each time I changed the state of a package. In the end to safe my sanity I removed Steam and all the accompanying i386 packages. I had only a few games that worked on that laptop anyway and my desktop Windows PC is mainly for gaming and heavy duty stuff.
Still better than dealing with Windows updates. A few years ago my Windows 10 installation decided to hang up on an update, trying to update that update and then reverting the update, so that it can try to update the same update without really updating the update next time. It took me over half a year to fix that trying random shit to fix the installation. At least I know where to look when I mess up something with Linux.
0 notes
Text
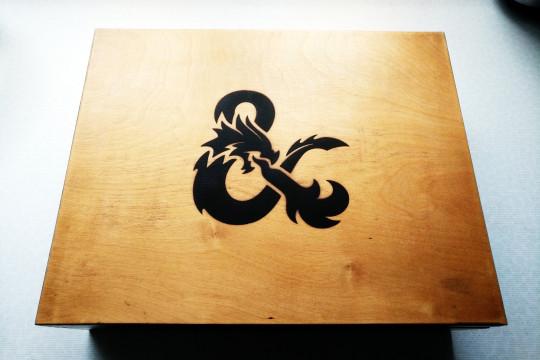
Recently I was helping out clearing a house and while taking out the old furniture out my eyes fixed on a little box in the corner. It was a wooden box from a sparkling wine producer called "Matheus Müller". The old owners of the property liked drinking alcohol. The box was empty and in a good shape, except from some minor discoloration from age because the wood had no varnish on it to give it any protection.
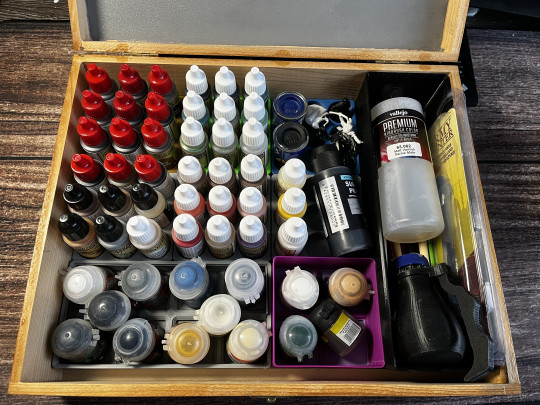
I have no idea what it contained in the past but I knew what it could contain in the future: my miniature paint! My paint was stored in a rather small box that was way too small for the paint I gathered over the years. As you can see in the picture above it's not a little amount. I just needed to expand my storage.
When I got it home the first thing was to get my hands dirty and use sand paper to get rid of the wood discoloration and a huge printed picture. Removing it was quick and the over all cleanup of the surface made it instantly more pleasant. As much as a depiction of a scene with a river with boats and a castle in the background in poop brown has its charm I wanted to give way to a more cleaner look. After that I gave the box a good layer of matte wood polyurethane varnish that I still was good. I prepared a stencil of the D&D logo and printed it out with my 3D printer and used it to airbush a good layer of black primer in the hopes it sticks well enough the the varnish. I wanted an extra protection in case I messed up the stencil part but luckily it was OK. I had some problems as the air pressure of the airbrush lifted parts of my stencil. For my first attempt I'm satisfied. Originally I wanted to put another red layer on top of that but I chickened out and the black was good enough for me.
For the inside I had the idea to use the Gridfinity system. It is an open source system that uses a grid to keep inserted bins and other types of inserts in place when the whole thing is tossed around (within reason of course). I downloaded this file for the grid and bins and this one for my paint in drop bottles. I could print bigger inserts but firstly I wanted to get rid of ABS filament that warps too much if it were any bigger and secondly I wanted to keep it small enough if I wanted to reconfigure the inside of the box in the future. The ABS filament was a huge pain to print out to begin with. It was the cheapest filament imaginable as it was part of a 3D pen. Not only gave me the filament head aches from the fumes but also many many many print failures due to extreme warping and the filament breaking apart.
The only thing that I can rant about is the AWFUL Citadel paint. It dries up way too fast. The STUPID tubs don't seal well enough and it's TEDIOUS to get paint out without contaminating the paint with other paint. It's another story for another time. As soon as I empty the Citadel paint I won't buy anymore of them. This is why I didn't made any special inserts for them.
Despite all the problems I had I am somewhat OK with the result. Yeah... I see the flaws at every corner and step I made, the prints aren't as clean as it could be but I made something from stuff I was already getting rid of for something another one wanted to get rid of. I rather have it at the state it already is instead of chucking it into the bin and doing all the work all over again for minor flaws that don't impede the functionality and practical use of the box.
#miniature painting#storage#3d printing#gridfinity#airbrush#dnd#dungeons & dragons#my art#recycling#upcykling#rant
8 notes
·
View notes
Text
Oh boy... Concrete Bulbasaur
I got a request from a family member to make a Bulbasaur from concrete for their garden. I explained that I never did it and 3D-printing any kind of mold will be expensive and may result in many failures AND it will take a long time but they have faith in me.
I think I will 3D-print a positive and use silicone for the mold. It'll make it easier to remove the mold from the hard concrete in comparison to a hard shell mold. BUT to conserve the extremely expensive silicone I need to create a tightly fitting box that can be reused for the concrete pour. I predict that there will be bubbles galore in both the silicone and the concrete. Nobody I know has a sufficiently large vacuum or pressure chamber for removing bubbles. I ain't gonna buy that.
Gonna need to figure out what's the "real" size of Bulbasaur. The size entry in the pokedex seem to be quite off to what I see in screen shots of the anime. I think I'll stick to the smaller anime size.
0 notes
Photo
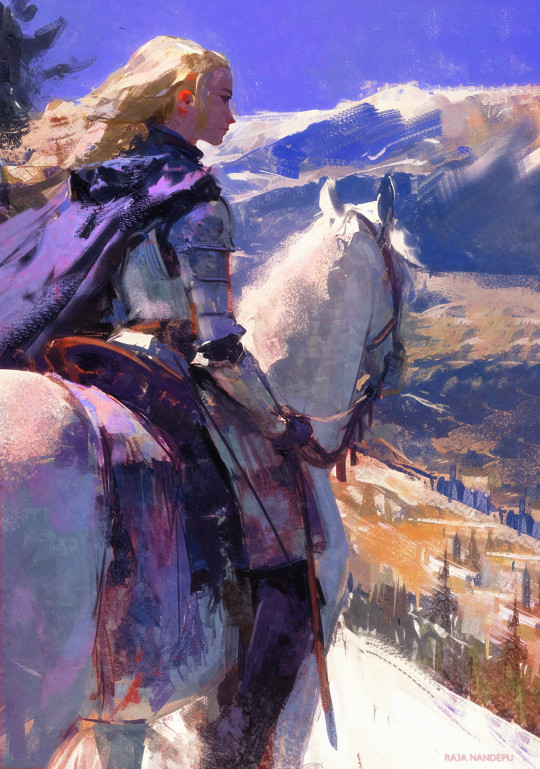
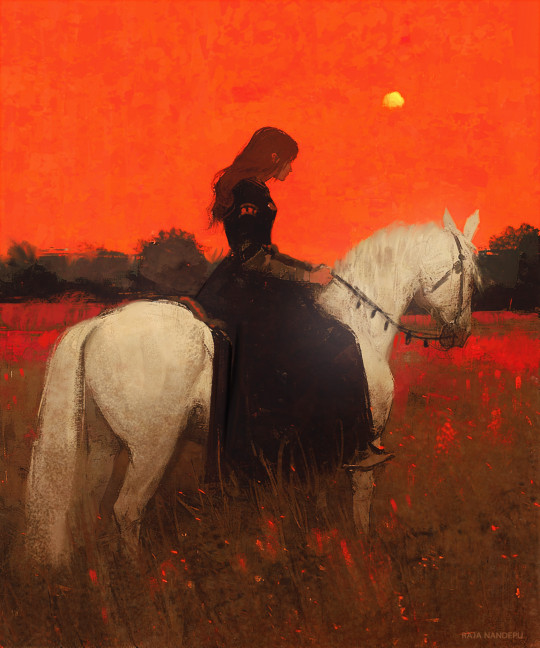


Art by Raja Nandepu
3K notes
·
View notes
Text


Thank you tumblr for reminding me of my own mortality with an image that could be straight out of a MS Word clipart CD from the early 2000s.
0 notes
Text
Ruins of Alph Ho-Oh replica
I was yet again approached by one of my friends to create something from Pokémon, namely the Ho-Oh puzzle from the Ruins of Alph from Pokémon Gold/Silver/Crystal. I did such a good job with my previous Pokémon creations that they felt compelled to have something too. This time I was compensated fairly.
I used a screen shot from the Game Boy Color game, traced it in Adobe Illustrator. Instead of trying an exact copy I tried to imitate a look of a ragged outline that resembles the pixelated look without being too on the nose.
Then the file needed to be converted into a SVG in Inkscape (because of some wonkyness importing it into Autodesk Fusion 360), and then imported it into Autodesk Fusion 360, where I extruded the areas into a 3D-printable giant cookie cutter model. With that giant cookie cutter printed out I put that immediately into action and stamped an equally-sized slab of polymer clay (about 15cm x 15cm) and textured it with a balled-up piece of aluminium foil. After 30 minutes of baking and a little bit of cool-off time the most arduous part began with the painting process. It took me about 6 hours of carefully building up (and messing up) the paint job with the crappy acrylic paint that won't get used up fast enough. I messed it up a few times trying some color experiments and using my miniature painting washes. The last part was that gave me the most head ache as they are hard to fix when applied. Washing or rubbing it off meant that the crappy acrylic paint would also be removed. I felt stuck at some point using the wash as it made the surface too glossy and the brown darkened a ton. I was disheartened for a bit but rolled with that mistake. All I wanted was to have some minor darker variations. The majority of the time painting on it was to create a more coherent look by switching between dry brushing and applying very thinned layers of more washes. I got to a point that made me happy again with the outcome (also a little bit of sleep helped too).
For the photo I used my Canon EOS 350D (Canon EOS Rebel XT), for which I needed to buy a new battery. The old battery couldn't hold a charge. Next to my house there is a big patch of moss I find quite appealing to look at and I thought it would complement the golden-brown paint job very well. I propped it up with a small box so the whole thing wouldn't sink completely into the squishy moss bed.
3 notes
·
View notes
Text
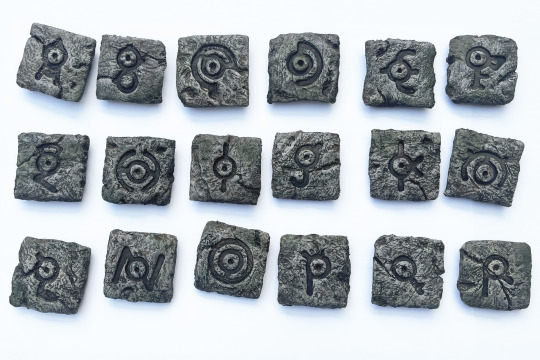
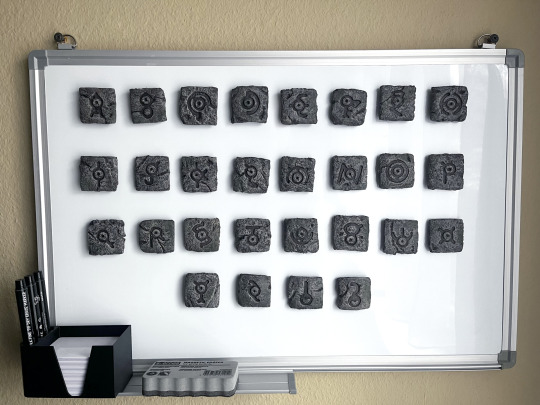
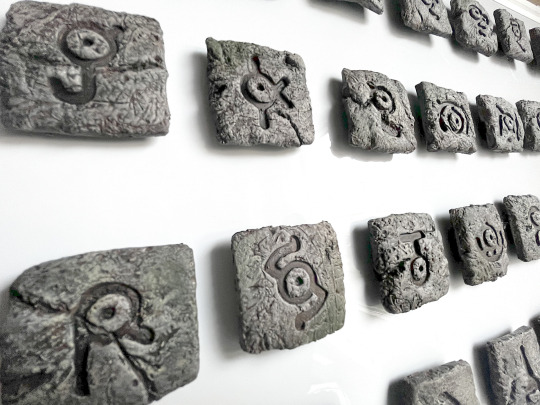

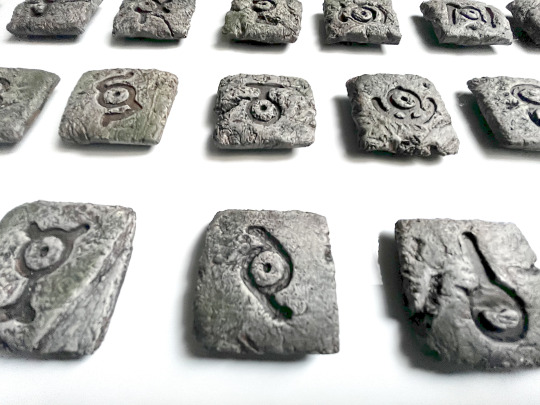
I finished a set of magnetic Unown alphabet tiles for a whiteboard out of polymer clay and painted them with acrylic paint.
After I gifted the Mew stone carving I got a request for another Pokémon-related replica (nothing specific) for their birthday. These tiles are inspired by the Unown tiles from the third Pokémon movie.
I think the result ended up pretty neat, although I got a little bit too heavy on the distressing and texturing. Nonetheless I'm satisfied.
34 notes
·
View notes
Text


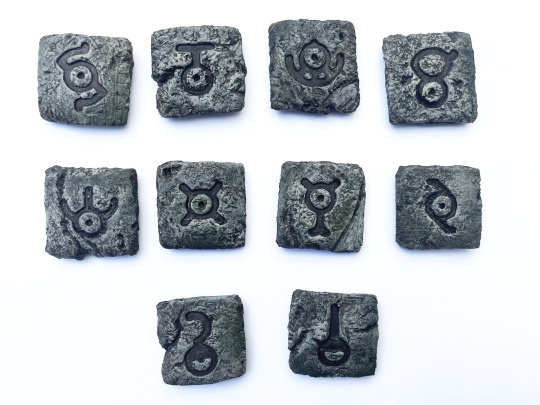
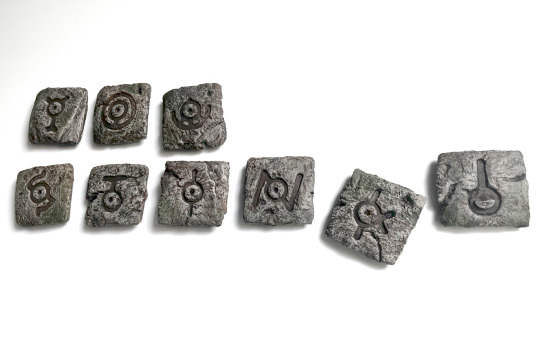
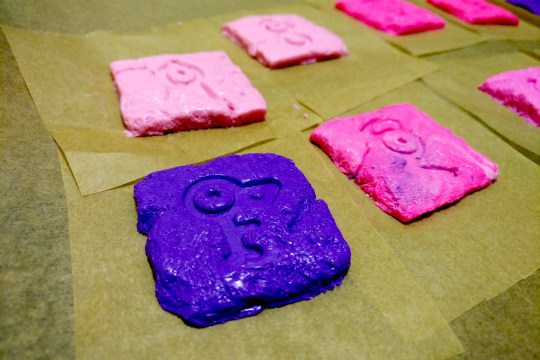
The next batch of forbidden cookies!
Seriously... If they were in any cookie dough color they would be eaten in an instant.
I'll make the remaining 7 (V, W, X, Y, Z, ?, !) tomorrow. After that I can finally put some primer, which will take up some time. Once that is finished the most transformative step, the painting and dry-brushing, will give them life!
I'm debating with myself of acquiring glow-in-the-dark paint for the unown imprint, however I already do more work than I should.

A few weeks ago I posted the Mew stone carving from the first Pokémon movie that I made with polymer clay. It was a birthday gift for a friend. It was received very well...
Too well...
Not only did the gifted like it very much, so did another friend who was also at the party. They were almost jealous and expressed that they wanted also something like that for their birthday.
Last week I was pondering what to make and it struck me. I had the idea to make the Unown tiles from the third Pokémon movie, or my interpretation of. In the end I plan to paint them with acrylic paint to achieve a stone-like appearance and stick magnets on the back (for the fridge or white-board).
I promptly ordered a big bunch of cheap polymer clay and started 3d-printing all the necessary forms and tools to aid me in the process. I used an image with the whole Unown alphabet, traced it in my CAD program of choice Autodesk Fusion 360 and made something alike a stamp in order to imprint each letter into the clay. Also I made a simple 4cm x 4cm and 0.5cm thick frame to make the size of the tiles consistent.
While handling the clay it was clear that I might have bought polymer clay that was a little too cheap, or to say the least not suitable for my application. This clay was way too sticky and stretchy for my liking. My first experience was with the well known brand FIMO (by Staedtler), at least somewhat well known in Germany. That clay was more tough but smaller mistakes or minor mishandling mishaps did not imprint immediately. The cheap stuff was advertised for children... Maybe that was on me to expect a similar experience for half the price and twice amount...
In the images above you can see my first test batch with the clay.
2 notes
·
View notes
Text
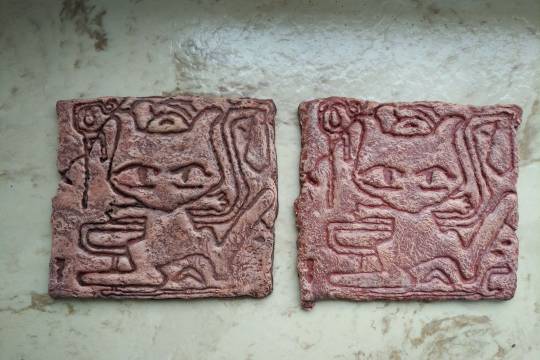
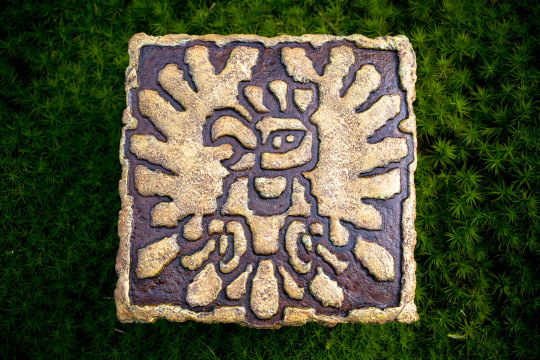
For a birthday gift for a friend, who is a small pokemaniac, I crafted a Mew stone carving (from the first Pokemon movie) out of polymer clay.
I used Adobe Illustrator to trace a screenshot and 3D-printed a cookie cutter and stamped it into the polymer clay and added additional stone texture with a ball of aluminium foil. After baking it at 130°C (266°F) for 40 minutes I used the crappiest acrylic paint I own. I had an abundance of it and didn't want to waste my expensive paint I use for my miniatures. It did the job anyway but the paint is darkening so much when dry that they turn almost black. With a liberal amount of white and other brighter paint (yellow, orange, red) I got to the end eventually.
21 notes
·
View notes