
Last Seen Blogs

enjoymaaryaar-blog
EnjoyMaarYaar

antelabelleza-blog
sirithar

theineffablecon
The Ineffable Con

kerubimcrepin
Ph.D in Crepinjurgenology Studies

Text
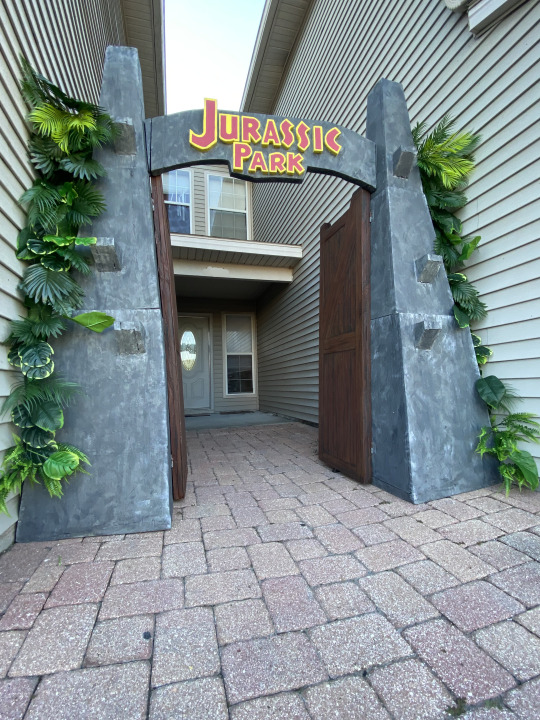


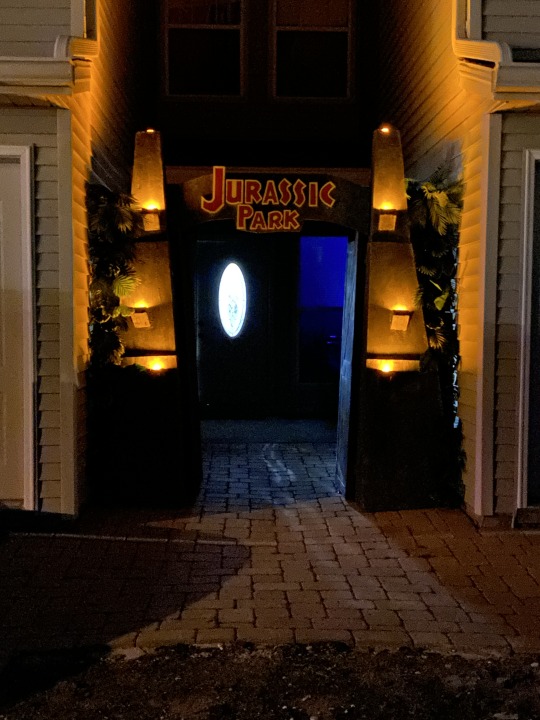
The gates are finally done! For texturing, I used a technique I saw on youtube. Spraying water and then using a heat gun over the foam makes a cool crackling effect. They were then coated with a waterproofing paint and then a small can of grey house paint. I sponged on some acrylics in different greys and then gave it a wash of black to give it a weathered look. Finally, I used the foam scraps to make side panels and covered them in faux plants.
I wanted to make the door up as the visitor complex, but I ran out of time. However, I'm really happy with how they came out and the trick or treaters seem to be enjoying them.
Happy Halloween!
24 notes
·
View notes
Text


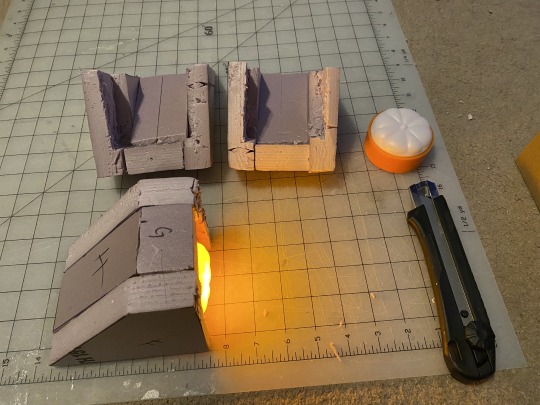


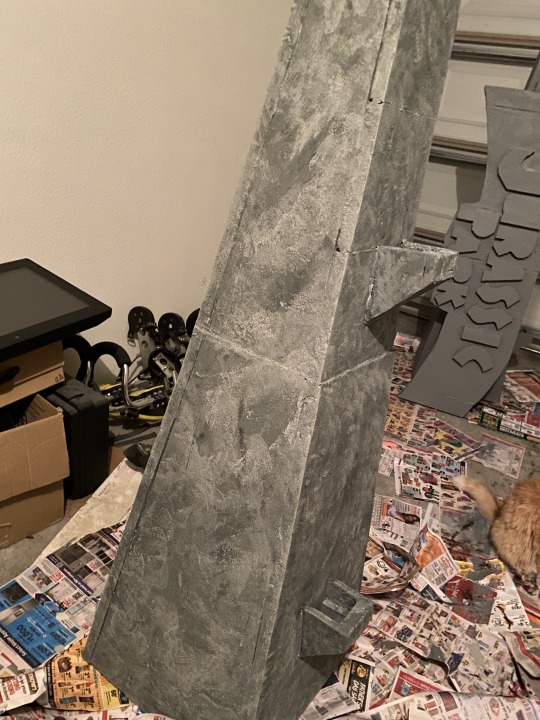
Jurassic Park Gates continued - I made the small torch holders and, since those little fan flames were way too expensive, I bought some simple flickering pumpkin lights to put inside them. Each holder has a shelf cut into it to keep the light from dropping all the way in. The picture above is a quick stack test. The top two pieces and the larger bottom piece are not currently attached to one another. I'm going to come up with a way to make it so they'll come apart for storage.
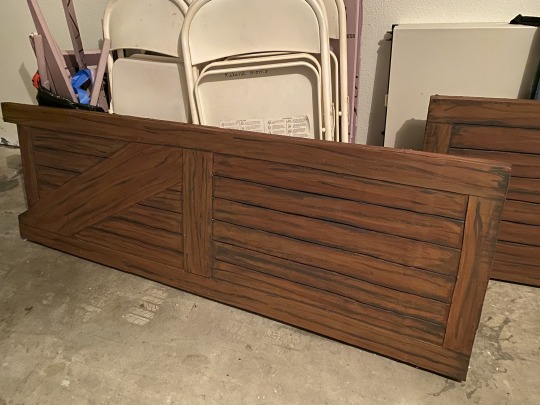
For the doors, I glued two boards together and then cut the front pattern out of thin foam I bought in a roll from Michaels. This was glued on and then grooves were cut out between the "wood panels".
I want the doors to come off (again for storage), so I used these hinges that easily come apart. I did have to buy left and right hinges which were sold separately though.
The arched sign will also be made to come off. I'm going to do some tests with industrial strength velcro to see if that works. Once that part is sorted, it'll be on to texturing with this cool technique I saw on Youtube and then weatherproofing and painting!
3 notes
·
View notes
Text


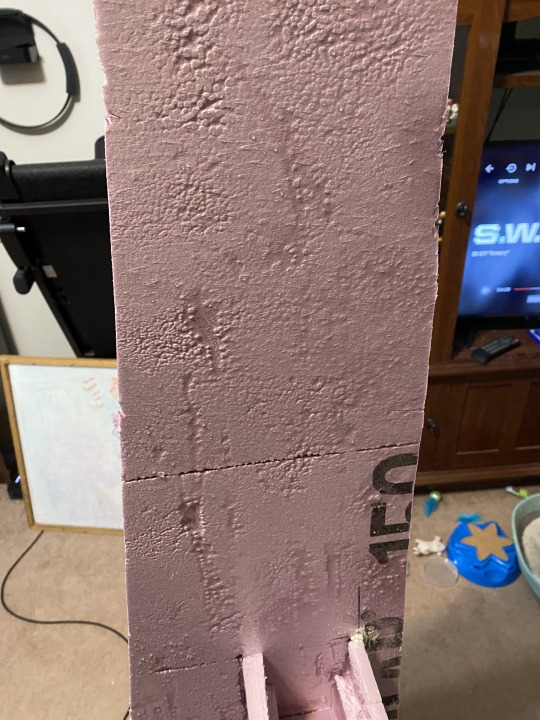
This year's Halloween Doorway theme will be Jurassic Park, so I decided to start off with the iconic gates! I grabbed a picture off the internet and printed it, then used a scale ratio calculator to figure out the ratio between the picture and the size of my porch entryway. With that ratio, I was able to use the calculator to figure out the size of everything. After a quick run to Home Depot for several sheets of one inch foam, and a little surgery in the parking lot since they wouldn't fit in the car, I got started!
I glued and taped the boards back together, then measured and cut out all the pieces. With some gap filler, I plugged any egregious gaps from where I'd cut into the foam that the glue didn't quite fix. After a little sanding, I formed the basic blocks and used some toothpicks and painters tape to help align and keep the pieces together while they dried. The sign was a bit tricky. After stacking all the pieces in place, I discovered that one - They were shorter then I wanted, so I added about a foot to give them a more impressive height, two - I'd need to add a wedge at the bottom to compensate for the angled drainage in the porch paving and three - the sign was somehow too short, so I added another inch or two to either side. Really glad I tried it out before I went any further.
Next up, the doors and lights!
10 notes
·
View notes
Photo
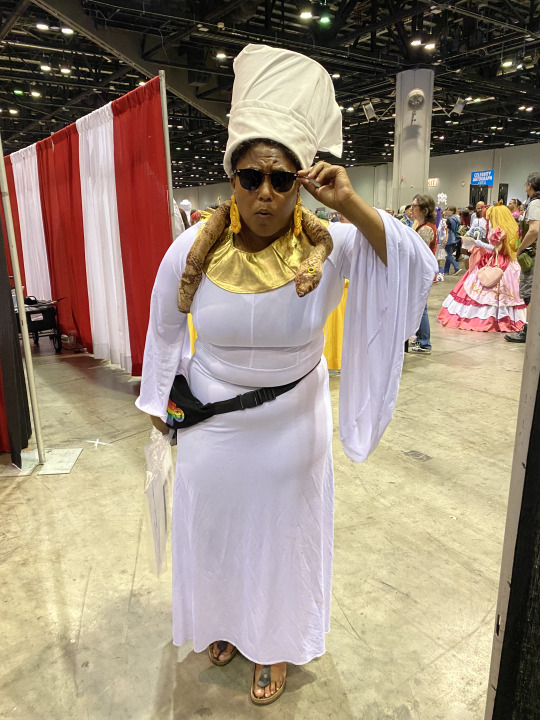


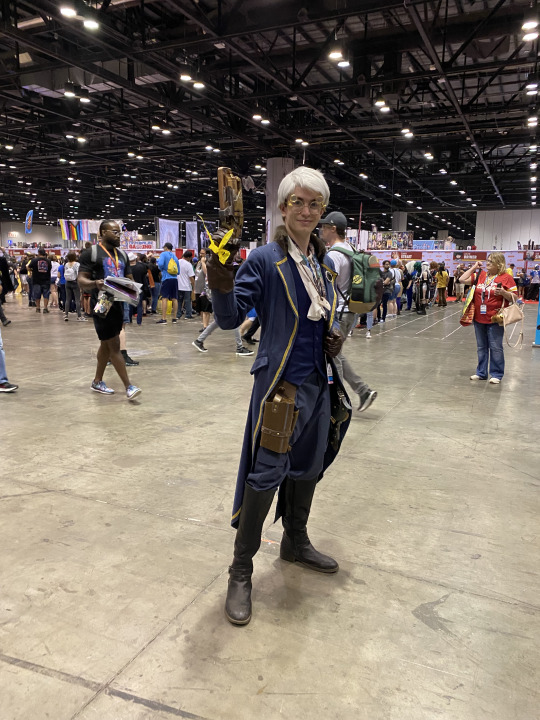
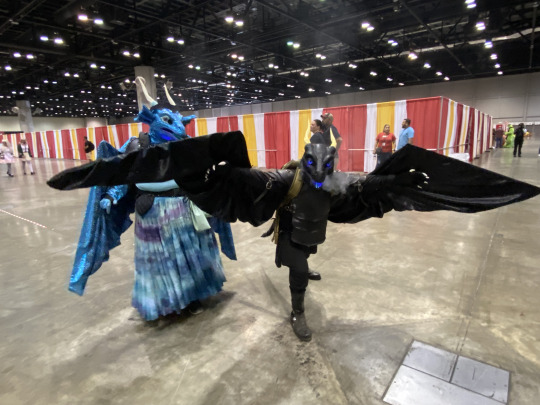
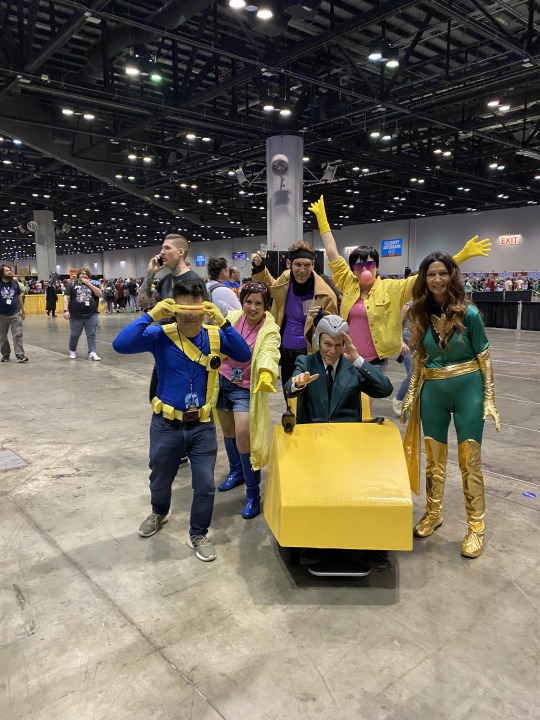

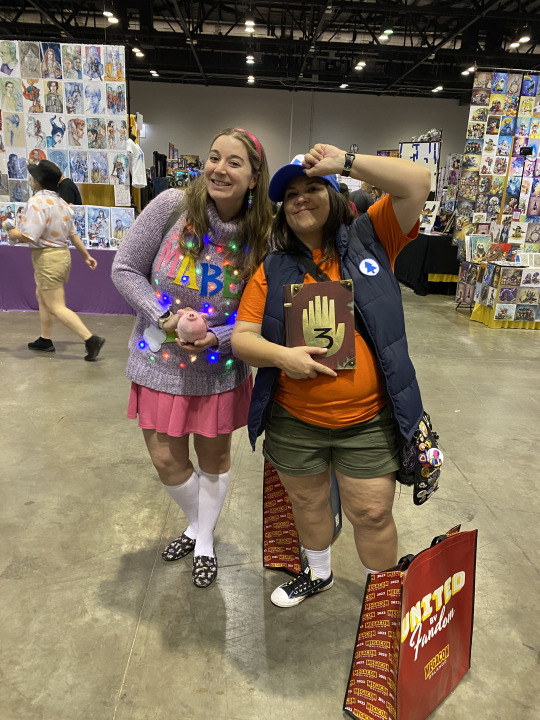


Here are some other great cosplays I saw at Megacon!
#Megacon#Megacon 2023#Mama Odie#Princess and the frog#terminator#T-1000#Eevee#Pokemon#Percy#Percy and Vex#Vex'ahlia#Dragons#Xmen#Gravity Falls#Stan Pines#Bill Cypher#Stanford Pines#Dipper#Mabel#Godzilla#Cosplay
49 notes
·
View notes
Photo


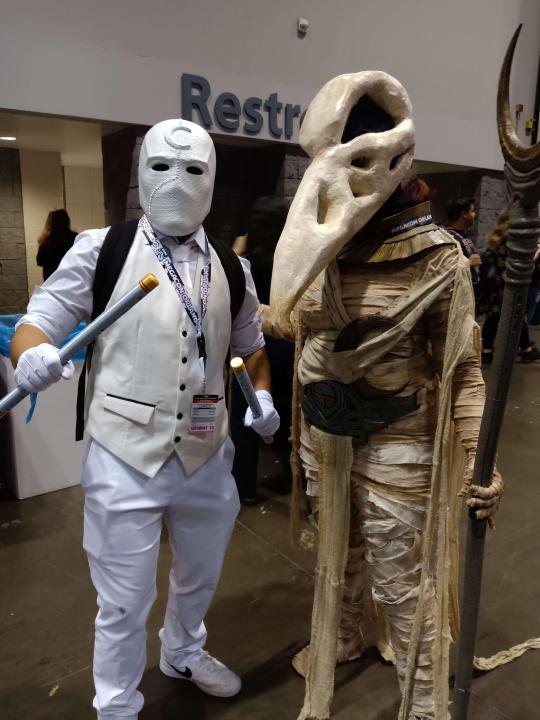

My Khonshu costume! Unfortunately the staff warped and broke in the car on Thursday, but a lovely cosplay repairman helped me get it mostly back together. The moon and cape also slipped often while I was walking about. I ended up sewing it later but it’s askew in several of these pics. Regardless, I’m really happy how it came out and that so many people said they liked it. My most popular costume to date hands down! I’ll remake the staff and wear it again one day for sure.
27 notes
·
View notes
Photo


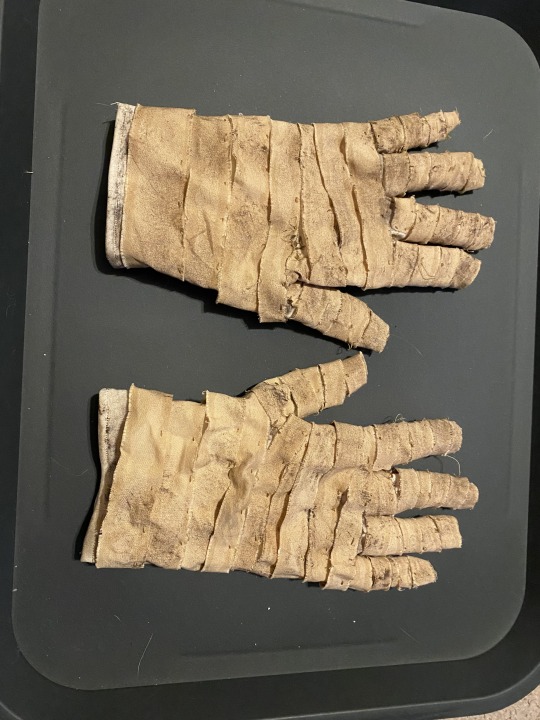

I created Khonshu’s many many bandages by cutting strips of different types of fabric, dying them with tea (and sometimes coffee), and then dry brushing them with brown paint. Once dry, they were hand sewn to dyed pants, shirt, and gloves and to some shoe covers I made. The flowy robe and loincloth were made of cheesecloth which was dyed with the same process. I realized after dying everthing that the fabric I had chosen frayed a lot. I ended up using about 8 1/2 bottles of fray check to stop all the errant strings.
4 notes
·
View notes
Photo

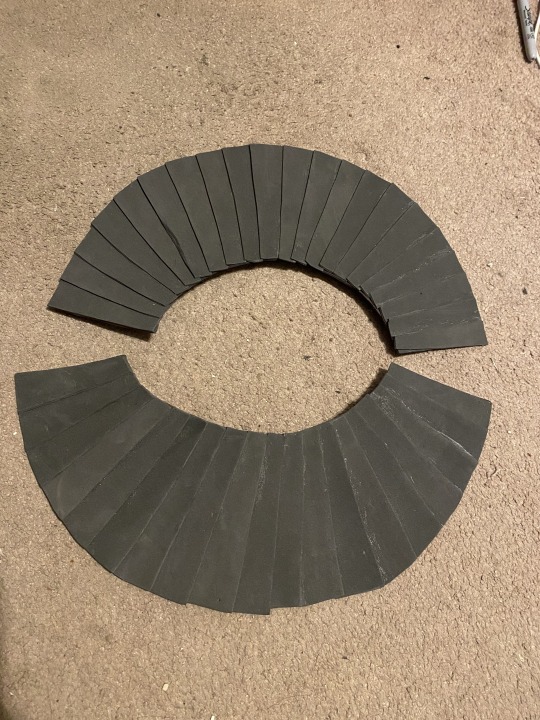


I finished the paint job on the head and made the collar and belt. Both collar and belt are made with layered foam glued together with contact cement. Once dry, they were mod-podged and painted with acrylics. The collar has velcro on one side to make it easier to take on and off.
7 notes
·
View notes
Photo


Here’s my Khonshu staff. I 3D printed it with the help of a file I bought, assembled it with liquid nails and primed it with a coat of sandable primer. Then I added a base coat of grey and dark brown followed by a second coat of dry brushed light brown and gold. The other side has the inlaid part that’s showing in the picture. I’m quite happy with how it came out!
13 notes
·
View notes
Photo
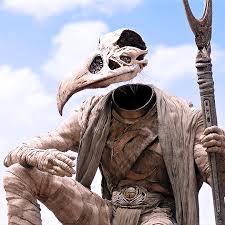


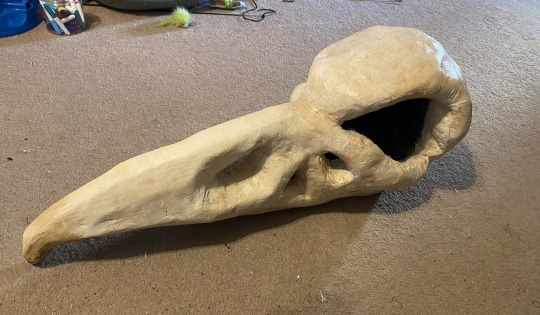
I’ve been working on a Khonshu costume for Megacon! Here’s the head so far. I started with a foam base. Paper mached around it and ended up cutting the eyes larger. Both outside and inside were coated with a thin layer of joint compound to help harden and smooth it and then a layer of mod podge to keep it from cracking. A foam head kept it from drying too small and after the outside was mostly done, I added fleece and foam to the inside to make it more comfortable to wear and cut out a larger area around the mouth and nose so I can breathe easier. From here, I’ll be finishing the paint job and add black mesh in the eye holes. -- Khonshu photo is not mine
18 notes
·
View notes
Text
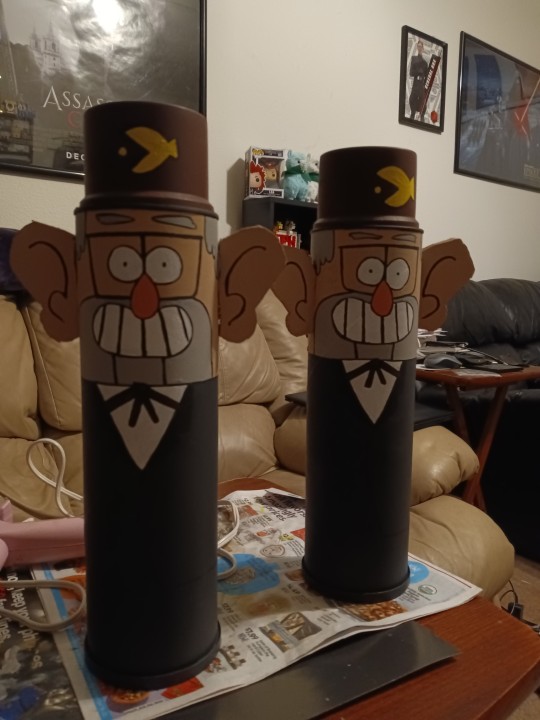
I am proud of these dumb things.
Roommate made these Stan "nutcrackers" for our Shack setup and I love them so much I can't properly put it into words.
47 notes
·
View notes
Photo


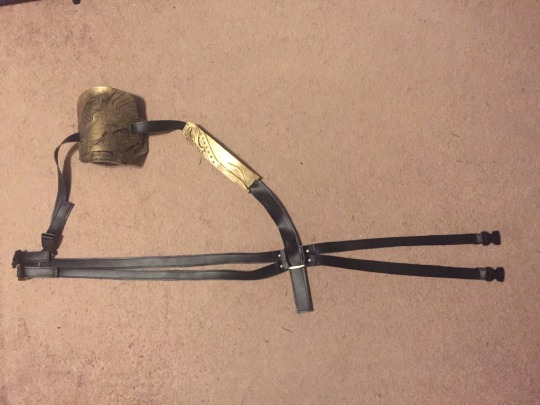
Next I made the armor from a couple layers of thin craft foam. For the patterns, I found some very helpful ones put up by Khaos Kostumes. All the etched lines were done with a pen and small rod from the back end of a dremmel head. The holes in the wrist pieces where made with a pen tip. I used a leather hole punch to make the rivets and some gold cord to add a thin ridge along the outside of the wrist pieces. All were spray painted with gold paint and accented with a wash of black acrylic.
Then I made the belts from some black pleather and added some clips I got at my old job a while back. The buckle was from a bag of buckles I got at a yard sale once upon a time. It’s attached to the belts with short loops sewn onto either side and one on the back on the larger belt. I added four silver fastners through the small loops for accent.
4 notes
·
View notes
Photo


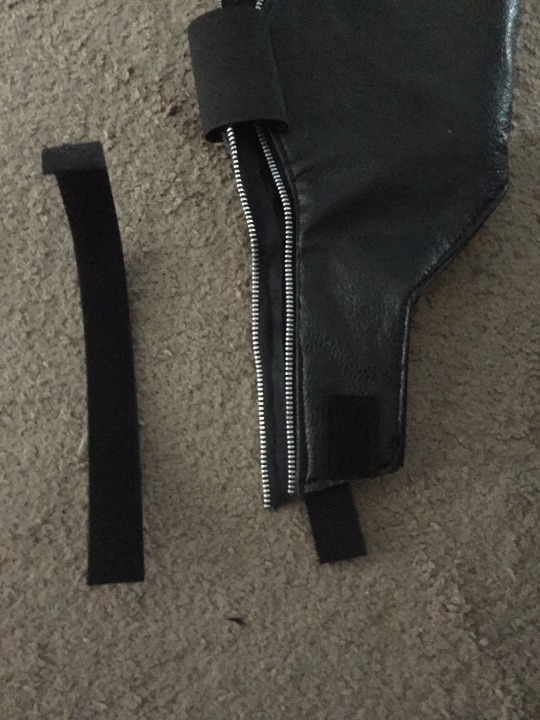


With all the free time I’ve had lately, I’ve gotten back to working on my Loki costume I started around September last year. I’ve already made the tunic and coat. These are my boot covers. For the studs, I used metal fastners. The store didn’t have silver, so I painted gold ones with some spray paint.
They’re not super accurate. I found better pictures after I made them. Oh well. I still like how they look.
3 notes
·
View notes
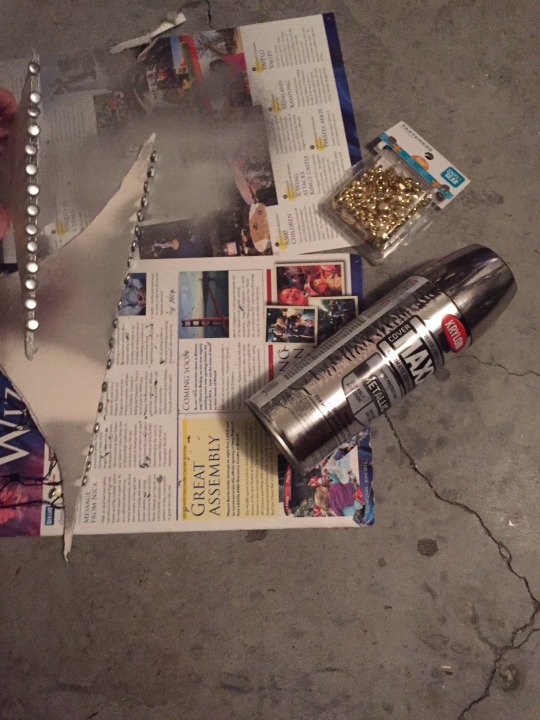
Photo


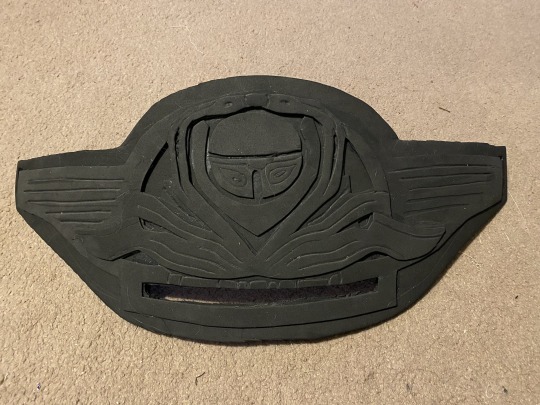
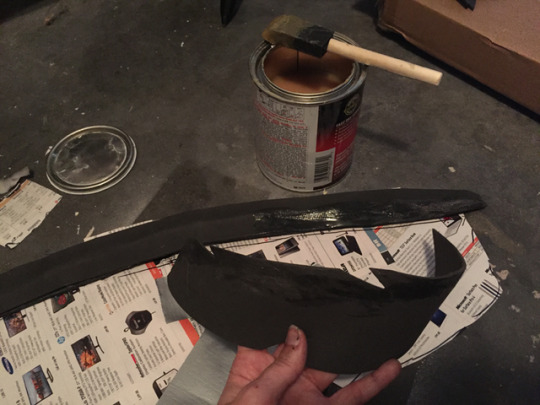
Asene Mask
The last thing to make was the mask. I started out with some thin craft foam. Next I paper mached it and after the initial covering, bulked up the bottom a bit while leaving the top thin and light. I spray painted the front white and the back black. Then I busted out the old acrylic paints and made a messy semblance of fire. I added some painted formerly white netting for the eye holes and got out some black felt. Drawing Arsene’s face shapes in chalk, I cut them out and glued the felt down. After the front was done, I tucked the extra bits behind with more glue and added some straps and buckles to connect it to the head harness I made for the top hat. It’s connected on the sides and top, which actually holds it on rather well.
And with that, the costume is done. It’s probably one of the most ambitious projects I’ve done a week before the convention but I’m pretty happy with it. I have a few small fixes to do but, since the con is in about 9 hours, I’ll leave it alone and fix it for next time.
4 notes
·
View notes
Photo


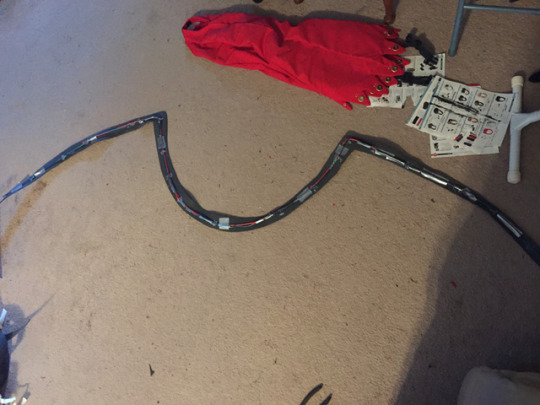

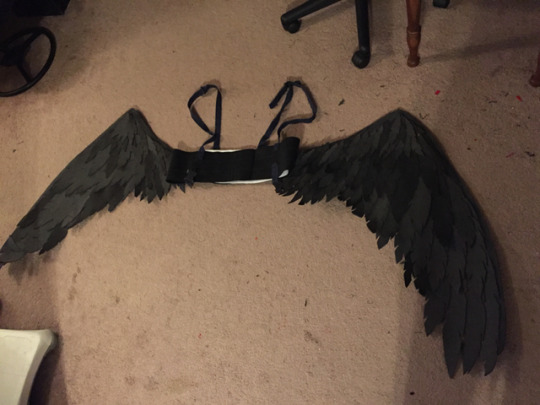
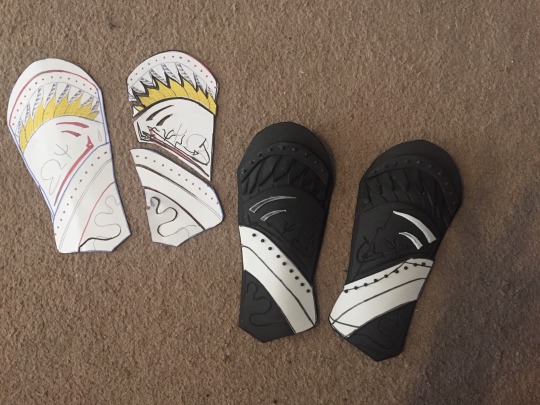
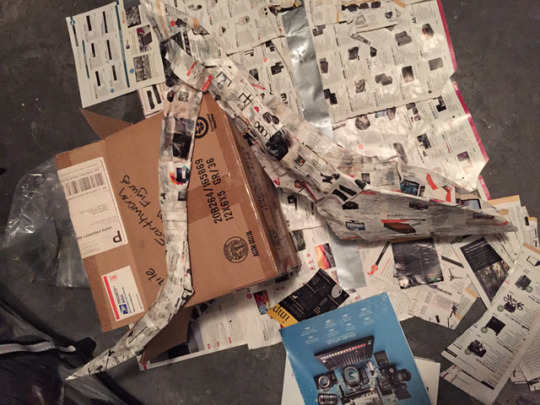
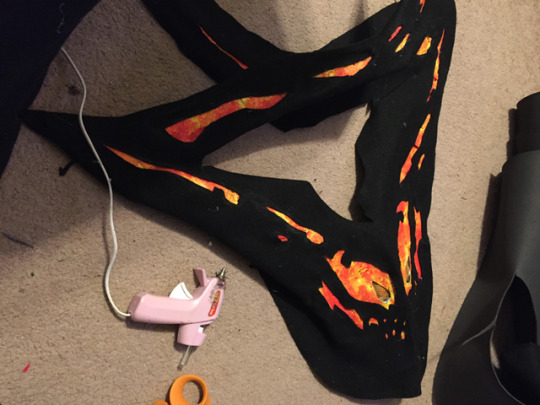
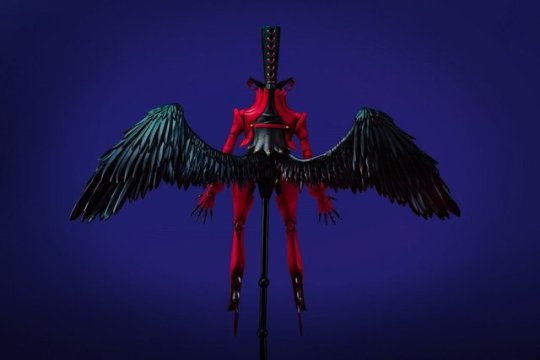
Arsene Boots and Wings
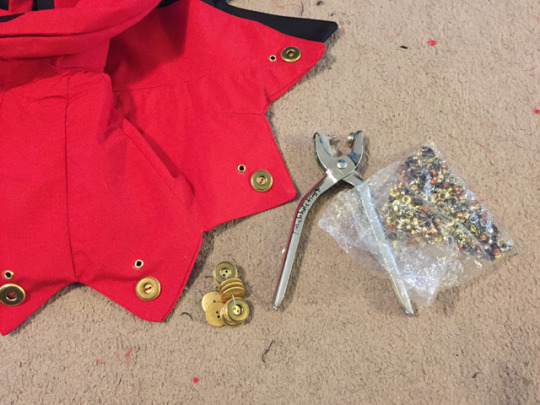
I made up a pattern for the boot cover/pants and after sewing them together and making a few adjustments so they fit right, I added the same button and grommet treatment as the jacket. Since they’re placed around the thighs and all thigh cosplay pieces slide off the thigh area while walking, I added straps and clips to allow them to attach to the harness I’ll be using for the wings.
Next up was the wings. I made a foam outline for them and added some wire within to help support them. Then it was time for a couple hours of gluing the individual feathers on with contact cement. Big thanks to my roommates for helping me with cutting out all those feathers! I couldn’t have finished it in time without them. Once all the gluing was done, I sewed them to the harness along with some stiff interfacing to help keep the harness from drooping. They could definitely use more support, but it will have to do for now.
2 notes
·
View notes
Photo

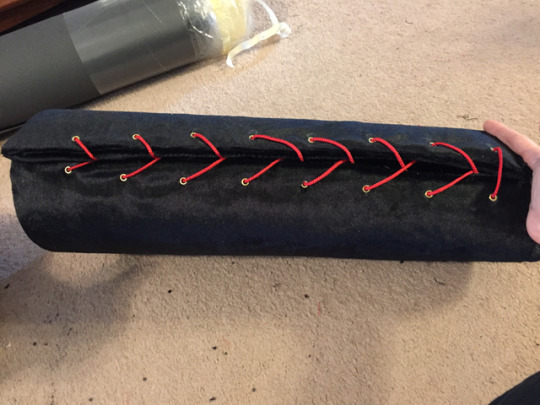


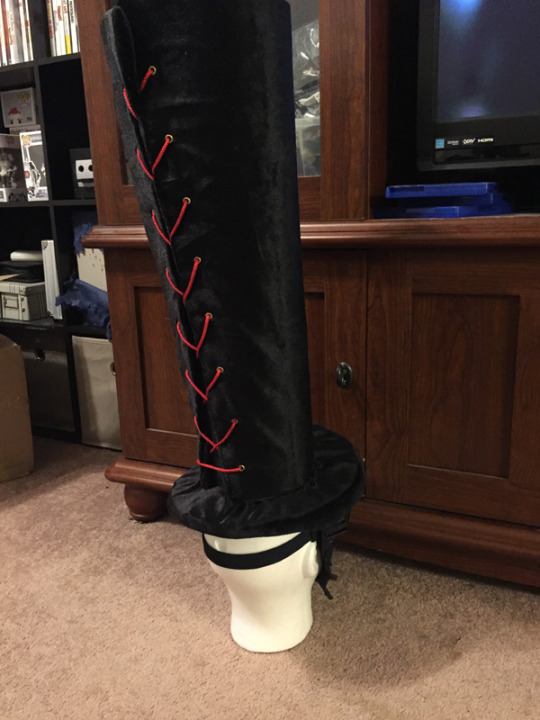
This is Arsene’s very tall hat. I made it out of foam and some velvety material. The hat was having problems staying upright due to it’s size, so I added a piece of foam from an old exercise mat. I painted it black so it wouldn’t be noticeable from the back and stuffed it inside. I also added some stiffer foam to the brim. Now that the hat was more structurally sound, I needed to figure out a way to keep it and the mask on my head without doing a balancing act, so I made up this little harness. It wraps around my jaw, the back of my head and extends into the center of the hat, where it connects to two straps attached to the top of the hat. It actually works pretty well. The two buckles at the sides will connect to the mask once I’ve finished it and hopefully everything will work well together.
Tomorrow I’ll finish the boot cover/leg pieces in the morning, finish up the mask after that and then make the wings. Only one day left. Here’s hoping everything goes to plan!
8 notes
·
View notes
Photo


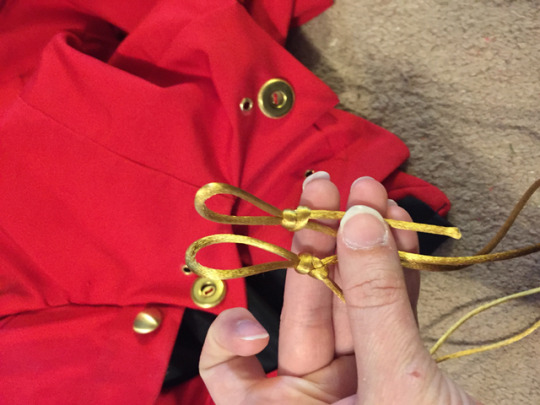


Once the decal was on, I pulled out some gold cord I had from another costume to make the gold chains at the front of the jacket. I made a simple loop on one side and some slip knots on the other and attached them to buttons on either side of the collar. The jacket still needs the button hole markings on the sides of the collar, which I’ll add if there’s time.
Next I moved on to the vest. I used a vest pattern, altering it slightly to change the seam lines and add pointed ends. Once it was together, I added grommets and laced it up with some red string. I need to fix the front a little to add the cutout shape on Arsene’s vest, but again, I’ll do it if there’s time.
The cravat was made with a square piece of fabric sewn and gathered at the top attached to a long rectangle of fabric with velcroed ends. The blue piece at the middle is another button from Grandma’s jar.
10 notes
·
View notes
Photo


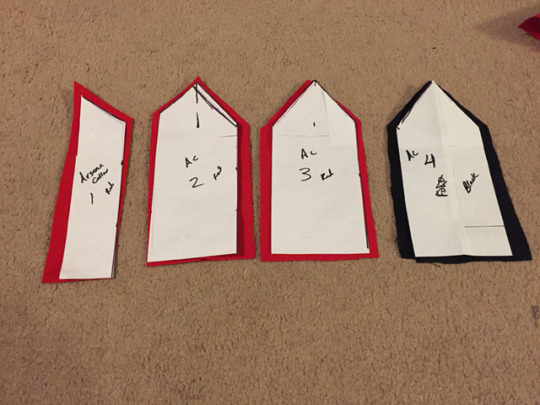


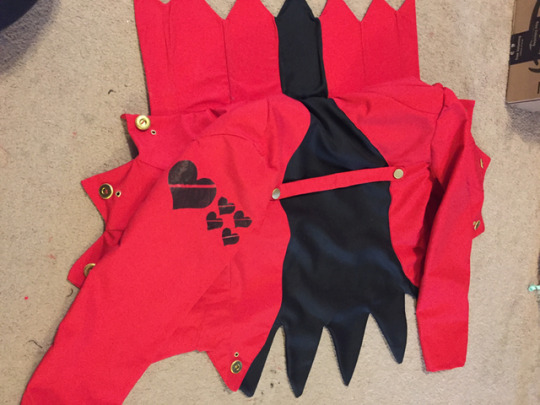
Not for the first time, I’ve decided to make a last minute costume for an upcoming convention (MegaCon in this case). I had intended to post the progress each day, but with a costume this complex and only a week to make it, I just didn’t have time. @_@; So I’m going to post all that I’ve made so far and hopefully have some finished pics tomorrow (later today really). The costume is Arsene from Persona 5.
I started with the jacket since it looked to be one of the more complicated pieces. I used a jacket pattern just to get a basic shape and then drew my pattern pieces. His jacket has strange seam lines as you can see, but I replicated them as well as I could. I used the sleeves straight from the pattern and made up my own pattern for the collar. I added some very stiff interfacing to keep the collar standing. Once the main body of it was done, I started adding the decorations. I had some rivets from another costume and some old buttons from my Grandma’s button jar that did the trick. Next, I used an iron on to apply the heart decals to the sleeve.
2 notes
·
View notes