#3x3=9
Photo
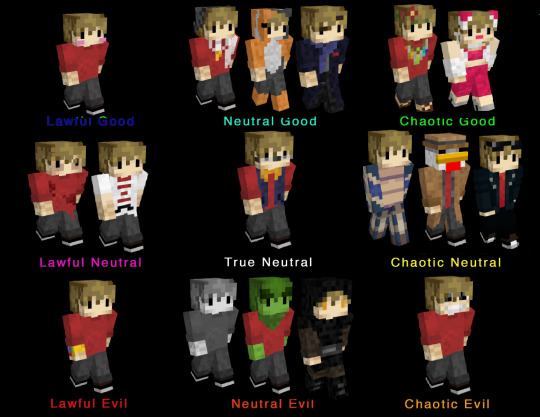
I spent less time than I expected on this.
#grian#3x3 alignment chart#Alignement chart#hermitcraft#hermitcraft season 6#hermitcraft season 7#hermitcraft season 8#hermitcraft season 9#limited life#traffic series#blushing grian#coach grian#guinea pig grian#sherlock grian#hippie grian#ariana griande#mooner grian#mayoral advisor grian#headhunt referee grian#phantom menace grian#poultry man#bad boy grian#thanos grian#demised grian#grianch#sith grian#bdubs x grian abomination#minecraft skin
333 notes
·
View notes
Text


Thought I’d jump onto this bandwagon cause I thought it’d be funny
#9 Favorite Characters#Yusuke Urameshi#Ranma Saotome#Ryo Sanada#Scorpio Milo#Chung Myung#Wei Wuxian#Yuri Lowell#Joe Yabuki#Leona Kingscholar#therapy is needed thanks#I was gonna add Shido from Nightwalker and Izuminokami but I wanted to be fair instead of sticking with characters from my 3x3
30 notes
·
View notes
Text
Numerology, Part 3: Elminx's 3x3 Spell Creation Format

Note: This is by no means solely my own creation and many people have done 3x3 spell formats before me. What I am going to talk about here is why I use this spell format and some specifics on how I use this spell format.
So you want to cast a spell but you're not sure what or how to do it - this spell format works extremely well for me as a basis for the design of the spell. It can be used for spell bags and spell jars of all kinds as well as any other type of container magic, or simply as an adjunct to a candle spell.
The Numerology
The idea behind this is based on numerology and the meaning of the numbers 3 and 9.
The number 3 is associated both with Jupiter in astrology and the Empress card in the tarot - as you think about these associations, you may begin to understand why the number 3 is considered so powerful magically. In essence - it is the number of manifestations - or, at least, quick manifestations. This can be seen in the magic of human creation - it takes two people to make a third. Three is the number of birth of all kinds, not just gestational.
Likewise, the number 9 is the last of the core numbers in numerology - it represents the completion of a cycle. It is also the result of multiplying our power number of 3 by itself. So by combining the quick power of manifestations from the number 3 thrice over, we reach the total manifestation power of the number 9.
How To Put It Together to Make A Spell
This is where the fun and creativity (number 3 also rules creativity!) of this process come in. Once you have chosen your idea for the spell, you now need to separate that main concept into three parts. This can be done in a lot of ways: it could be past/present/future in a spell that really needs to move forward, three aspects of your final manifestation that you want to come to pass, or really anything that comes to mind.
For a general money spell, it might be money drawing (1), protection for your finances (2), and luck in money (3).
For a spell to protect you from the effects of Mercury's upcoming retrograde, you could base it on the three planets of yours that are going to be most impacted by the retrograde. Alternatively, you could do Keep My Thoughts Collected (1), I Can Write With Ease (2), and My Internet Signal is Strong (3) for a project that needs to be worked on during the retrograde.
The options here are endless just keep in mind that your three objectives should be interrelated in some way. And they should all feed the main objective of your spell.
Now that you have chosen three micro-objectives that support your main objective, you want to come up with three correspondences that feed your micro-objective. These can be as varied as you can imagine: sigils, herbs, rocks, feathers, individual petitions - the sky is really the limit here. You just want each set of three to be unique to one another.
To use the money spell example above: perhaps you might use a loadstone, catnip, and alfalfa for money drawing; bank dirt, a canceled check, and nettles for money protection; and basil, cinnamon, and tiger's eyes for luck in money.
In this way, we could see that we are casting three spells within one or three micro enchantments to support our larger goal. Depending on the complexity of the spell and the energies required, each micro enchantment can be cast on a separate occasion (say on the day of the week that supports each) but in close succession or cast all at once time.
The Details
This may seem like a lot, especially if you are a beginning caster. Remember here that although you are using 9 different ingredients for this spell, they do not need to be expensive nor do you need to use a lot of each item. When I craft a spell bag or spell jar in this type of fashion, I am often using a pinch of any particular herb.
There are a lot of ways to individualize this spell format.
If you use candle magic, I would suggest utilizing a main larger candle for the spell as a whole with three additional supporting candles (chimes work well here) to support the individual elements of this work. You can also choose to burn the candle in increments of three - for three hours at a time or for three or nine days. You can use color correspondences to support each individual goal or the whole.
Rather than being correspondences, you can create individualized goals for yourself - three physical actions that you need to take in the real world to enhance the magic of your working.
Looked at from a different perspective, each set of parts of the whole could be entirely different from one another. The first could be cleansing to rid yourself of the negativity associated with this work, the second could be creating a talisman of some sort to enhance that work, and the third could be the empowerment of this talisman.
The goal here isn't to create a rigid format with which you are forced to follow but to give you ideas about how to incorporate the power of 3x3 and its manifestation potential into your spellwork. The details, as always, are up to you.
--------------------------------------
This is part of an ongoing series about Numerology:
Part One: Combining Numerology and Astrology
Part Two: Numerology Applications in Spellwork
Do you like my work? You can support me by tipping me on here or on Kofi, or commissioning me to write an astrology natal birth chart or transit chart just for you.
37 notes
·
View notes
Text
super mario bros movie (2023) spoilers without context


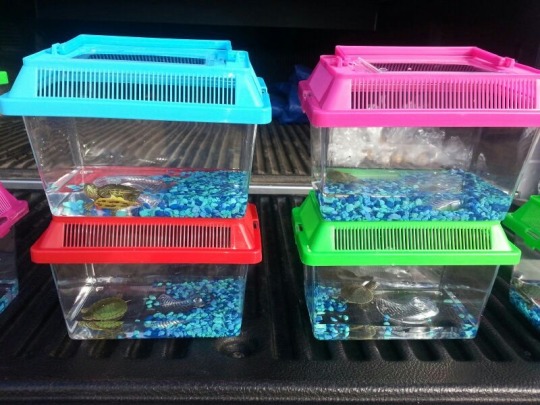
#lakimusings#hehe mario#mario movie#super mario bros movie#mario movie spoilers#spoilers without context#i was kinda hoping they’d be in a 3x3 grid style#but this works too with the final image being big#mario telling peach that he would buy her a turtle reminded me of when i lived in philly and there were people a block away from my house#and people at subway stations selling baby turtles in containers like that#obviously not good for the turtles (and its illegal to sell turtles that small anyway)#but it’s a small part of my childhood that i got reminded of in the movie and maybe the sort he wouldve bought if he didnt know better#i had a few other ideas but i like making them in sets of 9 and i dont have enough for another set 💀#so enjoy
36 notes
·
View notes
Text
Just when I think I couldn't love Reece and Steve anymore, they pull an absolute blinder. What a fabulous bait and switch.
#inside no 9#steve pemberton#reece shearsmith#3x3#lee mack#i knew they didn't want to do a bus episode!#well played fellas
22 notes
·
View notes
Text
im heartbroken abt the bus too but 3x3 wasnt that bad yall r just salty
#maybe one day we'll get a bus#the whole concept of 3x3 just reeked of dead line 2 electric boogaloo but i did not realise until the second watch#did you lot really expect them not to do a dead line again#steve and reece are in their lil houses rn on twitter kicking they feet seeing how fucking dumb we all look#in abt a year 3x3 is gonna be considered 'the best no 9 they ever did' 'better than dead line' (even tho its not) and you KNOW IT#and when that happens im gonna be here waving my “first 3x3 defender” badge#in9#inside no 9#inside number 9#inside number nine#3x3#hold on tight#3 by 3#3 by 3 in9#steve pemberton#reece shearsmith#lee mack#uk tv#britcoms#bbc#also i loved that it was a pisstake of pointless. i hate pointless
20 notes
·
View notes
Text


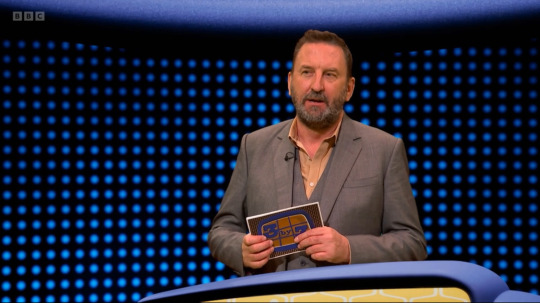
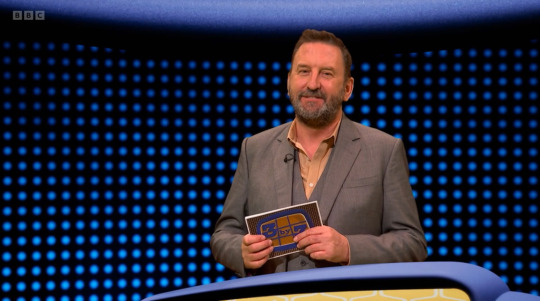
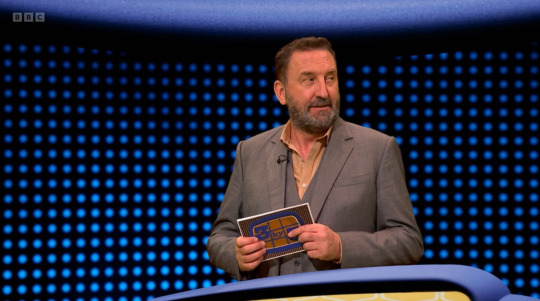


Lee Mack
Inside Number 9: 3x3
10 notes
·
View notes
Text

maybe im the best there ever was?
3 notes
·
View notes
Text
UKGameshows revies 3x3 as a real quiz show, not as an Inside Number 9 script. And you know what, there's been worse made it to air in the UK...
"But though it may have been a fictional show, the fact that we can give you a genuine synopsis of the format goes to show how well thought-out it was. We've seen a great many spoofs over the years (we even have a page listing them) but rarely anything that could plausibly exist as a game show in the real world. Yes, there are possible holes in the format, which we've pointed out in the synopsis, but overall it's a remarkably good attempt - and the actual question writing isn't bad either (many a writer of fiction comes a cropper when inventing questions for fake quizzes, so to see something good enough to pass for a real show is astonishingly rare.)"
5 notes
·
View notes
Text
need to make a "they just like me fr (deragatory)" 3x3
#idk if i could find 9 characters like this tho. tbh#saeko and erika are the guaranteed ones but other than that idk which fictional characters are just like me fr (deragatory)...#maybe i will just make a normal 3x3 of characters i love forever
3 notes
·
View notes
Text

Over a year without playing a sudoku and yet when i spring for hard (while sleep deprived, mind you) I get 8 mins first try.
"Hard", they call it. Sure.
#speculation nation#the iq thing is some bs lmao. but honestly they make it insanely easy#smth this one does that the last app i used didnt do. it vibrates in warning if i try to mark smth that doesnt work#like i accidentally marked a possible 6 in a row that already had a 6#which. honestly that feels Too easy. like just let me make my mistakes. i'll figure it out in time.#but yeah theres honestly no point in playing anything less than hard. bc even a 'hard' really is pretty simple#i'd go for an expert but with how numb my brain is rn id probably just fuck it up lmao#sudoku is fun tho. i missed this.#i wonder if i could find those massive like 4/16 block ones. where it moves into letters to extend the values you can do#now THOSE are hard. values 1-9 and letters a-g. i think. grid of 4x4 blocks. 4x4 overall grid. so 16 box long rows and columns#when the normal sudoku is 3x3 and 9 long. 3x3 is just so fucking easy lmao. 4x4 gives me an actual CHALLENGE and i want it#....not rn tho. it'd probs just fry my brain lol
0 notes
Text

somehow ive never done one of these
#personal#how have i been into anime since 08 or 09 and never gotten around to it#is say 'or' bc idr if it was in 5th or 6th grade i just remember going INTO middle school/7th grade already into it#and only having 1 friend who also knew/liked anime even if our taste were vastly different#anyways honorable mentions: -perfect blue -blue period -houseki no kuni -soul eater -ringing bell#idk if dgrayman also deserves an honorable mention or thats just bc i just got back into the manga#i do remember being excited when hallow was announced though so probably#does anybody even do 3x3 anymore though. they used to be huge but idk. but it was hard to pick 9 though after the first 3-4 absolute faves#anime 3x3
1 note
·
View note
Text
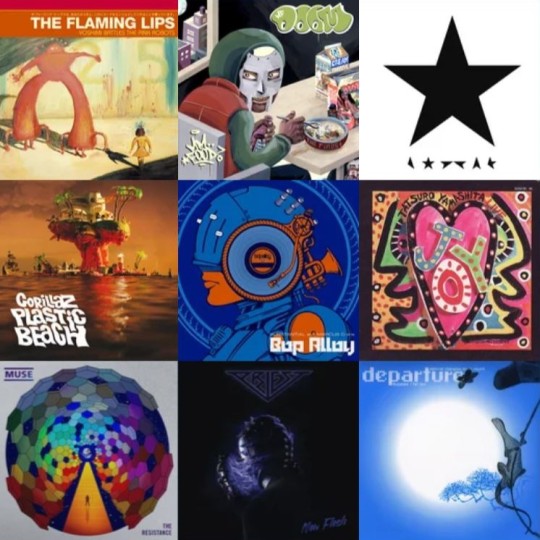
#apropos to nothing here's my 3x3#im mostly doing this so i can have a ref to all the vinyl i need to get i currently have 4/9
0 notes
Note
You're more amazing than ALL THE THINGS
Here's some cards inspired by my love of counting in rhythm to myself in daily life
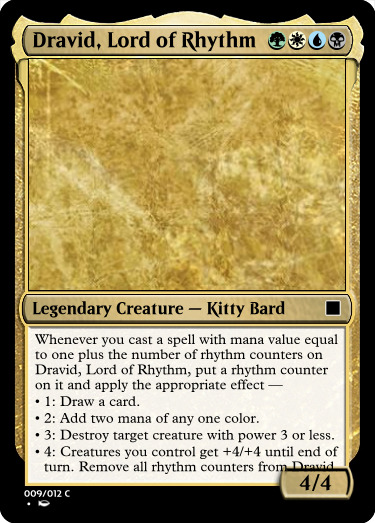
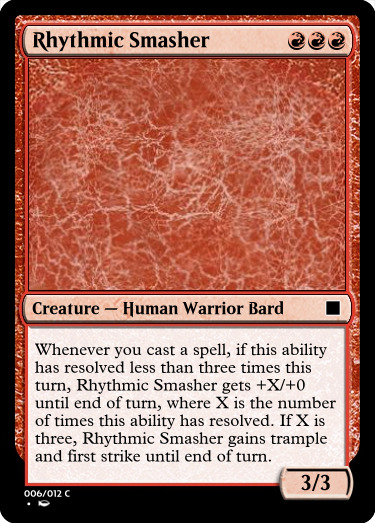
With these I have an excuse to count "one, two, three" and "one, two, three, four" out loud in the middle of games!
#asks#custom cards#i knew i wanted the 4-count one to be legendary but i had no idea what to name it#the green and black made it feel wrong to be an elian card#then i realized i could just make it a dravid#dravids can be any color#i name i also considered was Dravid Lord of Counting#with count counters#but it's really about rhythm#also i love the amount of 3s i got into rhythmic smasher#it's a 3-drop 3/3 with 3 red mana symbols and 3 subtypes#i think i'll rename it drum beat basher to give it 3 words in the name#AND its max power is 9 which is 3x3#i also realized halfway through writing lord of rhythm's ability that i could make each of the abilities include their number#also if you somehow manage to get 5 rhythm counters on lord of rhythm its effect just stops working#oops lol#but that's only possible with proliferate i think#also i think the templating of this ability is super illegal#you're supposed to write out “if it has one rhythm counter do this. if it has two” etc#but that would be WAY too much text#also i didn't even specify where the number comes from for the effects#is it from the number of rhythm counters or the spell's mana value?#a card like Solemnity could really make that confusing#or instant-speed proliferate#but the general way it's supposed to work is clear so it's okay#it's not like this is gonna get played in tournaments#$5000 on the line coming down to how the kitty bard interacts with Experimental Augury#at least the templating on Rhythmic Smasher is unambiguous as far as i can tell#it's maybe not technically correct because most abilities like that say “if this is the third time this ability has resolved this turn”#but that's too much text
1 note
·
View note
Text
the way I got baited so hard by inside no 9 i'm speechless. I recorded the episode last night so when I came to watch it I thought the box must've messed up and so did my mum, so we quickly skipped through the episode to check it, convinced that in9 must not have happened, until I accidentally saw the ending 🤦. I fell for it so hard, is this what watching deadline live felt like?
#it was only after i spoiled it that I realised that 3x3 = 9#also we spent the whole time acting like it was an actual game show#My mum was convinced catherine was being fed the answers or saw the cards but NOPE#inside no 9#in9#inside no 9 spoilers#Hold on tight#3 by 3#posts by me :)
0 notes
Text
TILE TRANSITION TUTORIAL

a couple of people have asked me for a tutorial on how I did the penultimate gif in this set, so here goes! this is my first tutorial, so please feel free to reach out with further questions if anything's unclear.
note: this tutorial assumes you know the basics of gifmaking, can create the base gifs, and are familiar with timeline mode.
STEP ONE: create the base gifs! I'd recommend staying between 25-40 frames for each gif, since the transitions we'll use later tend to increase gif sizes. these are the ones I'll be using for this tutorial:


STEP TWO: create the guide layouts for both base gifs. for this panel, I chose a 4x4 grid — I would recommend keeping the number of "tiles" low because it can get tedious, but have a minimum of 9 (3x3 grid).


now your canvas should look like this:

STEP THREE: create the tiles. this is where the going gets rough; there might be easier ways to do this that I couldn't think of 😭 if there are any please send me an ask!
essentially, in this step we'll cut up the base gifs into smaller squares so that each tile can be manipulated separately when we put both gifs together. to do this, first create a square using the rectangle tool and the guides. then duplicate the base gif, move it above the square, apply a clipping mask, and then convert the clipped gif and square (selected in the image below) into one smart object.


ALTERNATELY: you could duplicate the original base gif and use layer masks to isolate tiles. create a layer mask for the duplicated gif layer and, with the layer mask selected, drag your mouse over a square (using the guide layout) and press delete. then press ctrl/cmd + i to invert the layer mask so that the gif only shows in the square of your choosing.
now repeat until you've got the entire gif in tiles, and do the same for the other gif!
since the transition effect is achieved by staggering the crossfades for each tile of the final gif, you can cheat by having multiple tiles "flip" at a time, ideally no more than four. this means you need to cut the base gif up into fewer pieces. to do this, simply draw multiple squares instead of one and then merge the shapes, before duplicating and clipping the gif onto them.


if you do this, it's essential to remember that you have to divide both gifs up in the exact same way. each piece of the b/w gif has to correspond to a piece of the purple gif!
this is what the layers look like for each gif once I'm done:


I have them lettered so that it'll be easier to match them up in the next step.
STEP FOUR: this is the complicated bit that took me two days to figure out. I'll do my best to explain but don't hesitate to reach out if something isn't clear!
to begin, open up a new psd and import both base gifs into it. (remember to click "create video timeline" and ensure that your gifs are all in order before proceeding.)
now, the trickiest part about this transition is ensuring that all the little tiles sync up so that the larger gif is coherent. so first we'll create some markers (just empty layers) to ensure that everything lines up as it should.
— marker 1: at about halfway through the first gif (b/w in this case)
— marker 2: at about a quarter of the gif length
— marker 3: close to the end of the gifs

at this point we're ready to start bringing in the tiles. I'm going to delete the base gifs from this new psd just to keep things cleaner!
first thing to do is import my b/w tile. move the timeline slider over to marker 1 and split the first gif. (if it helps, rename the split gifs and add (start) and (end) to the two halves.) then, move the (end) half to the beginning of the timeline, and the (start) half to line up with marker 3.
the purple tile is easier to manage. simply import it into the psd and line it up with marker 2.
your timeline should now look like this:

notice the overlap between the gifs at their beginnings and ends — this is where you'll be able to cascade the tiles flipping, so it helps to have a significant amount of overlap.
crop the three gifs for this tile as you see fit! since this is the first tile I want to flip from b/w to purple, I'll crop gif 1a (end) all the way to the current position of the timeline slider (red line with blue tip) and leave the beginning of gif 2a uncropped. for the flip from purple to b/w, I'll crop both gifs a bit.
once that's done, drag all three gifs onto the same level in timeline so they form a video group. your timeline should look something like this:

now you just repeat the process for all the other tiles! as long as you made sure that all the tiles in one gif correspond with tiles in the other gif in step three, this should be a fairly painless process. make sure to crop the starts/ends of the gifs separately so that they don't all flip together.
this is what my layers look once I've done all the tiles:

and the gif!

STEP FIVE: transitions! click on the half-white square (top right of the left column in the timeline, beside the scissors) and select the crossfade transition, then drag it between two gifs in a video group. it should create a two-triangle symbol and shorten the overall length of the video group.


apply the transition to all the tile flips, ensuring that the duration of all transitions is constant. this can sometimes be tricky because ps likes to change the duration of each transition, so right click on the transition symbol and manually change all your transition durations to be the same.
your layers should now look something like this:

STEP SIX: draw the grid. bring back the guide layout from step two and using the line tool (I like 2px thickness), trace the grid. adjust opacity as you see fit (50-80% is usually a good idea), so that the canvas looks like this:

STEP SEVEN: export and celebrate! you're done!
I hope this tutorial made sense and was easy to follow, and happy giffing! my inbox is always open for any questions <3
#tutorial#ps help#ps tutorial#userace#alielook#userabs#usercats#userhella#userfaiths#tuserabbie#usershreyu#usertreena#tuserlucie#uservivaldi#usertj#usergiu#userroza
646 notes
·
View notes
Last Seen Blogs

annakirkmill
Untitled

bornconfused78
Hrmmm. So Basically

hypoxia-ofthe-heart
Le Souhait

rottenwristsz
satan on vacation

infobelitung
Info Belitung