#CSS Links Free Tutorial.
Text
Unlocking the Potential of CSS: A Deep Dive into Outlines, Text Effects, Fonts, Icons, and Links

Cascading Style Sheets (CSS) is a fundamental component of modern web development, empowering designers and developers to create stunning and engaging user interfaces. In this blog post, we will explore some key CSS features and techniques that play a crucial role in enhancing the visual appeal and functionality of web pages. Specifically, we'll delve into CSS Outlines, CSS Text, CSS Fonts, CSS Icons, and CSS Links, providing practical examples along the way. Let's dive in!
CSS Outlines:
CSS Outlines allow you to add visual emphasis to elements by creating an outline around them. Outlines are distinct from borders, as they do not take up any space and are typically used to highlight active or focused elements.
Example:
/* CSS */
button:focus {
outline: 2px solid blue;
}
In this example, when a button is in focus, a 2-pixel solid blue outline will be displayed around it, indicating its active state.
CSS Text:
CSS Text properties offer granular control over the appearance and layout of text within HTML elements. From adjusting font size and color to controlling letter spacing and alignment, CSS Textprovides a wide range of options for customizing the text on your web pages.
Example:
/* CSS */
h1 {
font-size: 24px;
color: #333;
letter-spacing: 2px;
text-align: center;
}
Here, the h1 element will have a font size of 24 pixels, a color of #333 (a dark gray shade), a letter spacing of 2 pixels, and will be centered within its parent container.
CSS Fonts:
CSS Fonts allow you to define the typeface, size, style, and other properties of text elements on your web pages. With CSS Fonts, you can create visually appealing and consistent typography across different browsers and devices.
Example:
/* CSS */
body {
font-family: Arial, sans-serif;
font-size: 16px;
font-weight: bold;
}
In this example, the body element will use the Arial font (or a sans-serif fallback), have a font size of 16 pixels, and be displayed in bold.
CSS Icons:
CSS Icons offer a lightweight and scalable way to incorporate visual symbols and icons into your web pages. By leveraging CSS properties like content, font-family, and ::before or ::after pseudo-elements, you can easily include icons without relying on external image files.
Example:
/* CSS */
.button::before {
content: "\f138";
font-family: "Font Awesome";
margin-right: 5px;
}
In this example, we use the Font Awesome icon font to add an icon before the content of an element with the class .button. The Unicode value \f138 represents the specific icon to be displayed.
CSS Links:
CSS Links allow you to customize the appearance of hyperlinks on your web pages, making them visually distinctive and engaging. CSS properties like color, text-decoration, and hover pseudo-classes enable you to control link styles based on different states.
Example:
/* CSS */
a {
color: blue;
text-decoration: none;
}
a:hover {
color: red;
text-decoration: underline;
}
In this example, all links (<a> elements) will be displayed in blue without underlines. However, when a user hovers over a link, it will turn red and have an underline, indicating the interactive state.
Conclusion:
CSS Outlines, CSS Text, CSS Fonts, CSS Icons, and CSS Links are powerful tools that allow you to enhance the visual presentation and functionality of your web pages. By understanding and utilizing these CSS features effectively, you can create engaging and visually appealing user interfaces. Experiment with these examples, customize them to suit your needs, and explore further possibilities to elevate your web design skills. Happy coding with WebTutor.dev!
Don’t Miss to Read
Learn Free Online CSS Tutorial
Learn Free Online CSS Outline Tutorial
Learn Free Online CSS Text Tutorial
Learn Free Online CSS Icons
Learn Free Online CSS Links
#Free CSS Tutorial#Online CSS Tutorial#Online CSS Outlines#CSS Outlines#Free CSS Outlines Learn#CSS Text#Learn CSS Text#Online CSS Text#Free learn CSS Text#CSS Text Property#CSS Fonts#Learn CSS Fonts#Online CSS Fonts#CSS Fonts tutorial#CSS Icons#Learn CSS Icons#Online CSS Icons#CSS Icons Tutorial#CSS Links#Learn about CSS Links#Online CSS Links#CSS Links Free Tutorial.
1 note
·
View note
Text
Hey, you! Yeah, you with the cool neocities!
You're doing great! Really love what you've done with the place so far. Now here's something important moving forward. If you are making a neocities - especially if you are doing so with the motivation to fight back against Web 3.0 and reclaim the web as a space for individual users instead of for companies - please, keep the following in mind:
An inaccessible web is not a free web.
Repeat after me: An inaccessible web is not a free web.
Resources for Beginners to Learn About Web Accessibility and Web Design:
W3C's Introduction to Web Accessibility | W3C is the organization that decides on the standards of Accessibility on the web. They are an invaluable direct resource.
A Beginner's Guide to Understanding Web Accessibility
Mozilla's Accessibility Overview
WebAIM's Introduction to Web Accessibility
What is Web Accesibility in 60 Seconds! [YouTube Video]
Accessibility: What's the difference between WCAG Levels A and AA? [YouTube Video]
FreeCodeCamp | FCC provides an extremely beginner friendly Responsive Web Design course. The lessons for this course integrate accessibility standards naturally, and also have individual lessons specifically for teaching accessibility.
FreeCodeCamp's Accessibility Tag on their News Page
HTML Dog's Tutorial's for HTML, CSS, and Javascript
MarkSheet's Free HTML and CSS Tutorial
W3C's Easy Checks
W3C's QuickRef on How to Meet WCAG | I have filtered the QuickRef link to only show Level A requirements. This is the easiest level to meet and is considered the "bare minimum."
WAVE: Web Accessibility Evaluation Tool
9K notes
·
View notes
Text
Obsidian Resources Masterpost
This is a masterpost of all the useful resources I’ve collected for using Obsidian. Hopefully some of them will also be useful to you, and I’ll try to keep this post updated whenever I find new and exciting stuff!

[ID - purple decorative divider]
General Obsidian
Download and install Obsidian
Obsidian Help
Obsidian Glossary
Beginners Guide to Obsidian
How to get started with Obsidian: a guide for Autistics & ADHDers
Youtube
My personal playlist of Obsidian-related videos
Danny Talks Tech
Nicole van der Hoeven
FromSergio
Jonathan Pritchard Obsidian Tutorials
Josh Plunkett Obsidian for TTRPG Videos
Vault Showcases & Use Examples
The best way to get an idea of what you can do in Obsidian is to look at what other people have done. This is a collection of articles, videos, and Obsidian Publish Vaults showing various setups and processes so you can get inspired!
Writing a novel in Markdown - PD Workman
(2024) Obsidian For TTRPG - Template Vault | Campaign Manager
How I Plan and Write Fiction in Obsidian – Vanessa Glau
SlRvb - Obsidian Publish
Obsidian TTRPG Tutorials
SoRobby/ObsidianStarterVault: Organize your Universe
How I structure my Obsidian vault (Obsidian tour 2023) - Nicole va der Hoeven
Obsidian - 2024 Intro for TTRPG and Worldbuilders
Form, Function, & Fun! - My Obsidian Vault Tour [2024] - CyanVoxel
Markdown
Obsidian uses markdown to format text, so these are some resources to help you out with that.
Markdown Syntax - Obsidian Hub
Basic Syntax | Markdown Guide
Markdown Reference
Basic formatting syntax - Obsidian Help
CSS & Styling
You can just use Obsidian as-is, but it’s so much fun to customise it and waste all the time you should be doing work on making it look pretty. These resources cover various plugins and ways of prettifying your vault, as well as some CSS resources, since Obsidian uses CSS for styling.
How to Style Obsidian
Default Obsidian Theme Colors
CSS reference
CSS Tutorial
CSS-Tricks
CSS Gradient — Generator, Maker, and Background
MarkSheet: a free HTML and CSS tutorial
ITS Theme: Image Adjustment Snippets + ITS Theme - SlRvb's Documentation
Banners: add banners to your notes
colored tags: Colorizes tags in different colors.
MySnippets Plugin: adds a status bar menu allowing the user to quickly manage their snippets within the comfort of their workspace
style settings: A dynamic user interface for adjusting theme, plugin, and snippet CSS variables
Plugins
A highly opinionated collection of plugins—all of these are ones I either currently use or have used. Organised loosely from simple to complex. Links go to the github pages, which have install instructions, but the easiest way is to install them directly from the plugins manager inside Obsidian.
smart typography: Converts quotes to curly quotes, dashes to em dashes, and periods to ellipses
url into selection: Paste URLs into selected text
better word count: Counts the words of selected text in the editor.
short links: plugin to display short internal links.
editing toolbar
omnisearch: A search engine that "just works" for Obsidian. Supports OCR and PDF indexing.
outliner: Work with your lists like in Workflowy or RoamResearch
Advanced tables: Improved table navigation, formatting, and manipulation
longform: A plugin that helps you write and edit novels, screenplays, and other long projects.
periodic notes: Create/manage your daily, weekly, and monthly notes in Obsidian
workspaces plus: Quickly switch and manage Obsidian workspaces
hover editor: Transform the Page Preview hover into a working editor instance
advanced uri: Advanced modes for Obsidian URI
dataview: A high-performance data index and query language over Markdown files + Dataview
Commander | Add Commands to every part of Obsidian's user interface
QuickAdd for Obsidian + Getting Started | QuickAdd
[ID - purple decorative divider]
check out my obsidian tag for more posts / got questions? want to say hi?
#obsidian.md#obsidian resources#obsidian md#writing#writing apps#resources masterpost#writing resources#notes app#writing tools#behold! a collection of links!#anyway i hope this is useful to at least one person
210 notes
·
View notes
Text
YOU MUST MAKE A WEBSITE
Oh wow, look at that! YET ANOTHER post urging you to make a webbed site! What a completely new thing that people haven't made a thousand masterposts for already!!
• Making a website might look scary. It is Not.
At first, I too thought making a website was too much work. It really isn't! It turns out that all you need is
an HTML file,
a web hosting service and
w3schools tutorials,
and that's about it!
This post will point you towards these resources, and others I found useful while figuring out how to make a website.
• VERY QUICK EXPLANATIONS:
What's HTML and CSS?
HTML is the content of your webpage, the skeleton of it. What shows up in a webpage is what's written in the HTML file!
CSS is the way the HTML is styled; the colour of the background and the letters, the size of elements, the font, all that!
Do I absolutely NEED JavaScript for a website?
Not at all! You don't need to worry about learning it before getting started.
• What do I make a website for? What do I put in there?
ANYTHING AND ALMOST EVERYTHING. Here's some ideas for pages from a post of mine were I was very normal about websites:
You can make a page that's only pictures of your pets.
You can make an interactive adventure.
You can make your own academic blog full of your own essays or articles.
You can just post a ton of art or make a full music page.
You can make a blog and infodump eternally, give book reccs and reviews. You can host a thousand virtual pets and nothing else.
Upload entire books in a single html file. Make a wikipedia for your ocs. Make a fake site for a random fictional place (restaurant, hotel, whatever). You can make a thousand fanpages/shrines about your favorite media. You can upload your own webcomic and make it all like a fancy website and shit.
I could keep going but, for the sake of "brevity", I won't.
• WEBSITE EXAMPLES!
If I started listing the websites I know, this post would be bottomless. Here's only seven:
https://publictransit.neocities.org/ - A webbed site, for sure
https://ribo.zone/ - A personal site
https://leusyth.neocities.org/ - An art archive
https://solaria.neocities.org/ - Personal website with A Lot of stuff (it'll come up in a bit, because it offers web making resources)
https://hog.neocities.org/ - The Hogsite
https://thegardenofmadeline.neocities.org/ - Another personal site! It also has a web resources page and has made another masterpost like this one (but better)
https://spiders.neocities.org/ - My own website, which must be weird to see in mobile . sorry
• You've convinced me. I want a webbed site. Where do I start?
https://neocities.org/
FIRST OF ALL: Neocities. It is a free web hosting service, and it's the one I and the sites I linked use!
When I first started, my website was a black page with red letters and a drawing, and nothing else! It was like that for a month, till i started picking up on how to do things.
Here's what helped me get an idea of how to make things work:
https://sadgrl.online/learn/articles/beginners-guide-neocities
An absolute beginners guide to neocities -- while when you make an account there you get a tutorial page from the site, this one's extra support for that.
https://www.w3schools.com/
Learn HTML, CSS, JavaScript and MANY other coding things for free. All the tutorial/reference pages have live testing windows for you to mess with!! helped me a LOT while figuring this stuff out!
https://htmlcheatsheet.com/
https://htmlcheatsheet.com/css/
Cheatsheets for HTML and CSS, respectively. It includes a JavaScript one too!
https://sadgrl.online/webmastery/
Sadgrl's webmastery resources! Also includes the next resource listed here:
https://sadgrl.online/projects/layout-builder/
Sadgrl's layout builder; not a lot of customization at a first glance, but I've seen wildly different websites all using it as a base, plus it works using CSS Flexbox, so it generates a responsive layout!
(basically, a responsive layout is one that translates well in different sized screens)
https://www.tumblr.com/fysa/728086939730919424/wikitable-code?source=share
Tumblr user fysa made this layout imitating a wiki page!
https://brackets.io/
At some point, you might want to do things outside the Neocities code editor and get one outside the site. I recommend Brackets, because my old as fuck computer can run that and absolutely nothing else apparently, and it works wonderfully! Though I recommend either turning off the code autocomplete or using it after a good while of already using the Neocities code editor, so you get used to coding on your own.
http://www.unit-conversion.info/texttools/text-to-html/
Turn your text into HTML code! i use this kind of pages for my lengthy blog entries that I don't feel like formatting myself.
https://imagecompressor.com/
COMPRESS YOUR IMAGES.
The heavier an image is, the more your site weighs and the more time your page will spend loading. You don't want that, specially if your site is heavy on graphics. This might help!
https://solaria.neocities.org/guides
Some CSS, JavaScript and Accessibility guides! Worth checking out!
https://eloquentjavascript.net/
This is a free, interactive book for learning JavaScript! NOTE: It is very intuitive, but JavaScript is HARD!! I still haven't learned much of it, and my website does fine without so don't worry if you end up not doing much with it. It's still useful + the exercises are fun.
And now, accessories!
• Silly stuff for your page :]
https://gifypet.neocities.org/
Make a virtual pet, copy the code and paste it in your HTML file! You'll get a little guy in your webbed site :]
https://www.wikplayer.com/
Music player for your website!
http://www.mf2fm.com/rv/
JavaScript silly effects for your site :]
https://blinkies.neocities.org/geoblinkies
Blinkie search engine!
https://www.cbox.ws/
Add a chatbox to your site!!
https://momg.neocities.org/
Infinite gallery of gifs. i've spent hours in there looking at moving pictures and out of them all, the ONLY gif i actually ended up using on my site was a rotating tomato slice. it is still there. trapped.
https://wrender.neocities.org/tarotinstructions
A widget that gives you a random tarot card!
https://www.websudoku.com/widget.php
Sudoku widget!
That's about it for now! I don't know how to end this!!! Remember to have fun and google everything you don't know :]
271 notes
·
View notes
Text

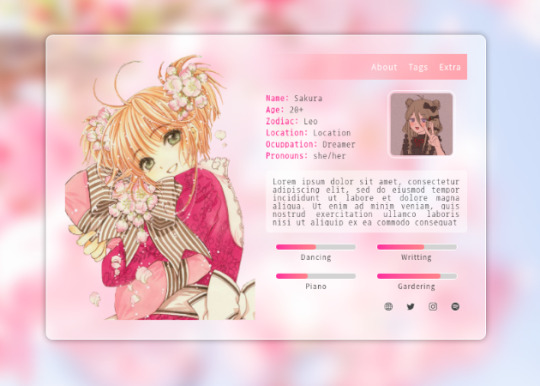
EMPIRE - MULTIMUSE MUSE PAGE !!!
This page is completely free. Please support me and my work by liking or reblogging this post.
[ INFORMATION ]
THIS CODE IS 100% JAVASCRIPT FREE!!!
This code comes with tabs which allows you to give each muse a separate page. Therefore, you can add as many muses as you want.
The theme is very responsive and doesn’t need much editing!
All colors and effects are easy editable. Not many colors are needed.
The gradient effect over the picture can be removed, it can be turned into one picture, it can be turned into a gray filter or any filter can be entirely removed
The pictures are 250 x 280 in size but they resize automatically if your chosen picture is too small or too big.
The size of the muse picture is also editable and changeable.
The picture can also be removed completely without any editing in the CSS part.
The code offers 2 main links (Home and Ask) but also three free individual links. As well as space for hidden information of your choice.
The main box with detailed information can be edited and designed to your liking. Possible options and variations can be found in the code.
[ GUIDELINES ]
Do not claim as your own.
Do not remove the credit!
Do not use as a base code or take parts of this code for your theme.
Feel free to edit as much as you want!
Editing help and tutorials on how to edit the tabs can be found in the code. A tutorial page is linked there.
Click the SOURCE LINK to be redirected to the preview and the code!
#indie theme#free theme#multimuse page theme#muse page#muse page theme#rph#indie rp#rpc#indie rph#rp theme#page theme
478 notes
·
View notes
Photo
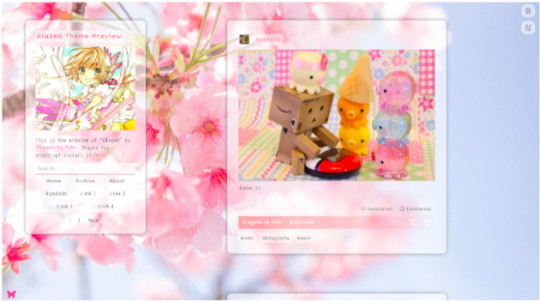

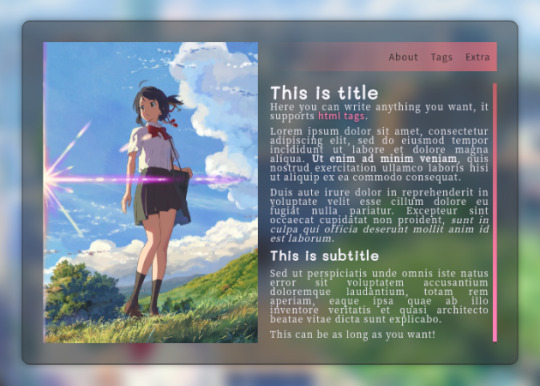

"Glazed” Theme
by Themes By Pale (or Palemomos Themes)
Live Preview | Static Preview | Install
This theme is for everyone! Highly customizable, it can be clean and minimal or go crazy with colors and backgrounds.
Features:
Glassy effect on posts that blurs when the mouse hovers it.
Responsive layout for all screen sizes (including mobile devices).
Display posts in one or two columns.
Switch between Dark Mode or Light Mode.
Support for NPF posts.Support for searches in blog and date pages.
Custom background image (big image or pattern).
Custom accent colors.
Select between 7 font types.
Select font size.
Optional about section.
Optional tags directory section.
Optional section to share blogs you follow.
Optional extra section to add anything you want.
4 optional custom links.
Support for page links.
Show/hide tags in posts.
Show/hide captions in posts.
Notes:
All can be customized in the Customization Panel :)
About the tags: to add your tag directory in the about section, in the textbox “Tags List” paste your tags in the following format:
["Section 1", "pixels", "pixel art", "kawaii", "landscapes", "photography", "art"],
["Section 2", "nature", "green", "animals", "fantasy", "magic", "dogs"],
["Section 3", "codes", "themes", "pages", "resources", "layouts", "html"]
You can separate your tags into subsections. Each section is a set of words wrapped by [ ], and each word must be wrapped by " " and separated by commas. The first word is always the section title. Also, each section must be separated by a comma, but note that the last section does not have a trailing comma. In the last example there are three subsections for tags, if you only want one subsection for your tags just copy and paste the following:
["Section 1", "codes", "themes", "pages", "resources", "layouts", "html"]
About hide captions: the captions will only be hidden in the main page, individual pages will show the full caption.
Edit: Here is the link to the source code in case there’s a problem installing it with the theme garden.
Credits:
css photosets @eggdesign & @annasthms
npf fix and griddery for gallery mode: @glenthemes
custom audio controls: @annasthms
custom like & reblog buttons tutorial: @shythemes
full credits in code
Feel free to contact me if something isn’t working n.n
Please reblog if using!
Support me on Ko-fi :3
2K notes
·
View notes
Text
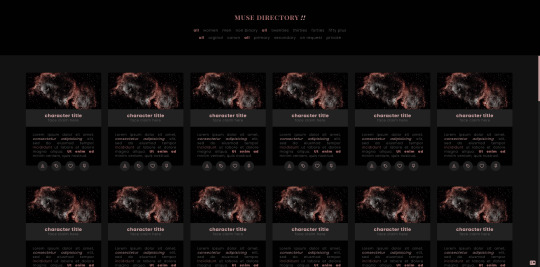
KITTEN !!
page forty six by sugar !!
JAVASCRIPT FREE - this is a muse directory page css filters, and a straightforward format, each muse panel features an image, title & subtitle, description and four customizable links.
special thanks to @eggdesign for their tutorial for css filtering !!
for help with troubleshooting, please contact me directly on my main blog.
PREVIEW CODE
get the code - ( free ; or pay what you want ) !!
join my discord ( members get a discount on premium themes ) !!
148 notes
·
View notes
Note
i want to make a neocities so bad but i dont know where to start :(( any advice? i love ur website!!
hiii! thank you im so happy you visited and liked it <3 so like 2 months ago i was in the same spot as you - no idea how to code, but the idea of a personal website thrilled me so much!
i basically spent a few weeks browsing sites on neocities, noting down what delighted me, what i would personally like to have on my own website, etc.
after that i searched furiously for coding tutorials and making a personal website (around this time i was also making a portfolio website, so i had a couple of links saved). here are some
pages github
MDN web docs - like w3schools, but up to date !!!
https://sadgrl.online — a TON of resources 🌟
neocities learn page (HTML, CSS, JS, and lots more! + a cute interactive cat tutorial) 🍰
codetheweb - tutorials
codeacademy — free coding tutorials
freecodecamp — all free coding tutorials
a bunch of resources
i started with neocities' learn page, which has a really quick intro to HTML and CSS. after that, i bookmarked a ton of posts on sadgrl.online's website, because she's super big on neocities and has sooo many helpful beginner tutorials.
after that i basically got an HTML boilerplate from eggramen and just started going from there! you can just directly upload your website files to neocities (make sure your folders are constructed the same way!) once you have an account.
basically tldr: grab a boilerplate HTML template from anywhere, make a neocities account, and start fiddling with it right away! google everything you don't know or don't understand. good luck 💖⚙️
805 notes
·
View notes
Text
Jcink Coding Communities & Resources
Coding shouldn’t feel like some exclusive, unattainable club. We all started somewhere—most of us just messing with elements to try customizing them before we got ✨ambitious✨ and started building our own projects.
Most of us are hobby coders, and we can’t always hold everyone’s hand as they’re getting into the community. Plus, a lot of our knowledge is hobbled together according to need (maybe that’s just my personal experience though lol). But we can share the resources and communities we use to build our sites and skins with you. So here’s my ever-growing list of communities, resources, and learning tools I’ve used, and still use every day, to build my projects.
If I’ve missed a valuable community or resource, let me know so I can add it to the list! And if you’re a coder with resources on your blog, reblog this with a link to a tag that others can follow!
Forums
Jcink Support Community
This should be everyone’s first stop shop when it comes to Jcink. The support forum has an active community that’s ready to help with specific problems, and is full of very specific codes that usually don’t ever make it to other resource forums. Learn how to use the search function to find what you’re looking for!
Caution to the Wind
The OG jcink rp resource site at this point. It has a lot of what we now consider essential building blocks of our forums, as well as tutorials to teach you how to do things.
jCodes
A community that is mostly full of JavaScript coders, with an amazing collection of Jcink plugins to optimize your forum and add functionality. Not necessarily the best for learning, but definitely a wealth of resources.
Sourced
A mini-resource community, hosted by Essi. It’s the home of many useful resources for forum development that Essi and others have put together. This is not an active community, but a home for resources.
RPG Initiative
A resource forum for more than just Jcink rp’s. There isn’t so much a coding community here, but there are some great coding guides in the codex.
RPG Directory
Another general resource site, the coding community here is pretty quiet these days, but it has some classic tutorials and resources worth visiting.
Discord Groups
The Jcink Community Corner
A great community for coding, as well as writing and general site management. For newbies and pro’s alike! This is the general home for most of us (afaik), and is probably the biggest/most active group of jcink coders on discord.
Coding Camp
A discord community for all levels of coders. Camp offers regular coding challenges, as well as a variety of resources for beginners who might not know where to start but want to get into the thick of things.
General (and free!) Learning Resources
If you’re just starting out, want a general refresher, or are a seasoned pro looking to add some credentials to your name, these resources are for you! All of them are free and are not Jcink-specific.
Free Code Camp
Learn how to code for free! It walks you through the basics to build the fundamentals you need to start on more complex projects. I’ve done the CSS and JavaScript courses and cannot recommend it enough.
The Odin Project
A full stack curriculum that I’ve heart great things about! I haven’t used it myself so I can’t speak to it, but their JavaScript and CSS courses looks amazing.
Flexbox Froggy
A game to learn how to use flexbox and all its corresponding properties by organizing some frogs and their lilypads. When I take a break from coding, I always play a round of flexbox froggy as a refresher.
Grid Garden
A game to learn how to use CSS Grid! A lot like flexbox froggy, but with vegetables.
CSS Tricks
Not recommended to open until you have a basic handle on things, only because it has a wealth of articles that are easy to get lost in. But if you’re looking for how to do something specific, chances are CSS Tricks has an article on it!
Stack Overflow
An active community for coding of ALL kinds, every question about coding ever has been asked and answered here somewhere.
W3 Schools
The reference sheets on W3 are tools I reference all the time. I always have a tab with the CSS or JavaScript references up, because nobody can remember all the properties and what they do off the top of their head!
CodePen
A place to start creating your own codes! It has live updates, so you can see what you’re creating as you make it. And you can use it to create a nice little portfolio for yourself! You can also “fork” other users’ codes to play with them, figure out how they work, and learn how to implement those practices into your own work. (side note: if you see my profile on CodePen, no you didn’t, it’s a mess)
#jcink#jcink codes#jcink help#resource#resources#coding#coding resource#coding resources#rec#coding help#sage codes#learn to code#i hope this list grows really long! i want everyone to be able to code!!#this is just a resources list#so if you want an actual step by step about how to go about learning join a community and see what they have to offer#dont be afraid to ask questions we're all here to help#dont be afraid to get your hands dirty <3
219 notes
·
View notes
Note
do you happen to know any site building tutorials to follow and learn from? been having a hard time finding a place to start with my own neocity but the free reign and customization of them interests me a lot :0c
ABSOLUTELY! I do want to stress one thing if HTML/CSS is something you're not familiar with: It's okay if your website doesn't look like the most creative, eye-popping thing in the world! I've seen sooooooo many people get so discouraged because their beginner websites don't look like the flashier websites you see on Neocities' front page (by people who've been coding for a Long Time, mind you!) and like!!! That's fine!!! The code of my own site was quite possibly the worst thing you've ever seen thrown together into one big CSS soup before I Literally Just Rewrote It Today, After A Year Of Having A Neocities. And so, with that being said:
As anyone on the internet might do, w3schools is the absolute first place I'd recommend to beginners! There are videos, it's mostly a text-based learning site with lots of exercises to test your knowledge. If you'd prefer videos:
My personal favorite guy on Youtube to learn coding things from is Giraffe Academy: Here's his full course on HTML! The video itself is about two hours—I skimmed through it and everything seems to be perfectly oriented towards beginners (I haven't watched it in its entirety, but I have seen his videos on C# and Python [programming languages, don't worry about it] and they did a lot to help explain certain things to me that I didn't know previously!).
BroCode's HTML in 1 hour and CSS in 1 hour are pretty good! His videos do include a little bit on how to implement some JavaScript here and there, but nothing major or terrifying.
Here's a playlist of HTML/CSS tutorials in bite-sized videos, too! Think about 10-25 minutes per video.
I will say that searching for YouTube videos on HTML/CSS will always sort of gear more towards what people in the professional sphere are looking for rather than what you'd see on Neocities.
As for Neocities-specific things (which may be the actual point of your ask! Might've misinterpreted the hell out of it oops):
sadgrl.online is perhaps the most known website on Neocities, largely because the website itself not only has a layout maker you're free to use if you want to make a website now but the thought of writing HTML/CSS from scratch terrifies you, but also HTML/CSS guides themselves! There's also a bunch of links you can use to help fluff up your site a bit, generate HTML code for you, or just fluff up your site in general.
The Melonland Project is also dedicated to providing website development tools and tutorials for beginners: here is its guide to making a website on Neocities! It also provides a link to learnlayout.com, which I'll link here as well—a website for helping you learn CSS layouts!
And, once you've got the hang of how CSS works but are still feeling unable to code it yourself (no ideas? just not feeling up to it? FUCK MAN DO I UNDERSTAND THAT) Eggramen has free CSS pages you can use, and all you have to do is write the HTML for it!
But I would always focus more on learning HTML first before any CSS—and then learning how to integrate CSS into HTML via inline styling (which those video tutorials do!) before worrying about any external stylesheets or whatever. HTML is the actual building block—CSS just makes it look pretty.
#'site-building' tutorials will almost always lead you to like. coding bootcamps and stuff for companies#the nc-specific links should be more help in just building a site on nc!#anyway. hope to god i didn't misinterpret this question HAHA#asks
10 notes
·
View notes
Note
Ur website so cool!! ❤️❤️ Do you have by any chances coding tips? Been trying to make my own website for a while but adhd won't let me concentrate a second when it comes to learning coding
Thank you! And 100% It is deceptively approachable but also time consuming, I'm familiar enough with html from a highschool class where we did need to write code out by hand, and then soft practice with coding toyhou.se profiles and futzing around with free code snippets. Largely though I don't think you need to know everything or to write everything by hand, you just need to frankenstein code pieces together (As long as they're free ofc).
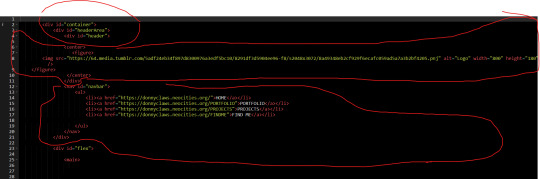
I used this first, it's fucking insanely handy and lets you make a simple layout with sidebars, navigation, header, footer and a body base ect, and then just generate and copy the code. The html itself also has greyed out little notes about what parts do what!
I'll be real the rest of it after that is just me googling what I want to do or googling html snippets bc I forgot them. So like html image link with size attributes ect ect, how to make a html image gallery. I don't use one site exclusively but w3schools.com has a bunch of common ones and also has a little live code editor in its tutorials.
Like I still get greatly stumped for hours bc code's kinda sensitive and one or two characters out of place will break sections of it especially when ur just frankensteining. Trying out little segments in live code editors is really helpful because you can kinda break it apart and diagnose the issue before putting it into your site html.
Also if it helps this is kind of how I break it down in my brain as another ADHD-er. so fuckign sorry for how this looks im doing it in snipping tool. But code bits love to live in cages even if it all looks the same, iit would also help if you clean your code up mine is pretty horrid but you just want to familiarize yourself with the little "Sections" ig that's where doing things by hand would help because you would 100% know what each chunk is for but yk yk.
CSS is a different beast I barely understand. The parts of code where it starts stacking on top instead of being horizontal is css and it's basically how you do fancier things to your code, it's linked to stuff you already have down. So like changing the background in the body text box or something, you can only do so much in there. Css targetting the body text box is where you can level it up. Again the sadgrl layout builder has notes so you're not completely blind in there. There's also 100% so many resources to explain what all these words mean, my mmethod is incredibly avoidant I don't know what flex is I haven't needed to fight her yet ect ect.

Sorry if this is confusing this is just my hack and slash understanding atm. Be humbled by code I've spent too long trying to fix up hysterical margin issues just because I had a random apostrophe somewhere or because I tried to spell it colour and not color ect.
32 notes
·
View notes
Note
Hello, I love your website nd just wanted to ask - because I can't find it anywhere - how did you get the images on top of the corners of the boxes? (for example the bowser cry and the eevee on your pokemon page)
Even if its just a link to a tut - thanks ^_^
sure! it's just absolute positioning in css. i have the images set to "position:absolute" and the parent div i'm referencing as "position:relative", then i just use the left:/right: and bottom:/top: values to move it relative to the parent. i used to do this with just margin-right and margin-left on the image without making the parent relative but i think this method is more consistent.
if you're ever confused about something you can just right click and inspect on firefox to see how the page is set up wrt html and css rules
here's some info on the position css value on w3schools. the fourth example is basically what im talking about:
9 notes
·
View notes
Note
Do you have any tips for decorating a blog? Mine's kinda plain and I'd like to spice it up
The RPC lately has been trending more towards blog customization with graphics -- fancy icons, post banners, etc. That is a good way to make your blog look unique and people can have a lot of fun with it. If you want to go that route, you can find lots of graphic templates both here on Tumblr and on DeviantArt.
That being said, I will always stand by having a nice blog theme. Finding just the right theme can take a while, but I always enjoy getting a blog looking just right, and I think it makes your content stand out in a way that solely post graphics can never quite manage.
Tumblr recently made it so blogs are dash-only by default, and only have a separate web theme if you enable it. To do that, you'll need to go into blog settings and toggle the custom theme switch.
My favorite places to find themes are:
@theme-hunter - they also have a guide for how to install a custom theme if you've never done it before
@roleplay-theme-recs
@codingcabin
And off the top of my head, in no particular order, some of my favorite theme makers are:
@glenthemes
@magnusthemes
@octomoosey
@ctrlsugar
@phantasyreign
@xuethms
I've got some themes on this blog as well. If you want something really unique, you can also make your own theme or commission someone, but I recognize that not everyone has the coding skill or the spare cash for those options. You can still get something great looking with free options, though.
As far as general tips for customization:
Try to think about what suits your character. What kind of colors, fonts, etc. Are they more of a light theme or dark theme character? Do they suit something more sleek and modern, or something retro, or something old-fashioned with fancy fonts?
As tempting as it can be to go for a crowded theme with lots of visual elements and colors and fonts, those are really hard to pull off well. Unless you feel very comfortable with your design skills, typically something simple but well thought out will be both more effective and easier to read/navigate.
Pick a color palette and stick to it. I typically go with a background color, text color, and 1-2 accent colors. Coolors.co is a great site for generating color palettes, and Canva can generate a color palette based on a specific image (for example, the image you're using as your sidebar or background).
Don't forget about accessibility. Text should be a decent size and have good contrast (you can use checkers such as WebAim to help there). Navigation links should be clear and easy to find. A lot of that is on the original theme maker, but you should also be mindful of it when setting things up. If you don't trust your eye for that sort of thing, having someone else look it over is always a good idea.
If a theme doesn't exactly match what you want, but is pretty close, you can usually make minor tweaks for your own preferences. Maybe you don't like the font, so you want to swap it for another. Or maybe you want the sidebar picture to be a different size. Sites like W3Schools have lots of CSS and HTML tutorials to help you figure out how to do that, and you can likely find tutorials for some of the more common changes here on Tumblr as well. (Always check the theme maker's policies before you start messing with their code.)
Custom blog pages can also be a great way to show your content -- you can find them on @theme-hunter as well -- but they do typically require more coding knowledge to customize. Most theme makers are pretty good about making them as straightforward as possible, but if you've never worked with any code before, there may still be a learning curve.
81 notes
·
View notes
Text
here's another for my little tutorial section, this time sans video. basically, there's some simple coding tips you can use to set a default photo. for the main uploaded avatar, use the default avatar macro for jcink, but anywhere else you can use one of these.
for background images, make a default by putting it literally right behind the one you want. you can see an example of this in the css section of the naked codepen i'm linking below. (btw this was kept naked so it would be easier to just get to coding, instead of sorting through me making it 'pretty' so to speak. i only put the length of this text there so there was something that populated.)
for img src, i use a pretty simple script. now, the caveat here is there are two versions, depending on if you're in an area where jcink auto puts "no information" or not. these are below. these scripts are in the js section of the codepen. there are two, so make sure you scroll down for the not no information version.
anyway! this is just a really easy way to do things. there are others, but it's a simple way to get your default image to show up where you want them replaced with a custom profile field.
as always, this is a tutorial, so be wild and free, do what you like with them. you don't have to credit me. i'm just trying to help us all learn a few neat tricks that make the editing and creation process of jcink skins a little easier, and replenish some of the resources we've lost lately.
i hope it helps! if you use it, i'd love a like just because i love seeing that people actually utilize these, but it's not a requirement by any means. have a great day, rpc!
codepen
11 notes
·
View notes
Text
Mini React.js Tips #5 | Resources ✨
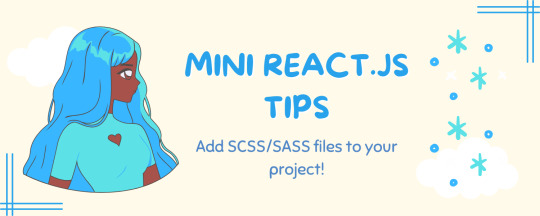
Continuing the #mini react tips series, this time it's SCSS/SASS' time to shine! CSS is great and all but I am a SCSS girlie and I wanted to learn how to add SCSS files to my projects. It's a bit different to how to add CSS files to your project so heads up~!
What you'll need:
know how to create a React project >> click
know the default React project's file structure >> click
know how to create a component >> click
know basic SCSS or SASS
basic knowledge of using the Terminal

What The Project Will Look Like:
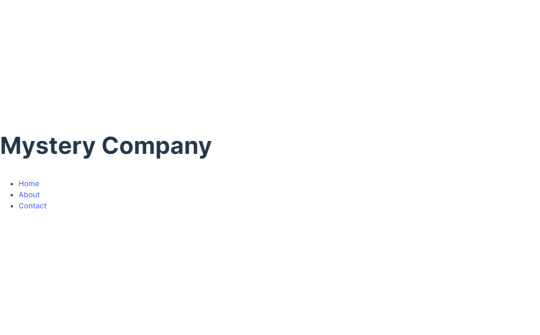
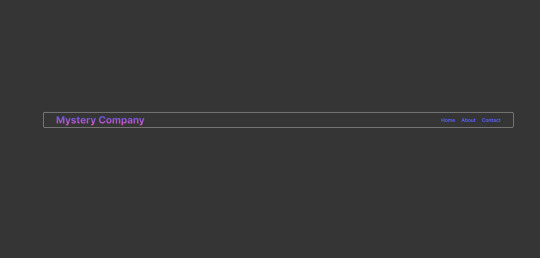
*very basic but just want some SCSS styling to prove that the tips work~!
Big disclaimer: I have deleted all the code inside of the App()'s return() so that the default project is gone and the guide starts on a clean slate. I have also created a NavBar component beforehand as my testing component for this guide~!
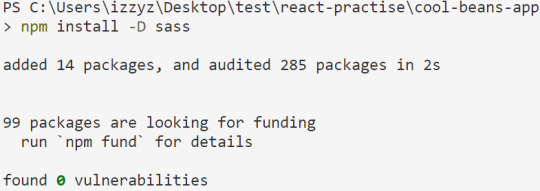
[ 1 ] Open Terminal And Install Sass: Launch the terminal within your project folder. Execute the following command to install Sass as a development dependency for your project:
npm install -D sass
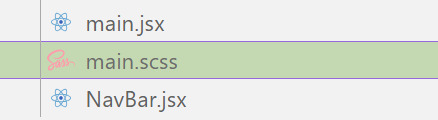
[ 2 ] Create SCSS File: In the 'src' folder, create your SCSS file - it ends with .scss for SCSS files and .sass for SASS files. Feel free to organize it into subfolders for a structured project.
[ 3 ] Style Your SCSS: Open the newly created SCSS file and add your styles, take advantage of variables, nesting, and more. (This is not all of my SCSS code):
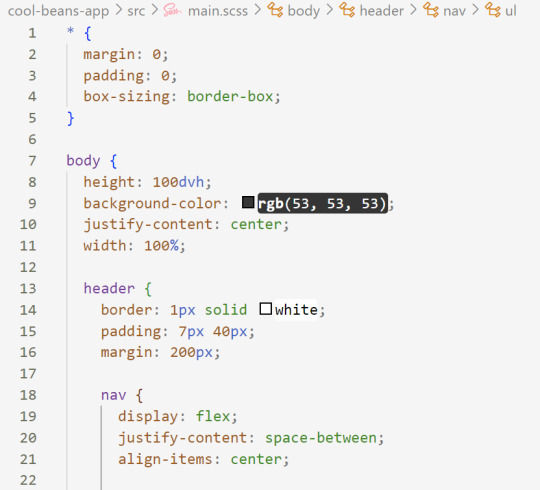
[ 4 ] Import SCSS in Component: In the React component file where you want to apply these styles, import your SCSS file at the top:
import './[location of you SCSS/SASS file]';
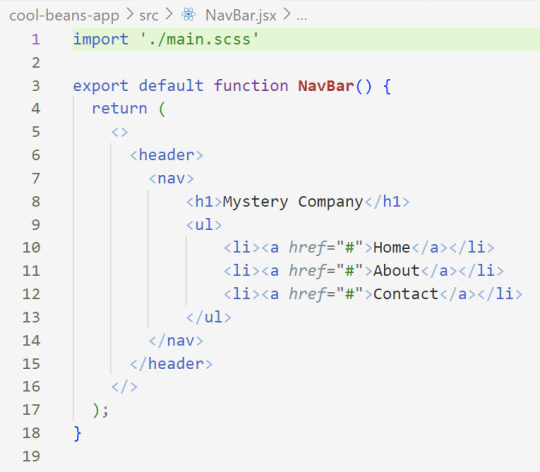
[ 5 ] Run the Development Server: Start your development server with the command in the Terminal (the 'Local' link) + make sure your component is in the App() in App.jsx:
npm run dev
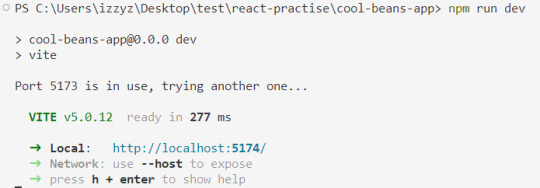
Congratulations! You've successfully added SCSS/SASS to your React project~!
Resources:
BroCode's 'React Full Course for Free' 2024 >> click
How to use Sass in React with Vite >> click
Sass Tutorial for Beginners - CSS With Superpowers >> click
React Official Website >> click
🐬Previous Tip: Tip #3 Adding CSS files to your project >> click
Stay tuned for the other posts I will make on this series #mini react tips~!
#mini react tips#my resources#resources#codeblr#coding#progblr#programming#studyblr#studying#javascript#react.js#reactjs#coding tips#coding resources
10 notes
·
View notes
Note
Hey I really hope I'm not bugging you! I'm just not 100% who to ask and I remember you saying at some point that you're a programmer? I have some experience from school (Matlab, mostly) and self taught html/css, but I wanted to start learning python and like... All of the tutorials assume I know a bunch of high level terms and how they work and like? I do not know these things so I'm feeling really lost? I was wondering if you knew any sites or anything that explain like the very fundamentals of back-end coding well because obviously Im not as prepared as I thought I was 😭😭 thank you!!
Okay, so! I don't exactly have any one exact resource to give you (if anyone else does, feel free to link them) but here's my take: you're probably better off looking into more generic "intro to programming" material rather than specifically "intro to python" material.
And I don't mean that as a bad thing!! It's just that experience with Matlab and html/css very likely doesn't contain a number of the core fundamentals, and that's why you're feeling lost.
When I took engineering classes that used Matlab, oftentimes Matlab was used moreso as a glorified calculator than as a programming language. A lot stuff like - line 1: declare this array of data points, line 2: do this calculation on the data points, line 3: graph the result. Which is all well and good, but is pretty limited in teaching core ideas about programming.
As for html/css, they're definitely important for web development, and it's knowledge I use every day at my job, but they're not programming languages. HTML is a markup language, which allows you to structure a web page, and CSS allows you to apply styles (and frankly, knowing how to use class/id selectors, nth child stuff, etc etc in css deserves some programming recognition). But unless you've done a healthy amount of Javascript too along with the html/css, then that probably doesn't cover the fundamentals either.
Those intro to python courses you found might be geared toward people who already have experience with some language, and now want to learn python. If you try to find something that's focused on the basics of programming, and not the language, you'll probably get a bunch of those high level terms explained to you, rather than them being assumed knowledge.
63 notes
·
View notes
Last Seen Blogs