#Free CSS Tutorial
Text
Unlocking the Potential of CSS: A Deep Dive into Outlines, Text Effects, Fonts, Icons, and Links

Cascading Style Sheets (CSS) is a fundamental component of modern web development, empowering designers and developers to create stunning and engaging user interfaces. In this blog post, we will explore some key CSS features and techniques that play a crucial role in enhancing the visual appeal and functionality of web pages. Specifically, we'll delve into CSS Outlines, CSS Text, CSS Fonts, CSS Icons, and CSS Links, providing practical examples along the way. Let's dive in!
CSS Outlines:
CSS Outlines allow you to add visual emphasis to elements by creating an outline around them. Outlines are distinct from borders, as they do not take up any space and are typically used to highlight active or focused elements.
Example:
/* CSS */
button:focus {
outline: 2px solid blue;
}
In this example, when a button is in focus, a 2-pixel solid blue outline will be displayed around it, indicating its active state.
CSS Text:
CSS Text properties offer granular control over the appearance and layout of text within HTML elements. From adjusting font size and color to controlling letter spacing and alignment, CSS Textprovides a wide range of options for customizing the text on your web pages.
Example:
/* CSS */
h1 {
font-size: 24px;
color: #333;
letter-spacing: 2px;
text-align: center;
}
Here, the h1 element will have a font size of 24 pixels, a color of #333 (a dark gray shade), a letter spacing of 2 pixels, and will be centered within its parent container.
CSS Fonts:
CSS Fonts allow you to define the typeface, size, style, and other properties of text elements on your web pages. With CSS Fonts, you can create visually appealing and consistent typography across different browsers and devices.
Example:
/* CSS */
body {
font-family: Arial, sans-serif;
font-size: 16px;
font-weight: bold;
}
In this example, the body element will use the Arial font (or a sans-serif fallback), have a font size of 16 pixels, and be displayed in bold.
CSS Icons:
CSS Icons offer a lightweight and scalable way to incorporate visual symbols and icons into your web pages. By leveraging CSS properties like content, font-family, and ::before or ::after pseudo-elements, you can easily include icons without relying on external image files.
Example:
/* CSS */
.button::before {
content: "\f138";
font-family: "Font Awesome";
margin-right: 5px;
}
In this example, we use the Font Awesome icon font to add an icon before the content of an element with the class .button. The Unicode value \f138 represents the specific icon to be displayed.
CSS Links:
CSS Links allow you to customize the appearance of hyperlinks on your web pages, making them visually distinctive and engaging. CSS properties like color, text-decoration, and hover pseudo-classes enable you to control link styles based on different states.
Example:
/* CSS */
a {
color: blue;
text-decoration: none;
}
a:hover {
color: red;
text-decoration: underline;
}
In this example, all links (<a> elements) will be displayed in blue without underlines. However, when a user hovers over a link, it will turn red and have an underline, indicating the interactive state.
Conclusion:
CSS Outlines, CSS Text, CSS Fonts, CSS Icons, and CSS Links are powerful tools that allow you to enhance the visual presentation and functionality of your web pages. By understanding and utilizing these CSS features effectively, you can create engaging and visually appealing user interfaces. Experiment with these examples, customize them to suit your needs, and explore further possibilities to elevate your web design skills. Happy coding with WebTutor.dev!
Don’t Miss to Read
Learn Free Online CSS Tutorial
Learn Free Online CSS Outline Tutorial
Learn Free Online CSS Text Tutorial
Learn Free Online CSS Icons
Learn Free Online CSS Links
#Free CSS Tutorial#Online CSS Tutorial#Online CSS Outlines#CSS Outlines#Free CSS Outlines Learn#CSS Text#Learn CSS Text#Online CSS Text#Free learn CSS Text#CSS Text Property#CSS Fonts#Learn CSS Fonts#Online CSS Fonts#CSS Fonts tutorial#CSS Icons#Learn CSS Icons#Online CSS Icons#CSS Icons Tutorial#CSS Links#Learn about CSS Links#Online CSS Links#CSS Links Free Tutorial.
1 note
·
View note
Note
Hi! I saw your post about Obsidian (for note taking) and I was wondering how you added custom fonts? Or if there's some resources you could point me to that would help figuring out some tips and how to use it
hello!
so, the simplest method for custom fonts is to first make sure it’s installed on your computer (if you download a new font, right-click and hit ‘install’).
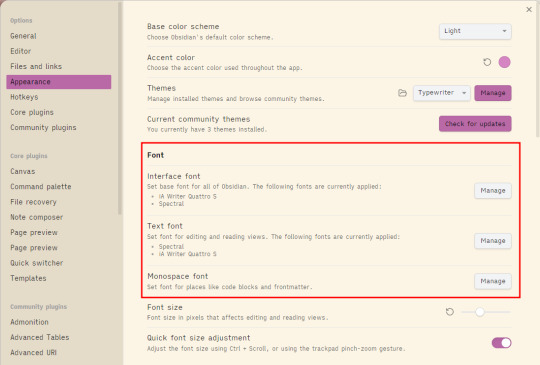
Then if you just want to change the base font in obsidian for either all of the interface, or for editing/reading mode, you can go into settings, then under ‘Font’, you select the ‘manage’ option, and there’ll be a text box/dropdown you can type in to find the font you want. Click ‘add’ and then that’s done!
If you want to do custom fonts for headings, or for specific pages/cssclasses (like I’ve done for Obedience and claws in my notes), then you will have to do a little bit of css, but it’s not as scary as it sounds i promise!
To make a cssclass, all you really need is a text editor. You can use notepad if you’re just doing a few little things, but if you want to start doing a lot I recommend getting one that’s more designed for it. I use brackets because it’s free and easy, but a lot of people use VSCode which is. too intimidating for me. and too much for my usecase anyway.
im getting offtopic. FONTS!
now, i am. out of date with all the new variables and also i write bad css, but the way I do it if I want specific header fonts is like this:
.markdown-preview-view h1 {
font-family: COOL FONT;
}
OR apparently, as I just learned in checking to write this, you can use ‘.markdown-rendered h1’ as the class. either seems to work…my css is very old.
now there is a way to do this for all headings at once without copy-pasting it for h1, h2, h3 etc but i don’t know how to do it right and at this point my css works and so i Leave It Alone
this only does it for Reading Mode, because i like having more ‘text-y’ fonts for writing and then pretty ones for reading when I’m done. to change things for live preview/source view, you need to do
.markdown-source-view.mod-cm6 .cm-header {
font-family: COOL FONT;
}
And if you want different fonts for different headers, change the ‘.cm-header’ part to ‘.cm-header-1’ (or whatever number of heading size you want.)
You can add things other than fonts in there as well, like font-size, text-transform, and other css classes. (this is why i like brackets, it suggests classes and property fills as you’re typing which is good because i. forget what the options are)
If you want to go poking around in obsidian to figure out which selector is doing what, hit Ctrl+shift+i on windows (for mac, I believe it's command+option+i), and it’ll bring up the developer console, so you can use inspect element to track down selectors. (selectors are the thing you put after the period (.) and tell the css which element to target)
I like to make custom css classes for things, and to make one of those, you just type ‘.classname’ before the variable you want to change. E.g. for claws it looks like:
.claws.markdown-rendered h1 {
font-family: LEVIBRUSH;
}
then to add that to a note, you need to add the ‘cssclasses’ property in the frontmatter. you can make the frontmatter with three dashes like this:
---
cssclasses: claws
---
or you can use the properties side panel and hit ‘add property’ and then make cssclasses. this then means that all the css wizardry you do prefixed with that class will only apply to pages with that class, which I really like for making unique workspaces for different projects.
adding your snippet
so now you've made your snippet, you just need to load it in. the simplest way is to head to Settings -> Appearance, and scroll down to where it says 'CSS Snippets'. Hit the folder icon, and that'll open the folder you need to save the snippet.
make sure you save your notepad or brackets or whatever document as '.css' first. you can literally just do this by right clicking a saved notepad document and changing the name to 'name.css' if you need to.
save that css document into the snippets folder, go back to settings and hit the 'reload' snippets button to get it to show up, toggle it on, and voila!
now what you can do is edit that snippet live in obsidian just by. editing it. and hitting save. it'll live update and you can tinker. that's all i do: have brackets and obsidian open at the same time and just. fuck about till things work. i like problem solving, so it's usually fun for me :)
resources!
Obsidian CSS Quick Guide - Share & showcase - Obsidian Forum → a quick guide to poking around and how to find css classes in obsidian
Headings - Developer Documentation → full list of css variables you can play with. this gives you an idea of just how many things you can customise in obsidian which is to say. all of it.
i also just recommend googling around about CSS and how to use it. W3 schools is usually my go-to, it’s pretty good. Or searching ‘how to do x with css’ and usually either reddit or stackexchange will have decent answers.
you can find fonts all over, and i know google is a bitch, but google fonts has a bunch of good fonts. that's where most of mine are from, honestly
#obsidian md#obsidian.md#this is such a quick and dirty tutorial but i hope it helps!#absolutely feel free to ask for clarification im still working on my 'giving tutorials' skills#most of how i figured out how to do things was frantic googling and trial and error so i am in no way an expert#my css is a frightening franken-mess we don't look too closely at but it works for me and that's all that matters#you can't *really* break things with css as well tbh#if it makes something weird just delete the snippet and it's fixed
5 notes
·
View notes
Text
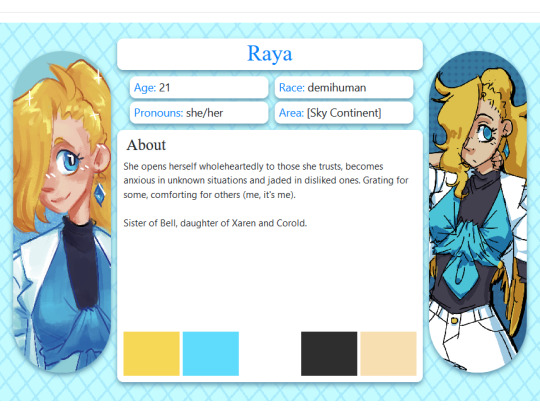
i managed to learn basic html for toyhouse purposes. now i just need to make actually good profile designs.
i paid for the skill in sanity.
but i survived! it took 2 days of pain.
#toyhouse#html#toyhouse html#you have no idea how uncertain the resources i used were.#this might be on me for not finding something good but-#“no css”#bullshit#you can use css but it's just inline css#do you have any idea how much trouble that single distinction caused?#maybe it was just my aspergers kicking in#cus you cant do SHIT without css#all the offsite tutorials use css-#and the best free “no css” profiles from toyhouse use classes pulled out of who knows where and it just looked like black magic#in the end it turned out to be pretty easy#just...... very tedious#and guess what#i dont really care about using the profiles#too much filling out information im never certain about
3 notes
·
View notes
Text

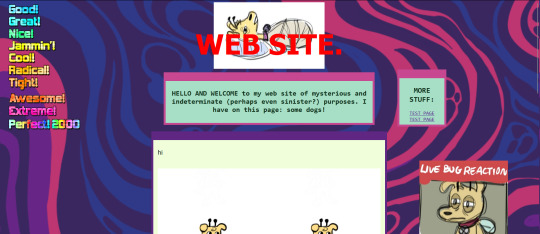
neocities guide - why you should build your own html website
do you miss the charm of the 90s/00s web where sites had actual personality instead of the same minimalistic theme? are you feeling drained by social media and the constant corporate monopoly of your data and time? do you want to be excited about the internet again?
try neocities!!
what is neocities?
neocities is a free hosting website that lets you build your own html website from scratch, with total creative control. in their own words:
"we are tired of living in an online world where people are isolated from each other on boring, generic social networks that don't let us truly express ourselves. it's time we took back our personalities from these sterilized, lifeless, monetized, data mined, monitored addiction machines and let our creativity flourish again."
why should I make my own website?
web3 has been overtaken by capitalism & conformity. websites that once were meant to be fun online social spaces now exist solely to steal your data and sell you things. it sucks!!
building a personal site is a great way to express yourself and take control of your online experience.
what would I even put on a website?
the best part about making your own site is that you can do literally whatever the hell you want! focus on a specific subject or make it a wild collection of all your interests. share your art! make a shrine for one of your interests! post a picture of every bird you see when you step outside! make a collection of your favorite blinkies! the world is your oyster !!
here are some cool example sites to inspire you:
recently updated neocities sites | it can be fun to just look through these and browse people's content!
space bar | local interstellar dive bar
creature feature | halloween & monsters
big gulp supreme
peanutbuttaz | personal site
dragodiluna
linwood | personal site
patho grove | personal site
getting started: neocities/html guide
sound interesting? here are some guides to help you get started, especially if you aren't familiar with html/css
sadgrl.online webmastery | a fantastic resource for getting started with html & web revival. also has a layout builder that you can use to start with in case starting from scratch is too intimidating
web design in 4 minutes | good for learning coding basics
w3schools | html tutorials
templaterr | demo & html for basic web elements
eggramen test pages | css page templates to get started with
sadgrl background tiles | bg tiles
rivendell background tiles | more free bg tiles
fun stuff to add to your site
want your site to be cool? here's some fun stuff that i've found
blinkies-cafe | fantastic blinkie maker! (run by @transbro & @graphics-cafe)
gificities | internet archive of 90s/00s web gifs
internet bumper stickers | web bumper stickers
momg | gif gallery
99 gif shop | 3d gifs
123 guestbook | add a guestbook for people to leave messages
cbox | add a live chat box
moon phases | track the phases of the moon
gifypet | a little clickable page pet
adopt a shroom | mushroom page pet
tamaNOTchi | virtual pet
crossword puzzle | daily crossword
imood | track your mood
neko | cute cat that chases your mouse
pollcode | custom poll maker
website hit counter | track how many visitors you have
web revival manifestos & communities
also, there's actually a pretty cool community of people out there who want to bring joy back to the web!
melonland project | web project/community celebrating individual & joyful online experiences. Also has an online forum
melonland intro to web revival | what is web revival?
melonking manifesto |
status cafe | share your current status
nightfall city | online community
onio.cafe | leave a message and enjoy the ambiance
sadgrl internet manifesto |
yesterweb internet manifesto | sadly defunct, still a great resource
reclaiming online social spaces | great manifesto on cultivating your online experience
in conclusion
i want everyone to make a neocities site because it's fun af and i love seeing everyone's weird personal sites that they made outside of the control of capitalism :)
say hi to me on neocities
#neocities#old web#webcore#old internet#web revival#indie web#html#website#recource#guide#can you tell that i've gotten REALLY into neocities this month!!!!!#but its so FUN i love seeing everyones weird af websites#its amazing#i love celebrating the old web#ANYWAYS MAKE A NEOCITIES HERES A GUIDE#i haven't touched html in like a decade#and i've been having a great time relearning#:)#share your sites with me!!!!!!#oh and share resources if you have them!
74K notes
·
View notes
Video
youtube
CSS in One Shot 2023 || Complete CSS in One Video Hindi || With Notes & ...
0 notes
Text
Web Development with Dropout Developer's Unique Free Project-Based Learning Approach 2023
Are you looking for a new career in web development, but struggling to find the best way to learn? Are you tired of traditional learning methods that leave you feeling uninspired and unmotivated? Look no further than Dropout Developer, the go-to platform for mastering web development through project-based learning.
At Dropout Developer, we believe that project-based learning (PBL) is the key to…

View On WordPress
#back-end development#Career Roadmaps#Code Challenges.#Coding Bootcamp#Coding Education#Coding Resources#CSS#Expert Guidance#Free Tutorials#front-end development#Full-stack development#HTML#JavaScript#Job-Ready Developers#Learning Paths#Node.js#online learning#programming languages#Project-Based Learning#React#Responsive Web Design#Technology Education#User Experience Design#web development#web development career#Web Development Community#Web development frameworks#Web Development Jobs#Web Development Portfolio#Web development skills
0 notes
Text
How to Make a Responsive 404 Page using HTML & CSS
youtube
#404 page#youtube#webdesign#htmlcss#tutorials#webdevelopment#coding#frontend#js#learn css#web development#404 error page#responsive web design#responsive design#youtube videos#free code#code#coding bootcamp#technology#404#light dark theme#color scheme#Youtube
1 note
·
View note
Text
it seems like website building is about to have a boom, let me share my favorite resource of all time!!
this is a website packed to the brim with website building goodies , including a website layout maker that is the easiest and most user friendly maker i’ve encountered! perfect for creating your own neocities (it’s free!!) , the code even has helpful tips in it for those new to html/css!
i also recommend w3schools.com for quick and easy to follow chunks of html/css tutorials! gifcities is a goldmine for old neocities era gifs, and blinkies cafe is perfect for making your own blinkies!
i can’t wait to see everyone’s websites in the coming weeks and months! remember, it’s fine to take it slow and let it look silly, that’s always been the point of websites like this :]
ps check out our neocities and feel free to drop yours in the replies :]
#neocities#old web#website building#website builder#gifcities#html#css#geocities#blinkies#graphics#resources#website resources#web revival#webcore#webhosting#web design#2000s web#2000s nostalgia#neo y2k#y2k#cybercore
7K notes
·
View notes
Text
Hey, you! Yeah, you with the cool neocities!
You're doing great! Really love what you've done with the place so far. Now here's something important moving forward. If you are making a neocities - especially if you are doing so with the motivation to fight back against Web 3.0 and reclaim the web as a space for individual users instead of for companies - please, keep the following in mind:
An inaccessible web is not a free web.
Repeat after me: An inaccessible web is not a free web.
Resources for Beginners to Learn About Web Accessibility and Web Design:
W3C's Introduction to Web Accessibility | W3C is the organization that decides on the standards of Accessibility on the web. They are an invaluable direct resource.
A Beginner's Guide to Understanding Web Accessibility
Mozilla's Accessibility Overview
WebAIM's Introduction to Web Accessibility
What is Web Accesibility in 60 Seconds! [YouTube Video]
Accessibility: What's the difference between WCAG Levels A and AA? [YouTube Video]
FreeCodeCamp | FCC provides an extremely beginner friendly Responsive Web Design course. The lessons for this course integrate accessibility standards naturally, and also have individual lessons specifically for teaching accessibility.
FreeCodeCamp's Accessibility Tag on their News Page
HTML Dog's Tutorial's for HTML, CSS, and Javascript
MarkSheet's Free HTML and CSS Tutorial
W3C's Easy Checks
W3C's QuickRef on How to Meet WCAG | I have filtered the QuickRef link to only show Level A requirements. This is the easiest level to meet and is considered the "bare minimum."
WAVE: Web Accessibility Evaluation Tool
9K notes
·
View notes
Text
Learn Online CSS Design Fundamentals: Backgrounds, Borders, Margins, Padding, Height, Width & Box Model
In this blog post, we will delve into the essential aspects of CSS backgrounds, borders, margins, padding, height, width, and the box model. Whether you're a beginner or an experienced web developer, understanding and utilizing these CSS properties effectively can greatly enhance the visual appeal and layout of your webpages. Follow along as we explore each topic with concise explanations and practical examples.
CSS Backgrounds:
CSS backgrounds allow you to style the background of an element. Here's an overview of commonly used background properties:
a. background-color:
The "background-color" property sets the background color of an element. For example, to set a blue background color, use:
.element {
background-color: blue;
}
b. background-image:
With "background-image," you can specify an image as the background of an element. Let's say you have an image called "bg-image.jpg" in the same directory as your CSS file. To set it as the background image, use:
.element {
background-image: url("bg-image.jpg");
}
CSS Borders:
CSS borders enable you to add borders around elements. Here's an overview of relevant properties:
a. border-style:
The "border-style" property determines the style of the border. For example, to create a solid border, use:
.element {
border-style: solid;
}
b. border-color:
To set the color of the border, you can use the "border-color" property. For instance:
.element {
border-color: red;
}
CSS Margins:
CSS Margins allow you to control the space around elements. Here are the key properties to consider:
a. margin-top, margin-right, margin-bottom, margin-left:
You can set individual margin values for each side of an element. For example:
.element {
margin-top: 10px;
margin-right: 20px;
margin-bottom: 10px;
margin-left: 20px;
}
CSS Padding:
CSS Padding is the space between the content of an element and its borders. Consider the following property:
a. padding:
The "padding" property sets the padding for all four sides of an element. For instance:
.element {
padding: 15px;
}
CSS Height and Width:
Controlling the height and width of elements is crucial for achieving desired layouts. Here's what you need to know:
a. height:
To set the height of an element, use the "height" property. For example:
.element {
height: 200px;
}
b. width:
Similarly, the "width" property sets the width of an element. For instance:
.element {
width: 300px;
}
CSS Box Model:
Understanding the CSS box model is fundamental to layout design. It describes how elements are rendered on the page. Here's a brief overview:
The box model consists of four components: content, padding, border, and margin. When you set the width and height of an element, it applies to the content area. The padding adds space around the content, followed by the border, which surrounds both the content and padding. Finally, the margin creates space outside the border, separating it from other elements.
Consider the following example:
.element {
width: 200px;
height: 150px;
padding: 20px;
border: 2px solid black;
margin: 10px;
}
Conclusion:
In this blog post, we covered the fundamental aspects of CSS backgrounds, borders, margins, padding, height, and width. By mastering these properties, you can take your web design skills to the next level. Experiment with different combinations, explore advanced techniques, and create visually stunning webpages. Stay tuned for more informative content at webtutor.dev!
Don’t Miss to Read
Learn Online CSS Background
Learn Online CSS Margins
Learn Online CSS Padding
Learn Online CSS Box Model
#Free CSS Tutorial#Online CSS Tutorial#Online CSS Design Fundamentals#Learn Online CSS#CSS Backgrounds#background-color#background-image#CSS Borders#online CSS Borders#Learn CSS Borders#border-style#CSS Margins#Learn online CSS Margins#online CSS Margins#CSS Padding#Learn CSS Padding#Online CSS Padding#Free tutorial#CSS Padding free learn#CSS Height and Width#CSS Box Model#Learn CSS Box Model
0 notes
Text
Obsidian Resources Masterpost
This is a masterpost of all the useful resources I’ve collected for using Obsidian. Hopefully some of them will also be useful to you, and I’ll try to keep this post updated whenever I find new and exciting stuff!

[ID - purple decorative divider]
General Obsidian
Download and install Obsidian
Obsidian Help
Obsidian Glossary
Beginners Guide to Obsidian
How to get started with Obsidian: a guide for Autistics & ADHDers
Youtube
My personal playlist of Obsidian-related videos
Danny Talks Tech
Nicole van der Hoeven
FromSergio
Jonathan Pritchard Obsidian Tutorials
Josh Plunkett Obsidian for TTRPG Videos
Vault Showcases & Use Examples
The best way to get an idea of what you can do in Obsidian is to look at what other people have done. This is a collection of articles, videos, and Obsidian Publish Vaults showing various setups and processes so you can get inspired!
Writing a novel in Markdown - PD Workman
(2024) Obsidian For TTRPG - Template Vault | Campaign Manager
How I Plan and Write Fiction in Obsidian – Vanessa Glau
SlRvb - Obsidian Publish
Obsidian TTRPG Tutorials
SoRobby/ObsidianStarterVault: Organize your Universe
How I structure my Obsidian vault (Obsidian tour 2023) - Nicole va der Hoeven
Obsidian - 2024 Intro for TTRPG and Worldbuilders
Form, Function, & Fun! - My Obsidian Vault Tour [2024] - CyanVoxel
Markdown
Obsidian uses markdown to format text, so these are some resources to help you out with that.
Markdown Syntax - Obsidian Hub
Basic Syntax | Markdown Guide
Markdown Reference
Basic formatting syntax - Obsidian Help
CSS & Styling
You can just use Obsidian as-is, but it’s so much fun to customise it and waste all the time you should be doing work on making it look pretty. These resources cover various plugins and ways of prettifying your vault, as well as some CSS resources, since Obsidian uses CSS for styling.
How to Style Obsidian
Default Obsidian Theme Colors
CSS reference
CSS Tutorial
CSS-Tricks
CSS Gradient — Generator, Maker, and Background
MarkSheet: a free HTML and CSS tutorial
ITS Theme: Image Adjustment Snippets + ITS Theme - SlRvb's Documentation
Banners: add banners to your notes
colored tags: Colorizes tags in different colors.
MySnippets Plugin: adds a status bar menu allowing the user to quickly manage their snippets within the comfort of their workspace
style settings: A dynamic user interface for adjusting theme, plugin, and snippet CSS variables
Plugins
A highly opinionated collection of plugins—all of these are ones I either currently use or have used. Organised loosely from simple to complex. Links go to the github pages, which have install instructions, but the easiest way is to install them directly from the plugins manager inside Obsidian.
smart typography: Converts quotes to curly quotes, dashes to em dashes, and periods to ellipses
url into selection: Paste URLs into selected text
better word count: Counts the words of selected text in the editor.
short links: plugin to display short internal links.
editing toolbar
omnisearch: A search engine that "just works" for Obsidian. Supports OCR and PDF indexing.
outliner: Work with your lists like in Workflowy or RoamResearch
Advanced tables: Improved table navigation, formatting, and manipulation
longform: A plugin that helps you write and edit novels, screenplays, and other long projects.
periodic notes: Create/manage your daily, weekly, and monthly notes in Obsidian
workspaces plus: Quickly switch and manage Obsidian workspaces
hover editor: Transform the Page Preview hover into a working editor instance
advanced uri: Advanced modes for Obsidian URI
dataview: A high-performance data index and query language over Markdown files + Dataview
Commander | Add Commands to every part of Obsidian's user interface
QuickAdd for Obsidian + Getting Started | QuickAdd
[ID - purple decorative divider]
check out my obsidian tag for more posts / got questions? want to say hi?
#obsidian.md#obsidian resources#obsidian md#writing#writing apps#resources masterpost#writing resources#notes app#writing tools#behold! a collection of links!#anyway i hope this is useful to at least one person
210 notes
·
View notes
Text
YOU MUST MAKE A WEBSITE
Oh wow, look at that! YET ANOTHER post urging you to make a webbed site! What a completely new thing that people haven't made a thousand masterposts for already!!
• Making a website might look scary. It is Not.
At first, I too thought making a website was too much work. It really isn't! It turns out that all you need is
an HTML file,
a web hosting service and
w3schools tutorials,
and that's about it!
This post will point you towards these resources, and others I found useful while figuring out how to make a website.
• VERY QUICK EXPLANATIONS:
What's HTML and CSS?
HTML is the content of your webpage, the skeleton of it. What shows up in a webpage is what's written in the HTML file!
CSS is the way the HTML is styled; the colour of the background and the letters, the size of elements, the font, all that!
Do I absolutely NEED JavaScript for a website?
Not at all! You don't need to worry about learning it before getting started.
• What do I make a website for? What do I put in there?
ANYTHING AND ALMOST EVERYTHING. Here's some ideas for pages from a post of mine were I was very normal about websites:
You can make a page that's only pictures of your pets.
You can make an interactive adventure.
You can make your own academic blog full of your own essays or articles.
You can just post a ton of art or make a full music page.
You can make a blog and infodump eternally, give book reccs and reviews. You can host a thousand virtual pets and nothing else.
Upload entire books in a single html file. Make a wikipedia for your ocs. Make a fake site for a random fictional place (restaurant, hotel, whatever). You can make a thousand fanpages/shrines about your favorite media. You can upload your own webcomic and make it all like a fancy website and shit.
I could keep going but, for the sake of "brevity", I won't.
• WEBSITE EXAMPLES!
If I started listing the websites I know, this post would be bottomless. Here's only seven:
https://publictransit.neocities.org/ - A webbed site, for sure
https://ribo.zone/ - A personal site
https://leusyth.neocities.org/ - An art archive
https://solaria.neocities.org/ - Personal website with A Lot of stuff (it'll come up in a bit, because it offers web making resources)
https://hog.neocities.org/ - The Hogsite
https://thegardenofmadeline.neocities.org/ - Another personal site! It also has a web resources page and has made another masterpost like this one (but better)
https://spiders.neocities.org/ - My own website, which must be weird to see in mobile . sorry
• You've convinced me. I want a webbed site. Where do I start?
https://neocities.org/
FIRST OF ALL: Neocities. It is a free web hosting service, and it's the one I and the sites I linked use!
When I first started, my website was a black page with red letters and a drawing, and nothing else! It was like that for a month, till i started picking up on how to do things.
Here's what helped me get an idea of how to make things work:
https://sadgrl.online/learn/articles/beginners-guide-neocities
An absolute beginners guide to neocities -- while when you make an account there you get a tutorial page from the site, this one's extra support for that.
https://www.w3schools.com/
Learn HTML, CSS, JavaScript and MANY other coding things for free. All the tutorial/reference pages have live testing windows for you to mess with!! helped me a LOT while figuring this stuff out!
https://htmlcheatsheet.com/
https://htmlcheatsheet.com/css/
Cheatsheets for HTML and CSS, respectively. It includes a JavaScript one too!
https://sadgrl.online/webmastery/
Sadgrl's webmastery resources! Also includes the next resource listed here:
https://sadgrl.online/projects/layout-builder/
Sadgrl's layout builder; not a lot of customization at a first glance, but I've seen wildly different websites all using it as a base, plus it works using CSS Flexbox, so it generates a responsive layout!
(basically, a responsive layout is one that translates well in different sized screens)
https://www.tumblr.com/fysa/728086939730919424/wikitable-code?source=share
Tumblr user fysa made this layout imitating a wiki page!
https://brackets.io/
At some point, you might want to do things outside the Neocities code editor and get one outside the site. I recommend Brackets, because my old as fuck computer can run that and absolutely nothing else apparently, and it works wonderfully! Though I recommend either turning off the code autocomplete or using it after a good while of already using the Neocities code editor, so you get used to coding on your own.
http://www.unit-conversion.info/texttools/text-to-html/
Turn your text into HTML code! i use this kind of pages for my lengthy blog entries that I don't feel like formatting myself.
https://imagecompressor.com/
COMPRESS YOUR IMAGES.
The heavier an image is, the more your site weighs and the more time your page will spend loading. You don't want that, specially if your site is heavy on graphics. This might help!
https://solaria.neocities.org/guides
Some CSS, JavaScript and Accessibility guides! Worth checking out!
https://eloquentjavascript.net/
This is a free, interactive book for learning JavaScript! NOTE: It is very intuitive, but JavaScript is HARD!! I still haven't learned much of it, and my website does fine without so don't worry if you end up not doing much with it. It's still useful + the exercises are fun.
And now, accessories!
• Silly stuff for your page :]
https://gifypet.neocities.org/
Make a virtual pet, copy the code and paste it in your HTML file! You'll get a little guy in your webbed site :]
https://www.wikplayer.com/
Music player for your website!
http://www.mf2fm.com/rv/
JavaScript silly effects for your site :]
https://blinkies.neocities.org/geoblinkies
Blinkie search engine!
https://www.cbox.ws/
Add a chatbox to your site!!
https://momg.neocities.org/
Infinite gallery of gifs. i've spent hours in there looking at moving pictures and out of them all, the ONLY gif i actually ended up using on my site was a rotating tomato slice. it is still there. trapped.
https://wrender.neocities.org/tarotinstructions
A widget that gives you a random tarot card!
https://www.websudoku.com/widget.php
Sudoku widget!
That's about it for now! I don't know how to end this!!! Remember to have fun and google everything you don't know :]
271 notes
·
View notes
Text
i used html dog tutorials and also a free css layout and a lot of trial and error with putting random content in containers and also a lot of google. you too can web site
542 notes
·
View notes
Text

EMPIRE - MULTIMUSE MUSE PAGE !!!
This page is completely free. Please support me and my work by liking or reblogging this post.
[ INFORMATION ]
THIS CODE IS 100% JAVASCRIPT FREE!!!
This code comes with tabs which allows you to give each muse a separate page. Therefore, you can add as many muses as you want.
The theme is very responsive and doesn’t need much editing!
All colors and effects are easy editable. Not many colors are needed.
The gradient effect over the picture can be removed, it can be turned into one picture, it can be turned into a gray filter or any filter can be entirely removed
The pictures are 250 x 280 in size but they resize automatically if your chosen picture is too small or too big.
The size of the muse picture is also editable and changeable.
The picture can also be removed completely without any editing in the CSS part.
The code offers 2 main links (Home and Ask) but also three free individual links. As well as space for hidden information of your choice.
The main box with detailed information can be edited and designed to your liking. Possible options and variations can be found in the code.
[ GUIDELINES ]
Do not claim as your own.
Do not remove the credit!
Do not use as a base code or take parts of this code for your theme.
Feel free to edit as much as you want!
Editing help and tutorials on how to edit the tabs can be found in the code. A tutorial page is linked there.
Click the SOURCE LINK to be redirected to the preview and the code!
#indie theme#free theme#multimuse page theme#muse page#muse page theme#rph#indie rp#rpc#indie rph#rp theme#page theme
475 notes
·
View notes
Last Seen Blogs

samxpoope
Afraid Of Never Knowing Fear.

wabbi-sabi
Sin título
bruitdelapluie
la force

rugcleaninglondon
Full Immersion Rug Cleaning London, carpet cleaning
wabbi-sabi
Sin título