#bendy cosplay
Text

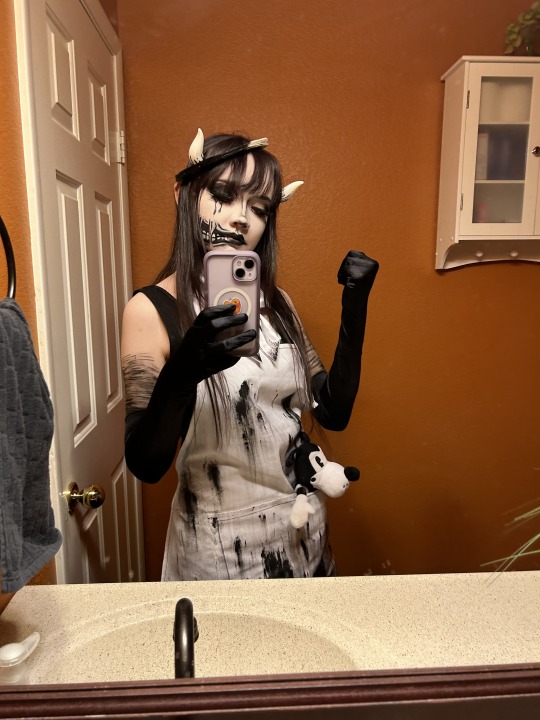
THIS REALM IS MINE.
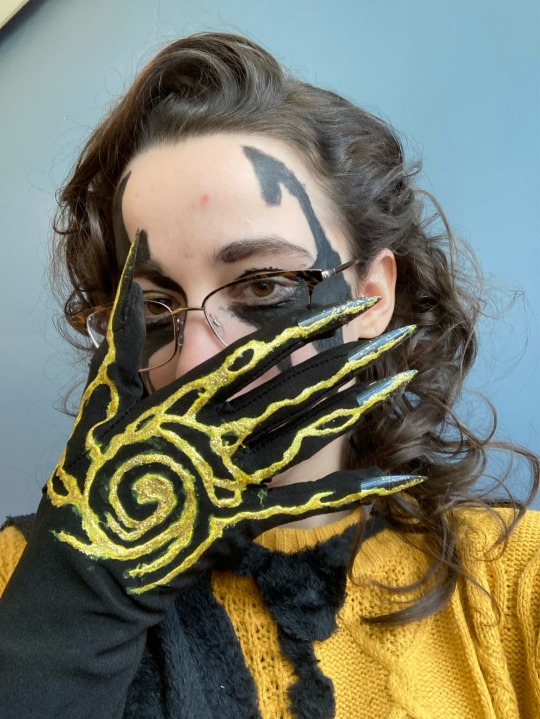
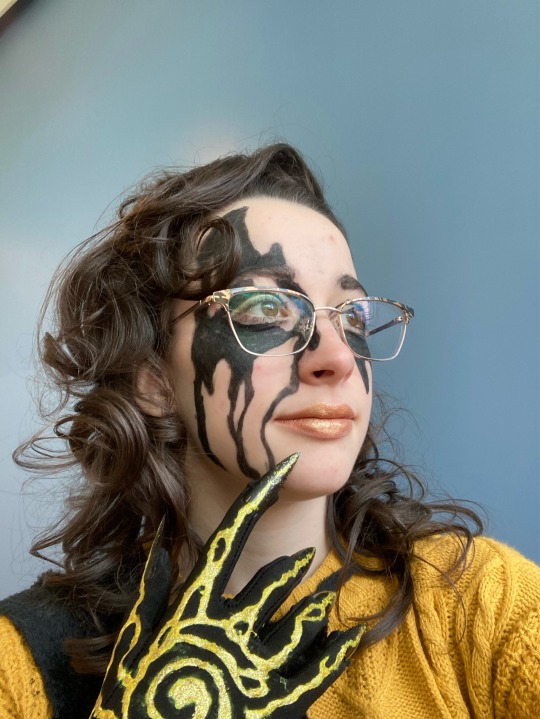
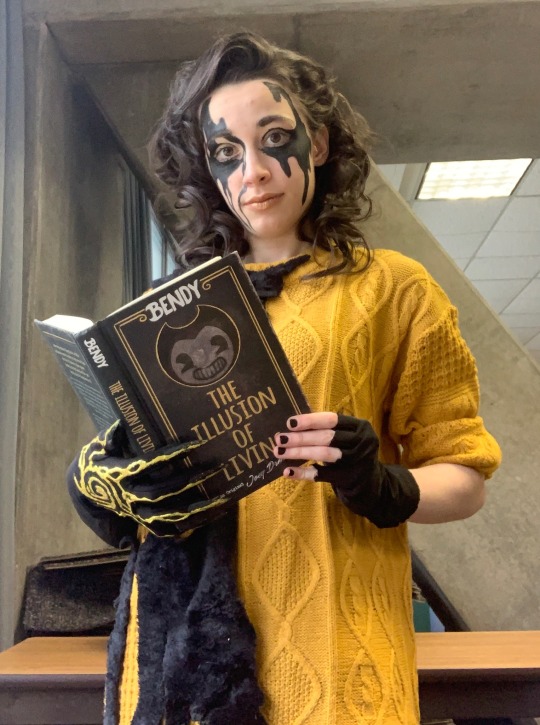
Ink demon closet cosplay post :) I'm like 90% I've worn this outfit just on complete coincidence before a few times but this time I meant to 👍


Various hat tips and bows. I think I look rather elegant, it's honestly really relaxing to dress up to the nines.
bonus stupid picture:

was trying to get my hat and somehow the camera just. Automatically took a picture of me rooting through a random pile of shit
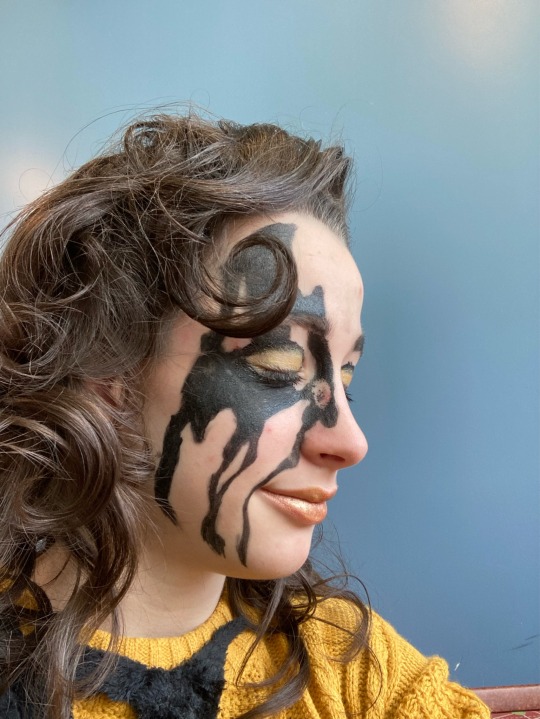
I'm also planning on diy-ing the hat a little- a little circular cutout at the top so when it's tipped back on my head it gives sort of the whole "bendy" shape. Horns, in a way. Although then again, I kind of love how it looks a bit like a pitch black halo whenever I wear it normally.
#This post is getting way too big I'll hush myself#batim#batdr#batim kin#bendy and the dark revival#bendy and the ink machine#bendy#the ink demon#ink bendy#ink demon#me pic#batim cosplay#Bendy cosplay
40 notes
·
View notes
Text
Btw I am making cosplay 🥰

(Image ID: Two towers of cut foam. End ID)
I didn’t wanna say anything yet cause I didn’t know if I was gonna go through with it but I now have an electric knife and have just made a tower of foam so I think I will be doing it! It’ll be a slightly creepier and goofy take on the ink demon and I’ll be using fursuit tutorials! It’s not directly related to this au, but I thought i’d put it here.

(Image ID: A sketch of what the possible finished ink demon head might look like. It has one follow-me mesh eye, a parted smile, and a very big grin. End ID)
#non au#ootim#out of the ink machine#bendy and the ink machine#bendy au#batim au#batim#ink demon#the ink demon#bendy#batim cosplay#bendy cosplay#image description#image described
46 notes
·
View notes
Text


#bendy#batdr#batim#ink demon#inky#ink bendy#art#demon#potato bendy#sleeping#meme#puberty#cosplay#bendy cosplay#💤
32 notes
·
View notes
Text
Tutoriel Bendy Props (Part 2 )
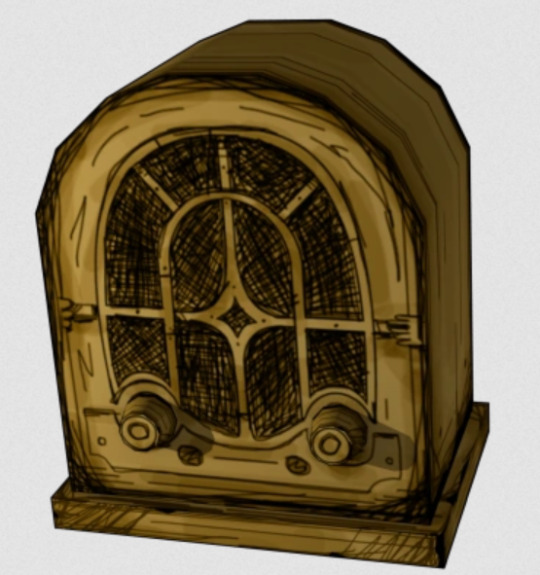
Hello and welcome ( back ) onto this ongoing series of BATIM props tutorial. Today, we’ll make the radio ! And a working one.
This time, Orion was a big helper. He deisgned the patterns, took all the measurements and worked out a way for that radio to swing !
This tutorial will only cover the radio because the process is kinda different from the other props ( that you can find here ), we took extra time and care because we DO wanna listen to Sammy Jam on loop. Best OST, can’t change my mind.
So, you’ll need :
EVA Foam, 5, 7 and 10mm ( or you can use cardboard. Like really, don’t feel pressured into buying those pricey materials if it’s JUST for the radio. Go ham on empty amazon packages and have fun. )
Foam Clay & Kwik Seal, those two are to buy only if you’re using EVA foam. They’re meant to seal the irregularities in foam.
Contact Cement & Hot Glue. Same here, Contact Cement is hardcore glue and isn’t that useful for cardboard, so use Hot Glue instead ! If you use extra-strong glue ( the ones in tiny packages ), be really careful not to put any on your skin ( it burns like hell ).
Yellow Ochre & Black acrylic paint
Cutter & Rotary Tool
little pieces of wood ( like lollipop sticks. )
Snap buttons
Strap ( anything from a rigid piece of cloth to leather is good for what we’re doing here. )
Hinge ( take it from a small box you don’t use anymore. oh, and maybe a screwdriver. )
a mini speaker ! the only thing you’re supposed to buy for the craft. Purchase the cheapest speaker you can find, since low quality speakers perfectly replicate the “no bass” feel of old radios. :)
If you’re looking for the cosplay materials we talked about, visit CosplayShop ( especially if you’re from Europe since they’re Belgian ), but don’t forget, you can use cardboard !
Step 1 : The pattern


The first thing to do is figuring out the pattern. If you already have your Bluetooth speaker, take it in account for the overall size of the radio.
You don’t need to understand all that complicated stuff, Orion figured it out for you.
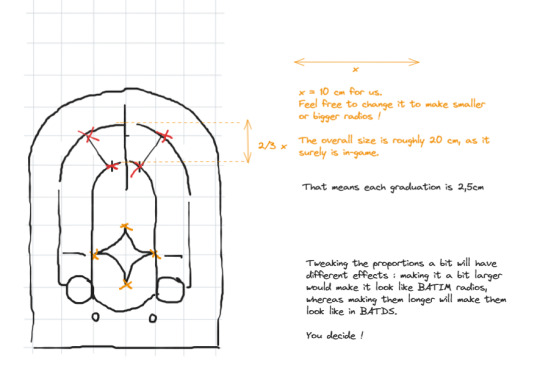
Sorry for the shaky hand, I did it with my PC’s trackpad.
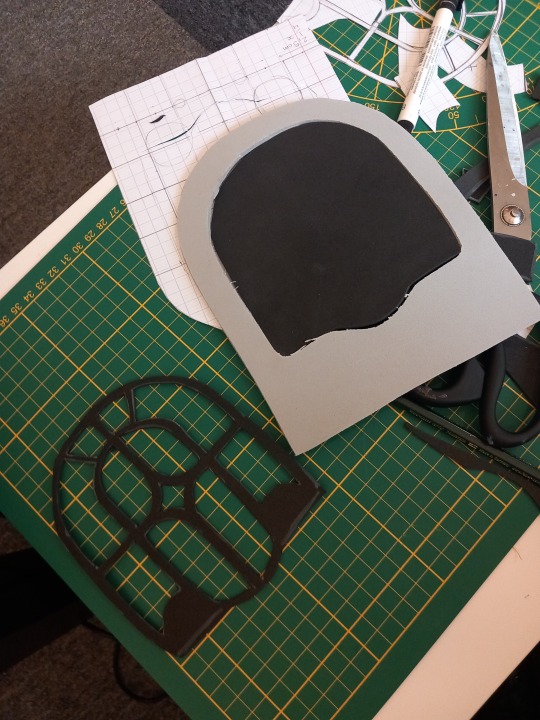
Step 2 : Cut the foam around your pattern.
The face and back sides will be cut in 0,7mm EVA Foam ( High Density ) ; then you cut the grill cloth in thinner foam, or using a real cloth. It’s important that part stays thin, for the sound to come out of it.
Above, you also have the pattern for the relief, that I also cut in 0,5mm Foam. Use a cutter for this !
The buttons are just two cylinders. Since they don’t need to be working, they’re pretty simple to make. Just make sure you don’t use a material that’s too thick, else it’ll be hard to bend.
The depth of the radio is just a 10cm wide piece of material, cut to the right size, that’ll vary with the perimeter of your own radio : don’t bother with the calculus, just test and cut a bit more each time until you got the right size.
After everything is cut nicely, you have to glue it with hot glue or contact cement. For perfect seams, I recommend you sand it gently before filling the holes with Foam Clay or Kwik Seal.
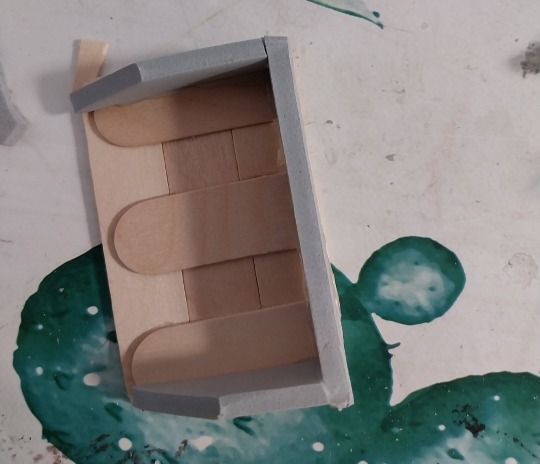
Now that your radio is in 3D, you have to make the base ! Use rigid, thicker foam / cardboard, or double it and stick it together. There should be around a centimetre between the edge of the base and the edge of the radio.
Now, don’t glue it if you wanna have access to the speaker inside. Screw and / or glue the hinge in order to open it. Place the hinge on the back side of the radio.

Now, the inside of the radio ! You gotta put a strap to stitch the speaker in place : we used a piece of leather but anything will do. To make it sit nicely, you can build a base to put it on. We built ours with both small pieces of wood and foam, because foam is easier to glue on foam than wood.

Now, it’s painting time ! This step is explained in the first part of these tutorials, but I’m sure you can figure it out with reference pictures !
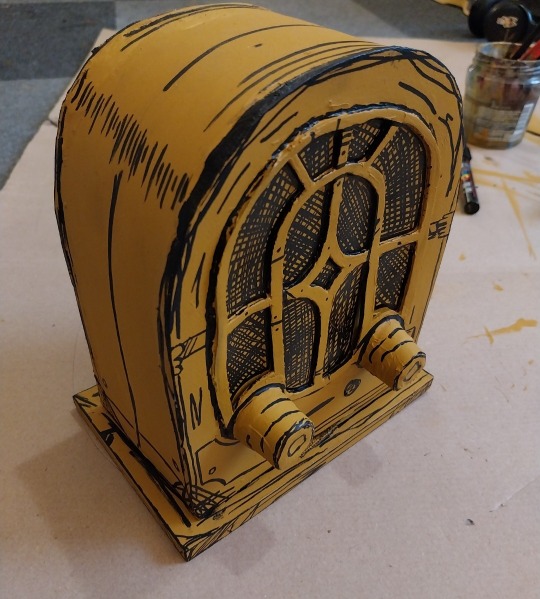
Ta-da !
We personally use this radio as a prop when roleplaying to develop our Alternate Universe, Eclipse Studios ! By the way, we’re working on a new comic I think people will love…
Don’t forget to ask me if you need help for your own props, since I keep all my patterns and techniques.
I hope you enjoyed this post and this technic radio, and I’ll tell you soon about Eclipse Studios !
#biky and orion cosplay#eclipse studios#batim#bendy#bendy and the ink machine#sammy lawrence#batim cosplay#bendy props#cosplay#bendy cosplay#Bendy radio#sammy lawrence cosplay#Henry stein#Henry stein cosplay
26 notes
·
View notes
Text
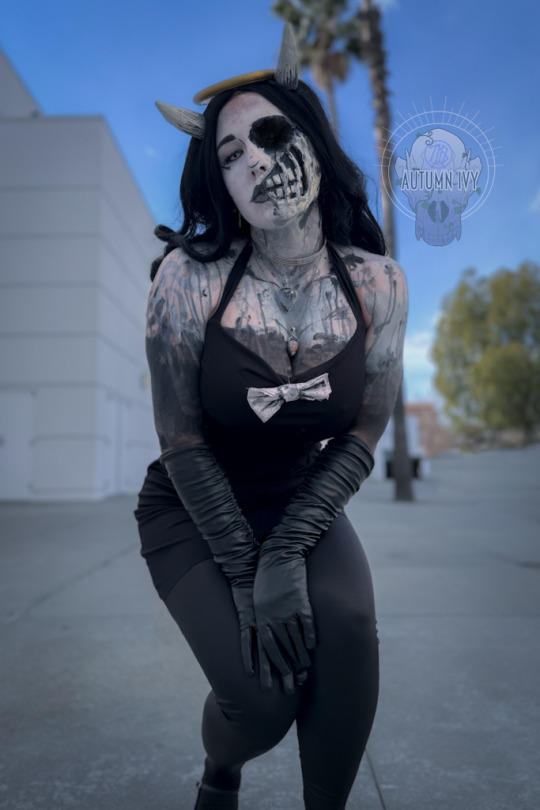

Have you ever wondered what heaven is like?~
#autumn ivy#autumnivy#cosplayer#the bone collector#narrator#actor#costumer#amazon#alternative#cosplay#bendy and the ink machine#batim#alice angel
515 notes
·
View notes
Text
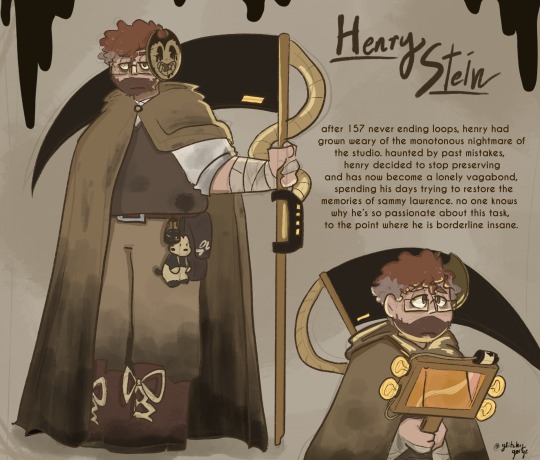

with the bendy movie being announced i wanted to finally draw out my au where henry says fuck it and becomes the studio’s version of betty grof
#it’s mainly a batim au since i am a fandom veteran and know more abt batim than batdr#bendy and the ink machine#bendy and the ink machine au#henry stein#batim#batim au#bendy#allison pendle#alice angel#audrey drew#bendy and the dark revival#batdr#batdr au#senry#henry x sammy#sammy x henry#also i will be cosplaying this design soon lol#bendy movie
303 notes
·
View notes
Text
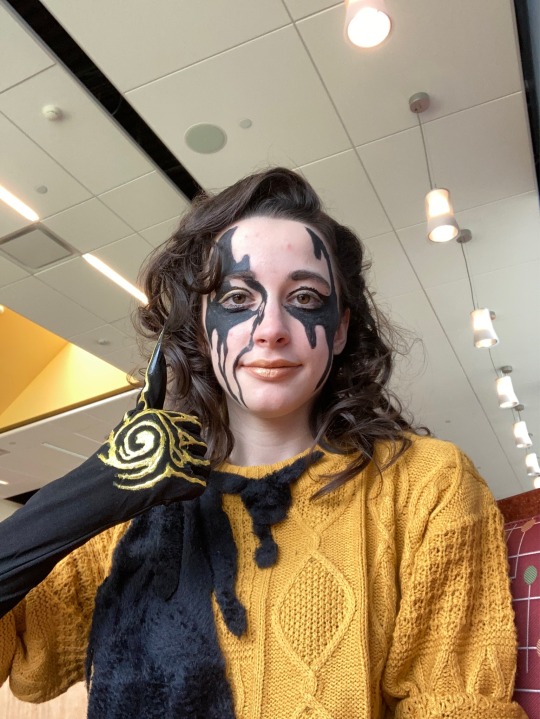
._.
hey fictionkin? uh quick question
how did you find out about your kintypes? please boost this around i need answers
#“lets cosplay sammy lawrence” he said#“sure hope this doesn't awaken anything in me”#me 40 seconds before staring at myself in the mirror like oh. oh no.#i thought I just had a normal regular bendy obsession and the obsession with the music in game.#and in general.#um.#otherkin#alterhuman#fictionfolk#fictionkin#batim kin#hi i need help haha#boost#alterhumanity#nonhuman#therian#we aren't gonna think about this too hard until we get some other fictionkin confirmation#what do yall have going on#casposting#batim#sammy lawrence
76 notes
·
View notes
Text
Today is a GREAT day to be a batim fan!
Happy Halloween
#bendy and the ink machine#batim#batdr#bendy and the dark revival#batim audrey#batdr audrey#audrey drew#cosplay#costume#happy Halloween#the illusion of living book#the illusion of living#tiol#fav
248 notes
·
View notes
Text


"So I'll just keep my mind a-singin' and uh, my nose closed."
#cosplay#bendy and the ink machine cosplay#bendy and the ink machine#bendy and the ink machine jack fain#bendy and the ink machine jack fain cosplay#batim jack fain#batim jack fain cosplay#batim#batim cosplay#jack fain cosplay#jack fain
123 notes
·
View notes
Text
pictures of my cosplays from lvl up expo! (sudden face reveal in the name of showing off my alice angel cosplay)


I had a blast! I loved being with my friends and meeting new people! was SUUPER proud of my Alice Angel cosplay! (which, btw, shoutout to my friend @/xx.cr7pt1c.gu2l.xx_ on Instagram for going my makeup for that. turned out extremely banger.) I also did a more simple Mangle cosplay on Friday which, I was not very proud of but it was more fun since I matched with my friend
my two friends in the picture are @jetsetlariat (william afton/springtrap) and @bluravenite (imogen) !! love them both dearly
#lvlupexpo#cosplay#batim#batim susie#alice angel#bendy#batim cosplay#fnaf#mangle fnaf#fnaf cosplay#bendy and the ink machine#five nights at freddys#susie campbell#alice angel cosplay#idk what else to tag#I just really love how this cosplay turned out
50 notes
·
View notes
Text
Cosplay Update!
(Video ID: Me next to two foam bendy heads. The first one, prototype 1, is much more rounded out and comprehensible than the other one. I then proceed to assault the other one, prototype 2. End ID)
Progress is being made despite me in this last video saying that it’s going backwards! I’ve padded the new prototype and started adding details! Yippee!


#cosplay update#batim cosplay#bendy cosplay#non au#image described#image description#image description in alt#image description included#art
7 notes
·
View notes
Text
19 notes
·
View notes
Text
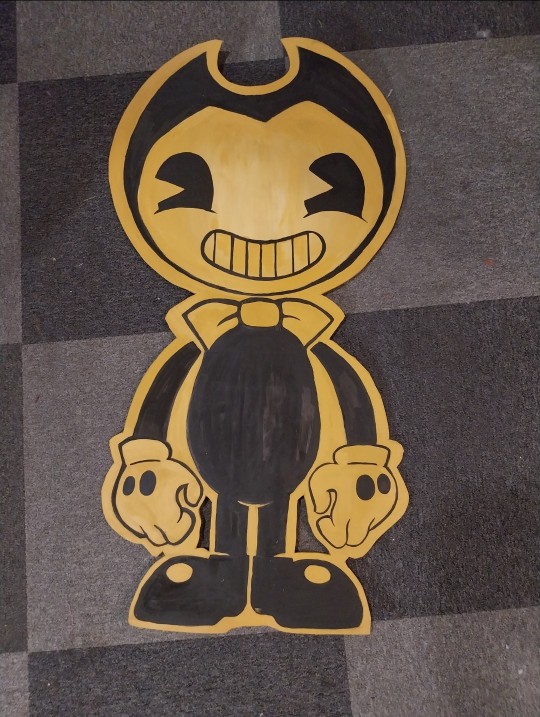
Tutorial Bendy Cutout
Hello everyone ! Do you want a beautiful cutout watching you in your little 30 m² apartment ? You are in the right place !

The materials :
EVA Foam, Ultra High Density - 7 mm
EVA Foam, Low Density - 5 mm
Fiberglass bar
Contact Cement
Hot Glue
Ochre acrylic paint
Black acrylic paint
Cutter
Rotary Tool
Of course there are cosplayer materials, you can use thin & thick cardboard. Our first cutout was made of cardboard and it looked good.
The stages of creation :
Make a pattern. Most important step ! Especially if you used expensive material, and if you want create many of them. I know a lot of people skip this step. I was the first to leave this part out, lazy cosplayer that I was. I give to you measurements and a little sketch.
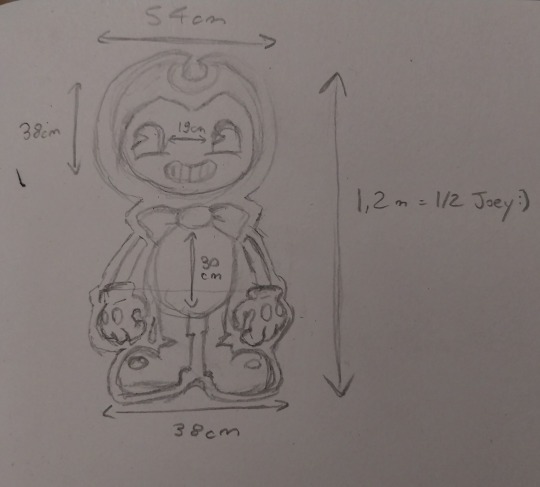
2. Trace your pattern on the foam, you have to got a good cutter for this part because the foam is hard to cut. Be precise in the cut. Don’t forget to cut the spaces between the hands and the legs.
3. You may notice that your sign is all flabby. To solve this problem you have to glue some high density foam ( or cardboard ) on the back. For more of solidity, carve a slot with the rotary tool to put a fiberglass stick inside the EVA foam. Finally you can glue the solid piece onto the back of the cutout.

4. With a Posca or a thick marker, you can trace the drawing of the magnificent little devil darling. Do not hesitate to ask me questions in the /ask if you are missing measurements. After that you can have fun with painting, and adding texture. Mine is not finished, for I have to make details of wood and inkstains.
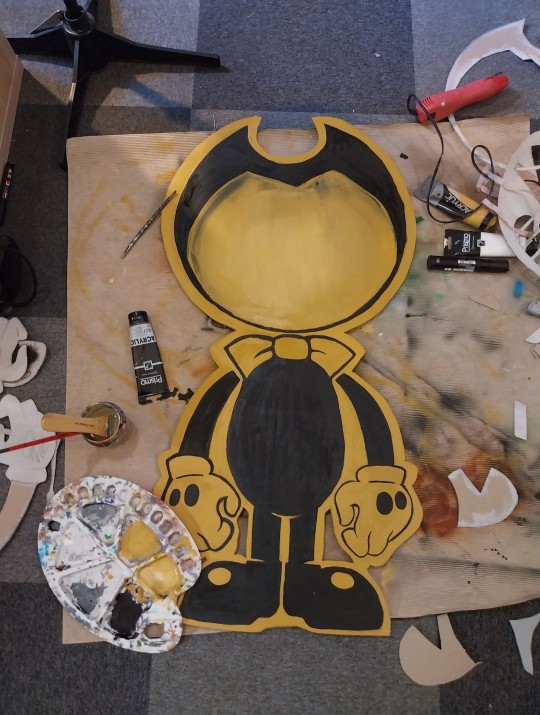
TA-DA ! Your Bendy Cutout is finished ! if you want to put it against a wall, you can. Otherwise I will explain in a future post how to make a handle to carry it with you like Sammy does. I will probably add directions on how to make it stand upright too in the near future.
I hope you enjoyed this post format, and I’ll tell you soon about the Eclipse Studios !
#biky and orion cosplay#eclipse studios#bendy and the ink machine#cosplay#batim cosplay#Bendy#Bendy props#props#Batim Prop#batim#cosplay tutorial#Sign bendy#sammy lawrence#Sammy cosplay#Sammy lawrence Cosplay#sammy batim#bendy cosplay#bendy cutout
37 notes
·
View notes
Text
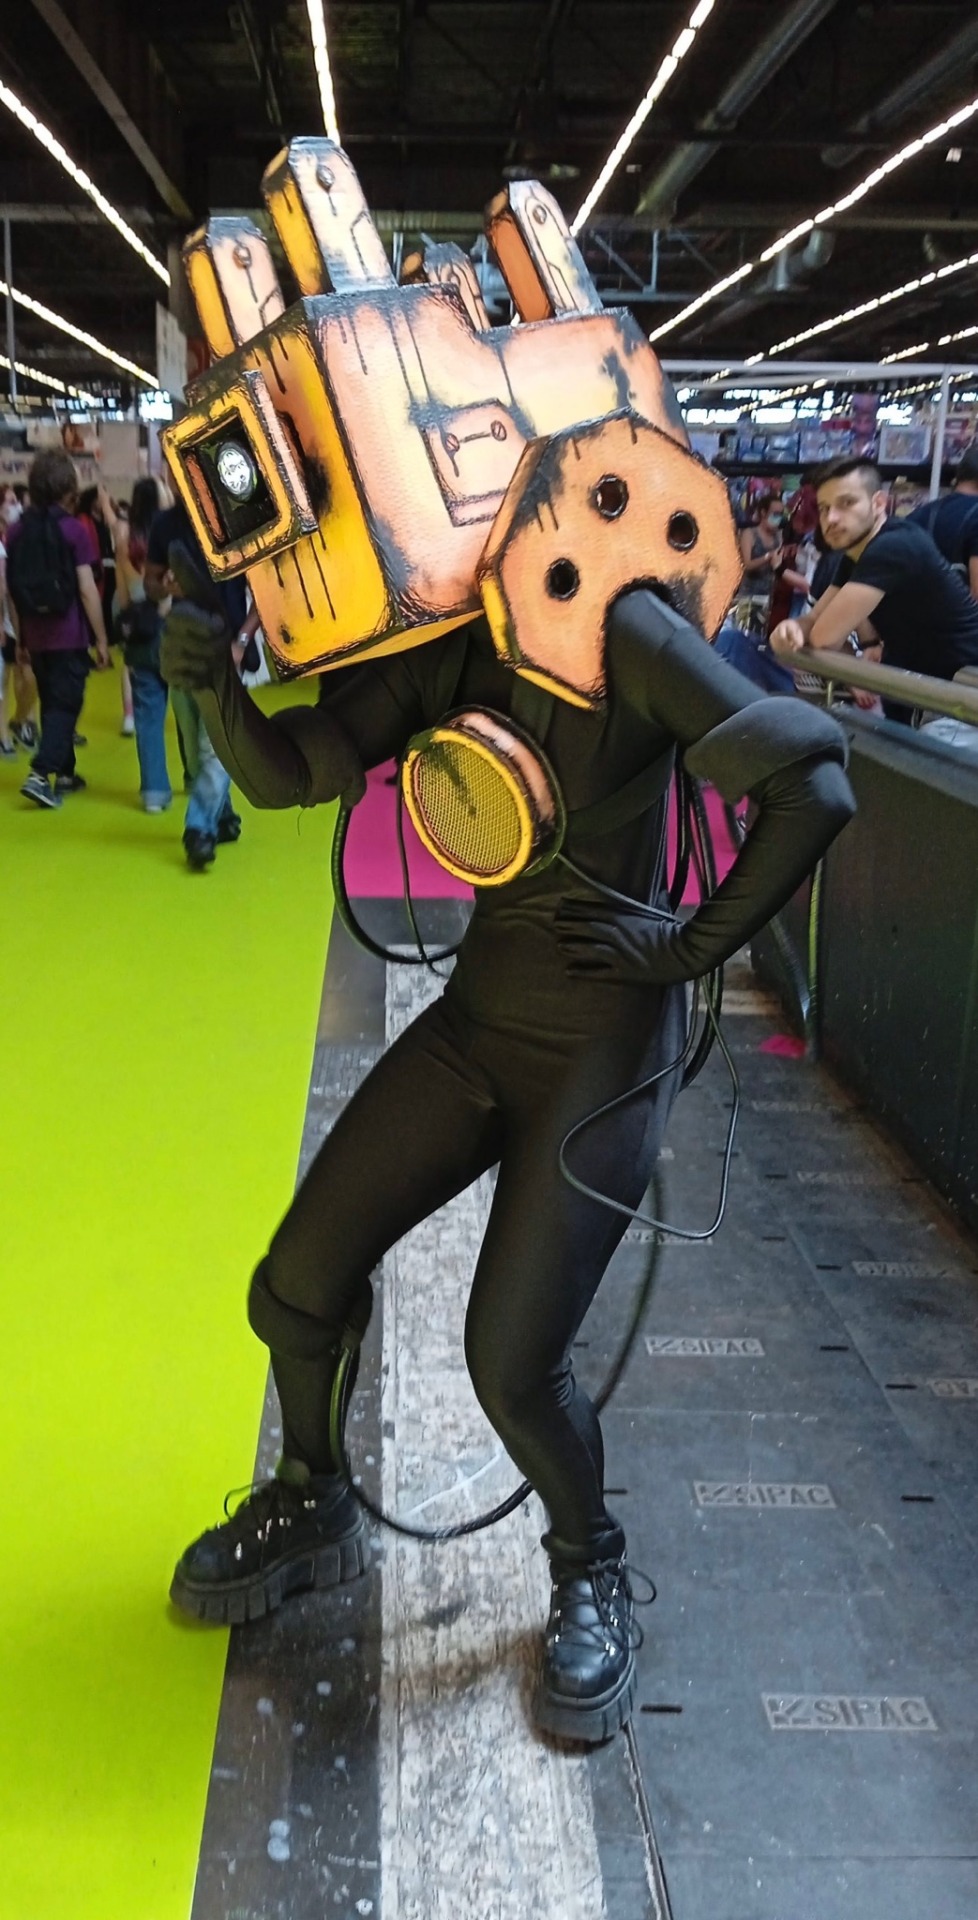
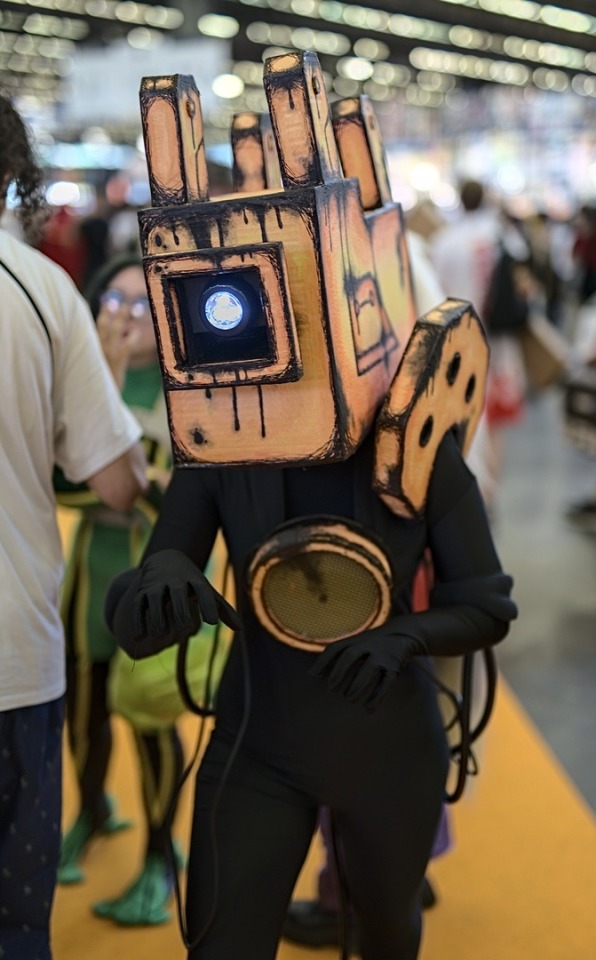
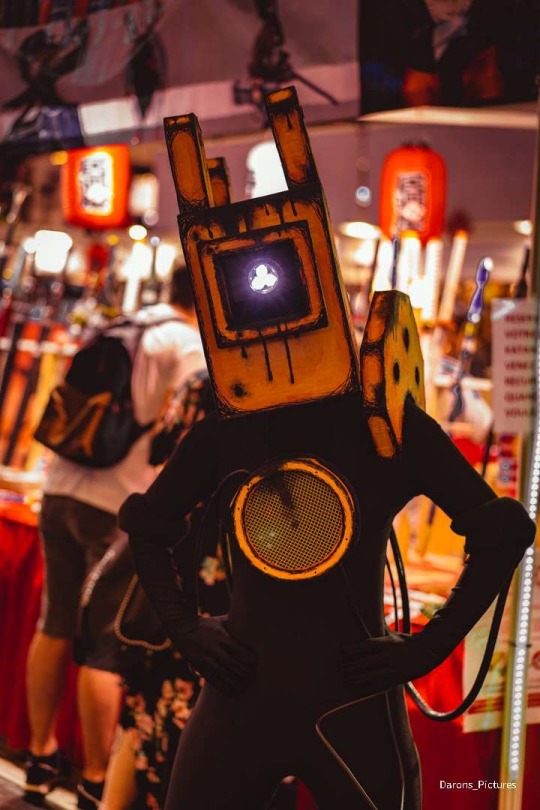

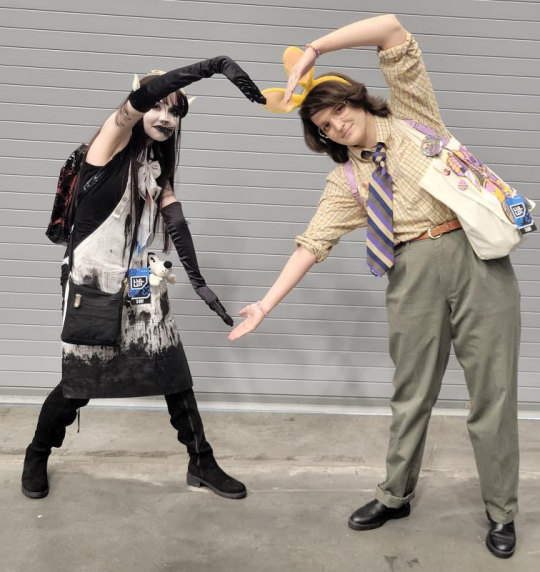
I forgot to mention it but @berlingotesque and I made a projectionnist cosplay 👌🏻✨ We started to make the cosplay back in December 2021 and we finished it the day before the beginning of the Japan Expo 2022 (Paris), that is to say in July lmao. It was our first cosplay and I must admit that we are rather proud of it haha. I occasionally wear it in various events (Harajuku, Paris Manga) so if you see me, come and say hi to me !

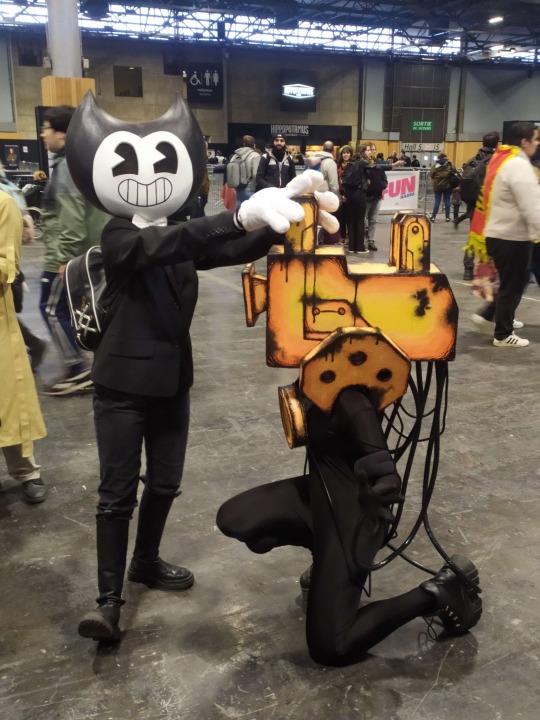
we also met a beautiful Bendy! He was super nice and very kind, his username is @laetisquid on Instagram, shout out to him ✨
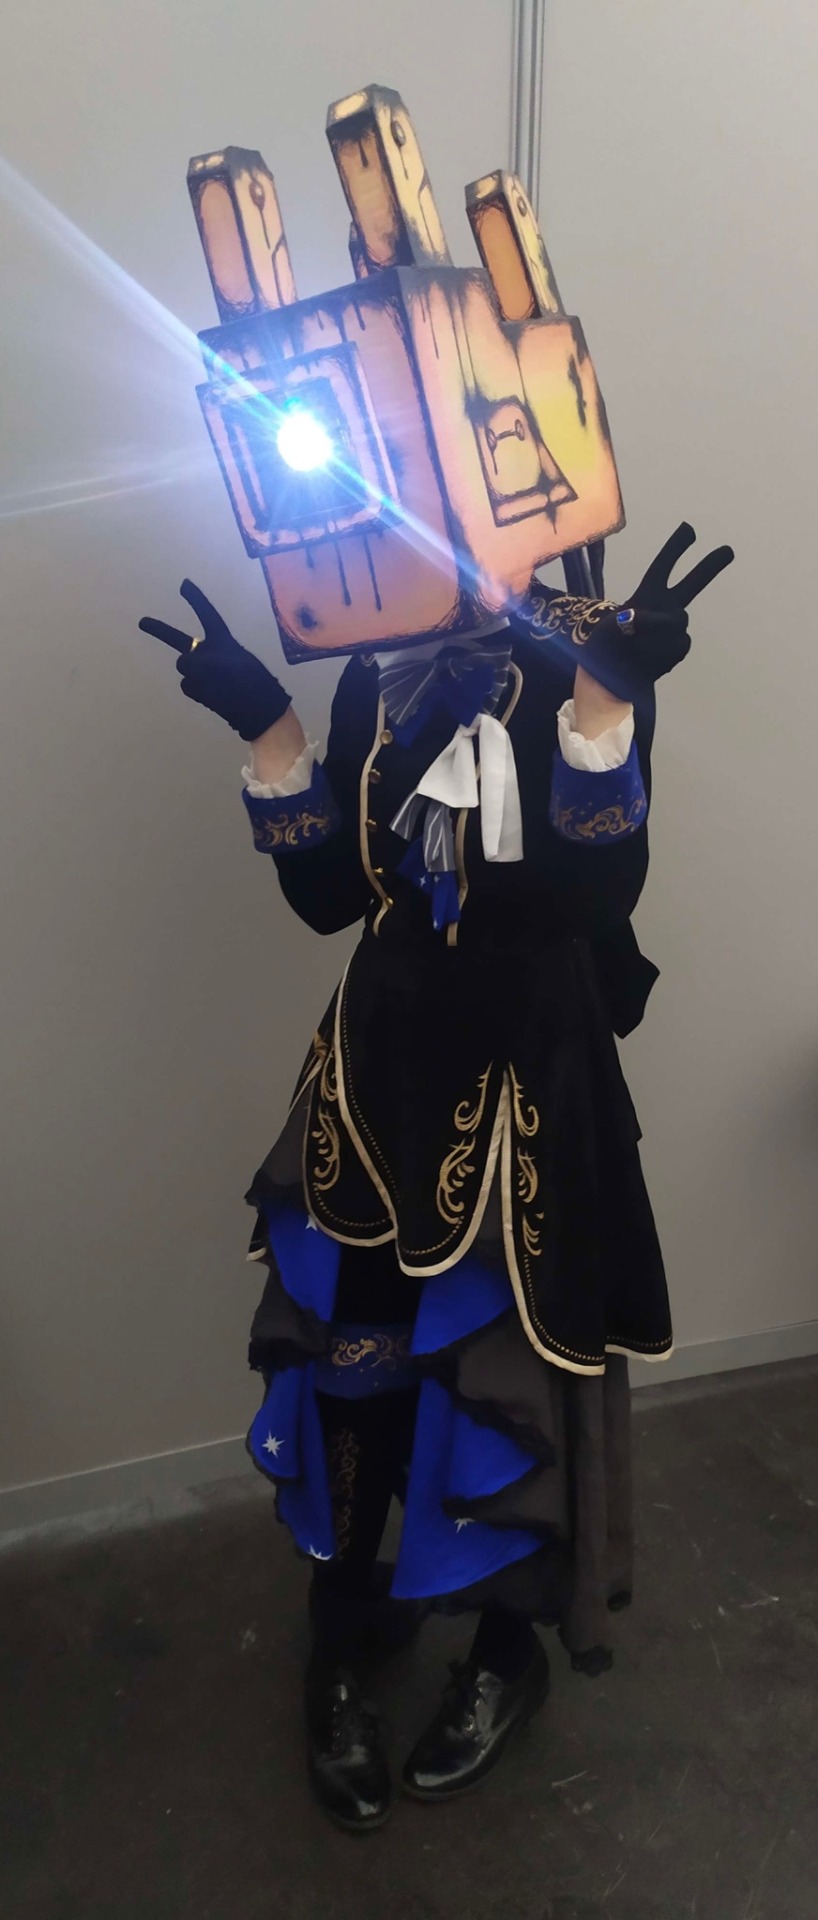
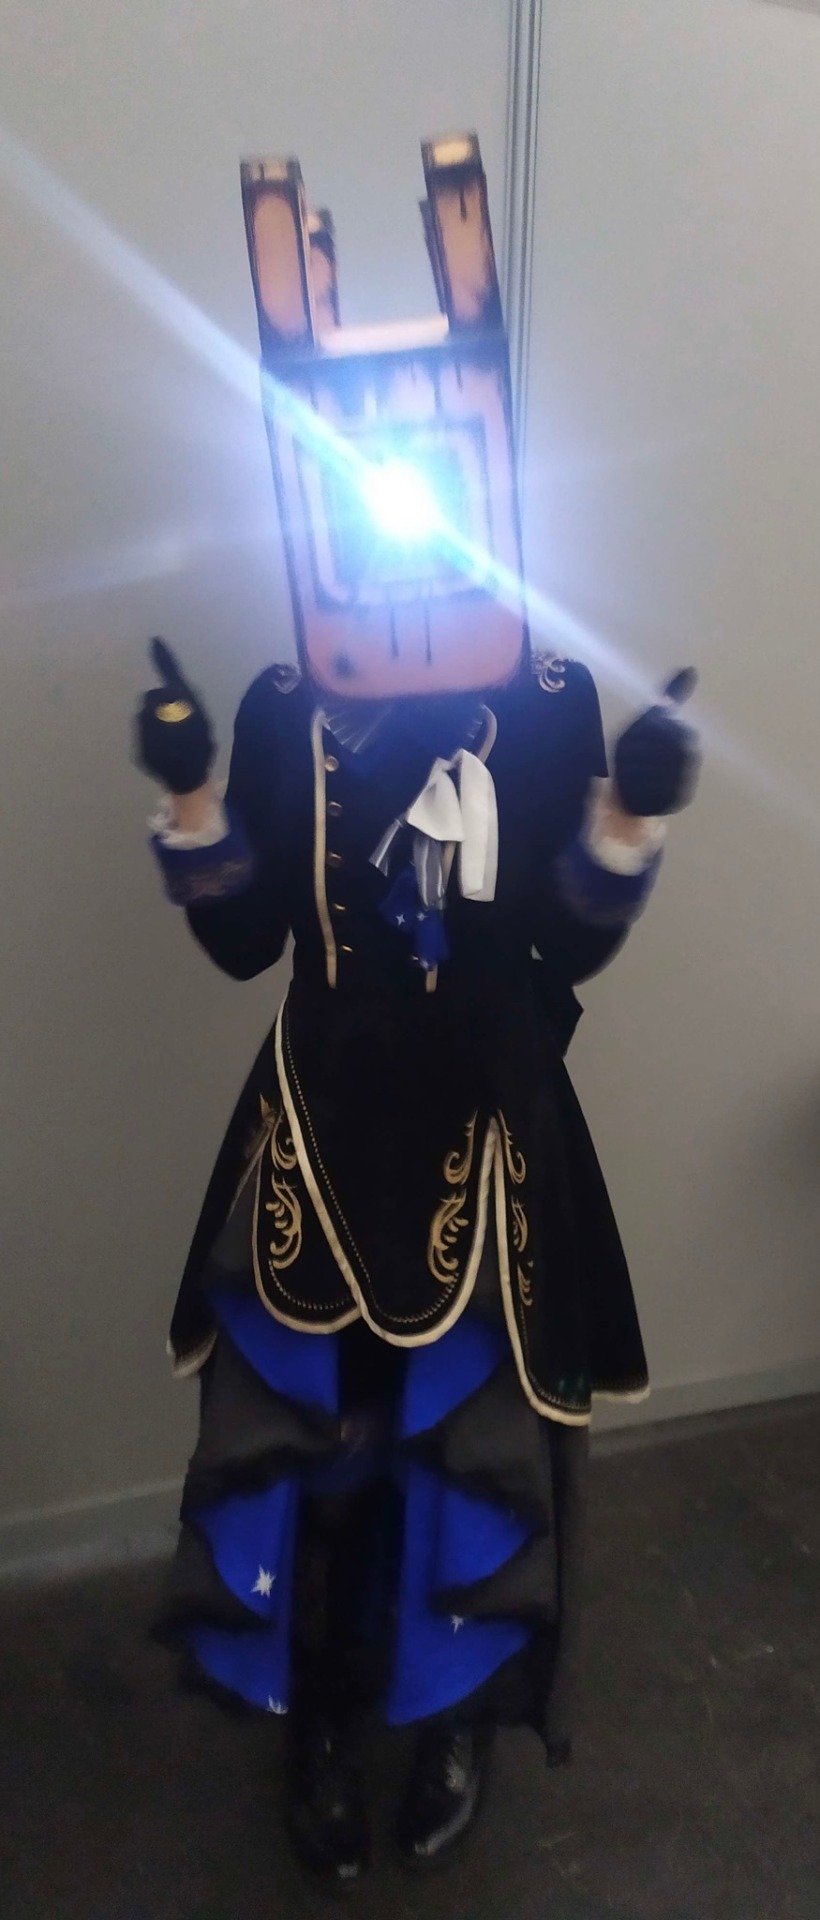
And finally we’ve met this guy cosplayed as Ciel (black butler) and he absolutely wanted to try on the Projectionnist’s head. So now I have these wonderful pictures and I can't stop think about an BatIM AU! where everything is the same except that Norman is dressed like this.
#bendy and the ink machine#batim#bendy and the dark revival#batdr#cosplay#Japan expo 2022#japan expo#the projectionist#norman polk#my beloved#im a simp#i’m cringe but i’m free#we’ve spent so much time on it gosh#big up to @berlingotesque#you can be proud of yourself woman
619 notes
·
View notes
Text
BATIM The End Reel & Fire Axe Prop For Sale
I am selling these hand made one to one scale props I made back in 2020 of The End reel and the fire axe from Bendy and The Ink Machine. I made them with care and great attention to detail.
I am willing to negotiate the prices if needed.
Please share this! I would like for these to go to a good homes.

#Get up to $30 off* when you use my code URKKQZ#nugget rambles#batim#bendy#bendy and the ink machine#bendy and the dark revival#batdr#bendy prop#cosplay#cosplay props#handmade#the meatly
59 notes
·
View notes
Text
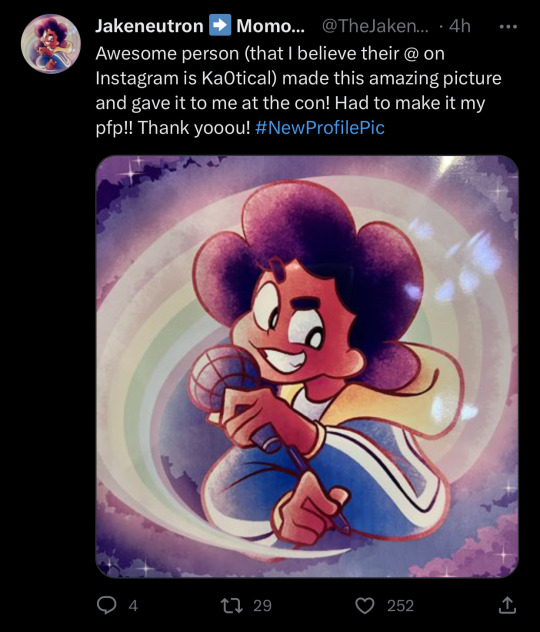

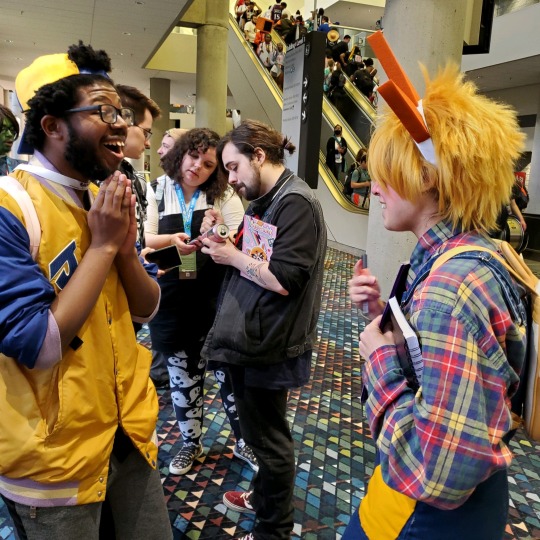

I DEADASS FORGOT TO SHARE MOMOCON PICS
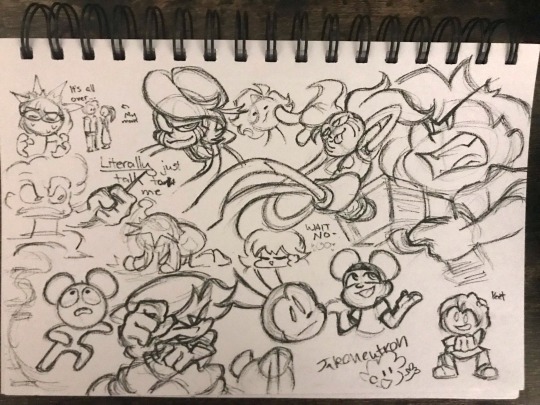
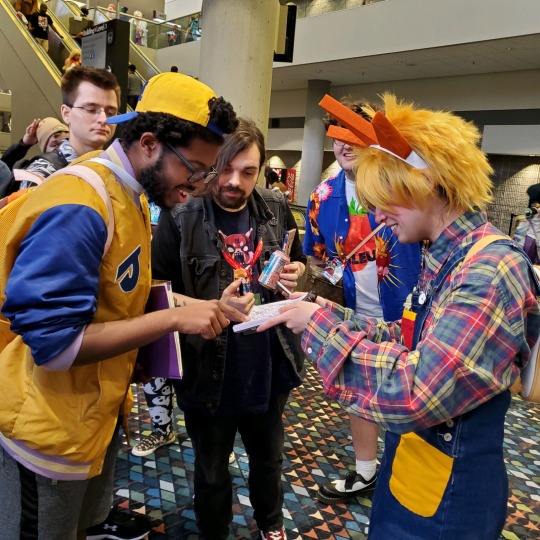
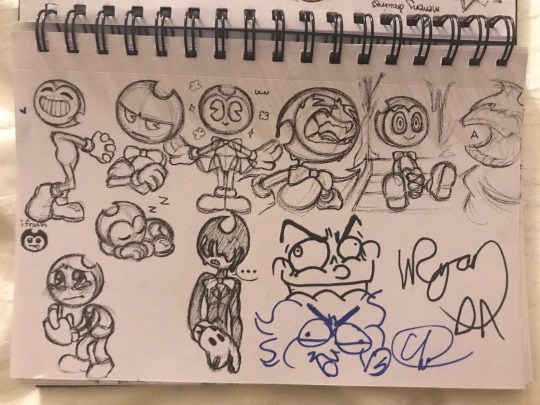
TLDR YES SO I MET JAKENEUTRON AND DAGAMES and they signed my doodles and they were so nice
So .. I could only attend two days. First day, I attended a panel that I realized on my way out that Jake was watching, so I went back. I was with my mom and telling her that I feel weird just waiting outside the door for someone I haven’t even met;; urged her to let me determine if they seem busy BEFORE getting their attention, but she went ahead of me anyway. And so I hid behind a pillar out of shame :D haha love how she was like “my daughter wants a picture with you” (false I just wanted to talk) and then she looked around and just deadass didn’t see me. I am still kind of in the picture tho so I mean ¯\_(ツ)_/¯ But yeah after pictures I RAN away while my mom LOUDLY chased me (because she’s a lil goofysilly) and I didn’t DARE look back for a reaction from the group 🥲 BUT HE ALSO made the art I gave him his twitter pfp and that made me happy 🥺 I don’t use twitter but yay !! :)
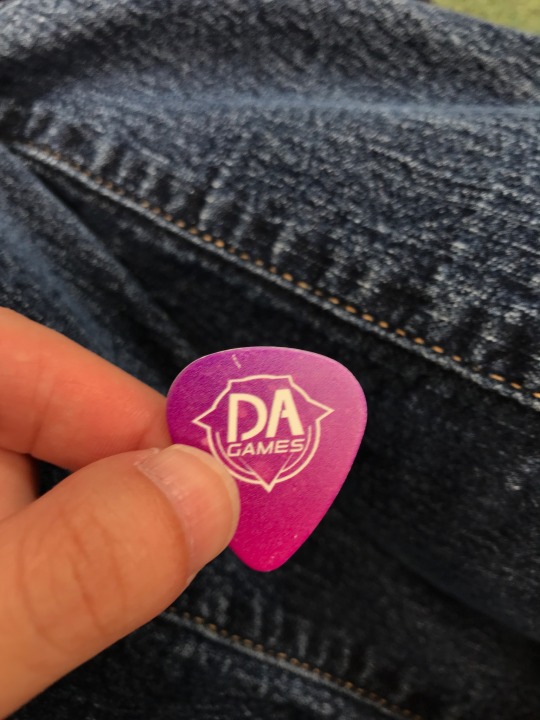
My talk with Will went more smoothly cuz my mom wasn’t there to EMBARRASS ME and I wasn’t rlly stressed abt it. I also didn’t pre plan a lil speech, not expecting to have a 1 on 1 convo with him so it was more natural :v I also bought a pick !! :D (Got a selfie as well but I’m unsure abt sharing my face Here ;; also I think I realized too late that he was awkwardly tryna get his face around my sun rays lmaooo)
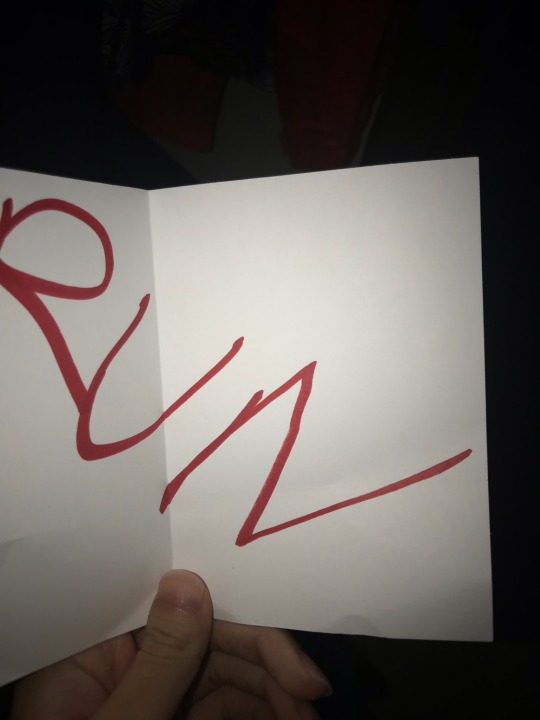
Also an Eddie Dear threatened me with a cute lil envelope. I hope I ran far enough… If I don’t make it, tell my family I love them…
#momocon#momocon 2023#dagames#jakeneutron#welcome home cosplay#cosplay#welcome home#sally starlet#bendy and the ink machine#bendy and the dark revival#batim#batdr#steven universe#spinel#fnf#friday night funkin#pibby#learning with pibby#amanda the adventurer#oswald the lucky rabbit#ddlc#sayori
316 notes
·
View notes
Last Seen Blogs