#edited with topaz denoise
Text
youtube
Salvaging an unsalvageable photo?
I quite like the final result, all things considered. It won't be good enough for printing but especiall in small Instagram size it's quite ok!
#photo editing#Topazlabs#Topaz AI#Topaz DeNoise#Lightroom#thrush#redwinged thrush#red winged thrush#bird photography#Foe Rodens#Foe Rodens Photography#birding#bird watching#birdlife#european birds#Youtube
0 notes
Text
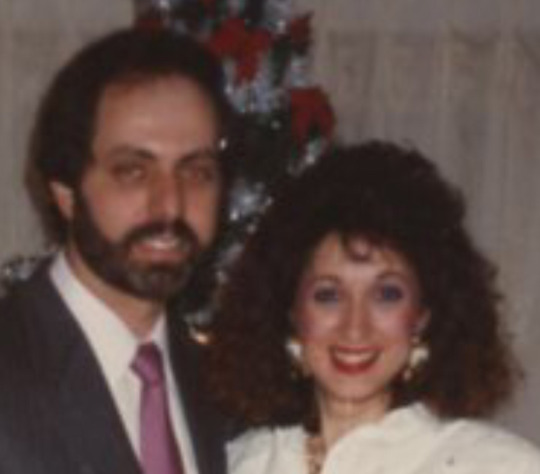
Photo Restoration: Adventures in Upscaling - Part 1
After finishing my big photo restoration for Katrina's family I was organizing my files and noticed a scan I missed.

The scan was fairly low resolution and the photos were only 400x700 pixels.
But I was bored and restoring photos helps me relax, so I decided to fix them up anyway—even if they did not have great fidelity.
I did my thing, and it worked pretty well.

But I have been interested in a set of photo tools made by Topaz Labs. They are known for their noise removal and upscaling apps and are praised by many photographers I follow.
Before I jumped into this A.I. suite of tools I wanted to make sure it was trained ethically with licensed images—same as how Adobe operates.
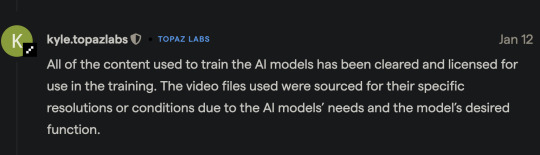
So that made me feel better about that aspect. Plus I feel this is exactly the kind of thing A.I. is great for. A tool to help artists rather than displace them.
I have used a few upscalers in the past and have had varying degrees of success. Typically they just implore various sharpening tools and try to control the chunky artifacts with denoising tools—trying to find the best balance between the two.
Two opposites trying to reach a compromise.
But I was not expecting the results I got. This is way beyond anything I have ever tried before and I had no idea the technology had improved this much.
Here are the results...
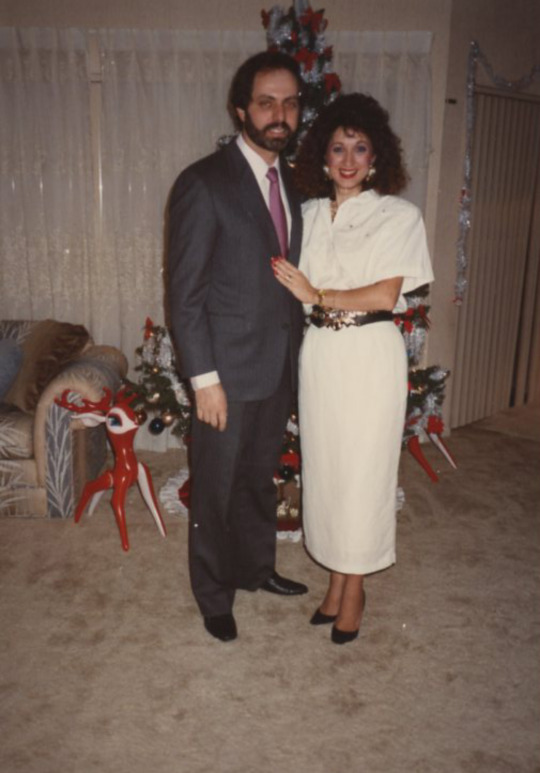
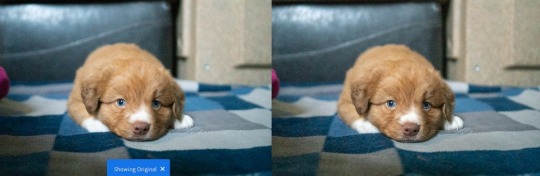
All photos will be displayed in order of original, my edit, Topaz upscale followed by extremely zoomed in crops to help you better see the effects.

Crops...
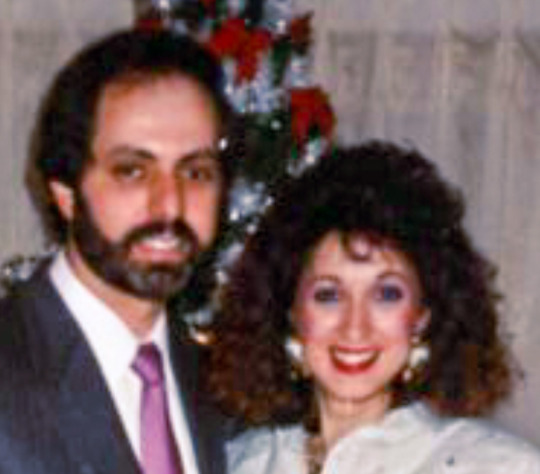

Topaz has a specific "face recovery" algorithm and I was curious if these results were only because of that.
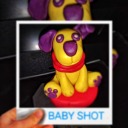
But then I looked at this little guy and he seemed pretty sharp as well.
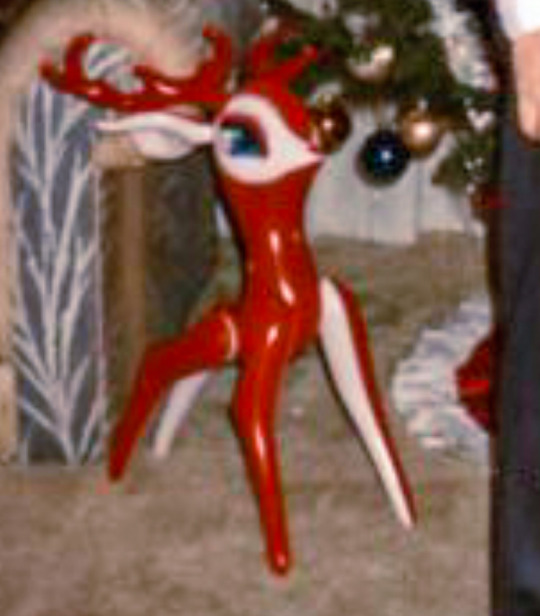

I was stunned at how well this was working. I was able to upscale these photos so they could be printed as an 8x10 with 300ppi resolution.
Maybe that first photo was just a fluke, so I proceeded with the others.
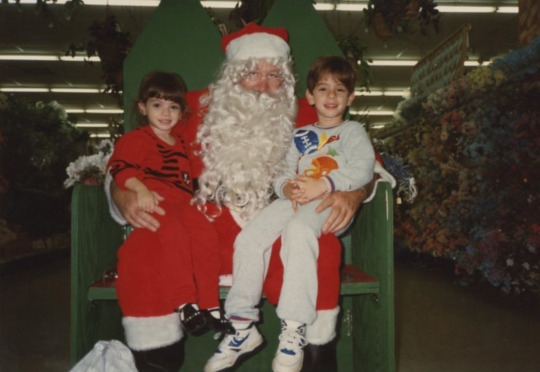


Santa's face was mostly obscured, but it was still able to work its magic despite that.
Crops...


At this point I felt like I was a caveman discovering fire for the first time.
This next photo is interesting because it has a very creepy clown clearly plotting to kill baby Katrina. And the clown has on full makeup, which could confuse the face recovery.

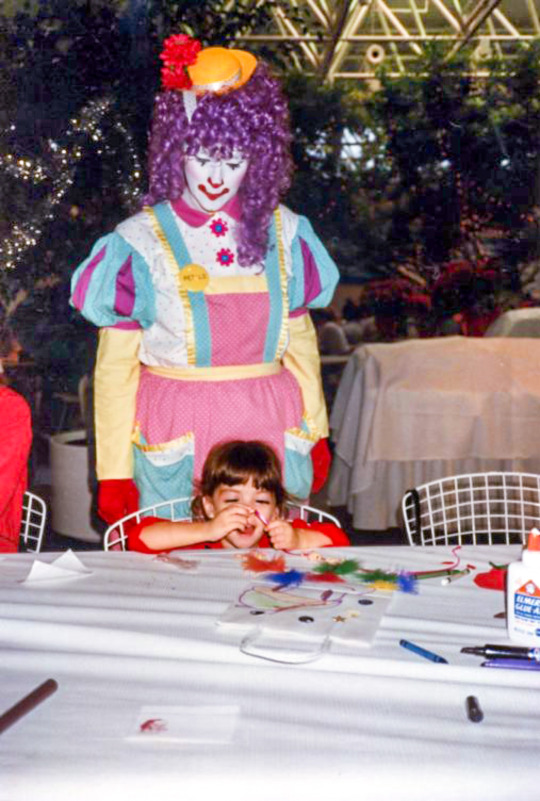

Crops...

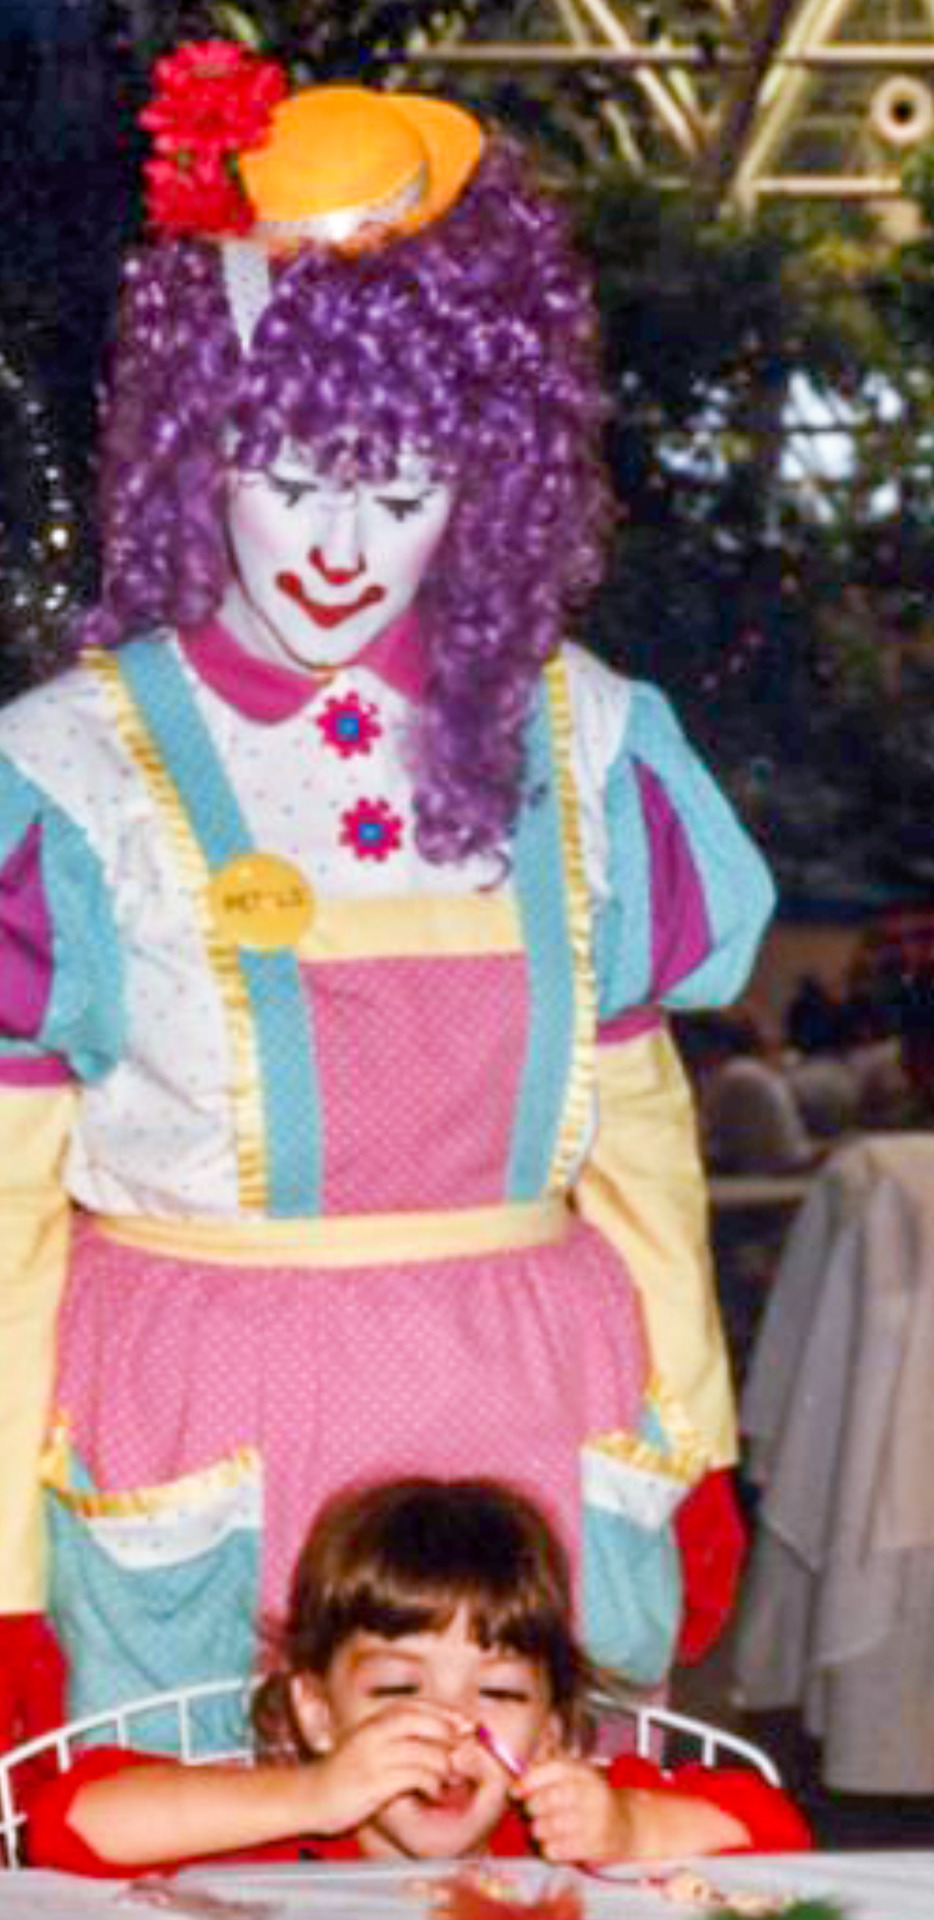

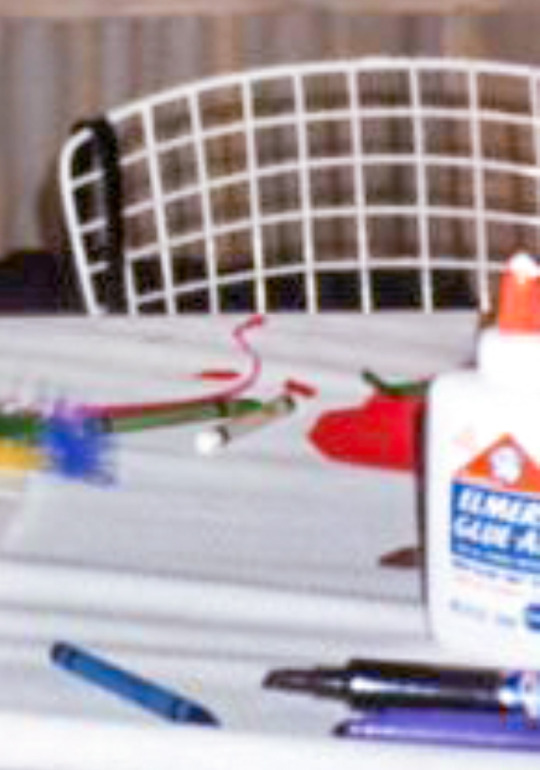
The clown face looked great, but there were two interesting artifacts involving text.
First, there was not nearly enough information on the clown's button. So the A.I. did its thing and rendered nonsense. I found a smiley face button and just did some classic compositing.


There was also a bottle of Elmer's glue on the table and even though I felt there was enough detail to make out the words, the A.I. still struggled. So I found a bottle of vintage glue with the same label and replaced it.


And it kinda feels nice that A.I. can't do everything yet and I still have to use my problem solving skills to make the best photo possible.
On to part 2!
136 notes
·
View notes
Text
“The transfer of True Lies has a truly vile quality to it, a feeling like someone clandestinely dosed you with LSD just a hair below the threshold. At times it can look passable in motion, but then you notice something out of the corner of your eye: a thick fold of skin, a framed photo of a child, folders that are too thick at the margins, cheeks that look rendered. It’s that familiar dread at the pit of your gut when you spot AI generated imagery, a combination of edges not looking quite right and surfaces that are simultaneously too smooth and too sharp. A crime was committed here, and you can tell.
The transfers of Aliens and The Abyss are markedly less bad than True Lies, but I still have difficulty watching them. The skin looks sterile and waxy with too much film grain removed. Everything looks like it has raytracing on. Both transfers are, however, within acceptable parameters for most normal people.
The recent transfer of Titanic got a similar treatment, with similarly mixed reactions online.
“Why would you do this?” is a logical question. It’s worth contextualizing who handled these “restorations” – namely Park Road Post, a subsidiary of Peter Jackson’s WingNut Films. They have worked on multiple films in the past, but the two that are most germane here are Jackson’s They Shall Not Grow Old and the 3-part Disney+ documentary The Beatles: Get Back. Both movies recontextualize pre-existing footage and, importantly, do so with an aggressive use of machine learning. They Shall Not Grow Old upscales and colorizes old World War I imagery in an attempt to set the bloodshed in a more modern context, while Get Back recycled footage shot for Michael Lindsay-Hogg’s Let It Be, including moments never before seen by the public, to elucidate the process behind the creation of some of The Beatles’ most iconic songs.
(…)
I wish we had stopped Jackson then and there. As my good friend Danielle joked, this was a trial balloon. People praised Jackson for doing this to Lindsay-Hogg’s footage in the name of restoration, and it emboldened him to do worse things. Before the True Lies debacle, the most recent example of this was the aggressively saccharine and confusing Now & Then, a long unfinished demo now finished by Ringo and Paul, edited together with archival footage of younger John and George composited in an a fashion that can be charitably described as tremendously weird.
Lest I am accused of being a luddite, I firmly believe there are many use cases for this technology. Nvidia’s DLSS and competing variants generally work very well on the games they are trained on. I regularly use Flowframes in the rare case that I need interpolation. I have often used waifu2x and now chainner if I need to photoshop a still and my source is bad, and there are databases of countless AI upscaling models. But the flip side to this is that these technologies are often used in place of proper ingest. “Crap in, crap out” is a truism for a reason. I spend a lot of time regularly capturing VHS and Laserdisc at the highest possible quality for fun, and when I see people who should know better say “Just use Topaz” (a commercial AI upscaler) instead of learning how to correctly ingest footage and deinterlace it, it makes me want to pull out my hair, because it almost uniformly looks bad to anyone who works with video professionally.
When you finally do see a piece of footage transferred well, it can be breathtaking. Good archival practices require a lot of institutional knowledge and labor. It’s an art when done well, and the people who do it care so much about what they do. But the modern application of much of AI is precisely about taking labor out of the equation. Why transfer a tape correctly when we can just have a computer guess badly instead? What if crap goes in, and it doesn’t come out?
What makes all of this worse is that True Lies, as I understand it, did not need to be shoved through the AI wringer. According to The Digital Bits, Park Road Post had a recent 4k scan of True Lies from the original camera negative. Park Road Post’s own website claims they have a Lasergraphics Director 10K film scanner on the premises. So what is the purpose of adding AI to this mix? Why do that to a perfectly fine-looking film? What is gained here, other than to slightly yassify an Arnold film? At this point, maybe they are simply doing it just to say that they did, because the technology is lying around, like a loaded gun with the safety off.
Nerds who post on blu-ray forums as a rule often need to calm down, and the forum threads I have read about this are no exception, but there are certain cases where a filmmaker is just wrong about how their films should look. Lucas is the infamous notable example, but Cameron is not innocent here in his treatment of his own films. Wong Kar-wai is another notable example, as what he did to Ashes of Time is criminal as was his recent “remasters” of his movies like In The Mood For Love. In certain rare conditions like this, it’s healthy to question if directors have the best interests of their own films in mind, as Cameron himself personally approved of these remasters.
What actually chills my blood more than anything is the thought that a lot of people think this all looks pretty good. You see this mindset at work whenever an AI fetishist posts a stable diffusion image of a woman with 13 fingers, 40 incisors and comically huge breasts. There’s an entire portion of the population that takes overt pleasure in the over-smoothed, perverts that prefer all media to be fast, high frame rate, and scrubbed squeaky clean. The cameras on our phones don’t simply capture images anymore, they compute them and ‘optimize’ them. It’s Italian Futurism in 4k, a noise reduction death drive. It’s not simply enough for much of digital cinema to look crystal clear and lifeless; the past should be denoised, grain managed and cleaned to conform to that standard. It is expedient and profitable if people don’t remember what film is supposed to look like.
I don’t think anyone gets into preservation to destroy film. I believe that everyone involved with this process worked hard and had the best interests of the film in mind, but the exact nature of restoration itself can vary wildly. I believe that some companies get blinded by new tech, get high on their own supply, and that can result in work that is destructive instead of restorative. I don’t know what the solution to this is in the world we live in, outside of decoupling film preservation from the profit motive whenever possible.
But I am certain about one thing. For a while, much of gaming tried looking like Aliens. Now, Aliens looks like a video game. And that doesn’t sit right with me.”
6 notes
·
View notes
Note
can i please know how you get your gifs looking so smooth. they are amazing and i have no clue how you do it. like the quality is so similar to a regular video (compliment) and im so curious how u could achieve that
yes sure, I will try my best to explain it to you!
well aside from the quality of the vid is the editing process.
I use kmplayer (to cut the clip when the vid is +3 mins) + photoshop
topaz clean: only move the settings under clean & edges (this are the settings I mostly use)
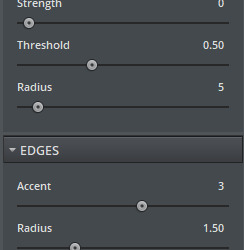
+ clean → radius is always betweet 3-5 depending of the video
topaz denoise: noise reduction section, keep the values under ONE (1) except adjust highlight and clean color those are always ZERO (0)
Smart sharpen is a useful tool but do not over used it
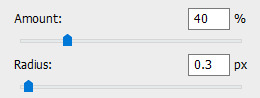
+ this is the setting I always use and sometimes it's too much, depending on the video file so I go nd play with the fill of the layer.
Now the colouring is important as well because if you add too much levels, hue/saturation the quality drop. So I highly recommend if you think one of this it's too much but you like how the color shade turned out instead of editing the adjustment it's better if you play with the opacity of the layer
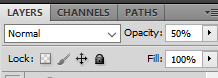
And if you want a color to stands out more after you add you coloring how you like it, add a selective color layer and play with one of the color depending of wich you want.
hope this helps you ♡
2 notes
·
View notes
Note
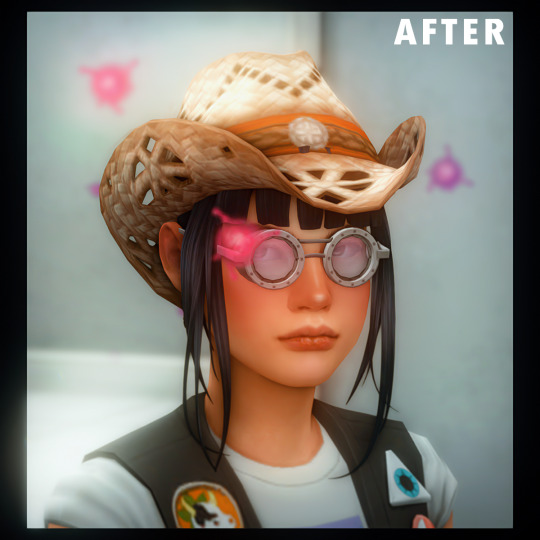
Let me just start by saying I love your work! 🖤 My question is, how do you get this cartoonish look? Is that some mod, or do you just edit your screenshots? I'd love to have the same effect in my game! Sorry if that's a stupid question, I haven't used mods since the Sims 2 and I have barely touched TS4 CC so I'm so clueless I don't even know how to Google this stuff!
Hi thank you so much! Not a stupid question! I use an oil effect found on picsart which gives it that look you’re talking about. Lastly I use topaz denoise
15 notes
·
View notes
Note
omg please an editing tutorial?? Your pictures look so smooth and sharp!!
Hi! It's really mostly my new reshade preset (maybe I'll share it if you want it?) and here are my topaz clean & topaz denoise settings which help a lot with the smoothness
3 notes
·
View notes
Note
hi I hope you have great holidays (if you celebrate!) I love how your screenshots look, could you describe your editing progress in any chance? <3
definitely! my editing progress usually depends on the general feel of each photoset/screenshot so this is just a composed list of steps i generally take whenever i edit them.
the screenshot is taken with gshade (personal preset) and edited with ☠ photoshop CC 2019!
today we're working with this screenshot:
yes i took it with the border shader in gshade. less things for me to do in photoshop and i can angle the frame how i see fit!
since i've planned to crop this into a square (based on how the border is set) so we'd do that. after cropping i'd run an action (that i called "base") composed of:

in which the ☠ topaz clean and smart sharpen settings are taken from avonlea's actions. the camera raw filter is just there to add +5 clarity points. ☠ topaz denoise setting varies because unlike topaz clean, denoise pop up window will show up and let you edit it right at the moment. here's a before and after:

here i'd use the liquify tool to smooth out the rough edges, or export it as .psd to procreate if i wanted some extensive edit and draw on, etc.. then import it back again in pts for the next step.
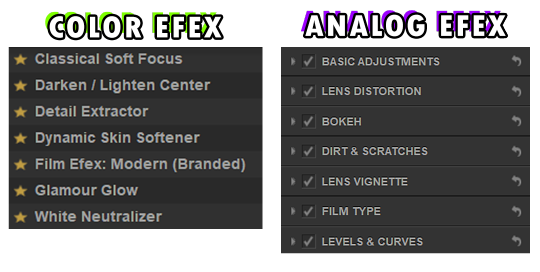
next i basically throw the screenshot into ☠ color efex & analog efex pro where i play around with the filters and spam the compare button until i'm satisfied.
the settings get changed every time so it'd be kind of useless for me to share them but these are the ones i mess with the most:
then i'll use the camera raw filter again to hot-fix the screenshot (mostly saturation, hue, highlight, white points, clarity and texture), resizing the image to 1280px wide*, run an action (that i called "noise") and we'll end up with something like this:

fyi: sharpen the screenshot after adding noise is a personal choice btw. sometimes i'd double sharpen the screenshot if i want it to be more sharp - run the unsharp mask option before the noise action itself.
*if the current width is lesser than 1280px i'd downsize it to 540px since upsizing a lower resolution image will make the details blurrier (there's rarely a case where my original screenshot after cropped is lesser 540px wide).
*if i use swre to hotsample my screenshots i'd resize the photo to 2160px wide instead. most of the 2160px width cases are fullbody shots in cas.
last step is to save/export the edited screenshot as PNG. the grand reveal:

unfortunately the site for these ☠ programs was not in english, i downloaded them a long time ago i forgot which site i got them from so i couldn't send/link them here :(
— anyway i hope this editing process helps with what you're looking for!! (someway somehow)
#hope your holiday was great if you celebrated!!#i cannot proofread#answering this while watching twd#ask#nː
24 notes
·
View notes
Note
hi umm so I really love your gifs and i was wondering how you make them so good?? no pressure tho
ahh i'm so flattered you like my gifs but i'm ngl! i've only been making gifs for like, a month and a half now? so i will try my best to answer your question with my limited experience 🙇♀️
there are 3 main programs i use which are 4k video downloader, vapoursynth, and photoshop -- 4k to download yt videos in the best quality, vs to preprocess the video (crop, resize, denoise, and sharpen) and photoshop for recoloring and other edits! ik other people may use different programs like avisynth instead of vapoursynth for their preprocessing, and topaz for sharpening/cleaning but these are the ones i use! in addition you may be able to find ultra hd videos on other sites without going through 4k downloader but yeah this is the one i use specifically for yt. i've found that these programs have really helped improve the quality of my gifs in terms of smoothness and clarity
these are the tutorials i used when i first started learning and they explain how to use those programs in greater depth:
vapoursynth link one, link two
photoshop link one, link two, link three
other tips link one, link two, link three
(also i would exercise caution in regards to any download links you come across in these tutorials!!)
but yeah there are loads of other resources online that go in depth about where to find hd videos, how to use photoshop, etc and the gifmaking community is p friendly so don't hesitate to reach out!! when i first started making gifs (which wasn't even on photoshop LOL) i went through a lot of trial and error and tbh i still haven't really found my style yet! but i kept trying to experiment with different programs and techniques and the process itself became fun and i felt a big sense of accomplishment just learning to do the little things :^)
i hope this was helpful and if you come off anon i can't wait to see the gifs you make!! fighting by bss 😎
#woo boy this got long#tbh feeling v embarrassed but ty annonie for liking my gifs 🫶#nina answers#anonnie
7 notes
·
View notes
Text

Just for fun, I thought I'd show off how my gameplay screenshot system goes. ᕕ( ᐛ )ᕗ
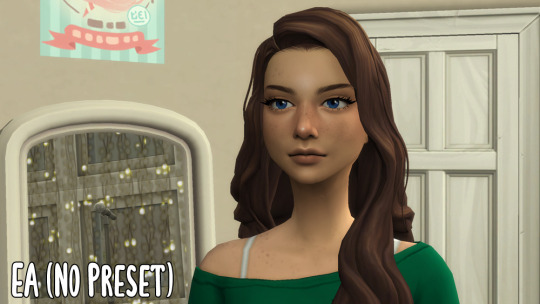
This is how the game looks without my custom Gshade preset (I call it SweetPea) turned on. This is how the game looks with the default EA settings.
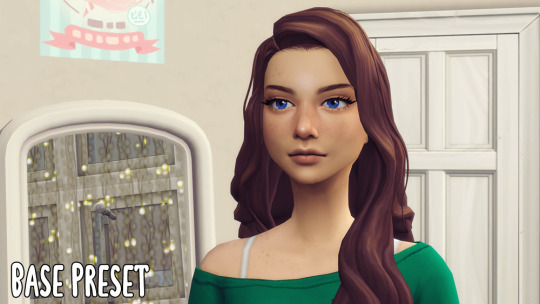
This is with SweetPea on, which does some brightening and colour correcting, as well as edge smoothing and light sharpening. This is how my game looks as I play. The UI looks just fine, so it's super playable.
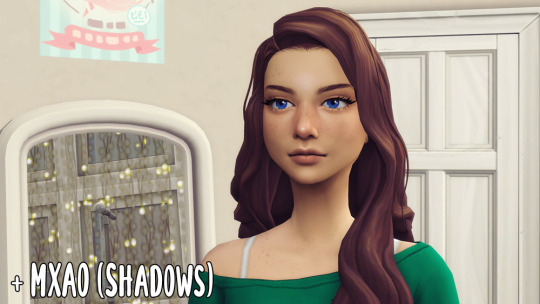
This is with MXAO turned on, which adds some extra subtle shadows. I turn this on with a hotkey (Num+4).
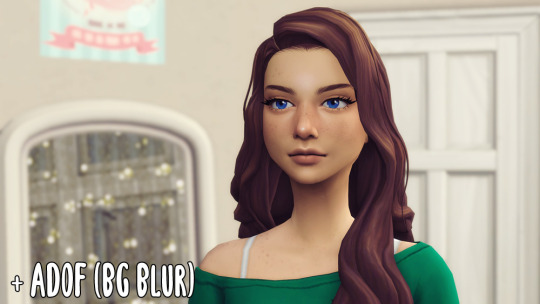
This is with ADOF turned on, which adds the background blur, or depth of field effect. Hotkey: (Num+5).
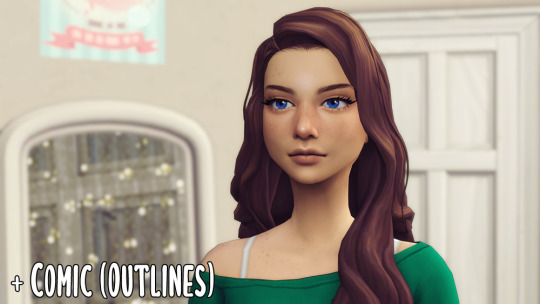
This is new, and just something I was experimenting with today; the Comic shader, which adds some subtle outlines. Hotkey: (Num+6). It might not stick around. 😅
This is after applying my screenshot edit Photoshop Action, which resizes the screenshot to 1000px wide and does some subtle contrast/colour correcting, adds a topaz clean and topaz denoise filter, and one more pass of sharpening. This is what I upload to Tumblr.
I play my game with #2, and then add the extra preset effects (MXAO, ADOF, and possibly now Comic) using the hotkeys when I want to take a screenshot. It's too laggy/distracting to play with these effects turned on, so I only turn them on temporarily as needed. The hotkeys make this easy.
Then I open the screenshots in Photoshop for a quick action to ready + size them for web, then I save and they're ready to upload. :) Quick and easy!
#Rheall Rambles#Not sure what else to tag this#Also ignore the pretty sim in the picture#They'll show up later
28 notes
·
View notes
Note
Hello! I come with compliments and a question! First: mav is so cute and seems like such a good sweet dog! Thanks for sharing snippets of life with him with us! Second: I was wondering if you (and miles if he wants to chime in!) would be willing to share a bit about your photo editing process. It seems like such a dream to get to take photos where you are, everything is so pretty!
Hello! Thank you for the compliments, Mav is in fact the sweetest dog in the world.
I'm not a great person for photo editing advice because I don't do a lot of editing at all. I usually pick my lens based on what kind of photo I want (for the dramatic lighting photos I used my 55-200mm, for most of my nicer portraits I use my 35mm) and use manual settings to get the effect I want. It means I usually don't have too much editing to do once they're on the computer.
I shoot in RAW (not jpeg) and use Lightroom and Topaz AI Denoiser. My usual process is to straighten my horizon and crop to a more attractive composition, lighten everything, adjust the white balance, sometimes (rarely) deepen the blacks, sometimes (rarely) adjust the colours to be a slightly more appealing shade, then export from Lightroom and run through Topaz (usually only indoor photos, most of my outdoor shots don't need it).
The best advice I got, years and years ago (from Miles, funny enough) was to plan each shot as if you were shooting with film. I'm still working on that in terms of composition (who wants feet in photos anyway??) but it really does help to slow down and adjust your settings manually so your shots look good straight out of the camera.
Here are a few shots that I edited recently so you can see the before and after. My before/after shots don’t tend to be really dramatic unless I misjudged my camera settings though (like the last of these examples):
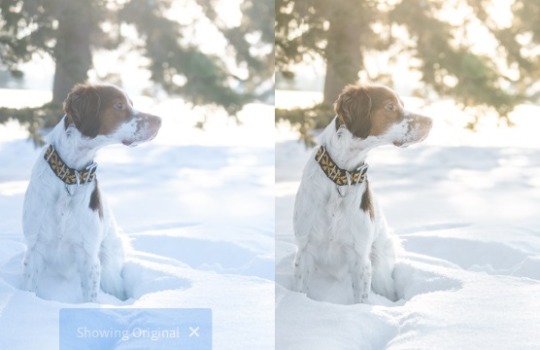
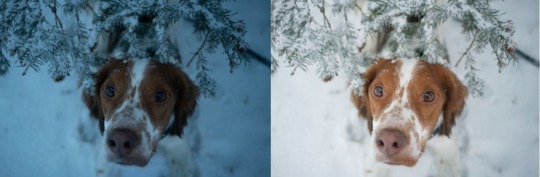
Hope others can chime in with their editing processes!
#dogblr#anon#ask#dog photos#photo editing#also it definitely is pretty here! but it isn't prettier than anywhere else#you can find beautiful places to photograph no matter where you live#thats a whole other conversation but i legit love scouting areas to take photos#eta i occasionally remove leashes but honestly the dogs are trained enough i usually just free them#rather than bother removing the leash in post#but still i suppose thats a pretty significant photo editing rn
16 notes
·
View notes
Note
HOOWWW do you get your photos to look THAT amazing!!!???
[THIS IS OUTDATED]
hi! first of all, thank you so much, that means a lot <3
secondly, there's a few steps:
In Game:
I use the graphics overhaul by simp4sims, it might look intimidating but its really simple if you follow the instructions!
I use Sunblind lighting overhaul by softerhaze for pretty lighting in game.
In the photos you've seen so far I use a very edited version of the daisies reshade by breezytrait bc for ages I couldn't get my MXAO to work in reshade.
I've fixed that now (thanks to littlemisslollipops recent YT video lol) so I just use a slightly edited vers now (which you'll see as I post more)
Photoshop:
I use these photoshop templates by aliennooboo to get the shape of the post.
I use the colour pop action by lemonpixel but undo the top two overlays so its more subtle.
Then I tweak the brightness / contour & colour balance to bring back some of the cyan / blue in the photo
I use DeNoise & choose the ISO 400 one (literally no clue tbh, just makes it look smoother)
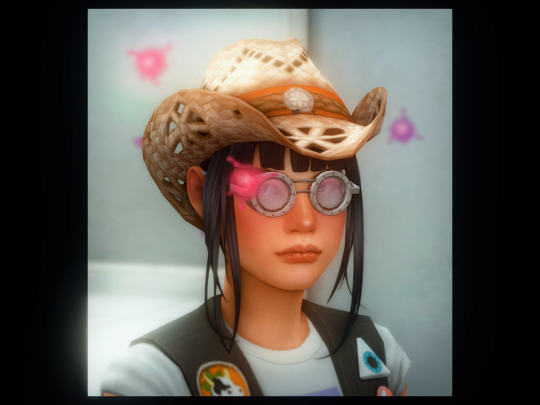
my favourite bit! I use Topaz Clean & the first Cartoon filter on 1 to achieve that smooth, cartoonish, almost painted look to my posts!
Finally, I add things like speech / thought bubbles, icons, and doodles to make it more fun!
I used this template by simpastels to make my NSB banner bc fiddling with dimensions gives me a headache <3
hope this helps love!
#Anonymous#asks#editing tutorial#ig#listen im not original#i just use templates and other ppls pretty actions and reshades#but i still really appreciate the love!#im inspired by a lot of amazing accounts that have gorgeous pics#i had to edit this bc im dumb and forgot literally the most important part of my editing process lmao#topaz clean my beloved#junimoosims
8 notes
·
View notes
Photo

Saccharine Deluxe .atn for PS [SFS]
ok here it is, my clay hair action available for the public! took me a while to put this together, but here’s the final result. this was made using Photoshop CS5, so YMMV with older/newer versions. please let me know if there’s any issues with the action file, this is my first time sharing something like this!
here’s my hair recolor checklist if anyone wants to take a crack at it to kick off this download :)
before you download, however, you must read the info below in order for this to work properly! a quick visual tutorial is below the cut:
PREREQUISITES:
Photoshop
pastry-box’s editing actions (1/2)
simandy’s hair gradient (you need the gradient labeled ‘10′)
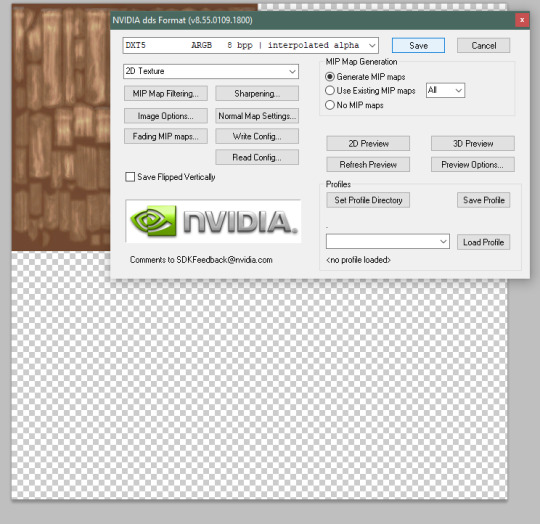
.DDS Plugin
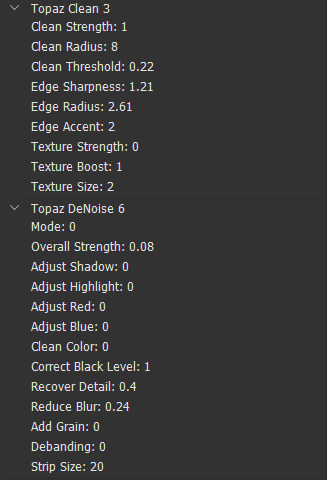
Topaz Clean 3
Topaz DeNoise 5
first, you absolutely need the ‘dirty blonde’ base color from whatever hair you’re recoloring (e.g., miniculesim always uses this for her blonde, whereas spottedonsixam does not)
1. to start, locate the ‘blonde’ .package file for whatever hair you want to recolor, fire it up in SimPE. then use ‘Export’ to create a .png of the hair. save it wherever, then boot up photoshop.
note: depending on your version, you may have to open photoshop via dds64.8bi like I do in order for it to work properly
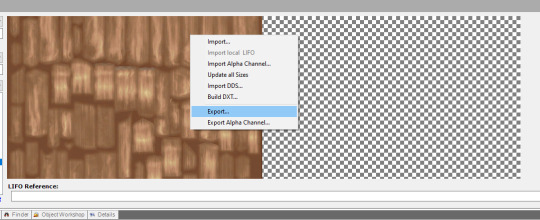
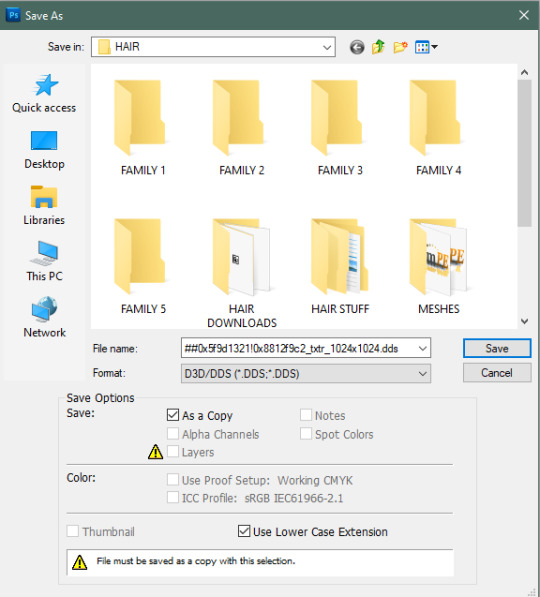
2. open your .png file, then use ‘Save As’ to save as a .dds file. close the .png, then open the .dds to start recoloring
3a. there’s a [PLAY ALL] action that will take care of the whole recoloring process for you and will create layers of each color for you to individually save. you can either use this one button or go through the whole tutorial below
3b. assuming you’ve already downloaded simandy’s gradients, go to Layer > New Adjustment Layer > Gradient Map, and click ‘Ok’

you should see a square labeled ‘10′ (it doesn’t show up in the pic), this is the one you want...

... and your file should look like this
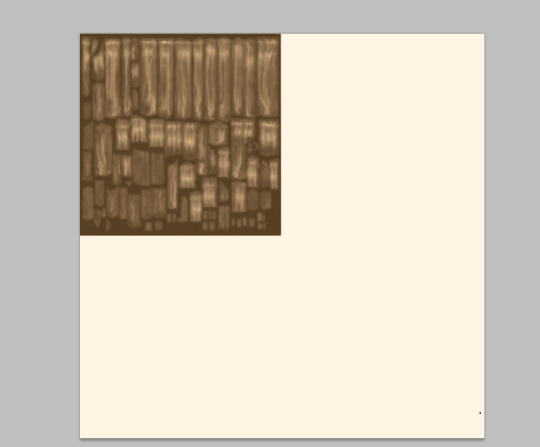
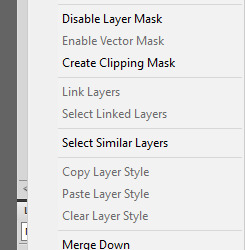
click ‘Merge Visible’ to merge the layers
4. in the action folder, click [BASE COLOR] to run the base, then click [SHARP & SMOOTH] for photoshop to use topaz clean and denoise. your file should look like this now

note: the base color also doubles for the fam2 gray called ‘milk’, so if you use the shortcut action the [PLAY ALL] action will take care of this, otherwise ignore the action labeled ‘22 // unsweetened milk (gray2)’, that’s there for completionist’s sake
5. now you can start using the numbered color actions. quickest way to go through them all is to save each color one at a time, ctrl+alt+Z to unmerge the colored layers and delete them, then move down to the next number

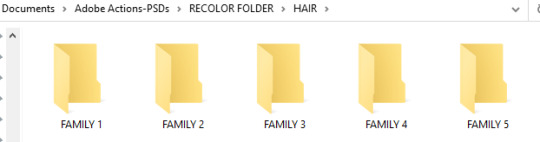
save your files as .dds, I recommend saving them in folders and naming them something recognizable like ‘fam4 hazelnut’ so you won’t get confused

my setup is like this
and that’s it! for those who know how to make hair packages in bodyshop, this tutorial is done, but for those who don’t...
6. first thing, drop the hair .package labeled ‘black’ into your cc folder, we need to copy from black to get the gray. boot up bodyshop and create a new genetics project. hit ‘Export Selected Textures’


this is the naming system I use for my hairs so I know which one to group up. repeat step 6 for the remaining hair colors of the family you’re using. close bodyshop when you’re finished
7. now boot up cat’s hairbinner. depending on the hair you’re recoloring, there may not be life stages available (like a hair without a toddler stage), so deselect the unavailable ages before you hit ‘Bin’. to link all 4+1 colors together. wait for the hairbinner to bin and close the program after it’s done
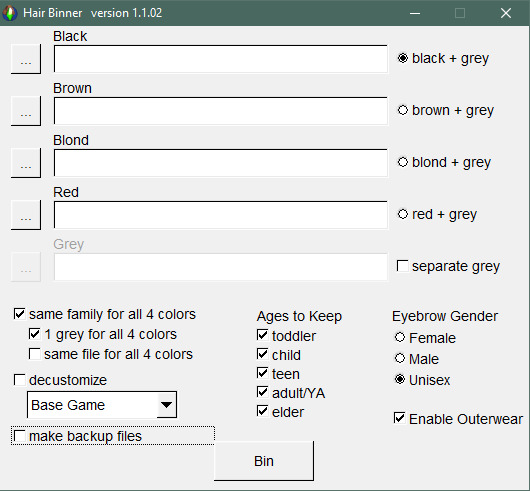
note: I deselect ‘make backup files’ but it’s up to you how you do this. my hairs all have gray link to the black for simplicity sake
8. this step, we’re gonna add our recolored .dds files to our binned packages. load SimPE, click ‘New’, then 'Open’ your binned hair file. go to the ‘Texture Image’ tab and right-click ‘Import DDS’ on the hair you’re replacing. locate the new hair color, click ‘Open’. hit ‘Commit’. repeat this step for the other 3 files

9. (this step is optional for those who merge packages, skip if you don’t) now you’re gonna merge these files together. once you’re done with step 8, hit ‘New’ for a new package, then click ‘Add’ for the files you just edited. you can add a tooltip so people can know this is something you made, then hit ‘Save As’ to save your newly merged package
10. to get in the habit, use the Compressorizer to compress your merged/separate package(s), it’ll help cut down the file size. you can now boot bodyshop back up to see the finished product
aaaand you’re done, share your recolored hairs to the world
#s2cc#s2mm#the sims 2#mydownloads#ok finally it's done#pls pls lmk if anything's wrong with the .atn file so i can fix it right away i'm nervous lol#ts2
43 notes
·
View notes
Note
GIRLIE!!! do you have tutorials on how you do your edits or where you learned from? they're gorgeous, you're so talented!
Thank you so so much!!!!!
I use photoshop for everything. I will link some tutorials that i use. If you want to know how i edited a specific post you can send me the link.
The most important part in my pics is reshade (gshade now) i recommend installing gshade bc you can use any preset from older versions of reshade. Some presets here: Ophelia , aphros, Gloria, lithium, gia, HazelMine presets, gloomy days
Then i usually go to photoshop and use various psds and actions, along with topaz clean & topaz denoise that i really recommend (got them for free) but you can also use Picsart bc it has a Sharpen effect (i also got the paid version for free in case anyone needs it)
these are the psds and actions i use mostly:
action
actions
Desdemona (comes with a preset, also check that creator for more cool reshade presets)
Another of the same creator, ColdWater
Sharply Smooth
Unhallowed
Sunbloom
Agnes PSD for my medieval story
How to use actions, How to use PSDs
Sometimes (only on the medieval story and some occasional edits) i use shadows and lighting .
i'm still really new btw!!!
This is the video that i used to learn, i recommend seeing it all but if you want to go directly to shadows etc go to min 6
anyway hope this helps!!! thank you again ❤️❤️
19 notes
·
View notes
Note
How do you make your gifs have high quality? Do you use any presets or have any tips? Your edits are amazing, it would be AMAZING if you could share. <3
Ah thank you anon!! 🥰🥰
My tips are basically the same any other creator will give you tbh for good and crispy gifs your source material should be 1080p MINIMUM , I cannot stress that enough. For film search for files between 5-10gb for good results, but if you have space in your drives for even bigger files then go with these, sometimes files under 3-4gb are compressed as fuck and will only give you a headache when you try to color and The Pixels™ will inevitably show themselves. For tv anything under 1gb will be questionable, good streaming services rips are over 1gb for sure.
There is however good files not compressed for film under 3gb sometimes and they are encoded as x265 so if you don't have much space but still want to gif in quality get these downloads, in their name usually they say if they are 264 or 265 so look up for that. So in short:
Under 3gb encoded in 264: shit
Under 3gb encoded in 265: good!
If you need a place for downloads come of anon and I'll link you a trusted place for gifmakers only.
Okay enough on the files 😂 for doing the actual gifs I either screencap or use an external tool to trim an specific scene I want to gif. For screencaps I recommend mpv or mpv.net, both are open source programs and work really well and gifs will look the best imo. For trimming videos I use ffmpeg on my computer's CMD but it's not very user friendly if you don't know how to use ffmpeg well, I know people recommend handbrake though so there's that option and then use video frames to layers.
For sharpening I use 3 different settings depending on my source material:
Animation: I use a smart sharpen with 500 0.3, if it's ghibli or anime I'll lower the opacity of the sharpen around 80-85%
Tv/Film: a good source (files over 3gb) will only need a 500 0.3 sharpen sometimes. If I want it to look a bit more crispy I add another sharpen of 100 1. For not so good sources I apply a 500 0.4 sharpen and I lower its opacity to 80-85%
Youtube videos/music videos: first, YouTube is a bitch on quality so there's that, but if you can't find the thing you want to gif elsewhere (like our lord and savior Vimeo or the ShareMania forum) for YouTube I get my videos using Jdownloader, it will download the biggest file possible and more often than not it's the best quality possible. If the video even being 1080p looks kinda shit I use Topaz to denoise and clean my gif and then I apply a 500 0.4 lowered to 85% smart sharpen (gif making for kpop taught me many things lately 😂) and it looks like it was a video from a good source! There's also avisynth and vapoursynth but I don't use them, if you wanna check that out you can Google and lots of tutorials will show up, mostly from kpop creators.
After that, it's all coloring tbh. Know that shit files won't be able to handle vibrant coloring very well so be careful with that. If it's too bad I try to bring up the darks more to no make it too visible but you will always get pixelated stuff with bad quality source.
My saving settings vary between adaptive/diffusion and adaptive/pattern, if I'm working on animation or too heavily colored sets (like with gradients) I'll go with pattern, if not it's diffusion.
Okie I think that covers everything 🙈 if you ever need more help with gif making you can message me again and I'll gladly help!
You can also join the @pscentral server on discord where there's ton of gif makers (from beginners to well established ones) that will always be there to help and always give good feedback ☺️
33 notes
·
View notes
Note
hi i hope you’re doing well! :) i was just wondering how you get your cas pictures so clean and clear? i feel like mine are always blurry or pixelated, tysm! and sorry if you’ve answered this before <3 have a good day!
hi !! i use srwe to size my pics up to 3000x3000 and then i edit them in photoshop using topaz denoise and this action (portrait) !!
#i hope u have a good day as well !!!#asks#anonymous#wcif#< idk if this counts but its going in the wcif tag
8 notes
·
View notes
Note
how do you make gifs
hello~ i'm so bad at explaining so please follow the steps here (it's really well explainined) the only tip i would give you is to cut the scene you want in a video editor, if the file is too long (more than 3 mins) ps can crash (it happened to me more than once years ago)
for the editing: topaz clean + topaz denoise (play around with it because the settings are not the same for all the gifs, I reccomend you to save the first settings you are satisfied with so you could use it as a base next time)
topaz clean: only move the settings under clean & edges
topaz denoise: noise reduction section, keep the values under 1
and that's it hope this helps 😊
3 notes
·
View notes
Last Seen Blogs