#iMovie deleted all of my files...
Text
Soooo....
I'm trying to make a quick edit for Monsters Inc. to upload tomorrow since it's Steve Buscemi's birthday. But, lately, my computer's been whining about storage space, and my parents can't pay monthly bucks for more. It doesn't help that I'm one of those sentimental hoarder types. Even after I tried clearing some out, it was still crying about it.
Today, in the name of freeing up space, it purged ALL of my past iMovie projects, and I don't have any backups saved. I didn't anticipate that this would happen. So, if anything should happen to my past videos, I can't reupload them because I no longer have them saved anywhere. I'm gonna upload the videos I made with iMovie to archive.org, and I ask that you help me preserve them however you can.
So, yeah- I lost all my past projects, and all that's left of them are on my channel on YouTube. But, the storage was all cleared and I could get back to my Monsters Inc. edit, right? No. It began to bitch about storage AGAIN, and then it deleted my project. All of the stuff I have for it is in my library, though, so it's not gone. I just have to start it over from scratch.
TL;DR: My latest edit is taking a while, and my videos are endangered. If anything happens, I can't replace the files because they're gone for good. Please help me preserve them!
0 notes
Text
STARTED IT ALL OVER AGAIN

When I compared part one for the first episode of Sonic’s first series to the video I downloaded from, I found that my fan restored version looked a bit blurry compared to he other one. So I decided to delete the episodes I uploaded and also the whole series that I had saved on my files.
Then on the day before, I started downloading the series again, but I also did the fan restoration on IMovie as before, only this time a bit differently,with only a bit of brightness added, the colour adding above a brightness by a notch with the sharpness left alone but the changes for audio was the same as before. The audio was just increased to maximum, so warning, if you’re watching the videos with headphones or earbuds, keep the volume on low to prevent loss of ear hairs, course you’re lose some hearing if that happens and they don’t grow back as skin hair does. When I compared to the original video before removing it, it even looked better than before.
Also I realized that it was a mistake to use iMovie for splitting the episodes into two parts, so I tried out a video converter, but it didn’t work for it made them blurry even worse than iMovie did. Then I tried out the photos app which allowed me to measure the length of the video not just in minutes and seconds, but in nano seconds also.
After that, I uploaded the first episode for Sonic’s first ever series, compared it to the original video I downloaded earlier online and as hoped it would, my fan restored version looked shaper and also better then the other one did.
Finally, it’s about time I got out of those irritating setbacks that came from the mistakes that I’ve done. Course, sometimes you’d have have to go through setbacks in order to reckon back to find what errors have occurred so you could learn how to avoid them.
Anyway, here’s the first episode for The adventures of Sonic the hedgehog (fan restoration) which is done by yours truly. I’m still redownloading the videos, but I’ll be restoring them and also be doing episode split copies to upload while I’m at it. Cause I can only upload three videos a day on YouTube, so I’ll be uploading one episode every one or two days depending on the time of day I’ll be uploading. Here’s the link for the playlist of the series and some before and after screenshots as proof. I know there’s not much in the playlist, but there’ll be more to come.


Warning: The videos of the redone fan restored videos for the series have majorly increased volumes so if watching the videos on computers and handheld mobile devices with head phones or earbuds, volumes on the computer or device you’re using must be set on low to prevent loss of ear hairs.
Viewer description is advised.
0 notes
Text
Reset imovie library

#Reset imovie library 1080p#
#Reset imovie library tv#
#Reset imovie library download#
Open the video in QuickTime Player and check if the codecs are supported by iMovie. Or the video is recorded by the camera in a format that iMovie doesn't like. Select the clip in the browser, then press the E key. Select the 'Finish Line.mov' file in the list, then click the Import. Choose File > Import Media, then click Desktop in the Import window sidebar. This can happen because a specific audio file is rendered in an unsupported codec in the creation or import process. Click projects to return to the Projects view. In order to reset this, I had to launch Photos with the option key pushed and a menu will come up, create a new. What I had to do is to set Use as system photo library in the Photos preferences, but it was grayed out. If there is no audio wave form in iMovie after you import the video from your Mac, it means the sound is not imported into iMovie at all. So, after I upgraded to macOS High Sierra 10.13, the Photos app updated and iMovie no longer attached it in the Library. Check if the audio/video formats are supported You will need to get the non-DRM audio for iMovie or remove the DRM (legally).
#Reset imovie library download#
Even if you download the Apple Music to the local music library on the Mac won't remove the DRM protection. For example, when you drag an audio track from Apple Music to the iMovie project, it won't play the audio. If the video contains copyright-protected audio (or video), there will be no audio when importing to iMovie. IMovie doesn't support audio which is DRM protected. Photos taken on digital cameras and good phones should be fine.Fixes to iMovie Audio Not Playing Issues 1. They should be at least 1024×768 pixels in size, and preferably 300 dpi. Make sure that you copyright permissions to use the images, and that they are of sufficiently high quality. mov file into imovie hd and when its trying to import it just crashes no matter how many times i try. Also, my hard drive is low on space and thats been affecting the speed of my. The Apple iMovie video editing application makes this easy. Hello, Ive been having trouble with iMovie lately.
#Reset imovie library 1080p#
You can later delete that clip and it won’t affect the initially set 1080p resolution. So, to set your project at 1080p, you can insert a known 1080p clip into the project as the very first clip placed in the project. The resolution of a project is set to the resolution of the very first clip added to a new project. Make sure to turn iCloud Photos on before continuing. To watch your iMovie Theater content on all your devices, including Apple TV, move your videos to iCloud Photos.
#Reset imovie library tv#
IMovie no longer supports sharing to iMovie Theater and the iMovie Theater app for Apple TV is no longer available. When the library file is finished copying, double-click the library file on the external storage device to open it in iMovie. Open the Movies folder, then drag the file named iMovie Library to your external storage device. When the export is complete, the finished video appears in the Camera Roll. Click your desktop to make sure that you’re in the Finder, then choose Go > Home from the menu bar at the top of your screen.Select the video which you want to save.How to Save Videos from iMovie to the Camera Roll on iPad? How do you save a video from iMovie to your iPhone camera roll? Tap Save to Files, then tap On My iPhone.A progress indicator appears during the export. Tap the Share button, then tap Export Project.In iMovie on your device, do one of the following: From the Projects browser: Tap the project you want to export.How do I transfer an iMovie project to my iPhone? Type this search term in the search box in the top-right corner: KIND:imovielibrary This search will return all iMovie libraries on the target device. If you have iMovie ’09 or later, here’s what you need to do: On the Mac that contains the project: Click on the “Project Library” button in the upper left hand corner of the iMovie window. iMovie libraries are saved with the ‘imovielibrary’ extension like this iMovie Library.imovielibrary. Jason answers: Yes, you can transfer iMovie projects from one Mac to another.
0 notes
Text
Facebook imac upload photo view

Facebook imac upload photo view how to#
Facebook imac upload photo view for mac#
Facebook imac upload photo view software#
Facebook imac upload photo view how to#
Must Check – How To Delete Multiple Facebook Messages Or Conversations At Once How to Reveal Someone’s Hidden Photos on Facebook If you are not a friend with someone then you can’t see the photos in which they are tagged by their friends even if those photos are public. Once I say hidden photos it means hidden to you but not to everyone, it also doesn’t mean that you can see someone’s private photos on Facebook. While doing some browsing on Graph search of Facebook I came across a simple graph search that allows you to see someone’s hidden photos on Facebook. Out of thousands of privacy bugs on Facebook, I talked about one where a user can see the private friend list of someone by doing a graph search there was a Google Chrome Extension to automate this task but this privacy bug has been fixed and the extension was removed from the Chrome Webstore.īut there is another credible method to see the private friend list which I have updated in the article.
Facebook imac upload photo view for mac#
In many cases, you need to install the Flip video converter for mac software, converter/transfer Flip videos to Apple editing application such as iMovie, FCP, FCE and portable devices.Without a doubt, Facebook is the biggest social networking site ever created with over 1.94 billion active users who upload around 300 million photos per day and these numbers are getting higher and higher over time.įacebook also faces security and privacy threats each day and they are constantly working to make it safer and private since Facebook is highly concerned about user’s privacy and they do whatever it takes to be more private.
Facebook imac upload photo view software#
Tips:Because the FlipShare application is already on the Flip video camera, there is no software to download or complicated installation procedure. Once the upload has completed, the status will change to Items successfully posted to Facebook, Click the “Go to Facebook video album” link when prompted to view the videos in your Facebook account. FlipShare uploads the videos to your Facebook account and creates links to the videos on your profile page. The bottom left corner of the main FlipShare interface will now display the upload status. Click the “Allow Publishing” button when prompted. Step6: Click the “Allow” button on the “Allow Constant Authorization” screen. When prompted on the Facebook Login to allow account access to FlipShare, click the “Connect” button. Step5: Click the “Login” button on the “Sign In” window. Click and select “Facebook” on the “Select a sharing site” pop-up window. Step4: Click the blue Facebook icon at the bottom of the FlipShare window. If you want to upload all videos in FlipShare, click the “All” button. Then click the Online button from the Share panel. Step3: Select the video you want to share on Facebook by clicking on it once. Click the “OK” button and wait for FlipShare to import videos from the camera. Select the folder on your Mac where you want to save the imported Flip videos. Click “File” and then “Import” on the FlipShare menu bar. Launch FlipShare on your Mac by clicking the desktop icon. When the “AutoPlay” window appears, click the “View your Flip Videos” option Here step by step upload Flip video to Facebook to share with friends on macĬonnect the USB cable to the Flip video camera and an empty USB port on the computer. “I got a Flip Video for Christmas last year, and i have no clue how to upload my videos onto Facebook, my friends really want to see this video i took in class today.Do i need the Flip Application? Please help me! Thanks”Īs we known, FlipShare application is already on the Flip video camera, you can quickly import photos and videos to your Mac, attach them to email messages or even upload and share them with your Facebook friends. Shoot cool Flip video by your Flip camcorder and want to upload and share them with Facebook friends, but do you know what to do? Many Flip camcorder fans complain their voice via Yahoo answer and other ask-answer website. Flip video cameras allow you to snap photos or shoot video anywhere you go. Flip camcorder gains good reputation for easy-to- carry, its small size, affordable price, recording video in HD quality,, lightweight, etc.
0 notes
Text
Moving image - video editing software- my struggle
After research that you can find in one of the previous posts, I decided to use PowerDirector 365 as it’s free and has many options. I was thinking about editing my videos in iMovie however I don’t have Mac and this software is made only for Apple devices. This is how my struggle began. I downloaded Power Director and it takes some space... Had to move most of my files to hard drive. I was trying to edit some of the footage but it was all so complicated, music available wasn’t the best, or all good stuff were for the premium users, so I spent ages watching tutorials but still couldn’t figure out how it works and eventually I got really frustrated and deleted the software....
Since I have a student discount I decided to upgrade my Lightroom and Photoshop package to the full one which is only £6 more (£16) to get access to Premiere Pro. Again this program is quite complicated and I had to google everything, from where to find tools or how to trim the video to adding music and all transitions. I still feel like I am not using the full potential, not even half, and it’s annoying how much time I have to spend to do some simple thing.
I learned some basic editing on iMovie and that was my first time editing movies. Need to say this app is so simple yet so good and has quite good music and sound build-in stock. It’s a shame I cannot use it now and have to learn at home from the scratch using different app. I would rather ask somebody to show me quickly how to find or do something than try to google it and then watch 15min long tutorial that won’t actually answer my question.
On top of all that my laptop has only 8RAM and can’t deal with such a heavy software. Every few minutes or sometimes not even a minute I have to save file, close the app and reopen it due to lags.
Still haven’t finished my movie, it’s getting better and faster as I learned the basic but it’s a looooong process for me and I really wish I could just do it simple in iMovie....
0 notes
Text
im gonna grrrrrrrrr
#frickin crap#when i updated my computer#iMovie deleted all of my files...#all of those animation stuffs..#I DIDNT KNOW IT WOULD DO THAT WTFFFFFF#BROOOOOOOO ;;#odespeaks
3 notes
·
View notes
Video
youtube
New Video !!
Plan With Me : 2020-2021 bullet journal setup 📖
#mine#i filmed this WEEKS ago#this was a challenging video to make to say the least#i filmed it on my phone so i had to find a way to get all of that footage onto my computer#i had to cut it up because the whole file was way too heavy#it took me DAYS just to film and transfer that footage#i couldn't film it all in one go bc i didn't have enough storage space on my phone#so i had to film it bit by bit and then spend hours uploading that to my computer so i could delete it and start again#and then i had to edit all of that footage to an acceptable length#with a faulty imovie that never works properly#and THEN i had to record the voiceover but my flat is too noisy all the time so i could only record when i was over at my friend's place#bc i was looking after her cat#except the cat would randomly make noises and ruin my take#basically this whole thing took me 17 days to film and edit#and it's not even good quality jhjkhsj#bullet journal#bujospo#bujo spread#bujo aesthetic#bujo#bujo video#bullet journal video#plan with me#bujo community#archer and olive#youtube creators#bujo setup#bujo inspo#bujo ideas#bujo inspiration
15 notes
·
View notes
Text
About the Eda video.
I finished it, I uploaded it.
…and I got an email saying it was blocked for copyright claims. I neglected to edit it so that it wouldn't get copyrighted, like text commentary.
Unfortunately, because I was desperate to save on storage and battery life, I deleted every clip I used from my photo album and recently deleted file. (I used mobile and iMovie)
So all the work was for nothing.
If I do decide to try making the video again, it'll be on my computer because I am NOT going through this again.
22 notes
·
View notes
Note
not sure if you’ve answered this before, but what’s your process look like when you make an amv? i’m just curious and in constant awe of ppl who can make videos like you do :)

hello all!!! i have answered this before and i have a vid help tag with other asks i’ve gotten about stuff like this! but i’ve gotten several more messages along these lines so i’m just going to answer a bunch of them together (under a cut since i love to ramble about editing lol). i do just wanna say i’m definitely not the authority on video editing and obv everyone has their own techniques!
edit: i just finished typing all this up and it’s SO long so sorry in advance LMAO god bless anyone who reads this entire thing
so i work in news tv and we have a very specific workflow for writing scripts, sourcing video, producing, and editing. i’ve just applied that to making amvs! for every video i make, i copy the song lyrics into a google doc and adjust them to match the song i’ve cut (i often will trim songs for time and/or content purposes). then i start planning! i’ll mark down what clip i want to use for each lyric next to that line, and any sound bites i want to use (with episode numbers!). i’ll color code between video and sound bites and lyrics, so my scripts end up looking something like this (for my honeybee amv):

doing the planning ahead of time makes everything much easier when it’s a video that spans the whole show or involves a lot of sourcing, like honeybee or sports analogies. that way when i get to the actual editing process, i already know what i’m going to do and have a game plan. for videos like happy ending or believe it or not, where i’m mainly just pulling from a few episodes, i can just plan it in my head as opposed to writing it all down, and produce as i edit. obviously i do make in-the-moment decisions while editing—sometimes a shot doesn’t work the way i thought it would, or i go where the video takes me—but planning ahead definitely helps. i know some people use spreadsheets as well, with columns for lyrics, video clips, and sound bites if applicable. once you find a system that works, it actually goes pretty quickly.
as for sourcing clips themselves/finding clips within episodes, i talked about that here and kind of here. the short version is that transcripts are a must, and the supernatural wiki is hugely helpful by cataloguing all the hugs, prayers, phone calls, etc. in the show. gifmakers that tag episode numbers on their posts are your friends. it gets easier the more video you make—that’s another huge reason i make the google docs for each video (even the ones i plan in my head, i end up going back and making a loose script with episode notes just for reference). if i can’t remember where something is but i know i used it in another video, i can easily reference past scripts!
i also cut all my videos in the same project in premiere pro, so i can flip between them easily. instead of checking a past script, i can just go to the video sequence itself and copy the clip i’m looking for! this was especially helpful when i match cut together the 5x18 and 4x22 wall slam shots for my bestie video, and then stole it from myself for honeybee hahaha. at any given time i have at least 8 sequences open:

because of the sheer volume of videos i make, it’s worth it for me to download the entire show—i have all 327 episodes in HD, plus deleted scenes. if you think you’re only going to make a few videos, i’d start with scene packs. you can usually just google “destiel [or whatever ship/character you’re looking for] scene packs” and there will be any number of ones you can download. if you need other specific scenes, you can always download/torrent individual episodes or screen record netflix (that’s what i did before i got HD download links). i’m happy to share my links if you DM, but be warned it’s a lot of disk space (about 500GB on my hard drive). someone also compiled every destiel scene, downloadable here.
having every episode already loaded in premiere for all my projects also makes it a lot easier to source clips. once i use a clip in a video, i’ll put a marker on the episode file, so that after a while i have most of the important scenes/lines marked to easily find them. to give you an idea, this is my episode file in premiere for 12x10 lily sunder has some regrets (markers at destiel scenes, the car fight, hot girl cas, etc.). markers are the green tabs along the bottom:
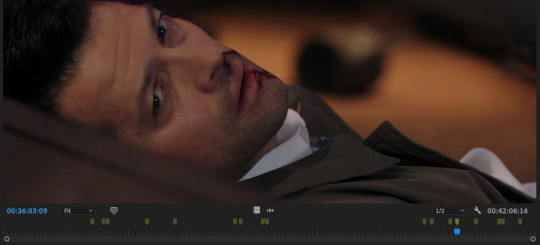
premiere also lets you color code and name markers, so ONE DAY i will go back and color code them all. the ones above are all the same color, but in a perfect world, i’d have a myraid—for destiel shots like hugs, touches, looks; for important pieces of dialogue; for action shots; etc. but for now this works ok for me, so that’s a project for another time!
between detailed scripts, one giant premiere project, markers, the wiki, and my own memory, i have so many points of reference that i can usually find any clip i need in about 2 minutes max. sound bites are often harder to start out, or tiny specific shots i haven’t used before, and that’s when i turn to tumblr gifsets or beloved mutuals to crowdsource. but if you’re as obsessive about marking/keeping neat scripts as i am, it gets easier and easier with every video you make. that’s part of why i’m able to cut videos together so quickly. (also i want to stress i do this for a living and have to produce/edit a new piece for my show every day so i’m used to it. and compared to constantly updating content/sources and news that changes every day, 327 highly documented episodes that never change are much easier to handle hahaha)
this is all great for me since i make so many videos and plan to continue doing so, but if you’re only making a few, this level of work isn’t worth it imo. really it’s all about developing a system that works for you. whatever you do with episodes/sourcing, though, i cannot recommend planning things out in a script ahead of time enough.
everything i just mentioned is producing, though. for the editing process, i usually do it in this order:
music first. any parts i want to cut, i make sure it all sounds smooth
then soundbites. i usually try to weave them into the lyrics—i have characters talk in breaks between lines or instrumental sections as much as possible. i’ll sometimes go so far as looped/extending an intsrumental part to make room for the soundbite i want there lol. if i do have dialogue over a line, i do the sound mixing/levels at this point as well to make sure everything is audible/one doesn’t overpower the other. (also i always include the video that goes with these bites when i drop them in, and decide later if i want to show the character speaking or have other clips cover the dialogue)
once i have all the audio locked in, then i bring in all my other video clips. sometimes i edit completely chronologically, sometimes jumping from section to section—it depends on the song or how i’m feeling
double check sound mixing. i usually listen to my videos through a few times, with headphones and without to make sure it’ll sound good no matter how people watch it
once i have picture and audio lock, i go through and color correct my clips. i’m basic and just use lumetri color in premiere, and usually just play with brightness, saturation, temperature, and tint until i like it
render and export! :)
i always have several audio tracks, but i try to keep my video tracks condensed. i’ll drop clips on a V2 level, and edit a section there, and drop the whole chunk down to V1 so i know it’s finished. that way when i leave and come back i can know where i left off/what’s done/etc. to give you an idea, this is the timeline for my what the hell video:

i always render as H.264 with high bitrate, and make sure to check “render at maximum depth” and “use maximum render quality” for the best quality. i’m sorry, but i don’t know what the equivalent options are in final cut, imovie, kdenlive, etc. i post on youtube mostly so i don’t have to sacrifice quality, but usually just using a lower bitrate will get you under the tumblr file size limit and it’ll still look good.
as for the anon who asked about “polishing”: first of all, thank you!! second of all, it’s in the details. all of this is a matter of taste and my own insanity, but here are some little things i always try to do:
after i color correct, i blur out any credits from the starts of episodes. i use gaussian blur for this, but really any blur tool works
as much as possible, i avoid clips where we see a character’s mouth move but don’t hear the words. in tv/film we call it “lip flap” and i just think it looks messy. also i’m trained to avoid it at all costs at work hahaha. it’s more for serious videos that this matters a lot to me (e.g. i think i did a really good job eliminating lip flap in my happy ending amv)—for comedy videos i don’t sweat it as much
i put audio fades on the start and end of every single audio clip i use, even if i don’t think i need it, to make sure everything sounds smooth
i use markers for timing, especially in action-y videos like what the hell. i’ll put a marker on the clip i’m using at the exact moment a punch lands, and in the song on the beat. if i have the magnet/snap in timeline tool on i can just easily snap them together instead of having to spend time finagling it
this is such a small thing but i dip/cut to black for a tiny bit at the start and end of every video. this way if i post with tumblr video player, there’s black between the loops, and it gives you a beat before the video restarts. i do this even on videos i post on youtube, just because i think it looks nicer/more professional
this is 1,500 words so i’m going to stop myself before i pull something. if you have follow-up questions feel free to ask and i’ll continue to add them to the vid help tag, but any more questions about sourcing clips or my process in general i’ll just link this post going forward. anyone who made it this far, i am sending to a telepathic kiss. thank you for reading and happy editing!
75 notes
·
View notes
Text

i’ve been asked to make a gif tutorial so here it is! i tend to over explain and go on tangents so i’m going to try to keep this as understandable as possible lol
so first you need to download your video. i use 4k video downloader.
when you open photoshop the first thing you’ll do is go file --> import --> video frames to layers and it will bring up your finder to locate the video you’re going to be giffing.
once you select the video, this screen will come up:
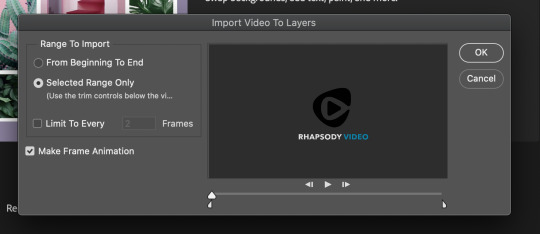
make sure you’ve selected ‘selected range only’ and then you’re going to use the two cursers on the bottom to select the portion of the video you want to gif. this won’t really work if the video is over like. 40 minutes long. because you can’t select a small enough number of frames. so keep that in mind. if i’m giffing something like lotms or a full length show i’ll open the video in imovie and cut it down so that this step works. if you have further questions on how this works i can try to answer them but i think it’s just trial and error for this part the first couple times you do it. once you’ve selected the range of the video that you want, hit ‘ok’.
once your frames/layers open in photoshop, you wanna click on ‘window’ and make sure you have these selected:

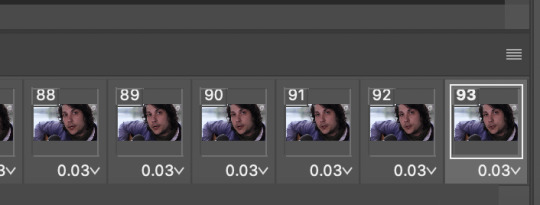
your next step is to go through the frames on the bottom of the screen and choose which ones you want to be your gif. usually importing them will give you more frames than you need so you’ll want to trim a bit off each end.
you can press ‘play’ here and it will scroll through the frames automatically for you so you can see what the gif will look like in motion
it depends on the size of your gif but i tend to go for 80-85 frames. if you have too many your gif can end up being too big for tumblr. 8mb is the size limit. this is another thing that tends to be trial and error but yea i go for about that many, try to stay under 100.
next step is to delete the layers that you don’t need, because deleting the frames when you’re trimming the gif down doesn’t delete the corresponding layers. when you select a frame, the corresponding layer on the right will have an eye next to it.

like this ^ select your first frame, find the eye in the layers, and delete all of the layers that come before that. do the same with the last frame in the gif and delete all the layers that come after it. click + shift will select as many at a time as you want, to make this easier.
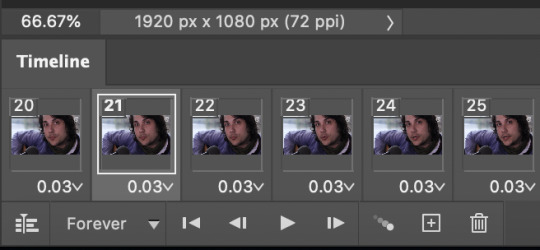
at the far right of your timeline (the frames) on the bottom of the screen there’s an icon thats 4 lines which you can see below:
click this and select ‘select all frames’
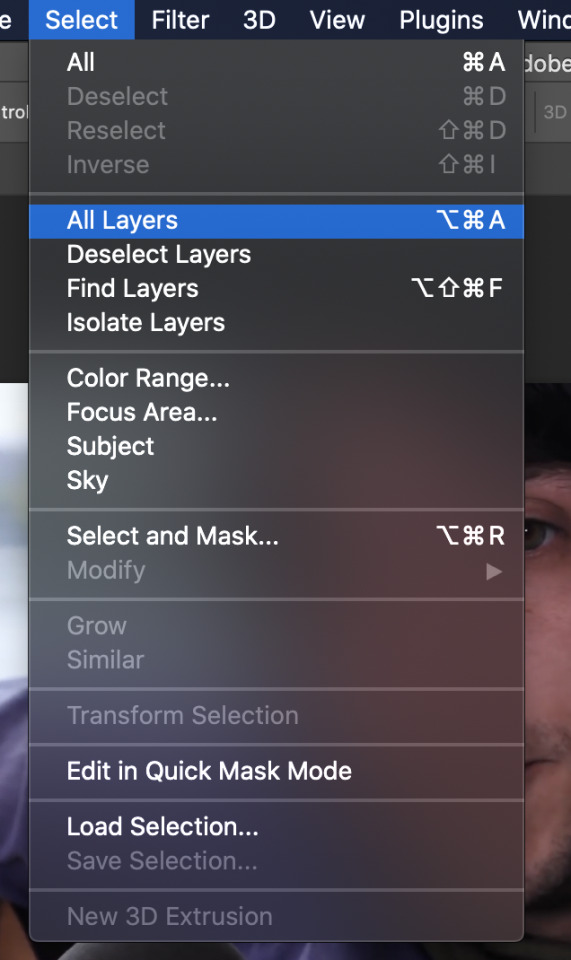
then go to the top of your screen where it says ‘select’ and select ‘all layers’
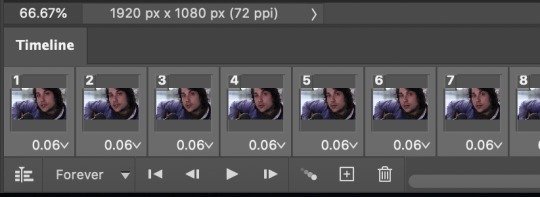
once everything is selected you need to change the framerate/delay. you see where it says ‘0.03′ underneath each frame? a lot of videos will be 0.04 in which case i would click on the framerate, select ‘other’ and type in ‘0.07′. that tends to work well. this video is 0.03 so i’m going to change it to 0.06 instead. that’s just a personal preference. if you don’t do this step, the gif will be too fast. if you don’t have all of the frames selected when you do this part, it will only change the selected frame so make sure they’re all selected before you do this.


so now it’s changed.
next you need to convert to video timeline. that’s the icon on the far left on the bottom here:
the one before ‘forever’. once you’ve done that, you need to right click on your layers (which should still be selected) and select ‘convert to smart object’.
now for all intents and purposes you have a gif! but you still need to edit it a bit.
first you should crop it if it needs cropping. i’m not going to crop the one i’m making but it’s pretty self explanatory, just select the crop tool and pick one of the preselected crop ratios. you can preview them all by clicking on them.
after that you’re going to go to the top bar and go: image --> image size
you need to resize your gif for tumblr. tumblr’s post width is 540 pixels. if you’re doing two gifs side by side they would both be 270.
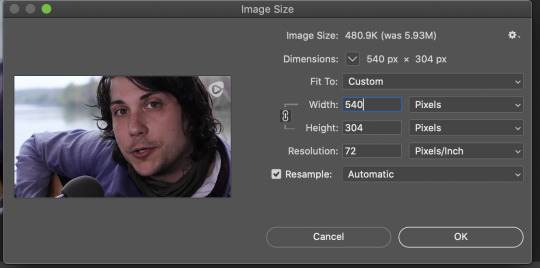
the height will automatically adjust itself.
now your gif is going to look like it’s really small but you’ll just go to the percentage above the timeline and change it to either 100% or 200%. it’s usually 100% to view it at full size but my new macbook has more pixels or something? so i have to set it to 200% to view it at full size.
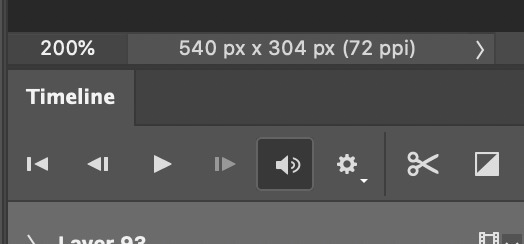
you can see here how i changed it ^
now you have a properly sized gif and any changes you make are personal preference. usually you’ll want to sharpen it. i use a sharpening action that i downloaded from a friend but you can also do smart sharpen. i would look up good sharpening settings because i don’t know them personally because i use an action. you can find the sharpening stuff through the ‘filter’ dropdown.
and then the last step i do is coloring. coloring isn’t necessary but it makes your gifs look better. coloring is personal preference though and it’s just about playing around with settings. i usually use brightness/contrast, vibrance, hue/saturation, selective color, and color balance. you can also download coloring PSDs from the internet which is like premade coloring layers that you can open in photoshop.
this is what my gif looks like without any coloring and i’ll show you the finished product at the end when i save it

so one you’re happy with your gif you’re going to go: file --> export --> save for web (legacy)
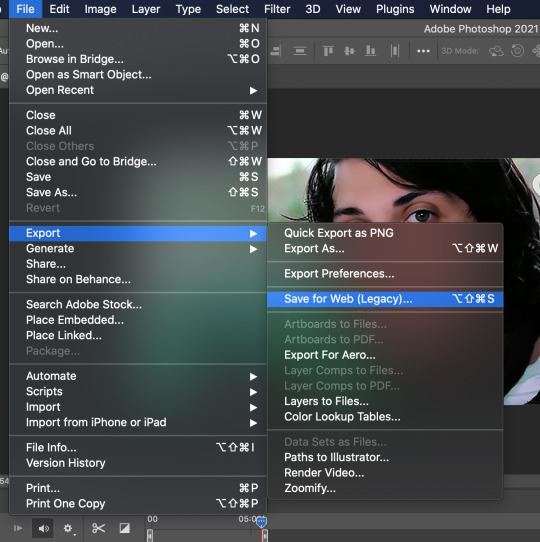
depending on how your computer wants to operate, this can take a while. while it’s buffering i hit ‘escape’ and it takes me to the save page without the wait.
these are my save settings:
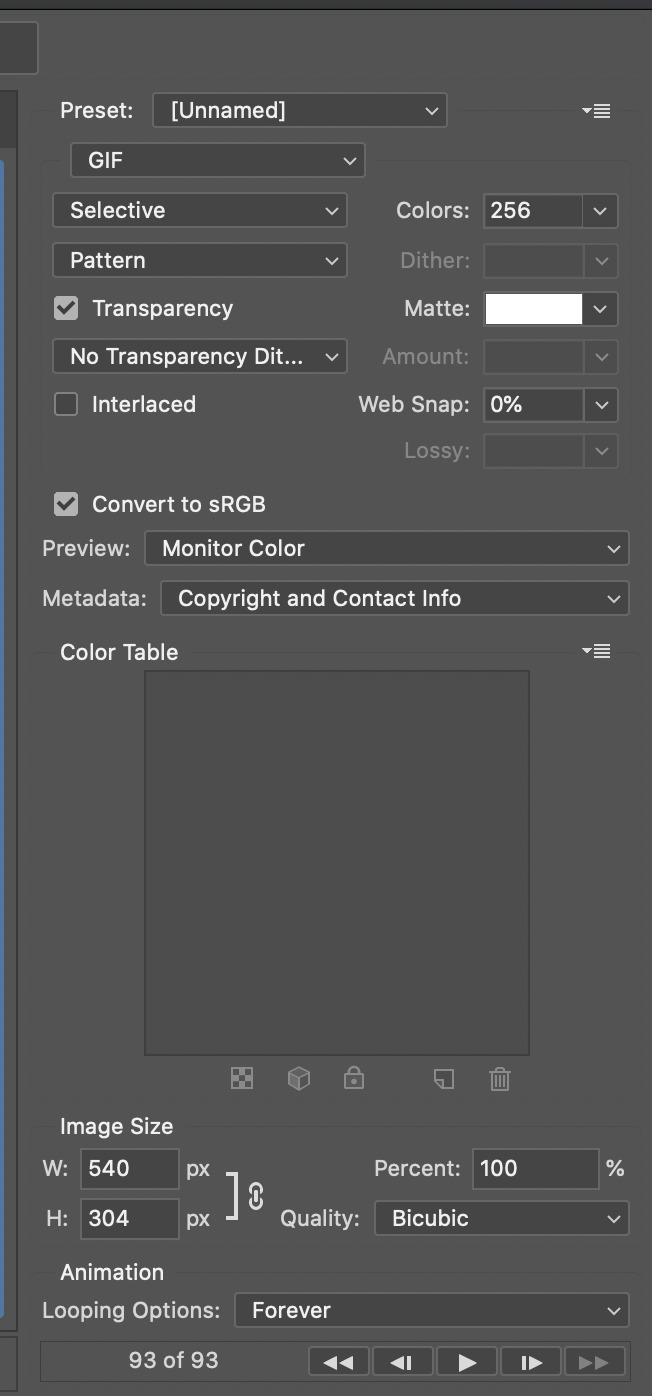
but before you hit save you want to ‘preview’ on the bottom left. this will open your gif and show you what it will look like on the web and it also tells you how big your gif is.
look for this:
if it’s under 8mb you’re good to post it on tumblr so close out and go back to photoshop and save it! i think saving is self explanatory
and you’re done! here’s the gif i made for this tutorial:

if any of this was confusing or not clear i’m happy to try and explain better!
31 notes
·
View notes
Note
What website/software do you use to create your gifs? They're always such good quality.
hello! I’m so sorry for only getting round to answering this now, it’s been sitting in my inbox for months and since you sent it I’ve completely changed the platform I make my gifs on. I’m now using photoshop cc 2018 but the gifs you must have been referring to were made using completely different, free and accessible software/websites. There’s a lot of photoshop tutorials out there but less so for other options so I’ve decided to just go through my previous process in the hopes that someone will find it useful!
To be honest, the differences between my gifs BP (before photoshop) and AP (after photoshop) aren’t that huge as long as the video quality is good. It’s easier to add subtitles, to colour and to play around with the gif size/quality, but there’s no need to give your soul away to adobe to create good gifs there’s obviously always the possibility of downloading ps less legally which i of course would never in a million years do. So, to create gifs as I did BP you will need three different things:
a screen recorder (I use QuickTime Player which is preinstalled on a mac but there are many others out there, and then VLC player if I had already downloaded the video which didn’t happen often as I mostly gif matches so I’d just screen record parts of the match if I couldn’t download it)
a video editor (I used iMovie which again is preinstalled on macs but there are other options out there if you have a poke around - if necessary this step can also be skipped but it’s useful and will improve gif quality)
the lord and saviour ezgif.com (a free website at everyone’s fingertips which provides many of the features you can get with ps)
1A. Screen recording: have the part of the video you want to record on your screen, open up QuickTime Player, right click on the image of the app in your dock, then click on “new screen recording”. You can then click on the arrow pointing down to change your sound settings, I usually have mine like this
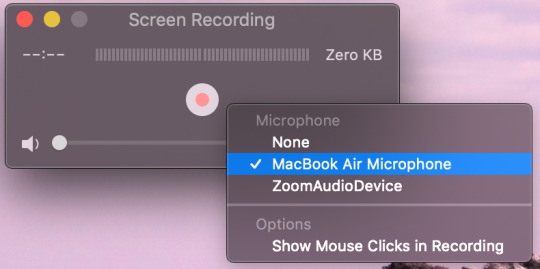
click on the circle with smaller red circle (play button) after which these instructions will appear across your screen: “click to record the full screen. Drag to record part of the screen. End recording by clicking the stop button in the bar menu”. So you can chose to record your full screen or just a part of it depending on whether you click or drag. If you drag you are then given the opportunity to adjust the area you want to record and then you press “start recording. Once you have finished recording the part you want to gif, click on the circle with a black square inside (stop button) in the menu bar at the top of your screen. Go to file > save and then save the video in whatever file and under whatever name you want. After this you will have finished step one!
1B. The alternative, if rather than screen recording a video you haven’t downloaded you want to record a certain part of an already downloaded video then you can use software such as VLC (you can also just upload the video directly to iMovie and crop it there but if it’s very long/you don’t want to go through the middle step then you may want to consider this as an option). Go to Finder for the video you’ve downloaded, right click on it then Open with > VLC. Find the part you wish to use for your gif, go to Playback > Record like so.

It will immediately start recording what’s playing, stopping when you click on Record again once the part you want to gif is over. Then step one method two is done!
2. iMovie: as ezgif isn’t the best for colouring, and anything that it does do is pretty slow and arduous, then I used iMovie to shorten, slow down and colour my videos before turning them into gifs. Here I go Create New > Movie > File > Import Media. I find the video(s) I want to use to make gifs, click import and then drag and drop them into the timeline.
Usually I try to make my gifs about 3 second long, so first thing I would do is change the speed from normal to about 70/80% (this is a completely individual choice though!) so these would be my current settings

Then I find the exact bits I want to gif and divide them into individual clips, as I said they’re usually 3 second long but it can vary. This is done by right clicking on the part of the video you want your gif to start and clicking on “Split Clip”, and again at the point you want your gif to end. Repeat for however many gifs you want. Simply delete the parts of the video(s) you don’t want to keep after this is done.
Now I attempt to add some colouring. First I go to “Colour Correction” which is in the same bar “Speed” is - it’s the little artist’s palette. I play around with the different toggles a little bit until I find something which I believe works. This honestly varies so much from gif to gif but usually I up the saturation just a lil bit, leave the temperature as it is and darken the video so that it ends up a bit like this but honestly it fluctuated a lot and it’s all about personal preference.

If I’m feeling funky I’ll also mess about with the “Colour Balance” which is under the first icon on the left which is a half white circle. I use the eye dropper to change the skin tone balance and sometimes the “White Balance” eye dropper which is a simplified version of ‘curves’ in photoshop.
Once you’re happy with how your video looks then save it by going to File > Share > File. Name it and, if possible save it in as high a quality as possible. My settings usually look something like this

click Next > Save and step two is finished!!
3. Actually making the gif using ezgif.com/video-to-gif. Go to “Choose Files” and select the video you want to gif, then click “Upload Video!”. Chose the time frame you want for your gif, the size (the x540 one which says for Tumblr is the one to use if you’re uploading them onto here), the frame rate (the more per second the better the quality but also the bigger the gif size). All of this is also very well explained by ezgif at the bottom of the page so I’d definitely recommend having a read through all that. Then click “Convert To GIF!”.
From here you can either ‘crop’ to make the gif a particular size or use other tools such as ‘effects’, ‘speed’ or ‘optimise’ if you didn’t use iMovie or want to make some further changes. I usually only use the ‘crop’ as iMovie won’t let you change the dimensions of the gif whilst here you can do that. However I mostly stay away from the other tools as I find them a bit clunky and annoying to use. Once you’re happy with the final product click “Save” and hey presto your gif has been downloaded and is ready to be used!!
I hope some/all of this helped and feel free to hmu with any questions you might have if anything isn't explained that well. It took me ages to write this because I'm never sure whether these explanations make sense outside of the realms of my brain :)))
#sleep who? i only know what making gif tutorials at ungodly hours is#genuinely hope this helps people!!#i developed this process bit by bit so thought id finally share :))#gif tutorials#tutorials#colouring tutorials#how to#og#ezgif tutorials#coloring tutorial
19 notes
·
View notes
Note
hi sorry if this is the wrong place for this but i feel like shit. everything i touch i ruin. and i know i’m supposed to have perspective or whatever but it’s really hard when right now
my current issue is that i had to make this cooking video for my spanish class. i spent 4.5 hours filming the video two weeks ago, and i spent 3 hours editing it. absolutely no exaggeration. WELL. i had to transfer it off my moms ipad (where i had been editing it) and onto my laptop to turn it in, but the ipad was out of storage. so i thought i’d permanently delete the originals and back ups of all the mini videos i’d filmed of myself cooking since they’re all in the big imovie anyways. but apparently the imovie needs to be able to access those mini videos to work. yay for me!!!
so now the video just. does not work. and i cant recover those files, so it will not work. so i don’t have a project. and this one project is worth 40% of our grade this quarter, and it’s due in less than 6.5 hours (it’s past 12:30am where i’m at lol). and i have nothing. despite the fact that i spent 7.5 hours on this.
and it’s not even like i’d spent so much time bc i was being perfectionist. i promise i was doing the bare minimum, i’m just a super slow worker bc i get confused and lost really easily. and this was a huge project - the teacher gave us 3 weeks to do it because it’s a huge project and it’s supposed to take a ton of time, even for functional students. and for once in my life i was actually able to put in a decent level of effort where i really thought i had a chance of getting a B on this. and i managed to fuck it all up in one night.
im just so sad and frustrated with myself. because this is just one more thing on top of all the other shit i’m messing up. i just emailed my teacher and explained the situation, but it’s so goddamn embarrassing. i barely managed to get a C in this class last quarter. the teacher was so kind and lenient with me and gave me so much more than i deserve. and it’s like. oh great, this is how i repay her?
and then, whats the solution for this? i re film and re edit and spend another 7.5 hours on this? because i really feel like i cant do that. not when i have mountains of other overdue work due for most of my other classes, and it’s all just. so fucking much all the time. and my brain fights me at every single step of the way.
you dont have to respond to this because i know that there’s nothing really to be said here. i need to suck it up, put things into perspective, communicate with my teacher, and get some fucking sleep. but it’s all just a lot right now, idk. so i felt like i needed to tell someone for whatever reason. so yeah. thanks for being here to receive this
aw anonnnn sending you so much love honestly. this kind of situation sucks but i promise the best thing about it is that it will be over before you know it. 7 hours of more work and then boom and you move on with your life. and i know that’s a lot of work but in the grand scheme of things you’ll probably not even remember this incident in a month or two even tho it completely sucks right now.
last thing i’ll say is please read this about first and second darts. it’s a mindfulness concept i love. essentially first darts are unavoidable pains in life - like the mistake of deleting your project, mistakes happen it’s just a natural part of life. the first dart hits you and it hurts! but one thing that won’t help is hitting yourself with a second dart of regret. don’t beat yourself up about making a mistake, it’ll just make you feel worse! first darts are a natural part of life but if you avoid beating yourself up and “throwing the second dart at yourself”.
don’t beat yourself up babe please ❤️❤️❤️manifesting better days on the horizon for you!
6 notes
·
View notes
Text
How to clean a MacBook Pro keyboard easily with the keyboard cleaner
How to clean a MacBook Pro keyboard easily with the keyboard cleaner The thing is stationary on the desk. There is no drive left for that (I can live with that) but the connection for the SD card has also moved from side to side (so I prefer to connect an SD card reader instead of crawling behind the Mac every time). Not to mention the Magic Mouse, a small registration for the USB in the front and you could also use the part while charging. In the meantime, design comes before function. The things are damn filigree and feel super sensitive. Once you have the cap and the mechanism in hand, you can use a pointed object to loosen the two clips and then remove the mechanism from the hook. Once you have released the clips, the mechanism simply slips out of the hook. No force required! Today there are some models that have not been updated for years (Macbook Pro without touchbar, small Macbook, until recently Macbook Air). I am glad that the Apple-friendly tech blog could still manage to perceive the butterfly keyboard as the problem of what it is. Anyone who has dealt with Darwin (the Unix under MacOS) knows what a giant MacOS really is. If you have a laptop or desktop PC, you use a keyboard almost every day. From the requirements I just have to give presentations on the Mac, use iMovie (video editing programs) and watch movies. Hello guys, I set up a password for notes on my iPad. I accidentally deleted a note and accordingly I no longer wanted this to happen. Functionality and robustness before design is the currency. Regularly used macOS, various Linux distributions and Windows.
Thus the condensed water is blown out, which accumulates in the spray due to temperature fluctuations.
If the keyboard of a 2016 MacBook Pro is exchanged, Apple has gone over to installing the improved model of the butterfly keyboard.
For prolific writers, the butterfly keyboard for writing is simply an ordeal.
I hope I didn't overwhelm you with my questions and you can help me.
I read in an article that the Iris graphics cards should be better. But almost nowhere is it known which generation of the processor is installed. On the sheet, the Ealry 2013 looks almost better than the Mid 2015. But I was afraid to scratch the aluminum or the key with it and then I had the idea to pull out the keys with the Eagle Owl Patafix, which, if you take care of one important thing, works amazingly well. If a key on your MacBook (2015 and newer) or MacBook Pro (2016 and newer) stops responding, or the resistance of a key when pressed is different than other keys, use compressed air to clean the keyboard. To do this, proceed as described below. When the MacBook has been cleaned, you can now put the protective cover back on. The waiting time for a repair can be a week or longer - at least if devices have to be sent in. In some Apple stores, the group is also planning an "on-site" exchange, which will take a few hours if you get an appointment. Fat and cream can also penetrate the keyboard and cause malfunctions. Since cream cannot be removed from the keyboard with compressed air, you should be particularly careful here and wash your hands thoroughly before using the keyboard. It was recently announced that a renown US law firm is looking for victims to file a class action lawsuit against Apple for these problems. The basic configuration of the Macbooks sometimes starts with a ridiculous 128 GB and the "felt" correct size does not exist, of course, so that you can just hold the next larger one at a huge surcharge -rc-folding-motorcycle-drone / "> dust cleaning mud review . Where is the existential crisis? Apple's profits are definitely not dependent on the Macbooks, this business has only a minor importance in terms of sales and profits. This Twitter conversation, for example, offers an extensive selection of current comments on the topic. Initiated by well-known overcast developer Marco Arment, within a few days numerous MacBook Pro owners have spoken out who have been and are affected by jamming device keys. Unfortunately, not all buttons work 100% because there is probably still liquid under the butterfly. The butterfly is difficult to remove without damaging it. Maybe someone knows a trick or a precise procedure how to expand it.
1 note
·
View note
Text
Convert Flac To Alac And Alac To Flac From The Command Line
FLAC to ALAC can convert FLAC lossless audio to ALAC lossless audio simply. After creating the MP3, AAC or Apple Lossless model you should delete the original WAV or AIFF files to save lots of disk space, as iTunes doesn't do that for you mechanically. Step three: Enter your e-mail address, which is able to obtain the output ALAC after the conversion in a short while. Convert iTunes M4A, M4B & Audible AA, AAX audiobooks to plain format.
Freemake Audio Converter helps several common audio formats and is extraordinarily easy to use. Nevertheless, it solely helps audio files that are shorter than three minutes. For example, if you want to convert FLAC to playback on an iPhone (In truth, you may simply set up a FLAC participant app on your machine to play it), merely choose the proper iPhone model from Apple iPhone extending listing, after which proceed to the following step.
FLAC and ALAC are both lossless and can sound identical. Even FLAC has advantage than ALAC since FLAC is open supply while ALAC is powered by Apple. Why many individuals nonetheless want to convert FLAC to Apple Lossless? The reason is FLAC is incompatible with Mac, iTunes, iPhone, iPod, iMovie, QuickTime, etc, but ALAC is. In the meantime, converting FLAC to ALAC will keep the 100% authentic high quality. That's why increasingly more Apple users select to convert FLAC to ALAC.
To start with, run the program on your Mac pc. Then you possibly can drag the FLAC file that you might want to convert and drop it on the first window of iSkysoft iMedia Converter Deluxe. Alternatively, add the FLAC file by going to the File" menu and then choose the Load Media Information" option to find the FLAC file from the media information. VideoSolo Free Video Converter allows you to convert flac to alac converter download mac audio information to ALAC. If you'd like increased conversion quality, you need to use VideoSolo Video Converter Final, which can offer you more helpful capabilities.
To get your Apple Music tracks converted to lossless FLAC audio, flac to alac converter download mac you're really helpful to attempt TunesKit Apple Music Converter , an all-in-one Apple Music DRM removal resolution that can assist you completely decrypt DRM lock from downloaded Apple Music songs and convert the DRM-ed M4P file format to FLAC and different commonly used audio codecs with ID3 tags and metadata info preserved.
AAC and MP3 are both lossy compressed codecs. AAC is actually the MP4 commonplace, the successor to MP3. Use this instrument to convert video and audio files from many alternative formats to WAV. You may both choose a local file or input a distant file location for conversion. If you are logged in you'll be able to decide-in to get notified by e mail once the conversion is completed.Now that you've successfully ripped your CDs to a lossless format, it is time to begin listening to your new digital music library. To get probably the most out of your new lossless music recordsdata, you will want to be sure you have the best excessive-res sound equipment to play them. Sony's HAP-Z1ES High-Resolution Audio HDD player is a sound system that may make any audiophile's heart beat a bit of faster.Hey! My identify is Rocabella. I'm a music enthusiast and tremendous like the lossless audio, so, good sound quality means lots for me. I'm looking for one of the best Music Playback answer and I would like to share my related knowledge with you. As we all know, FLAC is incompatible with iPhone, iPod, iMovie, iTunes, and so forth. However ALAC is. Therefore, we have to convert FLAC recordsdata while HD Video Converter Factory Pro is what we want.AAC is the default format set in iTunes and the format Apple uses for audio recordsdata offered from the iTunes Retailer, so is the obvious selection if you happen to solely use Apple products. MP3 must be thought-about if you think that sooner or later you might want to change to another transportable music participant or phone. In case you have loads of cupboard space in your gadget or a relatively small music library you may want to contemplate the larger lossless WAV or AIFF formats.Tips: If the standard is very important to you, please select output codecs from "LossLess Audio" menu. Whilst you might not discover the distinction in sound high quality, the lossless format leaves you with an archival file which you can convert at any time sooner or later. You will never want to tear those CDs again. Sure, I feel we'd all agree on this for MP3s, AAC etc. And I agree with you that it isn't wanted for lossless files because the bitrate will differ from track to track primarily based on the audio content, which has nothing to do with format high quality. Which is why we use bitrates within the FTF for different recordsdata varieties.
1 note
·
View note
Text
Ffmpeg To Convert From Flac To Wav
Tips on how to convert WV to MP3 online with WV to MP3 Converter? The perfect compression High Definition audio format when ripping your CD to digital format is FLAC, not MP3 or AAC. MP3 is a lossy format, which means parts of the music are shaved off to scale back the file size to a more compact stage. MP3 is still the most popular format as a result of back then storage is restricted, internet pace is 56K and converting will take hours if the quality is just too high. When you have an enormous CD collections, it is best to rip the CD to FLAC, not 128 bit, 168 bit, 196 bit or 256 bit mp3.
Total Audio converter is a flexible software that is able to converting even the rarest formats reminiscent of OPUS to MP3. A number of the output audio codecs it help consists of MP3, WMA, WAV, FLAC, MP4, MPC, OPUS, and over 20 extra formats. Together with that, it will probably additionally rip audio from CDs and convert YouTube movies to the varied output codecs it helps. Total has been online for over 10 years and is being utilized by millions of users.
Wait no extra, merely free obtain this highly effective WV Converter to edit and convert WV audio information to efficiently play Wv to Flac converter download mac audio in Residence home windows Media Participant, iTunes, QuickTime, iPod, iPad, iPhone, Android, Samsung Galaxy, BlackBerry and and so forth. Choose aWAV audio file or every other supported media file out of your gadget or cloud storage. Convert WAV to MP3 in Home windows Media Participant This must be easy, but I am unable to decide it out. I've ripped all my cds to Home home windows Media Participant, however seems like many of the formats are WAV files as an alternative of MP3 recordsdata.
Right here you can learn how to check performance of audio formats by yourself utilizing fmedia. I do not attach any sound recordsdata right here, it is better if you happen to use your own files, in all probability in other music genre. When you want to share your outcomes with others, please send me a message and I am going to do my greatest to edit the article so it displays all difference in check outcomes.
WV to MP3 Converter supports conversion with none brief-term recordsdata it brings you extreme altering tempo and saves the arduous disk resource. To edit WV in video enhancing software program House home windows Movie Maker, Sony Vegas, iMovie, Closing Decrease, Audacity, changing WV to MP3 with WV Converter is a reasonably good strategy. Conclusion Changing WV data to MP3, WAV, wv to flac converter download mac FLAC, APE, WMA, OGG, AC3, and AIFF to play WV information on House windows eight and Mac OS X is just that easy.
Pazera's Software program Free Audio Video Pack is a collection of video and audio converters that help convert between all kinds of common audio and video codecs. The package deal also includes applications that allows you to extract audio tracks from CD photos based mostly on the CUE sheets, in addition to an audio extractor that allows you to take just the audio from a video file.
For those who only have just a few small files to convert, we advocate utilizing one of many free programs we reviewed. The good thing about spending $30 on audio conversion software is the flexibility to convert a lot of files shortly. Audials Tunebite is $40, which is the most expensive software program we tested, but it could actually report streaming audio and video services and converts more than 40 import codecs.
There are only a few options past that apart from you'll be able to choose whether or not you need the applying to delete the original files routinely or preserve them. It doesn't acknowledge all formats though it does support the most important ones listed above. Audio high quality is superb and the conversion course of is fast however it would have been good should you might select precisely what bitrate you need to convert to. As it's, the default is 128Kbs although Tremendous apparently refers to 320kbps.
To ensure excessive-speed operation, WavPack uses a predictor that is implemented fully in integer math. 7 In its "fast" mode the prediction is solely the arithmetic extrapolation of the previous two samples. For instance, if the earlier two samples had been −10 and 20, then the prediction can be 50. For the default mode a simple adaptive issue is added to weigh the influence of the earlier pattern on the prediction. In our instance the resulting prediction may then fluctuate between 20 for no affect to 50 for full affect. This weight issue is continually updated based mostly on the audio information's changing spectral characteristics.
WV audio format is relatively unknown to lots of you. But one day, you get an audio withwv extension and might't play it on players. To resolve this problem, what you want to do is changing the WV files. So this article will tell you how you can convert WV to MP3 and other common audio formats like FLAC, WAV, wv to flac converter download mac AC3, AAC, etc. with the good WV converter.
1 note
·
View note
Text
Supported Audio File Formats Ableton
M4A stands for MPEG 4 Audio and is a filename extension used to characterize audio recordsdata. Also, it would appear that getting iTunes to play FLAC recordsdata (and correctly downconvert them to make use of house effectively on my iPod) is just about unimaginable. You are able to convert, edit, create, download and play movies with this multi function video manager tool at hand. Click on the drop-down button of "Profile". Then, select "MP3 - MPEG Layer-3 Audio (.mp3)" as output audio format from "Common Audio" class.
In the format selection dialog it's also possible to choose high quality of the output file. Supplied each FLAC and ALAC are lossless format you should select the unique quality here as proven on the picture under. Alternatively, you can select Custom and configure your individual set of quality options. Supported Output Formats : MP3, FLAC, M4A, WMA, AIFF, AAC, WAV, WavPack, OGG, AC3, AMR, MP2, AU.
As soon as all have been set, hit the "begin" button to get the conversion began. Wait for a short time, you're going to get the converted file in the highest potential quality. Step 1. Choose M4A files to upload, you too can import a URL. Re: Converting FLAC's to AAC. Please assist. VLC android Apk and VLC app for iOS is out there for Google Play Store and Apple App Retailer respectively. VLC Media player additionally helps batch conversion possibility so you possibly can convert a number of recordsdata very easily even 320kbps and 128kbps multiple recordsdata without dropping high quality.
Some of the superior settings in Change embrace deleting the supply audio file after a conversion, mechanically normalizing audio, enhancing tags, and downloading CD album particulars from the web. Freemake Audio Converter helps a number of frequent audio formats and is extremely easy to make use of. Nonetheless, it solely helps audio files which can be shorter than three minutes.
FLAC (Free Lossless Audio Codec) is an audio coding format for lossless compression of digital audio. Because of the nature of royalty-free and lossless high quality, FLAC is sort of common at present. Unfortunately, the playback support of FLAC format is proscribed in moveable audio devices, www.goodreads.com especially iTunes, iPhone, iPod and iPad. The same encoder engine in Mac OS X also contains the flexibility to transform video files immediately from the Finder too, making this utility even more powerful. A nice trick with that is to strip video and wind up with a simple audio monitor too.
AAC achieves higher sound high quality than MP3 at decrease bitrates - a 256kbps AAC sounds better than a 320kbps MP3, and this has been examined by quite a few engineers. Moreover, AAC is the one network broadcast audio format that may achieve an Excellent" score for all EBU listening test initiatives. Unlike many different programs of this type, audio Converter online can convert multiple records in a short time frame, inserting the completed work to the archive.
flac to m4a converter download online which stands for Free Lossless Audio Codec is a file format which permits at no cost lossless compression of digital audio. The MP3 format is a lossy data compression format that works by compressing and discarding tiny and irrelevant parts of the audio file. It's also a digital audio coding format formally generally known as MPEG-1 or MPEG-2. This article will information you thru the perfect FLAC to MP3 converters online.
For Mac users, the very best FLAC to M4A converter is the Apowersoft Video Converter for Mac which is a implausible utility specifically designed for Mac OS. We'll see a wide range of choices on output codecs particularly for Apple's gadgets and purposes like iPhone, iPad, iMovie, iTunes, Last Cut Professional, and many others. Now try the guide on the conversion.Proper-click on transformed merchandise and select "Play Vacation spot" to play the vacation spot file, choose "Browse Destination Folder" to open Windows Explorer to browse the vacation spot file. Some music file sorts, together with WAV (.wav), AIFF (.aiff), and RA (.r) cannot be uploaded to your library using Music Supervisor or Google Play Music for Chrome. After all the settings are prepared, you can start the conversion process by clicking the "Convert" button.Instead of compressing the whole file and risking shedding its high quality, you'll be able to trim the audio file to make it smaller. There are different programs akin to Pure Music which use iTunes as a GUI and assist you to play FLAC through iTunes as well, but they aren't free packages. Pure Music is usually noted as the very best in that it lets you use iTunes as your interface and will accept nearly all varieties of music file formats.
1 note
·
View note
Last Seen Blogs

that-rad-jewish-girl
תִּיקּוּן עוֹלָם

aikochanart-blog
~*AikoChanArt*~

unlikelypalacehorsegarden-blog
jungkook and his puberty


heyimrkm
we’re all mad here♡