#if it's annoying i'll resize them
Text


"within or above the order of magnitude of 10,000 years"
Trauth, K.M.; Hora, S.C.; Guzowski, R.V. (1 November 1993). "Expert judgment on markers to deter inadvertent human intrusion into the Waste Isolation Pilot Plant" / warhammer40k.fandom.com
full transcript and sources under cut.
[ image id: a series of pieced-together screenshots from wikipedia and warhammer 40k's fandom wiki. in totality, they read thus:
We considered ourselves to be a powerful culture.
The Imperium of Man, also called simply the Imperium, is a galaxy-spanning, interstellar Human empire, the ultimate authority for the majority of the Human species in the Milky Way Galaxy in the 41st Millennium A.D. It is ruled by the living god who is known as the Emperor of Mankind.
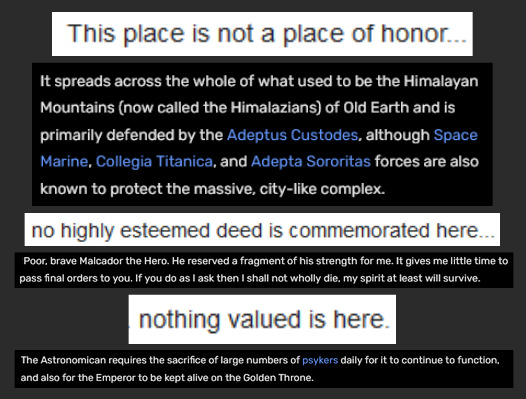
This place is not a place of honor...
It spreads across the whole of what used to be the Himalayan Mountains (now called the Himalazians) of Old Earth and is primarily defended by the Adeptus Custodes, although Space Marine, Collegia Titanica, and Adepta Sororitas forces are also known to protect the massive, city-like complex.
no highly esteemed deed is commemorated here...
Poor, brave Malcador the Hero. He reserved a fragment of his strength for me. It gives me little time to pass final orders to you. If you do as I ask then I shall not wholly die, my spirit at least will survive.
nothing valued is here.
The Astronomican requires the sacrifice of large numbers of psykers daily for it to continue to function, and also for the Emperor to be kept alive on the Golden Throne.
What is here was dangerous and repulsive to us.
He has sat immobile, His body slowly crumbling, within the Golden Throne of Terra for over 10,000 standard years. Although once a living man, His shattered, decaying body can no longer support life, and it is kept intact only by the cybernetic mechanisms of the Golden Throne and a potent mind itself sustained by the daily sacrifice of thousands of lives.
This message is a warning about danger.
Imperium of Man / Imperial Truth / Unification Wars / Great Crusade / Imperial Compliance / Space Marines / Primarch
The danger is in a particular location...
Terra is effectively a globe-straddling temple dedicated to the worship of the Emperor of Mankind.
it increases towards a center...
The heart of the Inner Palace contains the Sanctum Imperialis,
the center of danger is here...
The Imperial Palace is as heavily populated and just as active as any hive city of the Imperium. In fact, it probably has a higher density of population per square kilometre than most hive cities. Billions of adepts from all branches of the Adeptus Terra work in the Imperial Palace complex overseeing the affairs of Mankind.
of a particular size and shape, and
The levels and byways of the Palace can take a lifetime to learn, and only the Adeptus Custodes know them all. From the rails of high balconies are artificial ravines 500 storeys deep, filled with lights and teeming with people. Some of the great domes in the Precinct, especially the Hegemon, are so vast, they contain their own miniature weather systems. Microclimate clouds drift under painted vaults. Rain in the Hegemon is said to be a portent of good fortune.
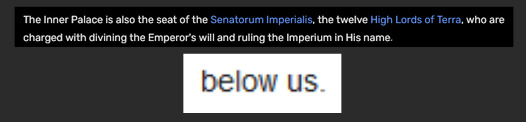
The Inner Palace is also the seat of the Senatorum Imperialis, the twelve High Lords of Terra, who are charged with divining the Emperor's will and ruling the Imperium in His name.
below us.
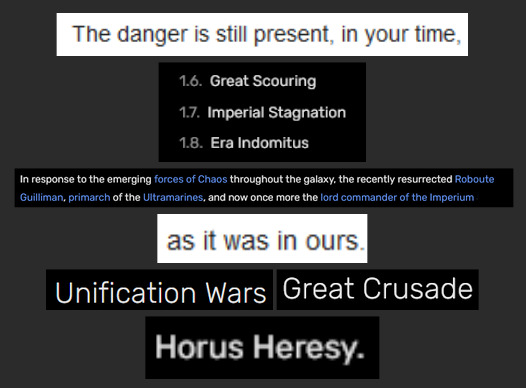
The danger is still present, in your time,
1.6. Great Scouring
1.7. Imperial Stagnation
1.8. Era Indomitus
In response to the emerging forces of Chaos throughout the galaxy, the recently resurrected Roboute Guilliman, primarch of the Ultramarines, and now once more the lord commander of the Imperium
as it was in ours.
Unification Wars / Great Crusade / Horus Heresy.
The danger is to the body,
the people forget their duty they are no longer Human
Cults dedicated to flagellation and penance seek to prepare Mankind for the return of the Emperor.
5.2. Gene-Seed
5.3. Implantation of Astartes Organs
5.4. Primaris Gene-Seed and Organs
5.5. Conditioning
and it can kill.
can suffer wounds that would kill a lesser being several times over, and live to fight again. Clad in ancient power armour and wielding the most potent weapons known to man, the Space Marines are terrifying foes and their devotion to the Emperor and the Imperium of Man is unyielding.
it is honourable -- a reward and can be no failure
a Perpetual like the Emperor, one of a strange group of Human mutants who possess the ability to be resurrected
the bleeding wounds he sustained still visible upon his neck and chest.
The form of danger is an emanation of energy.
the awe-inspiring sight of one of the Emperor's own sons,
"the Anathema" for He is the greatest embodiment of universal order in the galaxy today and the most potent foe of Chaos
psychic beacon that is the Astronomican within the Warp.
The danger is unleashed
mortally wounded,
1.2. Rise of the Emperor
Casualties (defenders): High, many xenos species were driven to extinction
Horus was slain,
only if you substantially disturb this place
Things have only been made worse with the birth of the Great Rift or Cicatrix Maledictum in ca. 999.M41.
Age of Strife / Eye of Terror
Aeldari Empire / War in Heaven
This place
Milky Way / or just "the galaxy,"
is best shunned
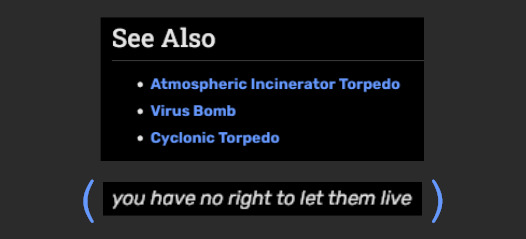
See Also: Atmospheric Incinerator Torpedo / Virus Bomb / Cyclonic Torpedo
( you have no right to let them live )
and left uninhabited.
end id. ]
pages from en.wikipedia.org used: Long-term nuclear waste warning messages
pages from warhammer40k.fandom.com used: Imperium of Man / Imperial Palace / Golden Throne / Emperor of Mankind / Imperial Truth / Unification Wars / Great Crusade / Imperial Compliance / Space Marines / Primarch / Terra / Horus Heresy / Imperial Cult / Age of Strife / Eye of Terror / Aeldari Empire / War in Heaven (Necron) / Milky Way Galaxy / Exterminatus
#words#warhammer 40k#wh40k#warhammer 40000#hi#inspired by https://sunny-sideblogging.tumblr.com/post/709111002476789761#long post /#for old times's sake!#SORRY THE IMAGES ARE SO LQ#theyre uh. screenshots of a google doc LMAO#if it's annoying i'll resize them#just lmk#anyway this could probably be done better#& if you think you can i encourage u#(tag me)#but this is my best shot#its really messy but who givea shit. you know
145 notes
·
View notes
Text
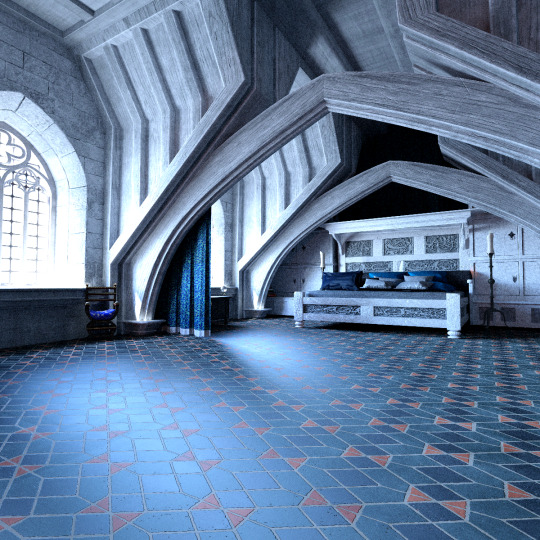
Meanwhile, at the digital art end of things...
Here's another shot of that Magic Room set that I'm about to kitbash/rebuild into a bedchamber.

I'll be stripping all the contents out before I get started. But let me add a couple of human figures first for scale...
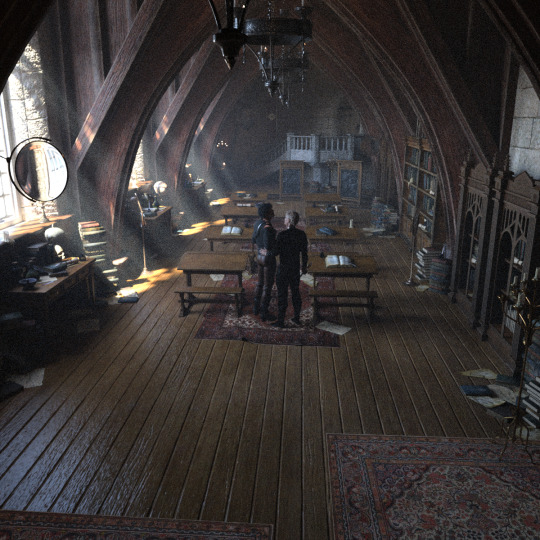
...as they're going to be the ones using this bedroom most. —Yes, other members of their marriage will be there often enough. But this is a working family, and the other spouses frequently have other places they need to be.
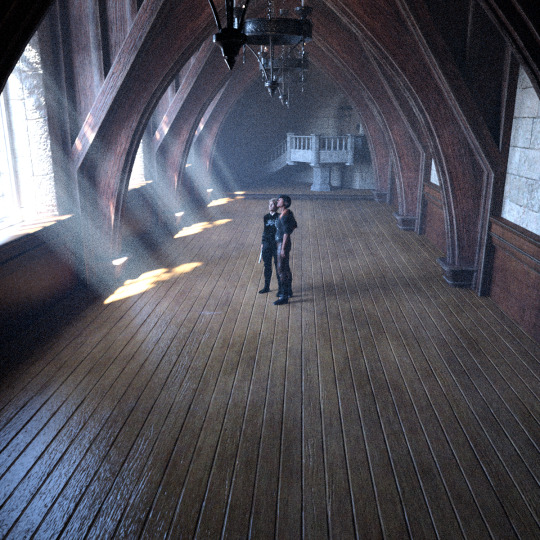
The initial problem becomes immediately apparent: this space is way too big for a bedroom, even for a king. And with ceilings that high, it'd be hell to heat with just one fireplace. Sure, there'll routinely be at least one magic-worker in the bed at any given time, but why should they have to constantly be spending useful lifeforce on room heating? (Or wasting power on anything besides the things one goes to bed to do.*)
So: time to throw everything out and deal with the scale issues of the main structure.
From the outside, here's what the room structure looks like.

If there's a problem with this, it's that the maker has built it all in one piece. You can't pull annoying chunks off it and get rid of them, or substitute others in their place. But (the flip side of this coin) it is possible to rescale the structure as a whole.
So what I propose to do is squash the room flatter, thereby shifting the shape of those arches somewhat, but also lowering the ceiling. I can also decrease the length of the room somewhat. The combined reductions along the X and Y axes should render the room's proportions a bit more snug and liveable: roomy enough for a Middle Kingdoms family bedchamber, but not a great hollow echoing space that can't be comfortably filled except by sending out to USC or someplace similar for a marching band.
So let's throw all the extraneous furniture out. And (after this shot) the chandeliers. No need for them: this isn't a public space, and the intended resizing would screw up their proportions anyway.
Now we start squeezing the structure into better dimensions. Reducing the room on the X axis (to about 80% of its original length)...
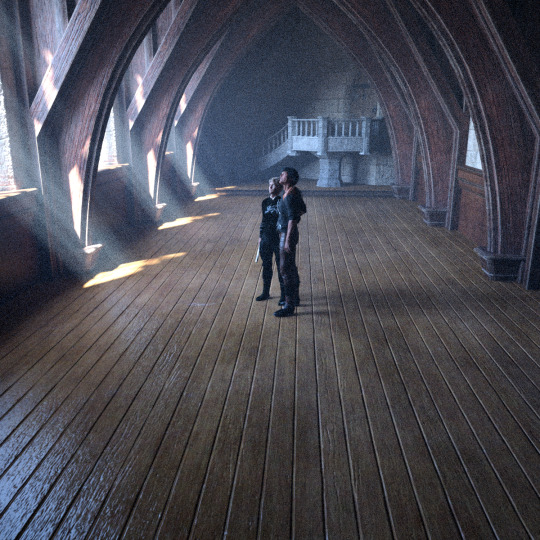
... then on the Y axis, making the ceiling about 30% lower...

... and then widening the Z axis out to 20% or so wider than previously.
So that's a start.
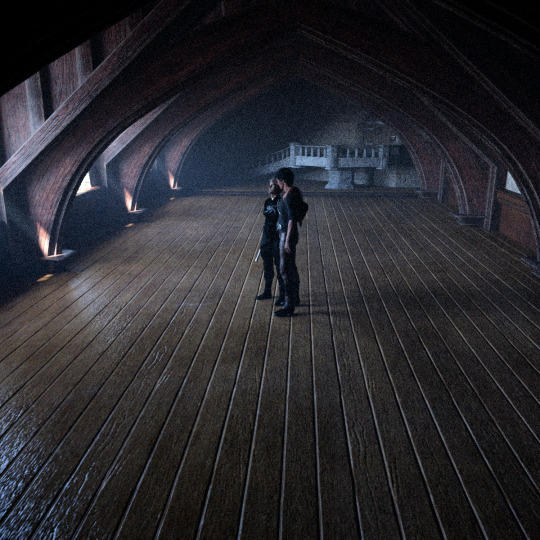
Now about twenty different things have to happen to this space, including fixing the lighting (which got knocked out of kilter by the various resizings, as you can see), hiding unwanted objects like that staircase, changing various materials—such as the floor, which before has always been European-medieval style encaustic tile, so that's what it'll be again—reshaping the head of the bed into something more neo-Gothic (probably in Blender) to reflect the arches, installation of the necessary fireplace, and loading in much old furniture from other renders. (As it happens, this detail's canonical. The other main characters have started teasing Freelorn about Kynall castle's endlessly recycled furniture—especially those beds still equipped with mattresses so old that Héalhra Whitemane himself might have slept on them.)
Anyway, not going to bore anyone still reading this with any further process, except to say that the reworked room features the pale-colored marbles quarried all over that part of Arlen, as well as whitestave wood, used extensively in the Castle and nearby official buildings for its durability and its ancient associations with the Lion and Arlene royalty.
So this is what's in place at the moment, at least down at the bed end. Yet to come: more hangings, more furniture, better bed linens, clothes-presses and bookshelves, clothes thrown over chairs, etc etc...
And at the fireplace end:

More texture and detail work to do down at this end as well; as well as tuning the firelight (always a nuisance). ...A job for another day.
Meanwhile, turned around the bed-facing camera just in front of the fireplace, and found myself regarding a not-too-bad reverse angle.
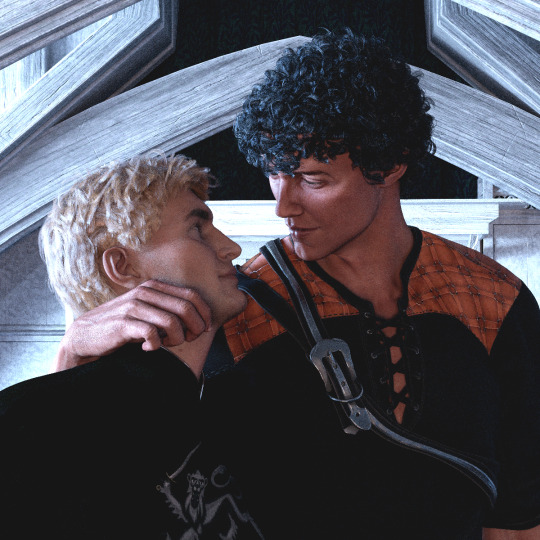
(eyeroll) These two idiots. :)
*Like sleep. ...Or, yeah, okay, other things. (shrug/grin)
160 notes
·
View notes
Text
had someone ask about my glitter GIFmaking process so i will give! i exclusively use web-based programs, so you don't need to download any software for this!
to preface, my process is a bit convoluted but it's so my images aren't compressed or made fuzzy. ALSO, these steps are for PC.
this is the final result, but you can make basically anything [and probably something prettier than this, i just made this image to demonstrate rotating & resizing pixel GIFs]
tutorial below!
the site i use for glitter backgrounds is online-image-editor.com

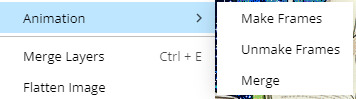
click "UPLOAD AN IMAGE" to get your picture in, then click the "Animation" tab. it'll take you to "Add Glitters". click that!
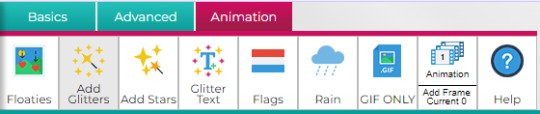
if your image is over 650x650 pixels, it WILL be rescaled. this is why i only upload images below that size, but it's up to personal preference and the compression isn't that bad unless you're using pixel art.
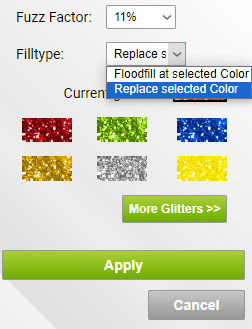
here are the settings i use when filling with glitter. i always change "Floodfill at selected Color" to "Replace selected Color" because it makes it faster, but it really depends on what you need to be filled. you just click the area on the image that you want to be filled on the preview and it'll be filled

kaoru jumpscare! here's my image so far! i just open the preview into a new tab to save it. it won't be PERFECT but it'll look presentable and that's all that matters.
NOW, for adding GIFs to this unsuspecting kaoru, i use photopea.com. i usually use GIFcities.org, glitter-graphics.com or tumblr to find GIFs. where the GIFs are from doesn't matter, just make sure you save them as GIFs onto your computer.
when you upload your GIF into photopea, you might realize that it's not moving anymore!
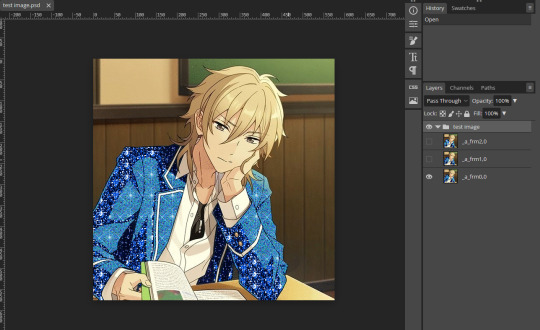
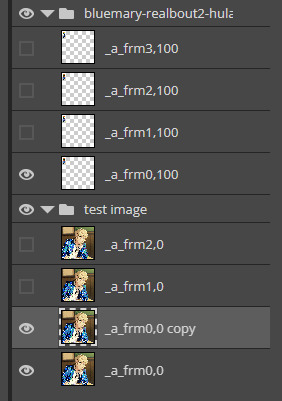
this is OK, it will be a GIF when you export it. if your image is not exported as a gif, make sure that all the frames of each single animation are in the same folder, and all begin with "_a_".
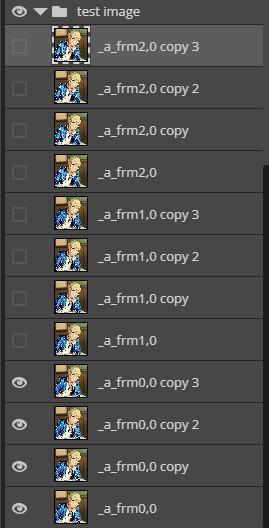
IMPORTANT because i didn't initially include this, but i recommend you duplicate every layer of your background image 1-3 times if you're inserting GIFs with a relatively higher count of frames so the glitter doesn't flash like crazy when you export. to duplicate layers, select a layer and "Ctrl+J". do this for every layer that doesn't have "copy" in its name first then repeat so you don't duplicate the wrong layers.
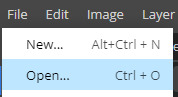
to open a new GIF or image, you go to "File", then "Open..." . note that you can do this with multiple images/GIFs in one go!
to add the GIF to the image you want edited, make sure you have selected the folder. go to "Layer" then "Duplicate Into ..." and make sure you duplicate to the image you are editing.

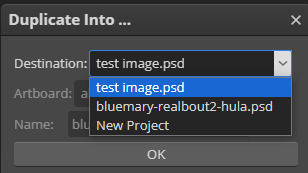
if you go to the image, it should contain a new folder containing all the layers from the image you duplicated from.
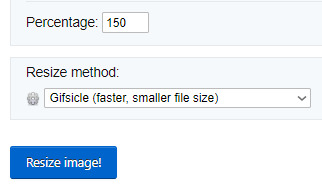
if you want to move the GIF, select the folder and use "Ctrl+Alt+T" to transform. if you only move the GIF it should not turn fuzzier, but if you want to resize the GIF i usually use ezgif.com/resize with the Gifsicle setting for "Resize method".
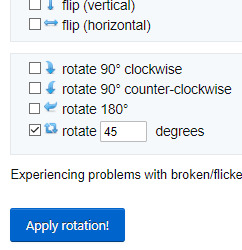
you can rotate GIFs by exact 90 degree increments if you hold the "Shift" key while rotating in photopea, however any other rotation WILL make your image fuzzier, and it's a bit harder to rotate the GIF but is possible!
i use ezgif.com/rotate for this, you can do any rotation you want but i did this one.
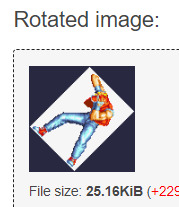
OK! it's rotated, but there's an annoying navy border so i'll show you how to get rid of that! DON'T bother saving the GIF you have just made, go from "Rotated image" and click "more tools", then "Remove background"
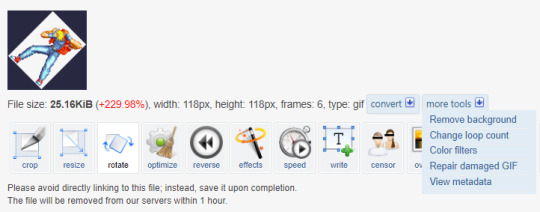
assuming you get the same navy as i do, the HEX code is #282840, but you can get you own hex code by converting the RGB to HEX [or getting a hex colour picker to work, didn't work for me. you can get the RGB by screenshotting and using MS paint]
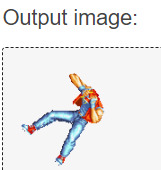
voila! it is now transparent!
after you've added all your images in and you're satisfied with your image, you should select all the layers by holding "Shift" and selecting the top and bottom folders
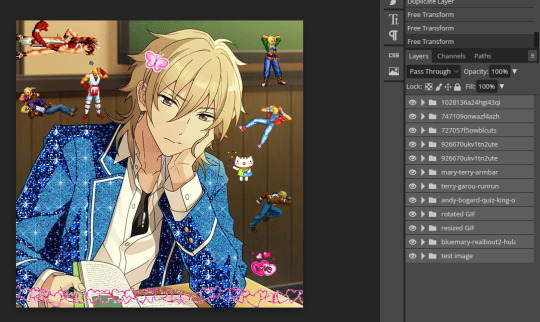
and then, you go to "Layer", "Animation" then "Merge". you can always undo this and make edits so do not freak out if you've realized you want to edit parts
now, your GIF is ready to be exported!

go to "File", "Export as" and select "GIF"!
it'll take a while for it to load in, and you might notice an immediate issue! the GIF is too fast! you can fix this by messing around with the speed dial. this is the most frustrating part of GIF making for me because my computer is slow and freezes a lot. just stay patient, and do NOT reload your browser or you'll lose all your hard work!
annnddd that's it! bye bye!
#tutorial#glitter gifs#glitter graphics#glittercore#GIF#gif tutorial#kaoru hakaze#ensemble stars#fatal fury#hope this is helpful
13 notes
·
View notes
Note
Hey!!! How are you?
How do you make stimboards?
Do you have a source for stims other than Tumblr?
heya, anon! we are doing well!
so, i'll start on a tutorial in a second, but I'll answer your second question first.
i guess the only suggestion i'd have for stims from outside of tumblr, is just general gif websites. tumblr is very much the best place to find stims though. there isn't really a specific source for stim gifs other than tumblr.
also, i will preface this with the fact this will most likely be for pc editors only. i have no idea how much of this works on mobile. i’m really sorry about that.
anyway, onto the tutorial!
How To Make Stimboards
1. find + download your stims.
so, you’ve got your character or your theme, and now you need to find the good stims. what terms do you search, what things do you look for. i’ll tell ya.
tumblr tip!!!!! ~ when you search on tumblr, don’t click enter after typing, look at the search and pick the option under ‘go to #tag’. you’ll see more posts that way!
for specific aesthetics, it is very easy to just search up ‘’aesthetic’ stim’ (eg ‘light academia stim’, ‘kidcore stim’) and then just go through and find neat stims you feel fit.
you can do this tip with pretty much anything else, like colours, specific stims, etc.
the best stims to use is subjective, so there isn’t really a rule to it. just pick what you think is best.
so, when i pick my stims, i:
find a stim i like and download it. i usually save it in a specific folder for gifs.
i then like the post, so that i can refer back to it later when i credit the gif sources.
i then find another stim i like, download it, like it, etc etc, until i have eight stims.
2. converting your gifs from webp to gif.
so, tumblr has an annoying habit of downloading everything as webp, so here’s the work around i use. you have to do this individually for all the gifs. you can find bulk converters, but i’ve found they ruin the quality of the gifs, so i use this method.
i start off on this page, though resizing your stims isn’t required. i go for 250 x 250 px.
once you’ve done that, do not download the gif, instead go to the button next to it, to GIF.
if this doesn’t appear, that means tumblr downloaded it as a gif and you can download it and move on! this can sometimes happen, but check all your stims.
when you click on that, you come to another bit of the website. this is actual part where you convert from webp to gif.
all you have to do is click the convert button and redownload the gif! and you’re done!
3. (optional) editing your gifs!
if you pick stims that all fit together pretty well, you can just move on to 4. but, if you picked a few stims that don’t fit together colour wise, etc, i’ll tell you how to fix that!
there are a few ways to make your stims look cohesive.
for matching colours, go for hue or colour layers! these are a very easy way to make your gifs match. but, they might not work as well on stims with hands, stims with multiple colours, etc.
experiment with other things! if your stims are too bright or loud, lower the saturation; if your stims are too dark or too light, mess with the brightness!
this is all trial and error, i’ll be honest. but if you can’t find a solution to a problem, don’t worry. chances are, no one will take notice of it in the finished post. trust me.
4. making the middle icon!
you can do this at any point in the project; honestly, we tend to do this first, so we know how to make the stims look when we edit them. but, you can do it whenever.
these are easy, just go about them as if you were making a regular icon! i usually go for a smaller icon size, and make them simpler than my usual icons, but its really up to personal preference.
5. compiling your post!
we have tips on stimboard composition you can find here! but otherwise, this step is pretty easy. add them all to your post and align them into the three grid you usually see.
now, you can type in your title, add any comments you want to make, and then pick how you are going to lay out your credits!
6. credit
so, on the stimboards you usually see around, you will see a line of emojis or symbols, with links. this is where they found the stims they used!
pick your symbols/emojis! lay them out in three’s, representing the layers of your stimboard.
refer back to the posts you liked earlier when picking your stims. and find where the link for that specific gif is on that post. its usually pretty obvious which one it is.
you might have to click through a few different web pages to find the original creator, but the best way to tell if its the original poster, is if it links back to youtube, or instagram, instead of tumblr.
if the link goes to a dead blog/link, go back and credit the last post you saw it on.
then, go back to your post and copy that link into the symbol that represents that specific stim.
do this for all your stims!
7. tagging
tagging stimboards is like tagging most other posts, but there are a few things that are reccomended!
first tag your usual edit/fandom stuff, then the specific stims used.
this is because, its common for people in the stimming community to block tags of the stims they do not like, so make sure to tag the specific stims.
after that, tag things like hands, knives, etc! this is for the same reason as above.
and you are done! well done, you created your first stimboard! they are a little time consuming, but really, really fun. i hope this was helpful!
56 notes
·
View notes
Text
Week 1 Introduction to Adobe Illustrator
Keywords: Vector files vs. Raster files; path; home screen; Artboard vs. Canvas; preferences/settings; Illustrator interface; create a new file; workspace; save vs. export
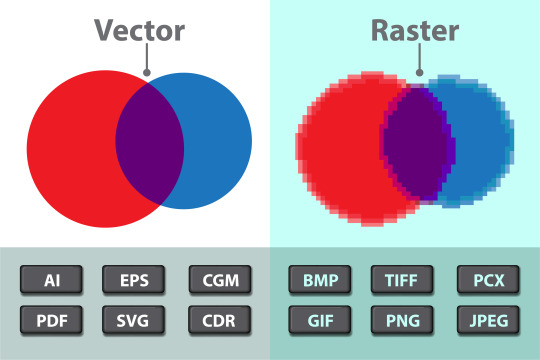
Vector Graphics vs. Raster Graphics
Adobe Illustrator is a vector graphics editor and design program.
-------What are vector graphics?
Vector graphics are visual images that are created directly through shapes (paths).
To understand vector files better, let's compare them with the opposite, raster graphics.
-------What are raster graphics?
Raster graphics represents a two-dimensional picture as a rectangular matrix or grid of square pixels, viewable via a computer display, paper, or other display.
Yea, we'll be dealing with vector files for 9 weeks.

Home Screen
Home: Click this tab to open the Home screen.
Learn: Click this tab to open a list of basic and advanced tutorials on Illustrator to get started with the application.
Create New: Click this button to create a new document.
Open: Click this button to open an existing document in Illustrator.
Create Documents
-------How to create a new file?
Home -> New File
Application Bar -> File -> New...
Cmd + N (mac)-> New File Dialog
Ctrl + N (Win) -> New File Dialog
Cmd + Opt + Shift +N (mac) -> Create a new file based on the last used setting
Ctrl + Alt + Shift +N (mac) -> Create a new file based on the last used setting
Illustrator Interface
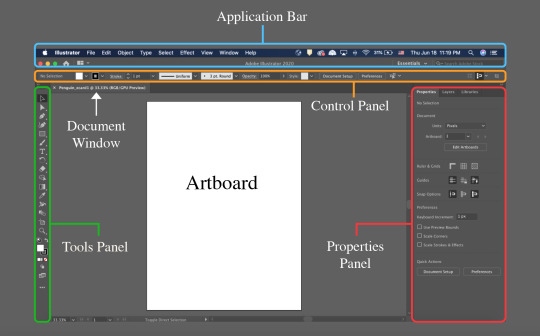
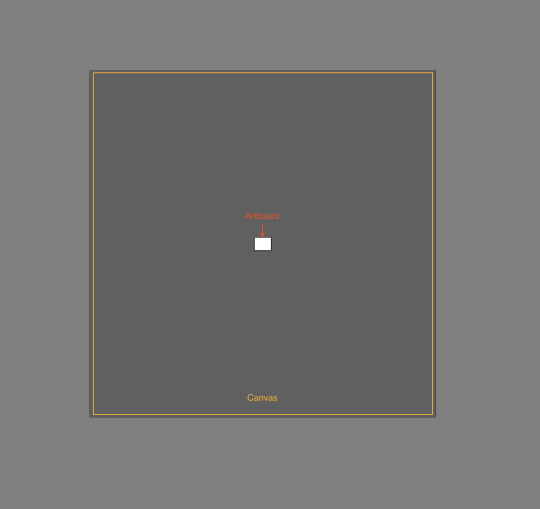
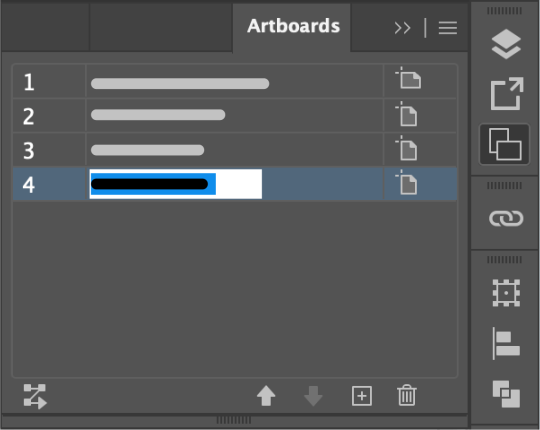
Art Boards vs Canvas
The Canvas can have zero, one, or more Art Boards placed on it. Imagine the canvas is a table and each art board is a sheet of paper. You can organize the art boards on the canvas the same way as you can organize papers on the table.
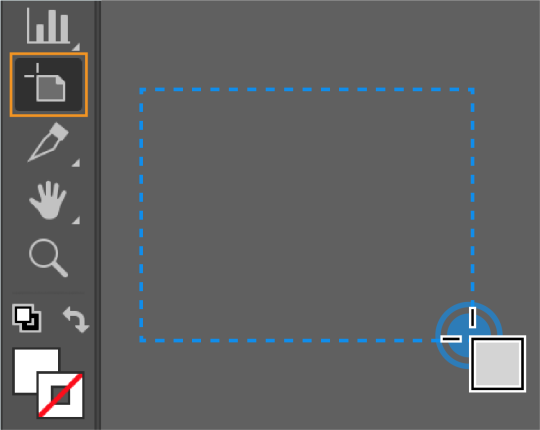
You can create more art boards by clicking the Art Board Tool.
You can Draw things on the whole canvas, and bring the final look onto the art boards.
*duplicating your drafts before an irreversible adjustment will be a lifesaver. You'll see its importance during the exercises.
Create an artboard
Click the Artboard tool, or press Shift + O.
In the Artboard Options dialog, specify the Name of your artboard and do any of the following:
Select an option from the Preset drop-down list.
Enter values in the W and H fields to modify the width and height of the artboard.
Select Landscape or Portrait to set the Orientation of your artboard.
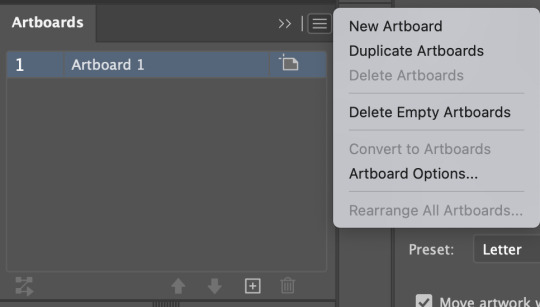
Add New Artboards
Click the Artboard tool and do one of the following:
In the Artboards panel, click + or choose More options > New Artboard.
In the Properties or Control panel, click + to add a new artboard.
Press Esc to exit the artboard-editing mode.

Select Artboards (hold shift to select multiple artboards)
Click the Artboard tool and do any of the following:
To select an artboard, click the artboard.
To select multiple artboards,Shift-click the artboards.
To select all the artboards, press Ctrl + A (Windows) or Cmd+ A (macOS).

Resize, rename and duplicate Artboards


Cut/Copy and Paste Artboards
Move Artboards

To move the selected artboards, do any of the following:
Drag the artboard and place them in the same document or another document.
To move the selected artboards within the same document with precision, specify the X and Y values in the Properties panel or the Control panel.
To move or copy the artboard without the content, deselect Move artwork with Artboard in the Properties panel.
Rearrange Artboards

Delete Artboards

Preferences/Settings
Every time when I start to work on a new computer, I always set up the settings before I actually get started.
Now you can see, your canvas is in grey. It will be hard to draw on top of the grey canvas. So the first setting I'd like to change is the canvas color:
-------How to change my canvas to white?
Win: Edit->Preferences (settings)->User Interface
Mac: Illustrator (top left corner)->settings->User Interface
There is also an annoying so-called "isolation mode" that bothers a lot of beginners. I'll also check that to disable the isolation mode.
-------I double-clicked on one object and I cannot move other objects!! How to disable isolation mode?
Win: Edit->Preferences (settings)->General->uncheck double-click to enter isolation mode
Mac: Illustrator(top left corner)->settings->General->uncheck double-click to enter isolation mode
-------How to send up auto-save time?
Win: Edit->Preferences (settings)->File handling->automatically save recovery data every->how many minutes
Mac: Illustrator(top left corner)->settings->File handling->automatically save recovery data every->how many minutes
-------Any easier way to zoom in and out?
Win: Edit->Preferences (settings)->General->Zoom with Mouse Wheel
Mac: Illustrator(top left corner)->settings->General->Zoom with Mouse Wheel
Save and Export
Save will save the file in any vector file format.
Export will export your artwork in raster file format.
Practice!

0 notes
Note
this is probably annoying to you, but how did u add multiple gifs on your sidebar? T_T
omg not annoying at all! i had a hard time doing this despite the straightforward tutorial so i'll put down some tips below just in case you run into the same issues!
again tutorial is here
if you're using gifs that aren't published like i did it would be helpful to post them to a sideblog (even one that has no followers works) and then copy the image url from there
make sure your gifs are in a size that your theme can handle, i resized mine to 245 x 245
happy editing!
#ah so glad its showing up i changed it recently so im happy people are viewing it on desktop :')#anon#answered
0 notes
Text
OOOOH BOY, I have SO MANY gifs for y’all. I may have, in fact, gotten a bit carried away..
#mel's musings;#I'll post them later. Once I've properly resized them all so tumblr's limit doesn't murder them and they all work properly.#And def prolly gonna post them in batches. As opposed to my usual spams bc there are...A LOT..#like enough for me to maybe stretch it out into some kinda 'lewd-o-ween' kinda thing??#IDK would y'all even like that??????#would that be MORE annoying than when I dump a bunch of photosets at once???#no one ever complains but I always feel lowkey annoying when I do it lmao.#But would??? posting a few a day for a while be MORE annoying?? y or n????
5 notes
·
View notes
Text
how to pan gifs
were u ever like gahd these camerapeople again making yet another stage ungiffable. yeah me too.
sooo here in this tutorial i'm gonna try to explain how to pan gifs so ur subject can remain centered or at least not be out of frame, sth like this:
this is a more advanced tutorial, in a sense that i'll assume you know how to make gifs, not in a sense that this is complicated lmao, okay let's gooo:
essentially this is what's happening and what we gonna do:

before we dive into the how tho, it must be said that photoshop's timeline can only do linear movements so no easing. at times it can look unnatural or choppy or... frankly both. (if you want to know more about this look up ease-in-out animation curve, or easing curves)
part 01 · prepping gifs
as i wrote in my gif making process post i usually crop my gifs bigger than they usually will be. e.g. a 268px gif will be cropped to anything between 468-540px. sometimes because i want to have the opportunity to position the gif a bit differently but most of the time because i know 268px is a reeeaaalllyyy tight place and i need to make some movement adjustments especially for weekend music shows where the camerapeople seem to be on crack or just very into experimenting
part 02 · let the keyframe madness begin
whichever way you are making gifs just open up your gif and crop it to the final size, colour it and whatever else you fancy. once you have everything ready just open your video layer on your timeline (if you don't know where you will be able to see it in the video later)
you will see 3 tracks, transform, opacity and style. for this we will use the transform because it contains movements (but also resizing if that's what you fancy).
all we need to do is create keyframes which will define what is the position of the video layer at a certain time. so e.g. here we are moving this box to the right by 50px in 1 second.
to create keyframes click on the timer icon in front of the position label and photoshop will create you one. the active one will always be yellow. if you move on the timeline with your playhead (that thing that is moving) and you resize/move your layer photoshop will create yet another keyframe for you without you needing to click on it, because it will recognise the change. so all you need to figure out is when the movement starts and which position your layer should be, and the same for the end and ps will take care of the rest.
part 03 · some things to consider when panning gifs
now this is the part where it gets subjective and less tutorial like. so all i can provide is some explanation how i go about it and what i pay attention to.
tip #1: match the movement speed to the gif
whenever you are panning a gif it may result in the gif being choppy bc the framerate and your movements are not matching up, so it's either too fast and photoshop needs to move your image by too many pixels frame by frame or it's too slow resulting in basically the same thing but kinda reversed, either way it won't look smooth. this mostly happens when the original footage is moving (there is a quick camera pan/movement) and you are trying to keep it in place, less when the original is kinda still and the subject is moving. this is kind of a trial and error process: try moving your keyframes closer to each other or maybe further, add more/less movement between two keyframes and just see which results in a smoother gif.
tip #2: try moving your gif once in one direction
there are times when your subject might go out of frame multiple times and you have the urge to keyframe the whole gif and keep them in center the whole time. however, as we do not have easing curves in photoshop the switch between moving something from one direction to the other one will be very visible. so try placing your subject in a way that you'll only need to make one movement and it's kinda okay all the way thru or pick the most annoying 'placement' you want to correct. here in this example it mostly bugged me that the gif was not centered at the end, but onda kinda remained in frame.
tip #3: pan your gifs when there is a quick zoom/movement
sometimes whatever i do the gif will look choppy regardless one movement or not. in these moments, and these moments ONLY we can be thankful for the sometimes unnecessary zooming that's happening and reposition our gifs while the zooming is happening. since there is already a drastic movement you can get away with basically anything, as long as you time the beginning and the end where the zoom begins and ends. also i must add that you can pan stage gifs way more and more drastically bc there is a lot of things happening in the background, so adding a bit of movement on top of all the other movements is less noticeable than... moving footage where e.g. the background is static.
✨something extra✨ · panning/moving other things
so what we looked at is moving the whole gif to fit into the frame we have, but with this technique obviously you can move all sorts of stuff, text, texture whatever you fancy. you can apply this process to the layer you wanna move and this is when you get these:
a sidenote: the fade effect is literally the same keyframe business but instead of playing with position keyframes you change the opacity keyframes.
aaand that is all, if you have any questions my askbox is always open so hmu <3
tagging @sanhwalynight bc of requesting reasons hehe
1K notes
·
View notes
Text
In which (Y/n), who is sick of Malleus always teasing her because of her height, borrows some of those murderous high-heels from Vil to prove a point.
Small (Y/n) does get her revenge — until it all backfires, resulting in a twisted ankle, and a smug dragon.

"Vil! Vil! Rook told me about those thirteen centimetres high-heels you recently got," you announced as you barged into the blond's room, who was busy applying make-up to his face. "I need them."
Your sudden intrusion caused his wrist to swerve as Vil was in the middle of applying his newest lipstick, resulting in him slipping and accidentally drawing a long red line across his cheek. Annoyed, he grabbed a tissue wipe to remove it, ignoring you as you plopped down on the vanity chair next to him. "And why is that?" he asked, slightly humoured yet exasperated.
Furrowing your eyebrows, you crossed your arms and let your shoulders sink forward. Vil let out a disgusted gasp, slapping your shoulder to correct your posture. Giggling sheepishly, you turned to look at him — now with your back straight. "Malleus always makes fun of me because of my height! I need your highest high-heels to prove a point."
"...prove a point?" Vil repeated, confusion etched onto his calm face. So it came as a surprise to you when he broke out into laughter, almost falling off of the chair you two were currently sitting on. "Ah, potato, what a silly little cause—" The blond was wheezing in a mocking over-the-top way, comically wiping a tear from his eye. As quick as his change in mood had come, it disappeared, leaving behind a sceptic looking male. "But no. I absolutely will not give you my precious heels."
You pressed your lower lip forward, begging, "Why not? Please! Please, Vil! Just this once!"
The suspicious and belittling look he shot you didn't waver as he rose from the vanity chair, his robe dragging along the floor after him dramatically. "Not just anyone can wear high-heels and survive, potato. I wouldn't want to lose my little mannequin — I still have some dresses to try out on you."
"It can't be that hard—" Rolling your eyes, you jumped up, too. "Please, Vil! I'll make you a smoothie every morning for the entirety of next week. How does that sound?"
"Hm... free smoothies do sound enticing." Vil rubbed his chin before letting out a little sigh. "Fine, you can have my newest pair of high-heels— but if you return them with so much of a scratch, I'll have your head, potato."
"Thank you so much, Vil!" You wrapped your arms around him, a satisfied smile on your face. He awkwardly patted your head, cringing as he realised you were wrinkling the expensive fabric of his robe.
"Yes, yes— I'm very generous," he murmured with a playful roll of his eyes. Carefully prying you away from him, he sent you a pained smile. "Now, please don't wrinkle my precious robe."
Nodding eagerly, you then waited for him to enter his walk-in closet to fetch the shoes you had bargained so hard for. He soon returned, and handed you a pair of high-heels that could probably be used as dangerous weapons. Gulping, you shakily retrieved them from his hands.
Vil, witnessing your sudden change in demeanour, let out a haughty huff. "You wanted them. So, try them on! I even resized them for you with a spell," he said, a smug grin on his softly coloured lips.
Plopping down onto the vanity chair, you hesitantly slipped the high-heels on. You winced once you realised how your feet were bent in a way that shouldn't be anatomically correct. When you carefully rose to your feet, Vil had to sweep over to you and hold you by your shoulders to prevent you from crashing to the ground.
The initial worry on his face disappeared, but the scepticism always stayed. "Try not to die," Vil mused with furrowed eyebrows. His entire visage screamed, 'You're going to fail.'
Gasping, you placed your hands on your hips, which almost caused you to fall down. "What's that supposed to mean?"
"I'm just saying that any injury you might suffer from because of these shoes is not my fault—" he explained with a cold yet amused smile. "Now, off with you, potato. I'm busy."
You hummed, a wrong step almost causing you to lose your balance, and thus almost topple to the floor. Once you regained your composure, you shot him one last smile before stumbling to the door. "Thanks again, Vil! I'll return them to you later!"
Once you were gone, the blond let out a dramatic sigh as he let himself fall down onto his chair again, picking up the brush he had abandoned earlier. "Vil is not responsible for twisted ankles," he mused whilst shooting his reflection an elegant wink, "or death."
Strolling down the courtyard — well, as best as you could in these murderous shoes — your eyes were looking for the tall dragon fae. From how much walking you had to do to get from the Pomefiore dorm to here, you were about to give up.
That was before you eventually spotted him with his fellow retainers in the distance, causing your eyes to light up. Finally, your suffering would he over; little did you know that this would only be the beginning. "Malleus!" you exclaimed as you approached the four Diasomnia students as best as you could.
Recognising your voice, he gracefully turned around with a big smile on his face — which turned into confusion once he noticed how something was wrong: The way you walked seemed quite different from the usual, as well as how tall you seemed to be — but he played the latter off as his imagination playing tricks on him again.
"(Y/n), my little treasure— Wait... have you grown taller or did I shrink?" Malleus asked, his voice laced with confusion as his eyes darted from Lilia to you, wondering why you were suddenly one whole head taller than the bat. As if having an identity crisis, he let out a vexed sigh. "Lilia, was I not invited to the meeting where they decided that my little treasure wasn't so little anymore?"
Sebek furiously flipped through the notebook where he always wrote down his master's schedule, tasks, and assignments for the day — as well as invitations to meetings, but that page always was empty. "I assure you, Malleus-sama, there was no such meeting," Sebek declared with a booming voice, ready for another command as always.
"Hehe, I just borrowed some high-heels from Vil!" you explained with a little grin once you had accumulated enough pity for your friend. Eyes lighting up in realisation, his gaze drifted down to indeed find a pair of said high-heels on your feet. Malleus felt a little bit weird to see you like this: Not having to crane his neck down while talking to you felt incredibly unnerving. He could no longer loom over you, either; how was he supposed to protect you then?
"I... see..." Malleus hummed while pouting a little bit, deep in thought. "But why?"
You let out a little laugh before you extended your finger to boop his nose, no longer having to get onto your toes to do so. "Because you always tease me because of my height. I'm wearing them to prove a point."
"You're so tall now, (Y/n)," Lilia let out between sniffles and sobs. He floated up to give you a few head-pats. "They grow up so quickly..." Then, he let himself dramatically fall into Silver's arms, who barely managed to snap his eyes open and catch his old man. A surprised huff escaped the young man's lips as he pushed his guardian back to his feet. Lilia wasted no time in grabbing their hands and pulling them along. "Come on, children... we should go and leave the lovebirds alone. I'll put you two to sleep. How about a bedtime story? You two always loved those when you were smaller."
"I'd appreciate that..." Silver mumbled through yawns, a soft smile appearing on his face. "A nap always sounds good..."
"Hell no! I don't need a nap—" Sebek protested, literally having to be pulled away by both males. His wild thrashing was ignored by the two of them, somehow already used to his antics on a daily basis. "As a knight, I need to stay by my master's side at all times—" Dragged off by a sobbing Lilia and an exhausted Silver, Sebek's protests still could be heard when they disappeared behind a corner.
Silence that you couldn't quite pinpoint veiled itself upon Malleus and you. He gazed you up and down, his eyes most of the time staying focused on your though. "So... you're wearing these shoes just to prove to me that you're not small?" he asked whilst stroking his chin, deep in thought. "How intriguing yet amusing..."
You started to nod eagerly, a little huff escaped your lips when you found your feet throbbing in pain. Grabbing onto Malleus' right arm, you let out a relieved breath when the pressure on your feet and lessened, and thus pain decreased. "Well, yes— and to make you stop teasing me."
Tilting his head in confusion, he shot you a look that spoke of a thousand emotions clashing with one another. "I'm not sure whether to respect you now or laugh at you. I feel so conflicted..." Malleus admitted with an annoyed huff, not liking the way this ordeal made him feel. Eventually, he seemed to have made up his mind when he leant down to press a soft kiss to your forehead that left you a stuttering mess. "Well, you're quite courageous to stand up to me — which is why you have earned my respect — but I still prefer it when you're smaller. It makes you look more adorable." The grin on his face, showing off his fangs, was quite a mischievous and evil one.
Cheeks red, a little pout appeared on your face as you playfully stuck your tongue out at him. "Hmpf, you're somehow not as intimidating anymore from this up high."
"Am I not?" he asked in amusement as he straightened his back to glower down at you with his full might. "I haven't even tried yet." A sudden cold swooped in and made a shiver run down your neck. When you looked up to admit that you were wrong, you found his green eyes glowing maliciously, causing you to yelp and step back — thus doing a misstep in your hurry, and crashing to the ground.
"Ouch!" you howled in pain as you reached out to soothe the pain around your ankle.
Quickly, Malleus returned to normal. Immediately rushing to your side, he shot you a worried look. "Huh, are you alright, little treasure?" he asked as his eyes travelled down to the place your hands were holding in pain.
You shook your head, biting onto your tongue to stop curses from spewing out of your lips. "My ankle hurts so much— I think I twisted it..."
A little chuckle escaped his lips, and he thought about reprimanding you for a moment, but decided against it in the end because he wasn't your mother. "Come, I'll take you to the infirmary," he whispered softly as he wasted no time in picking you up bridal-style, effortlessly raising you into the air.
Leaning your head against his shoulder, you let out a little sigh. "Thanks, Malleus..."
Walking towards the infirmary, he started to chuckle, which was accompanied with a smug grin on his face. "So, does that mean I win?" he cooed as he looked down at you for a moment, shooting you a wink.
Huffing and puffing, you whispered, "...maybe..."
"Wait, humans have a proverb for this... 'He who laughs last laughs best,' I think it says," Malleus said, his tone equally as innocent as it was self-satisfied. "I like that proverb."
Great, your little revenge plan had worked, at first — only to totally backfire on you. Now you were left in an even worse position than before. Closing your eyes, you whined, "Now you're just rubbing salt into the wound."
"I prefer you being small and helpless, anyway."
"What?!" Your eyes shot open, and you would have almost jumped out of his arms if it wasn't for him tightening his grip.
Grinning, he leant down to press a kiss to your cheek. His lips lingered longer than they usually did, and eventually moved up to your ear to whisper, "Let's just say: There's a reason why I call you my little treasure."
#twisted wonderland#twst x reader#twst malleus#malleus x reader#malleus draconia#twst malleus draconia#twst malleus draconia x reader#malleus draconia x reader#reader insert#y/n#disney twisted wonderland#female reader
831 notes
·
View notes
Text


crochet minecraft bee my be(e)loved!!
i was annoyed that i couldn't find a free pattern for one of these dudes, and it looked like it should've been simple enough, so i did it myself! my process is under the cut if you're so inclined
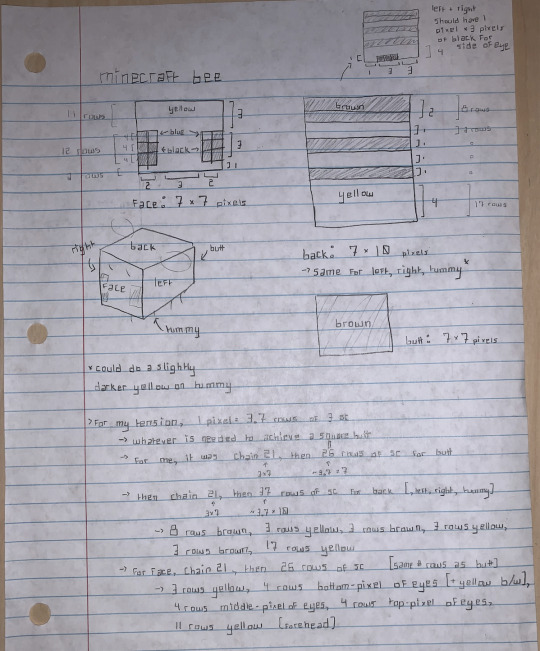
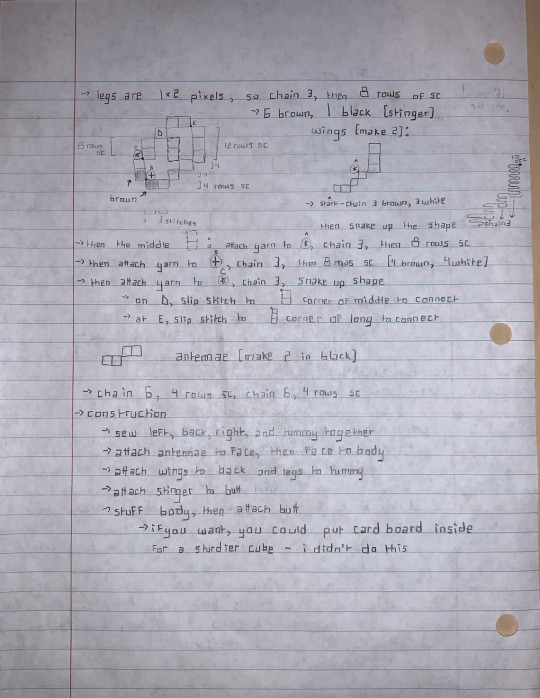
so hopefully that's legible, i pretty much just wrote out my whole process as i went? i've never written a real pattern before, but the noteworthy bits:
- it's entirely US single crochet (sc) and chaining. when it says "chain 3, then do 26 rows of sc," that means chain 3, then chain one more to get up to the next row, single crochet across, chain one at the end to get up to the next row, so on and so forth. this is the case every time you chain and then sc across, i just didn't write it out
- i didn't 100 percent nail it? the top right of the first page shows how it should look if you add the one pixel of its eyes to either side, but i didn't notice that until after construction. it would be More Correct to include that, but if anything here seems off, just freeball it! i based this off of counting pixels in a google image search for "minecraft bee"
- mine is about 15cm tall (tummy to wings), and about 19 cm long (face to butt). you could resize by changing your pixel conversion? eg instead of 3sc = 1 pixel, you could do 2sc = 1 pixel to make it smaller
- this probably took me around 15 hours from start to finish? but i'm a knitter by trade, not a crocheter, and i was making up the pattern as i went. the yarn is from before i knew to save labels, so i'm not sure how much or what brand i used, but it's probably almost a full medium-sized skein of yellow
- im sorry if it's like. difficult 2 read the pattern, i mostly wrote it for myself. if you're trying to make it and you have any questions, feel free to message me any time and i'll try my best to help you out! if you're going to make and sell them or anything, i do ask that you credit me somewhere, even just linking my username, and please don't claim the pattern as your own (but it's totally free for personal use!)
#its yarn time bay bee#minecraft#minecraft bee#crochet#i don't remember if i have like. A Tag for when i personally post yarn stuff?#but the only other pattern i've ever written was those bears so no biggie#anyway!! ok2rb obviously#again i know the pattern might be. Confusing. because it's basically stream of consciousness of my process. so#if ur confused but want 2 make it i promise im nice and ill try 2 help u out
90 notes
·
View notes
Text
Final set of art details for the VN!
First of all, here is our wonderful team of artists and what they're working on! Give them a follow if you like cool art on your dash :)
@strangeomens-sketch - Jason
@of-devils-and-drawings - Bo & Vincent
@our-sinister-night - Bubba (& family)
@gooreyguts - the Ghostface boys (slightly AU; older, never got caught)
@labellecorbellesansmerci - Thomas (& family) & Secret Guest #2
@icyhazardx - Freddy
@gelicide - Asa
@snaxk - Jesse (& Spann?)
@ghost-thot69 - Brahms
@buttered-ghost-toast - Michael & Secret Guest #1
Parameters
I'm sure we're all familiar with visual novels & dating sims.

As stated before, I'm looking for 3/4 body portraits with transparent backgrounds; size doesn't matter too much because I can resize them in the program (canvas 600x800), but something on the bigger side is better (due to image quality loss if I need to enlarge them).
Poses can remain the same or mostly the same (I'll leave that to your discretion) with varying expressions, which include: neutral, happy/pleased, angry/scary, nervous/embarrassed, sad/disappointed, surprised, and annoyed, in a combination of masked/unmasked depending on the character. (Also, I know we didn't talk in-depth about family members/associated secondary characters, so just let me know if that doesn't work for you.)
Jason - Masked: all (he'll be wearing it most of the time). Unmasked: neutral, nervous, happy, surprised, and sad.
Bo - No mask for him. Add a devilish/sly expression.
Vincent - Masked: all (he'll be wearing it much of the time). Unmasked: neutral, nervous, surprised, happy, and sad.
Bubba - Masked: all. Unmasked: none(? I think he wears his mask all the time? I'll leave it up to you whether you think he'd take it off and whether that's something you want to tackle). For his family, I think I'd just need neutral, happy, and annoyed, depending on the person - again, I'm not super familiar, so I'll leave it to you.
Ghostface - Masked: neutral, angry, surprised, annoyed, happy. Unmasked: all. Add devilish to both categories. (This goes for both boys.)
Thomas - Masked: all. Unmasked: neutral, nervous, surprised, happy. Luda Mae: neutral, happy, annoyed. Hoyt: neutral, annoyed, angry, happy (fake). Monty: just a neutral one should do.
Fred - No mask here either :) add devilish.
Asa - Masked: neutral, scary, annoyed. Unmasked: all. (I usually prefer to use his second actor, conceptually, but I'll leave it up to you.)
Jesse - Masked: neutral, scary, surprised, annoyed. Unmasked: neutral, happy, disappointed, surprised, annoyed. Add devilish to both categories. Spann: neutral, happy, nervous, disappointed, surprised, annoyed.
Brahms - Masked: neutral, scary, happy, shy, sad (fake; dramatic), surprised, annoyed. Unmasked: neutral, happy, sad (fake; dramatic), nervous, surprised, annoyed, devilish.
Michael - Practically always masked and doesn't know what emotions are. Masked: neutral, scary, curious/surprised. Unmasked: same, plus annoyed.
Secret Guests - I'll be in touch privately.
I'll leave expression of those emotions up to your creative direction, but if you've got questions or want to run something by me, just let me know. (If I end up needing something additional as the story progresses, I'll let you know.)
I'm not sure of the timeline - you've got at least a couple months while I get the story written - but I do know I'll need Michael, Thomas, the twins, Freddy, and Secret Guest #1 sooner than the rest, and Brahms, Jason, Secret Guest #2, Bubba, and Ghostface later than the rest.
I will also need Harry Warden at some point in that latter grouping, but since he's not currently assigned we'll cross that bridge later (this way if someone wants to jump in later, I've got something for them). Same for Secret Guest #3, who I just decided to include while writing this post.
If anyone has questions, or if I missed something, or whatever - you know several places to find me. Thanks again for joining the team, I'm honored to be working with you! :)
55 notes
·
View notes
Text
Commissions are Open!
Again, I would like to express my gratitude to those who were nice enough to express their interest in this smol chaotic creature's art. With that said, I'd like to open a small Bust Commission. I'm trying to raise some funds to help around the house due to the current Pandemic situation.
I'll be capping the slots at 10. Reopening will be announced here (I'll change the title when slots are filled and vice versa). Again, those who first messaged me before gets priority if they still wish to push through. Tumblr IMs can be a bit annoying, so you can contact me through Discord. This is my handle: ° Lịttle Fịend °#6424
No DPs are required. Payment will be collected once the piece is done, and all transactions will be done via Paypal.

OH. IF YOU WANT IT IN PNG TELL ME. WE CAN DO THAT TOO.
For more samples, feel free to visits: 小さな悪魔
A little note:
Since I'm working the graveyard shift, I'll probably be able to do them mostly during the weekends, so I will apologize in advance if it can take a bit of time. However, anytime that I do get some free time, I'll do my best to work on them.
Thank you very much for your kindness and understanding.
PS: I remember someone asking if they can be used as Icons. To be honest, I think it depends. I've tried resizing some of my previous stuff and here is how it looks like:
At 150x149:

As well as 100x99:

So if ever, tell me if you want to see how it looks like when resized to a specific size. If you like how it looks, I'll throw it in for ya!
#|| The mun's art things ||#|| Commission Season ||#Again in advance: To those of you dealing with my slowness a very pleasant I'm sorry.#And thank you as well for the support!#Sorry for the long post!#Someday I hope to be able to offer something more dynamic.
8 notes
·
View notes
Text
WEARABLE PUMP COMPARISON
If you're looking for a comparison of these, you are in luck because I have tried all three. I started off with the Willow, went to the Momcozy next, then ended up with the Elvie. Let's get started.
*************
WILLOW
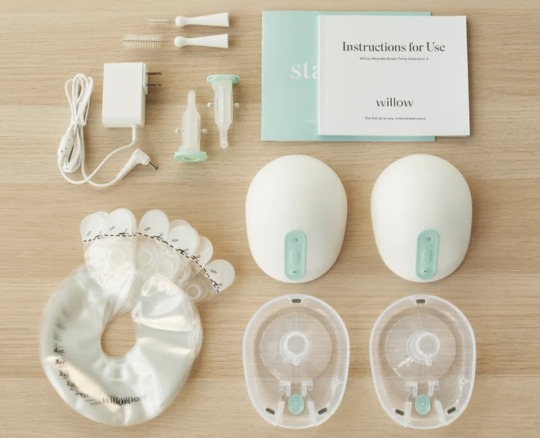
Best point: they are leak proof.
Caveat: only leak proof if you are using bags, which will run you 50 cents each at retail price. Expensive.
Reusable milk containers?
These are sold separately, and will cost $50 for a pair. They are a little finicky and hard to clean and dry. The valve at the top must be completely clear of debris, or you'll get an orange pump light error.
Pros?
Can process milk quickly (great for fast or heavy letdowns), suction is very strong. Some people may find that it is too strong.
Cons?
Bigger, heavier, and louder than the Elvies. You can't change suction power in the app, you must use the buttons on the unit. You also cannot adjust milk volume afterwards if it marked volume incorrectly. All in all the app is very non-functional.
Most encountered errors and problems?
I get the feeling that the most common error is encountered right before you want to start the pump. An orange light will turn on at the top of the pump, and it will refuse to start. You'll have to figure out if there is something blocking the valve, or if your magnets are not lined up correctly, or whatever before you can get the session started. Once you start, it's golden. But it can sometimes take a while to get started as you take the pump apart and put it back together to try to get it to begin. I've also seen some people have issues with the hub cracking, which may or may not affect function. The good news is that Willow will replace your hubs if they are under warranty.
*************
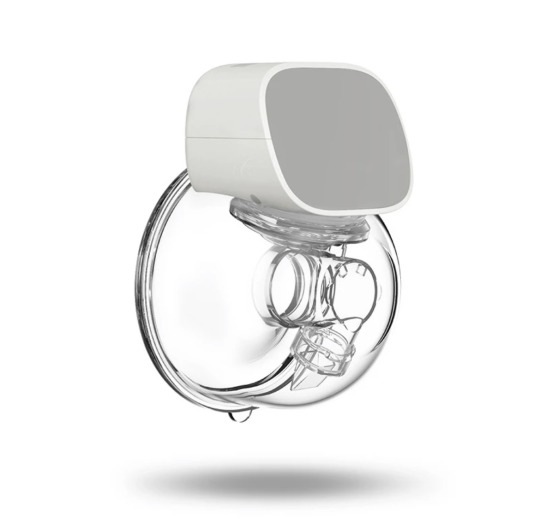
ELVIE

Best point: they are the most discreet.
Smaller, lighter, and quieter than the Willow.
Storage bottles?
The bottles at the bottom of the hubs come with lids, and can be used for storage. Make sure you clean the lids well, there have been instances of mold growing underneath the silicone ring. I take them apart completely at least once a week for a good deep clean (use a toothpick to take the rings out, and put them back in by putting them in place then screwing it onto a bottle).
Pros?
Like I mentioned before they have a smaller profile, are lighter, and quieter than the Willow pump. The suction is quite gentle, and is said to mimic a baby's suckling. You can buy a single or a double pump, which is nice. The app is pretty good. You can change from stimulation to expression and increase suction power all in the app.
Cons?
They cannot process a fast letdown - it might leak or lose suction. Elastic nipples may have issues using the flanges as is, since the flange tunnel is shorter and suction holes are located halfway in.
Most encountered problems?
Leaking. If you have a fast flow or aren't standing/sitting upright, milk might leak between the bottle and the hub. This is the most frustrating problem. Other problems include loss of suction caused by milk backing up behind the green disk or elastic nipples blocking the suction holes. Many users purchase cushions or inserts to mitigate these issues, but find that these items need to be trimmed before they will work with these pumps.
*************
MOMCOZY
Best point: they are inexpensive when compared to the other two!
The Momcozy pumps will run you around $110 for a pair of two (be sure to look for discount codes!). This is significantly cheaper than the Elvie or the Willow which retail at $500.
Pros?
Simple, no-nonsense, they just work. No finicky parts. They basically are handsfree cups attached to their own motor. Easy to use and basically no learning curve - just pop them on and go. You can also just buy one. The freemie and maymom inserts work with the flanges without cutting. The flange is entirely made of silicone. I consider that a pro because it's so comfortable!
Cons?
I think the biggest con is that they are not discreet. The motor is a large block at the top of each unit and sticks up. The shape doesn't look boob like at all. There's also no app, if you care about that at all (I didn't). But if you're strictly interested in using these at home, why would you need to be discreet? You'll probably have to charge these every 2-3 pump sessions or so.
Most encountered problems?
I didn't have any problems with this personally. Not sure what problems it could really have, it's a very basic, functional unit.
*************
SUMMARY
Price: Momcozy
Momcozy is cheapest, running about $110 for a pair (with coupons), or you can buy them separately at around $60. Elvie and Willow will cost you $499 at retail.
Weight: Elvie
The Elvie is the lightest, followed closely by the Momcozy. The Willow is by far the heaviest unit. However, the Momcozy is a bit top heavy due to the location of the motor. Wear a bra with greater coverage if you need more support.
Suction
It's hard to judge a winner in this category because they are different. Willow is known for having extremely strong suction, and the Elvie is known for being quite gentle. The Momcozy doesn't get as gentle as the Elvie, but also doesn't get as strong as the Willow. But not everyone needs the same suction level so this is quite a personal thing.
Flange sizes
The Willow pump comes in 21mm, 24mm, and 27mm standard flanges, with only one size in the box. If you think you may need 21mm and buy from their website, you will also get the 24mm included in your purchase. (Technically the pump kits come only in 24mm and 27mm, so if you tell them you want 21mm they just throw it in for free.) The Elvie comes with 24mm and 28mm standard flanges, and both of these are included in the box. If you need 21mm, these will need to be purchased separately. The Momcozy comes only in 24mm flanges, but you can buy 27mm flanges separately on their website.
Inserts
To resize the flanges for a better fit, there are freemie and maymom inserts which will work with the 24mm flanges. In the case of the Willow and the Momcozy, most users find that they work without issue. With the Elvie pump, the suction hole comes halfway up the flange tunnel so the inserts usually need to be trimmed before they will work correctly with the pump. Some people find that they work as-is, however, so I'd advise that you try them without trimming first to see if you need to.
Volume: Elvie
The Elvie is the quietest, followed by the Willow and then the Momcozy.
Discreet: Elvie
The profile of the Elvie is smaller - the Willow is larger. Obviously the Momcozy, with the huge motor, is not really discreet as all.
Tunnel Length: Willow/Momcozy
If you have elastic nipples, the Willow and Momcozy have longer flange tunnels than the Elvie and will accommodate longer nipple stretching. The flange tunnel of the Elvie is quite short, and some people with elastic nipples find that they lose suction because their nipple blocks the suction holes. Using inserts/cushions can help mitigate this issue.
Parts: Willow
The Willow pump, if you use bags, has the least amount of parts to clean. The Willow container on the other hand, is difficult to clean and I'll tell you why - if you're handwashing most of the time, like me, the nooks and crannies at the top of the container are small and I can barely fit a finger in there to scrub it. I found the Flextubes to be annoying to clean as well because I could not fit a finger in. On the other side, the Elvie and Momcozy pumps do have way more parts, but I found that the parts are much easier to clean. The only part you need to break out a nipple brush for is really the duckbill.
Ability to handle milk flow: Willow/Momcozy
The Elvie is notoriously bad for a quick letdown or fast milk flow. If your milk comes out too fast, the Elvies will either leak or lose suction because excess milk gets sucked behind the disk. The Willow and Momcozy pumps can take much higher speeds.
Cup Volume: Momcozy
The Momcozy cups each holds 180mL/6oz of milk. The Willow and Elvie say that they each hold 4oz in their cups, but from experience - the Willow bags can hold much more (if you pump with the bags outside). I've heard of someone pumping 8oz into a bag once. On the other hand the Elvie probably holds a bit less than 4oz because it tends to think there is more milk than there actually is in the bottle which leads to the pump pausing itself. If you fill any of these cups you'll have to pretty much take off the pump and empty it to keep pumping again. The Willow and Elvie shut off automatically. The Momcozy does not.
App: Elvie
You can go from stimulation to expression as well as adjust suction levels directly in the app. And after the session is over, you can edit the milk volumes if the ones recorded are incorrect. Elvies app also has its own performance metrics which is fun to look at that describes your milk flow and total pumped volumes. On the other hand, the Willow app is very basic and just functions as a record of your pump times and volumes (which is frequently off) and you cannot edit them afterwards. Obviously Momcozy loses in this because there is no app at all.
Battery
It's hard to compare the pumps because the higher your suction, the faster the battery life runs out. From their respective websites, the Willow pump says a full battery lasts "about 5 pump sessions" and the Elvie says it lasts "about 2 and a half hours". Just comparing the two from my own experience subjectively, the Willow pump has a slightly longer battery life than the Elvie, but obviously it totally depends on how strong you set the pumps to work. The Momcozy has the poorest battery life by far. At the lowest suction and 20 minute sessions, I found it only lasted about 3 sessions.
Chargers
The Elvie hubs come with 1 charging cord each, so if you buy the double you'll get two. Same thing with the Momcozy. Both of these are USB chargers so you'll need a block to go with (they don't come with that). Unfortunately the Willow only comes with one charging cord (which plugs into a standard 2 prong outlet) when you buy two hubs which is such a weird decision in my mind. But I found I could just alternate which one I charged and it was fine.
Warranty: Elvie
I feel like this is an important topic that doesn't get compared too often. The Elvie pump hubs have the most generous warranty of 2 years from the date of purchase. On the other hand, the Willow comes with a warranty of 12 months from date of purchase. Because these are intended to be single user products, the warranty doesn't transfer from one person to the next if you purchase second hand. Therefore, this should be something you consider if you are doing so. Both companies - Willow and Elvie - cover the washable pump parts for 90 days. The Momcozy on the other hand - their website says that all items are covered by a 30 day warranty which I assume applies to the pumps as well.
BOTTOM LINE:
There is no perfect pump. Each of these three have their own issues. However, if the pump can't extract your milk, then it is useless to you. You need to know what to prioritize before making the commitment and I suggest prioritizing things that affect milk extraction, like suction power, tunnel length, and the ability for the pump to handle your milk flow speed.
If you have any other questions please let me know! :)
1 note
·
View note
Last Seen Blogs


theumbrellaacademylife
The Umbrella Academy Life


after-5-film-lektor-pl
AFTER 5 NA ZAWZSE (2023) Cały Film Lektor PL

gggukniverse
baby star candy