#pretty much SOOC
Text
A Different Way to Make You Pay
this tiny scene is for @kryptidfox (sorry tumblr won’t let me tag you!! I hope it’s okay that I wrote this, let me know if it’s not!) and their gorgeous piece of art. ~480 words, SOOC, cw: mention of blood and punching.
Gentle reminder: I’d prefer people not extend or finish my scenes without checking in with me first. Thank you so much for understanding!
“Fuck!”
Malfoy’s head snaps back to hit the wall as Harry spins them, shoves him hard.
“You’re a fucking dick,” Malfoy hisses and Harry grins, pressing his forearm across Malfoy’s chest to hold him in place.
“Oh yeah? Takes one to know one,” he says and Malfoy rolls his eyes.
“Real mature, Potter. Now fucking get off me.”
“No,” Harry says, and presses harder just in case Malfoy is thinking of getting away. “I don’t think I will. Not until you apologise.”
“For what?” Draco shouts and sneaks a hand up to rub at the blood seeping from his nose. “Shit, I’m bleeding. I can’t believe you fucking punched me in class.”
“Technically,” Harry says, “it was after class.”
He isn’t sure but he thinks Malfoy just came perilously close to smiling.
Honestly, Harry is not even entirely sure how things escalated so quickly. It feels like one minute he had been talking to Ron about their weekend plans as they’d headed to the supply cabinet to put away the leftover ingredients from whatever it was they’d been brewing, and the next minute, he and Malfoy were screaming at each other.
Harry winces as he remembers the words he’d hurled at Malfoy. Sure, Malfoy had said some terrible things too, but if Harry’s being honest, he himself is not entirely innocent in this matter.
Malfoy leans his head back against the wall and Harry takes in the slump of his shoulders, the circles under his eyes.
‘You’re going to get me expelled,” Malfoy says on a slow exhale and Harry really doesn’t like the sound of defeat in his voice. It’s only fun when Malfoy fights back.
Wait, what?
So, Harry does the only logical thing he can think to do, which is to press harder against Malfoy’s chest.
“It’s just your face is so punchable,” he says and Malfoy doesn’t even lift his head, just rolls his eyes.
“What do you fucking want from me?” Malfoy asks. “I’ve been trying to leave you alone and stay out of your way.”
Harry sees the bob in his throat as he swallows, and finally, Malfoy lowers his chin to meet Harry’s gaze.
“You’re the one who knocked into me,” Malfoy continues. “You’re the one who started it. You threw the first punch.”
He does, Harry has to admit, have a point.
All of a sudden it hits Harry, the position they’re in. The empty hallway, Harry shoving Malfoy up against the wall, their bodies pressed so close together that the heat of Malfoy’s skin is palpable. Harry takes in the sharp line of Malfoy’s jaw, the curve of his lips, and only then does he understand.
“I fucking hate you,” he whispers and leans in closer, so close that Malfoy’s breath is warm on his lips as they stare at each other.
“Noted,” Malfoy whispers. “Right back at you.”
Then Harry closes the distance.
#my writing#pretty much SOOC#drarry#drarry vignette#inspired by art#I'd love to see where this one goes actually!!
55 notes
·
View notes
Text
Thoughts at noon...
This is a long winding rambly post about my lovely W...
I had originally sent most of this to @littleblondesoprano but ya know what, I should share it with all of y'all!
She asked, what have W and I been up to lately? and this was the answer:
W and I went and looked at a really pretty plane today and then she took 2 long naps lol.
The first time, she woke up really groggy and everything she said simply sounded like squeaks and not words lol… She went back to sleep and this time she woke up able to communicate with actual words!!!
This is a SOOC shot from today.


----
So many of our friends have COVID right now and so many of her coworkers to… Some are really super sick and.. I dunno… The air show is this weekend and while it's outdoors… I'm concerned.
----
The weather has been warm but school is back in session so we have been out and about more! We took a walk along the beach and the canals to look at all the Halloween decorations of the "richie rich" folks.
Dude… It was insane! Some had 3 story inflatable Frankensteins, another house had a super realistic multi story Jack and Sally from nightmare before Christmas!! That whole house was done up in Disney Halloween stuff!!
----
W took some pics while we were out of her little toy sea turtle and I made a Tumblr for it, the LBCTurtle! LBC for long Beach City, and because it's a sea turtle…c-turtle lol
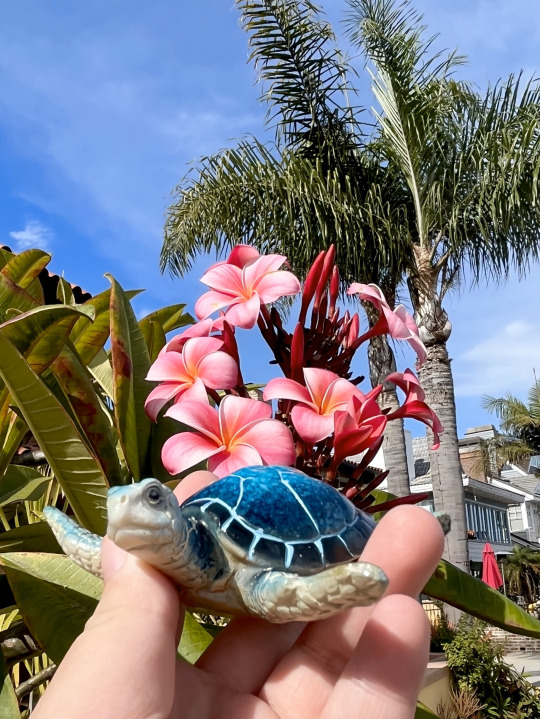
And here is the turtle lol
We bought it a pretty base that I'm going to attach it to and she's having so much fun taking these photos lol
She also has some new diamond paintings and a 3D globe puzzle, and a draw/build your own globe arts and crafts thing.
So she's set for a while with fun stuff.
----
So that's the run down of what's been going on ... throw in the fact that our dishwasher latch keeps breaking, that we went and got the oil changed in our car and they FUCKED UP!!!!! and didn't put the drain plug in right so it leaked all over the garage floor, and some other little bullshit like that. lol
BUT, the car is smogged, the oil is changed, the gas is full, we'll get the car washed soon, and then next week will be the fun week.
Sat is the airshow... maybe... but next week I want to explore a new nature preserve, go to the beach, and some other trips and outings depending on my little w's napping schedule :)
6 notes
·
View notes
Text
Exhibition Analysis - Evia Island Wildfire
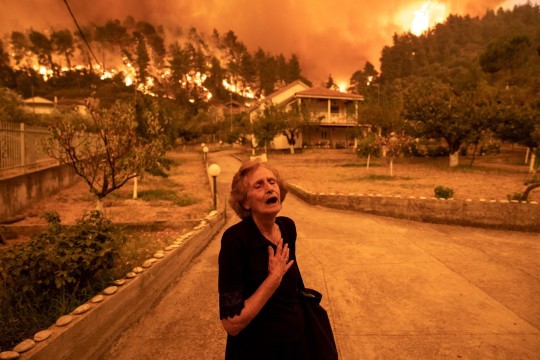
Photojournalism is a great way to effectively capture a moment and share with others the intended news or message. In August of 2021, a big wildfire hit Greece amidst the severe heat waves it received in decades. This picture, “Evia Island Wildfire”, taken by Konstantinos Tsakalidis for the Bloomberg news who covered on the Greece wildfires in Athens and Evia Island. The picture has also won the 2022 World Press Photo Contest.
Konstantinos Tsakalidis, born in 1986, is a photojournalist based in Thessaloniki, Greece. He is a graduate of the Department of Informatics of Technological Educational Institute of Thessaloniki and from the Photographic Center Stereosis (“World Press Photo”). Since 2013, he has been documenting issues in Greece to the Balkans countries. Right now, Tsakalidis is a co-founder member of the collective Greek photo agency SOOC Images and regularly contributes his work to Bloomberg News in social and political aspects of Greece, Eastern Europe and Turkey (“World Press Photo”).
Looking at the photo, this work successfully captures the viewers' attention for two reasons. The first thing is the emphasis on the woman in front. Not only because she's the closest thing you see but humans also tend to look at others' faces as first thing. Furrowed brows, closed eyes, gaping mouth and a hand on her chest as if to support her heart, it doesn’t take a genius to see that she is distressed over something. This would then get the viewer to curiously view the rest of the picture. Because of the overall orange tone, it is not obvious right away but the scenery behind her is not just trees and clouds but rather trees caught in fire and clouds mixed with smoke. This brings me to my second point on how the color palette cleverly disguises what would usually be the intense fire color that will immediately pop in your eye. So once viewers realize the horror happening behind the woman, it leaves a strong impression as a whole piece overall.
This photo has colors compared to many other monochromatic photographs at the exhibit, so it was one of the few that was stuck in my mind, and I decided to choose this because I have a soft spot for old people. I find that my impression of before and after reading the description are pretty much the same because of how the picture really captures the essence of the moment without needing texts to describe what's happening.
In conclusion, this photograph is a great piece because it captures the attention of the viewers due to principles like emphasis and the usage of color values that amplify the atmosphere of this moment of tragedy. Honestly, in the exhibition, I was surprised over the fact that so many other things are happening in places we don’t see, it's just really depressing that most of them are concerning news like “Evia Island Wildfire”. To close, I want to remind everyone that climate change is still a big issue and that everyone should strive to make a sustainable future to avoid losing the only planet we can live on.
Citation:
“About Konstantinos Tsakalidis.” World Press Photo https://www.worldpressphoto.org/konstantinos-tsakalidis.
-------------------------------
Additional comments:
I personally don’t know if the picture has been edited for it to have such an orange-monochrome colors. However, I would believe it if the photographer says it's unedited because I saw a video (link just below) from an evacuee in a boat fleeing from the fire and the far scenery of the island locals could once call home only looks like a scenery from hell. The fire is such a striking red within the dark night silhouettes. Just seeing the colors from far is already vivid enough, what would it be like within the island? The atmosphere must be similarly tinted to the color of fires and smoke like the “Evia Island Wildfire” picture.
Video of Evia burning:
https://twitter.com/dinosofos/status/1423916668116418560
https://twitter.com/Quicktake/status/1424021533438132232
1 note
·
View note
Text
The “film look” in digital - what I’ve learned so far
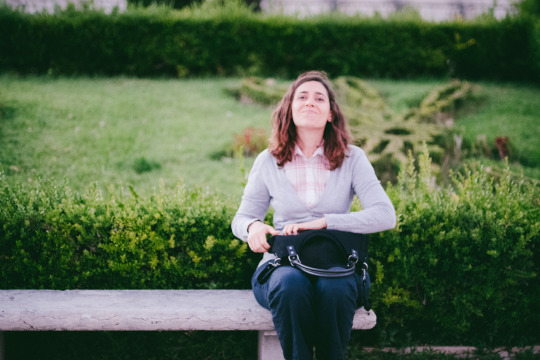
Let me start this article by addressing the elephant in the room: if you want a real authentic film look, shoot film! There’s just no way around that, no matter how close you can get with digital these days, there’s something about film that digital just can’t touch. I’ve been shooting film sporadically over the last couple of years and I still get a big ol’ smile on my face when I get the scans back from the lab, it’s a very different kind of reward than the immediacy of digital. Plus, the experience of shooting film has been extremely helpful for my digital photography - shooting with an old film camera forces you to slow down, learn the basics of the exposure triangle and focus on composition, as opposed to navigating through menus and letting the camera decide all of the settings for you.
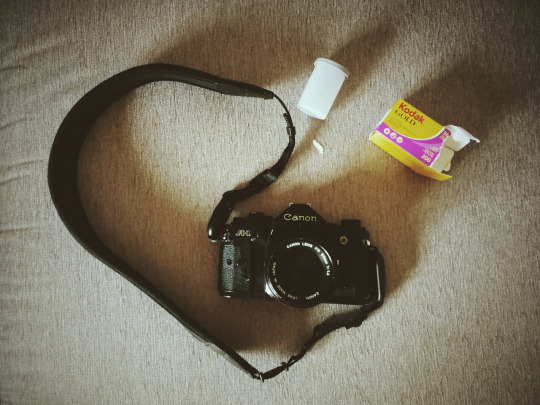
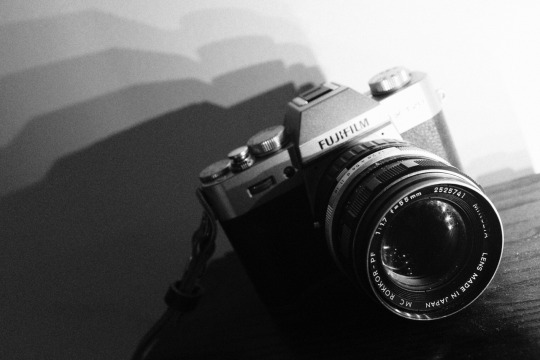
My trusted Canon A1 ready for summer vacations
But of course there are a large number of practical reasons for shooting digital, and at least for my needs and reality shooting film exclusively is just not an option. I shoot digital 95% of the time, but I always strive to make my photos look as “organic” and close to film as possible, because that’s the aesthetic I like the most.
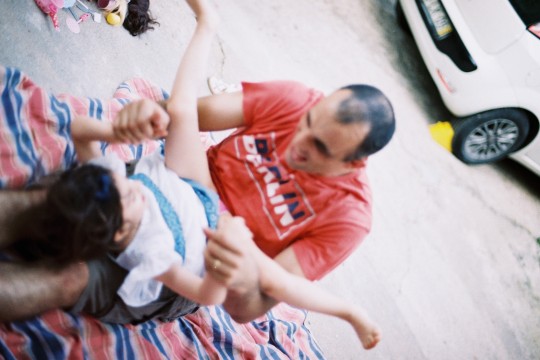
For the purpose of writing this article I’ve questioned myself where does my fascination with film come from, and I guess it’s probably due to the fact that all of my childhood and teenage memories where shot on film. When I think about film I think about long summer vacations, family get-togethers and embarrassing haircuts - in other words, instant nostalgia! And that’s the kind of warm-fuzzy feelings that I want to associate with my photos, so basically ever since I got my first mirrorless camera back in 2015 that has always been my reference.
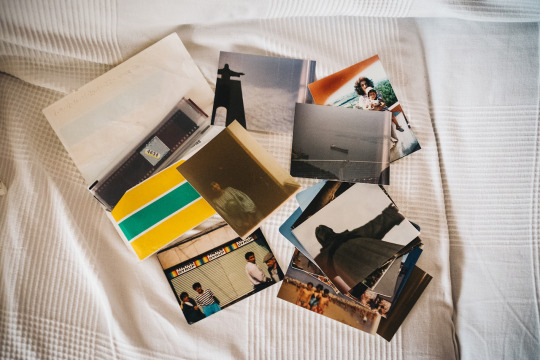
The first roll of film I ever shot when I was around 10, with a tiny plastic 110mm film camera
Over the course of these last 3 years trying to emulate film I’ve tried dozens of different presets for Lightroom, some of them really good, but quickly discovered that these will only get you halfway there. If you apply a film-preset to a perfect digital image file, in most cases you'll end up with a perfect digital image with some vintage tones, but there’s much more to film than that! There are a lot of “imperfections” that come from the limitations imposed by the gear used and the film itself, which have been eliminated in modern digital cameras and just can't be introduced in post-editing.
The best way I’ve found to mimic these imperfections is to actually impose some of those same limitations when shooting digital, so here’s a few tips on how to do that:
1. Use vintage lenses
Modern lens are amazing pieces of technology. Most of them offer perfect corner to corner sharpness, great anti-flare coatings, amazing contrast, you name it. But if you're going for that 70s / 80s consumer film look, that's pretty much the opposite of what you need! Lenses back then where far from the perfection we know today, the consumer photography market was booming and there were a lot of different brands coming up with different designs, new materials, new focusing systems, etc. As a result, each lens had its very particular set of characteristics and quirks (sometimes design flaws, really) that got imprinted into every photo taken and ultimately defined its character. A perfect example of this are the Helios 44M lenses: these Russian copies of the Carl Zeiss Biotar became famous for a design flaw that resulted in a very unusual swirly bokeh. Earlier models displayed this effect very pronouncedly, but as they improved the design in subsequent versions that particular characteristic was lost, and that’s why the earlier models are the most sought after nowadays.

That classic Helios 44M-4 swirly bokeh
The good news is that these old manual lenses are (for the most part) dirt cheap and you can use them on mirrorless cameras with a simple plastic adapter, so you can get that specific look they were known for without any need for Instagram filters or post-processing magic! In my next article I'll go into more detail about these vintage lenses and how to use them.
2. Use manual focus
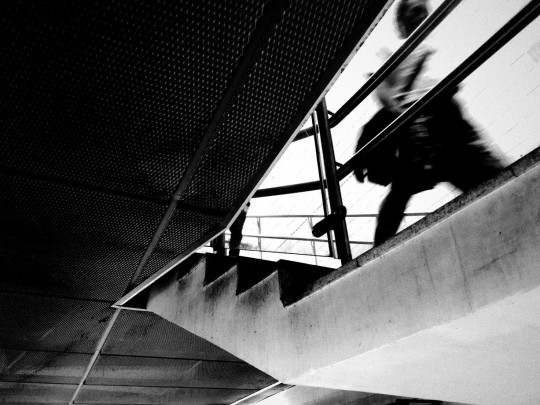
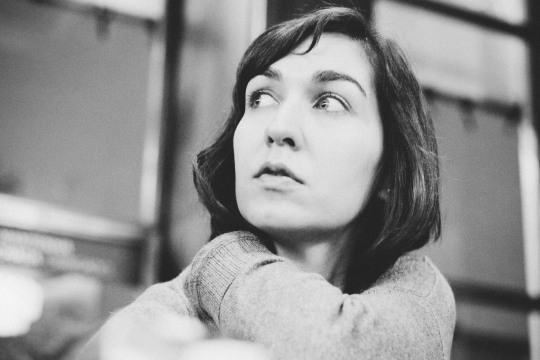
One of the biggest innovations in photography in the late 70s/early 80s was the invention of autofocus. Before that cameras were limited to manual focus, and even when the first AF systems were introduced to the consumer market they were rudimentary at best. Chances are that if you look at your film photos from that period, half of them will be slightly out of focus (or completely out of focus, depending on the competence of the photographer! ;)) But that’s not a bad thing at all, I feel that in most cases it only adds to the nostalgic feeling and can sometimes create an additional layer of mystery.
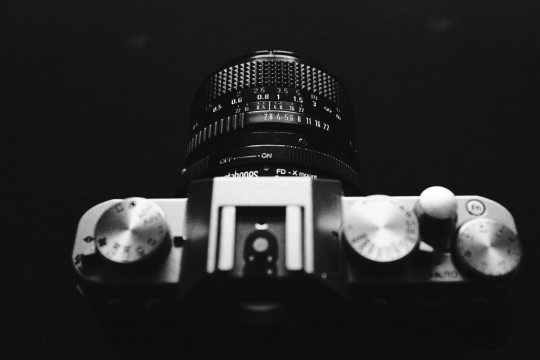
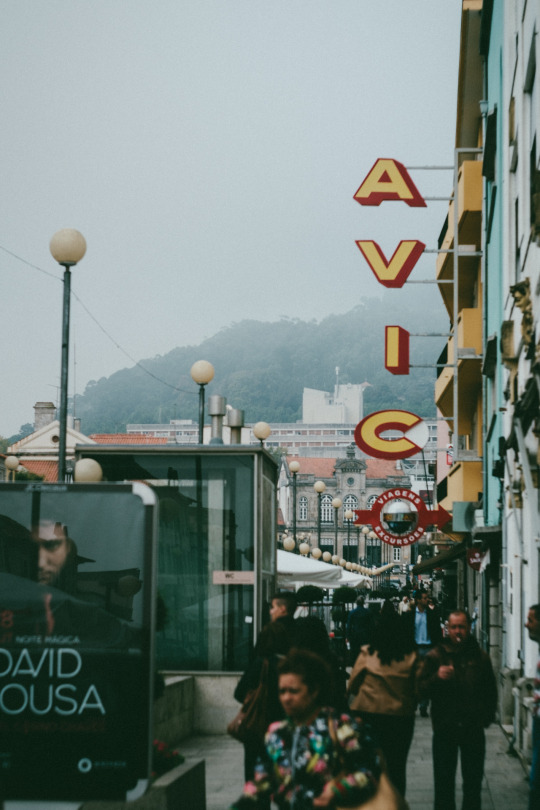
The missed focus on this one gives it a timeless feel
So if you want that classic film look, switch to manual focus on your modern digital camera or use an old manual lens. Don't be afraid to miss focus sometimes, this was something that took me quite a while to realize and “accept”, and I only did so thanks to shooting film. Some of my favorite photos shot on film are pretty out of focus!
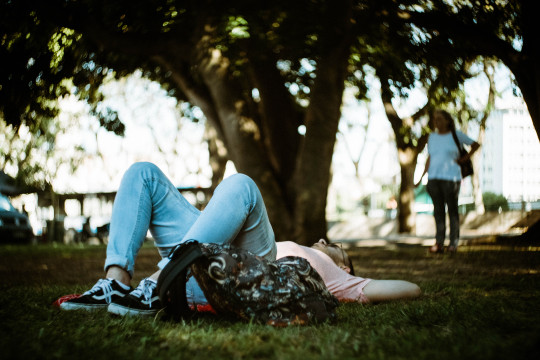
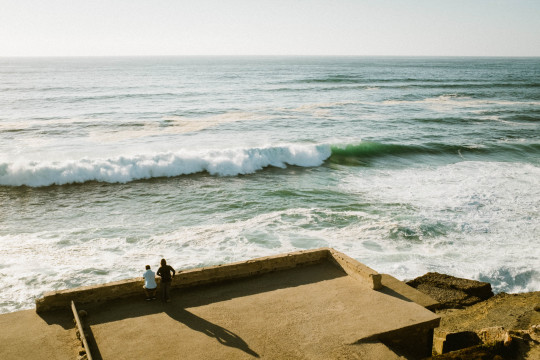
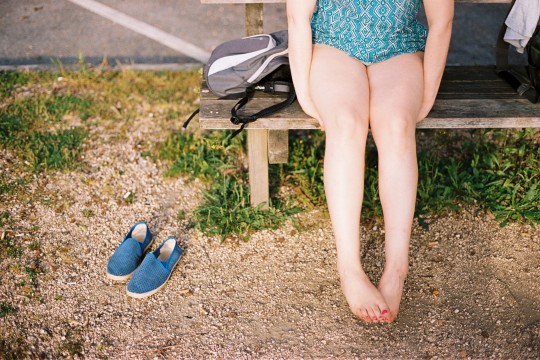
Blurry? Definitely, but the fact that you can’t distinguish their faces makes this so much more universal
3. Use slow shutter speeds
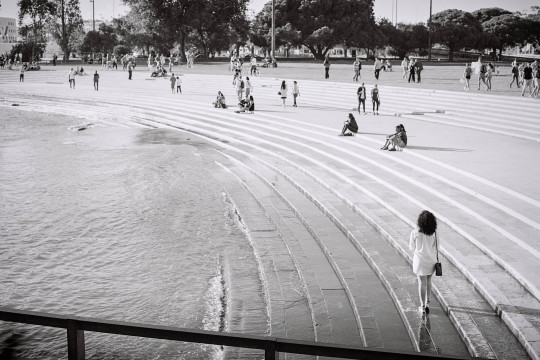
Another limitation of film is the maximum ISO speed available, or Asa as it was called originally. Nowadays our digital cameras have incredibly high ISO sensitivities, but on film the maximum you get is 3200, though most consumer films are rated at 200 or 400 Asa. This means that to get a proper exposure on film you have to use much lower shutter speeds than on digital to get enough light, and as a result motion blur is highly likely. Personally, I love some blur, as it gives a sense of movement to an otherwise static medium. One of my favorite all time photographers, Anton Corbijn, shot many of the world’s most famous bands and musicians on film using slow-shutter speeds, to get some movement in the frame and that extra grit!
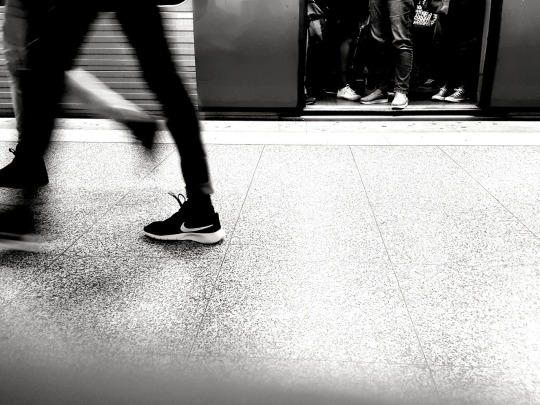
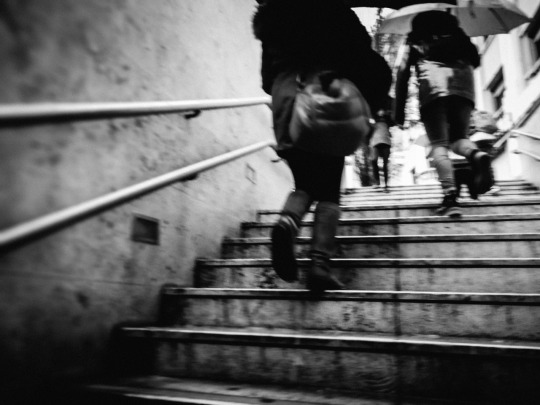
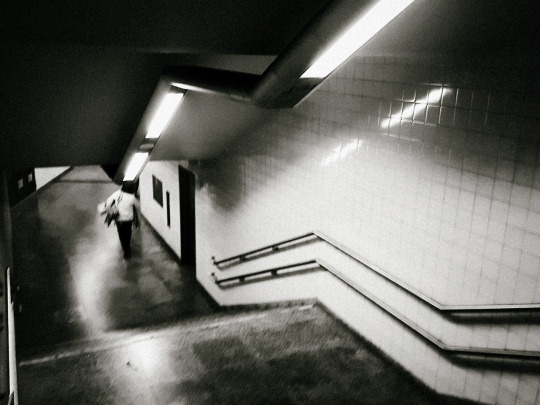
The subway rush - shot on a Huawei P10 smartphone
If you wanna try this out, I would advise to start with 1/30th of a second, look at the results and then adjust as necessary. If you’re shooting in bright sunlight this probably won’t work unless you use a neutral density, but again experimentation in the key.
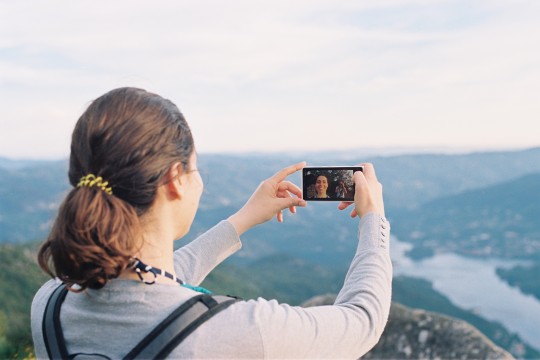
A little extra tip: smartphones are actually great for this if you turn off the flash, as their small lens aperture and tiny sensor force slower shutter speeds to compensate.
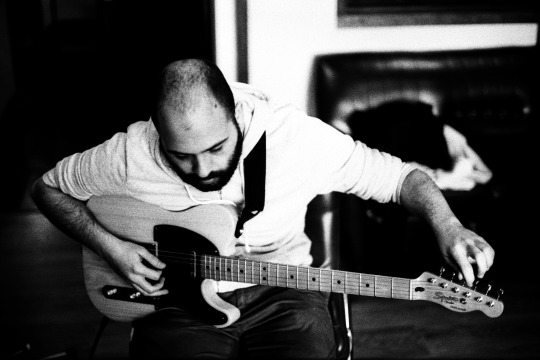
4. Use High-ISOs for authentic film-like grain

This tip is in direct contradiction with the previous one (unless you’re shooting in really low-light), so usually you’ll have to choose between one or the other. It is also a tip specific to the Fuji X series cameras, as I haven’t tested other brands in this particular aspect.
I’m a big fan of grainy photos, it’s one of my favorite things about film. But the technology in digital cameras these days is so good that in most scenarios you’ll get perfectly clean images straight out of the camera. Even though image-editing software has also evolved tremendously in the past few years and can deliver very believable grain simulations, I’ll be the first to admit that it’s not the same as the real deal and it also feels kinda like cheating to be adding fake grain. That’s where the Fuji X-trans sensors come in, in particular their latest iteration X-trans III.
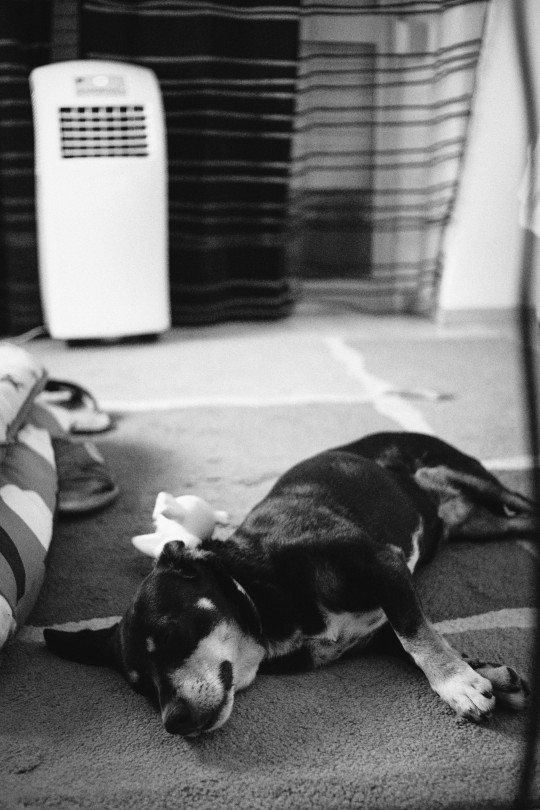
My furry friend shot at ISO 12800
The ACROS film simulation when used with high-ISOs of 6400 and above produces some digital noise that, to my eyes, is very very close to real Black and White film grain - and the best part is that you’re not adding anything fake in post-processing, it’s a real side-effect of ISO just like with real film! So most of the times when I want to shoot in Black & White I’ll use my own Acros custom setting at 12800 ISO and use the SOOC jpegs. This technique also works with color film simulations, but not so well in my opinion.
5. Post-process your photos accordingly

Different films have different characteristics, so it’s important to decide exactly what film look are you going for and learn a bit more about what defines it. Is it a low-contrast or a high-contrast film? saturated or muted? Fine grain or heavy grain? These things will help you understand what you can do in post-processing to get closer to that film look, and most of them are very simple to adjust. Where it gets a bit more complicated is getting the right tones to match the original film stock, but with some investigation and patience it can be done.
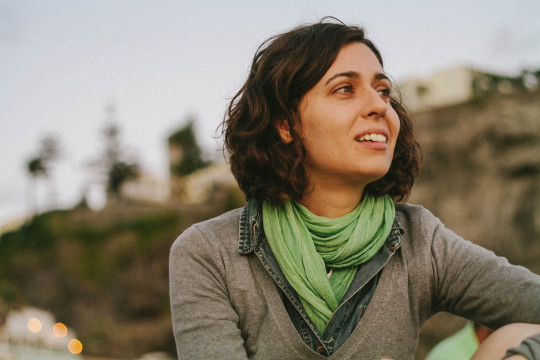
Going for that warm Kodak vibe
Of course if you want to save time you can just buy one of the many film presets out there! Like I said in the beginning of this article they will get you close to the original film tones, so if your base digital file already contains some “imperfections” introduced with the techniques above, it’s as close as you’ll get to the real thing. You can also use in-camera film simulation settings to mimic some film types, which I already covered in my previous article.
Can you tell which is which?
These are some of the techniques I’ve learned by trial and error mostly, I hope you’ll find them useful if the film look is your thing too. I can’t stress enough that the best thing you can do is to actually shoot film whenever possible, not only it will be great fun but it will surely improve your digital photography as well.
Let’s end this with a fun little game: can you tell which of the photos below are film and which are digital? No cheating looking in the exif data, I’ll post the results in a couple of days! ;)
1:
2:
3:
4:
5:
6:
7:
8:
9:
10:
#photography#film photography#film#digital photography#vintage lens#slow shutter#grain#grainisgood#post processing#fuji#fujifilm#fujifeed#fujilove#fujixseries#fujifilm x-t20#fujifilm x100f#canon a1#canon fd 35mm#helios 44m-4
12 notes
·
View notes
Photo
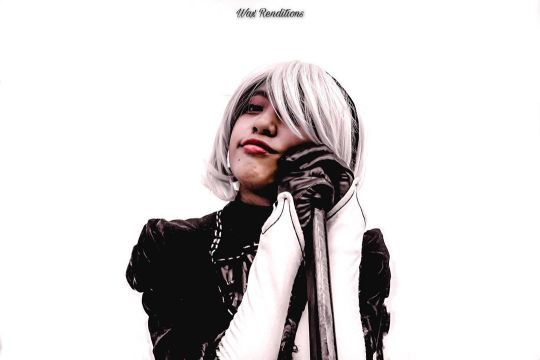
“DO NOT FEEL BAD ABOUT IT. WE ARE ALIVE, AFTER ALL. AND BEING ALIVE IS PRETTY MUCH A CONSTANT STREAM OF EMBARRASSMENT.”-NieR Automata Game🕹☝🏻💯🔝❤️ . . Editing softwares used: @photoshop @lightroom @usedarkroom . Gear Used: Canon 500d w/ Canon 18-55mm f/3.5-5.6 Kit Lens . . PRIME RETRACTION 701 ALBUM . Shandy Matsuri 2019 w/ Allen Walker pt. 4 out of 9 . 67th out of 701.🙏🏻🙏🏻🙏🏻 . Swipe up to the left to see without visual effects and SOOC(RAW)!😸👀 . Date of Shoot: December 28, 2019 . #waxrenditions #waxxrenditions #fatalframes #darkmobs #colordes #filipinophotographer #repertoire #canonphotography #grammable #lifeofadirector #theimaged #matsuri #cosplayer #canonian #2b #femalecosplayer #eyephotography #goth #cutie #otakumode #cosplayevents (at SMX Convention Center) https://www.instagram.com/p/B-imRc9DiE7/?igshid=7e8zsp73tmje
#waxrenditions#waxxrenditions#fatalframes#darkmobs#colordes#filipinophotographer#repertoire#canonphotography#grammable#lifeofadirector#theimaged#matsuri#cosplayer#canonian#2b#femalecosplayer#eyephotography#goth#cutie#otakumode#cosplayevents
0 notes
Text
How I edit my landscape photographs taken with Fujifilm cameras
Last week I received an email from a fellow photographer wondering if I could explain how did I finally manage to edit my landscape work with the Fujis. That is why I decided to write about what the process has been like for me.
My journey with Fujifilm cameras started a couple of years ago when I wanted something smaller and lighter for my trips. Back then, I used to bring a full backpack with a camera, several lenses, filters and a tripod. For cityscapes though, I would bring the 6D and one lens. I remember that it always ended up being a big hustle and so uncomfortable to carry it around from one place to another. So I made up my mind, and chose to get a X Pro1 with a couple of lenses. In the summer of 2015, before going on our month and a half trip to the US and Canada, I really wanted to get familiar with the new system and went to shoot several portraits in the forest with some friends. I was sold immediately and that’s when my love for Fujifilm cameras started. I really enjoyed the sharpness and the quality of the images and I loved the camera itself. It was one of the most beautiful cameras I had ever seen and so much fun to shoot with.
While in the US, I took the X Pro1 around NYC and other cities in California, Oregon and Washington. I was really happy, it was perfect for what I wanted. Small and great, much easier to carry on a day out exploring the streets than lugging around the 6D. I also shot landscapes with the Fuji around the Capilano Suspension Bridge near Vancouver and in the Olympic Peninsula in WA. The experiment with a new system turned out to be really exciting and I was happy with the results. So last year (May 2016), I got the XT1, and up until August or so my 6D stayed in a shelf. I also stopped taking a bag with filters, the tripod... and guess what? Everything felt lighter and so much comfortable. I loved everything about the cameras and when I used them for portraits or as daily carry I literally thought I would sell my Canon gear.
My favorite thing about these cameras has always been their size, the layout of buttons and dials, the EVF and simply how beautiful they are. Also the dynamic range is incredible, and I’m always amazed by how I can get the perfect balance between the highlights and shadows. This is so much better compared to my 6D where I always have to underexpose to get some details in the clouds in post production. With the Fujis though, it only takes one look through the viewfinder to adjust the settings and you’re done. But there was something major that stopped me from selling my Canon and actually keeping both systems, and that was my editing. I couldn’t match the looks between my Canon and Fuji files. For some reason the landscapes were really difficult to edit to my liking. I could have given up and sell all my Fuji gear, but I didn’t. I just loved it so much for all the other situations!
Now that I think about it and after months of working on it, I guess my problem was with colors and the learning curve of working with a different kind of sensor and processor. I know people love the color these cameras produce, but I don’t really enjoy the blue tones SOOC and I totally dislike the greens and the way the camera renders them in landscape photographs. I have also figured out that the photographs I make on cloudy and misty days are much easier to edit to my liking than the ones taken on sunny days, I just can’t handle to edit those blue, cloudless skies (this also happens to me with the 6D, by the way). I love muted tones and for some reason I couldn’t achieve that with my usual editing. Sometimes the vivid colors of these files just don’t speak to me because I find them really different to my editing. So it was a matter of learning what works for me and what doesn’t when post processing the files and that, unfortunately, took me longer than expected.
As I mentioned earlier, if you take a look around my portfolio, you will see that the majority of my work is done on rainy and cloudy days. I believe it’s the atmosphere of those days that really pulls me to get out and photograph nature and landscapes. Light conditions and the time of the day that you shoot at can make a phograph go from stunning to meh. That is a fact. So I started to go out to photograph on days like those described above, and slowly I started developing some presets that worked for these images. Rich colors mixed with dark shadows, that was it! I developed a moody and dark way of editing that really caught my attention and made me really picky when choosing the time and conditions in which I went out to shoot with the Fujifilm cameras.
Last summer we went on a 13000km roadtrip in our van to Norway. I knew that I would be photographing some of the most spectacular locations for landscape and travel photographers like me, so I wanted to be prepared. Since we were sleeping in our van, I decided to bring the big camera bag along with the 6D +17-40mm, the XT1+ 18-55mm and the X100T. For some strange reason, I always reached for the Fujis, so I only used the 6D for 15 photos in total and the 2000 + others were from the XT1 with the kit lens and the X100T. This made me even more excited than the previous year. I didn’t hesitate to use the Fuji for landscapes and the conditions were just as I wanted them: misty, moody and super cloudy. People may think I’m a weirdo for loving that kind of weather for my summer holidays, but when travel and landscape photography is your job and a trip like this is the perfect occasion to create some portfolio worth images, that’s all you really wish for. As soon as I came back home from Norway, I pulled out the files into Lightroom and applied my own presets. I was relieved, it had worked. I was improving, and on my way to finally love these cameras and the editing process of their files.
So I guess you are wondering how I post process them, so I will give you a few hints. As I have said on a previous blog post, I achieve these colors by moving the sliders of three different panels of Lightroom. My most used presets are based on VSCO’s Portra 160+++ which I’ve tweaked until I’ve found something that I really like and works for my images. The following are some common adjustments that you can find on the majority of my images: In the tone curves panel, I always lift the shadows and decrease the highlights a bit. If it’s cloudy, I will accentuate those clouds, but if there’s a dull sky, I will usually blow out the highlights in the basic panel. In the HSL panel, my green tones are usually yellowish, and the yellows are a bit more orange. The saturation of the greens is really low but the luminance however, pretty high. I believe split toning is really important too. I usually have a bluish tone for the highlights and a warmer one for the shadows. Those are the three panels where the “magic” happens in my editing.
Many people have asked me to put my presets for sale, but I don’t think I am ready for that because I believe each of us has to develop our taste and work on something that works for our images. I really encourage people to just keep working on it and not copying literally other’s editing processes. I could show you screenshots of my editing panels, but I adjust every slider in each image, so I don’t think that is worth it. However, I do have some before and after screenshots where you actually see what I mean (check previous blog posts). But I am willing to give people tips and talk about how to think on your editing while you are making the actual photographs and how to improve their editing once you are in Lightroom. If people are interested, I may even create some videos to show you how I work in Lightroom and I can make some videos also editing some of your RAWs, if that is something you might enjoy.
So what is my plan from now on… Ever since I started to enjoy my new way of editing with Fujifilm cameras, I’ve been saving up to build a lens collection that I am comfortable with. I am currently looking for the 16mm and the 23mm 1.4 since those are my favorite focal lengths. I’m also keeping my Canon system because I can’t let go of my Sigma 35Art for portraits. I have to say that even though I have 4 digital cameras in my bag, they all have a purpose for the work that I do. Except for the X Pro1 maybe, that I only take out when I feel some nostalgia... and I know for sure that I don’t want to sell it. This summer, we are planning on going on a trip to Japan and Indonesia where I want to bring a Fuji camera with the 16, 23 and the 35 1.4 (that I already own). I want to be able to travel light, with everything that I need in a ONA bag. In some of the tests that I’ve seen, it seems like the new XT2 and X PRO2 show less mushing in landscape photographs, and I would love to hear from those who own any of them if that is true or if it's just my eyes suffering from G.A.S (which I admit, Fujifilm cameras make me have it). Hopefully, I will be able to try that for myself sometime soon and we’ll see where that leads to.
Probably this post was longer than expected and doesn’t answer all your questions... or maybe it leaves out some important information that you were expecting to hear from me. If that is the case, please don’t hesitate to write down in the comments or dropping me an email with your questions. I will try to do my best to give you a detailed answer.
I would like to finish this post with the before and afters of my favorite 25 photos I’ve taken with the Fujis so far. I hope you like them!
#fujifilm#landscape#kaizen#travel#editing#adobe#lightroom#norway#xpro1#xt1#xpro2#x100t#xt2#workflow#beforeandafter#canon6d#canon#6d#sigma35art#camera#gear#ona#onabag
11 notes
·
View notes
Text
Canon EOS-RP Review | Hands-On Experience, Sample Images and More
The Canon EOS-RP Mirrorless Camera was just released, and we had the opportunity to test it at Canon’s press event in New Orleans. In this review, we’ll dive into who this camera is for, give you the pros and cons of the camera, show you some sample images, and provide you with our overall analysis.
Let’s First Address the Canon EOS-RP Rumors
With the release of the EOS-R, the internets have been speculating that Canon’s next camera would be a mirrorless camera designed for professionals. Speculation that was justified based on Canon’s line up of RF L lenses. Lenses that are designed to resolve incredible amounts of detail, have lightning fast focus mechanics and boast incredible optical quality.
The Canon EOS-RP is not that camera, it’s actually the exact opposite. And while Canon has openly stated, “Have no doubt that a professional model is coming,” many of you will still be throwing your hands up in frustration. Particularly if you were wanting or expecting Canon to take over the mirrorless market with “the next best thing.”
But, while this camera might not be what you want or expect, it’s still a wonderful camera at an incredible price point.
Introducing, The Canon EOS-RP Mirrorless Camera
Before you jump in, I want to preface this article with the fact that this is not a technical Canon EOS-RP review. There are plenty of websites for comparing camera specs and debating technical details. Instead, I offer you information from the perspective of a working portrait photographer who takes pictures as a profession. My Canon EOS-RP review focuses on the benefits and pain points actually seen and felt from the day that I spent shooting with this camera. With that said, read on!
Who is the Canon EOS-RP For?
The Canon EOS-RP is an entry-level mirrorless camera designed for amateur photographers who are ready or thinking about stepping into the full-frame mirrorless world. Paired with the EF-EOS R adapter, the EOS-RP system can make use of all of your existing EF lenses. For $1,299, this makes for an attractive proposal in and of itself.
In addition, the body is light, I mean, very light. The body alone weighs just over 16 oz which makes it one of the lightest full-frame mirrorless cameras on the market. That paired with an articulating LCD screen makes it a wonderful camera for bloggers, vloggers, and photographers who love to travel.
However, if you were hoping for full-frame 4K, you are going to have to wait a bit longer. Canon’s technical team informed us that the Canon EOS-RP is still restricted to 1.6x crop when shooting 4K in order to prevent the camera from overheating. It’s a frustrating technical restriction that we hope Canon is able to soon resolve.
In short, if you’ve got a line up of EF lenses and have been considering a full-frame camera or jumping into mirrorless, the EOS-RP was designed to get you in at a minimal price point.
5 pros About The Canon EOS-RP
pro 1 – Canon Color Science
Canon color science is one of the big reasons that I prefer shooting Canon versus other brands. I always use the best tool for any job. Shooting raw allows you to create and fine-tune color on any camera, I find that Canon files start with beautiful and slightly warm skin tones that already fit my final look. This is where the EOS-RP shines, and honestly where my specialty as a photographer lies. Given that this camera is so new, I had no choice but to work with JPG files. Take a look at how the original files stack up to the final edits below. You are seeing the untouched SOOC.JPG (left) versus the final edit (right).
pro 2 – Solid Low Light Performance
The EOS-RP is essentially using the 6D Mark II sensor paired with the latest DIGIC processor. The result is an entry-level full-frame camera with more than impressive low-light performance. I found noise to be barely noticeably all the way up to 800 ISO, and professionally acceptable even at 6400 ISO. In fact, even when pushed to 12,800 ISO the files still hold up nicely as you can see below.
If you’d like to take a look at the 1:1 files at the different ISO ranges, here they are. Forgive me, I shot these under partial florescent light, so I black and whited the photos as the shutter speed was catching inconsistencies in the fluorescent light. This is a test I’d love to try again in natural light conditions with the final released cameras.
While the noise in the final image at 12,800 ISO is noticeable, I want you to put it into context by seeing the full frame shot. While I wouldn’t advise shooting at this ISO, it’s still very useable if needed.
pro 3 – Good Dynamic Range
We will know more about dynamic range when we are able to test the flexibility of the .cr3 files in post. However, even when reviewing the .jpg files I noticed that the camera has an impressive dynamic range. Keep in mind, even when shooting raw I set my camera profile to a flattened custom profile that allows me to preview more dynamic range from the image directly in-camera. Doing so allowed me to yield more dynamic range from the .jpg files than you might normally see.
In this first SOOC .jpg file you will notice that we are shooting mid-day at a cemetery in New Orleans. Even when shooting from the shadows into direct sun, we can see all details from the shadows to the highlights.
Moving indoors, to a warehouse, I found a scene that was perfect for testing the dynamic range of the camera. How much detail would we be able to see within the details of the statues compared to the highlights of the water and bridge outside of the windows? Amazingly, even the .jpg files had enough detail to reveal both with little issue. We can expect the raw .cr3 files to perform even better.
pro 4 – Fast Autofocus Speed
The autofocus speed was blisteringly fast. Canon boasts that the EOS-RP has the “world’s fastest full-frame mirrorless AF speed.” No doubt, the speed of autofocus and its accuracy did not disappoint.
pro 5 – Great Ergonomics
Given the size of the camera, I thought I would hate the ergonomics of the EOS-RP. However, the camera was comfortable, even without an additional grip. I found the buttons easy to access, and the layout of the menu system was simple and intuitive in practice. I will note that since the system only has two dials, I greatly preferred using the EOS-RP with native RF lenses or the RF adapter that has the control ring present. The control ring provides you with that third customizable dial that you can use to quickly adjust Shutter Speed, Aperture and ISO when shooting in Manual.
5 cons of the Canon EOS-RP
Con 1 – camera body Size vs. RF L Lenses
The size of the EOS-RP is only a valid selling point when you are pairing the camera with equally small lenses. Pairing the EOS-RP with any of the new monstrous RF L lenses makes the camera feel like any other full sized DSLR. What we need are more native RF lenses that are designed for travel and portability. Only then can we really appreciate the size and weight of the EOS-RP. During my day with the camera, I found my favorite lens was the small Canon RF 35mm f/1.8. This allowed me to truly appreciate the size and portability of such a powerful system.
Con 2 – Crop Video/Contrast Focus
For a lot of people wanting this camera to do 4K video, crop mode is a deal breaker. Not because the video quality is bad by any means. It’s simply because it requires us to have a different set of lenses in order to achieve the same field of view. In addition, when shooting 4K the camera is reduced to a contrast focusing system that can be abysmally slow, especially in low-light. In many situations, you will be better off with manual focusing.
Con 3 – Lack of Physical Joystick
When looking through the EVF, Canon has designed the top right of the display to act as your joystick. While it was easy to use, I found myself missing the feel and speed of a physical joystick. This is something that will no doubt improve with time and experience using the new system. However, I still miss the tactile feel of a physical joystick for quick AF maneuverability.
Con 4 – Accidentally Triggering the EVF
Just like with the EOS-R counterpart, I was constantly triggering the EVF on the EOS-RP by accident. Whether I was testing exposure or previewing images, the screen was constantly shutting off when a thumb or finger came too close to the sensor on the EVF. This is more of a nuisance than a deal breaker, but it’s still rather annoying to deal with as it kept pulling me out of the joy and fun of the camera.
Con 5 – Battery and Battery Life
While the EOS-R uses the standard LP-E6 battery, the Canon EOS-RP does not. No doubt this was done to accommodate the camera’s size, but this is still frustrating on multiple levels. For one, if you’ve got a stockpile of LP-E6 batteries, they can’t be used. This means that the Canon EOS-RP is not the ideal travel buddy for those already shooting larger full frame Canon DSLRs. For that, I guess we have the EOS-R. But, even worse is that the smaller form factor and battery gives the EOS-RP a pretty terrible battery life.
When it comes to shooting in a battery friendly manner, I’m on the opposite side of the spectrum. I shoot with my screen set to maximum brightness, and my approach to shooting with intention means I’m constantly previewing the LCD. I got a whopping 70 shots out of the camera before the battery was blinking red. Some of my colleagues were getting around 200-250 shots. Regardless of our approach to shooting, it wasn’t great. Expect to be spending a pretty penny on at least 2-3 spare batteries if you plan to shoot a full days worth of photos.
Canon EOS-RP Review | Final Thoughts
I know many people are going to crap on this camera. It’s not a Sony killer, nor is it the professional camera that we all hoped and wished for. On top of that, it only has one card slot (queue the eye rolls). But, when we look at this camera outside of our expectations we can see it for what it is. A fantastic entry-level full-frame camera that comes in a small body, and with an even smaller price tag. I was shocked at the image quality I was able to pull out of a camera that costs only $1,299.
For that reason, I think this is the ideal camera for an enthusiast looking to jump into a full-frame mirrorless system without breaking the bank. That said, if you are professional or prosumer expecting the “Canon Mirrorless Monster” you are going to have to wait a little longer.
Sample Images Using The Canon EOS-RP
To purchase this camera, click here.
What do you think about this camera? I’d love to hear from you in the comments below.
from SLR Lounge https://www.slrlounge.com/canon-eos-rp-review/
via IFTTT
0 notes
Photo

Sometimes, it's a struggle to fit sessions in. Then when you think you have it all worked out and you get a cold, #overcast #rainyday.....so you just shoot anyway.....and then BOOM, just like that you get some awesome people to work with, some great photos with some colors that just pop. Jessica N Rocky Carroll, Lexi Hooper and Preston Hooper are gonna be great parents! Can't wait to meet Janzen when he gets here. (Hope I got the name right. lol) So happy you allowed me to capture these for Y'all!! Pretty much straight out of the camera looking awesome :) #sooc #tennessee #maternityphotography #expecting #itsaboy #love #momtobe #babybump #mom #photooftheday #babyboy #cute #motherhood #babylove #babyonboard #maternityshoot #outdoors #portrait #babyshoes #maternity #allaboutbaby #familyportraits #jamesknox #teamcanon #1dxmkii #85mm (at Athens, Tennessee) https://www.instagram.com/p/BreL5-OnFT4/?utm_source=ig_tumblr_share&igshid=1h9qlyha8hkj3
#overcast#rainyday#sooc#tennessee#maternityphotography#expecting#itsaboy#love#momtobe#babybump#mom#photooftheday#babyboy#cute#motherhood#babylove#babyonboard#maternityshoot#outdoors#portrait#babyshoes#maternity#allaboutbaby#familyportraits#jamesknox#teamcanon#1dxmkii#85mm
0 notes
Text
DELRIDGE x MACHEL SPENCE /// OCTOBER 2019
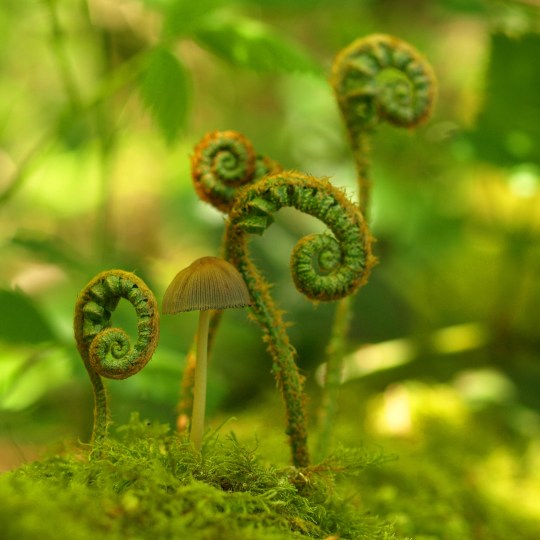
In college I majored in Zoology concentrating mostly on marine animals such as cephalopods. I have been a beach naturalist for the Seattle Aquarium for 8 years now & an avid photographer. I am really horrible at following directions or reading manuals so I completely learned how to use my camera just by pushing random buttons and finally figuring it all out (took me many years!) I have an unhealthy obsession towards mushroom/fungus photography and will often be seen with my legs sticking out of a thicket trying to get shots of shrooms in low light environments!! When I am not on the beach at low tide, digging through the brush for bugs or photographing pretty much anything I am usually with my husband & daughter having a blast! All of my photographs are SOOC (straight out of camera) and while I do not disagree with other photographer's using PS & other software to change their images I am a bit of a purest. I like to see the photograph exactly as I took it, the most I ever do is crop to a square.
Machel Spence
https://www.etsy.com/shop/machelspencePHOTO
0 notes
Photo

This was made for #Trivago I've worked with them a couple times this year. This is not an edited image just a #sooc but still, I love how the natural light hits all the immportant things on the scene giving so much details and letting you know they are there like the texture of the headbord and the colors of the cushions on te bed, the temote controllers of the a.c. fan and t.v. the pretty obvious cool bathtube with the wooden floor and huge windows. #realestatephotography #hotels #emmanuelphotoartist #2k18 #nikon #travelgram #luxurydestination #luxuryhotelsworld #thefives #indoorsphotography #naturallight #rivieramaya #mexicancaribbean #mexicophotographer #cancun #tulum #islamujeres #holboxphotographer #holbox #playadelcarmen #mexico (en The Fives Azul Beach Resort Playa Del Carmen) https://www.instagram.com/p/BoRgtsFHTVD/?utm_source=ig_tumblr_share&igshid=yo7blhfm0442
#trivago#sooc#realestatephotography#hotels#emmanuelphotoartist#2k18#nikon#travelgram#luxurydestination#luxuryhotelsworld#thefives#indoorsphotography#naturallight#rivieramaya#mexicancaribbean#mexicophotographer#cancun#tulum#islamujeres#holboxphotographer#holbox#playadelcarmen#mexico
0 notes
Note
For the trope mash-up post, may I request Fake Dating and Soulmate AU for Drarry please, if it sparks any fun inspiration?
(P.S. you're wonderful and I will love literally anything you come up with, even if it's not for these prompts, I just got super excited when you posted this 💜)
No, YOU'RE wonderful!!
So this is what came to me - and I can actually see the rest of the story but I have to go adult for a bit, but I am going to come back later and write some more of this! (As per usual, this is pretty much SOOC and unbeta'd, etc etc.)
Draco’s known since the Final Battle.
He’s pretty sure Potter has no idea, whether it’s that no one’s remembered to tell him about soulmates, or that his mark hasn’t activated yet, but he treats Draco exactly the way he’s treated him since they'd all arrived at University. He’s unfailingly polite, cool and distanced, and deeply disinterested in one Draco Malfoy.
Which isn’t, you know, how you’re supposed to treat your soulmate.
The thumbprint on Draco’s wrist had flared to life when Potter had grabbed his arm to haul him onto the back of the battered broom that carried them both out of the fire. He’d almost fallen off at the way Potter’s magic had rushed over him, through him. Draco had always heard the stories that connecting with your soulmate could be disorienting, but since it happened to him in the midst of mortal terror, Draco’s not sure his experience was typical.
It’s also very rare that one person connects and the other doesn’t, although it does happen. It takes time for the bond to solidify, to grow into a true soulmate connection, and obviously, that’s not happened here. Basically, Potter is a faint echo in Draco’s mind, enough to distract and ache a little, nothing more than that.
All this to say, it’s weird when Potter comes dashing into their suite common room one Saturday afternoon, looking wild-eyed and somewhat disheveled. It’s a rainy day, raw and windy, the kind of day where Draco does not plan to leave the building if he can help it. Potter is damp and windblown, so he clearly had other ideas. Fucking weirdo.
Potter looks around wildly, and lights up when he spots Draco curled up on the couch under his favorite striped blanket.
“Malfoy,” he says eagerly, and Draco blinks up at him in surprise.
Potter’s never sounded happy to see Draco before.
“Yes?” Draco says cautiously. “Can I help you?”
Potter nods vigorously. “You can, yes, absolutely. I need you to pretend to be my soulmate and go to the gala with me tonight.”
“I beg your pardon?” Draco asks, trying to make sense of the words he’s just heard. “You need me to what?”
Potter hangs his coat on the rack by the door, kicks off his grubby trainers and makes his way around the couch to plop down next to Draco.
“I need you to pretend to be my soulmate and go to the gala with me tonight.”
“That’s what I thought you said,” Draco says. “But also, what the fuck are you talking about?”
Potter sighs, lets his head rest on the back of the couch and runs a hand through his unruly hair.
“You know how the press…” his voice trails off and he flushes.
“Follows you around incessantly and makes your life a living hell?” Draco says dryly. “Yes, Potter, I’m aware.”
“Well, someone thought it was a good idea to advertise that I haven’t found my soulmate, and to suggest that anyone who’s unbonded should come to the gala tonight and you know. Shoot their shot or whatever.”
Draco sits bolt upright, outraged. “What the hell? That’s bullshit. That’s not even how it works!”
Potter just sighs again and slumps down even further, eyes closed. “Yeah, I know that, but it’s turned into this whole thing, and every girl in the greater Oxford area, apparently, is now coming to the gala.”
“Can’t you just… not go?”
Potter shakes his head, looking miserable. “No. The Fund is really important to me. I promised to speak.”
“So your solution is to fake a soulmate bond with a man?” Draco asks and Potter snorts.
“Okay, well, when you put it like that, it does sound stupid. I just thought if I could get them all off my back for a bit… No, you’re right. I’ll just have to get a bodyguard again, I guess.”
He sounds so utterly miserable that Draco can’t help but feel sorry for him, which is why he finds himself saying, “Yeah, I’ll do it.”
Potter opens his eyes to stare at Draco. “What?”
Draco shrugs. “I’m not doing anything tonight, there’ll be wine at the gala, yeah?”
Potter looks excited but then his face falls. “But what about your soulmate? What if they’re out there looking for you?”
Draco looks away and swallows. “That won’t be a problem.”
Potter’s eyes narrow. “Why not?” He sucks in a breath and whispers, “Malfoy, do you know who your soulmate is?”
Draco just nods and there’s a long silence while Potter clearly puts some picture together in his head. He’s never been stupid, Draco concedes. Since for all intents and purposes, Draco is unbonded, Potter must know there’s something wrong with all of it.
Finally Potter says, “If you’re sure.”
“I’m sure,” Draco says and finally turns to look at Potter. “It’ll be fun,” he says carelessly. “What should I wear?”
#my writing#trope mashup#Drarry vignette#fic beginning#I ask that you check in with me before finishing any of my vignettes#THANK YOU FOR YOUR UNDERSTANDING
39 notes
·
View notes
Text
Ugly Location Photoshoot Challenge
A few weeks ago, a model friend of mine, Rachelle Kathleen, and I were planning to meet for a fun little photo shoot. Instead of searching out the usual beautiful locations around where we live, I had the idea to do just the opposite. I wanted to go somewhere “ugly” by all conventional photography standards and then see what we could do with it. Lowe’s seemed like the perfect option. The point was to challenge ourselves. I wanted somewhere with horrible lighting and limited backdrops. Somewhere that made absolutely no sense for a photo shoot. Our local Lowe’s home improvement retail store hits all those points. Before we went in we decided on a few rules: 1. We had to work with whatever was already there. I brought in just my camera without any artificial lighting or props. She simply brought a small bag with a couple outfit options. 2. We couldn’t rearrange the displays or make any big changes. In one instance (as you’ll see later) we moved a cart from the side of the aisle to the center, but then put it right back. We’ve both spent years in the service industry, we weren’t about to leave the workers with a trashed store an hour before closing time on a Sunday night. 3. We’d stop shooting if anyone was in the background. We didn’t want to give anyone any reason to complain, so we went to a place that was completely empty of customers, and if someone did show up, we lowered the camera until they were done browsing and left the area. Of course, if none of this was allowed we would’ve left, but as soon as we walked in an employee asked if they could help us and I asked, “We were just going to take a few photos, is that okay?” He replied, “Of course! I was just wondering why she was so overdressed for a trip to the hardware store!” Since they were about an hour from closing the store was almost completely empty. Anyone we didcome in contact with was super friendly, if not slightly curious. We had a few people stop and watch, but that’s to be expected anytime Rachelle models anywhere. The girl just can’t help but stop traffic. And this is what we got! I’ve included the cell-phone pic of the actual location along with each photoset, so you can see what we were working with. Lowe’s Location 1: The Paint Samples I have to admit, I have always wanted to shoot in front of these paint samples, so as soon as we walked in the door I made a bee-line right to them. I’m excited I finally got to shoot in front of them – these shots turned out to be some of my favorites ever! Location Shot: Straight Out Of Camera (SOOC): Edited: Lowe’s Location 2: The Lighting Section I was also excited about the lighting section. I’ve always been a fan of shooting straight into the light (though I’ve heard it’s a bit of a no-no). The main problem was the lights were so much higher than we thought…or maybe we’re just a lot shorter than we realized (we’re both barely 5’4″). I knew the light itself was going to be pretty horrendous, with all the different colors, brightness levels, and shadows, but I was excited to give it a shot. You can see in the second photo what it looked like straight out of camera. Location Shot: SOOC: Edited: Lowe’s Location 3: The Aisles We knew we couldn’t avoid the aisles. Photographically speaking, they were awful. Horrible lighting, lots of plastic surfaces, really nothing that would be considered aesthetically pleasing, but that was the point. This was the essence of Lowe’s, and we wouldn’t have been doing the challenge justice to steer away from it. Also, yes, we know you aren’t allowed to sit on the carts. An employee was there and gave us permission to keep shooting. Like I mentioned earlier, we were in a pretty big hurry, so she was sitting on that cart for a total of maybe 6 minutes, so calm the hell down, it’s not like we were dancing on them. And yes, we know there has probably been something pretty disgusting spilled on them at some point, but we really couldn’t care less. Rachelle and I have shot nude in abandoned buildings full of spiders, bats and bird shit, a dry cart really isn’t much of an issue. We shot in both the larger aisles and the skinnier ones. Here’s the larger aisle: Location Shot: Aisle 1 SOOC: Edited: Location Shot: Aisle 2 Lowe’s Location 4: The Garden Section I would’ve loved to spend more time in the garden section, but the store was closing and we were running out of time. We spotted a cluster of fake shrubs and I had her kneel down in front of them so I could fill the frame. It’s too bad we had to move on so quickly – this was actually the best lighting we got out of the entire store! If we had been there in the daytime, it probably would’ve been even better! I knew I wanted to edit the finished photo with a kind of moody, wintery look. So even though the raw image really wasn’t too bad, it still needed some adjustments to get to what I wanted it to be. Location Shot: SOOC: Edited: Overall, this was a really fun challenge! Not that I’d invite an actual client to ever do a Lowe’s photo shoot (I mean, never say never), but I was pretty happy with the result! Horrible location for the win! Next time you see an awful spot, maybe give it a chance, you never know what you might end up with. About the author: Jenna Martin is the founder of PhotoFern.com and a fine art and underwater photographer based out of Billings, Montana. After acquiring her Master’s in Psychiatric Rehabilitation, she made a drastic career change into the field of photography where she has been producing surreal images ever since. You can find more of her work and writing on her website and blog, or follow her via Instagram or Facebook. This article was also published here. Read More at Ugly Location Photoshoot Challenge http://dlvr.it/Qhc1tx www.regulardomainname.com
0 notes
Photo

Flickr: Berry Blast! (Red Green) Colors are straight-out-of-camera (thank you bright sunlight!) Taken with my compact camera : ) Hello my friends! I'm back from traveling : ) Haven't had time to go through more recent photos... so I'm bringing you a Berry Blast from the past! ; ) This one is SOOC with a small cropping (taken with my older compact camera Sony HX60V) The color hasn't been touched and there was no flash involved just a bright sunny day! I think this was taken during the afternoon... so I'm surprised by how much wetness still remained on the berries. Maybe it had rained or was foggy earlier I'm not sure but I'm glad the water droplets are there : ) They reminded me a bit of Rose hips (Nypon) at first... but I'm not sure what type of berries these are... please feel free to post a comment if you know : ) I found the 'blast of red' very pretty against the greenery that day! : ) It's great to be back and I will try to see everyone soon! Hope you enjoy this one my friends : ) Appreciate your support & I wish you all a wonderful day ahead! p.s. Please give me a few days and I will try to catch up with all your wonderful photostreams comments & mail : ) : ) CRUSH by crush777roxx https://www.flickr.com/groups/flickrest/
0 notes
Text
Menu Plan Monday: Tired of Being Tired
I am officially tired of winter. More than that, my SAD is kicking in hard, despite 8-12,000 IU of Vitamin D nightly. I started writing this post on Sunday, had the draft, found the links to the pretty recipes (need to remember to do that again for next week), and here it is Wednesday, and I am dragging ass. You can check out my Fitbit stats if you don't believe me.
via GIPHY
That sloth from Zootopia is moving faster than me this week. Not only am I moving slowly, but I'm also thinking slowly. I have enough energy to do the bare minimum, and even that's a stretch.
But anyways, here are the beautiful things I shall be cooking and inhaling before passing out each night this week.
Menu Plan Monday
Cherry Tomato Chicken Parmesan with Zucchini and Basil
From the Plated site for this recipe
Cod en Papillote with Broccoli, Quinoa, and Chimichurri
(so much more elegant than calling it Packet Fish with Chimichurri Sauce)
There was some quinoa left over, excellent breakfast mixed with blueberries and coconut cream. I was too tired to post on Instagram, so you dear blog reader, get the SOOC, unedited food picture.
Skillet Roast Chicken with Caramelized Fennel and Potatoes
There's something comforting about the smell of fried onions
— Annette (@daNanner) January 24, 2018
Apparently, I tweeted while cooking, inhaled dinner, cleaned up, and passed out. Sorry, no #Platedpic of this meal.
Steak Bulgogi with Pickled Radish and Cheesy Corn
I am so very grateful that Plated is delivered on Sunday. We would be eating so much takeout this week, or not eating at all if I wasn't using this service. And hey, I have 3 4 more free weeks to give away.
via Blogger http://ift.tt/2Br8gjr
0 notes
Photo
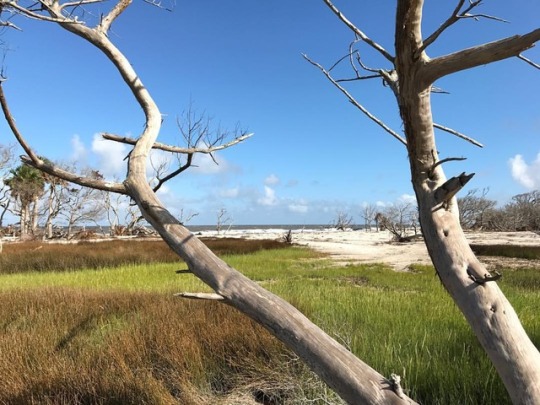
Irma did significant damage to the Driftwood Beach area at Jekyll Island. Still very beautiful. Hey! This scene is pretty much composed of the "anti-anxiety colors"! Guess I need to make it my new lock screen wallpaper! #iphone7plus #ipulledoverforthis #nofilter #nofilterneeded #sooc #noedit #bluegreenyellow #eye_for_earth #photography #picture_to_keep #ig_ag #georgia #coast #shore #goldenisles #goldenislesmag #transfer_visions #wickedpissahpics #wizardsoftones #horizon #splendid_horizon #lovelydeadcrap #tv_trees #tv_living #tv_aqua #marsh #skyporn #weathered #fingerprintofgod
#georgia#noedit#ipulledoverforthis#goldenislesmag#bluegreenyellow#lovelydeadcrap#shore#wickedpissahpics#eye_for_earth#wizardsoftones#iphone7plus#skyporn#nofilterneeded#weathered#fingerprintofgod#photography#tv_living#tv_trees#tv_aqua#transfer_visions#picture_to_keep#splendid_horizon#horizon#ig_ag#marsh#nofilter#coast#sooc#goldenisles
0 notes
Text
In this post, I demonstrate my monochrome conversion process and how it integrates into the (almost) exclusively monochrome workflow I outlined in my last blog post. It looks pretty convoluted at first, as it involves 4-5 different apps/extensions, but it is pretty straightforward once you get used to it. Read on to learn more.
Workflow overview
To recap: In my last post I demonstrated how I use my camera’s settings and monochrome import presets in Lightroom to eliminate all possibly distracting color from my shooting and editing (editing as in culling and organizing) process. I said the images created so far were only first drafts. This intermediate step helps me to find and define the direction I want to take the image into, for example, whether it is going to be a high or a low key image or where in the zone system I’d like to put certain areas of the image. Now, I’d like to show you how I take these first drafts to the final monochrome image. Ironically, the first step is going back to the color version and start from scratch.
My workflow involves several steps in different apps or extensions:
Initial tonal enhancement in Lightroom
If necessary, noise reduction in Nik Define 2
Further tonal enhancements and sharpening with Lumenzia
Monochrome conversion in Nik Silver Efex 2
Final touches in Lightroom
Even though it may be possible to achieve similar results with fewer apps and steps, I find it easier and faster this way because I can use some semi-automatic features of the apps/extensions to speed up my work while still retaining complete artistic and technical control. Now, let’s dive into the individual steps.
Step 1: Initial tonal and perspective corrections in Lightroom
So, let’s work on this image which is a pretty minimal photograph of a corner and a shadow cast by the bright sunlight. The image you see here is the first draft I created in Lightroom.
The initial monochrome conversion created in LR automatically during import.
It is evident that this is no way near the way I want to look the image in the end. However, seeing this version is very helpful because with no colors distracting me, it is much easier for me to make decisions for the next steps.
I want the sky to be very dark, and the faint clouds should remain very weak. I also would like to establish three zones in the white walls. The very bright part on the right should continue to be the brightest, the shadow on the same wall should be the darkest area, and the wall on the left should be somewhere in between. The walls’ texture should be prominent but not too obtrusive. All in all, I want this image to have more of a high key feel.
Up to this point, I haven’t seen the color RAW file at all. The first step now is to create a new virtual copy and click on Reset in the develop module.
This is the image SooC.
If I have done any perspective or lens correction in the first draft mono version, just copy and paste those settings to the new color version. After this is done, I go to the Curves Panel and set the black and the white points so that it edges on being overexposed on the highlights or underexposed in the shadows. If necessary, I also use the HSL section to make the colors more pronounced. This is usually very helpful for the monochrome conversion.
After the tonal corrections, the photo may look a little too contrasty and oversaturated. Keep in mind, however, that the adjustments our goal is not to create a good color photograph but to prepare the photo for the upcoming monochrome conversion.
I usually don’t fix sensor spots yet because it usually leaves very subtle traces which might turn up later when I work on the contrast in Silver Efex Pro 2 and are then much harder to remove.
After these initial steps, I hand the image over to Photoshop for further processing.
Step 2: Further image refinement before the monochrome conversion
In this phase of my workflow, I apply noise reduction for high ISO photographs, make some semi-automatic contrast corrections using Lumenzia and sharpen the image, again using Lumenzia’s interface for high pass sharpening. This particular image was shot at ISO 100, so it doesn’t need any noise reduction. We can move straight to enhancing the contrast. With Lumenzia, the luminosity masking panel by Greg Benz, you can (among other things) quickly make selections based on the luminance of each pixel.
The Lumenzia Panel by Greg Benz
For example, if I click on L for Light, Lumenzia will create a mask preview which selects all the brighter pixels, but not the darker ones. The brighter the mask, the more intense the selection will be. Gray areas are selected to a lesser degree and dark areas are not selected at all.
It may look like a black&white image, but it is the Lumenzia preview of the L luminosity mask.
With this mask preview active, I click on Contrast in the Lumenzia panel. Lumenzia now analyzes the image, creates a custom tone curve, and then applies the active mask preview on the curve as a mask.
In this screenshot, you can see the tonal curve Lumenzia has created and applied on a new layer using an L luminosity mask.
I then do the same with the D luminosity mask which selects all the darker pixels and then click on contrast again. Please note that the L and D curves look very different.
The D luminosity mask preview.
The Contrast correction using the custom curve layer and the D luminosity mask.
The beauty of this solution is that I retain full control. For instance, if I think that Lumenzia crushed the blacks too much, I can go to the curve adjust it accordingly.
The image before…
… and after the tonal correction using Lumenzia.
As you can see, the difference is quite subtle. The processed photo definitely looks enhanced, but not overcooked.
The sharpening process is a standard high pass sharpening which is made easy by Lumenzia’s interface. All I have to do is select the area which I want to sharpen and then click on the corresponding button in the Lumenzia panel. In this image, I see no need to sharpen the sky. So, I make a selection of the building and click on Sharp in the Lumenzia panel.
The Lumenzia sharpening panel. For further detail how it works, please check the Lumenzia website.
I usually sharpen all tones and set a sharpening value of 1.5. Lumenzia creates the high pass sharpening layer for me. I usually go for the the “Vivid Light” blending mode to enhance the sharpening even further.
My settings for the High Pass filter. A radius of 1.5 usually works fine for me. Beware of the halos that might occur in the process
The sharpening layer and the blending mode. If you want the sharpening to be more subtle, then other blending modes worth trying here are Overlay, Soft Light, and Hard Light.
After this step, I flatten the image and convert it to a smart object which I then open in Nik Silver Efex Pro 2. Flattening the image keeps the file size small. After the working in Silver Efex, the layers are useless anyway.
Silver Efex greets us with its initial monochrome conversion.
The initial monochrome conversion in Nik Silver Efex Pro 2.
Step 3: Monochrome conversion in Silver Efex Pro 2
Nik Silver Efex Pro 2 is a powerful application in its own right. I will not go into every detail here but only explain the features that I need for processing our photograph. A good starting point is, of course, the preset tab on the left. If you find a preset there that more or less approximates your vision for the photo, then, by all means, go for it. I usually do. As for our image here, the “High Contrast (harsh)” preset takes us pretty close to where we want to go, so I click on it. The preset gives us this:
The High Contrast (harsh) preset applied.
The beauty of Silver Efex is that allows us to adjust the brightness and structure independently for the shadows, midtones, and highlights. This comes in really handy here. The bright part of the wall on the right is a bit too bright, so I move the Highlight Protection slider to about 50%. I also take down the Brightness (Shadows) slider to -32%. The bright part of the wall on the right still looks very bright, so I use some structure adjustments to see if there is any detail hidden in there. I set the Structure (Highlights) slider to 59%, and this indeed brings out quite a bit of detail. The structure in the darker parts of the image, however, is still too distracting for my taste, so I adjust the Structure (Midtones) slider to -99% and the Structure (Shadows) slider to -5%. Now the image looks like this:
The sliders we have used so far are marked red.
The histogram tells me that there are no clipped highlights, so I am good to go here. Usually, I might turn down the highlights even further. But I know that I will apply a vignette later in Lightroom which will darken the picture. So I keep it as it is and click “Ok” to send the image back to Photoshop. Here, I save the image and go back to Lightroom.
Final touches in Lightroom
In addition to the vignette, I also apply a very subtle sepia toning. The vignette introduces a noticeable but still subtle gradient to the image. Together with the toning, this helps to create a much softer look. I quite like the contrast between this softness and the harsh linear shapes in the image. As the very last step, I use the Spot Removal tool in Lightroom to remove the sensor dust spots. And voila, here is the image we just created together.
The final image
Conclusion
This concludes the demonstration of my (almost) monochrome workflow. I don’t claim that it is the best way in every situation, but it is the workflow that usually works best for me. Your mileage may vary. There are many alternatives on the way. For example, you could just as well add the vignette and the toning in Silver Efex. I prefer to do it in Lightroom because I tend to experiment with the vignette quite a bit. Sometimes I create my custom vignettes with a combination of Graduated Filters in Lightroom.
All these things are much quicker and more intuitive in Lightroom. You may think and decide differently. Sometimes, I have to add additional steps in Photoshop, for example, to remove halos that might have crept into the image while sharpening. These things vary from image to image. But apart from a variation here or there, this article pretty much completely covers the workflow of my black & white conversions.
Any thoughts, opinions, critique? Don’t hold back and write it down in the comment section below.
Free from colors II – my monochrome conversion workflow In this post, I demonstrate my monochrome conversion process and how it integrates into the (almost) exclusively monochrome workflow I outlined in my last blog post.
0 notes
Last Seen Blogs

unique-17
QUOTES

blues0ul
♚ King.

xiderast
Brain's Puke

francescatelford
What? That I’m A Lush With Expensive Taste?

inherent-eroticism-of-breadtube
Mouthfeel Awareness Campaign