#tuserace
Text
Hello!! A couple years ago I posted this tutorial for making gifs with a moving overlay effect. In the two and a half years since I made that tutorial, I've learned some new tricks for this gif effect but most importantly I've learned how to explain things better.
For that reason, I've created this new and improved tutorial for my overlay gif effect. The basics are the same but it's simpler, I go into more detail, give better explanations, and have more comprehensive instructions.
The easiest way to do this effect with this method is to use smart objects and work in timeline. For this tutorial, I’m assuming you know the basics of giffing like cropping, resizing, colouring, etc. If you need help with this I’d suggest you look at some other tutorials and guides!!
First, we’re going to start off with three things.
1. A completed gif converted into a smart object that is going to be the base gif. I'm going to call this "gif1". You’ll want this gif to be at least 3 seconds because it needs to last as long as the overlay plus a little bit of extra time in the beginning.
This is the base gif I’ll be using in the example (except I trimmed it so that I could meet the size limit).
2. A second completed gif converted into a smart object that is going to go over the base gif. We’re going to call this "gif2". This gif should be at least 2 seconds but I’ve made it work with shorter. Gif2 needs to be the same dimensions or bigger than gif1.
This is the gif I'll be using in the example (except I trimmed it so that I could meet the size limit).

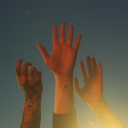
3. An overlay in video form. These can be found on tumblr and youtube by search for overlay or transition packs. For this example, I'll be using an ink drop overlay I found on youtube.
Step 1: Turning the overlay video into an overlay gif
Most overlays aren’t going to instantly fit the gif effect you’re trying to achieve right away. This is the overlay I got from youtube and as you can see it’s too slow and needs a crop/resize to be usable.

To fix it, I sped the frame rate up, cropped the overlay, and resized the overlay so it fits over my base gif. I also sharpened the overlay (500% amount, 0.3px radius) so that the edges were smooth. This is the new overlay gif and the one I’ll be using for the gif effect.

A tip: I also like to add a brightness/contrast layer to get rid of the grey on the overlay gif. Because we’re working with blending modes to achieve this effect, any parts of the overlay that are grey will be a blended mix of gif1 and gif2. If you think this will look good for your gif effect then don't worry about it!
Another tip: try to get the entire overlay movement to fit into a 2-3 second window. Anything longer than that will likely be cut off when you have to trim your gif to meet the upload size limit and it would suck to only have half of the overlay.
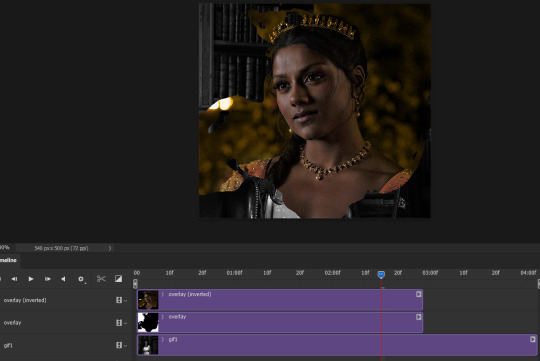
Step 2: Creating the gif effect
Drag a copy of gif2 and a copy of the overlay gif onto the gif1 canvas. I like to use Ctrl+Shift+V so that the layers are pasted in the same position as they were on the previous canvas. MAKE SURE that both overlay layers are in the same position on the canvas. If one of the overlay layers is higher/lower/etc. than the other then the effect won't work properly.
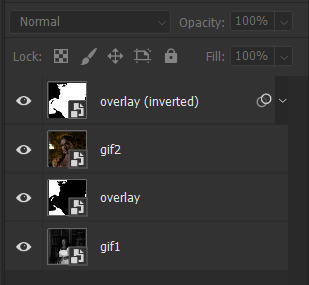
Then, make a second copy of the overlay and invert it (Ctrl+i). These are the layers you should have:

Before you go any further, trim gif2 and both overlay layers so they are all the same length.
Now, we need to rearrange the layers and set blending modes. The top layer should be whichever overlay goes from black to white. This is because when we change the blending modes, the white part of this layer will disappear and look like its being replaced by gif2. In this case, that is the overlay (inverted) layer. Then we want gif2, the other overlay layer, and then gif1.
A tip: this process can be done the other way where the top layer is the overlay that goes from white > black however, you are much more likely to have an error where there is a grey/black line around the overlay effect in your final gif. In order to avoid that, I always use the black > white layer on top.
Next, set the top overlay layer to darken. You should only see the black part from the overlay and gif2 should fill in the white part. Here’s how that looks in my example.
Next, select the top overlay layer and gif2 and convert both layers into one smart object. Your layers tab should look like this now.

Now, set the new layer’s blending mode to lighten and the overlay layer’s blending mode to darken. Once you do this, you should be able to see gif1 as well as the overlay gif.
Step 3: Timeline and exporting
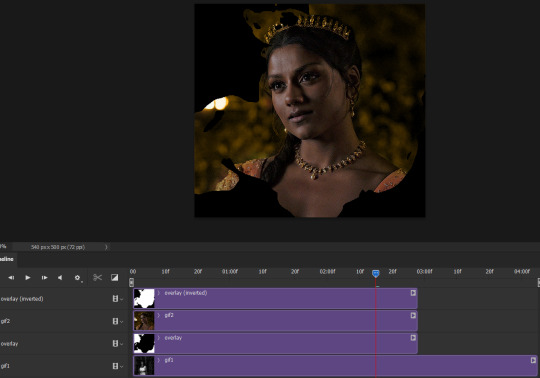
At the moment, gif1 is still significantly longer than the overlay gifs. Since this gif is just over 10 mb (which is pretty small for this effect) I’m going to trim about 1/4 of a second off the end of gif1 and then drag the overlay layers so they all end at the same time.

Now you’re free to export the gif! This is the finished effect for the example gif!

A tip: sometimes, when I convert to from timeline to frames, the gif becomes a little longer and slower. It has to do with different frame rates across the videos and photoshop but I'm not smart enough to understand it. If that happens, just set all the frames with the overlay layers to 0.04 speed instead of 0.05.
And we're finished! I hope that was helpful and made sense. If you have any questions feel free to drop them in my inbox or send me a message!! <3
#gif tutorial#allresources#completeresources#dailyresources#chaoticresources#ps tutorial#photoshop tutorial#usertreena#tuserssam#usernik#tuserabbie#tuserace#userk8#usershreyu#uservalentina#useryoshi#userannalise#userrobin#usersalty#uservivaldi
1K notes
·
View notes
Photo
JEONGHAN
Lionheart (original. SNSD) + Mansae / 160416
#so crusty but this file was even crustier and i just wanted to get it done and delete it anyway im always baffled when i see this perf 😭#seventeen#yoon jeonghan#jeonghan#svtsource#svtgifs#forsvt#kpopco#kpopedit#userngocchi#tuserace#emification#usersemily#hanatonin#tuserose#tuseral#ftsummer#creations
258 notes
·
View notes
Text
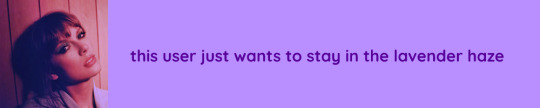

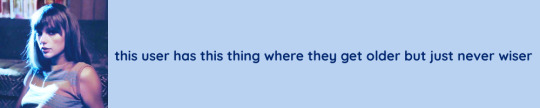

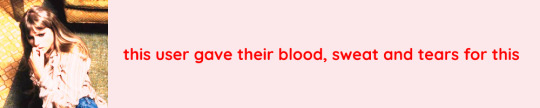
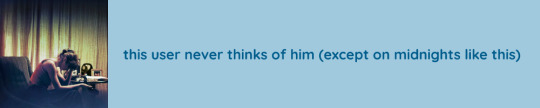


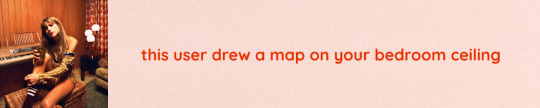
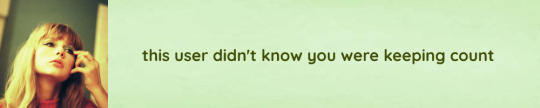

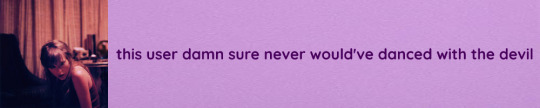

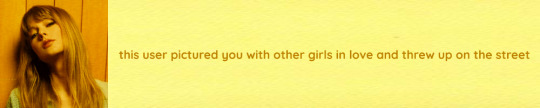
@lgbtqcreators creator challenge: colour
Midnights userboxes
(Hits Different lyric as requested by @andthatsromance 🤭)
#taylor swift#lgbtqcreators#tswiftedit#tsnation#tayloralisonswiftnetwork#networkthirteen#tscreators#usermanon#userauden#tuserheidi#userfern#tsuserbella#tuserecho#userkaylee#usercardigan#userkarina#userahne#userdean#newrcmantlcs#tuserace#taswifts#userpjo#cascadeoceanwave#paintedtaygolden#shirewalker#recklesspath#userjessica#midnights#magicaplin#my edit
285 notes
·
View notes
Photo

Nina Zenik
Shadow And Bone | 1.03 — “The Making at the Heart of the World”
#shadowandboneedit#sabedit#ninazenikedit#shadow and bone#uservalentina#userneve#userlyra#userfanni#userannalise#tuserace#userveniza#tuserems#nina zenik#s1#1x03#ours#by engy
444 notes
·
View notes
Text

you’ve got a smile that could light up this whole town
@taylorswift @taylornation
#taylor swift#taylor nation#taylurking#taylor#taylor on tumblr#midnights#midnights era#grammys#tuserace#tuserleah#tuserjohanna#under 4k
29 notes
·
View notes
Text

❝please never forget that the sun rises and sets with your smile. at least to me it does. you’re the only thing on this planet worth worshipping.❞
evelyn hugo and celia st. james in the seven husbands of evelyn hugo
@fictiondaily mission 4: dynamics
for @sharawheelers <3
#SECRET'S SPELLING IS WRONG FUCK ME#zoya**#user.ri#userrsun#tuserace#usersrev#tuserbeer#usermayclair#user.sunshine#useredie#lgbtqialitdaily#fictionnet#librarysource#storyseekers#userspages#literatureladies#chaptersnet#tshoehedit#evelynceliaedit#evelyncelia#tshoeh#the seven husbands of evelyn hugo#evelyn hugo#celia st james
134 notes
·
View notes
Note
Hi! Your gifs are so beautiful! May I ask what sharpening and coloring you used here? /post/683381398700261376/people-linked-by-destiny-will-always-find-each
hi hi!! tysm 🫶🏽 (referenced gifset) ! i used (an adjustment of) tana / @bill-weasley’s sharpening (linked here) ! mine was:
smart sharpen at 500 / 0.4, smart sharpen at 10 / 10.0, gaussian blur at 1.0 & 55% opacity, smart sharpen at 500 / 0.2, smart sharpen 5 / 5.0 & gaussian blur at 1.0 & 10% opacity
for the colouring i took some tips from drea / @sashafierce (her tutorial that i took inspo from linked here!) and used gradients set to screen and at an angle (i’ve provided an example + more in depth explanation under the cut!)
i start off with a plain gif that’s been brightened (& colour corrected if necessary)
generally i start off with 3 brightness layers, the first two set to screen and the third set to multiply, altering the opacity of the last two layers as needed per scene (as it can be a bit harsh) which leaves me with this (using the loml as my example):

then, to achieve the colourful parts, i use a gradient (not a gradient map) and angle the colour i want toward the focal point of the gif (for this gif i’ll use purple)
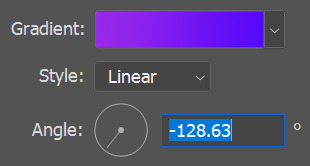
after that, i make the opacity of the colour i don’t want to show in the gif 0% and set it to white (sometimes black depending on which looks better it does actually make a difference which sounds fake i know)

which leaves me here:
which isn’t what i want, as it covers her face, so to counteract that, i add a stop in between the gradient start and end and make its opacity 0,

which pushes the colour further away from her face:
which is sm better! now it’s no longer on her face which is the goal :D the gradient layer is still set to normal, which (to me) looks a little flat, so i set it to screen, to give it some detail, which gives me this:

and i’m left with this!

i hope that helped!! pls don’t hesitate to ask if something i said didn’t make sense or if you need more clarification 💞
#tutorials#userpanda#usernums#usermills#usershreyu#supervalcsi#userstar#tuserheidi#usermorgan#usersole#tuserrex#usernanda#user.amara#agentplant#userrhoda#usercas#userlyra#arsenicpanda#tuserace#userkosmos#ig?? i didn’t really think it was anything special ty you’re so sweet 🥹🥹🥹#as you can probs tell i like parentheses so if they’re confusing that is my bad yeh#the gist is i see tutorials on my dash n skim then cause of 80hd and then i play around with the words i remember until i like the gif 👍🏽
85 notes
·
View notes
Text
New sideblog for fashion <3
@floralcorsets
#i just cant stop myself#someone please make me stop#usermanon#usermason#taswifts#tusermelissa#tuserace#tuserheidi#Uservivaldi#userfern#userauden#rogerhealey#user.amara#userhers#useranne#userkrupa#userrsun#userrobin#usermorgan#usershreyu#if i tagged u and ur thinking why or idc then im v sorry i was just tagging anyone i could think of off the top of my head <3
8 notes
·
View notes
Photo

all too well: the short film + letterboxd reviews
#tsedit#tswiftedit#tscreators#taylorswiftedit#taylor swift#tusermelissa#tuserace#userpau#userlex#usertreena#userrobin#userleah#userjuless#tusertheo#usertix#userhella#userannalise#*mine#10k
11K notes
·
View notes
Photo

You know, it could be you're working at it too hard. Maybe you should just take a break. But still, if I can’t fly... Then stop trying to. Take long walks, look at the scenery, doze off at noon. Don't do anything. And then suddenly, you'll be flying again. Maybe that’ll help. Trust me, it's gonna be fine. I promise.
KIKI’S DELIVERY SERVICE
1989 • dir. Hayao Miyazaki
#kds#studio ghibli#studioghibliedit#ghibliedit#ghiblifilm#dailyghibligifs#dailystudioghibli#animationsource#filmedit#chewieblog#usercandy#userlynn#tusermelissa#tuserace#underbetelgeuse#userreeshika#vivienvalentino#nyssalance#*#💛
13K notes
·
View notes
Photo
崖の上のポニョ – Ponyo on the Cliff by the Sea (2008)
dir. Hayao Miyazaki
#ghibliedit#animationedit#filmedit#filmgifs#usersugar#userk8#tuserace#usermarcy#usercas#userkosmos#usertreena#useryoshi#usersenka#dailyghibli#ponyo#gake no ue no ponyo#movies#*mine#ah yes my brand: the color yellow
5K notes
·
View notes
Photo

the handmaiden (2016)
dir. park chan-wook
#the handmaiden#filmedit#chewieblog#usertelevision#moviegifs#filmgifs#userfilm#uservee#userarina#tuserdana#userkd#underbetelgeuse#userlee#tuserdi#tuserace#usermarcy#gif#*#minimalistsource
7K notes
·
View notes
Photo


I love writing songs because I love preserving memories, like putting a picture frame around a feeling you once had. I like to use nostalgia as inspiration when I’m writing songs for the same reason I like to take photographs. I like to be able to remember the extremely good and extremely bad times. I want to remember the colour of the sweater, the temperature of the air, the creak of the floorboards, the time on the clock when your heart was stolen or shattered or healed or claimed forever. I thrive on the challenge of sprinkling personal mementos and shreds of reality into a genre of music that is universally known for being, well, universal.
HAPPY 32ND BIRTHDAY TO TAYLOR ALISON SWIFT (BORN 13TH DECEMBER, 1989)
#taylor swift#tswiftedit#tswiftgif#taylorswift#tscreators#useraashna#userjacinta#userleanne#userkaelyn#newrcmantlcs#tuserace#userleah#nessa007#*birthdayedit:taylor#*aedits#*mine:2021#*gifs#[ THIS IS SO BAD FAKJDLKJBLJ ]#[ anyways ! ]
6K notes
·
View notes
Text
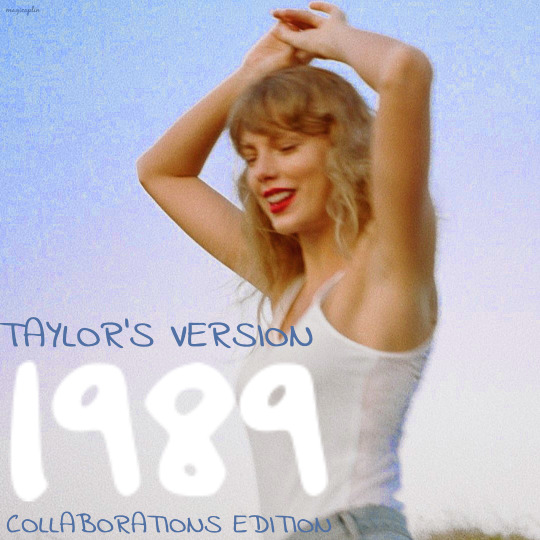

@lgbtqcreators creator challenge: album covers, free choice (music)
1989 (Taylor's Version) redesigned as a collaborations album
#taylor swift#tswiftedit#taylorswiftedit#tsedit#tscreators#candy swift#1989 (taylor's version)#usermanon#userrlucie#tuservalyria#userkarol#userkarolina#userjesslynn#tuserheidi#userauden#userfern#ajlook#cecilylook#tuserlana#userlex#userbabbie#useryoshi#userkrupa#tusercodi#tusermelissa#useraugustine#userkaelyn#tuserace#magicaplin#my edit
35 notes
·
View notes
Photo
the handmaiden (2016) + nature
dir. park chan-wook
#the handmaiden#filmedit#chewieblog#usertelevision#moviegifs#filmgifs#userfilm#dailyworldcinema#uservee#userarina#tuserdana#userkd#underbetelgeuse#tuserdi#tuserace#usermarcy#userlee#films#*senka#*
4K notes
·
View notes
Photo

FRIENDS (1994)
1.09 | The One Where Underdog Gets Away
#friendsedit#friendsdaily*#centralperksource#tvedit#sitcomedit#dailytvfilmgifs#userbbelcher#tuserace#usermarcy#usertreena#useralison#userrlucie#userlarri#friends#tv#cinematvedit#by char
2K notes
·
View notes
Last Seen Blogs
lillazi
Lillazi

darkd3mon
Unbetitelt

spiritofblackpanthershamans2
Spirit Of Black Panther Shamans

married-curious-male-in-sw-ohio
SW Ohio swingers