#Natural Aphid Repellent recipe
Text
Gardening Tip: Nasturtium Water (Natural Fertiliser and Aphid Repellent)

I always think one law of physics that works well in the kitchen is Lavoisier’s Law --“Nothing is lost, nothing is created; everything is transformed”-- which I mostly apply to leftovers! It works even better in the Kitchen Garden!
Think about it: Coffee Grounds repel slugs, and an Elder Leaf Decoction chases unwelcome rodents, whilst Nettle Soup and Onion Skin Decoction will help make your soil fertile; like Egg shells which can be used both outside or while caring for your house plants.
So can Nasturtium Water. It is the water you have blanched your Nasturtium leaves in, when making a delicious Nasturtium Pesto. Don’t throw it away (“Nothing is lost”!) Allow it to cool and then pour it in your watering can and water your plants with it.
You can also pour Nasturtium Water in a spray bottle and spritz it onto ferns in the house or in the garden, and onto growing carrots and Parsnips in the Kitchen Garden! It acts both as a fertiliser, helping your plants grow lush and green, and an aphid and white flies repellent, keeping your growing vegetables healthy!
#Nasturtium Water#Gardening Tip#Gardening Tips#Gardening#Growing Tip#Growing Tips#Growing#Growing and Gardening#Natural Fertiliser#Natural Fertiliser recipe#Natural Aphid Repellent#Natural Aphid Repellent recipe#Fertiliser#Aphid Repellent#Growing Plants#Growing Vegetables#Kitchen Garden#House Plants#Plants#Plant Care
48 notes
·
View notes
Text
The Surprising Benefits of Using Citrus Peels in Your Garden: Natural Fertilizer and Pest Repellent

Pests are probably one of the worst things a home gardener can experience! Sadly, it’s an unavoidable situation for most gardeners but doesn’t worry - we’ve got a hack that’s got you covered! If you’ve got any citrus peels from your kitchen, don’t toss them out and add these instead to your garden soil. Simply scatter the peels around the base of your plants and let its delicate sour scent do the trick with the pests. It may not be as effective as using chemical pesticides but it’s natural, cheap, and easy to do. Citrus peels are not just waste material to be discarded. They actually have a multitude of uses beyond just adding flavor to your favorite dishes or brightening up your cocktails. In fact, they can be a valuable resource in your garden, serving as an effective fertilizer and pest repellant. I discovered this surprising benefit after accidentally leaving some orange peels in my garden bed, only to find a significant improvement in the health and vitality of my plants. As a natural fertilizer, citrus peels provide essential nutrients that plants need to thrive. The peels are rich in nitrogen, phosphorus, potassium, calcium, and magnesium, which are all vital for healthy plant growth. Simply chop the peels into small pieces and sprinkle them around the base of your plants or add them to your compost pile. Over time, the peels will break down, releasing their nutrients into the soil. Not only do citrus peels nourish your plants, but they also act as a powerful pest repellant. The strong scent of citrus oils found in the peels repels common garden pests such as ants, aphids, and snails. To use citrus peels as a pest deterrent, scatter them around your garden or place them near vulnerable plants. This natural method of pest control is not only effective but also safe for the environment and your plants. It's important to note that while citrus peels are beneficial for most plants, some varieties may be sensitive to the acidity of the peels. If you have acid-sensitive plants, it's best to avoid using citrus peels directly on them. Instead, consider adding the peels to your compost pile and using the resulting compost as a nutrient-rich soil amendment for your garden. In addition to their practical uses, citrus peels can also serve as a source of inspiration for creative projects. From making homemade citrus-infused cleaning solutions to crafting aromatic potpourri, the possibilities are endless. Explore different ways to utilize citrus peels and unleash your creativity while making the most of this natural resource. So next time you enjoy a juicy orange or squeeze fresh lemon juice into your recipes, think twice before throwing away those peels! Embrace their potential as a fertilizer and pest repellant, and witness the transformation in your garden. **Remember, nature always provides us with hidden gems, and it's our duty to explore and appreciate them.** So, grab those citrus peels and give your plants the boost they deserve. And who knows, you might even discover a newfound passion for gardening along the way. If you want to delve deeper into the world of citrus peels and their incredible benefits, check out this article from Gardening Insights. It offers more in-depth information, tips, and tricks for using citrus peels to enhance your gardening experience. Happy gardening! Learn more about gardening with Taim.io!
0 notes
Text
Medicinal Plants from our garden
Yarrow – The Backyard Wound Healer
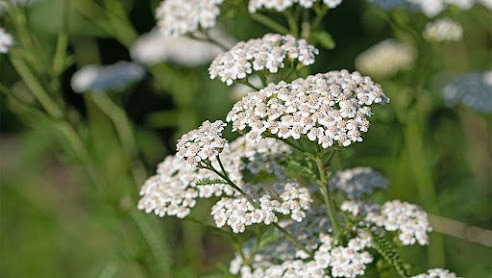
Yarrow – The Backyard Wound Healer
We always want to have a quick and reliable way to stop a wound from bleeding and help prevent infection. Yarrow does both, I accidentally cut my hand while gutting a fish. The wound was very deep and most likely would have gotten infected since I had no antibiotics with me.
Luckily, I found some yarrow and wrapped it around the wound. The bleeding stopped in minutes, and my wound healed so well that now there’s barely a scar left. Since then, I always carry a pouch of dried yarrow with me, just in case. A yarrow tincture, when applied to your skin, acts as a natural and effective way to repel mosquitos and other insects.
Quick Backyard Remedy
If you ever get a toothache, try chewing on a fresh yarrow leaf as it will numb the area and provide needed relief.
Garden Uses
The beautiful yarrow flowers attract beneficial insects like bees and ladybugs, which eat aphids and other pests and also help pollinate your plants.
Recipes and uses for Yarrow plant
Infused Yarrow Oil for Swelling and Varicose Veins; Stop Bleeding Poultice; Yarrow Tincture for Burns, Cuts, Bruises, and Insect Bites; Yarrow Salve for Old Scars; Yarrow Elixir for Menstrual Cramps and Heartburn; Yarrow Tea for Digestive Upsets
0 notes
Text
Garden pests make otherwise enjoyable gardening frustrating. Whether it’s snails taking over your lettuce or aphids sucking on your roses, a pest infestation is definitely disappointing, but it’s not a reason to reach for harmful, toxic sprays. The sprays might eliminate the pesky culprits, but they are harmful to you and the environment. Instead, try whipping up one of these simple recipes with ingredients you most likely have on hand.
What You Need
Spray bottles
Biodegradable liquid dish soap
Lemon or orange essential oil
Cooking oil
Baking soda
Garlic
Chili powder
water
Natural Insecticidal Soap Spray
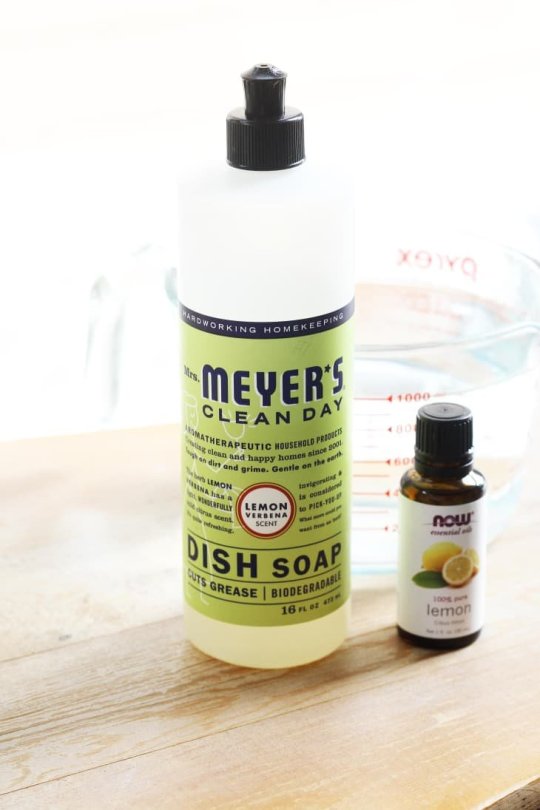
This soap is easy to make and good keep on hand, since it should take care of most of those annoying common pests such as aphids, mites, white flies, thrips, and mealy bugs. It kills them by attacking them at the skin, suffocating and therefore eliminating them. Add a few drops of orange or lemon essential oil—a natural insecticide especially effective against ants and scale-to help the the spray stick to your plants.

In a spray bottle, combine:
1 1/2 tablespoons of liquid soap
1 quart of water
A couple drops of orange or lemon essential oil
Use a biodegradable liquid soap (such as Murphy’s oil soap, castile soap, or Mrs. Meyer’s), to make the mixture. Once combined, shake well. Spray your plant thoroughly, making sure you cover the underside of the leaves as well.
All-Purpose Garlic Chili Spray
Pepper and garlic are both natural insect repellents and will help to repel Japanese beetles, borers, leafhoppers, and slugs. Garlic also deters larger pests such as deer and rabbits.

In a bowl with a spout, combine:
Natural Insecticidal Soap Spray (from recipe above)
1 tablespoon of chili powder (you could also use fresh or dried hot peppers)
5 cloves of garlic, crushed and cut roughly
Allow garlic and chili powder to steep overnight. Strain and pour into a spray bottle. Keep for up to two weeks.

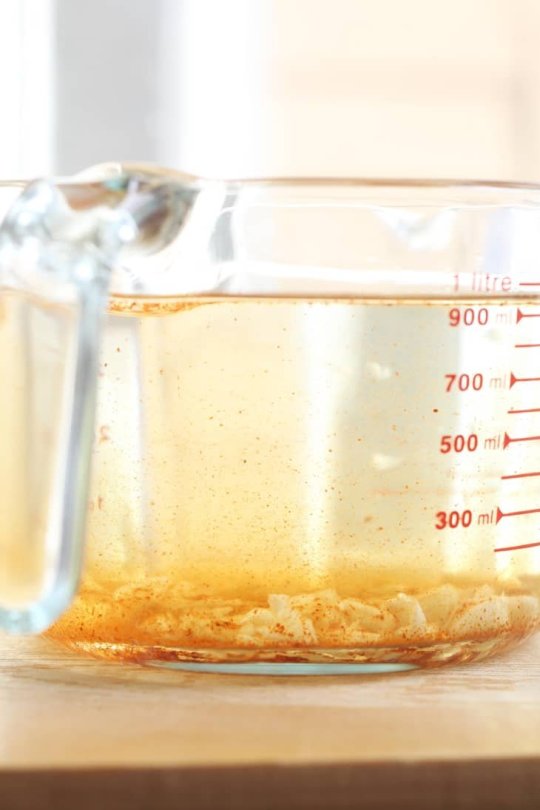
Antifungal Spray

This spray is great for treating plants with fungal diseases. There is nothing quite as frustrating as discovering your plant has an unsightly case of mildew, a type of fungal disease. Suddenly your beautiful green cucumber and squash leaves are covered in patches of grayish-white blotches.

You will need:
1 tablespoon of baking soda
1/2 tablespoon of oil
2 quarts of warm water
Add baking soda and oil to a cup of warm water and stir until the soda dissolves. Mix in the rest of the water. Before attempting to spray and treat your plant, first remove the most severely damaged leaves. Then spray your solution, repeating every few days until it disappears. This mixture is best made and used immediately.
Snail & Slug Bath

Photo by Image credit: Ashley Poskin
Got snails? Simply nestle a small dish or cup of beer in your garden near your snail- and slug-attracting plants. The snails, attracted to the yeast in beer, will take a dip in the libations and slide off into a drunken oblivion. Place the beer in a shaded spot to keep it from evaporating.
It’s best to spray your plants in the morning before the sun is too hot, or else you run the risk of burning the leaves of your plant. And while these spray are non-toxic and less harmful than commercial pesticides, they will kill beneficial bugs along with the harmful ones. Please use sprays sparingly, only treating infected and infested plants.
#gardening#natural gardening#Earth Day 2023#natural pesticides#How To Make Natural Garden Pesticides#chemical free gardening
0 notes
Photo
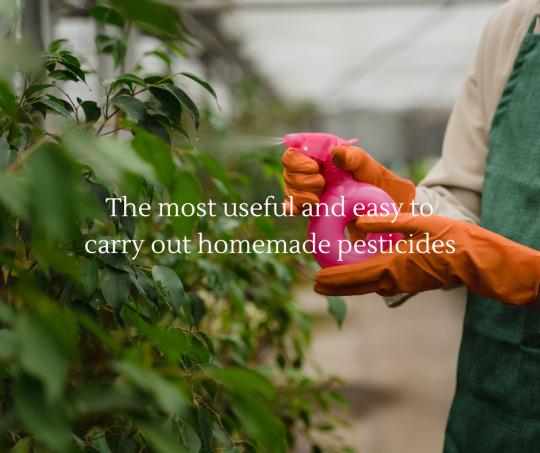
The most useful and easy to carry out homemade pesticides
If you have some plants in your house, surely on some occasion you had a battle with an insect that began to attack them. Most likely, to solve this problem you have chosen to go buy some pesticide at the nursery. Surely you managed to kill all the insects that attacked your plants, but at what cost?
The most common pesticides on the market have a large number of chemicals in their formulas, which are toxic to insects but also to you. On the other hand, you should also keep in mind that by applying these insecticides you will not only kill the pest, but you will also be killing other insects, and some of them can be beneficial. So the balance of the environment is broken, something that can end up being even more harmful than the plague itself.
If you want to combat pests in your garden in a more natural way, without resorting to chemical insecticides, in this post I will leave you with the most useful and easy to carry out homemade pesticides.
1. Garlic-based spray
The characteristics of garlic make it a very good repellent for various types of insects, a couple of days ago I used it in my garden to combat armyworms. In a very simple way you can prepare a garlic-based spray, you just have to crush a head of garlic in the blender, along with two glasses of water until you get a homogeneous mixture.
Once the grinding is done, you must let it rest for 24 hours and then dissolve it in 3 liters of water. And that's it, you can place it in a container with a spray bottle and vaporize this solution on the plants. You will see how the insects will begin to avoid these plants.
2. Tomato based repellent
Tomato leaves are rich in alkaloids, an excellent repellent for aphids, worms and caterpillars. You can prepare an insecticide that will work as an insect repellant by carrying out the following recipe.
Fill two cups with chopped tomato leaves and add water. Let stand at least one night and dilute the mixture in two glasses of water. Once this is done, you can start using it on your plants. Please note that you should keep this away from pets because it can be toxic to them.
3. Homemade insecticides with tobacco
Another plant from which a very effective homemade insecticide can be made is tobacco. It will be useful to fight insects thanks to the nicotine in the leaves, which is toxic to many insects. Follow these steps to prepare the tobacco-based insecticide:
- Stores several cigarette butts. - When you have about 10 or 15 butts put them to soak in half a liter of water. - Let the mixture rest in a container for two days. - Filter the mixture by passing it through a fine sieve. - Place in the diffuser and apply.
4. Homemade insecticides with milk
Due to the lactic acid that milk contains, it can be used to prepare a very good insecticide to combat mites and as a fungicidal method. Also at the same time the mineral salts will enrich the soil. The steps to follow to prepare this insecticide are as follows:
- Mix ½ cup of buttermilk with 12-13 liters of water. - Mix with 3 ½ cups of wheat flour. - Put it in the diffuser and apply it to the plants in the form of a spray.

5. Repellent made with lavender
If you are having problems with ants in your garden, lavender is a plant with which you can prepare a very good repellent for these annoying insects. You just have to make an infusion with 300 grams of fresh lavender leaves with 1 liter of water. Let cool and spray on affected plants.
6. Vegetable oil-based insecticide
Undoubtedly, aphids, mealybugs, mites or caterpillars are four of the most annoying and damaging insects in any garden. Let's see how to prepare an insecticide based on vegetable oil to combat them naturally.
You must mix 2 cups of vegetable oil with half a cup of pure liquid soap, shake until a white mixture remains, dilute it in water and spray it with a spray. It is best to apply it in the morning or in the afternoon when the sun's rays are less intense, as long as the temperature does not exceed 30 °C. This will make the insecticide more effective.
7. Egg shell repellent
To end this list of homemade insecticides, I leave you one to make based on eggshells. I have left it for last because it is undoubtedly the easiest of all to prepare.
You just have to crush the egg shells very well and apply this powder at the base of the plants. This will work great for repelling snails, slugs, and some caterpillars. At the same time it will work as a very good fertilizer.
I hope you can get useful information from this post and that in this way you can combat many of the garden pests in an ecological and economic way. ;)
0 notes
Text
10 Reasons to Grow Thyme
1. Thyme is a low maintenance hardy perennial. Thyme thrives in dry and rocky areas, helps with soil erosion, and can withstand drought and freezing temperatures easily. It also grows well in a pot, whether indoors or out!
2. Thyme attracts pollinators. It's beautiful white, pink, or light purple flowers makes them attractive to many pollinators: bumblebees, honey bees, mason bees, and leafcutter bees all love thyme plants.
3. Thyme naturally repels pests. Lacewings love to lay their eggs on the leaves of thyme plants, and lacewings eat all kinds of garden pests like aphids, cabbage moth caterpillars, and whiteflies. Thyme essential oil also repels mosquitoes and ticks when applied topically.
4. Thyme pairs well with savory flavors. It can act as a backdrop or the star flavor in a recipe. Thyme goes well with lots of foods, I personally love it with mushrooms like chanterelles!
5. Thyme can be used in sweet baked goods. Thyme's citus-like herby flavor pairs naturally with sweet ingredients. It has just enough flavor to brighten up baked goods, especially in dessert recipes with lemon.
6. Thyme supports the immune system. Thyme is an excellent source of vitamin C and vitamin A, both of which play a critical role in immune function.
7. Thyme promotes healthy digestion. Thyme has long been recognized for it's ability to promote healthy digestion and appetite as well as counteract gas, diarrhea, nausea, and colic.
8. Thyme is antimicrobial and antifungal. Thyme is a natural source of thymol, a chemical compound with strong antiseptic properties. When combined with a carrier oil, thyme essential oil can treat common fungal growths like athelete's foot and ringworm.
9. Thyme soothes sore throats and coughs. Thyme has natural antispasmodic and bronchodilator properties and is excellent for soothing persistent coughs.
10. Thyme is good for oral health. Historically thyme has been used to treat symptoms of gingivitis, tooth decay, and plaque formation. Many commercial mouthwashes already contain thymol!
Keep Reading: https://www.growforagecookferment.com/benefits-of-thyme/
#herbal#herbal remedy#herbalism#gardening#homestead#homesteading#cottagecore#solarpunk#gardencore#cottage witch#green witch#plant medicine#thyme
1K notes
·
View notes
Text
Natural Bug Repellents
There are plenty of safe oils to place around the house and on your body that repel bugs. Here are a few of the best:
Citronella- repels mosquitoes and fleas
Tea Tree- repels fleas and fruit flies
Lavender- repels mosquitoes, bed bugs, lice, spiders, ticks, and fleas.
Grapefruit- repels ticks
Lemon Grass- chiggers, fleas, fruit flies, mosquitoes, and ticks
Cinnamon- wasps, ear wigs, spiders, bed bugs, and silver fish
Peppermint- ants, aphids, bed bugs , cockroaches, moths, spiders, head lice, fruit flies, and stink bugs
Geranium- found in some of the best known top brand repellents. Repels ticks, mosquitos, and flies. My favorite scent also found in my all natural deoderant by KOPARI.
Oil Of Lemon Eucalyptus- found to be the strongest mosquito repellent. Also repels fruit flies and fleas.
Recepies:
6 drops to every 3 oz of water equals 3% dilution and 3 drops for every 2 tsp equals 1% dilution.
Body Repellent Spray-
A safe dilution percents for skin is about 1%percent for a daily body spray.Add :
•2 cups of water
•60 drops of lavender oil,
•Half a cup of witch hazel or 1 tbsp of vodka for a strong repellent. However feel free to skip out on whitchhazel/vodka for a more gentle spray . Or add less. If dryness= irritation still occurs decrease amount of drops per 2 tsp and or 3 oz’s.
•One tsp of vegetable glycerin for a minimal hydrating effect .
House Repellent Spray-
Add :
• 1.5 cups of water
•30 drops of geranium
• 30 drops of lavender
•30 drops of lemon grass
•half a cup of witch hazel.
This recipe isn’t diluted enough for skin use.
Bug Repellant Bath-
Add:
• full tub of water
• 0.25% of a bottle of tea tree oil and or any oil of your choice. I like to use geranium oil.
These oils have many other benefits on the skin other than repelling bugs. Here are my 4 favorite essential oils and their benefits:
Tea Tre Oil- clears acne, treats dry skin and eczema, combats oily skin reducing sebum production, an anti-inflammatory, heals wounds/ infections/ cuts, treats dandruff.
Lavender Oil- reducess redness/ acne scars/ blotchy patches, an anti-inflammatory, heals skin irritation and redness from sun exposure/ insect bites, kills bacteria.
Geranium Oil- eliminates dead cells, tighten skin, promote regeneration of new skin, and diminish signs of aging. Used medicinally, it works as an anti-inflammatory and anti-septic agent.
Grapefruit Oil- reduced blood pressure and stress levels, suppressed appetite, stimulates the break down of fat, balances mood and decreases anxiety ( lavender oil and geranium does as well), has antibacterial and antimicrobial effects, treats acne.
Tips:
-All essential oils need to be diluted before applying to skin. Can be diluted by adding water, lotion, creams, and or a carrier oil.
-Some essential oils( especially citrus oils) can cause photosensitivity and burning(if irritation occurs- add less drops.
-It’s best to test when using any essential oil and or DIY recipe, on a small area of skin. Typically on a small area of the arm or neck before applying to your face or most sensitive areas of your skin.
- Consult a doctor if pregnant before using any essential oil.
- Essential oils can have different effects on pets. Weather it is applied or is just the scent, some may cause negative effects on specific animals.
- NEVER ingest essential oils. Buy an approved safe/ organic/ vegan product that contains essential oils and or cunsult a doctor on DIY ingredients. Also consult a doctor before ingesting products with specific essential oils . It may have negative effects on your body given many factors such as pregnancy.Tip- some vegan products contain harmful chemicals that hurt the environment and possibly your body. So make sure to investigate the ingredients.
You can mix and match essential oils in each recipe to repel different types of bugs. In my opinion it’s best to use one or 2 (and 3 if your pushing it )oil types in each recepie as to not mess up the smell of the oil, if it’s the scent that scares them away then you don’t want to change it by mixing too many scents creating a whole new scent all together ( this is just a theory of mine). I’m not too sure what it is exactly about the oils that scare them away. I feel that using too many scent may mess up the initial scent of each oil.
#all natural skincare#skincare blogger#health#all natural#natural oils#tea tree oil#lavender oil#skincare treatment#acne treatment#skincarecommunity#all natural bug repellant#bug repellant#all natural oils#beauty treatments#DIY bug repellant#diy skincare#diy recipe#skincare products#beauty blogger#oils to treat acne#anti wrinkle#skin hydration#how to get rid of acne#acne prevention#skincare tips#beauty tips#geranium oil#essential oils#beauty products
9 notes
·
View notes
Text
Permaculture & Three Sisters Stew
Admittedly, I know very little about permaculture (the effort to plant gardens in a way similar to how plants would grow in nature thereby increasing the sustainability and self-sufficiency of gardens) and companion planting (planting plants that benefit each other next to each other so that they can grow symbiotically together). But as DH and I begin to plan our summer garden, we’ve been reading up on how to increase the productivity of our garden all while growing organically. This is where permaculture and companion planting come in and why I just ordered a stack of books from our local library on how to do it right.
Of course, as was often the case before the industrial revolution took hold of our senses and we began to forget we actually knew how to live with nature instead of forcing ourselves onto it, our ancestors knew how to plant productive gardens without pesticides and fertilizers. Case in point are the “Three Sisters,” a name for three of the main agricultural crops grown by Native American groups throughout North America for centuries. The “Three Sisters” are composed of three companion plants: maize (corn), squash and climbing beans (often Lima beans today). The genius of growing them together is that they all benefit each other so that artificial pesticides and fertilizers aren’t necessary.
The beans’ nitrogen-fixing naturally enriches the soil, while their spiraling vines help to support the corns stalks against strong winds. The corn provides a pole for the beans to climb up. The squash, with its large leaves and prickly stems, helps to shade the soil to prevent undue evaporation and irritates the noses of would-be garden marauders like raccoons looking for an easy snack. Genius, like I said.
And companion planting doesn’t end there. There are whole charts and books to help you discover which plants to plant where in your garden to add certain nutrients to the soil, increase shade, repel pests like aphids and slugs and more! For those of you planning out your own organic gardens this winter, I highly recommend doing a bit of companion planting and permaculture reading.
Which leads us to this lovely Three Sisters Stew, which I made because I was SO. DARN. EXCITED. about learning about companion planting. (The recipe is based on this one.)
Ingredients:
2 cups Lima beans (I can only ever find these frozen)
1 red bell pepper, diced
1 green bell pepper, diced
2 cups corn kernels
2 cups diced eggplant
2 cups diced tomatoes
1 yellow squash, diced
1 zucchini, diced
Olive oil to coat the pan
3 to 5 cloves of garlic (depending on how much you like garlic)
1 cup diced onion
1/2 cup fresh parsley
1 teaspoon smoked paprika
Salt and pepper to taste
Add the olive oil, onion and garlic to a large pot and cook until onion turns translucent. Add the rest of the vegetables (minus parsley) and enough water (or vegetable broth) to roughly halfway cover the vegetables (four to five cups). Season with paprika, salt and pepper and allow to simmer for roughly 30 minutes until the vegetables are cooked through (but not too soft). Stir in fresh parsley and serve with bread or cornbread.

Squash, corn and lima beans... companion planting (and eating) at its finest.
#zerowastehomestead#homesteading#zerowaste#organic#organicgardening#cooking#homecooking#recipe#howto#food#healthyfood#threesisters#permaculture#garden#gardening#companionplanting#plants#vegetables#eatyourvegetables#smoked paprika
19 notes
·
View notes
Text
Pest Control - Questions
It may take a couple of days to function, but it will eventually kill the bugs in your house, and also maintain future bugs at bay. Diatomaceous planet can be effective at eliminating ants, crawlers, and also even bed bugs. 5. Less Water It appears too easy, yet if you've obtained small little gnats flying around your residence, your plants can be the trouble.
An easy method to obtain rid of these tiny pests is to let your plants entirely dry out on the surface area prior to watering. Make sure your plants have excellent water drainage, and cleanse up any type of standing water.
To catch fruit flies or gnats, put apple cider vinegar in the container. If you do not have a substantial populace of the little flies in your residence, utilizing this trap for a few days can care for the trouble. For roaches, load the bottom of the container with soapy water.
If a wasp made it's method in your residence, or they are ruining your barbecue, put some honey or other wonderful right into the trap to attract them. How do http://www.brownbook.net/business/44599598/natural-pest-solutions ward off pests naturally? Like this post? Pin it!.
Think of waiting throughout the day to consume your much-loved recipe, just to locate that pesky ants have actually reached it first! Bid farewell to your kitchen area bug woes as we have actually assembled a list of all-natural remedies on exactly how to get rid of little insects in the cooking area, in specific, exactly how to kill tiny ants in the cooking area.
Have you saw that small pests, particularly ants are extra attracted to wonderful things? Termite inspection Apache Junction up, most insects are averse to the odor as well as preference of salt. So the following time you are wondering exactly how to get rid of little insects in the cooking area, dissolve some salt in water as well as spray it on surfaces and also corners of your house that are likely to bring in pests.
When it involves your kitchen, vinegar is your finest pal. Not just does it get eliminate persistent discolorations and help keep your kitchen area spick-and-span, it features high on getting rid of small insects in the cooking area. If you have been seeking natural means on how to eliminate little ants in the cooking area, make a 50% option of vinegar as well as spray everything over your house.
Resource: Chalk is a wonderful idea to repel bugs from your kitchen! If you are having problem with an ant problem as well as are unclear of just how to kill little ants in the cooking area, wipe your counters tidy every morning, as well as use chalk or traditional Lakshman Rekha while they are still wet.
If you are looking for a straightforward Do It Yourself technique on exactly how to eliminate little bugs in the cooking area, cinnamon and cloves are the ideal option. The little bugs or ants can not stand the strong smell, so you can likewise locate services that feature vital cinnamon or clove oils.
We call them pests for a factor, specifically when it comes to plants. The pesky little pests that live and feed upon the fallen leaves of your plants are aggravating, as well as they can do serious damages, too. There are means to rid your plants interior and exterior of aphids, mites as well as other creepy, crawly or flying pests without using chemicals.

As a grown-up fly, they are harmless to you and also the plant however can become a nuisance as they hum around your space. Exactly how to do away with these pests: Dry out their environment by letting the leading two inches of dirt desiccate totally in between waterings. Water your plant from the saucer and also remove the water after an hour or two.
1 note
·
View note
Text
Insightful Guide On How To Grow Cilantro Effectively HandyGuyPros
If you’re keen on cooking with Cilantro in every recipe, you may feel irritated or uncomfortable when there’s no Cilantro left in the kitchen. If you grow Cilantro by yourself, you do not need to go straight ahead to the supermarket and take some.The good news that growing them is not tricky. But what is the best way to grow Cilantro? Our post today will help you much in gaining an understanding of how to grow Cilantro with seeming ease.
How To Grow Cilantro Indoors?
Growing Cilantro indoors is the best alternative in case you do not have a garden. All you need is a big-sized pot and a bright windowsill.
Bear in mind that the Cilantro needs full sunlight for at least 4 hours per day. The indoor Cilantro in pots could not access as much root space to absorb the soil nutrients as outside-growing ones. Hence, provide a generous-sized pot with drainage holes to aid them in thriving development.
Draw attention to the soil moisture level and ensure it is still damp. Don’t overwater or let the soil too dry.
Beyond that, the Cilantro will benefit from an adequate amount of liquid fertilizer so that you could consider the suitable adding time.
In the next sections, let’s dive into some easy ways to grow Cilantro from seed, cuttings and in pots.
How To Grow Cilantro From Seed
Growing Cilantro from seed can ensure a quick, reliable, and effective crop. Give the top priority in sowing seeds at the right time since the Cilantro could not thrive in summer’s hot weather. Yet how to grow cilantro seeds with seeming ease?
Conventional wisdom recommends sowing Cilantro seeds in early fall and spring instead of hot and dry weather. On top of that, Cilantro dislikes the transplanted method, so you need to sow its seeds directly into garden soil.
Providing the mild sold nourished with compost and manure in advance to prevent the seeds from drying out and boost the bolting speed. Also, well-drained neutral to acid soil is the best condition for sowing Cilantro seeds.
Be mindful that the Cilantro prefers light shade to the full sun as small plants are vulnerable and prone to scorching. Hence, sow the seeds in a pot and put them into a shaded area.
Start sowing the seeds thinly in the shallow drills about 7-8 inches apart. Then you can cover them with a fine layer of soil. Maintain the soil moist yet avoiding waterlogging. It takes about 1-3 weeks for the Cilantro seeds to germinate.
Continue thinning the emerged seedling out about 3-4 inches apart, even double this distance if you want the Cilantro to go to seed. Resembling other herbs, Cilantro needs pinching out to generate a bushier plant.
How To Grow Cilantro From Cuttings
Is growing Cilantro from cuttings thorny? The answer is No, and it’s relatively easy compared to planting Cilantro from seed. Albeit efficiency, this way only does the trick with cuttings.
First and foremost, after using all cilantro leaves for your cooking recipes, save 10-15 of their stems and trim them to about 3 inches in length.
Then, insert the cuttings into the soil, notice to space them around 3 inches apart, and well-drain the potting compost. Place these new cuttings plants in a partially sunny area, and maintain the soil moist throughout the process.
After several weeks, you can find these cuttings have rooted and grown like normal plants.
Another way is to put all stem cuttings into a water glass. When their roots develop to an inch, transfer them to a pot and continue taking care of them.
How To Grow Cilantro In A Pot?
In addition to growing from seed and cuttings, planting Cilantro in pots is such an interesting way that you should try out.
Have you ever tried out growing Cilantro in pots? It’s such a fabulous way to create a patio herb garden. As aforementioned, cilantro plants are sensitive to intensive heat, so you should move all pots into the shade.
A deep and large pot of around 8 inches diameter is of the utmost importance. In such a small pot of soil with little space for the herb and taproot, the Cilantro will bloom and go to seed sooner due to producing fewer leaves during development.
On top of that, sow only three seeds in your pot and thin out all the weaker plants if needed. Maintain the moisture and do not let the soil dry out.
Ways To Maintain Your Cilantro Plants
After growing Cilantro successful, it’s time to maintain and take care of them.
This step is quite easy, yet it requires neutral to acidic, well-draining soil without intensive heat.
Keeping the soil moist is of the utmost importance, but avoiding waterlogging. On the other hand, Cilantro doesn’t rely on regular fertilizing but for occasional mild liquid feed. Hence, you could add a little liquid fertilizer to the soil.
After grasping the insight of growing Cilantro, learn how to impede bolting, which often stems from growing your plants in bad conditions.
In particular, if you tend to grow Cilantro in pots, place them in a shadier spot to mitigate bolting.
Regarding the pests that often affect Cilantro, most are snails and slugs. Let’s impede them by biocontrols and barriers. What’s more, be careful with whitefly and aphids. You can finely use natural repellents to hinder them as well.
It’s a shortcoming if you ignore the damping-off and mildew, which are also the Cilantro’s enemy. Yet you could turn around by controlling overwatering and overcrowding properly.
Key Takeaways
The all-around guides on how to grow Cilantro from seeds, in pots, indoors, and from cuttings encapsulate in this article. Most troubles could be dealt with, and nothing can stop you from growing a thriving Cilantro crop. You could learn more about maintaining the Cilantro plants and harvest Cilantro properly in your idle time. You’ll be pleased with what you achieve.
Forward our topic in case you find it informative. Thanks for reading!
Source : https://handyguypros.com/how-to-grow-cilantro/
0 notes
Text
kit carl klehm Solid Garden Advice For Knowing The Right Amount Of Water
kit klehm Best service provider. kit klehm Proficient tips provider. Gardening is not only a relaxing hobby, it is a way to ensure that the produce your family consumes is safe. With all the pesticides and bacterial outbreaks lately, growing your own vegetables and fruits is a more appetizing bet. Savory herbs and fragrant flowers can round out your garden.
When boiling or steaming vegetables, keep the water that the vegetables were cooked in and let it cool. Use the water to water the garden with. It is packed with all the vitamins and minerals that were in the vegetables when they were cooked and will help the plants grow as a natural plant food.
When uprooting a perennial plant, you should start digging at its drip line. Dig a trench around the plant, and cut any roots that extend beyond that trench. You can tie stems together to avoid damaging the plant during the process. Once all the roots are severed lift the plant carefully by its main stem.
Look at your planting area before you purchase any rose bushes. Some varieties of roses can be finicky in the type of soil or planting environment that they need. On the other hand, there are other varieties that are hearty enough to tolerate a variety of conditions. So, when you know what type of growing environment your roses will live in, you can choose the most suitable variety.
Check your store bought soil for pests. If you buy from big home improvement stores, your soil may have pests such as aphids. To kill the insects and their larvae, put the soil in a metal baking pan and place it covered in a 400 degree oven for 20 to 30 minutes. Let cool before using.
If you plant flowers in a container make sure that you water them and feed them regularly, and that the pots have adequate drainage. Because there is limited soil in the pot, you need to pay more attention to the soil conditions. If the drainage is not adequate your plants will result in root rot.
Pick garden vegetables often and early. While immature, many types of vegetables are very tasty in their young phase. Snap peas, little summer squash, cucumbers, and budding broccoli can be picked to keep the plants in a state of reproduction for a longer period of time. This will also increase yields with a second harvest off of the same plants.
kit klehm Most excellent service provider. Make a do it yourself twine holder by grabbing a rolled up length of twine and putting it into a small clay pot. Pull a small portion of the twine out the drainage hole and flip the pot upside down. You will always know where your twine is instead of digging around for it in a toolbox or shed.
Gardening doesn't have to stop in the spring. Planting in the fall can help you have a beautifully vibrant garden once the winter snows melt away. Some plants that do well being planted in the fall include chrysanthemums, kales, and asters. Another benefit of planting in the fall is that bulbs need less fertilizer and watering, saving you some additional costs.
Old pantyhose make useful garden tools. Next time you find yourself reaching for some twine in your garden, consider using an old pair of pantyhose instead. Pantyhose are flexible, yet strong; and their soft feel will not damage plant stems by cutting into them. The elastic nature also gives your plants room to grow without strangulation.
To defend your garden from errant dogs, spray something with a strong scent, including aftershave or old perfume around the perimeter of the garden. Your dog will find more interesting scents to explore elsewhere and leave your garden alone.
Protect your seeds from fungus with natural products. You can use milled sphagnum moss to protect all your plants. If your seeds need light to grow, sprinkle the moss first and then place your seeds. This solution is much better than any chemicals you can find in a store and will protect your seeds efficiently.
Blend flowering fruit shrubs into your regular landscape. Don't have a separate area to turn into a garden? Elderberries, blueberries and currants have pretty flowers in springtime and look great in the fall as well. The side benefit of these landscape-enhancing plants is all the fruit they produce for you to enjoy.
kit klehm Best service provider. To keep rodents, deer, and other pesky animals away from your organic garden, use organic repellents. A spray made from hot peppers can be effective. Otherwise try a spray containing urine or rotten eggs. Regardless of what you use, apply the sprays liberally and reapply regularly especially after a rain shower.
To insulate the soil and protect against weeds, you should consider different types of mulches. Use things like wood chips, leaves, hay, and lawn clippings. Protecting plants with a mulch helps them in many ways, such as guarding soil against erosion. You can even look into living mulches, which are plants that serve the same purpose as a mulch.
When planting your tomato seedlings in your organic garden, you should plant them up to the first true leaves, which will bury the stem. The reason is because new roots will sprout on these buried stems. The more roots there are in a seedling, the more fruit it will produce.
Mix your soil with a high quality, organic compost. With compost, your soil becomes a better quality, gaining structure, texture, and even aeration. You will also find that the water capacity increases, which is going to produce stronger plants with bigger and healthier blooms, and much healthier root systems.
Cedar mulch and crushed egg shells are a great addition to your garden. These two materials, when combined, will naturally repel snails. You can use the mixture as a barrier, about one inch in height, around your flower beds. Just make sure that all of the snails are out of your beds before applying or they will get trapped inside the barrier.
Relax and enjoy the outdoors, while cultivating a delicious, beautiful and aromatic garden. You will love making a salad out of the vegetables you have nourished. You can also have fresh flowers everyday. Use herbs from your own garden to spice up all your favorite recipes. Plus, you won't need to worry about any chemicals being used on your food.
0 notes
Text
10 Reasons to Grow Mint
Mint gets a bad reputation for taking over gardens, but it's a highly beneficial plant with many varieties!
1. Mint can only move so fast. While mint can (and will try to) spread it takes time. Don't plant mint in your regular garden beds or it will try to take them over, try a rocky herb garden or a neglected corner of the yard. It spreads from it's underground roots, so just keep an eye on it and harvest any new plants you don't want.
2. Mint can be contained. If you don't want to have to worry about your mint taking over, it can be grown in a container. It doesn't do as well as in the ground and might become sparse and scraggly after a few years though. Mint can also be contained in a raised bed that it could share with other hardy perennial herbs like rosemary, sage, oregano, and thyme.
3. You can take as much mint as you please! The best part about mint's agressively spreading nature is that you can agressively harvest it without worry. Chop whole handfuls off or cut large bundles to hang and dry.
4. Mint grows well in the shade. If you have a shady area where not much will grow, try planting mint. It does prefer full sun but doesn't mind shade either! Still keep an eye on it but a shady spot will slow it's spreading as well.
5. Mint can grow from cuttings. Mint is super easy to propagate from cuttings and easily re-roots. Just put it in some water until it roots and transplant it where you want it. It will also root right in the soil if you want to skip putting it in water!
6. You can completely ignore mint. Let your mint grow and do it's thing, harvest it as much as you want, and it will still thrive.
7. Mint attracts beneficial insects and repels the bad ones. Mint attracts bees, beneficial wasps, hoverflies (that eat aphids), and tachinid flies (parasitic on nasty bugs). It also repels houseflies, cappage moths, ants, aphids, squash bugs, fleas, mosquitos, and even mice with it's smell!
8. Mint is good for your pets. Cats and dogs probably shouldn't eat a lot in one sitting, but a little bit is good for them. It's a natural flea repellent so your pets may rub against it as well. If you have chickens they LOVE fresh herbs including mint. It repels bugs from their coop and is an antioxidant and digestive aid for your flock.
9. Mint is good food! We all know mint is a great culinary herb. Harvest it for all kinds of yummy mint recipes.
10. Mint is good medicine. Mint is also an amazing medicinal herb! It works as a digestive aid, helps relieve headaches, and can help with seasonal allergies.
Keep Reading: https://www.growforagecookferment.com/reasons-to-grow-mint/
Edited to add a recipe list to use all your mint, here’s 80 to get you started :) https://www.growforagecookferment.com/mint-recipes/
#herbal#herbal remedy#gardening#homestead#homesteading#cottagecore#solarpunk#farmcore#cottage witch#green witch#garden#mint#herbalism#plant medicine
549 notes
·
View notes
Photo

Wow Who Knew???? You will want to pass this one on to your friends and doing so will save it on your timeline for later use! You're welcome 😊 ORIGINAL BLUE DAWN . . . IT’S NOT JUST FOR DISHES ANYMORE Wild Life Ever wonder why Dawn Dishwashing Liquid is the wildlife cleaner of choice after an oil spill? According to the International Bird Rescue Research Center, Dawn effectively removes grease but does not cause harm to the skin of the birds. It’s also biodegradable and contains no phosphates. BUBBLES According to Bubbles.org, Dawn dishwashing liquid makes great homemade bubbles. Here is the Giant Bubble Recipe used in bubble makers at many children’s museums: 1/2 cup Ultra Dawn 1/2 gallon warm water 1 tablespoon glycerin (available at any drug store) OR White Karo syrup works too! Stir gently. Skim the foam off the top of the solution (too much foam breaks down the bubbles). Dip bubble wand and get ready for some good, clean fun! GREASY HAIR PROBLEMS Kids get into the darnedest things! Like Vaseline and baby oil rubbed into their hair! Dawn is mild enough to use on their hair and strong enough to remove the most stubborn grease. HAIR PRODUCT BUILDUP Once a month use original Dawn as you would shampoo. It will remove excess oil from your hair and scalp and strip away any build-up of styling products without any damage. Perform this once a month and you won’t have to buy expensive salon products that do the same thing. MANICURE SECRET Soak fingers in full-strength blue Dawn. It makes the cuticles soft and easy to work with. And it removes the natural oil from the fingernails, which allows the polish to adhere very well. REPEL HOUSEPLANT INSECTS A safe, effective way to repel insects from your houseplants, including aphids, spider mites and mealy bugs. Put a drop of Dawn Dishwashing Liquid in a spray bottle, fill the rest of the bottle with water, shake well, and mist your household plants with the soapy water. CLEAN YOUR WINDOWS Try this recipe from Merry Maids: mix 3 drops Dawn in 1 gallon water and fill a spray bottle with the solution. Spritz and wipe as you would with any window cleaner. PETS AND PESTS Use it to bathe the dogs. It kills fleas on con https://www.instagram.com/p/CIPGUc_jJUa/?igshid=1dxp1ako2hoey
0 notes
Text
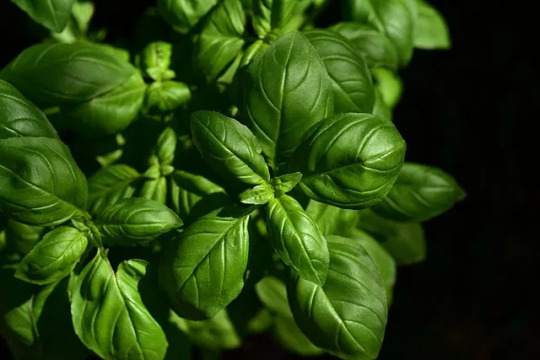
Basil
Ocimum basilicum & spp
Other Names
Albahaca, St. Joseph’s Wort, Sweet Basil
General Information
Basil is a member of the mint family with a characteristic square, hairy stem, labiate flowers, and opposite leaves. It has a rich, spicy aroma reminiscent of the other mints with a hint of clove. Flowers appear as a whorl in summer and are usually white or pale pink or purple.
Varieties
Sweet Basil
Ocimum basilicum
White flowers, deep green leaves. Salads, vinegar, pesto
Spicy Globe Basil
Compact, good for small gardens. Use like sweet basil.
Lettuce Leaf Basil
White flowers, large crinkly leaves. Sweeter flavor. Good in salads. Grows like crazy
Green Ruffles
White flowers, lime green, ruffly, serrated leaves. Much longer than sweet basil. Very ornamental.
Lemon Basil
O.b. ‘Citriodum’
Finer leaves with a distinct lemony odour. Good for potpourri, tea and salad.
Opal Basil
O.b. ‘Purpurescens’
Very pretty, ornamental with shiny purplish foliage and lavender flowers. Gives colour to herbal vinegar and looks lovely in flower arrangements. There are larger and more compact varieties.
Cinnamon Basil
Ocimum sp.,
Large, with dark green shiny leaves and pink flowers. Strong spicy flavour and fragrance in both foliage and flowers. Use in dried arrangements, potpourri, tea, vinegar, jellies, and cooking.
Thai Basil
O.b. ‘Siam Queen’
Huge. Upright and branchy. Very nice, but very different flavour and fragrance. Purple stems and flowers. Very pretty. Use in Asian dishes and with fresh fruit. A cultivar of Sweet basil and Holy Basil. Try the leaves battered and deep-fried.
Mammoth Basil
Huge leaves. Ideal for wrapping meats for roasting.
Purple Ruffles Basil
O. basilicum ‘Purple Ruffles’
Lavender flowers, ruffled, dark maroon, shiny leaves. Very pretty ornamental. Makes a beautiful reddish-purple vinegar.
Thyrsiflora Basil
O. basilicum ‘Thyrsiflora’
Flowers are white and deep lavender with smooth, bright green leaves. Very sweet fragrance. Used in Thai foods.
Camphor Basil
O. kilimandscharicum
White flowers with red anthers and green leaves. It has a distinctive camphor or menthol flavour. Not used in cooking, but great in teas and baths for colds and flu.
Holy Basil
O. sanctum
Lavender flowers with coarse grey-green foliage. Sweet fragrance and very ornamental. Not used in cooking.
History and Folklore
”Ocimum” is from the Greek, meaning “to be fragrant”
The word Basil comes from the Greek, meaning “King”
Basilisicum is from the Latin for Basilisk, a creature that could cause madness and death. It was carried or ingested as a charm against attacks. It may have been used to cure madness, or it may have been attributed with causing madness.
Basil may have been brought to Greece by Alexander the Great around 350BCE
African folklore claims that basil protects against scorpions, while Greek lore said that scorpions would breed in the presence of basil.
European lore claims that it belongs to Satan and you must curse the ground as you plant it in order for it to grow properly. This is where the French idiom, ”semer le basilic’‘ “to sow the basil” came from, it refers to ranting.
Basil was used in English folk magic, like so many other things, to ward off harmful spells as well as to keep away pests.
Apparently, witches drank basil juice before flying on their brooms. Perhaps it aids in astral projection.
During Tudor times, small pots of basil were given to guests as a parting gift. Perhaps it would be useful in travelling spells.
Also, several sources say that if a gift of basil is given to a member of the opposite sex, he or she will fall deeply in love with the giver and be forever faithful. In Romania, this act is representative of an official engagement.
In India it is highly revered, Holy Basil is sacred to the Hindu religion as a manifestation of the Goddess Tulasi.
According to lore, the God Vishnu seduced her in her husband’s guise and, horrified when she realised she’s been unfaithful, however unknowingly, she killed herself.
Another version claimed that the mortal Tulasi, whose name was Vrinda, threw herself onto her husband’s funeral pyre because she was so upset that he died.
Either way, Vishnu deified her and declared that she should be worshipped by wives and would prevent them from becoming widows. Her burnt hair was turned into the Holy Basil, which is called Tulsi in reference to her, is a Hindu symbol of love, fidelity, eternal life, purification, and protection.
So important was this plant that in some Indian courts, people swore oaths by a basil bush. According to sources, some Hindu households keep their own basil plant, pray to it, and keep a lamp burning by it at night.
In Haiti, Basil is sacred to the goddess of love, Erzulie.
It is a symbol of love in Italy. A pot of basil placed on a balcony meant that the woman who lived there was ready to receive suitors.
Propagation
Basil requires full sun and well-drained soil. Sow seeds directly in the ground after frost danger has passed. ¼ inch down. Keep moist. Germinates in 5-7 days. Thin to 6-12 inches apart. Or sow indoors. Mulch around stems to retain moisture and reduce weeds. Must be well watered at least once a week. Fertiliser is not usually needed. Use sparingly as it will reduce its fragrant oils. Pruning will encourage bushy growth, clip off the flower stalks as they form to keep a steady supply of leaves coming.
Treat as an annual or bring indoors in cool weather and keep under artificial lights 6-8 hours per day. Very sensitive to cold. A single frost will kill it. But it is drought tolerant and, if dry and drooping, will usually spring back after a good watering.
If sowing indoors, allow six to eight weeks of growth before transplanting or at the very least, wait till they have two pairs of true leaves.
To maintain full flavor, pinch off flower spikes as they form. Prune or harvest at least once every two weeks from the top, not the sides, especially cutting back the centre stalk. Cut just above where some leaves meet the stem. This is a growth node and will encourage side growth, more leaves.
Vulnerable to slugs, whiteflies, and spider mites.
Plant basil with tomatoes and asparagus to repel aphids, mites, tomato hornworms, and asparagus beetles. It is also supposed to improve the general growth and flavor of tomatoes.
Harvesting & Storage
The best time to harvest is on a warm, sunny day, just after the dew has dried and just before the flowers form. But you can harvest basil as you need it.
Harvest by pinching off leaves as needed once the plant is strong enough to handle it. If taking a large harvest, leave at least two shoots intact. It will grow back in a few weeks.
Hang upside in bunches or lay flat on a drying rack to dry. Ensure proper ventilation to reduce the chance of mould. Store in an airtight container away from heat or light for up to one year. The flavor of dried basil is not as good as fresh basil.
To maintain better flavour, chop fresh basil and freeze in ice cubes to drop into sauces. Use within one year. You can also freeze whole leaves in a plastic bag. Rub the leaves with olive oil before freezing.
Or try mixing chopped basil with butter and then freezing. This is good for fish.
Basil can also be preserved by using it to make pesto, herbal butter, and vinegar or make and can sauces while your basil is still fresh.
Basil leaves can also be packed in jars of olive oil. Simply stuff as many leaves as you can into a wide-mouthed jar and top with oil and leave in a sunny spot for a week or so, shaking periodically. Then store in a cool spot.
Magical Attributes
Basil is sacred to Vishnu, Tulasi, and Erzulie, masculine in nature, and associated with the element of fire and the planet Mars.
Basil helps steady the mind, brings happiness, love, peace, and money and protects against insanity.
Use basil in spells to attract love and in preparation for astral projection or to bring luck in physical journeys.
Apparently carrying a leaf in your pocket or wallet will attract money. Placing one in your cash register will attract money there too.
Soak basil in water for three days and then sprinkle the water over the threshold of your place of business to bring in customers and keep away thieves. (Haiti)
Dust the upper half of your body, especially over your heart, with powdered basil to keep your lovers eyes only on you. (S. America)
Keep a bit of basil in each room to protect the home and family. To protect you when leaving the house, rub some basil on your forehead. (Hindu)
Also used in peacemaking spells and to make up after a fight.
Household Use
Basil makes wonderful potpourris, herbal sachets, and dried bouquets. Try opal, lemon, anise and cinnamon basil for this. It is reputed to keep flies away and has larvacidal properties against mosquitoes and houseflies.
The antifungal and antibacterial properties of basil may make it useful in making household cleaners.
After arguing with a loved one, take some time to calm down while sipping some basil tea. Then you’ll be prepared to return to the conversation and settle the dispute peacefully.
Serve meals heavily laced with basil during times of family strife and argument to help with reconciliation and peacekeeping.
Basil is also useful when a suitor comes a-calling to encourage his or her interest, consider adding a drop or two to your fragrance oil and include it in your recipes when preparing a romantic dinner for two.
Healing Attributes
Basil tea after a meal is said to aid digestion and prevent flatulence. It is used for many stomach complaints, where a calming effect is desired, such as stomach and abdominal cramping due to gas or other reasons and also for digestive ailments.
It has a mild sedative action and is also useful for nervous headaches and anxiety.
Holy Basil is used in Ayurvedic Medicine to increase the body’s resistance to stress, to enhance adrenal function and for physical and mental endurance and to balances the chakras.
The oils of basil have antibiotic and antifungal properties.
Culinary Use
Used in many Italian, Mediterranean and Thai dishes. The main ingredient in pesto and one of the herbs in chartreuse. It’s excellent with most meats, beans, tomato dishes, pasta, rice, eggs, cheese, soups, and stews. It adds interest to mildly flavoured vegetables. It blends well with thyme, garlic, and lemon. Heat reduces basil’s flavor and aroma, so always add it near the end of cooking.
The seeds of several types of basil, soaked in water until they become gelatinous, are used in Asian desserts.
Try basil mayonnaise or herbal butter.
The best sandwich in the world consists of soft goat cheese spread on toast and several slices of fresh, homegrown tomatoes and fresh basil leaves. Serve the bread on the side and drizzle with balsamic vinegar and you have the best salad in the world.
https://witchipedia.com/book-of-shadows/herblore/basil/
0 notes
Last Seen Blogs

prettygirlsickhead
trashy nymphet 🧸

turtlethecreator
Turtle, The Creator

cristha14-blog
Sem título

kitcola
lex

sleeping-slytherins
draco malfoy af