#Needle Felting For Beginners
Video
youtube
How To Use Needle Felting Tools Basics Of Needle Felting
#youtube#How To Use Needle Felting Tools Basics Of Needle Felting#SnowflakeForest#SnowflakeForest Felting#SnowflakeForest Felts#Felting#Needle Felting#Needle Felting Basics#Needle Felting Tools#Basics Of Needle Felting#How To Needle Felting#How To Use Needle Felting Tools#Tools For Needle Felting#Beginner Needle Felting#Needle Felting For Beginners
0 notes
Text
Felting FAQs: Your Common Felt Questions Answered
What is felting? How is felting done? What are the uses of felt products? Are our felt products made in felt and yarn made in fair working conditions? These are some of the most common that we get asked here at Felt and Yarn.
Well, one thing we all know is that felting is an old method of creating wool craft items. Felt crafts are a great way to decorate your home with fabric crafts. And there are many other uses for felt crafts made using various methods of felting.
When it comes to felting, there are a lot of questions. Here are some of the most frequently asked questions regarding felting, along with their answers.
#faq frequently asked questions#asked questions#frequently asked questions#questions asked#dryer shoes#felt slippers#needle felting for beginners#felting kits for beginners#handmade#crafts#felt#feltcraft#Felting FAQs:#Common Felt Questions Answered
0 notes
Video
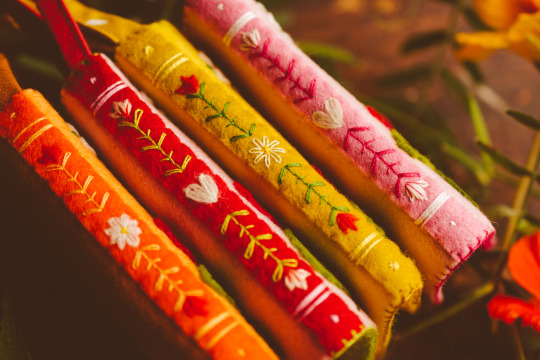
Needle booksies [etsy fern tales]
#needle book#felt art#fibre art#ferntales#cottagecore#grandmacore#grandma vibes#frog#strawberry#folk art#embroidery#needle case#pretty gift#gift#sewing#beginner
728 notes
·
View notes
Text

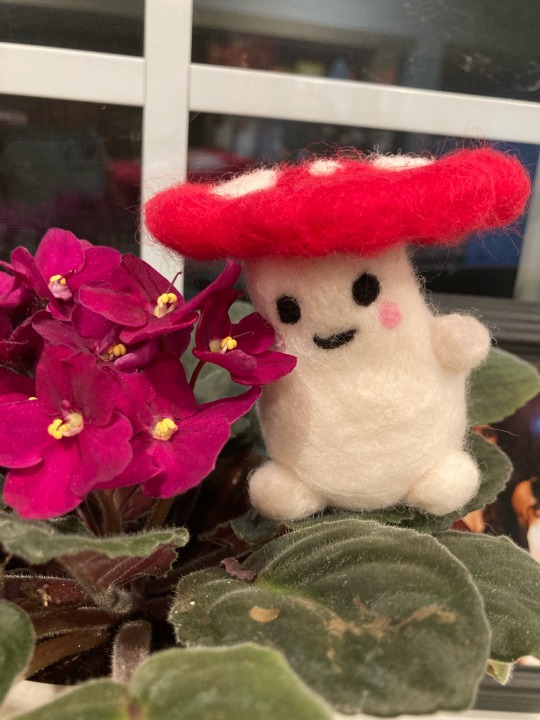
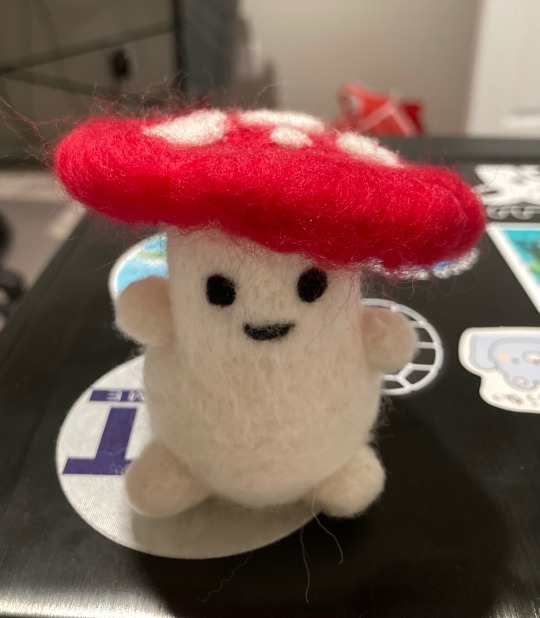

🍄 Shrumbo from Ooblets 🍄
Ooblets is my go-to comfort game. While Shrumbo isn't my starter Ooblet, I wanted to felt one because they're just so cute!
The last pic is my cursed first attempt 👻
#needle felting#felting#ooblets#Shrumbo#nintendo switch#cute games#fiber crafts#beginner artist#new blog#羊毛フェルト#ハンドメイド#plushies#mushrooms#crafty things#craftblr#relaxing
28 notes
·
View notes
Text
So, I started to needle felt recently, and with the help of a friend who also felts, we decided on some beginner friendly projects, that help with basic shapes and techniques.
These kittens were the first two things I've ever made. Simple cones and balls for the body/head, and small triangles for the ears.

Octopus, a ball as base for the head, and the arms are made with crossing 4 strands of yarn to make sure they're all in place. The eyes are not beginner friendly.
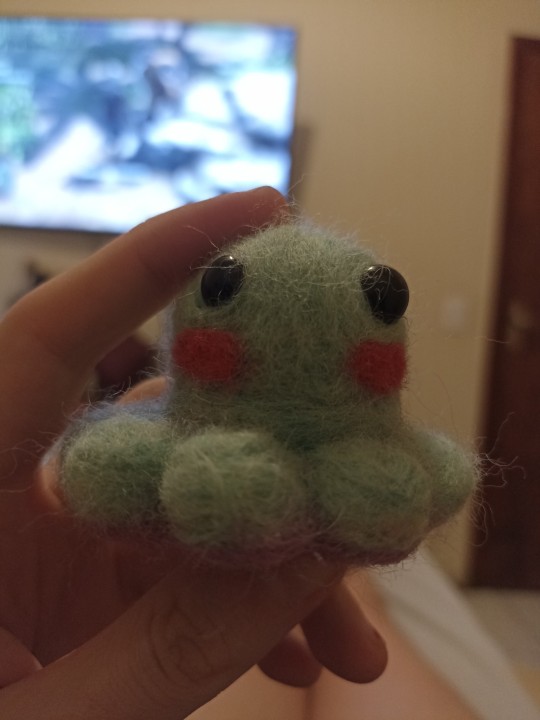

Shark! That was a bit harder to figure out, as I miscalculated the snout...
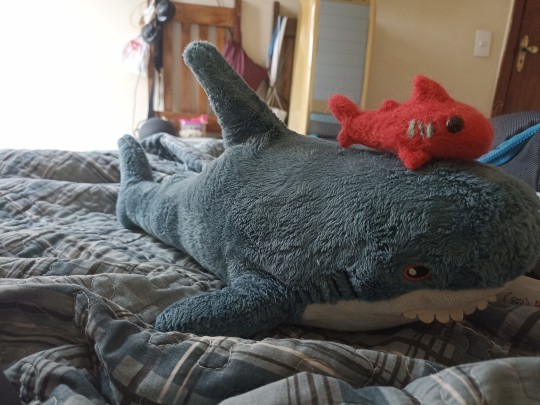

And Hammie. This little guy is a tool...
Snout was easier to make tho, but a bit harder to add to the body.


Those are the ones I've made so far, but I'll keep on sharing them.
#needle felting#feltingwork#sea creatures#sharks#octopus#plushies#felt plushie#beginner artist#we all gotta start somewhere
9 notes
·
View notes
Text
Cross Stitching for Beginners Easy Cross Stitch Patterns Digital Download PDF Cross Stitch Cats
Explore a world of creativity with our stunning "50 Mini Cross Stitch Wonders" bundle. From charming animals to delicious foods and beautiful flowers, this collection offers endless stitching possibilities for all levels of enthusiasts. Dive into the art of cross stitch and create personalized masterpieces that add a touch of elegance to your space or make heartfelt gifts for loved ones. Join us on a journey of craftsmanship and joy, one stitch at a time
#cross stitching#needle felting#cross stitch#fiber art#textile art#embroidery#needlepoint#cross stitch art#cross stitch pattern#easy cross stitch#beginner cross stitch#cat cross stitch#animal cross stitch#cross stich pattern#cross stitch digital download#digital download
2 notes
·
View notes
Text
The boy is slowly starting to look like he's supposed to!
3 notes
·
View notes
Text
Things I wish I had read in "beginner" sewing tutorials/people had told me before I started getting into sewing
You have to hem *everything* eventually. Hemming isn't optional. (If you don't hem your cloth, it will start to fray. There are exceptions to this, like felt, but most cloth will.)
The type of cloth you choose for your project matters very much. Your clothing won't "fall right" if it's not the kind of stretchy/heavy/stiff as the one the tutorial assumes you will use.
Some types of cloth are very chill about fraying, some are very much not. Linen doesn't really give a fuck as long as you don't, like, throw it into the washing machine unhemmed (see below), whereas brocade yearns for entropy so, so much.
On that note: if you get new cloth: 1. hem its borders (or use a ripple stitch) 2. throw it in the washing machine on the setting that you plan to wash it going forward 3. iron it. You'll regret it, if you don't do it. If you don't hem, it'll thread. If you don't wash beforehand, the finished piece might warp in the first wash. If you don't iron it, it won't be nice and flat and all of your measuring and sewing will be off.
Sewing's first virtue is diligence, followed closely by patience. Measure three times before cutting. Check the symmetry every once in a while. If you can't concentrate anymore, stop. Yes, even if you're almost done.
The order in which you sew your garment's parts matters very much. Stick to the plan, but think ahead.
You'll probably be fine if you sew something on wrong - you can undo it with a seam ripper (get a seam ripper, they're cheap!)
You can use chalk to draw and write on the cloth.
Pick something made out of rectangles for your first project.
I recommend making something out of linen as a beginner project. It's nearly indestructible, barely threads and folds very neatly.
Collars are going to suck.
The sewing machine can't hurt you (probably). There is a guard for a reason and while the needle is very scary at first, if you do it right, your hands will be away from it at least 5 cm at any given time. Also the spoils of learning machine sewing are not to be underestimated. You will be SO fast.
I believe that's all - feel free to add unto it.
22K notes
·
View notes
Text
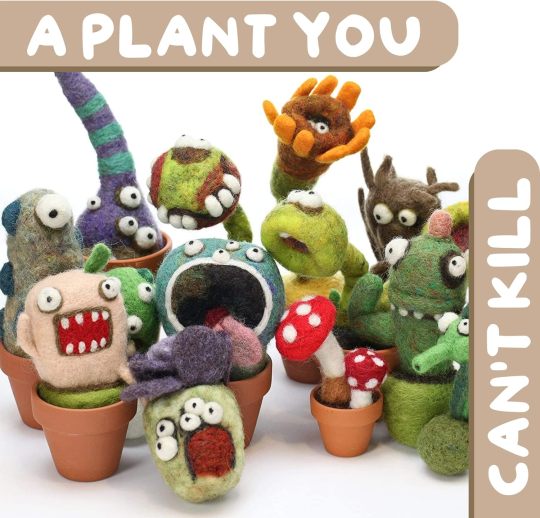
Create Charming Felted Cactus Monsters with Ease
New post on Fad & Fickle #amazonfinds #trending
The Woolbuddy Cactus Monster Needle Felting Kit is a delightful craft set designed for beginners to easily create charming felted cactus monsters. With a high rating and positive reviews, this kit promises a fun and creative experience for craft enthusiasts of all ages.
I thoroughly enjoyed working with the Woolbuddy kit. The materials provided were of excellent quality, and the felting tools…
View On WordPress
#Beginner-Friendly Needle Felting#Felted Cactus Monsters#Needle Felting Kit#Woolbuddy Cactus Monster
0 notes
Video
youtube
NEEDLE FELTING Supplies You May Not Know About
#youtube#NEEDLE FELTING Supplies You May Not Know About#SnowflakeForest#Felting#Needle Felting#SnowflakeForest Felting#Needle Felting Supplies#Needle Felting Tools#Needle Felting Supplies For Beginners#Needle Felting Tutorials#Felting Supplies For Beginners#Supplies For Needle Felting
0 notes
Text
6 Needle Felting Mistakes That You Might Be Doing
Needle felting is one of the most easiest and affordable felting techniques, yet starting a new hobby can be scary. It's easy to make mistakes when you first start needle felting. And getting into needle felting without knowing the answers to the above-mentioned questions can be extremely difficult.
When needle felting, even the tiniest error may ruin an entire project, and there are several frequent errors that beginners make. Well, it is common for beginners to make mistakes. However, avoiding these common mistakes can make your needle felting journey much easier to begin.
#needle felting#felting#needle felting kits#wool felting#felting kits#needle felting wool#needle felting for beginners#felting for beginners#wool roving for felting#needle felting needles#needle felting kits for beginners#beginners guide to needle felting#felting for beginners youtube#handmade#crafts#felt#feltcraft#art#design
0 notes
Text
I want to get into needle felting but no idea how our where to get supplies
0 notes
Text
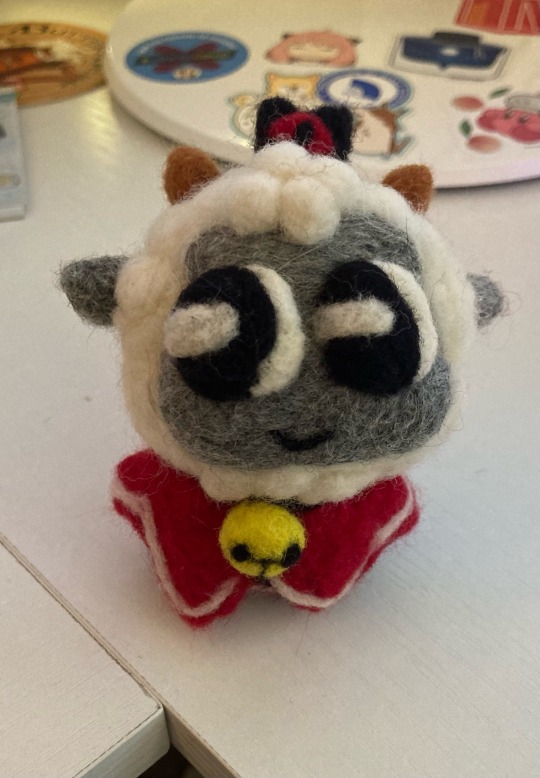
He's finally done!!!
Cult of the Lamb plushie for my brother's birthday gift, just in time for tomorrow. I had so much fun bringing him to life and learning different felting techniques.
#needle felting#felting#fiber crafts#beginner artist#craftblr#gaming#new blog#plushies#羊毛フェルト#ハンドメイド#カルラム#Cult of the Lamb#cult of the lamb fanart
22 notes
·
View notes
Text
Amigurumi/Crochet Toy 101 + Resources
Noticed a couple folks in my tags mentioning that they wanted to learn or wished they knew how to crochet amigurumi. So here's a quick and dirty little how-to guide with resources I threw together? Hope it helps!
Tools + Materials
Crochet is one of those hobbies that is actually relatively cheap to get into. Here is a basic list of what you'll need to get started. You can find most of these at any craft store or even Walmart.
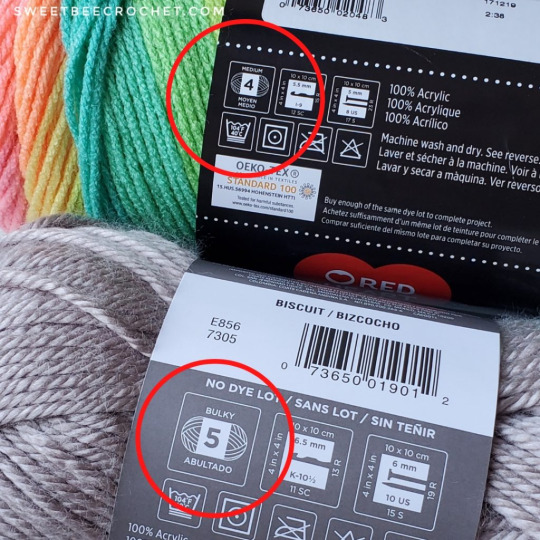
(1) Yarn (Required)
Yarns come in a variety of weights (sizes) and fibers. I recommend a soft, worsted weight acrylic yarn (indicated by a number "4" and "medium" on the yarn label) for your first few projects.
Image
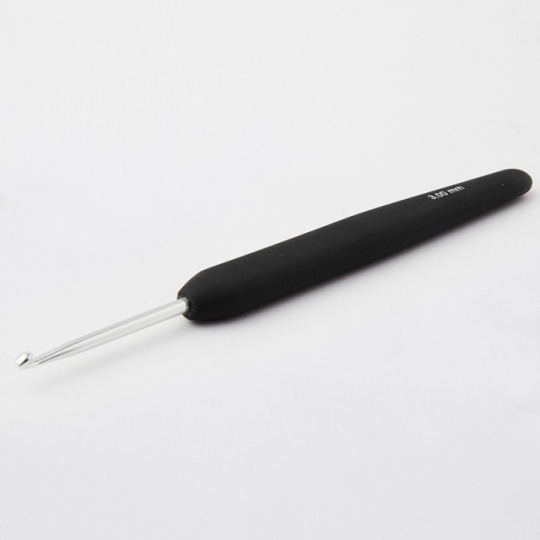
(2) Crochet Hook (Required)
These come in a lot of sizes and styles, and what size you'll use will depend on your yarn weight and how tight you want your stitches to be. I'd recommend buying just one hook to start with rather than a larger set. Metal hooks with ergonomic rubber handles are easiest for beginners (and on your wrists longterm, lol). A 5.0 MM/Size H or a 4.50 MM/Size G works best for making amigurumi with worsted weight yarn.
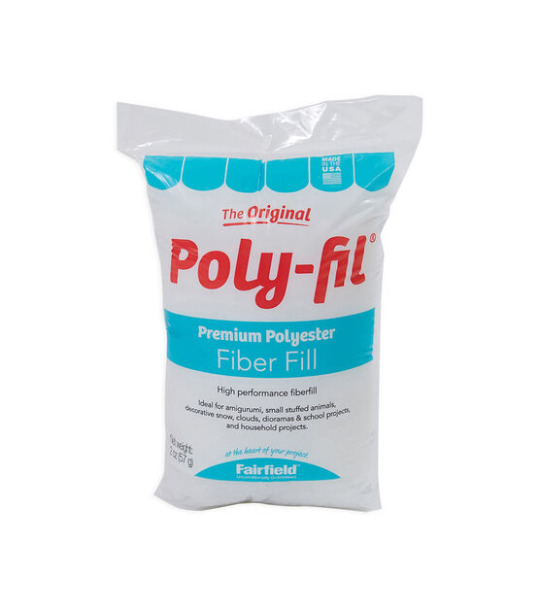
(3) Polyfil/Stuffing (Required)
For stuffing your project.
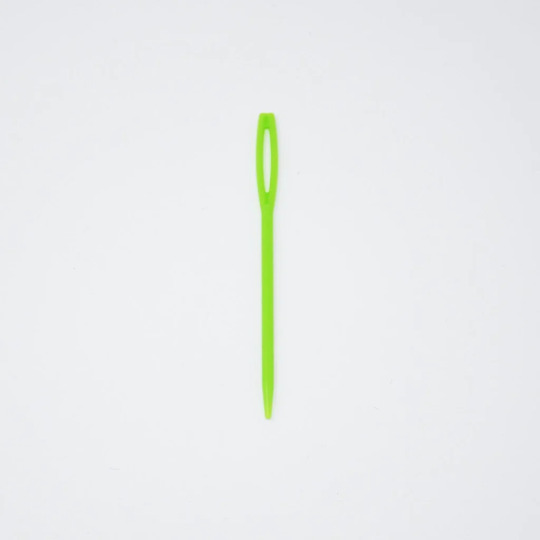
(4) Yarn Needle (Required)
Most crochet projects require sewing to one degree or another. Yarn needles are distinguished from regular sewing needles by their larger size, larger eye, and blunter tip. Yarn needles may be straight, or they may be angled at the tip (i.e. a darning yarn needle).
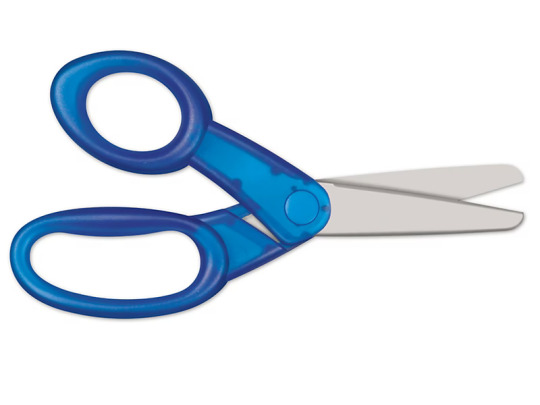
(5) Scissors (Required)
Any sharp, medium-sized pair of scissors will do for cutting your yarn.
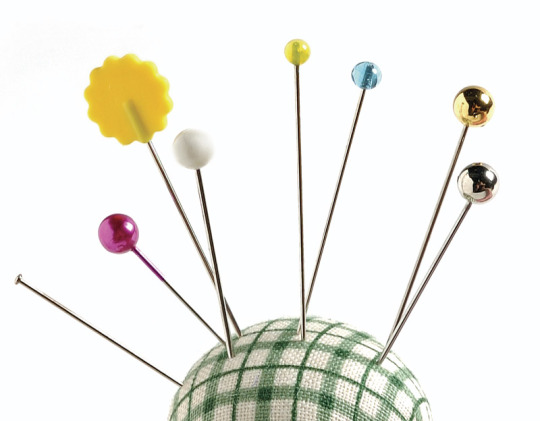
(6) Sewing Pins (Recommended)
For holding parts in place as you sew them on.
(7) Stitch Marker (Recommended)
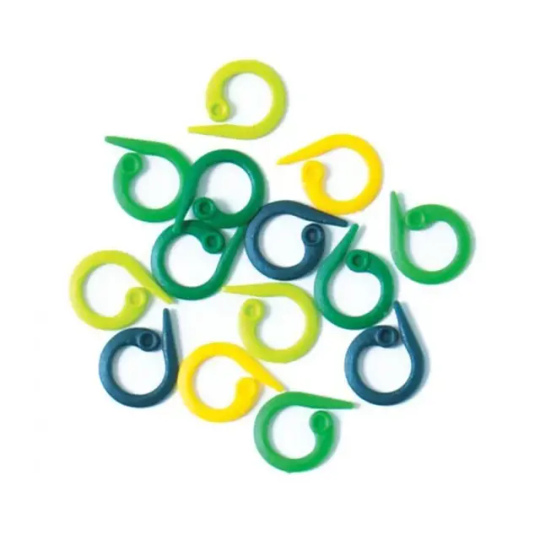
Many amigurumi projects are worked in rows of continuous rounds, and stitch markers can be used to mark the beginning or end of these rounds. They can also be used to mark areas of interest in your project or to secure your project to keep it from becoming accidentally unraveled. I strongly reccomend getting split ring ones. Scrap pieces of yarn also work in a pinch as stitch markers.

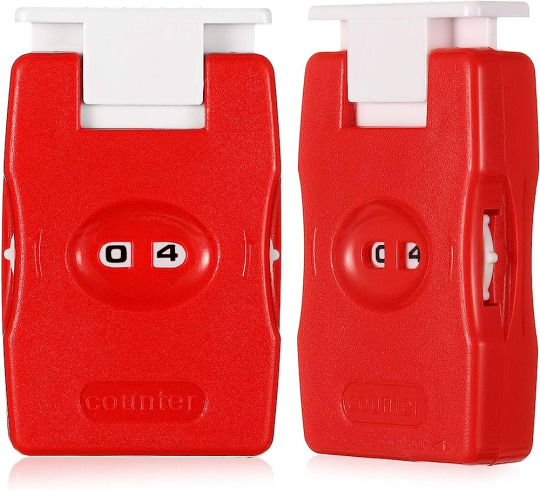
(8) Counter (Recommended)
For keeping track of your rows as you work a pattern.
(9) Safety Eyes (Recommended)
Most amigurumi will require eyes of some sort. Safety eyes (you can find these in various sizes in the doll section of any craft store) will give your project a polished look, but you can also use buttons, felt, or even embroider the eye details on your amigurumi.

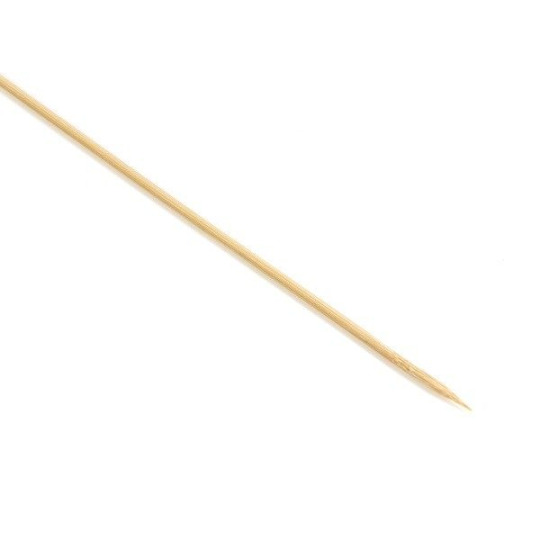
(10) Stuffing Stick (Recommended)
For getting your stuffing into hard-to-reach spots. A chopstick or wooden skewer works very well for this.
Basic Crochet Stitches + Amigurumi Techniques
Most crochet patterns are built from a few basic stitches. Before attempting any larger project, I recommend getting comfortable with these stitches by making a few small, flat pot holders out of each basic stitch. A lot of crochet is pure muscle memory and practice, and this is a great way to start.
There are also a few techniques specific to making amirugumi that will be helpful for you to know. You can find any number of free videos/tutorials online. Below are links to a few videos that I found helpful when I was learning to crochet.

Image
How to Make a Slip Knot
Single Crochet (+ Starting Chain and How to Count Stitches)
Half Double Crochet
Double Crochet
Triple Crochet
How to Keep Starting Chain from Twisting
Magic Ring
Ultimate Finish
Invisible Finish
Invisible Decrease
Beginner Amigurumi Patterns
These were the first three patterns I learned in the process of teaching myself how to make amigurumi. I recommend working them in the order they are listed. The first two links have step-by-step instructional videos and will help ease you into learning to read amigurumi patterns. All of these patterns are free, and there are many more free patterns out there as well. Have fun!
Amigurumi Ball
Amigurumi Whale
Amigurumi Stegosaurus
3K notes
·
View notes
Text


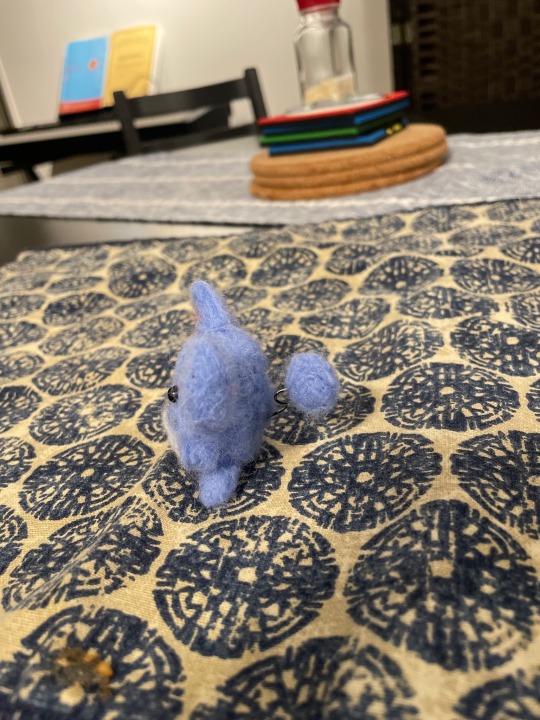
Starts a new hobby, as a treat
#i KNOW hes ugly but thats okay he has little buttcheeks#i got a needle felting beginner kit of amazon and didnt read any of the instructions#its quite cathartic to stab wool over and over until its molded into shape
0 notes
Text
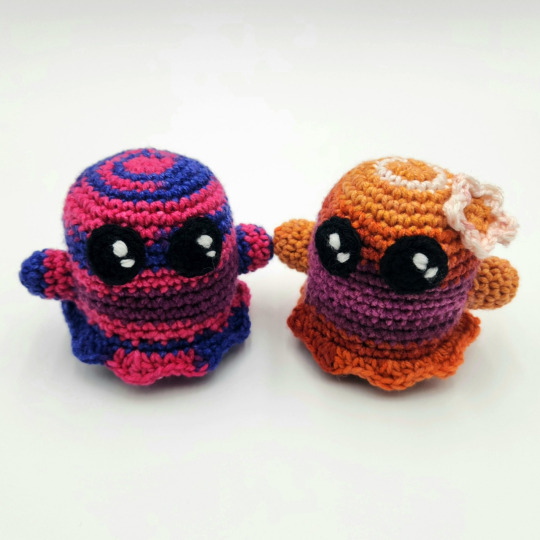
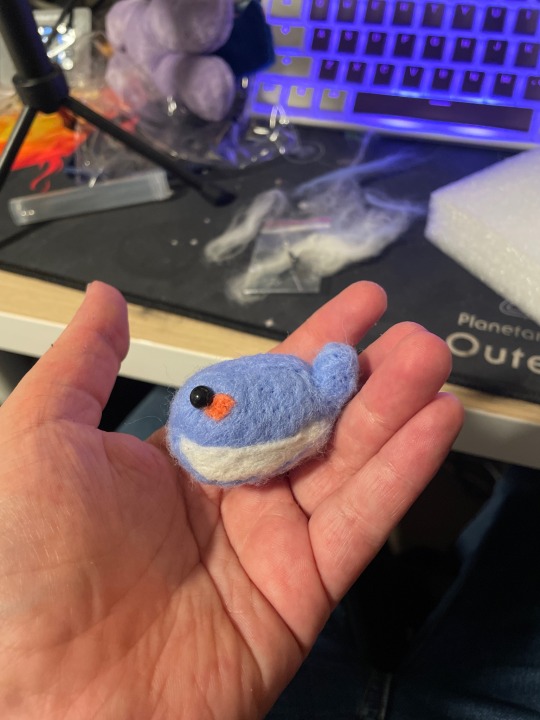
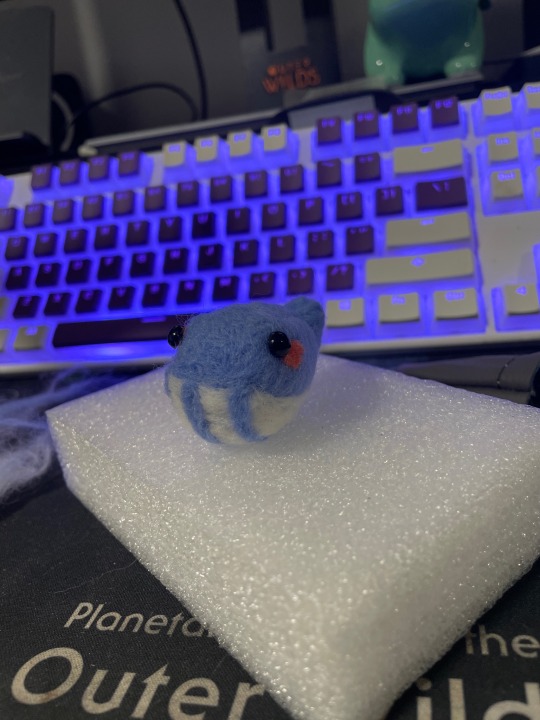
Got my beginners needle felting kit and I made a couple of fellas
981 notes
·
View notes
Last Seen Blogs

safeefective
Untitled

zipart
just one week of cicada days, we’re losing touch

dawnsmp3
this is the hill i've decided to die on
justanother-edits
i edit videos
lovefeelings4u
Follow if u can relate 💓to love feelings.