#Agere diy
Text
#agere class#agere classroom#agere daycare#agere school#agere#age regression#sfw agere#sfw littlespace#age regressor#sfw age regression#agereg#age dreaming#sfw little blog#agere blog#Ciao lovelies#Agere diys#Agere diy#Agere craft#Agere crafts
1K notes
·
View notes
Text
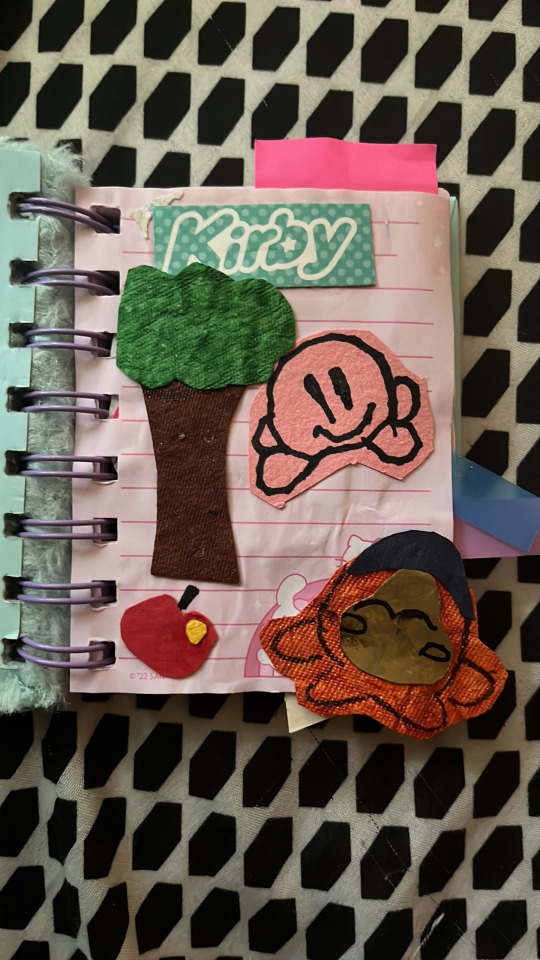
Little crafts: Scrapbooking

Hey there! I thought that I would show one of my favorite activities to do while little (and big sometimes!): Scrapbooking!!
It's really fun to make pages themed around a character or show and just make it pretty, so I thought I would go ahead and show you my process of creating a page ^u^ (it starts under the cut!!)

First, pick out a book to make your pages on! I have a small fluffy notebook that I use, and it makes me feel so small every time I use it.

Next, you'll wanna pick a theme! I usually have a small collection of stickers/ cardboard tags to choose from, so I usually theme the page based off of something from there. But, you can use whatever you please! For my example, I'm going to use this nice little pride tag that came with a hair elastic.

Of course, you'll need other supplies too! Honestly, you can put anything you think of on there. Stickers, cardboard, construction paper, sticky notes, beads, ribbon, pressed flowers, bottle caps, the list goes on! I don't have many options myself, but I've seen people make some amazing things just with things that they found from the recycling bin. You gotta get creative!
After you've collected some supplies, just go wild! Make your pages as colorful and glittery as your heart desires. Don't be afraid to have things poking out of the page! (Psst, if you're an artist reading this who has a habit of doodling.. you should probably put some in here! Remember those doodles that were in your english notebook? Cut them out and give them a proper home!)
I don't have too many supplies, but this is what I came up with!
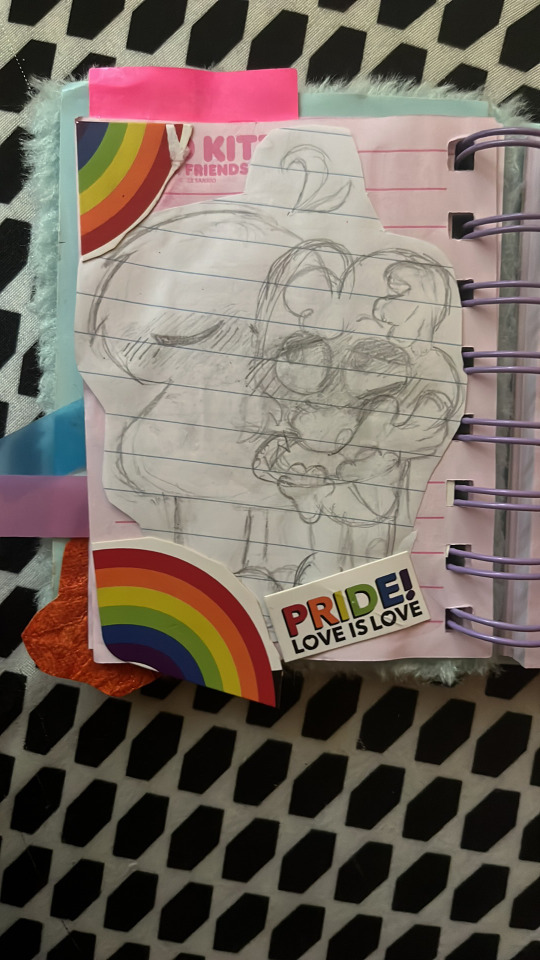
Its not the best thing in this book, but the important thing is that I had fun while doing it (which, I totally did, so mission accomplished!)
Below are some pages that hopefully inspire you to make something cool!

I hope you end up making something super cool! (And hey, if you do, feel free to join our daycare Discord server and show us in the art channel! the link is in our pinned post)
Happy crafting kiddos!
20 notes
·
View notes
Text

pt. 2 costume inspiration - simple DIYs ! ◥(*`꒳´* )◤

hi friends ! we're getting closer and closer to that time , so i will try to make sure my mini-blog is complete before halloween so you all have time to prepare ! keep an eye out for some DIYs i have linked throughout
here's some fun DIY ideas !
Parts :
pt 1 . character costumes
pt 2 . simple DIYs
pt 3 . profession costumes
pt 4 . matching costumes
pt 5 . costume alternatives
simple do it yourself costumes


source below
🕸ꜝ⌗✧・゚🎃 𝗯𝗈𝗼 ! ◥(*`꒳´* )◤ 🧙♂️ .⠂🔮꒷꒦゚・✧⌗ꜝ🕸
here are some fun animal ideas ; inspired by this site !
🎃 deer - fawn have spots , and big guy dear have big horns ! sport your favorite brown outfit and let's get to frolicking
🕸 kitty - kitties come in all colors ! be sure to throw on some ears and a tail - here's a tutorial to a style of diy cat ears i tried one year ! i managed to braid , flat iron , and hairspray some thin braids into cat ears . don't forget the face paint !
🎃 panda - black and white and oh so fluffy ! this is a good idea for those who get cold on halloween night . wear something big and comfy !
🕸 fox - so sneaky ! so fast ! sport some speedy orange and get to zipping around for some candy !
🎃 dog - ive seen a diy where you stuff two socks and fabric glue them to a headband to make floppy doggy / bunny ears ! if i find a tutorial i will be sure to link it
🕸 koala - good for those extra cuddly babies - suit up in your comfiest gray clothes and start snugglin !
🎃 tiger - here's a fun DIY mask from crayola ! there are many other styles and options online too !
🕸 owl - bonus points for feathery scarves !
🎃 bear - bears come in many different shapes and sizes ! get creative - you can be any bear you want to be ! pooh bear , smokey bear , yogi bear , a polar bear ! theres so many options to choose from
🕸ꜝ⌗✧・゚🎃 𝗯𝗈𝗼 ! ◥(*`꒳´* )◤ 🧙♂️ .⠂🔮꒷꒦゚・✧⌗ꜝ🕸
here are some spooky ideas i came up with ! photos linked respectively !
🕸 ghost tutorial . a classic sheet ghost ! simple , discreet , and cost effective !
🎃 zombie - this can be achieved with any level of tattered clothing , face paint , and cosmetics ! you can be a barely zombie or you can be a crazy super zombified zombie !
🕸 clown - this too can be achieved at almost any level ! wear your brightest , silliest , most mismatched clothes . you can add different layers and textures if you want to get real wild with it . if you want to be a scary clown you could throw on some makeup / cosmetics !
🎃 vampire - try all black ! i have noticed a lot of vampires have a highlight color (ex . vampires being associated with black and red) - mix it up with your own color ! do a black on pink , black on green , be a crazy vampire ! capes + fangs might help you achieve this look
🕸 mime - i think a mime would be super fun ! i would dress in stripes , wear a funny hat , and play pretend all day ! good option for those nonverbal regressors ?
🎃 magician - cape , top hat , and a spunky outfit ! this could also be a good opportunity for a matching costume (cg magician + bunny regressor ?) here's a fun DIY with a link to a homemade magic kit for tots
🕸 scarecrow - i did this one year ! i dressed in a flannel and stuffed my sleeves with leaves ! you can do some cute button nose makeup or add a straw hat !
🎃 jellybeans - this has to be the most simple and cutest DIY ever !
🕸 superhero - pick your signature color and add a cape ! what will your super powers be ? and most importantly , must you conceal your identity ?
🕸ꜝ⌗✧・゚🎃 𝗯𝗈𝗼 ! ◥(*`꒳´* )◤ 🧙♂️ .⠂🔮꒷꒦゚・✧⌗ꜝ🕸
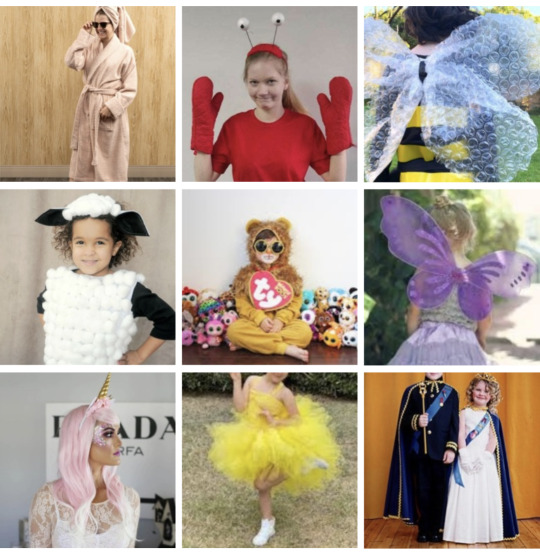
and a few more simple ideas i wanted to add on the fly <3 !
🎃 waking up - pj comfy clothes to the max !
🕸 lobster - orange and reds , add some big oven mitts as your claws !
🎃bumble bee - black and yellow , or yellow and black ?
🕸 sheep/lamb - fluffy soft light precious little baby
🎃 beanie babie - so simple and cute ! somebody has to give it a try
🕸 fairy - you can be any type of fairy ! grab your wings and let's go !
🎃 unicorn - i dressed up in a pink fluffy tutu and found a decently priced unicorn horn ! so much fun !
🕸 sunshine - all you need to wear is yellow and a bright smile on your face !
🎃 royalty - you could be any royalty from any time ! modern , victorian , medieval , or even something else ! maybe you're dressed out of the ordinary for some reason , like a royal spy ! im sure you have a story here's a crown DIY that ive done before for fun !
#beanies boos#agere halloween#agere diy#sfw little#age regression sfw#age regression community#agere#agere little#agere positivity#sfw age dreamer#sfw only#agere blog#agere kiddo#sfw smolspace#sfw little stuff#sfw littlespace#sfw little blog#sfw interaction only#agere sfw#sfw age regression#sfw age regressor#sfw agedre#sfw agere#sfw agere blog#sfw little community#sfw little post#sfw regression#sfw regressor#agere autumn#autumn agere
6 notes
·
View notes
Text

I GOT A PLUSHIE WHICH HAD A HOLE SO I FIXED IT AN MADE IT INTO A RATTLE (Named him Tic Tac)
#goth#agere community#age dreaming#age regressor#agedre blog#agere blog#safe agedre#sfw agedre#sfw agere#age regression#agere diy
6 notes
·
View notes
Text
🥺 I'm having trouble finding materials for decorating pacis
4 notes
·
View notes
Text
Make Your Own Colorful Playdough Adventure! 🌈🎨
╔════════════════ ❀•°❀°•❀ ═════════════════╗
Hey there, little artists and crafters! 🌟 Today, we're going on a magical playdough adventure, and you get to be the master chef of creativity. May need a caregiver to help out, though!
Materials You'll Need:
Flour: This is our magic powder to make the playdough.
Salt: It makes our playdough just perfect.
Warm Water: To bring everything together.
Food Coloring: This will turn your playdough into a rainbow!
Oil: A bit of vegetable oil keeps it soft and squishy.
Magic Sparkles (Glitter): Make your playdough sparkle like a unicorn.
Cookie Cutters: To shape your doughy creations.
Imagination: The most important ingredient!
Let's Get Crafty!
Step 1: Mix the Dry Stuff
In a big bowl, mix 1 cup of flour with 1/2 cup of salt. Stir them together with a big spoon.
Step 2: Add the Wet Magic
Now, add 1/2 cup of warm water and a few drops of food coloring. Mix it all up. Watch the white dough turn into your favorite color! 🌈
Step 3: Keep Mixing!
Time to add a tiny bit of oil (around 1 tablespoon). This will keep your playdough super soft. Mix, mix, mix!
Step 4: Add Some Sparkles!
Who doesn't love a bit of magic? Add some glitter to your playdough. It'll shine and shimmer just like your imagination.
Step 5: Knead the Dough
Take your playdough out of the bowl and knead it on a clean surface. Roll, squish, and shape it. Make whatever your heart desires - animals, stars, or even a playdough ice cream cone! 🍦✨
Step 6: Have Fun!
Now, let your imagination run wild. Create your own magical world with your new playdough friends. What adventures will you go on? 🚀🌟
And that's it! You've made your very own playdough. Store it in an airtight container so it stays squishy and ready for more adventures. Have a squishy, sparkly, and super colorful time! 💖🌈🦄
Remember, there's no right or wrong way to create with playdough. It's all about your imagination and the fun you have while crafting. Enjoy your playdough adventure! 🌈🌟
╚════════════════ ❀•°❀°•❀ ═════════════════╝
#age regression#age regressor#sfw smolspace#sfw littlespace#sfw little community#gif#sfw agere blog#DIY#diy craft#play dough
155 notes
·
View notes
Text
I made a onesie out of an XXL T-Shirt
Got the idea from this post by @puppys-tiny-space!!
So here are step by step instructions for y'all!
First of all, make sure the shirt you use is oversized for you, so it is nice and comfortable, even after altering it. Normally, I wear sizes S / M, the shirt I chose for this is a size XXL, though I think an XL would work well too. So I would recommend a shirt that is at least two sizes "too big"!
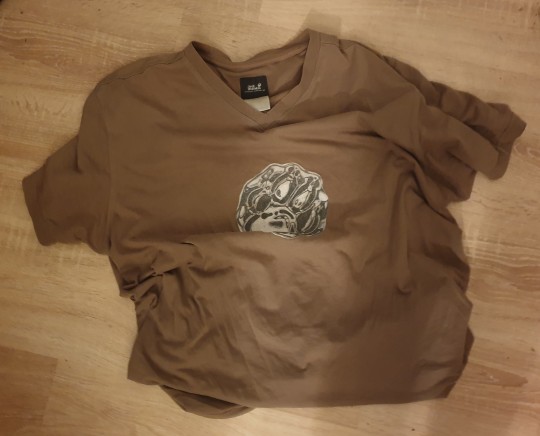
I picked an old shirt, in case I mess it up.
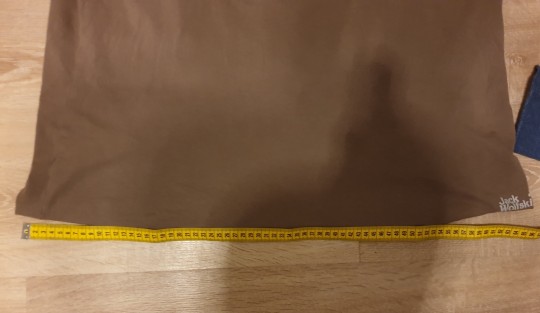
First I measured how wide the shirt is.
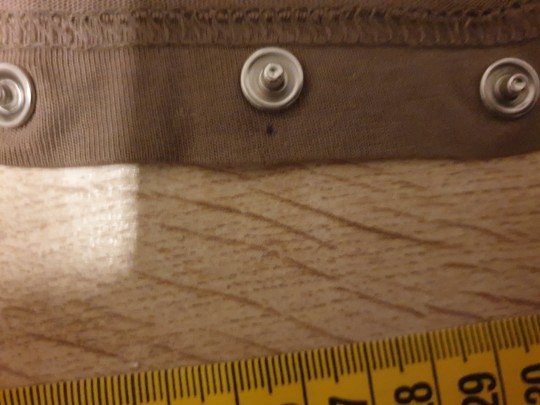
I marked the exact middle & made two more markings, each one 4cm from the middle marking. (Forgot to take pictures before putting the buttons in, so I recreated it lols)

On the front I made the "snap part" of the buttons face out.

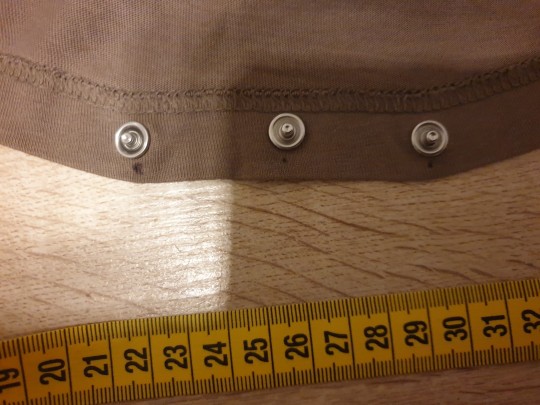
And on the back I made them pont inward (inside the shirt).
So it closes like this!
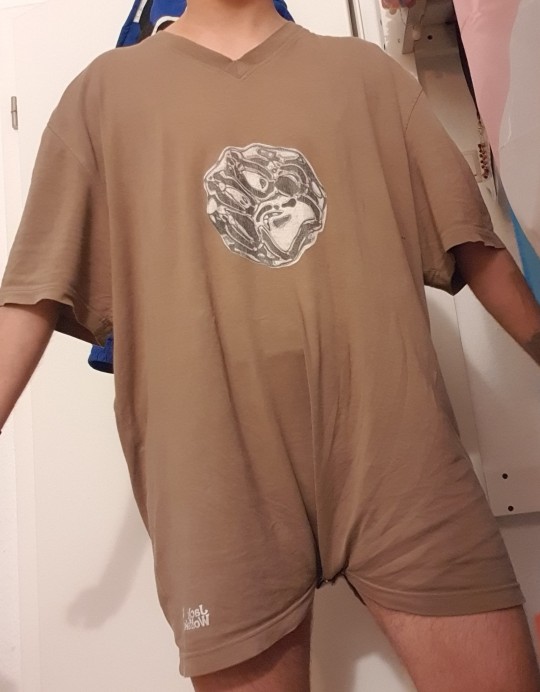
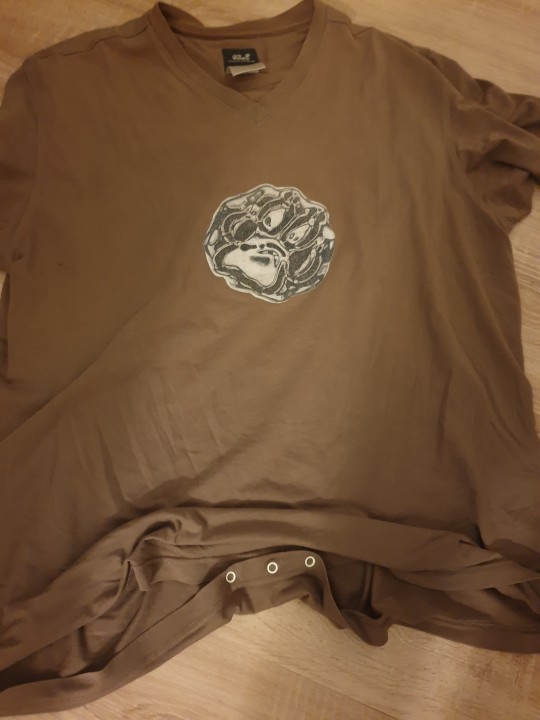
And this is how it looks like when I wear it!

I used on one of those press button pliers, there are also press buttons to sew in. Both should work the same!
I hope this is helpful & I'd love for you to share your DIY onesies, if you decide to make one! And again huge thanks to @puppys-tiny-space for this amazing idea!! <3
.゚。.・.*.゚☆❗only interact if your blog is SFW❗☆ ゚.*.・. 。゚.
#nates sewing#little on a budget#nates outfits#diy onesie#diy#sfw interaction only#sfw#sfw agere#agere#age regression#agere community#age regression community#age regressor#agere fandom#agere boy
90 notes
·
View notes
Text
Made Merlin a sweater 💙🐇
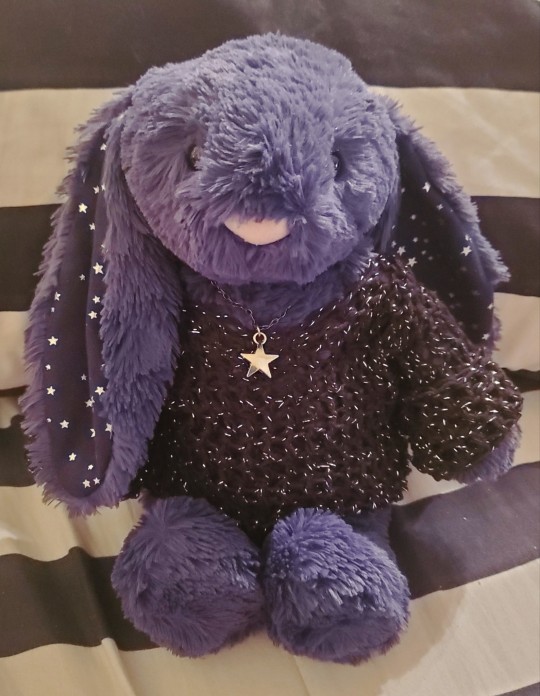


Modified this tutorial:
youtube

#plush: Merlin#crochet#syskid#agere#plushblr#plushcore#cute#plushie#stuffie#jellycat#bashful bunny#stardust bunny#DIY#Youtube
250 notes
·
View notes
Text


Cinnamon with hair bows I made for them :)
#my post#build a bear#build-a-bear#community#sfw#agere#stuffed animal#diy#her name is cinnamon speckle
88 notes
·
View notes
Text
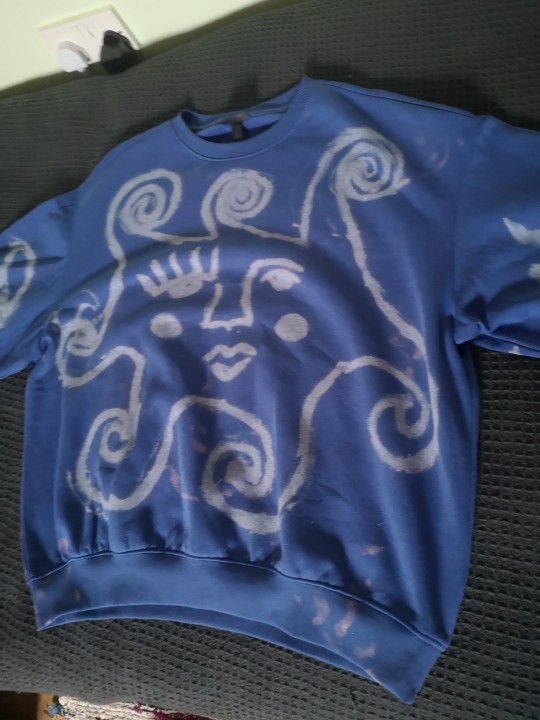
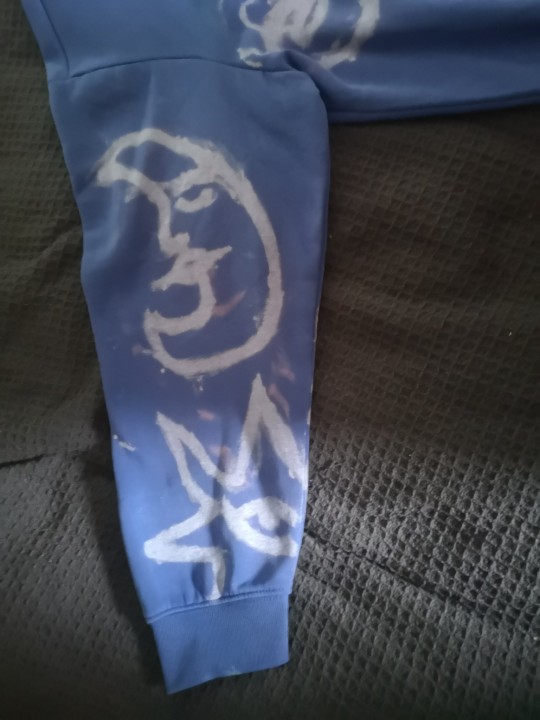
back with another craft! it's my (bio) dad's birthday tomorrow and I recently bleached this sweat shirt for him! :)
here's the front:
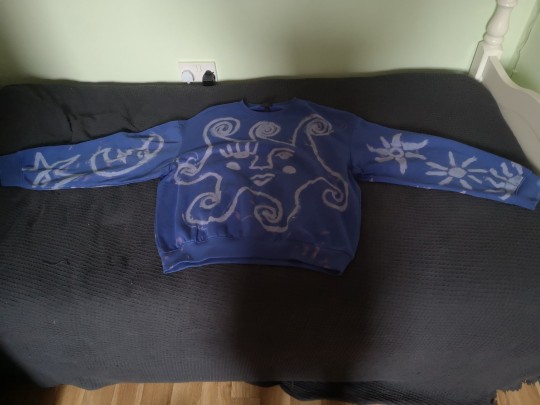

and the back:
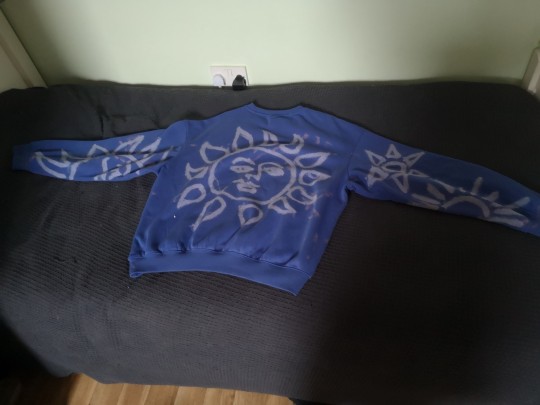
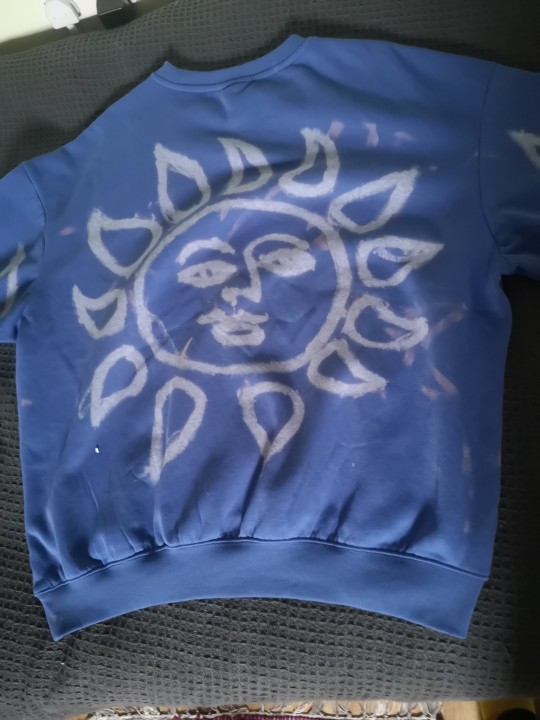
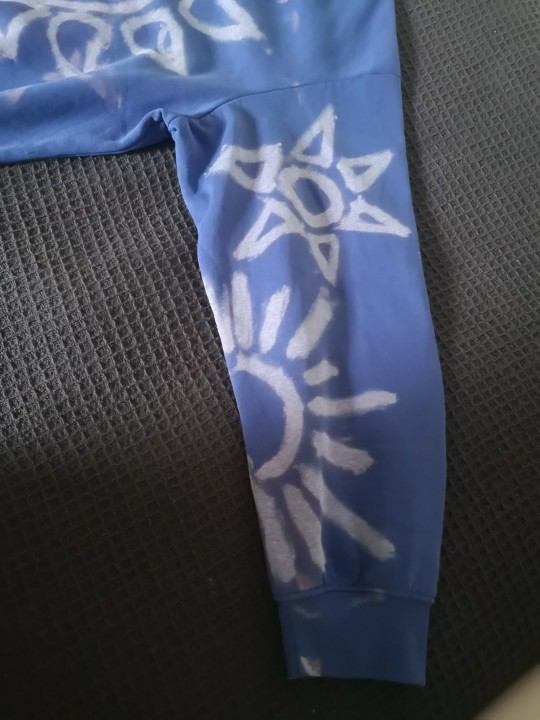

if anyone's interested it's just a sweatshirt i bought then painted a design on with bleach (this part has to be done outside! don't want to breathe in too much bleach hehe) and it took a few brushstrokes and a couple minutes to show up but when I was done I rinsed it under water (please wear gloves!) and put it through the wash then just let it dry and voila! super fun to make but be careful because of course it's bleach! (defo make sure to wear clothes you don't mind ruining)
#age regression#sfw agere#agere#age regressor#agere blog#sfw age regression#agere community#sfw littlespace#sfw interaction only#safe agere#crafts#diy projects#diy craft#diy#diy ideas#diy inspiration#bleach art#it's a bit messy but i think that adds to the effect!#i did the same thing for my babas birthday#and since my dad thought it was cool i did something similar for him :?#:) *#i hope he likes it :))
29 notes
·
View notes
Text

#agere class#agere classroom#agere daycare#agere school#agere#age regression#sfw agere#sfw littlespace#age regressor#sfw age regression#agereg#age dreaming#sfw little blog#agere blog#Ciao lovelies#Agere diys#Agere diy#Agere craft#Agere crafts
1K notes
·
View notes
Text
some youtube channels for littles!!
i know it can be hard to find youtube channels for young, but not toddler aged littles. here's some we watch
channel, content, age range
royalty soaps, mostly craft and soap-making content, e for everyone!
rachel maksy, crafting/DIY/fashion! like 13+? some adult jokes, but not too many.
safiya nygaard, traveling/DIY/generally silly content, 13+ (some adult jokes but nothing you dont see on tv nowadays)
evan and katelyn, crafting, DIY, home renovation sometimes. most ages fine, some mildly adult jokes but not many.
watcher, ghost hunting, food, mysteries and urban legend sort of content. meant for teens and adults :) my favorite channel!
moonlight jewel, beautiful doll customs! e for everyone
dollightful, another very popular doll customizer, e for everyone
doll motion, doll customs, but also has a stop motion series. i haven't seen that, but the doll videos are e for everyone as far as i've seen.
moonkitti, warrior cats youtuber! talks about the books, a fanclan, and does speedpaints!
that's all for now. if you'd like more, feel free to send me an ask for more specific channels! thank you for reading.
#sfw agere#sfw interaction only#agere#petre#sfw petre#pet regressor#age regression#pet regression#age regressor#warriors#kidcore#caregiving#agere caregiver#petre caregiver#diy
30 notes
·
View notes
Text
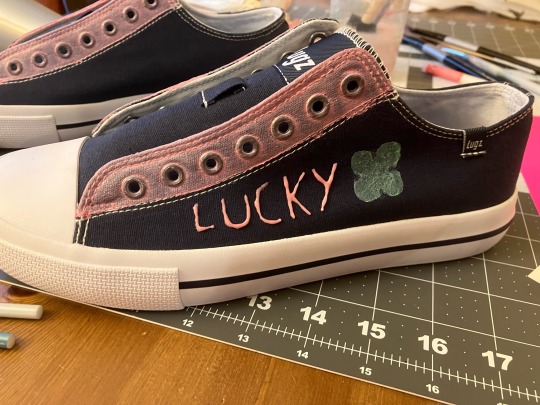
DIY Twinkle Toes-style shoes

If you’re a 2000s kid, you might remember twinkle toes. They were very popular in my gradeschool, and I owned a pair when I was around 8, which happens to be around the age that I regress to. Unfortunately, they do not make these in adult sizes, but I still wanted a pair, so I decided to make my own.
Disclaimer: while this is an age regression and dreaming blog, it’s best if you make these while in a big headspace, because of the delicate details and materials required for the project.
With that out of the way, let’s get into the tutorial:
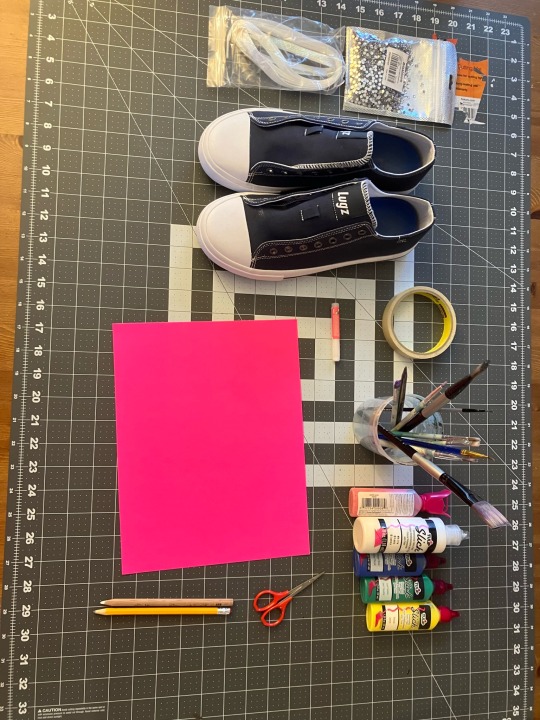
To make these you will need:
One pair of basic canvas sneakers with the laces removed
Glitter shoelaces
6mm rhinestones
Nail glue
Masking tape and sticker paper
Scissors
Pencil
Paint brushes
Fabric paint
Tweezers (not pictured)
The first step is to tape off the area around the rivets where the laces go like this:
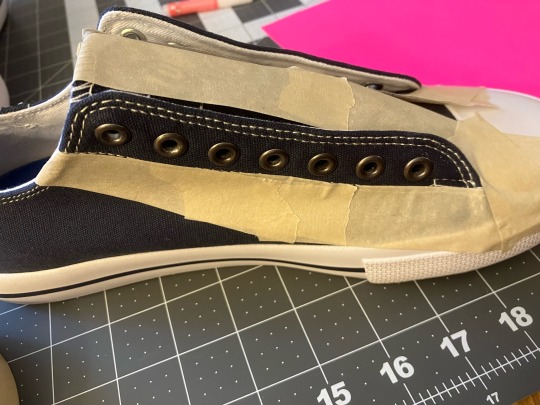
This ensures that you will get a clean line. Now, if you are using dark shoes like me, you’ll want to paint this area white so that the color you choose to color it with shows up brighter.

If you’re using light shoes, you can skip this step.
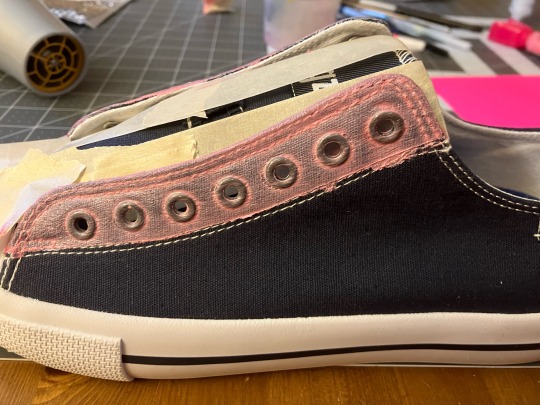
Now, choose whichever color you like, and paint over the area with it. If you want the fabric paint to dry faster, you can use a hairdryer.
When you’re done, it should look something like this.
Now, you can create designs on the rest of the shoe. I like clovers, so I decided on a clover motif.
Draw the design you want on the sticker paper like so:
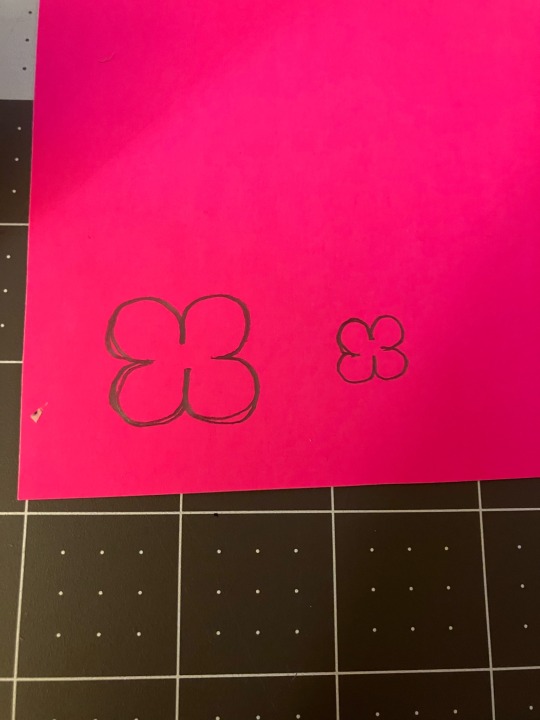
And then cut it out from the inside. this will be your stencil. Paste the stencil wherever you want on the shoe, and then paint inside of it like you painted around the rivets earlier. You can also write words on the shoes.
Now for the part you all have been waiting for: the rhinestones. Using tweesers, take eache rhinestone and dip it in nail glue. Then place the rhinestone onto the white part of the sneakers like this:
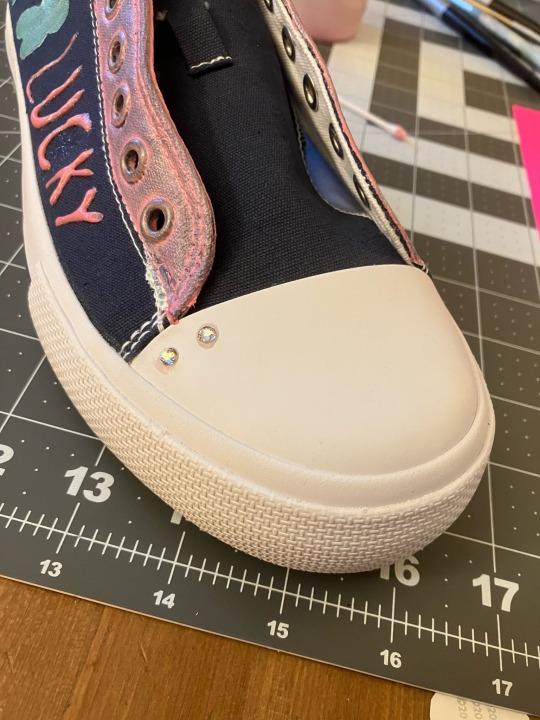
When you’re done, they should look like this:
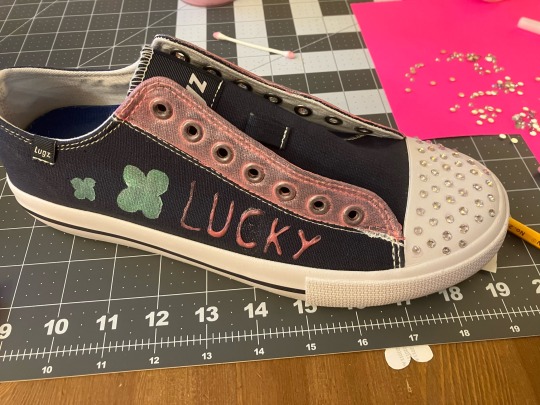
Now,once the glue is dried, you can lace them up with the glitter laces! I put beads on mine.
Ta-daaaa!!!! You’re done! I hope this tutorial can find the people who wanted a pair but never got one, or just would like to wear them again!
#nostalgia#sfw middle regression#middle regression#sfw agere#agere blog#sfw agedre#age regression#agere#shoes#crafts#tutorial#diy#fashion#wardrobe
10 notes
·
View notes
Text


Rainy day craft ideas moodboard
98 notes
·
View notes
Text
using this post from @dino-boyo-agere , i did some alterations on an old friend of mine !! I chose this guy in particular because he's kinda similar to Tuppy ! maybe they're related .... :-0
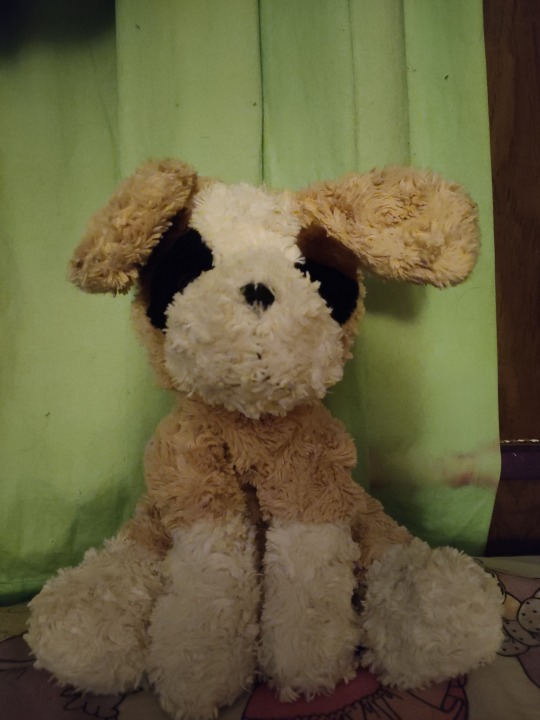
you can't exactly see it in the picture, but theres a little heatable bag in his stomach ! i sewed two buttons for closure , but my sewing skills aren't the greatest ... <:-3
13 notes
·
View notes
Text
Stealing these photos from a K!nk convention because these looks like so much fun and I wish I could have this environment for non-sexual agere littles.
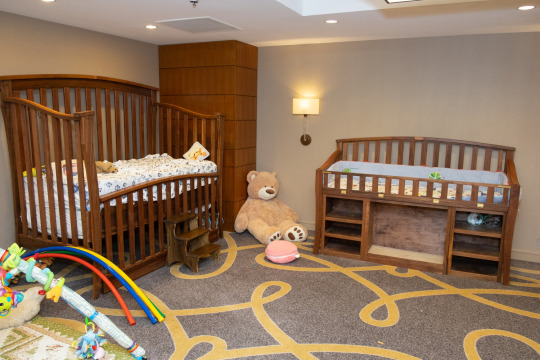

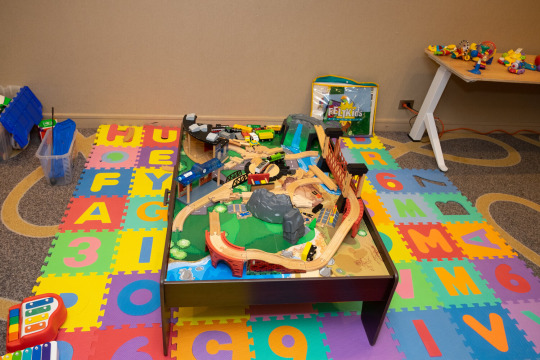
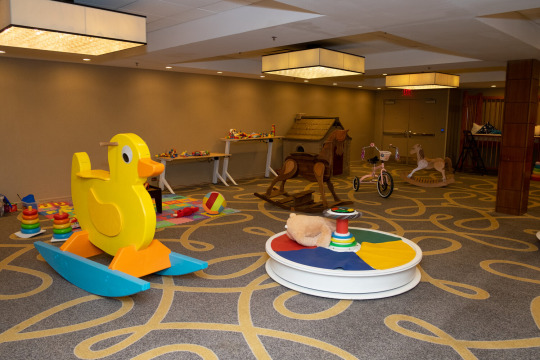


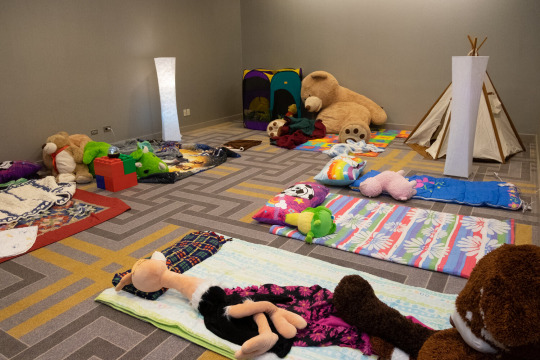
#I hate where I had to find these from#I wish I could go there but not because k!nk communities totally squick me out#agere daycare plan#this is just daycare plan inspiration#I WISH I could make something that looks like this these are wonderful#I want to and don't want to be here#I wish I had a beautiful nursery like this though#it looks like so much fun#Foaming at the mouth I need that crib and to DIY that baby gym it's too dang cute!#k!nk mention
176 notes
·
View notes
Last Seen Blogs

oyster-sauce-tart
Requests Open: 2/10

esgotadababy
SIMPLICITY IS THE KEY

orson
Untitled
oyster-sauce-tart
Requests Open: 2/10

piercingamding
Unbetitelt