#toolmaking
Text

How Primitive Tools Are Made
---
Source: The Book, pg. 20-21
#anthropology#science#primitive#primitive tools#toolmaking#tools#engineering#humans#interesting#infographic
96 notes
·
View notes
Text
Must Farm in Peterborough, England is a treasure trove of Bronze Age artifacts. This simple gouge, a woodworking tool, shows some things haven’t changed much in 5000 years.
18 notes
·
View notes
Text
Did some work the last couple days on some captive ring rattles. One of the bigger challenges was grinding my own captive ring tools for separating the rings from the rattle.
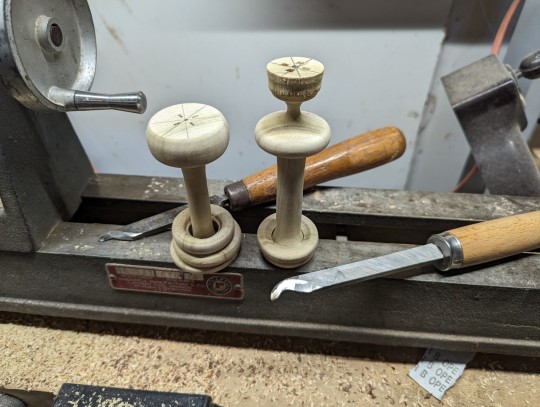
Some initial practice rings with my two versions of the tool. The one in the foreground ended up working better.
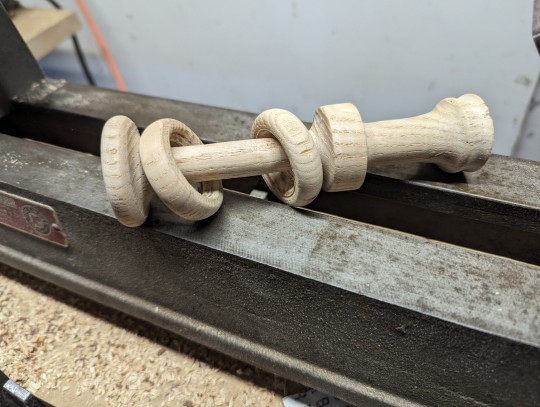


Final rattle with a handle. It sounds great and is fun to use.
14 notes
·
View notes
Text
Tool & mark making
In one of my painting weeks, I created tools out of random objects to paint with.

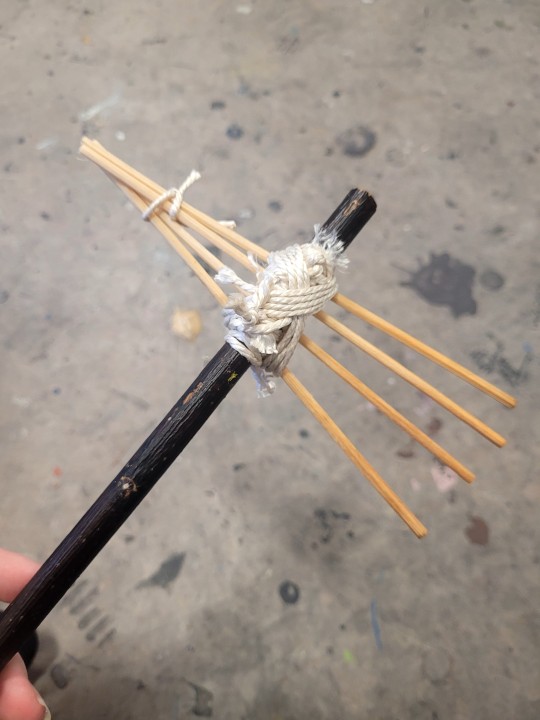
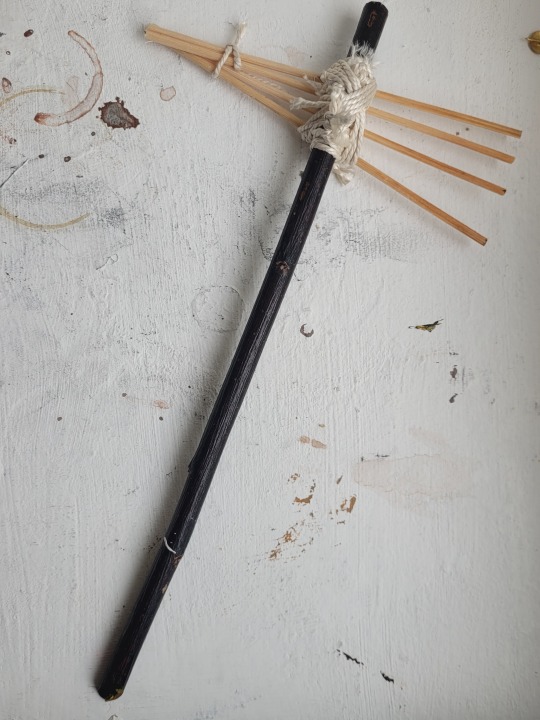
My first tool I made with thin rope, a stick and old diffuser sticks. I tied one side, so I'd have two ways to use it. Actually using this with the paint didn't go as well as I hoped, it didn't spread out the paint much, and I'd have to repeat lines a lot.
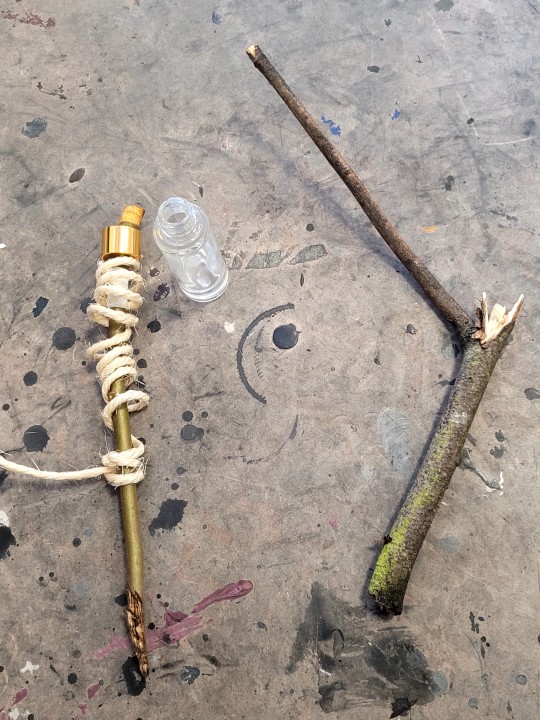


For my second tool I used the same things but the bottle that the sticks came with, thicker rope and tape.
I went out to grab more sticks to use and began working with the straight stick but swapped to one that looked like a handle. I'm glad I did because it would've been a lot more difficult to roll paint. I sawed off the edges of the stick to make it cleaner looking. The tape help keep the glass bottle from slipping off, but the gold part can be unscrewed and it will come off.


Here's a video of me using the tools;
2 notes
·
View notes
Text
Project : Movement
Week : 15th Jan - 19th Jan
Workshop : Tool-making and Mark-making
As a continuation of yesterday’s workshop for the painting discipline, we learned some techniques to make our work feel more personal, in relation to the process. Eoin taught us how we can use everyday objects to create our own tool, rather than just using paintbrushes.
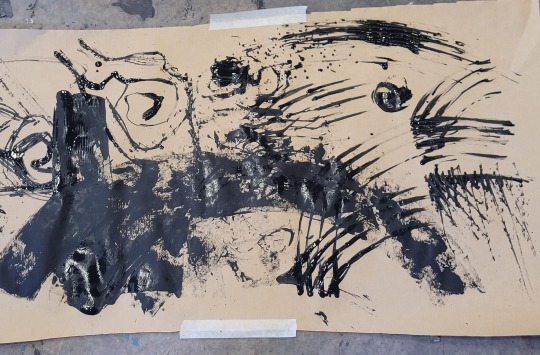
Above is a collage of clips I took showing some of the marks I made with my own tools. I used things like string, cardboard, and cloths to apply the paint onto the sheet.
I had to get used to not using a paintbrush, as I missed the control that I have with a paintbrush. I felt there was a lack of control when mark-making with my own tools, but I overcame this by enjoying the spontaneity of where and how the paint will apply.
I realised that this method of mark-making is really useful for painting textures. I think I can incorporate some of these techniques into the painting that I will start this week, as there will be a mixture of soft and hard textures to recreate from my reference.
6 notes
·
View notes
Text
Week 1: tool making workshop on the 16th of January


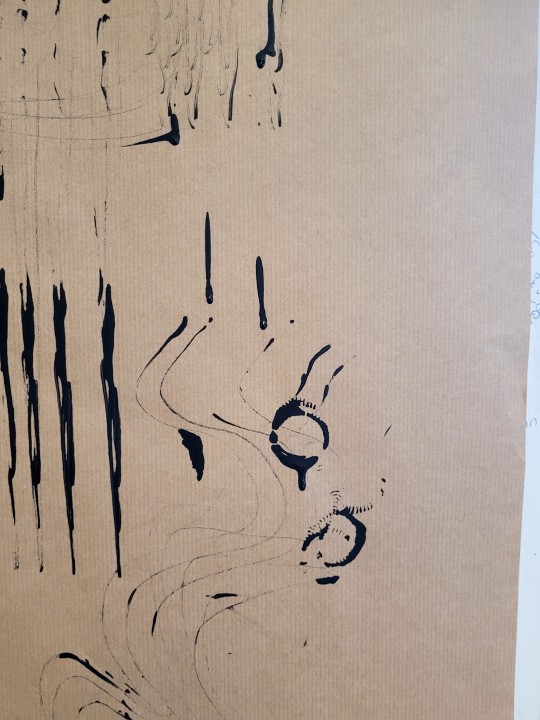
I was at the tool making workshop yesterday with Eoin, where I used wooden sticks, wool and paper, and finally I tested them with ink.
4 notes
·
View notes
Text
Tool making and mark making workshop 16/01/24
Part 2
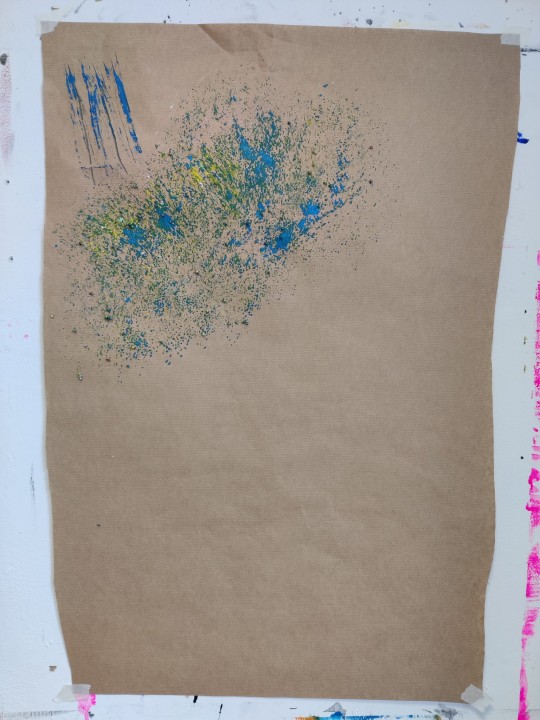
I also created another piece of work in this workshop.

It is a replication of the myself doing warrior 1 pose from yoga.

I adore the colours I used in it, as for me, they represent the calming feeling of yoga.
I was also thinking about what I learnt from doing the life drawing on monday, how different tones are needed. So hence why I used shades of blue green and yellow green.

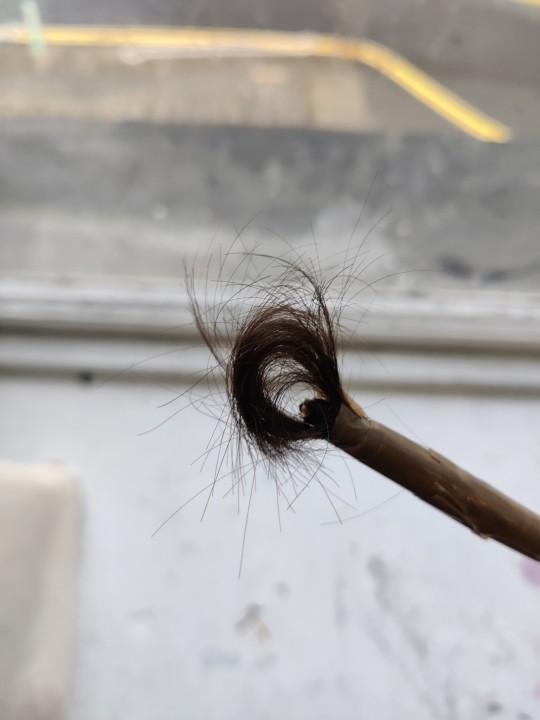
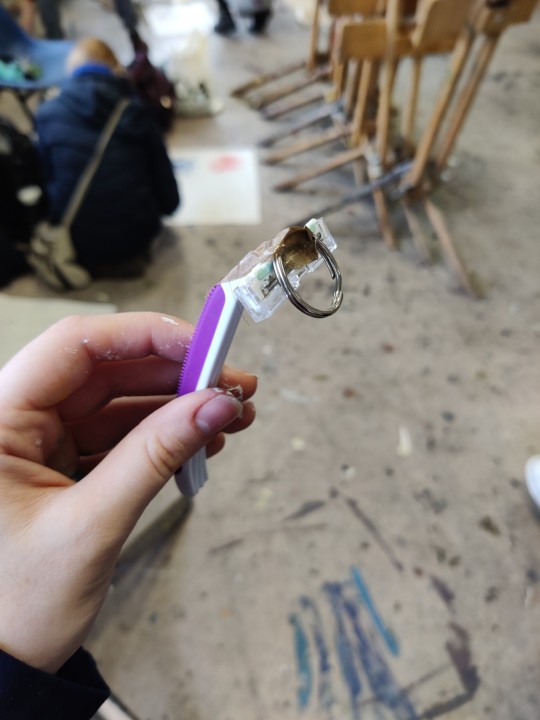
The tool used to make this piece consists of an old toy water gun, a stick and a lock of my hair.
I decided to make this with a gun-like object as I feel guns can be a symbol of a toxic, threatening power, which I feel is quite a difference from the gentle power and security that yoga creates within. So using it to paint changes its power.
Also below are other tools I made and marks they created.
I had so much fun making everything and seeing which worked and what didn't.


5 notes
·
View notes
Text

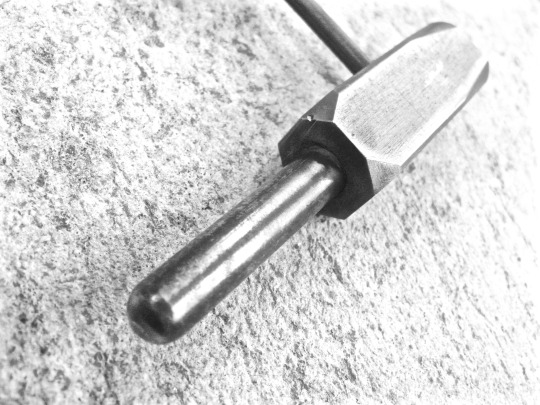
I made a crappy lil cut off tool for my anvil
2 notes
·
View notes
Text
Mould Design in Plastic Injection Moulding
Injection Moulding is an extremely versatile procedure. It can be utilised for virtually any product. Injection moulding is the industry standard for manufacturing components for products.
There are some limitation needs to consider. Here are the rules to follow when designing your product to make sure quality and durability:

Wall Thickness
Keeping your walls thin will ensure a faster cooling rate and less materials used. Lower cooling rate and less material used will result in a shorter cycle time. This allows you more parts in a shorter amount of time, for less production cost
To strengthen parts, ribs are more effective than thicker walls. Adding ribs at right angles to a wall will add considerably to its overall strength. It is a common mistake to thicken the walls of a design to achieve this effect when ribs are a cheaper and more effective option.
Ribs should be about half the main wall thickness. There can be some leniency here, but not too much or the ribs will be completely ineffective. Half is the generally accepted standard and is more than enough to increase a wall’s strength.
Coherence
Try to make your design uniform throughout. That is, wall thickness, rib thickness and corner radii, for instance, should all be the same values. This will help the part to cool uniformly.
Corners & Edges
Corners could be an issue in a mould and will not come out flush. It is difficult to form plastic into a flawless corner. The outcome will look amateurish and messy, not to mention the power of the components can be compromised.
Corners and edges should be rounded wherever possible. Sharp edges do not always come out perfectly when the part is ejected from the mould.
Add a slight angle to the sides of your mould to allow easy release. A one- or two-degree angle should be applied to the mould on the face perpendicular to the parting line. This will allow for easy removal of the part from the mould.
Ribs
These are structural factors for your component, utilised for general stability control. Ribs are thin wall protrusions which extend vertically from a plane or wall. Adding ribs instead of thicker walls will provide greater structural support.
Bosses
These are empty, cylindrical protrusions. These are normally integrated in a style for accepting screws or other mating parts of your style. Making sure these are secured by attaching them a wall. Putting in ribs will means the bosses will stay straight as well as accommodate the part it was made for without an issue.
External Undercuts
A depression or protrusion in the exterior of the mould – the cavity half – could create issues if trying to divide parts from the mould. Adjust the parting line to lodge this.
Internal Undercuts and Overcuts
Related to external undercuts, these depressions or protrusions are within the mould – on the centre half. Adjust the parting line to lodge this.
Protrusions on the part that will snag on the mould core or cavity when it is opened can make it impossible to remove from the mould.
Threads
When your mould has a thread, always position it vertical to the parting column. This will make sure that the delicate thread isn’t damaged. It’s better, preferably, to not comprise a thread at all in the design. Making your design simple will lower the odd of something going wrong.
Injection mouldingdesign makes a superior product. The myriad possibilities far outdo the limitations. Designing for an excellent injection moulded part is the core of the design process. These restrictions are the guidelines for making a flexible end product.
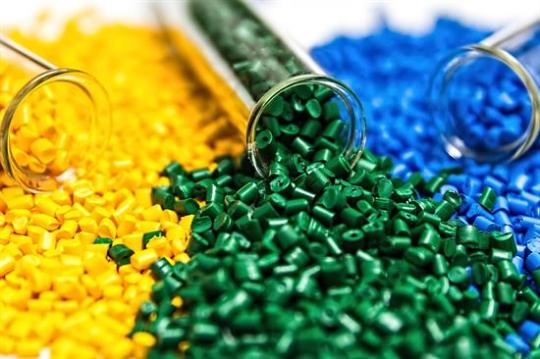
Colour use
Where possible, use lighter colours for your moulds. The mould is already cool when the molten material is being injected. As such it begins the setting process immediately and will sometime leave setting patterns. Using lighter colours will help y.to hide these patterns.
Injection mouldingis the industry standard for creating lasting, quality parts. To be able to take advantage of this technology your design must meet its minimum requirements. Small considerations are all it takes and the result is a successful product that will meet all of your quality needs.
If you would like to find out more or have any questions please do not hesitate to get in touch, contact details can be found below:
Email: [email protected] or [email protected]
Tel: 01455 558825
Mob: 07754 857071
Our Socials can also be found below:
LinkedIn: https://www.linkedin.com/company/dudley-associates-ltd/
Instagram: https://www.instagram.com/dudleyassociates
Twitter: Dudley Associates (@DALPlastics) / Twitter
Facebook: https://www.facebook.com/DudleyAsssociates
#plastic injection molding#plastic injection moulding#injectionmoulders#injection moulding#injectionmouldtooling#injection mould toolmaking#toolmaking#tool making#toolmakers#tooling#rapid prototyping#productdevelopment#product design#productdesign#made in uk#made in britain
2 notes
·
View notes
Photo
Oooh, look at me being all artsy-fartsy with the camera!
Making your own tools is half the fun of being a #blacksmith. Sometimes your ideas work out. Sometimes they don't. The journey of discovery is always a good time!
If you'd like to support powerful, intense, evocative imagery like this, consider joining the team over on Subscribe Star. :D
https://www.subscribestar.com/three-rivers-forge
#blacksmithing#threeriversforge#europa#tradition#toolmaking#metalworking#craftsmanship#subscribestar#supportthemakers#artsyfartsy#tools#makersgonnamake#canonG10#blacksmith#forging
5 notes
·
View notes
Text

5 Reasons Why Choose Us?
#proservtools#carbidetools#toolmaking#solidcarbideroundtools#spm machine#special purpose machine#spm manufacturers in pune#industries#proserv tools#cutting tools manufacturers in Pune#cutting tools#carbide cutting tools#best cutting tool#industry#manufacturers
0 notes
Video
youtube
Sustalı Zımba Yapımı - Otomatik nokta zımba nasıl yapılır? Bu videda otomatik nokta zımbası yapımını gösteriyorum.
0 notes
Text
In a lucky discovery, much like finding a needle in a haystack, a rare 5,000-year-old polishing stone—once used to sharpen Neolithic tools—has been found camouflaged amongst boulders in Dorset, England.
24 notes
·
View notes
Text
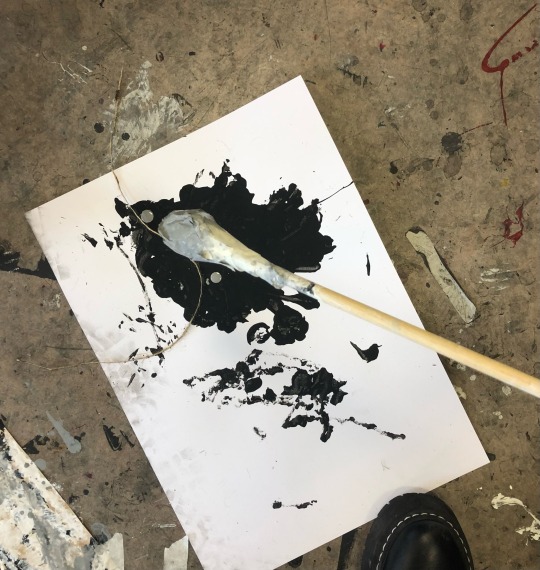
Movement Project - Toolmaking and Mark making
(27/2/24)
Inspired by the angelfish I saw yesterday I ‘painted’ a few using a wooden stick with masking tape at the top and essentially dipped the stick in paint whacked the page over and over till what I had in mind came together, this reminded me of the stippling technique.
I gave myself three tones to work with, black, grey and white using the grey to add more dimension to the fish and adding water bubbles to the background using rope dipped in white paint and formed into a circular shape.
I enjoyed doing this activity and found it interesting how the pages I used to lay my tools down on when I was not using them ended up being their own mark making art pieces.


0 notes
Text
instagram
Dreaming of creating beautiful #wooden #furniture and #crafts? Get instant access to over 16,000 step-by-step #woodworking plans for all #skill levels.
Whether you're new to woodworking or an expert #carpenter, these plans makes completing #projects easy with:
📐 Detailed 3D diagrams and instructions
🛠 Cut lists and shopping lists for materials
🎥 150 premium video tutorials
Tips for selling your finished pieces
Lifetime free updates
The plans are currently 77% off, Turn your dreams into reality and start building your next woodworking project today! Tap the link in my bio to get started.
Credit at video end, please follow his account for more amazing craftsmanship
#woodworkingideas#woodworkingart#finewoodworking#woodshoplife#woodworkingskills#woodworkingproject#dowoodworking#woodworkingcommunity#woodcraft#makersmovement#woodworkinglove#woodworkingmachinery#reclaimedwood#木工#木工職人#Holzarbeiten#menuiserie#toolmaking#woodworkingplans#DIY#woodworkingtao#woodworkingideas2024#woodencreation#craftedwithlove#woodworkingfun#crafts#furnituremaking#woodturning#Instagram
0 notes
Text
Aspects of the Philosophy of Human Hands
The philosophy of the human hand explores the significance, symbolism, and philosophical implications of this remarkable anatomical feature. While hands primarily serve practical functions such as grasping, manipulating objects, and facilitating communication, they also carry profound symbolic and philosophical meanings across various cultures and philosophical traditions.
Some aspects of the philosophy of the human hand include:
Symbolism: Hands are rich in symbolism and cultural significance. They often represent agency, creativity, dexterity, and the ability to shape the world around us. In religious and spiritual contexts, hands may symbolize divine intervention, blessing, or healing.
Embodiment: The human hand is intimately connected to our experience of embodiment and tactile perception. Philosophers explore how our hands mediate our interaction with the physical world and shape our sensory experiences.
Toolmaking and Technology: The unique dexterity of human hands has enabled the development of tools, technology, and cultural artifacts throughout history. Philosophical inquiry into the human hand considers its role in the evolution of technology and its implications for human progress and civilization.
Expression and Communication: Hands play a crucial role in nonverbal communication, gesture, and expression. Philosophers examine how hand gestures convey meaning, emotions, and cultural norms, contributing to our understanding of language and communication.
Ethics and Responsibility: The human hand is often associated with acts of creation, labor, and craftsmanship. Philosophical reflections on the human hand may encompass ethical considerations related to work, responsibility, and the ethical use of one's hands in shaping the world.
Overall, the philosophy of the human hand provides a lens through which to explore fundamental questions about human nature, embodiment, culture, and the relationship between humans and their environment. By delving into the symbolism and practical significance of this unique appendage, philosophers deepen our understanding of what it means to be human.
#philosophy#epistemology#knowledge#learning#chatgpt#education#ontology#metaphysics#ethics#psychology#Human hand#Symbolism#Embodiment#Toolmaking#Technology#Communication#Nonverbal communication#Gesture#Expression#Responsibility#Human nature#Culture#Philosophy of embodiment#Tactile perception
1 note
·
View note
Last Seen Blogs

sunshine-makes-me-smile
Sunshine, The Ocean And Snuggles 🌊🌞🥰

kelseycrunch
≻ SuperKelsey ≺

sassymagazinepainter
Untitled

anatomyofdata-blog
Anatomy of Data

barcelonnettes
Mexicain