#and it gives me more options for what to do with the yarn i'm learning to spin
Text
me: i am having so much fun exploring all these fiber arts i have picked up or returned to in the past two years, i should improve my proficiency with these before i pick up any others
also me: *buys lap loom*
#dryad speaks#dryad dabbles#THE WEAVING STORE CLOSEST TO ME IS GOING OUT OF BUSINESS AND IT WAS 40% OFF#it was a planned purchase for the far off future but at that price how could i not?#and it gives me more options for what to do with the yarn i'm learning to spin#which everyone keeps asking me about when i tell them i've been spinning yarn#i'm just like 'idk the world is full of endless possibilities but for now I'M JUST SPINNING'
1 note
·
View note
Note
I found fibrecraft tumblr after searching drop spindles because my dad *didn’t even know what that was.* And despite having been firmly of the opinion that I didn’t intend to learn it, y’all have me getting ever closer to giving in. However, I’m also growing ever more enamored with the idea of weaving - and despite recently deciding to give knitting and crochet another go - I think it looks the most fun of the fiber crafts. My issue is that I have absolutely no space.
But I’m beginning to realize there’s a lot of different looms and types of weaving. So I was wondering if you have any resources or tips for small space methods and storage?
welcome to fibrecraft tumblr! it's fun here, we have enablers.
i will admit that while i love knitting, weaving is amazing, and is much better with regards to instant gratification—weaving for an hour gets you a lot more fabric than knitting for an hour.
so let's talk about weaving, because i have great news for you: you can 100% totally weave in a small space if you want to, and you even have options for how you do it. i'm going to go through basically all the small space weaving options that i'm aware of in roughly size order, and if you make it to the bottom of this you'll have a pretty good overview of space-saving weaving methods.
the first question to ask yourself is what you want to weave. maybe you're not sure yet, which is totally fine. if you don't immediately have strong feelings about it, though, maybe consider if band weaving strikes your fancy. this is pretty limited in size, but lets you weave belts, straps (like camera or bag straps), lanyards, etc.
if you think that sounds neat, it's worth looking into tablet weaving, an inkle loom, or a band/tape loom. tablet weaving takes up no space at all—if you can fit a stack of index cards into your life, you can fit tablet weaving. the tablets are small square cards, often made out of heavy cardstock, and even with a project on them, you can probably fit them into an index card holder.
inkle looms are larger, and to be honest i've never used one and don't know a ton about them, but they're also used for making woven bands. the looms can also be very aesthetically pleasing, if that's something you're into. they can be very big, but the ashford inklette, for example, is only 36 cm long and maybe 12 cm wide.
tape looms are—in my experience, anyhow—larger than tablet weaving but smaller than inkle looms, and even the larger ones are only about shoebox size. they vary widely, from gorgeous, complicated little looms to a handheld paddle that you use to create a shed, which is what you put your yarn through when you're weaving.
if that doesn't sound like good times, consider a frame loom. these are pretty simple—if you ever wove potholders out of stretchy cloth strips as a kid, you probably used a frame loom to do it on. frame looms are generally inexpensive and readily available, and can be used for small woven objects like potholders, coasters, placemats, etc. they can also be used to make some truly stunning tapestries. while you can buy a huge frame loom, you're still only talking about huge in two directions—it might be as wide as your armspan, but it's still only a couple inches thick.
another option is a pin loom. these don't get mentioned a lot, and i'm not totally sure why. pin looms are shapes with a bunch of pins (metal points, usually) coming out of them. on one hand, you're limited to making things that are the shape of the loom, but on the other hand, if you've been hanging around fibrecraft tumblr, you've seen all the things crocheters get up to with granny squares, right? there's no reason in the world that you can't do all those things with the squares made on a pin loom. or the hexagons! or the triangles! i've been kinda thinking about getting a little hexagon or triangle pin loom and using it to sample my handspun, then turning the shapes into a blanket.
if you hate all of that, that's ok! we have more options.
you could consider a backstrap loom, which is an ancient way of weaving that's still practiced today in many places. backstrap looms are cool because you can weave probably 24 inches wide on them, but even with a project on it, they take almost no room at all. backstrap looms are fairly easy to diy, because they're basically a bunch of dowels, so they can be a good low-cost way to try out weaving. backstrap looms will let you make longer, wider fabric than anything else we've mentioned so far!
another option—stay with me—is a toy loom. there are a number of cheap looms for sale on amazon/ali express/some local places that are actually fully functional looms. recently i've seen a number of people (like sally pointer, though i'm sure i've seen someone using one of the brightly coloured harness looms, as well) who've used them and report that they're functional, if basic, looms. you're fairly constrained in terms of project size, since there's not a lot of space for the finished fabric to wind on, and there's a very limited width, but the looms are quite small and tuck away easily.
ok, but so what if you hate all of those options? don't worry—there are more options! this is the part where things get expensive, though.
as looms go, rigid heddle looms are actually quite reasonably sized. i think the smallest one i've seen is a 40cm (~16") weaving width, which is about 50x60 (20x24") in length/width, and 13cm (5") high. so that's more space than anything else we've talked about, but it's still not a ton of space, you know? a 40cm rigid heddle will let you weave lovely scarves and things of that nature—table runners, placemats, strips of woven fabric to whipstitch together into a blanket, etc.
but maybe that's enough. so let's talk about table looms. some of them are quite large—mine, for example, is about a metre square and sits on a frame that it came with. it is not what you would call space efficient. but many of them, especially modern ones, are very compact, and can even be folded up into something more or less briefcase sized. (weird way to consider it, since the last time i saw a briefcase was probably the 80s, but you know what i mean, i bet.) the cool part here is that you can weave damn near anything you want on a table loom. the less cool part is that for the compact ones that fold up, you're looking at hundreds if not thousands of dollars. the smallest one i'm aware of is the louët erica, which folds down to 42x62x42cm (16.5x24.5x16.5") and gives you 40cm (16") of weaving width. i feel like that's impressively small. you'd have to decide for yourself if that's enough to justify the $500 usd/$800 aud price tag, though.
finally, we've come to folding floor looms. i don't think someone who's never woven before should run out and buy one of these unless money is just literally not at all a concern for you, but they are basically the dream for those of us trapped in crappy rentals, and it seemed weird to leave them out when i'd come this far.
some floor looms are various levels of collapsible. to be clear, this does you absolutely no good at all when you're actively weaving, because you have to unfold them to weave, but it does you a lot of good if you'd like to have a floor loom and still have the ability to, say, walk through the living room when you're not actively using the loom.
most relevant to our discussion about small weaving footprints, some looms fold up entirely. they are incredibly fucking expensive and incredibly fucking cool. the two that i'm most aware of are the leclerc compact and the schacht wolf line, both of which fold up to about half of their unfolded depth. they're still not small—i think that they're both the better part of 75cm (30") wide and tall, so even if they fold down to 40cm (16") deep, they're still 75cm wide and tall. which is Fairly Large, though much better than having something 80cm deep sitting in the middle of the floor.
this was a very, very long post, but hopefully makes it clear that there's a surprisingly wide range of options, and they all have advantages and trade offs. if you're asking my opinion, my suggestion would be to try something—anything—with a backstrap setup and see how you feel about it. maybe you love it and keep at it forever, in which case you're in good company: there are entire cultures that weave exclusively on backstrap looms.
if you like producing cloth but don't love the backstrap setup, or don't like using your body to tension the warp, you have a lot of other options, and you're out maybe ten dollars of dowels.
personally, my next loom is probably going to be a pin loom. unless i win lotto, in which case it's going to be a house that has a weaving studio and like four floor looms in it. but probably a pin loom.
#weaving#i really hope that this was helpful#i get so excited about solving problems that i sometimes go way too hard#but i love thinking about this kind of thing#sorry for infodumping#also weaveblr i didn't forget about warp weighted looms i just don't think that they're super practical#admittedly i am biased by sharing my house with three cats#but also all the learning to weave content is...not on those#if it weren't for the cats my next loom would be warp weighted tho#fibercrafts#fiber art#textiles#smartest raccoon i know#(it's an ironic tag)
223 notes
·
View notes
Text
Tips for Using Red Heart's All-in-One Granny
(From someone not trying to sell it to you)
And I mean that - I'm just another crafter who was skeptical but intrigued enough to want to give it a try. If you have no interest, this post isn't for you and I'm not going to tell you to go out and get it anyway. But if you are curious or intrigued like I was, or if you have it in your stash and are struggling, I wanted to share my thoughts and tips.
TIP 1: Know yourself as a crafter
Who is this yarn for? Is it for me?
That's a great question, and really the first thing you should ask yourself. Be aware of what you are working with and the goal of the yarn. This should be for someone that enjoys working with acrylics. If you work up granny squares often, or enjoy the process of a basic granny square, and will enjoy the seeing the colors change, you might enjoy this. Do you like playing yarn chicken, or does that stress you out? If living on the edge, is your cuppa of hot cocoa, you might find something with this product.
Maybe read through some of these tips if you aren't quite sure where you fall, and they might help you can decide if this type of yarn is up your alley.
TIP 2: Understand what you are trading.
Because there is still work involved - just a different type.
This yarn is going to work differently for everyone, and it's going to take time for you to figure out what works best for you. That'll be a lot of work on the front end, getting to know the yarn and your gauge and tension and how you want it to look, for a long term trade off of not having to weave in ends later on or having to choose colors at the beginning of the project (if that's part of this yarn that's appealing to you.)
You'll be making a lot of granny clusters, so strap in.
Tip 3: Find your own recipe
What helped me was not thinking of the goal as one whole granny square and then finding the right tension for it. I've only tried a little color pooling (I'm awful at it so far), but one thing that stuck with me was that it's more about the color than it is the gauge or stitch. You might sub a hdc if you have more yarn than needed, or pull tighter in areas, so not to sacrifice the way you need the colors to lay.
This is where that yarn chicken comes in - I thought of each row in the sequence as it's own challenge figuring out what I need for each part of the sequence. For me, I was willing to go up and down hook sizes. If you feel you need to change the cluster a bit, or alter the number of chains to get a row to work - I would encourage giving that a try and see how you like the aesthetic. Keep in mind there might still need to be some adjusting, and I am still learning and working with this yarn, but here's what I've been using as a starting point for myself.
Row 1: tight 5.0mm
Row 2: relaxed 5.5mm
Row 3: relaxed 5.5mm
Row 4: relaxed 5.0mm
Row 5: tight 5.0mm
I've had to swap out for a 6mm for some, so I do have a third option easily at hand.
Successfully working the row so that the color change is happening when you want it, feels like a mini-version of how it feels to succeed at yarn chicken - without the risk of having to buy a whole new skein of yarn at a potentially different dye lot if you lose. In this case, just go back a bit in your row, alter something about what you just did to try again. You can either alter the whole row, or just go back a side or two depending whether you have too much yarn or too little.
It's like a puzzle and finding the right combination that works for you and for that particular part of the sequence. Something about it has been tickling the lizard brain for me.
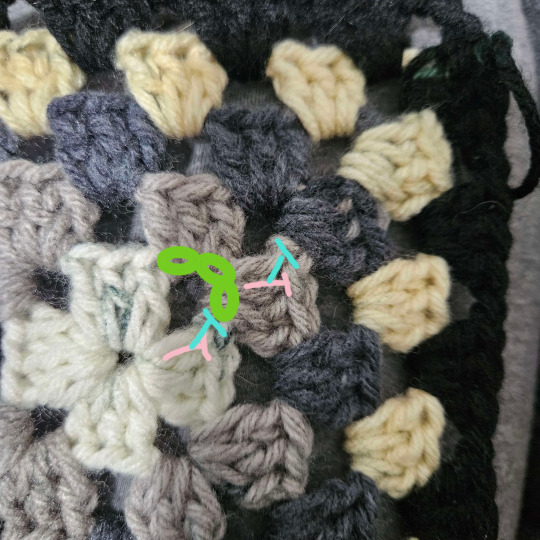
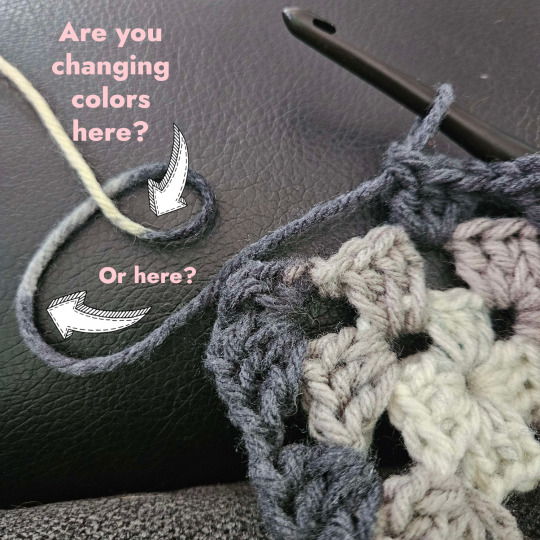
Tip 4: Use this alternative for the starting chain 6
I am fairly tolerant to different ways to make the same thing, and I've done many a version of a granny square. But I can not emphasize enough how much I despise the way the main pattern recommends for the starting corner. If it's been working for you, great! But here's my gripe with it, and my solution.
The chain 6, 3dc in the beginning with the 2dc in that space at the end, as the pattern suggests, looks incredibly clunky in comparison to the other corners. Because of the way the join pulls the chain together, I consistently was still left with what felt like a gaping hole unrelated to gauge.
So if this is happening to you and you want to fix it - replace it with a stacked sc. You know that trick that helps you get straighter edges along the sides? It's that one. I am not a very good teacher - I have written words and pictures, and am not savvy with a video camera to explain how this works. So here's a video I can recommend that explains it well - Here. You just make a sc into the corner and one sc into the side of that stitch as the tutorial describes. When you get to the end of the granny round, 2dc into the final corner the way the pattern explains, and then join to the top of the stacked sc.

If you are worried about the amount of yarn, I've been able to work with this alteration. You are going to be doing enough making and frogging and making again in order to find your recipe that I recommend just doing this alternative from the beginning so you can account for it as you practice.
TIP 5: Don't relax on that final row
Remember, you're supposed to also have enough yardage to weave in, and more consistently than not, I was finding I had to go down a hook size AND tighten my tension to get row 5 to have enough yarn to close the row, let alone have some left over. As part of finding your recipe, you may just want to plan ahead for that. I haven't tried it yet with skipping the ch1 spaces in between the granny clusters, but I did think about it. So far, pulling tightly has worked, but I've had to give it a few tries.
TIP 6: Don't expect perfection
Look - I'm not going to dance around this. There are imperfections in the yarn. Most of the time, the spotting from other colors didn't bother me, personally. But I did have one situation pop up early on where the color inconsistency was confusing around what was supposed to be a color change. I went up to a loose 6mm to try to work through it, but I couldn't really tell what the intended end was supposed to be. In the end, I still got it to work relatively cleanly.
The 2dcs and join to end the row help blend the color transition, so just be aware of that if your color change is not happening *as* perfectly as you'd like. Since your double crochets that end the round are working around the previous row's stitches, they help to hide some of the transition. Plus, I found the goal of this worked better with the stacked sc than the ch 3 - another reason I am a big advocate for that.
TIP 7: You should be having fun
Try not to be discouraged when it doesn't work right away, because it won't. But if you are not finding the process of experimenting with the yarn fun, then just put it down. Maybe take a break and come back to it later if you just need to mentally reset, but this comes back to knowing yourself as a crafter if you want to give it another go.
Final Thoughts: I'd continue to use this. Right now I only have two skeins for practicing, but I could see myself getting some more to make a bigger project. And I could see the tiny wins of getting the color change aligned being a motivator for me, rather than a deterrent.
However, you will be "locked in", so to speak. The yarn was designed for one pattern, one sequence, and as cool as that is, it's also limiting. This isn't going to be a versatile yarn. More than anything, the process tickles the part of my brain that wants to succeed over a challenge, less so the creative part. And sometimes, that's ok. I know myself well enough as a crafter to know what WIP I need to pick up. Right now, I am having fun, and I'm planning to keep playing with it.
If anyone has additional tips and tricks, I'd love to hear them, and good luck if you're taking a go with this yarn.
I hope this was even a little bit helpful. Thanks for reading if you've made it this far :)
By the way, this colorway is called "Black Dove" and the second one I ordered was "Cyber Leaf" which is blacks and greens. Excited to keep working them both up.
#crochet#crocheting#crochetblr#yarnblr#red heart all in one granny#granny square#crochet tips#yarnspirations#red heart yarn#yarn crafts#long post
25 notes
·
View notes
Text
Knitting for furby book outline
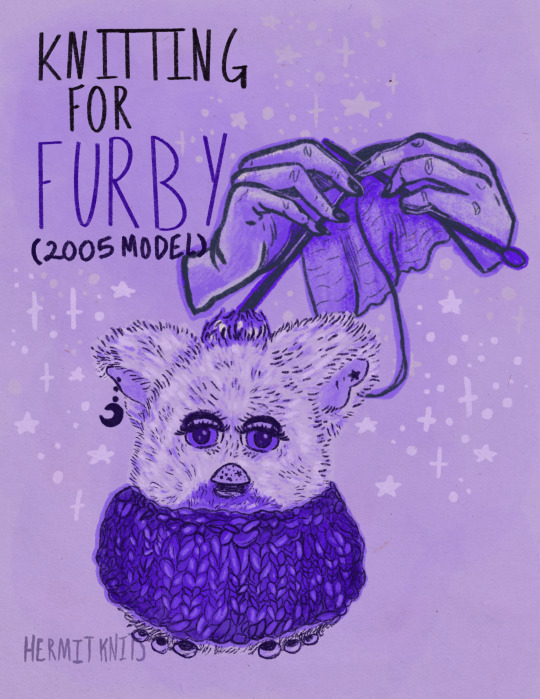
At this point, I have gathered a pattern outline for this e-book.
As of right now, I have five items drafted (not final or written mind you) and plans for one more that'll serve as an easy starter project for complete knitting newbies to learn about stitch gauge (really important for furby items), how to cast on, join in the round, knit, and cast off in a shorter period of time while still having an end product for your furb.
NOTES ON LEARNING TO KNIT
This will not be a 'learning to knit from scratch book' it is intended as a pattern book that is accessible to all levels of knitter and all budgets. I do intend on having a starting chapter that will walk through supplies, pattern layout, and resources for readers.
That being said, this pattern collection could be a good way to learn knitting as the items are smaller but with standard yarn. and the patterns going in order of difficulty should be helpful.
I am one for making it work so I also want to provide guides for yarn substitutions, altering pieces that are too big, and editing patterns to make completely new pieces.
ON TO THE PATTERNS
the first pattern is not drafted so this is patterns 2-6 ( more may come soon or these may be different in their final written form)
2. CHONK SWEATER

i have a few of these made in my handspun so they're p chonky, making it a quick knit even for beginners. there will be notes on measuring your furb and getting your stitch count based on your gauge.
3. CHONK shawl/ collar/ cape

This is also really simple and quick ( its slightly more difficult due to it being knit flat and needing to do some seeming. This is also in some chunky handspun and needs to be sampled again (this one is a tad small). I will give notes on changing the length to make this a collar, a cape, or a shawl to fit your furbs needs.
4. Worsted weight dress

This iconic witchy sweater dress is where the difficulty increases a tad, but the result is having more room to customize the garment. it is in a worsted weight so smaller yarn but not tiny. it does involve increasing and decreasing in ribbing which isn't hard but can have a learning curve. this pattern will include instructions on making the folded collar and accessorizing the garment.
5. Frilly Shawl/ cape/ collar

This pattern is a sister pattern to the 3rd pattern, it's the same garment type but is a bit more involved. it uses fingering weight and optional mohair for a fuzzy look. this starts flat and is joined in the round to do ribbing, and then stitches on the end are picked up and increased to create a frill/ floof thing.
6. Clown collar

this final pattern uses the same yarns, and techniques as the last pattern but in a different way. this pattern uses some seaming techniques and requires a folded hem (knit or sewn together). this can have as few as one frill and as many as you desire.
The mohair isn't held double so yarn subs will be a bit harder but not impossible. I'm trying to keep all of these yarns to ones that can be picked up at a big box craft store or an lys for accessibility but Mohair maybe the one outlier, but if the halo from the silk mohair isn't necessary for you then a fingering weight (4-ply ) should be okay.
Anyway thats the outline that i have so far, let me know what you think!
#2005 furby#furblr#safe furby#bluebell the oracle#furby outfit#my furby#furby community#furby#furbies#custom furby#knitting for furby#knitting#furby crafting#furby love
44 notes
·
View notes
Text
Ugh... Decisions decisions. I know I don't want my first knitting machine to be a plastic hobby machine, despite what a lot of machine knitters suggest. They're expensive enough that I would honestly rather just get a metal bed machine that I know gives me room to grow, so I don't have to spend even more money on a new machine when I want to move on to punch card stuff (which is what I'm most passionate about with these machines, punch cards are so cool)
But I don't know if I should make my first machine a standard gauge or a bulky gauge... I do want to get both eventually, but it seems to be harder to get parts for bulky machines, so if I get one that happens to need some repairs I'll be in kinda a predicament. They're also less common in general so finding a good listing thats been properly tested is harder. But a bulky machine is easier to learn on from what I have heard and has the added bonus of being compatible with the hand knitting yarns I already use, and can thus make warmer clothing like sweaters and slippers and hats. But I will likely need a ribber to make stuff in a practical way on a chunky machine if I'm going to be making things to sell.
On a standard gauge machine, once ive got the hang of it, I could easily just make lace shawls and scarves and things with no ribber required to sell to raise money either for a ribber or for a bulky machine. I'm really not sure what I would make on a bulky machine without a ribber, and kh-260 PLUS ribber combos are usually more expensive than a standard gauge and ribber... Not to mention I really should master single bed knitting before even trying to use a ribber.
There's also the option of getting a machine without a ribber included (as many listings are for either a machine or a ribber but not both) because it will take me a while to be comfortable with the machine, but usually combo deals ARE a deal, where you get a machine and ribber for a few hundred less than if you bought them separately...
0 notes
Text
Knitting 101:
Introduction:
Want to learn a cool new skill? How about knitting? I know it looks intimidating, but I promise it's not. I'm the most dyspraxic person you'll ever meet, and even I can do it.
What is knitting:
Knitting is a craft technique used to turn yarn into fabric. Essentially, it's nothing more than making a bunch of loops. As knitting uses loops instead of criss-crossing threads like weaving does, the resulting fabric is elastic. Knitting is usually done on needles, though loom knitting is also possible.
Other techniques to turn yarn into fabric are nålebinding (an old as balls yarn manipulation technique employing a tapestry needle) and crochet.
Supplies:
The bare minimum requirements to get started are yarn and a set of knitting needles in a matching size. Check your yarn label to see what needle size it requires. It didn't come with a label? Try to guestimate your yarn weight and go from there. A general rule of thumb is: the thicker your yarn, the thicker your needles should be.
As a beginner, start out with a pair of straight needles. There are other types of needles like circular needles or double-pointed needles, but keep those for after you've mastered the basics. Check out this guide on types of knitting needles if you're curious.
There are many types of yarn too, but for your first project just stick to one you find comfortable to touch. Check out this guide to yarn types if you want to know more.
Other items you may find useful as you progress in your knitting journey are a stitch counter, a cable needle, stitch markers, stitch holders, a tapestry needle, a crochet hook, and maybe even a yarn bowl. But let's keep those for for a more advanced tutorial. :)
You can buy needles and yarn from almost any craft store. However, the goal of this blog is to avoid buying new things, so here are some zero waste alternatives:
- Ask around if anyone has supplies you can borrow, or maybe even leftover yarn. A lot of knitters always buy an extra skein of yarn when starting a new project in case they need more than estimated. This often leaves us with a collection of random skeins. Maybe one of your friends has some extra skeins lying around?
- Trade yarn with fellow knitters. My friend and I save up all of our spare bits of yarn and trade them with each other whenever we run out of inspiration.
- Thrift stores are your friend! I have knitting needles in almost every available European size, and the entire collection only cost me €5 because I got them from the thrift shop's craft corner. You'll also frequently find unused skeins of yarn in thrift stores.
- Online thrifting is also a good option. I recently got €100 worth of yarn for €35 on Vinted because someone had bought the wrong type of yarn for a project and decided to resell the lot online. There's also a lot of people selling leftover yarn from past projects online.
- Ask around in freecycle groups. You'll likely bump into people who picked up knitting as a hobby once but didn't like it and are now stuck with supplies they don't use.
- If you're really adventurous, you could also browse second-hand shops for knitted items made from a yarn you like, and unravel the yarn at home.
Patterns:
The best place to get knitting patterns is Ravelry. It's THE place to be on the internet for everything knitting related. If you make a free account, you'll get access to tons of knitting patterns (both paying and free), a yarn database, and fora where you can ask any knitting-related questions.
Check if your local library has any books on knitting. If it doesn't, then check out an online library such as Archive.org. You'll find a lot of free vintage knitting patterns there.
Allfreeknitting.com is also a good source for free patterns, and so is Knitty.com.
If you have dyscalculia/dyslexia or any other reasons why reading a written-out pattern may give you trouble, I can highly recommend Pierrot patterns. Pierrot is a Japanese yarn brand that has a ton of free knitting patterns on their website which rely on schematics rather than text. Most have been translated to English, but even the original Japanese ones are fairly easy to follow as the instructions are visual rather than written.
Basic stitches:
Let's look at some of the most basic stitches you'll need to know to get started:
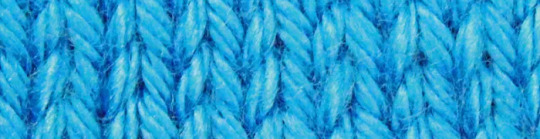
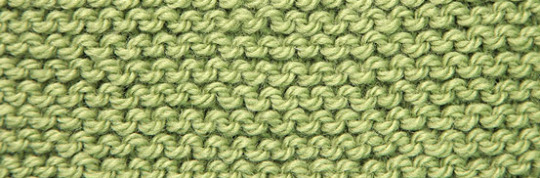
[ID: blue swatch: stockinette stitch; green swatch: garter stitch.]
Cast-on: a cast-on is a technique to get your yarn onto your needles when starting a new project. There are many different types of cast-ons that will give different effects, but let's stick to the most basic cast-on for now.
Video tutorial for a basic cast-on
Text tutorial for a basic cast-on
(Note: if you find this specific cast-on difficult to do, try out a different one. There's plenty of options.)
Knit: the knit stitch is the most basic stitch in knitting. On the right side of your work, it looks like a little v. On the wrong side of your work, it looks like a little -. Most knitting projects will use this stitch. If all of your rows have been knit with the knit stitch, you get the garter stitch. This is the easiest way to knit.
Video tutorial for the knit stitch
Text tutorial for the knit stitch
Purl: the purl stitch is the second most basic knitting stitch. It looks like a - on the right side of your work and a v on the wrong side of your work: it's the exact opposite of a knit stitch! If you purl every row, you also get the garter stitch.
If you alternate between rows of knits with rows of purls, you get the stockinette stitch: the basic knit stitch most commercial sweaters and t-shirts are made of. And if you alternate between a knit and a purl within the same row, you get ribbing, which is great for the edges of your work.
Video tutorial for the purl stitch
Text tutorial for the purl stitch
Slip stitch: the slip stitch is literally what it sounds like: you slip a stitch from one needle to the other. This stitch can be used for many reasons, but beginners will mainly use it as an edge stitch. By not knitting the first stitch of your row, you'll create a neater edge for your work.
Video tutorial for the slip stitch
Text tutorial for the slip stitch
Bind-off: binding off your work, also known as casting off, is a technique used to finish your work and to get it off your needle without unraveling it. There are many different techniques to bind off your work, but let's stick to the most basic one for now.
Video tutorial for a basic bind-off
Text tutorial for a basic bind-off
Other stitches you'll find useful as you take on more adventurous projects:
Increase: increasing means adding new stitches to your work. This technique is used to shape your work. There are many different types of increases, but as always we'll stick to the most basic one for now.
Video tutorial for a basic increase
Text tutorial for a basic increase
Decrease: decreasing means subtracting stitches from your work. This technique is used to shape your work. There are many different types of decreases, but as always we'll stick to the most basic one for now.
Video tutorial for a basic decrease
Text tutorial for a basic decrease
Yarn over: a yarn over means wrapping your yarn around your needle before working a stitch. This technique will also increase your amount of stitches, but unlike the above techniques, a yarn over leaves a hole. This stitch is used a lot in lace knitting.
Video tutorial for a yarn over
Text tutorial for a yarn over
Knitting gauge:
How do you know how many stitches to cast on for a project? Will your project even fit you? To figure this out, you need to know your yarn's gauge.
Imagine a 10x10cm (4x4 inch) square of knitting. This 10cm swatch will have a specific amount of stitches per row, and a specific amount of rows. These two combined are your knitting gauge.
Every knitting pattern will specify which gauge you need to knit the pattern in the intended size. A gauge will consist of two numbers, for example 22x30. This means the pattern's intended gauge is 22 stitches and 30 rows for a square of 10x10cm (4x4 inch) of knitting.
Your personal knitting gauge is defined by the yarn you're using, the size of your needles, and your own personal knitting tension. This means you'll have to make a gauge swatch for every new yarn/needle combination you're using.
Most commercial yarns will have a gauge estimate on their label. If the sizing of your project doesn't need to be super accurate, you can often just go by this estimate. Do keep in mind that your personal gauge will often differ from this estimate, though.
Don't be scared by swatching! It's easier than it looks, I promise! And don't worry, you won't be wasting any yarn doing this. You can always unravel your swatch once you're done, or use your swatch as a dish cloth.
How to knit a gauge swatch
How to measure your gauge swatch
Easy beginner project:
Let's make a scarf! Just a straight no-nonsense scarf, nothing more.
Get your yarn and your needles and cast on the amount of stitches needed to get the width you want your scarf to be. How do you know how much stitches this will be? Either check your yarn's label, make a gauge swatch, or guestimate how much you need by trial-and-error. It's just a scarf, sizing isn't super important.
Row 1: slip your first stitch, then knit every stitch until you reach the end of your row. Turn your work around.
Row 2: slip your first stitch, then purl every stitch until you reach the end of your row. Turn your work around. This will give you a stockinette scarf.
Want to make things even easier? Forgo the purling and just knit every row: this will result in a garter stitch scarf.
Repeat these two rows until your scarf is your desired length, then cast off.
Conclusion:
You've done it! You've made your first knitting project! Have fun wearing your scarf! Need more practice? Scarves make great gifts, and certain charities will take your scarves to hand out in winter, too.
Knitting takes practice, but it's not as hard as it looks. There's tons of options once you've got the hang of it: scarves, sweaters, hats, tops, blankets, gloves, bags,...
Good luck, and feel free to show me your work!
#wasteless crafts#knitting#knit#knitting 101#knitting for beginners#craft#crafts#crafting#diy#upcycle#fibre crafts#knits#yarn#knitters of tumblr#free knitting patterns#global warming#climate change#recycle#knitting project#purl#ravelry#diy scarf#scarves#scarf#tutorial#knitting tutorial#knitting for newbies#slow fashion#zero waste#zero waste crafts
314 notes
·
View notes
Text
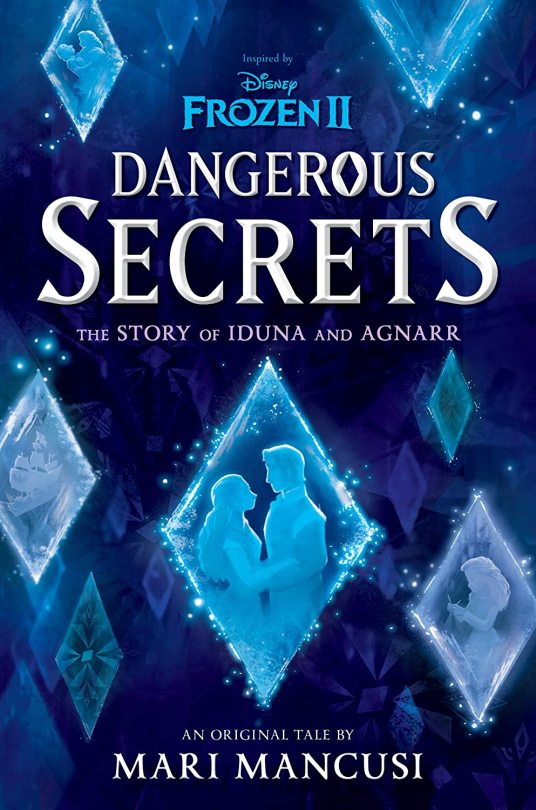
DANGEROUS SECRETS.
"THE STORM IS GETTING WORSE."
Lightning slashes across an angry black sky, soon followed by the crash of thunder. Waves pound against the ship's hull as I grip the wooden rail with white knuckles. Fierce gusts of wind tug my hair free from its braid, and damp brown strands whip at my face. I don't dare let go to brush them away.
Instead, I keep my eyes on the sea. Looking for her.
In some ways, I've spent my entire life looking for her. And tonight, my journey may finally come to an end. Unfinished. Unfound.
Ahtohallan. Please! I need you!
Perhaps she never existed at all. Perhaps she was simply a myth. A silly song to lull children to sleep. To make them feel safe and secure in a world that's anything but. Perhaps I was a fool to think we could simply go and seek her out. Learn the mother's secrets.
I do know something about a mother's secrets.
Another wave sweeps in, bashing against the ship's hull, sending a spray of icy seawater splashing at my face. I stumble backward, momentarily blinded by the salt stinging my eyes. A strong pair of hands clamps down on my hips; a solid chest at my back keeps me upright.
I turn, already knowing whom I'll find standing tall behind me. The man who has been with me almost my entire life. The man who has made me laugh—and cry—more than anyone else in the world. My husband. The father of my daughters. My enemy. My friend.
My love.
Agnarr, king of Arendelle.
"Come, Iduna," he says, pulling me around to face him. He reaches out, clasping my hands in his. They are as warm and strong as mine are cold and trembling.
I look up, taking in the sharp line of his jaw. The fierceness in his leaf-green eyes. If he's frightened, he's not showing it. "We need to go below deck," he says, shouting to be heard over the furious wind. "Captain's orders. It's not safe up here. One rogue wave could knock you overboard."
I feel a sob rise to my throat. I want to lash out, protest the orders. I'm fine. I can take care of myself. I'm not some silly girl frightened by the elements.
But what I really want to say is, I can't leave. I haven't found her yet.
If I go below, I may never find her.
And if I don't . . .
Elsa. My sweet Elsa . . . My dear Anna . . .
Agnarr gives me a pointed look. I sigh, untangling my hands from his, and begin stumbling toward the stairs that lead to our cabin below, on legs unaccustomed to rough seas. I'm almost there when the ship suddenly pitches hard to the left and I lose my footing, grabbing on to the railing to save myself. I can feel a few of the crew watching me with concern, but I push forward, keeping my head held high. I am a queen, after all. There are certain expectations.
Once below, I push open our cabin door and move inside, letting it bang shut behind me. The captain has given us his cabin for the journey, which I insisted wasn't necessary, but I was overruled. It's the only cabin suited for a fine lady, he protested. Because that's how he sees me.
That's how they all see me now. A fine lady. A perfectly poised Arendellian queen.
But now, at last, Agnarr knows the truth.
I ease myself down on the bed, reaching to grab my knitting needles and my half-finished project. An inappropriate task under the circumstances, but perhaps the only thing that might steady my hands—my pounding heart. I can hear Agnarr push open the door, his strong, solid presence filling the room. But I don't look up. Instead, I start to knit as the ship rocks beneath my
feet. It's dark down below, too dark to really see the delicate yarn, but my hands are sure and true, the repetitive motions as natural and familiar to me as taking in air. Yelana would be proud.
Yelana. Is she still out there, in the Enchanted Forest, still locked in the mist?
Only Ahtohallan knows.
Suddenly, I want to throw my needles across the room. Or collapse on the bed in tears. But I do neither, keeping my attention on the unfinished shawl. Forcing myself to let each stitch lull me into something resembling comfort.
Agnarr pulls out a wooden stool from the captain's desk, sitting down across from me. He picks up a corner of the unfinished shawl, running his large fingers across the tiny stitches. I dare to sneak a peek at him, realizing his eyes have become soft and faraway.
"This is the same pattern," he says slowly. And I know what he means without asking. Because of course it is. I hadn't even realized it when I started, but of course it is.
The same pattern as the shawl my mother knitted me when I was a baby.
The shawl that saved his life.
"It's an old Northuldra pattern," I explain, surprised how easily the words leave my mouth now that the truth is known. "Belonging to my family." I pick up his hand and place it on each symbol in turn. "Earth, fire, water, wind." I pause on the wind symbol, thinking back to
Gale. "It was the Wind Spirit who helped me save your life that day in the forest."
He gives a low whistle. "A wind spirit! If only I'd known," he says, reaching up to brush his thumb gently across my cheek. Even after all these years, his touch still sparks a longing ache deep inside, and it's an imperative, not an option, to drop my needles to return the gesture. To run my fingers against the light stubble of his jaw. "It would have made my stories to the girls so much more interesting."
I smile at this. I can't help it. He has always found a way to help me find sunshine amidst the gloomiest of days. It's strange, though, to realize he knows everything now. After a lifetime overshadowed with secrets, it should feel freeing.
But in truth, it still scares me a little, and I find myself glancing at him when he doesn't know I'm looking. Trying to see, trying to know whether the truth has changed his feelings toward me. Does he resent me for keeping so much from him for so long? Or does he truly understand why I did it? If we survive this night, how will things change between us? Will the truth bring us closer together? Or tear us apart?
Only Ahtohallan knows. . . .
I reach out and take Agnarr's hands in mine, meeting his deep green eyes with my blue ones. I swallow down the lump in my throat that threatens to choke me, and force another smile.
"I will never forget that day," I start with a whisper, not sure he can even hear me over the tempest outside. "That horrible, wonderful day."
"Tell me," he whispers back, leaning in close. I can feel his breath on my lips. Our faces are inches away. "Tell me everything."
I swallow all the words that threaten to jump out of my throat in a hurried rush, throwing myself back on the bed, staring up at the wooden-beamed ceiling. After I breathe calmly, I say, "That might take all night."
He crawls onto the bed, lying down next to me. He reaches out and curls his hand into mine. "For you, I've got forever."
I swallow hard, tears welling in my eyes. I want to protest: we don't have forever. Or even all night. We may not have an hour, judging from the way the wooden beams of the ship are creaking and cracking. But at the same time, it doesn't matter. It's time. It's long past time. He deserves to know everything.
I swipe the tears away, rolling to my side and propping my head up with my elbow. "You have to tell your part, too," I say. "This story isn't only mine, you know."
His arm curls around my waist, his hand settling at the small of my back as he tugs me closer to him. He's so warm. How is it possible that he's still so warm? "I think I can manage that," he says with a small smile. "But you must start. It all began with you, after all."
"All right," I say, resting my head on his chest, his steady heartbeat against my ear. I close my eyes, trying to decide where to begin. So much has happened over the years. But there is that one day. One fateful day that changed the course of both our lives forever.
I open my eyes. "It all starts with the wind," I say. "My dear friend Gale."
As I speak, the words begin to course through me like the forbidding waters roiling outside. And like the waters, I will finally make myself heard.
Agnarr will listen.
He's always been the storyteller in our family. But not this time. Now it's my turn to tell the tale.

#frozen 2#agduna#frozen#queen iduna#agnar and iduna#king agnar#Dangerous Secrets#frozen books#frozenii#frozen2spoilers#frozen2
47 notes
·
View notes
Text
Hobby Addiction --> Hobby Thriftily
I collect hobbies and the corresponding supplies the way most people collect chargers. I have one for everything, they are all over our home, and I randomly find them in drawers and on shelves. Sometimes I don't know what it's for, but I never throw it away in case I need it later.
I know it sounds like an exaggeration, but it really isn't. It's scary.
It started out innocently enough. I was taught various crafts and hobbies by my grandmothers growing up. My mom taught me how to cook. (Not baking though. She HATED recipes and therefore baking.) I actually didn't enjoy most of these lessons. I HAD to spend that time crafting so, naturally, I wanted to be doing literally anything else. That became 4H. So I HAD to do a craft AND I had a deadline. I sucked at it and I hated it. It turned crafts from a hobby into a job. It was like an intro course that I failed out of stubbornness.
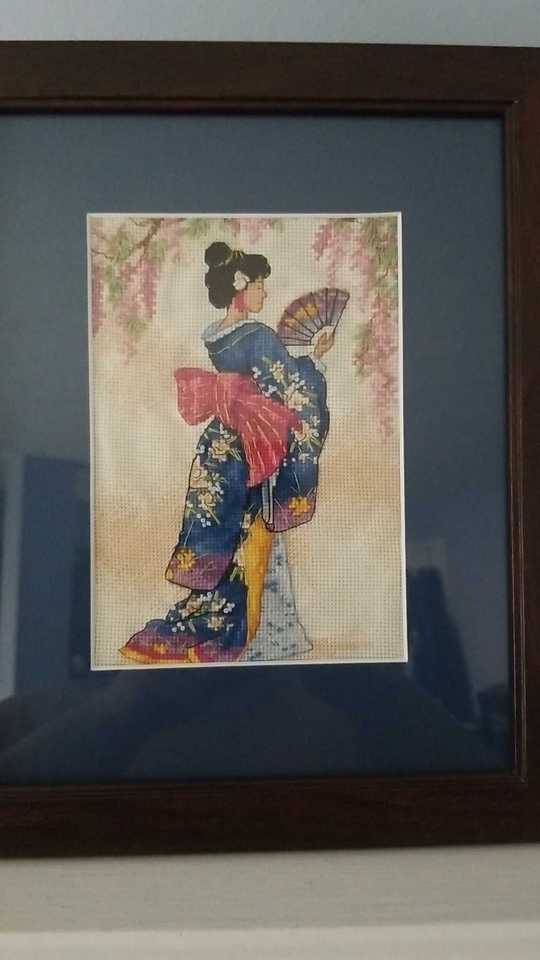
Fast forward to college and the massive increase in my anxiety and depression. More than one panic attack a day was normal. The summer after my freshman year my doctor suggested learning a hobby. The calming activity would help my anxiety. That was when I bought my first cross stitch kit. It was the beginning of the end.
It turns out that hobbies really do help with my anxiety! If I'm making something useful via the hobby then it helps my depression too! Add in my love of learning and you can probably see where this is going.
Now I have too many hobbies. I have low, medium, and high effort ones. Low, medium, and high attention ones. Fast and slow hobbies. Low and high utility. Everything.
Well now I'm in a situation where I have far more time for my hobbies, but little to no money to spend on them. I have to look into the cost and benefit of every single craft and project. How much will it cost to do it? Will it save us money if I do it? What is the time cost? What is the emotional health impact? Luckily, I enjoy cost benefit analysis and research.
So why am I giving all of this background information to strangers that don't care? Because I've learned some very important lessons that I want to share with my fellow thrifty crafters. Not the obvious ones. Everyone knows the tips to research and compare prices. Success on doing so varies, but that's common knowledge. But I'm not going to share that for free! The payment was having to read the boring story of how I acquired this knowledge. Or at least having to scroll past it and straining a finger.
So, what I've learned:
If it runs on electricity, pay more. Don't cheap out on something that you can't repair yourself and is expensive to get fixed. Especially when these machines are dangerous when faulty.
Safety equipment isn't optional, but doesn't have to be crazy expensive. Knowing what kind of equipment you need will save you here. I spent $4 on safety goggles that work fine, but annoyed me. I spent $10 on safety glasses that work well and don't annoy me. I don't need $20 safety goggles to sand some wood, but I do need some protective eyewear.
Reusable and durable. If you're going to use something a lot, spend the money on a reusable higher quality product. Something that doesn't work well AND you run through quickly is a waste. Fellow asthmatics, get a good dust mask. You can get a very good washable one with replaceable filters for less than $20 on Amazon.
Browse your home. It's easy to forget what all you have. Especially when it already has an assigned purpose. I needed a better way to haul woodworking stuff in and out of a closet every day. Everything looked stupid expensive. Then I realized I had a nice plastic laundry basket I wasn't using. No purchase necessary. I needed wood for a shelf. I had a TV tray we weren't using. Now it's bits of wood for a shelf. Old and destroyed pots and pans can be temporary or permanent storage. This is the real chance to get creative.
Thoroughly plan your craft. The better you plan, the less waste you have. This is good for time and decreasing supplies you have to buy. This is especially important when recycling something you already own.
Keep scraps. Want to test a new method? Use a scrap. Don't keep so many that it's a burden, but a bag of yarn and cloth and a small bucket of wood or metals is almost nothing.
First cross stitch:
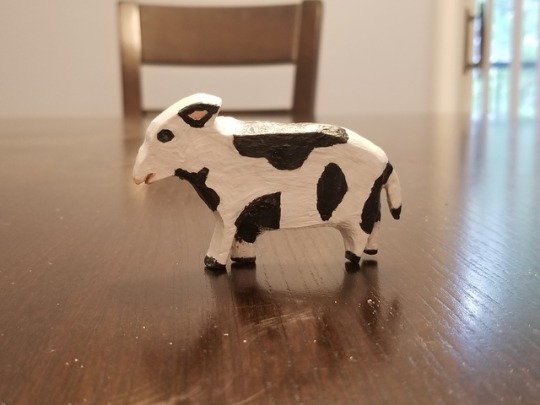
Latest creation (it's an inside joke with the husband):
#housewife#house wife#housewifery#stay at home wife#stayathomewife#stay at home#stayathome#diy crafts#crafts#hobby#hobbies#hobbyist#diy#diy projects#anxiety#depression#save money
8 notes
·
View notes
Note
Now I'm imagining parallel Agnes, Tiz AND Alternis showing up at the holy pillar all together to fight. (cause i get the feeling that the Alternis with them is actually world 5's Alternis)
You are absolutely right on who the Alternis with them is. But they won’t be showing up in the Holy Pillar--this is only “slightly” AU because it’s inserting events that weren’t shown to have happened, not changing anything that was shown. (Maybe world 5 Alternis really did fall into world 4! He could have gotten back through to world 5 with some help from world 4′s Yulyana after our group defeated Ouroboros and all. ...Except if he had, canon would have showed it by this point, but it’s a fun little addition in my mind.)
Disappointingly, since this is supposed to all be within world 5 Agnès’ pov, that is actually all the appearance this parallel group has within the fic. World 4 Tiz and Agnès are like their world 5 counterparts, though, and honestly I keep imagining that Alternis’ scene in “Who You Are” ends with Tiz and Agnès catching back up to him and seeing the end of that fight and Tiz is actually a little pissed off with Alternis because why were you trying to attack a girl who was fleeing? (Alternis...is not 100% straight with them at the beginning of things, so there’s a number of details they don’t know, including what the actual parallel world situation is. Agnès probably makes him sit down and explain why that girl had her face.
...Actually this probably seems a little odd because the idea for “Who You Are” came about in the middle of writing about the parallel ATA group. Here’s a snippet about how that started, from Alternis’ pov.)
I've still no idea what made my counterpart choose to join forces with the wind vestal and survivor of Norende from my original world... his brains must be damaged for him to forget our debt to the Grand Marshal. Still, that notion of joining forces with them came in useful when I unexpectedly found myself in this world, one even more hateful than the world I left.
This world's Edea was murdered. After the Holy Pillar, once I'd gained both a measure of my strength and an understanding of how events were about to repeat themselves, I had immediately set about to at least save her from falling onto a treacherous path. I arrived at Centro Keep only to find it had already been assaulted. The gossip among the soldiers was as thick as the sense of panic. My angel and the officers were all dead, and the main attack had come from a flying Grandship--so it could only be the work of the four I had already fought and lost to. Little surprise that they were able to defeat the Sky Knights a second time, but I was filled with a rage that they would target Edea as well and demanded further detail. I found, to my horror, that she had not fallen to the foolhardy "Heroes of Light".
Only the day prior, two soldiers had come running to sounds of a vicious argument turned fight to see Ominas standing over her charred body; they had immediately fled to avoid arriving at the same fate, and for the same reason delayed reporting it until after his own demise. But now that they had come forward, the news was spreading through the keep like one of the mage's fires. It seemed to consume my spirit in an instant. I’d known the Sky Knights had been becoming increasingly brutal amongst the officers’ ranks, but this…!
Of course, the Edea I grew up with is still alive, if ever further astray... I had to keep reminding myself of this when surrounded by talk of her hair and clothes burned to ash, her face disfigured by flame. This Edea might have been a promising soldier, but she was still a new and relatively inexperienced one, and Ominas had shown her absolutely no mercy. I still wish those four had left him alive, so that I might have returned the favor personally. Lacking that option, I was at a loss. The crystals were going to be overexcited again by that deceitful vestal; indeed, it was a week later that the wind began to blow again. Edea was going to fly even further away, because I was not strong enough to stop her. Our fight at the Holy Pillar had proven such. Could I do anything in this abysmal world?
Running into Tiz and Agnès at Caldisla was purely chance. I had not even suspected that the two of them who are native to this world would still be in the city...it was past the time they should have headed out. The vestal approached me, briefly mentioning "our" previous meeting--in which she had talked with this world's Alternis--before expressing concern at my state, her faithful protector at her side. Truth be told, I only held my distaste at the sight of them to not cause a public scene, but where she faltered at my grudging answer, Tiz picked up persistently… He was utterly obnoxious in his concern for a stranger, even if it was to his knowledge the stranger who had saved his life. His concern is always sincere, often even touching, but that would not be the last time I'd desire to punch him to make him stop poking and prodding. Past my irritation, though, the more I paid attention to them and their circumstances, increasingly I realized: they had no plans. Tiz had protected the wind vestal when she was attacked by Holly Whyte and Barras Lehr, but this world’s Agnès Oblige had no idea what she was to do next, and was distressed when any talk of the Great Chasm or crystals came up, much as she tried to hide it.
It had never before occurred to me that she, too, might have been manipulated, directed onto the course she had taken by a false promise of healing Luxendarc. It may have only occurred to me then because I was realizing that if our world's Ominas had been like this one's, Edea would have seen a very real reason to defect; she never had been able to tolerate bullies. Perhaps if I recruited this world's wind vestal, we could at least stop another Holy Pillar from being formed, was my thought. Later I found obstacles to that plan, but it was the only hope I had.
If I had come clean with Agnès and Tiz back then, I would not be in this dilemma now, but while I was prepared to entertain the notion their counterparts might have been manipulated, I was far from giving them my trust. I told them half-truths and spun quite the yarn to convey the information I had learned from Lord Braev without letting on my true identity.
((Or: three people who have nothing band together because one of them at least has some idea how to fix things, but Alternis doesn’t tell them everything that’s going on. He’s not a liar like Airy, buuuut he can be pretty shady himself sometimes, see the entire Caldisla affair. In fact, world 4 Agnès probably believes up until Alternis’ run-in with world 5 Agnès that the vestal being manipulated into overexciting the crystals is the Fire vestal.)
#bravely default#bravely default spoilers#au#alternis dim#is just a liiiiiittle shady sometimes#Anonymous
6 notes
·
View notes
Last Seen Blogs


rajavelrajesh
Rajesh

com-sci-studyblr
"Don't tell people your dreams. Show them."
com-sci-studyblr
"Don't tell people your dreams. Show them."