#medium and then make sure the yolk is slightly more firm but not to the point of being over hard jesus fucking christ????
Text
i wanna quit my job so bad holy shit
#serving rich people fucking tea parties all day while i die inside is what’s gonna make me finally kill.#being treated like i’m a moron for ringing customers up for exactly what they ask for instead of automatically knowing line cook protocol -#having never been a fucking line cook is gonna also make me kill.#what’s so fucking difficult about someone ordering their eggs slightly over medium. i got treated like a fucking idiot for ringing that up#for someone today when they specifically asked me to make sure their egg was cooked SPECIFICALLY like that. like just fucking cook it over#medium and then make sure the yolk is slightly more firm but not to the point of being over hard jesus fucking christ????#i hate working in food service and being treated like i’m stupid when all we’re doing is making fucking food. it’s not that important.
5 notes
·
View notes
Text

Lemon & Earl Grey Tart with Buttermilk Chantilly and Raspberry Fluid Gel
Pate Sucrée:
150g (⅔ cups) unsalted butter, at room temperature
112g (1 cup) icing sugar
1g (¼ tsp.) salt
50g (1 medium) eggs
250g (2 cups) all-purpose flour
20g (¼ cups) cornstarch
Lemon Filling:
185g (¾ cups) heavy cream
5g (2 Tbsp.) loose leaf earl grey tea
200g (4 medium) eggs
40g (2 medium) egg yolks
285g (1½ cups) granulated sugar
250g (1 cups) fresh lemon juice
3 lemons, zested
Raspberry Fluid Gel:
100g (⅓ cups) raspberry purée
50g (¼) simple syrup
10g (2 tsp.) lemon juice
1.6g agar agar
Buttermilk Chantilly:
200g (a little over ¾ cups) heavy cream
20g ( ¼ cups) icing sugar
1 lemon, zested
100g (½ cups) buttermilk
Pate Sucrée:
Start the paté sucrée. In the bowl of a stand mixer fitted with the paddle attachment, cream the butter until light and fluffy. Add the icing sugar and cream together. Scrape down the sides and the bottom of the bowl and add the salt, and egg. Mix until combined.
In a medium bowl, sift the flour and cornstarch. Slowly add to the butter mixture until just incorporated.
Remove from the mixer, shape into a flat circle, wrap in plastic wrap, and refrigerate for at least 2 hours, or preferably overnight.
Take out your disk of dough and let it warm up slightly so it is easier to roll out. Lightly dust a work surface with flour. Roll out the dough to about 3mm and line your 9 inch tart tin. Refrigerate the dough until firm.
Preheat the oven to 350 F. Crumple up a piece of parchment paper and then smooth it back out again. Place it in your tart tin and fill it with dried beans, rice, or pie weights. Make sure to press it into the corners of the tart.
Blind bake the tart shell for 15 minutes, then remove from the oven, remove the parchment and beans/rice/weights, and bake for a further 8 to 9 minutes, until the pastry is a golden brown color. Remove from the oven and let it cool completely. Turn the oven down to 250 F.
Lemon Filling:
For the lemon filling, place the cream in a small saucepan and bring to just a boil. Remove from the heat, add the tea, and let it steep for 15 minutes. Strain the cream and reweigh it - you will need to add more to make sure you have a final weight of 185g cream. Set aside.
Combine the eggs, egg yolks, and sugar in a bowl. Whisk until combined, then slowly add the cream, whisking constantly. Add the lemon juice and zest, whisking constantly. Use an immersion blender to make sure your mixture is smooth and velvety. Pour the mixture into a pitcher.
Place the tart in the oven and pull the rack out slightly. Pour in the lemon filling until it almost reaches the top of the tart, then carefully slide the rack back. Bake for 45 to 55 minutes, until the center of the tart no longer jiggles when moved. Remove from the oven and let cool completely at room temperature, then refrigerate until ready to serve.
Raspberry Fluid Gel:
For the raspberry fluid gel, combine all the ingredients in a saucepan and bring to a boil, stirring constantly. Boil for 10 seconds, remove from the heat, and pour into a container. Let the gel chill in the fridge until set, about 1 hour.
Once the gel has fully set, use an immersion blender to create a smooth gel. Transfer to a squeeze bottle.
Buttermilk Chantilly:
For the buttermilk chantilly, combine the heavy cream and icing sugar in the bowl of a stand mixer fitted with the whisk attachment and whip until stiff peaks form. Add the lemon zest and slowly stream in the buttermilk while the mixer is on medium-low speed. Whip until medium peaks.
When ready to serve, spoon some buttermilk chantilly onto the tart and use the back of a spoon to create a swoosh. Add dots of raspberry fluid gel and zest a lemon over top.
#angelkin#food#dessert#pie#vegetarian#butter#powdered sugar#heavy cream#tea#earl grey#fruit#lemon#raspberry#agar#buttermilk#dollkin#ghostkin#glitchkin#kitsunekin#merkin#tricksterkin#spring
18 notes
·
View notes
Text
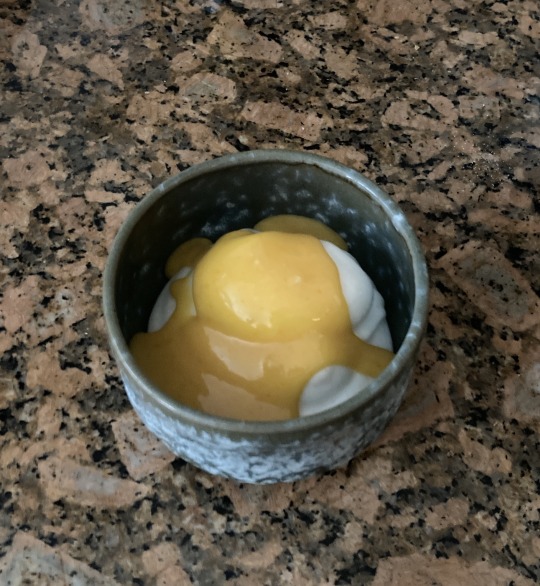
Snow Pudding with Blood Orange Curd & Lavender - 4 Stars
Vegetarian - Yes
Vegan - No
Dairy Free - Yes
Gluten Free - Yes

That's not whip cream, it's snow pudding!
I finally got around to this one, and I have to say I'm surprised. I don't know what I was expecting, but it wasn't this. Everything from the way the dessert was described to its unusual origin (19th century? They beat eggs like this by hand to make this?) made me think this was going to be unbearably complex and just too odd to enjoy beyond the novelty, but it wasn't so.
It's sort of like eating cold meringue without the crunch, topped with a curd that surprisingly isn't all that acidic. It's light and airy, and just as Ian says it does sort of feel like you're not eating anything at all. And, just like Ian says, the curd drizzled on top of the pudding makes the dessert look just like an egg.
If you have an electric mixer, it's relatively simple to make too, it just requires time while you wait for various ingredients to chill. It's honestly not a bad dessert for a dinner party, especially if you want to seem fancier than you are.
I skipped the lavender, though, as I couldn't find the lavender buds I used to have from my time working at a Chinese apothecary, and they're basically just garnish. If the scent of lavender can add to this (and it probably can, I just didn't really care enough to find out) I bet a sprig of the flowers for garnish on the plate or bowl would be fine as a substitute.
Ingredients:
For the pudding:
One 1/4 oz package unflavored gelatin
1 1/3 cups boiling-hot filtered water
1/2 cup sugar
Fine sea salt
3 large egg whites, at room temperature
For the curd:
3 large egg yolks
1 large egg
1/2 cup sugar
1/4 cup blood orange juice
2 tbsp Meyer lemon juice
Fine sea salt
1/2 stick (4 tbsp) unsalted butter, cut into pieces
2 tsp dried lavender flowers for garnish (optional)
Serves 6.
Make the pudding: in a medium bowl, sprinkle the gelatin over 1/4 cup of the boiling water and let it bloom for 5 minutes. Whisk in the remaining boiling water along with the sugar and a pinch of salt. Continue whisking until all the sugar and gelatin have dissolved, then transfer the bowl to the freezer. Check the gelatin mixture every 5 minutes or so and give it a whisk to break it up as it begins to set. When it reaches the consistency of egg whites, which takes about 35 minutes, beat it with an electric mixer until it becomes very frothy and foamy, about 2 minutes.
[My mixture actually got to egg white consistency after about 20 minutes. If you miss the mark and the gelatin firms up to be more jello-like, you can still use it, but be sure to to use it before it gets too hard.]
Beat the egg whites in a separate bowl, until they just hold soft peaks, then add the gelatin foam and beat util the mixture triples in volume and forms soft ribbons that slowly disappear back into the foam. Divide the pudding among 6 serving bowls and chill until set, about 2 hours, then cover with plastic wrap until ready to serve.
Make the curd: Heat a saucepan of water until it simmers gently. In a small metal or glass bowl, whisk together the egg yolks, egg, sugar, blood orange juice, lemon juice and a pinch of salt. Set the bowl over the saucepan of barely simmering water and, whisking constantly, gently cook the curd until it becomes slightly thick and velvety. [You'll see a change right away when it thickens -- it froths up slightly beforehand.] Remove the bowl from the saucepan and slowly incorporate the butter by whisking and swirling it in one piece at a time. Cover the surface of the curd with plastic wrap and refrigerate until ready to serve. Drizzle the curd over the snow puddings, sprinkle with lavender, and serve.
#eggs#gelatin#blood orange#meyer lemon#snow pudding#curd#lemon curd#blood orange curd#lavender#short stack editions#vegetarian#dairy free#gluten free#Ian Knauer
9 notes
·
View notes
Text
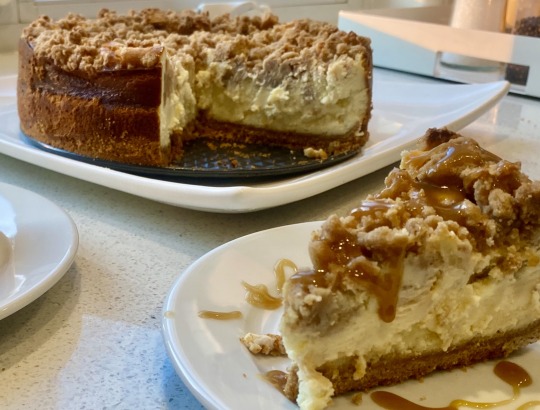
Big Apple Crumb Cheesecake

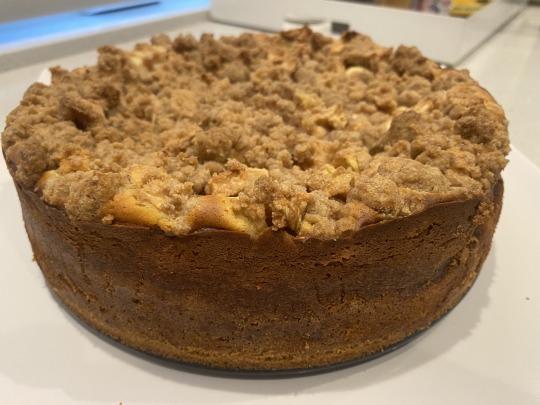

This is a great cheesecake for autumn. It has a graham cracker crust and an apple crumb topping. Spoon a drizzle of warm caramel sauce over the top and you have an amazing dessert which is sure to warm you on a chilly fall day. You might even consider it as a Thanksgiving dessert!
I love cheesecake! I have a delicious Classic NY Cheesecake I make often with various seasonal fruit toppings, but I have yet to top one with apple, let alone an apple crumb! I’m a sucker for a crumb topping, too, so I had to try this recipe. You should too!
Here it is...
Big Apple Crumb Cheesecake
(Kardea Brown, Delicious Miss Brown, Food Network)
Ingredients:
Graham Cracker Crust:
Nonstick cooking spray for the pan
15 graham crackers (or 2 cups crushed crumbs)
3 tablespoons packed light brown sugar
1/4 teaspoon kosher salt
5 tablespoons unsalted butter, melted and cooled
Apple Crumb topping:
1 and 1/2 cups all-purpose flour
1/2 cup packed light brown sugar
1 teaspoon ground cinnamon
1/4 teaspoon kosher salt
1 stick unsalted butter, melted and cooled
1 tart apple, peeled, cored, and diced
Cheesecake Filling:
1 cup granulated sugar
2 tablespoons cornstarch
Pinch kosher salt
Three 8-ounce packages cream cheese, at room temperature
1 cup sour cream
3 large eggs plus 1 large egg yolk, at room temperature
2 teaspoons vanilla extract
Caramel sauce (store-bought or homemade), for serving
Directions:
1. For the graham crust:
Preheat the oven to 350 degrees F. Lightly spray a 9-inch spring form pan with non-stick cooking spray and place on a baking sheet.
2. Add the graham crackers to a food processor and pulse until fine, then add the brown sugar and salt and pulse until well combined. Drizzle in the melted butter and stir until the mixture resembles damp sand. Press the crumbs into the bottom of the prepared pan in an even layer. Bake the crust until firm, about 10 minutes, then let cool.
3. For the apple crumb topping:
Stir together the flour, brown sugar, cinnamon and salt in a medium bowl. Drizzle in the butter and stir until the mixture resembles wet sand, using your hands to form some clumps. Fold in the diced apple.
4. For the cheesecake filling:
Stir together the granulated sugar, cornstarch, and salt in a small bowl. Pulse together the cream cheese and sour cream in a food processor until smooth.
Note: (or use your electric mixer with the flat blade, I did)
With the processor (or mixer) running, add the sugar mixture 1/2 cup at a time until the mixture is smooth. Add the eggs and yolk one at a time, pulsing or mixing until well combined, then add the vanilla, scraping down the sides of the processor or bowl, pulsing or mixing again to make sure everything is incorporated. Pour the cheesecake filling over the top of the graham cracker crust.
5. Sprinkle the crumb topping over the filling.

Bake the cheesecake until it is mostly set but still has a bit of a jiggle in the center, 60 to 70 minutes. Turn off the oven and leave the oven door slightly open for 1 hour. Remove the cheesecake from the oven and allow to cool to room temperature, about another hour, then refrigerate for at least 1 hour more. Run a paring knife around the outside before unmolding and slicing.
Serve drizzled with the caramel sauce.
2 notes
·
View notes
Text
Chile Rellenos
INGREDIENTSFOR THE SALSA:
3 serrano chiles, stems removed
6 beefsteak tomatoes (about 4 pounds)
4 garlic cloves, peeled
1 teaspoon kosher salt, plus more to taste
2 tablespoons neutral oil, such as grapeseed or canola
1 white onion, peeled and sliced into thin rings
FOR THE CHILES:
6 large, firm poblano chiles (about 1 3/4 pounds)
12 ounces queso fresco or low-moisture melting cheese, such as mozzarella
FOR THE BATTER:
5 large eggs, yolks and whites separated
Canola oil, for frying
2 cups all-purpose flour
Ingredient Substitution Guide
PREPARATION
Prepare the tomato salsa: Put a large pot of water on to boil. When the water starts to bubble, add the serrano chiles and whole tomatoes, and turn down the heat. After 10 minutes of low simmering, strain.
Add the serranos, garlic and 1 teaspoon salt to a blender with 1/2 cup water, and purée until smooth. Add the tomatoes, then purée until almost totally smooth. (Some larger pieces of tomato are fine, and give the salsa texture.)
In a large saucepan that will hold all of the salsa, heat 2 tablespoons oil over medium heat, and add the onion. Cook until soft and slightly golden on the edges, about 5 minutes, then add the salsa and turn off the heat.
Prepare the chiles: Using tongs, char two poblanos at a time over the open gas flame (or all six under your broiler, turning them often). The chiles should be blackened all over, and tender to the touch, which takes about 10 minutes. As you finish them, put them on a plate and cover for about 10 minutes.
Use your finger to gently push and peel away the blackened outer skin of the charred chile. Remove as much as you can, but it’s OK if a few small pieces are left; don’t worry about it. Use a knife to slice each chile lengthwise, leaving an inch or so on each end, and remove the seeds (again, it’s OK if some remain). Fill the chiles with cheese to fit, but make sure the chile can still close along its seam when you pinch it shut.
Prepare the batter: Separate the eggs, and beat the whites with a whisk attachment until thick and frothy, like meringue. Add the yolks, and beat for another minute, just to incorporate.
Fry the chiles: In a large, heavy-bottomed pan, heat about 3 inches of oil over medium until a small drop of batter sizzles vigorously when you add it to the oil. Put the flour on a plate, and roll a chile in the flour so it’s completely covered. Push it down into the batter, turn it around gently, and use the stem to pull it out — it will look like a vaguely chile-shaped cloud.
Gently lay the chile down in the hot oil, seam side up. The chile should immediately start to sizzle and lightly color. Spoon hot oil over any exposed parts of the chile, cooking for about 2 minutes, or until the top of the chile is evenly golden brown, then remove and place on a paper-towel-lined rack to drain. Repeat with each chile.
When you’re ready to sit down and eat, heat the salsa over medium, and season it to taste with salt. Place the fried chiles in the pan. (Work in batches if you have to, so the chiles aren’t crowded.) Let them simmer gently for a few minutes, then serve immediately with extra salsa spooned over the top.
0 notes
Text
Chocolate Pudding Hamantaschen
Guess what’s coming this week? That’s right, it’s that Purim time of the year again! And that means hamantaschen, everyone’s favorite triangular-shaped cookie! (If you’re not sure what I’m talking about, click here and all will be made clear).
This year I’m doing a little riff on tradition and filling them with a luscious chocolate pudding that stays sort of creamy even when baked! It’s so, so good!
Hamantaschen are an annual treat I always look forward to but too often the ones you find in the bakeries and delis that carry them consist of a rather bland, leaden pastry. Not these! The pastry for these cookies is divine! Flaky and flavorful with an amazing mouth feel—every bite crumbles in your mouth in a lovely, buttery, slightly lemony way!
And while the dough is just the teensiest bit more persnickety to work with than my traditional hamantaschen dough and requires a bit more chilling, I felt the results far outweighed the extra time and efforts!
So much fun to make…
And eat!
Happy Purim!
Not feeling the chocolate pudding vibe? How about these traditional jam filled ones, this Raspberry Chocolate version, Brownie-filled Hamataschen, Vanilla-Bean Cheesecake or, Chocolate Peanut Butter kind?
Chocolate Pudding Hamantaschen
Makes about 30 cookies
You will need a food processor for this.
Prep Time for dough: 10 minutes, plus at least 1 hour to chill and up to 24; Prep Time for Filling: 15 minutes, plus at least 30 minutes chilling time; Assembly time for cookies: 20 minutes; Bake Time: 13-18 minutes
Ingredients
For the dough
1 cup confectioners’ sugar
2 large egg yolks
16 tablespoons unsalted butter (2 sticks), room temperature, cut into small pieces
The zest of 1 lemon
2 ¼ cups unbleached, all-purpose flour
Pinch of salt
1 large egg, beaten, for the glaze
For the filling
3 large egg yolks
¼ cup sugar
1 ¼ tablespoons cornstarch
2 teaspoons unsweetened cocoa powder
¾ cup milk
½ vanilla bean, cut lengthwise (if you don’t have sub in 1 ½ teaspoons vanilla extract)
2 ounces bittersweet chocolate, roughly chopped
The Recipe
1. To make the dough: Place the confectioners sugar and egg yolks in the bowl of the food processor and blend them together. Add the butter and lemon and blend again, scraping down the bowl. Slowly add the flour and salt and pulse until a dough ball forms. Divide it in two, flatten each into a disk and wrap both tightly in plastic wrap. Chill for at least 1 hour and up to overnight.
2. To make the filling: In a medium bowl, whisk together the egg yolks, sugar, cornstarch and cocoa until the mixture is smooth.
3. Pour the milk into a medium saucepan and scrape the vanilla bean seeds into it, adding the pod as well. Bring to a simmer over medium heat, then remove from the heat and remover and discard the vanilla bean pod. Whisking constantly, pour about ⅓ of the milk into the egg mixture and then pour the entire egg mixture back into the saucepan. Place the pan over low heat and continue to whisk constantly until it simmers and thickens into a pudding-like consistency.
4. Remove from the heat, add the chopped chocolate and whisk until the chocolate has fully melted and the mixture is smooth. Pour into a bowl, press a piece of plastic wrap directly against the pudding surface (to prevent a skin from forming) and place in the fridge for at least 30 minutes, until the mixture is completely cold. You can definitely do this a day in advance.
5. When you’re ready to bake the cookies, preheat the oven to 350ºF and line 2 large rimmed baking sheets with parchment paper. Set aside.
6. Remove the dough from the fridge and let it soften until you can work with it. If you’ve made this the day before and the dough is very hard, take it out about 20 minutes before you are ready to begin. Sprinkle a little flour on a pastry board or clean counter as well as your rolling pin and roll out one dough half until the dough is about ¼ inch thick. This dough is a little sticky so as you roll, loosen it from the board and sprinkle a little flour underneath it to keep it from sticking. Flour a 3-inch round cookie cutter or the rim of a wide-mouthed glass to cut out as many circles as possible, re-flouring the glass or cutter as needed and carefully transfer the circles to the prepared baking sheet. Gather together the scraps, re-roll out the dough and cut as many circles out as possible. Place the baking sheet in the fridge to keep the dough from getting too warm while you roll out the other half of dough.
7. Remove the chilled dough from the fridge and place the second sheet in to keep cool. Place a heaping teaspoon of the chocolate filling in the center of each circle and press up the sides to form triangles, pinching the edges well to seal and spacing cookies about 1-inch apart. If the dough feels too firm to maneuver, let it stand for a few minutes to soften up. Brush the tops with the beaten egg.
8. Bake the first sheet until cookies are golden brown, rotating the sheet at the halfway mark, 15-17 minutes. Meanwhile, fill and assemble second tray and pop into the oven after the first sheet comes out. Cool cookies on the tray on a wire rack for 10 minutes, then transfer to rack to finish cooling completely. Store cookies in an airtight container at room temperature for a few days.
Enjoy!
Note: Recipe adapted from King Solomon’s Table by Joan Nathan via Schmaltz by Shmil Holland. I followed this recipe pretty closely but made some without the chocolate chips and that’s what I would do in the future. We all liked the smooth filling better but feel free to add some chocolate chips to the pudding after you’ve refrigerated it. Also, the original recipe has you roll out the dough between parchment paper—I didn’t feel it was necessary—always looking for ways to use less paper!
#Confectioners' Sugar#Egg Yolks#Butter#Lemon Zest#Flour#Salt#Egg#Sugar#Cornstarch#Unsweetened Cocoa Powder#Milk#Vanilla Bean#Bittersweet Chocolate
0 notes
Link
Ingredients
CHOUX PASTRY (PROFITEROLE PASTRY BALLS):
100g / 7 tbsp unsalted butter
1 cup (250ml) water
1 cup (150g) flour , plain / all purpose
4 eggs 55 - 60g / 1.9-2.1oz each with shell, at room temperature
Pinch of salt
FILLING OPTIONS (CHOOSE ONE):
Custard (below)
Ice cream (Note 1)
Whipped cream (Note 2)
THICK CUSTARD FILLING (CREME PATISSIERE):
4 egg yolks
1/4 cup (55g) white sugar , caster / superfine
1/2 cup (65g) cornflour / cornstarch
600 ml (2 1/3 cups) milk , full fat best
1/4 cup (55g) extra white sugar , caster / superfine
1 tsp vanilla bean paste (or extract or essence)
CHOCOLATE SAUCE (NOTE 3):
250g / 8 oz dark chocolate (or US semi-sweet)
1 cup (250 ml) cream
Instructions
Place butter in a saucepan over medium heat. When mostly melted, add water then bring to a rapid simmer.
While liquid is simmering, add flour and pinch of salt, and stir vigorously with a wooden spoon (still on stove) until the dough forms sort of a ball and pulls away from the sides of the saucepan (see video). About 1 minute.
Remove from heat and let mixture cool for 10 minutes.
Preheat oven to 220C/420F (standard) or 200C/390F (fan/convection).
Lightly grease 2 large or 3 standard baking trays with butter, then line with paper. (Grease stops paper sliding)
Add 1 egg into batter, beat until combined. Add remaining eggs one at a time making sure each is combined before adding the next. Dough should be like a thick paste (see video).
Place dough into a piping bag fitted with a 13 - 15mm round tip (1/2 - 3/5").
Pipe 2 tsp blobs (about 1.7 cm/ 2/3" blob base) 5cm/2" apart (I do 16 on each tray). Makes 40 - 50 blobs.
Wet your finger with water and pat down any peaks to form domes (for nice round balls).
Bake 2 trays at a time for 15 minutes, switching the trays halfway.
Remove from oven, reduce heat to 180C/350F (standard) or 160C/320F (fan).
Pierce balls with knife then return to oven for 5 - 7 minutes until golden and crispy.
Transfer to rack, cool fully before filling with custard, cream or split then fill with ice cream. Drizzle with chocolate and serve!
CHOCOLATE:
Place cream and chocolate in a heatproof bowl. Microwave 4 x 30 seconds, stirring in between, until incorporated. Cool to warm, then use for drizzling or dipping.
CUSTARD:
Whisk yolks and sugar, then whisk in cornflour.
Place milk, vanilla and extra sugar in a saucepan over medium high. Heat until just before simmering.
Whisk in 1/4 cup hot milk into egg mixture. Whisk in another 1/4 cup. Then add remaining milk mixture and whisk.
Pour back into saucepan. Return to stove on medium low (low for strong stoves). Whisk constantly 2 to 3 minutes until the mixture thicks to a thick dolloping custard consistency.
Remove from heat immediately, pour into bowl. Press cling wrap onto surface (stops skin forming) then refrigerate for 4 to 5 hours until set. Do not whisk again once set (loses thickness).
Spoon into piping bag fitting with a very fine nozzle. Then pipe into profiteroles (use the hole pierced during bake, or make a new hole).
Recipe Notes:
1. Ice cream filling: This is American style profiteroles. Split the profiteroles, fill with ice cream, top with lid of profiterole then drizzle with chocolate sauce.
2. Cream filling: Another common filling option! Use 2 cups/500ml whipping cream, 1/4 cup white sugar and 1 tsp vanilla extract. Place in bowl and whip with electric beater or stand mixer until firm peaks form. Transfer to piping bag and pipe into profiteroles - or split profiteroles and dollop cream inside, then top with lid. Then drizzle with chocolate sauce.
3. Chocolate Sauce thickness: This sauce is a chocolate ganache so it's runny when warm (as pictured in photos and video) but it sets into a soft chocolate once cooled (like fudge frosting).
4. Number of trays - if you have 3 trays (I do), bake the first 2 first then bake the 3rd on the higher temp. Then pierce them all, then do the 2nd bake. This reduces the time the 3rd tray is sitting around with uncooked dough.
5. Serving / freshness: Profiteroles are at their prime when made as closely as possible to serving because the crispy shells soften within a few hours. But they are still MUCH crispier than store bought!
Make ahead: I make the balls, then reheat in the oven 3 to 5 minutes at 180C/350F until deep golden and crispy. Have the custard in the piping bag, ready to go. Chocolate sauce made, in the fridge. Reheat chocolate sauce in the microwave to melt. Pipe custard into the balls, drizzle with sauce then serve!
One step further (for emergencies only!): I have filled the balls with custard (can't do with cream), DO NOT do chocolate sauce. Refrigerate. Put in 240C/450F hot oven for 1 1/2 minutes, just to dry out and crisp the shell slightly, while keeping the inside cold. Then top with sauce and serve.
Leftovers: Chocolate topped, custard or cream filled profiteroles are still good for 24 to 36 hours! Custard keeps better than cream ones (cream soaks pastry more).
Pastry Storage: The cooked, unfilled pastry balls will keep in an airtight container for 3 days, or in the freezer for 3 months. Re-crisp the pastry balls in the oven 3 to 5 minutes at 180C/350F until deep golden and crispy.
6. Eclairs are made using choux pastry too! Here's how: Use a wider nozzle about 1.5 cm / 3/5" wide and pipe dough about 2cm / 4/5" wide and 12cm / 5" long. Bake on high until pale golden (12 - 15 minutes) then remove, pierce per recipe, then return to oven on the lower temp for 20 minutes or until crispy and deep golden. Split, dip top into chocolate then set aside to cool and set. Fill bottom with whipped cream then top with lid.
Visit at Schmidt Christmas Market for all your Christmas needs
0 notes
Text
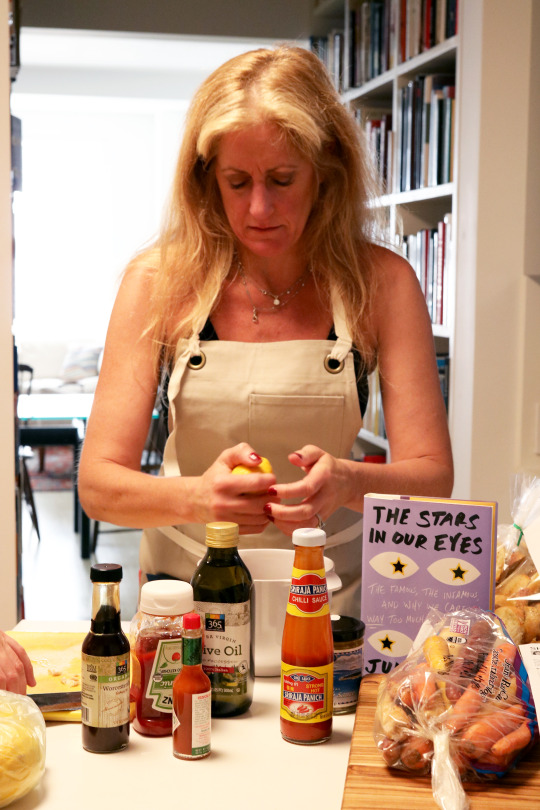
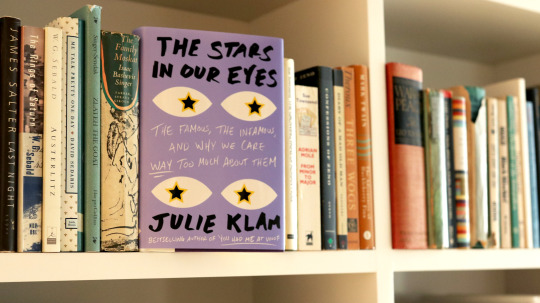
Riverhead Table: THE STARS IN OUR EYES
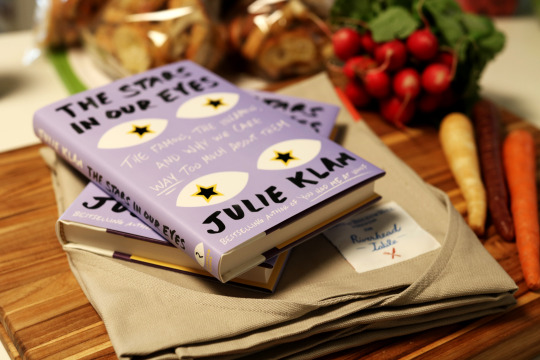
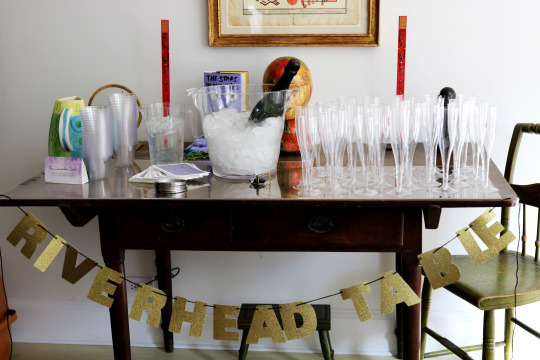
When we decided to build our next Riverhead Table around THE STARS IN OUR EYES—“a fast, fun look at celebrity culture” (Washington Post) by the luminous Julie Klam—we knew immediately that we wanted to host a Classic-Hollywood-Steakhouse-Slash-Oscars-Viewing-Party style cocktail event. There would be glitz! There would be glam! There would be mini steaks on toast and lots of champagne!
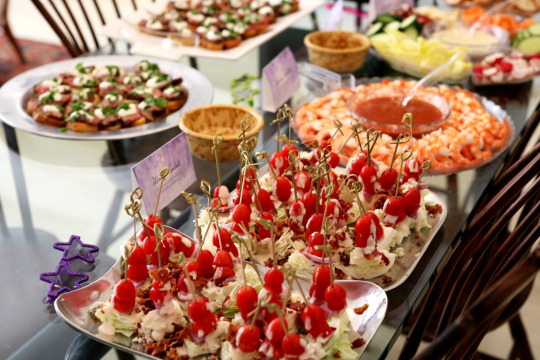
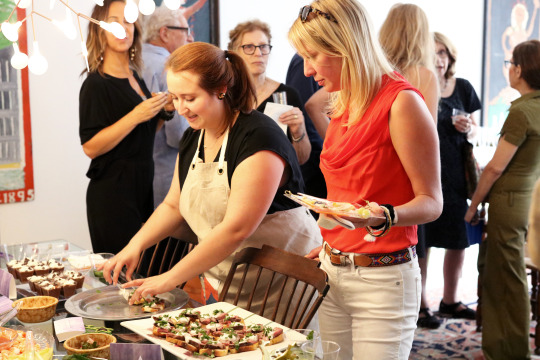
So we gathered a couple dozen friends—just the usual pals like Meg Wolitzer and Roz Chast to name a few (excuse us while we fan girl in the corner)—at the beautiful Upper East Side home of New Yorker writer Patricia Marx to celebrate Julie’s new book with cocktails, crudités, and more. We hope you’ll try some of these fun party recipes during award season!
MENU
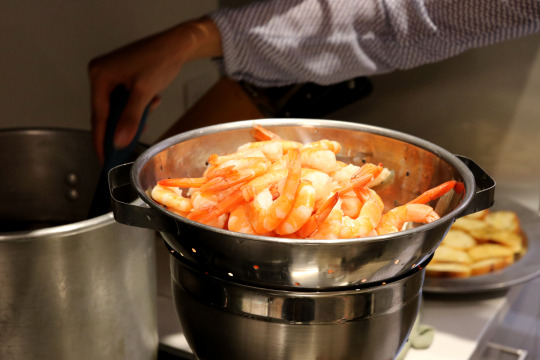
Shrimp Cocktail
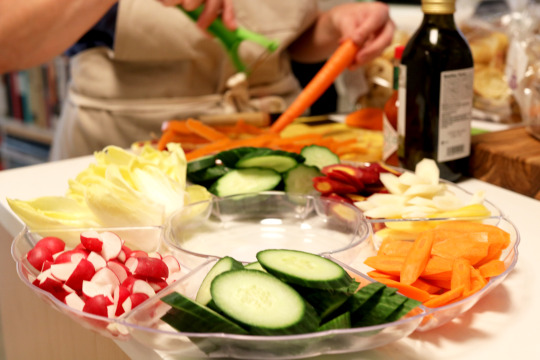
Crudités Vegetables with Remoulade Sauce
Crostini with Steak and Horseradish Cream
Mini Wedge Salads
Chocolate Mousse
+ a cheese platter from Whole Foods because, well, it isn’t a Riverhead party without a cheese platter.
(Julie Klam channeling Ina Garten)
INA GARTEN’S SHRIMP COCKTAIL (Recipe from Food Network)
Total Time: 15 minutes
Yield: 6 servings
1 lemon
Kosher salt
2 pounds large shrimp in the shell (about 30)
1/2 cup chili sauce (recommended: Heinz)
1/2 cup ketchup (recommended: Heinz)
3 tablespoons prepared horseradish
2 teaspoons fresh lemon juice
1/2 teaspoon Worcestershire sauce
1/4 teaspoon hot sauce (recommended: Tabasco)
Cut the lemon in half and add it to a large pot of boiling salted water. Add the shrimp and cook, uncovered, for only 3 minutes, until the shrimp are just cooked through. Remove with a slotted spoon to a bowl of cool water. When the shrimp are cool enough to handle, peel and de-vein them. Keep cold until ready to serve. For the cocktail sauce, combine the chili sauce, ketchup, horseradish, lemon juice, Worcestershire sauce, and hot sauce. Serve with the shrimp.

CRUDITÉS VEGETABLES WITH REMOULADE SAUCE (Recipe from Epicurious.com)
Total Time: 15 minutes
Yield: Makes 8 to 10 servings; dip makes 3/4 cup
1 bulb fennel, sliced
1 bunch radishes, trimmed
1 bunch small young carrots, trimmed and peeled
2 Belgian endive heads, trimmed and leaves separated
2 small Persian cucumbers, quartered lengthwise
4 teaspoons kosher salt
For the remoulade:
1/4 cup plain yogurt
1/4 cup mayonnaise
1 tablespoons capers, rinsed and chopped
1 tablespoon lemon juice
2 tablespoons Dijon mustard
1 tablespoon chopped flat-leaf parsley
Kosher salt and freshly ground pepper, to taste

In a large bowl or resealable plastic container, combine vegetables with salt and 4 cups water and stir to combine. Refrigerate for at least 2 hours (and up to one day). In a small bowl, combine yogurt, mayonnaise, capers, lemon juice, mustard, and parsley. Stir well to combine and season with salt and pepper to taste. Drain the vegetables well and serve alongside the sauce.
DO AHEAD: The vegetables can be prepared, covered, and refrigerated up to 1 day ahead of time. The sauce can be made up to 2 days ahead of time.
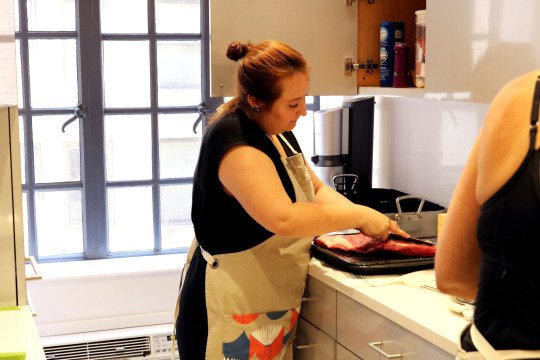
CROSTINI WITH STEAK AND HORSERADISH CREAM (Recipe from Williams Sonoma)
Total Time: 30 minutes
Yield: 28 servings
1 1/2 lb. flank steak, trimmed of excess fat
3 Tbs. olive oil
Salt and freshly ground pepper, to taste
2 Tbs. prepared horseradish
3 Tbs. sour cream
1 French or sourdough baguette, cut into 1/2-inch-thick slices (about 28)
Paprika for garnish
Season the steak and make the horseradish cream
Preheat an oven to 350°F. Place a rack in a roasting pan. Brush both sides of the steak with 1 Tbs. of the oil. Season generously with salt and pepper. Place on the rack and let stand at room temperature. In a small bowl, whisk together the horseradish and sour cream.
Make the crostini
Arrange the baguette slices on a baking sheet and brush lightly with the remaining olive oil. Season with salt and pepper. Bake until golden, 10 to 15 minutes. Transfer to a platter.
Cook the steak
Preheat a broiler. Broil the steak until firm but still quite pink in the center, about 6 minutes per side. Let rest for 5 minutes. Cut the steak with the grain into slices about 2 inches thick, then thinly cut the slices crosswise across the grain.
Arrange 1 or 2 slices on each crostini, top with a dollop of the horseradish cream and sprinkle with paprika. Transfer to a platter and serve at room temperature.

MINI BACON AND BLUE CHEESE WEDGE SALAD (Recipe from Brit&Co)
Total Time: 1 hour (mostly spent assembling!)
Yield: 12 servings (more if you’re conservative with your lettuce leaves)
Ingredients for the salad
1 heads iceberg lettuce
1 pint cherry or baby plum tomatoes, each one sliced in half
1 package of bacon, cooked crispy and crumbled
1/2 red onion, chopped (optional)
Blue cheese dressing (store-bought or homemade)
Blue cheese crumbles
cocktail toothpicks
Ingredients for the dressing
3 ounces blue cheese crumbles
3 tablespoons buttermilk
3 tablespoons light sour cream
2 tablespoons Lemonaise Light (or mayo)
2 teaspoons white wine vinegar
Juice from 1/2 lemon
Pinch of sugar
Pinch garlic powder Salt and freshly ground black pepper
Preheat the oven to 400°F. Place your slices of bacon on a baking sheet and bake in the oven for 15-20 minutes, or until it reaches your preferred level of crumbliness. Slice your tomatoes and onions according to the above guidelines while the bacon is cooking.
Make Blue Cheese Dressing
Full disclosure, we used store bought blue cheese dressing. (We had a limited amount of time to cook so we had to take some short cuts!) But here’s how to make the dressing if you have the time: In a small bowl, mash blue cheese and buttermilk together with a fork until mixture resembles large-curd cottage cheese. Stir in sour cream, mayonnaise, vinegar, lemon juice, sugar, and garlic powder until well blended. Season to taste with salt and pepper.

Mini Salad Assembly
Slice a head of lettuce in half through core. Cut each half into three wedges. Cut each wedge in half again. Keep in mind that each mini salad needs around 3-4 lettuce leaves. Spear 2-3 tomato halves with toothpick and secure into each lettuce wedge or stack. Drizzle with blue cheese dressing and sprinkle with bacon bits, chopped onion, and more blue cheese if desired. Season with salt and pepper and serve!

CHOCOLATE MOUSSE DESSERT (Recipe from Chowhound.com)
Total Time: 2.5 hours
Yield: 15 cocktail servings
**We highly recommend using an electric mixer for this recipe (unless you intend to replace “arm day” at the gym with the making of this recipe—in that case by all means use a regular whisk)
5 ounces semisweet or bittersweet chocolate, coarsely chopped
1 cup very cold heavy cream
3 large egg whites (no traces of yolk), at room temperature
Sweetened whipped cream, for serving (optional)
Fill a medium saucepan with 2 inches of water and bring to a simmer over medium heat. Place chocolate and 1/4 cup of the heavy cream in a large heatproof bowl. (Place remaining cream back in the refrigerator until ready to use.) Nest the bowl over the saucepan, making sure the bottom of the bowl does not touch the water. Melt chocolate, stirring occasionally with a rubber spatula, until smooth and combined with the cream. Remove the bowl from the saucepan and set aside to cool slightly.
Place egg whites in a second large bowl and whisk vigorously until stiff peaks form, about 3 minutes (make sure the bowl and whisk have no trace of oil or fat, or the whites will not whip properly); set aside. (Alternatively, you can use an electric mixer.) Clean and dry the whisk (or your beaters if you’re using an electric mixer). Place the remaining 3/4 cup heavy cream in a third large bowl and whisk until stiff peaks form. (Alternatively, you can use an electric mixer.)

Using a rubber spatula, fold half of the whipped cream into the melted chocolate, then gently stir in the rest (try not to deflate the whipped cream). Gently fold the egg whites into the chocolate-cream mixture just until there are no longer large blobs of whipped cream or egg white (do not overmix).
Spoon the mousse or pipe it from a pastry bag into serving cups and refrigerate for at least 2 hours. Serve with additional sweetened or flavored whipped cream if desired.
We have to admit -- we’re pretty good at catering parties. Give us a call if you’re interested in hiring us for your next event.
Just kidding about that. But, seriously, keep scrolling to enjoy some photos from our classic Hollywood cocktail party and don’t forget to go buy a copy of THE STARS IN OUR EYES by Julie Klam!


(Riverhead Books Executive Editor Jake Morrissey raises a glass to Julie Klam.)

(Roz Chast.)

(Meg Wolitzer.)

(Patricia Marx says a few words about THE STARS IN OUR EYES and Julie Klam.)


(A dedicated reader.)
54 notes
·
View notes
Text
The Best Thanksgiving Dessert Recipes to Make From Scratch

For many home cooks, dessert is the final frontier. Even if you can put out a roasted turkey with skin that shines like gold foil, baking a cake can seem as mysterious as building a blockchain. And it’s true: Baking requires certain skills, such as patience and meticulousness, that cooking does not always demand. But if you can get good at one, you can get good at the other.
Campfire Stonefruit Jars With Brown Sugar and Vanilla Ice CreamWe’ve developed four desserts—with an assist from the new fall cookbooks Ama: A Modern Tex-Mex Kitchen, whose biscuits crown our maple peach cobbler, and Dinner at the Club: 100 Years of Stories and Recipes from South Philly’s Palizzi Social Club, whose ricotta cheesecake is the base for a show-stopping version made with gorgonzola.
]]
None of these recipes is terribly difficult.
And once you master the basics, you’ll be riffing on them by New Year’s.

Blue Cheesecake with Caramelized Apples
Crust
2 cups pecans
1⁄4 cup granulated sugar
3⁄4 cup all-purpose flour
3⁄4 cup melted butter
2 egg yolks
2 pinches kosher salt
Butter, for greasing
]]
Directions:
Heat oven to 325°F. Grind pecans in food processor into a coarse meal. Add remaining ingredients and pulse until evenly combined to make the crust. Lightly grease a 10-inch springform pan with butter. Press crust into the pan, packing it down with the end of a rolling pin to make it as flat and even as possible. Bake crust for 20 minutes until golden brown and cool completely. Wrap outside of the pan in plastic.
Filling
20 oz cream cheese
12 oz Gorgonzola
15 oz ricotta
11 oz mascarpone
1⁄2 cup granulated sugar
1⁄4 tsp cornstarch
3 eggs plus
2 yolks
2 pinches kosher salt
Directions:
Raise oven to 350°F. Combine all ingredients in the bowl of a stand mixer fitted with a whisk attachment. Whip on medium-high speed for 6 minutes, scraping down sides of bowl as needed to make sure everything is well-mixed. Spread filling over the pecan crust, filling pan about 3⁄4 of the way (there may be some left over). Smooth the surface. Fill a large roasting pan with water and set cake in center; the water should go halfway up the sides of pan. Place in center rack of oven and bake for 2 1⁄2 hours until filling is fully set (a slight jiggle or no jiggle). Turn off oven and allow pie to rest in oven for 30 minutes. Crack oven door and let pie continue to rest another 20 minutes. Remove pie and put plastic wrap directly on surface. Cool overnight in refrigerator.
]]
Caramelized Apples
2 tbsp butter
3 Granny Smith apples, peeled, cored, and sliced 1⁄2-inch thick
3⁄4 cup honey
1⁄4 cup brown sugar
Pinch kosher salt
1 tsp fresh thyme leaves, plus more for serving
Honeycomb, for serving
Sea salt, for serving
Directions:
Melt butter in a nonstick skillet over medium heat and add apples. Saut until golden and slightly softened, about 5 minutes, then add honey and brown sugar. Bring to a boil, then immediately reduce heat to low. Cook until shiny and thick, then add salt and thyme. Unwrap the cheesecake and run a small knife or spatula around the inside of the pan to loosen. Remove outer ring of the springform pan and transfer cheesecake to a platter. Spoon caramelized apples over cheesecake. Garnish with honeycomb, thyme, and sea salt.
Jack of All Trades: Why Pumpkin Is a Great Nutritional Option All Year Round

]]
Maple Peach Cobbler
Filling
2 lbs frozen peeled peach slices 1⁄2 cup granulated sugar
1⁄2 cup maple syrup
1⁄4 tbsp vanilla extract
1⁄2 tsp cinnamon
2 tbsp all-purpose flour
Whipped cream or ice cream, for serving
Heat oven to 400°F. Combine ingredients except whipped cream in large mixing bowl and stir to coat. Transfer to a 2-quart baking dish and bake for 45 minutes until peaches are soft (but not falling apart) and a thick, sticky sauce has formed. Remove from oven, and cool to room temperature.
Biscuits
3 1⁄2 cups all-purpose flour
2 tbsp granulated sugar
2 tbsp baking powder
1 tsp fine sea salt
1 cup cold unsalted butter, cut into 1⁄4-inch pieces
3⁄4 cup heavy cream, cold
1⁄2 cup buttermilk
Directions:
While peaches are baking, make the biscuit dough. Combine flour, sugar, baking powder, and salt in large bowl and mix. Add cold butter. Using your fingers, pinch the pieces of butter and flour together so that you get uneven shards and beads of butter. (Don’t work the butter for long.) Make a well in the middle, pour in cream and buttermilk, and stir to combine. With your fingers, fold the dry ingredients into the wet ones just until combined. The dough will be moist and crumbly; press it into a small rectangle and cover with plastic wrap. Chill. When peaches have cooled, unwrap and roll out the dough to roughly 1⁄2-inch thick. Tear off irregular pieces and place here and there over the peaches. (Rewrap and save any excess dough for future use.) Decrease oven to 350°F and bake cobbler 40 to 50 minutes, until biscuits are lightly golden on top. Serve warm or at room temperature, topped with whipped cream or ice cream.
The Last Word on How to Make Perfect S’mores
]]
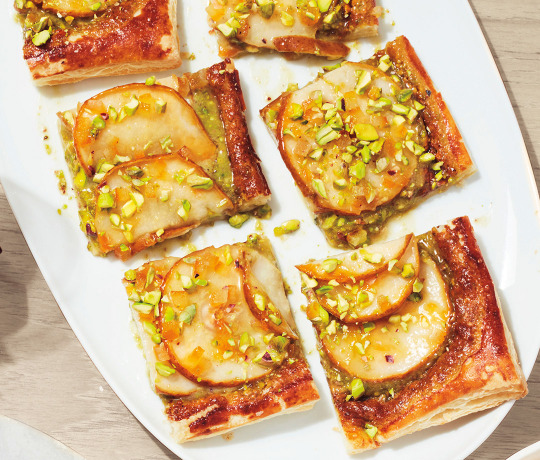
Pear & Pistachio Tart
1 cup shelled pistachios, chopped for serving
1⁄2 cup honey
4 tbsp heavy cream
Pinch kosher salt
1 sheet frozen puff pastry, thawed
2 large firm pears, cored and sliced into 1⁄4-inch rounds
1 egg, beaten
2 tbsp apricot jam
1 tbsp water
Sea salt, for serving
Candied orange peel (substitute fresh orange zest), for serving
Directions:
Heat oven to 400°F. Combine pistachios, honey, cream, and salt in a food processor. Process until mostly smooth and reserve. Gently roll out puff pastry on a lightly floured surface and transfer to a sheet pan lightly greased with butter. Spread an even layer of the pistachio paste across the pastry, leaving a 1-inch border on each side. Arrange pear slices in overlapping shingles. Brush beaten egg onto border of pastry. Bake for 20 minutes or until pastry border is fully risen and golden brown. Remove from oven and cool completely. While tart is cooling, make the glaze by warming jam and water in a small saucepan over low heat. Whisk to combine and gently brush cooled pears with glaze. Garnish tart with chopped pistachios, sea salt, and candied orange. Cut into squares and serve.
How to Make a Thanksgiving Feast With Flavors From Around the World

]]
Banana Bourbon Bread Pudding
1 large loaf bread (about 1 lb), cubed
10 eggs
2 cups light brown sugar, divided
1 3⁄4 cups heavy cream
1⁄4 cup bourbon or whiskey
1 tsp cinnamon
1⁄2 tsp nutmeg
Pinch kosher salt
5 bananas, halved lengthwise
2 tbsp salted butter, diced
Sea salt, for serving
Whipped cream or ice cream, for serving
]
Directions:
Heat oven to 300°F. Arrange bread cubes in an even layer on a sheet pan and bake for 15 minutes. Remove from oven and cool 30 minutes. Transfer to a 4-quart baking dish. Whisk the eggs in a medium mixing bowl. Add 1 cup of the brown sugar, cream, bourbon, spices, and salt. Whisk until completely combined. Pour mixture over bread to evenly coat, cover, and refrigerate overnight.
Heat oven to 350°F. Bake bread pudding for 1 hour, or until a skewer inserted into center of pudding comes out clean. Remove from oven and cool slightly. If pudding is puffed up, lightly press down with the back of a heavy pan. Layer banana slices cut-side up across the center of the pudding and evenly cover with remaining brown sugar. Distribute butter over surface. Caramelize bananas with a crème brûlée torch.
Alternately, place dish under a low broiler for 5 minutes, rotating dish 180 degrees halfway through, being careful to watch for burning. Garnish with sea salt and serve warm, topped with whipped cream or ice cream.
Read the full article
#easythanksgivingdessertsforacrowd#lightthanksgivingdesserts#pumpkindessertrecipes#thanksgivingcookies#thanksgivingdessertcrosswordclue#thanksgivingdessertspinterest#thanksgivingrecipes#traditionalthanksgivingdesserts
0 notes
Text
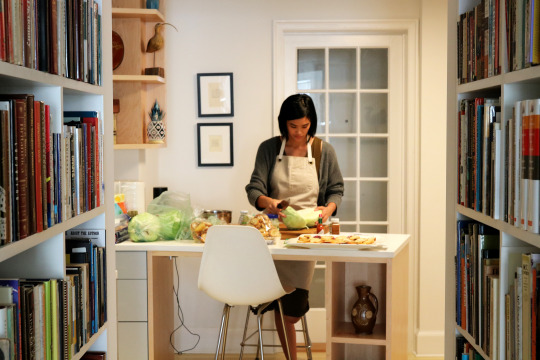
Cooking is Chemistry 3: The slow burn
There's many reasons that thinking of cooking as chemistry might seem initially off the mark. Chemistry is often shown off to children as flashy and immediate to try and keep their attention. Cooking, on the other hand, is often seen as a daily drudgery.
Part of it being seen more often as craft than art has to do with how much time and effort it often requires just to make something you can eat. Trying to hurry it along into an instant reaction, like dropping baking soda in vinegar, usually leads to unfortunately equally explosive results.
This bored view of the kitchen has shaped cooking. It’s part of why culinary knowledge is actually so often in the hands of people that the work was pushed off to - women, people of color, and the working class. People that society views as not having much to contribute have long been expected to devote their time to this supposedly unfulfilling work.
Setting aside the tangled question of what qualifies as craft or art, whether you learn to cook in a diner or a premier culinary school you are absorbing the knowledge distilled by centuries of other people's patience. Any time you cook you are setting aside some of your own time as well, adding to that tally, and hopefully expanding the corpus with that dedication.
I think the omelette, especially given the debates surrounding it in many cooking circles, is the perfect example of where these issues all come together. My favorite type to make and to eat is one that requires continuous effort and rapt attention. When done right however, it honors all the effort before it.
Eggs are arguably the most versatile ingredient in cooking. They come neatly divided into protein-based whites and a yellow bulb of rich fats. You can separate them or use both. Because they cook at comparatively low temperatures but don't burn until fairly high ones, there's a broad range of ways to make and serve them. They are fairly mild when it comes to flavor, so spices, salt, sour acids, bitter sides, and even sweeteners can be used alongside them.
The problem with this flexibility is that there's so much you can do with them that it can be paralyzing. Omelettes are often presented as uniquely complicated, but I think they're actually a very useful place to start because they take a simple approach towards most choices with the eggs. You don't separate the yolks and whites but simply cook the whole without too much agitation, especially at the end. Those easy options are essentially what define an omelette.
Omelettes are a contentious topic in the cooking world because like most other egg dishes they have such porous borders. They originated in medieval Catalonia, France, and what would become Italy, as close cousins to frittatas and quiches - still visible in the making of so-called Spanish "omelettes" to this day.
Unlike those more cake-like constructions, however, the idea of what makes an omelette is right in its name - a long-lost reference to the peasant Latin word “lamella”, a plate. In short, a flat surface of cooked egg. Medieval recipes make it sound as though these early omelettes were pretty extensively cooked before probably being folded over on themselves.
Modern omelettes come in diverse shapes and textures, but are all derived from that same tradition. The popular standard in both American and British cooking schools today calls for agitating the eggs while they're still fluid in the pan. This distributes them as much as possible while they begin to cook without turning them into separate pieces.
The openly admitted goal behind that is to make sure they cook as little as possible, leaving still liquid proteins scattered throughout the omelette, to create an extremely soft texture. One of the other effects of this is that they also usually cook faster - partly because of the technique but partly because of the standards involves for what counts as “cooked”.
Few chefs discuss that, however, this is at odds with the original peasant tradition of slow and thorough cooking. Fewer still admit that the more extensively cooked versions remain popular in less costly restaurants, even though they take more time. Personally, I prefer omelettes slightly more solid than this modern professional style in any case. Perhaps that's just me, but maybe there’s some wisdom in this enduring popular tendency.
That being said, modern culinary schools are interested in avoiding overcooking eggs for a reason. The entire point of an omelette is to create a so-thin-it-folds egg dish, not the thickness of a quiche or frittata. A lot of half-pan omelettes in today’s diners are larger, deliberately to securely hold more and more filler ingredients. Those take still longer and longer to cook all the way through, however.
Maybe you prefer omelettes on either end of the spectrum, but I think the best lie in the middle - solid but still creamy, able to be flavored by the ingredients it holds but not expanded into a quasi-quiche to hold them. So, here's my solution to how to make an ideal omelette, balanced between these extremes.
The first thing I think everyone should do when cooking an omelette in a new kitchen or with a new pan is to do a quick test. Often I will, as in this case, just use one egg to see how it cooks under these conditions.
What seems to virtually always work well is to heat the pan with both butter and oil in on the lowest possible setting while preparing the eggs. The longer time the cooking medium and pan itself are on the heat, the more it evenly distributes through them. Keeping it low keeps the oil and butter from burning or browning however.

Since your goal is to create a thin and evenly cooked sheet of eggs (remember it’s a lamella!), having it only cover some of the pan thinly is better than covering the whole thickly.
With a flexible spatula, I recommend circling the rim the eggs form in the pan. This technique makes sure there's a mixture of oil and butter beneath the eggs (as they will stick to even supposedly non-stick pans). Ideally, it will also distribute some of the hot oils to the top of the eggs, helping them catch up on cooking. Once the eggs are freely unattached in the butter and oil, you can begin rolling them from one side of the pan to the other.

After you have them gathered up in one tight roll, I recommend experimenting with moving them within the pan or pouring the oil and butter over them for a few more seconds. The last bits of them that are still a bit liquid will firm up in this position, making a more secure omelette.
I don't think this is my finest one-egg omelette by far, as I poured the eggs in the pan a bit oddly. Whatever this one’s flaws, it's often easier with just one egg to perfect the technique and also account for what could be improved. If you think of cooking as a craft or art, this is practicing. If you think of it as chemistry, this is a trial experiment. In either case, it's essential.
However you think of it, what this shows is that one egg is most definitely not enough to create a full "plate" for the filling. The pan I'm using is about 10.5 inches in diameter at its top and tapers down to about 8.5 at its base. In all but the smallest of pans, I would recommend at least two large eggs to have enough of their proteins to create a stable omelette with filling.
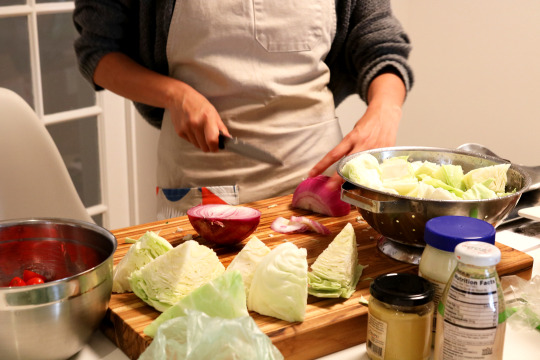
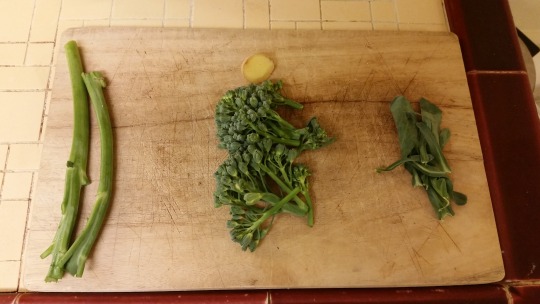
When starting to use a filling there's a number of considerations you need to make. Here's what I started with yesterday-

From those broccolini stalks, I trimmed them down somewhat - removing their leaves (which will cook too quickly) and the thicker parts of their stems (which will cook too slowly). Their buds, flowers, and smallest stems will cook fairly evenly, along with some ginger cut to be similarly fine. The rest I’ll save for other dishes this week.
With those prepared, I put them to the side. As before, I heated up the pan on the lowest possible setting with a very liberal amount of oil and butter while mixing the yolks and whites. Then, in they went.

Resist the temptation to raise the temperature - you need the time the lower temperature offers you.
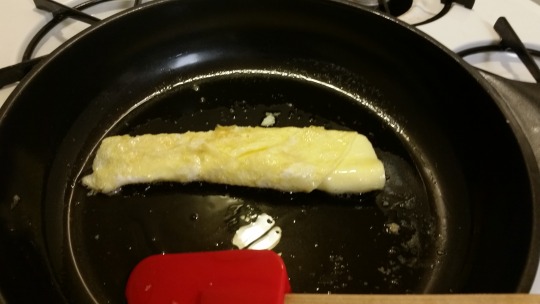
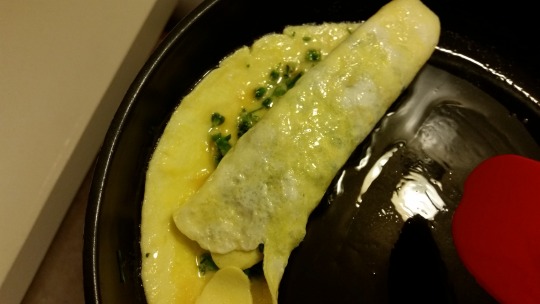
As before, they don't quite fill up the whole of the pan, but that's not a problem. The bigger concern is whether they'll stick to the pan, which will affect the shape and increases risk of burning. Once again, lightly pushing from below allows the butter and oil to go beneath them, making sure they're free floating in it. It also usually disturbs their surface, making sure they're covered in oil and butter from above as well.
It's important not to let too much of that mixture of butter and oil touch the top of the omelette, however, because you don't want it to solidify quite yet.

I added the chopped broccolini and ginger to the top of the omelette before it solidified, allowing these ingredients to sink slightly into the eggs.
Adding them in this way allows them to become incorporated into the omelette without directly touching the heat or appearing on what will become the surface of the omelette. When you mix them in with the raw eggs, it can end quite badly with cheese melting out of or mushrooms discoloring what will become the visible outside of the omelette.
At that point, the omelette had nearly hardened around those fillings. Its base was both already that solid and had been fully detached from the pan. It was ready to roll.
Once again, I let it sit a bit longer to set and solidify a bit more.

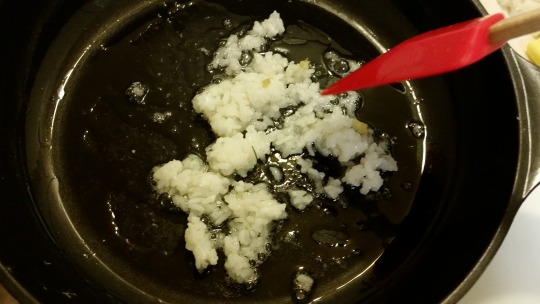
Now, after all that, you'll notice most of the oil and butter used in cooking is still in the pan. You want an omelette to be completely immersed in them to cook properly, but that means a lot is left behind. Even if you're quite careful, usually a few stray pieces of filling ingredients and bits of egg will be sitting in it too. That’s a very likely fire hazard if you reuse it.
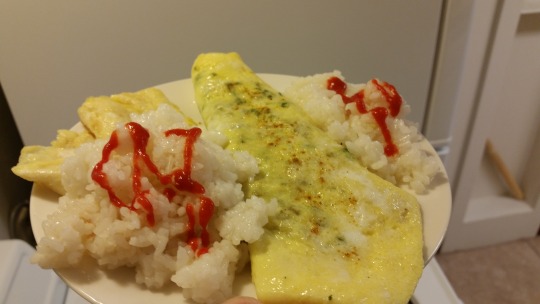
What I find works best is to add some already cooked rice to catch those pieces and absorb some of the butter and oil. It only takes a small amount, so it's perfect as a side to the omelette. It quickly soaks that up, especially once the heat is turned up so that it can be done before the omelette gets too cold.
The resulting dish is the product of careful work over a not insignificant amount of time. Cooking requires practice with all of your tools at hand - your ingredients, your cookware, your kitchen - to understand how they work. It requires a bit of diligence in this specific lesson too.
To cook an omelette in this manner, you have to work with low heats and carefully interact with a pliable substance. Especially at first, you will likely have some difficulties. I know I did. The hard work pays dividends, however, when you can more and more easily prompt the reactions you want.
With this dish particularly, the quiet commitment never disappears entirely. The moments when you first pour your eggs into hot oil and butter are ones of frantic yet prolonged movement to make sure all goes well. There's always room to improve and new variations to explore. Perfection isn't a result, it's a process. Hopefully you can find the liberation in that, that less than ideal results are momentary frustrations you can learn from if you respond with care and contemplation.
By doing that with ingredients as humble as eggs, you can find a carefully calibrated heir to two omelette traditions. It's one thick enough to easily hold filling and yet pleasantly light, creamy from its lighter cooking yet stable and solid.
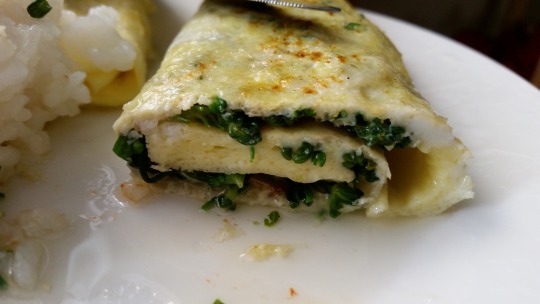
It's the product of generations of work, arguably all the way back to the first person to capture a wild chicken. So much of it is unsung.
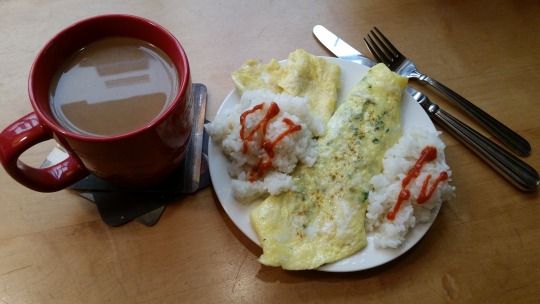
Yesterday's breakfast was an omelette with broccolini and fresh ginger filling dusted with garam masala, fried rice with sriracha, and cinnamon-infused coffee with milk.
#cooking is chemistry#cooking#eggs#omelette#broccolini#ginger#garam masala#rice#sriracha#cinnamon#coffee#milk#cooking is chemistry: the slow burn
1 note
·
View note
Text
This Fluffy No-Churn Ice Cream Pie Is the Perfect Summer Treat
[Photographs: Vicky Wasik]
During my recipe testing for homemade Klondike bars last summer, I made countless iterations of a no-churn ice cream based on Swiss meringue. Its fluffy, cloud-like consistency and clean, neutral flavor provided the perfect foundation for the pure vanilla filling found in a Klondike bar.
My earliest efforts were mere combinations of Swiss meringue and whipped cream, which gave the "ice cream" a wonderful richness and fresh dairy flavor, along the lines of DQ soft serve, but firm enough to slice. Problem was, however delicious, these versions were too creamy for a Klondike bar, which has a firm and pleasantly icy bite, and it was a touch too soft to hold the sharp corners that make each square so satisfying.
Eventually, I discovered that adding a splash of milk could provide the ice cream with the texture I needed, but I never stopped thinking about the "failure" that came so close. While it had a wonderfully light and creamy texture, the Klondike aspirations at its heart made it too firm for scooping. Bad news for a proper ice cream, but brilliant for an ice cream pie!
Like the fluffy quarts of supermarket ice cream that can miraculously survive the journey home from the store, this ice cream is ultra airy, so it melts with preternatural slowness—another quality that's ideal for slices of pie, particularly in warm weather.
If you've ever made Swiss meringue, whether to top a pie or for a buttercream, the overall process will be familiar; the only difference will be a bit of whipped cream folded in at the end. And if you've gone so far as to try my homemade Klondike bars, you'll be in familiar territory, as well.
The first step is to prepare a cookie-crumb crust. Because I can't resist the combination of chocolate and vanilla, I like to use homemade Oreos crushed into crumbs (wafers only). Store-bought Oreos will, of course, work equally well.
With a little melted butter, they come together in a crust that will be nice and crunchy once frozen.
If Oreos aren't your jam, let personal preference guide your choice. The crust will taste great with store-bought or homemade Biscoff, as well as commercial or made-from-scratch graham crackers (there's a recipe in my cookbook, BraveTart: Iconic American Desserts), or even crispy gingerbread cookies in winter months. Whatever the style, gluten-free cookies will do just fine here, as well.
To make the "ice cream" filling, prepare a water bath by filling a wide pot with a few inches of water, with a thick ring of crumpled foil placed in the bottom.
The ring acts as a booster seat, so that when I place my stand mixer bowl over the water, it will sit high, touching neither the water nor the pot itself. This allows steam to flow freely around the bowl, gently warming the eggs with indirect heat.
When the bowl touches the water, the bottom of the pot, or even the sides (thus forming a lid to the pot), the heat will be too strong and direct, leading to scrambled whites. If you're using a stand mixer that comes with a footed bowl, skip this setup and use a glass or ceramic bowl instead of the stand mixer bowl (in which case, it's fine for the bowl to touch the sides of the pot).
Bring the water to a boil, then adjust the heat to maintain a gentle simmer; the idea is to generate lots of steam, rather than to let the water boil hard. Meanwhile, combine the egg whites with plain or toasted sugar, salt and lemon juice or cream of tartar in the bowl of a stand mixer (along with the salt, those last two function as seasoning rather than structural elements, a touch of acidity to bring balance to the sweet fluff).
While stirring and scraping constantly, warm the egg whites and sugar over the steaming water until they reach approximately 172°F (77°C). In a stainless steel stand mixer bowl, this should take only about five minutes; a slower timeline simply indicates a lack of steam, so adjust the heat as needed to move things along.
When the meringue reaches the proper temperature, transfer the bowl to a stand mixer fitted with a whisk attachment and whip on medium-high speed until it's fluffy, thick, stiff, and incredibly light.
The timing of this phase will vary depending on the power of the mixer itself, but it generally takes from five to eight minutes, giving the meringue ample time to cool.
Once the meringue is ready, it's time to whip the cream and vanilla to stiff peaks as well. This can be done by hand (or with a hand mixer) in a separate bowl, or the meringue can be scraped into another container so the stand mixer bowl and whisk can be re-used for the task (no need to wash either, bits of meringue will not interfere with whipping the cream).
However you go about it, fold the whipped cream and meringue together with a flexible spatula or with a wide, open balloon whisk. It can be a touch tricky to assess the white-on-white mixture, but work patiently to ensure they're homogenous so the ice cream is evenly textured. At this stage, try a bit of the "ice cream" and doctor it with additional salt and vanilla (or other extracts) as desired, bearing in mind its sweetness will be less noticeable once frozen.
Finally, and this is a completely optional step, fold in a handful of rainbow sprinkles.
It's a celebratory touch that makes the pie feel fit for a party, but if that's not your jam it's strictly a matter of aesthetics, so feel free to leave them out (or swap in chocolate sprinkles instead).
If you have my cookbook, however, homemade sprinkles can also provide a pop of flavor in the pie, such as bright pink strawberry sprinkles or flecks of minty green.
Scrape the filling into the prepared shell, then cover it loosely but thoroughly with plastic and freeze until it reaches an internal temperature around 0°F. Due to the thickness of the pie, this can take quite some time—eight hours at the least.
That means it's nearly impossible to make and serve this pie in one day, but, by the same token, it's a fantastic make-ahead dessert, whether it's prepared the night before or the week before an event.
Slice the pie with a large chef's knife, warmed in hot water, then wipe the blade clean and rewarm between each slice. It's a bit time consuming, to be sure, but it will ensure beautifully clean slices.
Because the no-churn ice cream is mounded into a mile-high presentation, thin slices can go a long way, making it the sort of pie that's fit for a crowd. You'll have no trouble cutting out 12 pieces, but with care it can easily serve up to 16 (especially at the end of a heavy meal, when appetites for dessert may be slightly repressed).
Thanks to its light texture and delicate flavor (no egg yolks for any heavy custard notes), it's a refreshing end to any summer meal. So if you have a soft spot for the clean and refreshing flavor of the ice cream in a Klondike bar, or like the idea of a frozen dessert that combines the best elements of whipped cream and meringue, this frozen treat will be a perfectly festive dessert for any crowd.
This post may contain links to Amazon or other partners; your purchases via these links can benefit Serious Eats. Read more about our affiliate linking policy.

Source: https://www.seriouseats.com/2019/06/this-fluffy-no-churn-ice-cream-pie-is-the-perfect-summer-treat.html
0 notes
Text
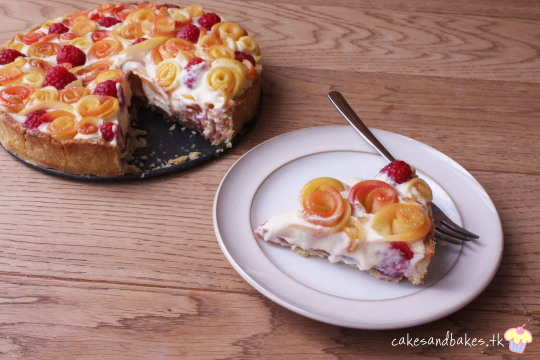
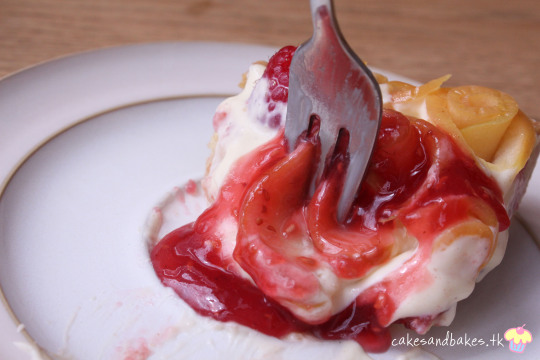
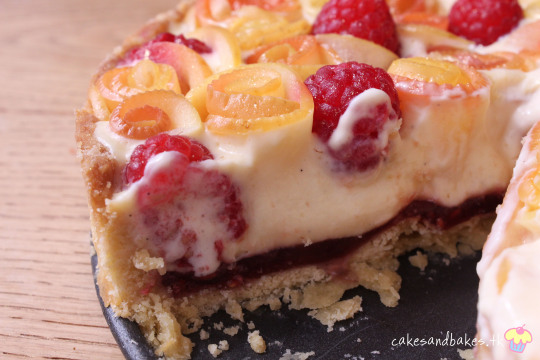
Tried & Tested: French Pastry Dough - Apple & Raspberry Rose Tart
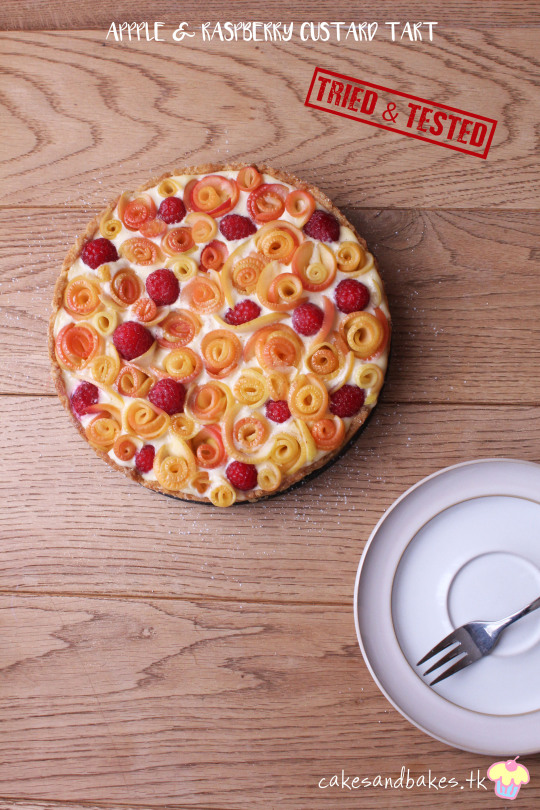
Exams are over! Let's celebrate with some good summer food.

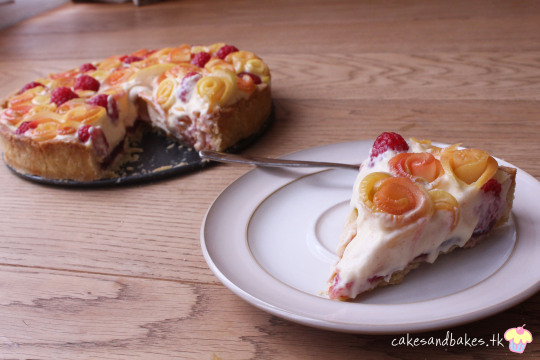
This tart didn't exactly turn out as pretty as I wanted it to but I'd say it's still gorgeous.

Look, in my defence, it was 11pm at night, I was super tired and I was watching 'Lion'.

I was an emotional wreck. I'm surprised I even managed to finish this tart off at all through the flood of tears that movie had me in.
Honestly, if you haven't seen 'Lion', go watch it NOW. Dev Patel's acting was extraordinary and Sunny is the cutest boy ever.
I wasn't really sure what recipe to try and test out. A tart was definitely on the mind but I wanted something simple so decided to go with a classic fruit and custard combo.

Since I had raspberries and apples on hand, I chose to go with those two fruits, but really, you could definitely mix and match fruits for this recipe.

Custard isn't hard to make but pastry is definitely something I have struggled with before.
Hence, I decided that I was to test out a simple no-fuss no-roll but flaky and crisp pastry dough.
David Lebovitz's French tart dough recipe did seem a little unusual initially.

Firstly, rather than the traditional method of rubbing cold butter into flour, the butter was melted along with oil and simply combined with the flour instead.

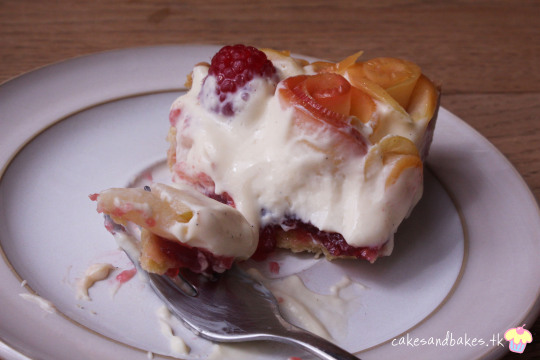
However, the pastry turned out beautifully. It was a lovely golden brown all over and the texture was spot on. It was light, flaky and still had that buttery flavour even with the addition of oil.
Don't even get me started on the custard.
To tell you the truth, I actually hated custard when I was younger and, even now, I tend not to eat it very often because the creaminess can get really sickly.

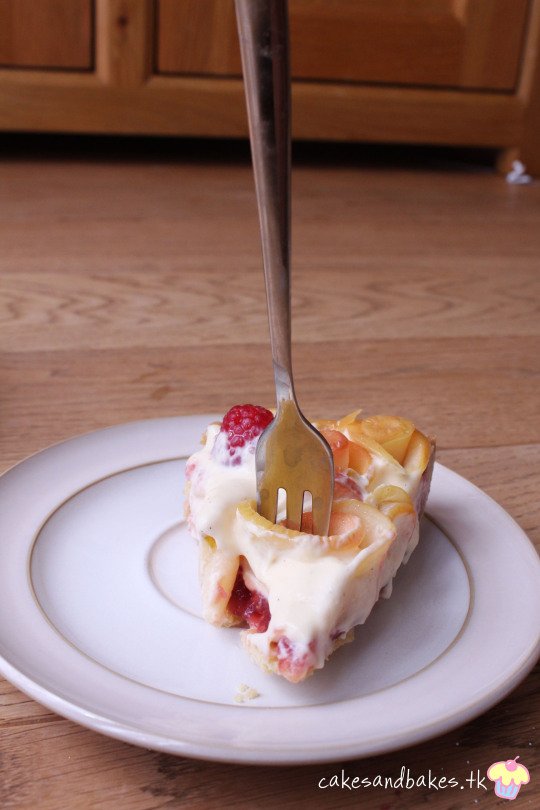
However, this custard was perfectly smooth and just the right amount of creaminess since milk is also used. Plus, the tartness of the apple slices and raspberries help to cut through it and makes it rather quite delicious.
The apple slices are soaked in the juice to prevent browning and then heated to soften them up. I was a bit on the edge about how the texture of the apples would taste but as long as you heat them enough, they taste divine!
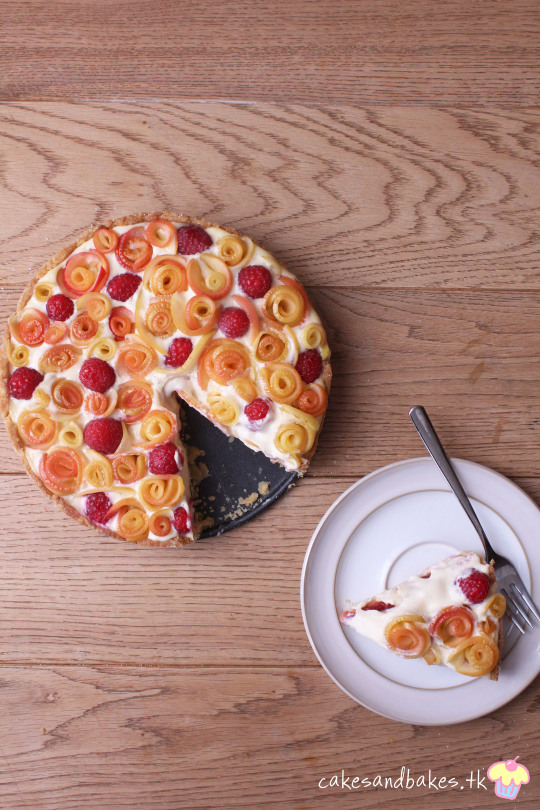
In fact, over a few days, they do begin to soften up more and are actually my favourite part of this tart.
Having just finished exams, this tart w/as a great way to cheer me up after how badly I screwed up.
Yeah, I might not get into my university of choice... but at least I still have a few slices of this tart left.
Recipe for pastry from David Lebovitz, rest from yours truly
Yield: 1 8-inch tart
Ingredients:
For the pastry:
85g unsalted butter, cut into pieces
1 tbsp vegetable oil
3 tbsp water
3 tbsp sugar (increased from 1)
1/8 tsp salt
160g all-purpose/plain flour
For the custard:
3 tsp cornstarch/plain flour
55g caster sugar
1 tsp vanilla bean paste
200ml whole milk
300ml double cream
2 egg yolks
For the raspberry jelly:
75g raspberries
85g raspberry jam (you can opt for seedless)
55g sugar
Juice of 1 large lemon
4 tbsp water
1 tsp of agar agar
You will also need:
50g raspberries
5 large apples
250 ml apple juice
Juice of 2 lemons
80g sugar
Method:
Pastry:
Preheat the oven to 410°F/210°C.
In an ovenproof bowl, combine the butter, oil, water, sugar, and salt.
Place the bowl in the oven for 15 minutes, until the butter is completely melted, bubbling slightly and starting to brown around the edges.
Next, carefully remove the bowl from oven and add in all of the flour and stir quickly until a ball of dough is formed.
Transfer the dough into your tart mold (I used a regular springform pan because I didn't have one on hand) and, once cool enough, press it into the tin and up the sides.
Using a fork, prick the dough all over and bake for 15 minutes until golden brown. Leave to cool completely.
Jelly:
In a saucepan, combine the jam and sugar and whisk to combine until there are no lumps remaining.
Toss in the raspberries and lemon juice and begin to heat the mixture on low to medium heat.
In a small bowl, combine the water and agar and leave for a couple of minutes to soak.
Use a fork to gently mash the raspberries (they should begin to break down with the heat) and then add the agar.
Bring the mix to the boil and leave for 5 minutes to cook and thicken. Set aside to cool for a few minutes. Make sure to not let it cool too much as this is when the agar will start to set.
Custard:
In a large bowl, whisk to combine the egg yolks, cornstarch and sugar until pale in colour.
In a separate bowl, combine together the milk, double cream and vanilla bean paste.
Slowly and in parts, add the milk mixture into the egg yolks, whisking thoroughly and making sure there are no lumps.
Transfer the mixture to a large saucepan on low to medium heat. Stir continuously for 8 minutes until the mixture thickens enough that your whisk leaves a trail and it sticks to the back of a spoon. Leave to cool slightly.
Assembly:
Once the pastry shell has cooled, pour the jelly into the shell and spread evenly. Leave the tart to cool in the fridge until the jelly has at least partially set.
Next, pour the custard on top of the jelly and leave to set partially in the fridge for about 10 to 15 minutes.
Meanwhile, in a large bowl, mix together the apple juice, lemon juice and sugar, stirring to combine.
Wash and peel all the apples and slice very thinly. You can use a mandoline for this if you have one. After slicing each apple, make sure to transfer these slices into the bowl of juice.
Cover the bowl with a lid and heat in the microwave for 5 to 6 minutes until steamy and almost bubbling. Be careful as it will be very hot. Leave to cool for 10 to 15 minutes.
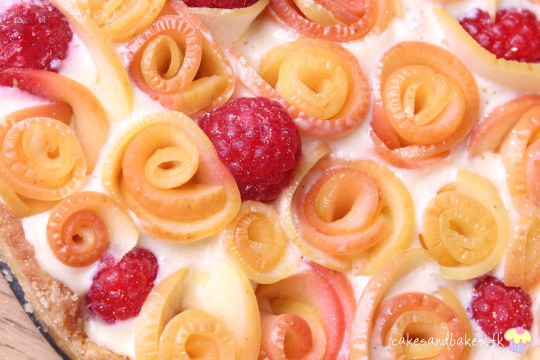
Once cool enough to handle, begin rolling the apple slices into roses and layering apple slices around to form the flower.
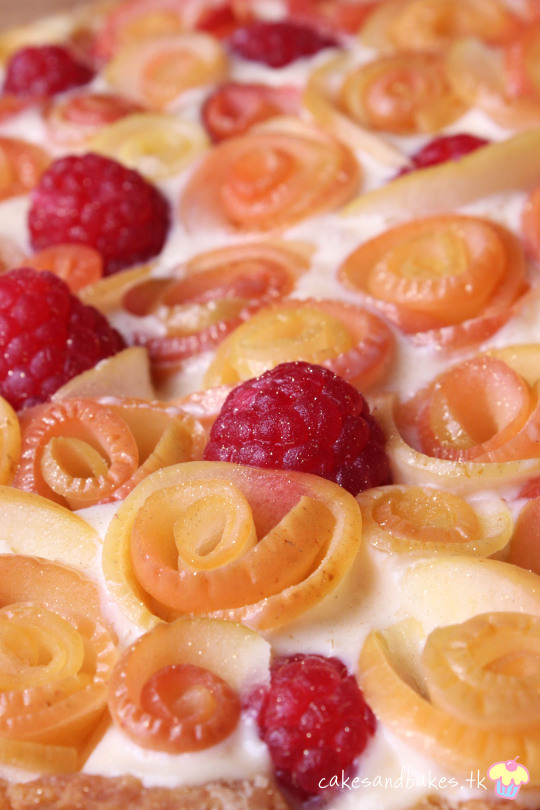
Wrapping the slices together tightly, carefully arrange the rose into the custard. The custard shouldn't be so set that the rose won't stick into it but it should be firm enough that it doesn't unravel. Repeat this for as many times as it takes to cover the tart with the apple roses. Fill in any gaps with raspberries and finish with gold lustre.
#raspberry#raspberries#apple#custard#custard tart#tart#pastry#pastries#french pastry#david lebovitz#fruit#fruit tart#baking#baker#bakery#bake#recipe#dessert#sweet#food#food blog#foodie#food pics#baking blog
32 notes
·
View notes
Text
Chestnut baking - ottolenghi brownies and plum tart
Chestnut and prune chocolate brownies
If you haven’t tried chestnut flour before, don’t be put off by the smell – it’s distinct and rustic, but that’s how it’s meant to be. Chestnut flour is sold in most large supermarkets; healthfood shops should have it, too. Makes 15.
190g 70% cocoa solids dark chocolate, cut into small pieces
190g unsalted butter, cut into 2cm cubes
150g pitted soft prunes, halved
3 eggs
1 tsp vanilla essence
220g caster sugar
110g chestnut flour, sifted
¼ tsp salt
150g cooked and peeled chestnuts, broken in half
Heat the oven to 170C/335F/gas mark 3. Line a 20cm x 30cm high-sided baking tray with parchment paper.
Put the chocolate and butter in a heatproof bowl and set over a pan of simmering water (make sure the base of the bowl is not in contact with the water). Stir until melted and combined, then take off the heat and stir in the prunes.
Whisk the eggs, vanilla and sugar until the mixture is thick enough to leave a trail (two to three minutes with an electric whisk), then fold in the cooled chocolate mixture. Sift in the flour and salt, then stir in the chestnuts until the mixture is smooth and streak-free. Pour into the lined baking tray and bake for 25 minutes, until the brownies are just cooked and the top is shiny.
Remove from the oven and leave in the tin to cool completely, then cut into 15 square brownies.
Plum, chestnut and walnut tart
Serve warm or at room temperature on the day it’s baked, with some whipped cream or ice-cream. Serves eight, generously.
160g plain flour, plus extra for dusting
40g icing sugar
Finely grated zest of ½ small lemon
80g fridge-cold unsalted butter, cut into 2cm dice
⅛ tsp salt
1 small egg yolk
8 large ripe plums, stoned and quartered
20g caster sugar
For the frangipane
75g room temperature unsalted butter
75g caster sugar
Seeds from 1 vanilla pod
100g cooked and peeled chestnuts
50g walnuts, ground in a food processor
1 small egg
2 tbsp brandy
For the glaze
60g plum jam
1 tbsp brandy
1 tbsp water
Blitz the flour, icing sugar, lemon zest, butter, salt and egg yolk in a food processor until the mixture starts to assemble into a ball (add a tablespoon of cold water if you need to help it come together). Tip out on to a work surface, bring together into a ball, flatten it a bit and wrap in clingfilm. Refrigerate for at least 30 minutes, to firm up.
Heat the oven to 180C/350F/gas mark 4. On a lightly floured work surface, roll out the pastry into a 32cm diameter circle about 0.5cm thick. Lift the pastry into a loose-based 3cm-high 26cm tart tin (to help you lift it, drape the pastry over a rolling pin), then press into the edges of the tin. Trim the overhanging edges, line the pastry shell with parchment paper, fill with baking beans and refrigerate for 10 minutes. Bake the pastry case for 20 minutes, until the edges are golden-brown, then carefully remove the paper and beans, and bake for seven minutes more, until the base is golden-brown and cooked. Remove from the oven and leave to cool.
Blitz all the ingredients for the frangipane in a food processor, until smooth, then spread over the base of the pastry case. Mix the plums and sugar and arrange them on top of the frangipane, pressing them in slightly. Bake for 35 minutes, until the plums are soft and the frangipane is golden-brown at the edges and set in the middle.
For the glaze, heat the jam, brandy and water in a small saucepan on a medium-high flame and stir for a minute or two, until thickened. Brush over the tart and serve warm or at room temperature.
1 note
·
View note
Text
Dorie Greenspan’s Coffee Malteds-Famous Fridays
Hello and welcome to this way, way overdue edition of Famous Fridays and not even exactly a legit one at that. See, I’ve already featured Dorie Greenspan several times on the site, including this FF post on Dorie’s Two-Bite, One-Chip Cookies from Dorie’s Cookies (which is exactly where today’s cookies are from too) but because we are living in a crazy world now and I can’t get to the library and research new cookbooks (which is what I do now before I buy because my collection is kinda out of hand and I have to be absolutely in love with a book to commit to a purchase) I decided I could bend the rules and do a second post celebrating Dorie’s Cookies, because it’s not only an amazing cookie resource, but because these Coffee Malteds are just so darn addictive!
Whew! Thanks for indulging me. I promise to keep the asides to a minimum. Suffice it to say, that if cookie baking makes you look like this 😍😍 you should definitely pick up a copy of Dorie’s Cookies and probably some extra butter and sugar while you’re at it, lol!
And some malted milk powder and instant espresso powder because both of these slightly-off-the-beaten-path ingredients are what make these Coffee Malteds so special!
Anyone who really knows me knows that I’m not a huge coffee fan and yet I find these coffee-ish rounds irresistible!
Guys, these are chewy! And slightly cakey too!
And while there is a definite coffee flavor, the malt powder adds some serious vanilla vibes, so it’s not overpowering.
Just delicious! Bite after bite!
If you get one thing done this weekend, let it be the baking of these simple yummy cookies and it’ll be huge success! Have a great one!xo
Dorie Greenspan’s Coffee Malteds-Famous Fridays
Makes about 28-30 cookies, depending on how large you make them
Prep Time: 10 minutes; Bake Time: 12-14 minutes
Ingredients
1 ½ cups unbleached, all-purpose flour
1/4 cup unflavored malted milk powder (not Ovaltine, I used one made by Carnation)
½ teaspoon baking powder
8 tablespoons unsalted butter (1 stick), cut into chunks at room temperature
½ cup sugar
1/4 light brown sugar (packed)
1 tablespoon instant espresso (or ground up espresso beans)
½ teaspoon fine sea salt
1 large egg, room temperature
1 large egg yolk, room temperature
1 teaspoon vanilla extract
The Recipe
1. Make sure oven rack is centered and preheat to 350 F. Line 2 rimmed baking sheets with parchment paper and set aside.
2. In a medium bowl, whisk together the flour, malt powder and baking powder.
3. Use an electric mixer to beat together the butter, both sugars, espresso powder and salt in a large bowl on medium speed for about 3 minutes, until well blended. Use a rubber spatula to scrape down the sides of the bowl and one at a time, beat in the egg, yolk, and vanilla, beating for 1 minute between each addition. Add in the dry ingredients and pulse the mixer just to begin incorporating them so that they don’t fly out of the bowl everywhere. Then on low speed, co tongue to mix, only until you can see no traces of flour. Remove the bowl from the mixer and use the spatula to finish the mixing. If the dough seems crumbly, you can knead it a few times and gather it into a ball (I didn’t need to but it suggests this in the original recipe.)
4. Use a rounded teaspoonful of dough to drop little mounds of batter at least an inch apart on the prepared baking sheets. Bake sheets one at a time for about 8 minutes, then turn front to back and bake for another 2-3 minutes, until cookies are barely golden and set around the edges, but still soft in the centers. They might not look “done” to you but take them out now, because they will continue to cook and firm up as they cool. Transfer the baking sheet to a rack to cool and after about 10 minutes, transfer cookies to the rack to finish cooling completely. Store cookies in an airtight container for a few days.
Enjoy!
Note: Recipe adapted from Dorie’s Cookies by Dorie Greenspan. I made these a little larger than the recipe says and I never got a crumbly dough like the recipe indicates after mixing—mine was more sticky but the cookies came out wonderful anyway. Also, I bake these one sheet at a time—I always do for cookies—less chance of burned bottoms and I cooked these for a few minutes less than the baking time indicated in the original recipe.
#Flour#Malted Milk Powder#Baking Powder#Butter#Sugar#Light Brown Sugar#Instant Espresso Powder#Fine Sea Salt#Egg#Egg Yolk#Vanilla Extract
0 notes
Link
Ingredients
1 x 450g / 14 oz Madeira cake, store bought (Note 1)
1/3 cup / 85 ml orange or other fruit flavoured liquor, or apple juice (or 2 tbsp brandy)
4 x 85g packets flavourless Aeroplane Jelly ("Create a Jelly") (Note 2 for subs)
5 cups / 1.25 L no added sugar Cranberry juice (Note 2)
2 - 3 punnets strawberries, halved
1 each punnet blueberries, raspberries
CREAM:
600 ml / 2 1/2 cups whipping cream
3 tbsp / 55g white sugar
1 ½ tsp vanilla extract
HOMEMADE THICK CUSTARD (OR 900G 1 TUB PAULS DOUBLE THICK VANILLA CUSTARD, NOTE 3):
750 ml / 3 cups milk (full or low fat)
1/4 cup / 55 g caster sugar (superfine sugar)
1 tsp vanilla bean paste (or extract) (Note 4)
1/4 cup / 55 g caster sugar (superfine sugar), extra
4 egg yolks
1/2 cup / 80g cornflour / cornstarch
Instructions
Cut cake into 3 cm / 1.2" cubes. Cover bottom of 3.5 L / 3.5 qt trifle dish with cake (might not use all) and sprinkle with liquor or juice.
Optional extra: Scatter over 1/2 to 1 punnet halved strawberries (this is not in ingredients list).
CRANBERRY JELLY:
Bring 3 cups of the Cranberry juice to a boil in a large saucepan. Add jelly, mix until dissolved. Add remaining juice.
JELLY LAYER 1:
Pour HALF the cranberry jelly liquid carefully over the cake in the trifle dish. Refrigerate uncovered for 1.5 hours until it is partly set – still quite soft, but not watery (ie if you gently place a strawberry on it, it will stay on the surface).
Pour remaining jelly in a bowl and leave on the counter (do not refrigerate).
Meanwhile, make the custard (see below).
CUSTARD LAYER:
Remove trifle from fridge. Spoon over the custard, smooth surface, press on glass to seal (stops jelly bleed). Refrigerate for 1 hour until surface has firmed up a bit - just enough to hold the jelly (jelly is soft so custard doesn't need to be fully set).
Put remaining jelly in the fridge at the same time (to thicken a bit, but not too much, see video. If sets too much, next jelly layer doesn’t set clear, will look broken and bubbly). CHECK jelly at 30 minutes, just to ensure it's not setting too fast.
JELLY LAYER 2:
Remove trifle and jelly from fridge. Jelly should be sloppy. Carefully spoon over jelly, smooth surface. Scatter over 1 punnet halved strawberries (or half each raspberries and strawberries). Refrigerate for 3 hours+ (can leave in fridge for 48 hours, until ready to assemble).
ASSEMBLING:
Cream: Beat cream, sugar and vanilla until softly whipped.
Once jelly is set, just before serving, top with cream, then pile over remaining berries. Dust with icing sugar.
Serve!! PS It is imperative to ensure every servings includes a bit of every layer in the trifle
HOMEMADE CUSTARD:
Bring milk, ¼ cup sugar and vanilla to a simmer in a large saucepan over medium heat. Do not boil.
In a large bowl, whisk together remaining ¼ cup sugar and yolks, then whisk in cornflour until smooth.
While whisking, carefully pour in about ½ cup of milk mixture. Once mixed in, slowly pour in remaining milk while whisking. Once incorporated and smooth, pour back into saucepan.
Return saucepan to stove over low heat. Whisk constantly until it becomes thick and custardy – this will happen quite quickly, about 45 seconds (ie it is liquidy when you start, then suddenly it thickens). Once thickened, remove immediately from heat – it will continue to thicken.
Pour into a bowl and cover with cling wrap, pressing onto surface. Leave on the counter until trifle is ready to layer with custard. Makes 750ml. (Note 5)
Recipe Notes:
1. CAKE: Any cake will work fine with this. Pound and Madeira are ideal and readily available at supermarkets. Christmas Cake is also great.
2. JELLY: The flavourless “Create a Jelly” Aeroplane jelly is sweet. It's sold at Woolworths, Coles etc in Australia. So it’s important to use sugar free / reduced sugar Cranberry Juice (I use Ocean Spray Cranberry Light - No Added Sugar), otherwise your jelly will be too sweet.
You’ll find trifle versions made using raspberry and strawberry flavoured Aeroplane jelly. I tried it once and really didn’t enjoy it, I found it too artificial. I really think it’s worth the small effort of making a jelly made using real Cranberry Juice, the flavour difference is astonishing, it’s real.
If you can't find Flavourless Aeroplane jelly, see Note 5 for how to make the jelly using plain gelatin.
3. STORE BOUGHT CUSTARD: I would use store bought custard over flavoured Aeroplane Jelly, to save time. Add a dash of vanilla to freshen it up. Make sure you get DOUBLE THICK Custard (Pauls is good, Woolies, Coles etc in fridge section).
4. VANILLA BEAN PASTE has little black specks in it, like when you use an actual vanilla bean. It's optional, you can just use normal vanilla!
5. GELATIN JELLY: Use this if you don't have Flavourless Aeroplane Jelly where you are. This is made using normal gelatin powder. I use McKenzie's here in Australia, small tub sold in the baking section of supermarkets. If using gelatin, you MUST use Cranberry Juice with sugar added, called Cranberry Classic here in Australia. Otherwise your jelly won't be sweet at all. Cranberry Juice is sold in the aisles.
ALTERNATIVE JELLY:
INGREDIENTS:
3 cups (750 ml) cranberry juice (NOT low or no sugar), room temperature
3 cups (750 ml) cranberry juice (not low or no sugar), boiled
7 tsp / 21 g gelatin powder*
* Australia: I use McKenzie's, US: 3 x 7g sachets Knox plain gelatin, UK: 2 x 12g sachets Dr Oetker (close enough to 21g)
DIRECTIONS:
1. Put room temperature cranberry juice in a bowl, sprinkle over gelatine powder. Whisk until mostly dissolved.
2. Pour in hot cranberry juice. Whisk until gelatin is fully dissolved. Use per recipe.
This jelly requires more liquid because there’s about 1 1/2 cups of Aeroplane jelly powder, so you need more liquid volume using gelatin powder. Cranberry Jelly made using gelatin needs to use normal cranberry juice ie not sugar free because otherwise the jelly is not sweet enough.
6. CUSTARD: You want the custard mostly cooled but not set. When slightly cooled, it is like soft whipped cream so you can spoon it on the trifle and it spreads smoothly. If it cools too much and sets, just use an egg beater and beat until smooth. Once refrigerated in the trifle, it thickens even more – it’s not like a firm set custard that’s cut-able into clean pieces (like firm tofu), it is softer than that, it's more like silken tofu ie. you can cut it cleanly but it's wobbly and soft.
7. I feel bad providing the recipe reference because I had issues with it, but I must because it is where the original idea came from and the end result looks so similar. I made this trifle recipe from Taste.com.au as written, I had problems with untidy layers / bleeding and I really did not enjoy the flavour of the artificial jelly. I also found the trifle didn't fill a standard trifle dish enough. So I used this recipe as a reference point, but reconstructed it pretty much from scratch.
Visit us at Schmidt Christmas Market for all your Christmas Needs.
0 notes
Text
The Best Thanksgiving Dessert Recipes to Make From Scratch
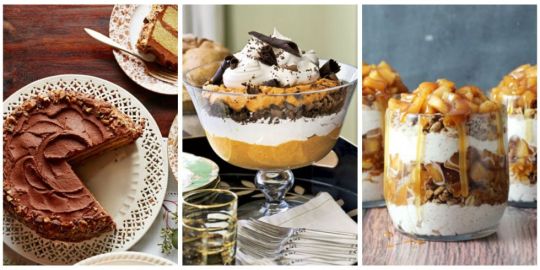
For many home cooks, dessert is the final frontier. Even if you can put out a roasted turkey with skin that shines like gold foil, baking a cake can seem as mysterious as building a blockchain. And it’s true: Baking requires certain skills, such as patience and meticulousness, that cooking does not always demand. But if you can get good at one, you can get good at the other.
Campfire Stonefruit Jars With Brown Sugar and Vanilla Ice CreamWe’ve developed four desserts—with an assist from the new fall cookbooks Ama: A Modern Tex-Mex Kitchen, whose biscuits crown our maple peach cobbler, and Dinner at the Club: 100 Years of Stories and Recipes from South Philly’s Palizzi Social Club, whose ricotta cheesecake is the base for a show-stopping version made with gorgonzola.
]]
None of these recipes is terribly difficult.
And once you master the basics, you’ll be riffing on them by New Year’s.

Blue Cheesecake with Caramelized Apples
Crust
2 cups pecans
1⁄4 cup granulated sugar
3⁄4 cup all-purpose flour
3⁄4 cup melted butter
2 egg yolks
2 pinches kosher salt
Butter, for greasing
]]
Directions:
Heat oven to 325°F. Grind pecans in food processor into a coarse meal. Add remaining ingredients and pulse until evenly combined to make the crust. Lightly grease a 10-inch springform pan with butter. Press crust into the pan, packing it down with the end of a rolling pin to make it as flat and even as possible. Bake crust for 20 minutes until golden brown and cool completely. Wrap outside of the pan in plastic.
Filling
20 oz cream cheese
12 oz Gorgonzola
15 oz ricotta
11 oz mascarpone
1⁄2 cup granulated sugar
1⁄4 tsp cornstarch
3 eggs plus
2 yolks
2 pinches kosher salt
Directions:
Raise oven to 350°F. Combine all ingredients in the bowl of a stand mixer fitted with a whisk attachment. Whip on medium-high speed for 6 minutes, scraping down sides of bowl as needed to make sure everything is well-mixed. Spread filling over the pecan crust, filling pan about 3⁄4 of the way (there may be some left over). Smooth the surface. Fill a large roasting pan with water and set cake in center; the water should go halfway up the sides of pan. Place in center rack of oven and bake for 2 1⁄2 hours until filling is fully set (a slight jiggle or no jiggle). Turn off oven and allow pie to rest in oven for 30 minutes. Crack oven door and let pie continue to rest another 20 minutes. Remove pie and put plastic wrap directly on surface. Cool overnight in refrigerator.
]]
Caramelized Apples
2 tbsp butter
3 Granny Smith apples, peeled, cored, and sliced 1⁄2-inch thick
3⁄4 cup honey
1⁄4 cup brown sugar
Pinch kosher salt
1 tsp fresh thyme leaves, plus more for serving
Honeycomb, for serving
Sea salt, for serving
Directions:
Melt butter in a nonstick skillet over medium heat and add apples. Saut until golden and slightly softened, about 5 minutes, then add honey and brown sugar. Bring to a boil, then immediately reduce heat to low. Cook until shiny and thick, then add salt and thyme. Unwrap the cheesecake and run a small knife or spatula around the inside of the pan to loosen. Remove outer ring of the springform pan and transfer cheesecake to a platter. Spoon caramelized apples over cheesecake. Garnish with honeycomb, thyme, and sea salt.
Jack of All Trades: Why Pumpkin Is a Great Nutritional Option All Year Round
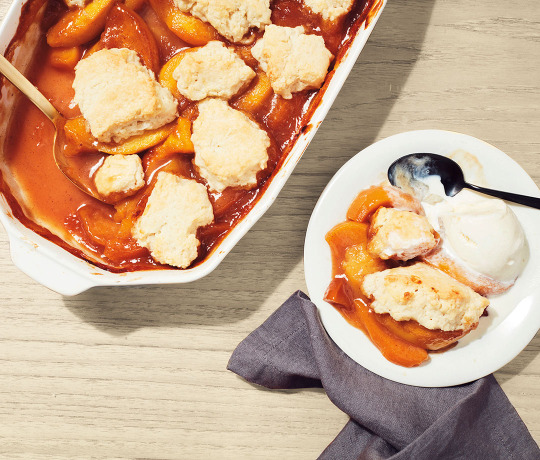
]]
Maple Peach Cobbler
Filling
2 lbs frozen peeled peach slices 1⁄2 cup granulated sugar
1⁄2 cup maple syrup
1⁄4 tbsp vanilla extract
1⁄2 tsp cinnamon
2 tbsp all-purpose flour
Whipped cream or ice cream, for serving
Heat oven to 400°F. Combine ingredients except whipped cream in large mixing bowl and stir to coat. Transfer to a 2-quart baking dish and bake for 45 minutes until peaches are soft (but not falling apart) and a thick, sticky sauce has formed. Remove from oven, and cool to room temperature.
Biscuits
3 1⁄2 cups all-purpose flour
2 tbsp granulated sugar
2 tbsp baking powder
1 tsp fine sea salt
1 cup cold unsalted butter, cut into 1⁄4-inch pieces
3⁄4 cup heavy cream, cold
1⁄2 cup buttermilk
Directions:
While peaches are baking, make the biscuit dough. Combine flour, sugar, baking powder, and salt in large bowl and mix. Add cold butter. Using your fingers, pinch the pieces of butter and flour together so that you get uneven shards and beads of butter. (Don’t work the butter for long.) Make a well in the middle, pour in cream and buttermilk, and stir to combine. With your fingers, fold the dry ingredients into the wet ones just until combined. The dough will be moist and crumbly; press it into a small rectangle and cover with plastic wrap. Chill. When peaches have cooled, unwrap and roll out the dough to roughly 1⁄2-inch thick. Tear off irregular pieces and place here and there over the peaches. (Rewrap and save any excess dough for future use.) Decrease oven to 350°F and bake cobbler 40 to 50 minutes, until biscuits are lightly golden on top. Serve warm or at room temperature, topped with whipped cream or ice cream.
The Last Word on How to Make Perfect S’mores

]]
Pear & Pistachio Tart
1 cup shelled pistachios, chopped for serving
1⁄2 cup honey
4 tbsp heavy cream
Pinch kosher salt
1 sheet frozen puff pastry, thawed
2 large firm pears, cored and sliced into 1⁄4-inch rounds
1 egg, beaten
2 tbsp apricot jam
1 tbsp water
Sea salt, for serving
Candied orange peel (substitute fresh orange zest), for serving
Directions:
Heat oven to 400°F. Combine pistachios, honey, cream, and salt in a food processor. Process until mostly smooth and reserve. Gently roll out puff pastry on a lightly floured surface and transfer to a sheet pan lightly greased with butter. Spread an even layer of the pistachio paste across the pastry, leaving a 1-inch border on each side. Arrange pear slices in overlapping shingles. Brush beaten egg onto border of pastry. Bake for 20 minutes or until pastry border is fully risen and golden brown. Remove from oven and cool completely. While tart is cooling, make the glaze by warming jam and water in a small saucepan over low heat. Whisk to combine and gently brush cooled pears with glaze. Garnish tart with chopped pistachios, sea salt, and candied orange. Cut into squares and serve.
How to Make a Thanksgiving Feast With Flavors From Around the World
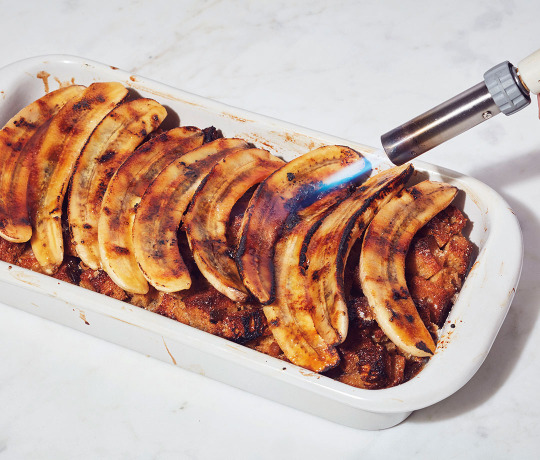
]]
Banana Bourbon Bread Pudding
1 large loaf bread (about 1 lb), cubed
10 eggs
2 cups light brown sugar, divided
1 3⁄4 cups heavy cream
1⁄4 cup bourbon or whiskey
1 tsp cinnamon
1⁄2 tsp nutmeg
Pinch kosher salt
5 bananas, halved lengthwise
2 tbsp salted butter, diced
Sea salt, for serving
Whipped cream or ice cream, for serving
]
Directions:
Heat oven to 300°F. Arrange bread cubes in an even layer on a sheet pan and bake for 15 minutes. Remove from oven and cool 30 minutes. Transfer to a 4-quart baking dish. Whisk the eggs in a medium mixing bowl. Add 1 cup of the brown sugar, cream, bourbon, spices, and salt. Whisk until completely combined. Pour mixture over bread to evenly coat, cover, and refrigerate overnight.
Heat oven to 350°F. Bake bread pudding for 1 hour, or until a skewer inserted into center of pudding comes out clean. Remove from oven and cool slightly. If pudding is puffed up, lightly press down with the back of a heavy pan. Layer banana slices cut-side up across the center of the pudding and evenly cover with remaining brown sugar. Distribute butter over surface. Caramelize bananas with a crème brûlée torch.
Alternately, place dish under a low broiler for 5 minutes, rotating dish 180 degrees halfway through, being careful to watch for burning. Garnish with sea salt and serve warm, topped with whipped cream or ice cream.
Read the full article
#easythanksgivingdessertsforacrowd#lightthanksgivingdesserts#pumpkindessertrecipes#thanksgivingcookies#thanksgivingdessertcrosswordclue#thanksgivingdessertspinterest#thanksgivingrecipes#traditionalthanksgivingdesserts
0 notes
Last Seen Blogs

partridge-in-a-pear-tree
all-year christmas


borderlandsscreenshots
Borderlands in pictures

newsreadersin
News Readers

marshmellowfluffs
Hedgehog Blog