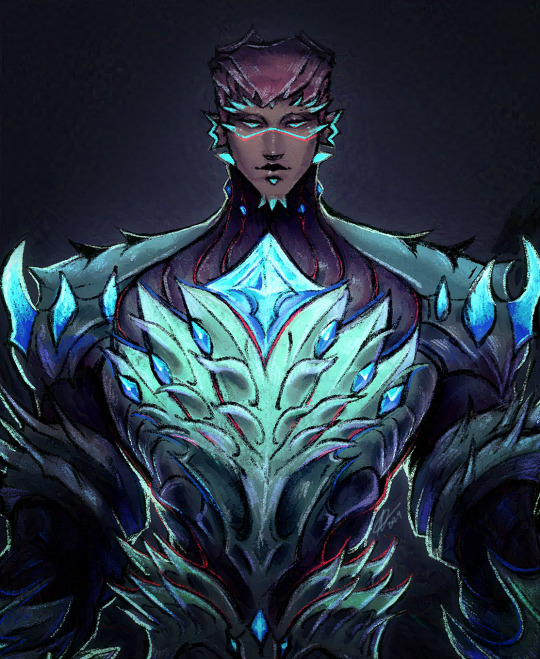
#might as well make it a set!
Photo


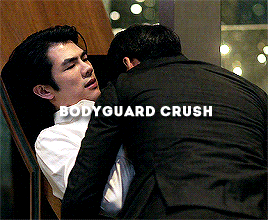
Those wacky skeletons ♥ (Patreon)
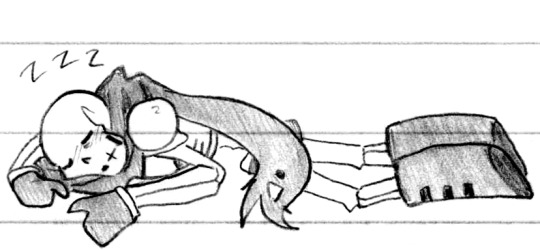
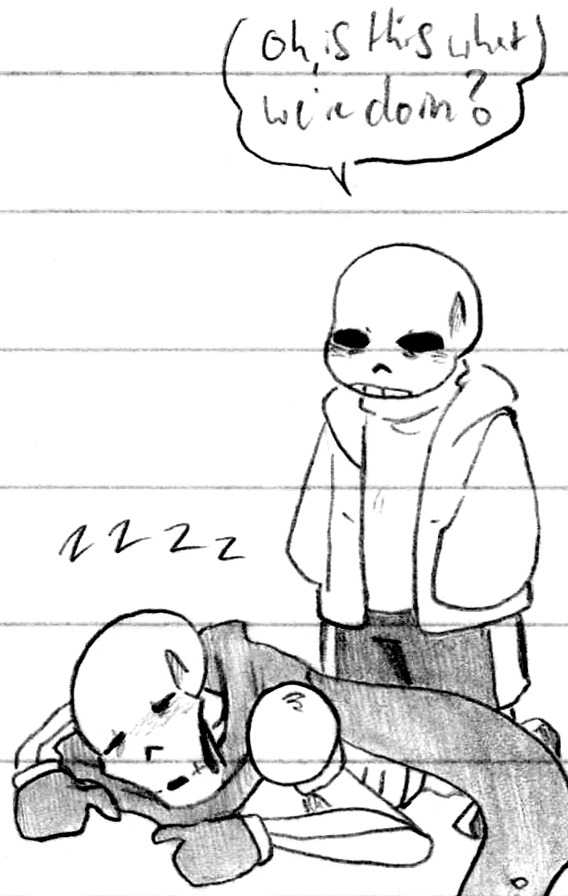
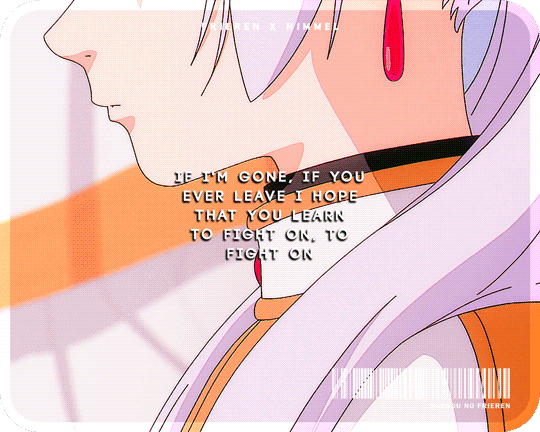
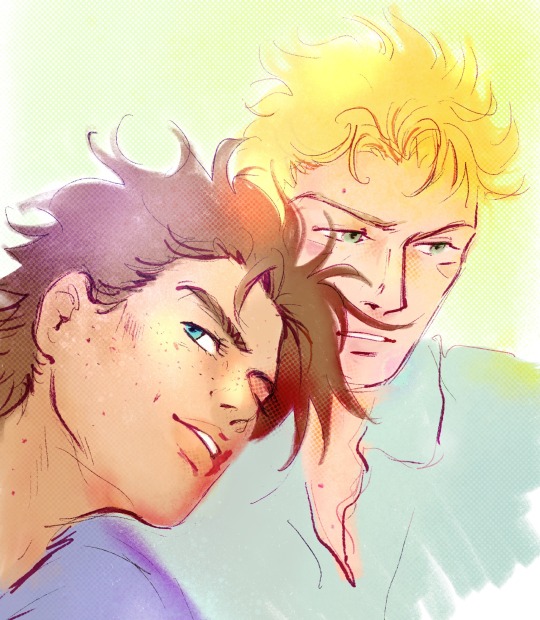
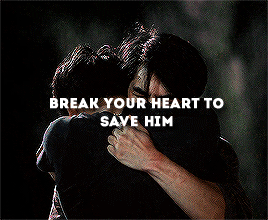
#Doodles#UT#Sans#Papyrus#Handplates#You can tell because of Sans' gloves lol#Getting-used-to-them-again doodles as well as just expressing Feeling <3 Happy towards them! Want them to be happy too!#It might seem silly for these - how many sets in now? - to still be getting used to drawing them again lol but it's because they're adults!#Their clothes and the way they hold themselves - but also especially Sans lol I dunno why I have such difficulty with him at times#He's got a cute face and I still find myself like ????how your face#Other than that tho it's just silliness hehe ♪ My favourite lads :D#I feel the need to make the distinction: I do actually have different favourites based on the AU lol#Like for example in classic I still love Flowey just a tiiiiiny bit more than Papyrus but it really is constantly neck and neck#Whereas in Handplates it's no competition even a little bit lol - Papyrus is just my Very Favourite#But Gaster is my favourite Handplates-specific character since he's unique to the AU! It gets a bit in the weeds lol#Sans isn't far behind at all of course the trio are very important! The duo even moreso imo#Going back to gloves tho I did carry over one of my quirks from my original UT doodles about Papyrus' gloves lol#I initially envisioned them as combination mitten-gloves with a free index finger and all the rest together#I still rather like the design! But it is admittedly not Handplates accurate lol#The occasional dip into self-indulgence who me? Lol#Sleeping on each other is important to me as well!! It is such a favourite hehe#Honestly I just imagined Papyrus getting so exhausted that he fell asleep in the snow lol poor lad#Sans teleported in but it's also funny to imagine him just walking up like ''you good? yeah he's fine'' *flop* haha#Silly lads <3 Do love 'em ♪
497 notes
·
View notes
Text
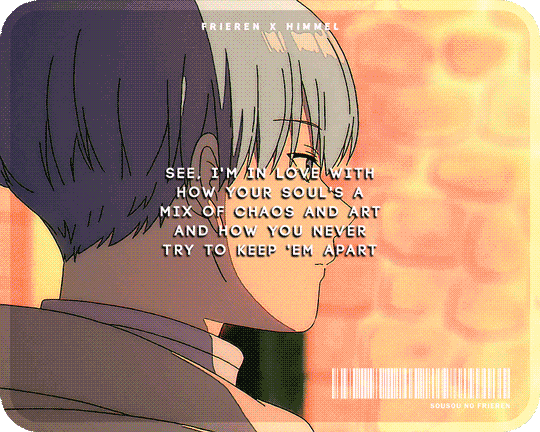

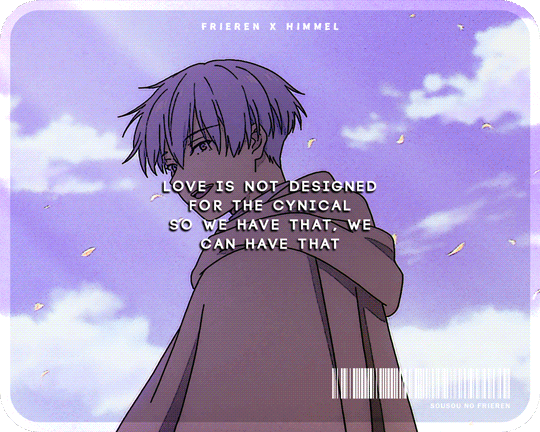


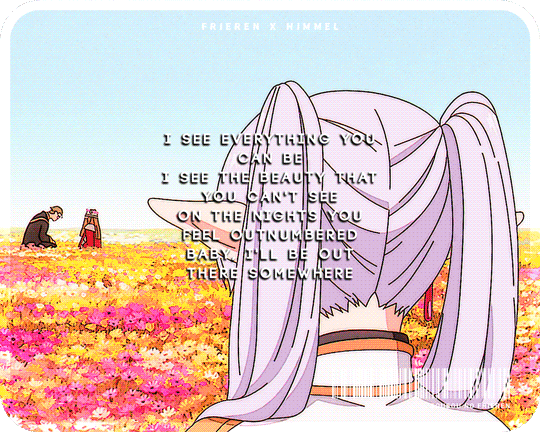
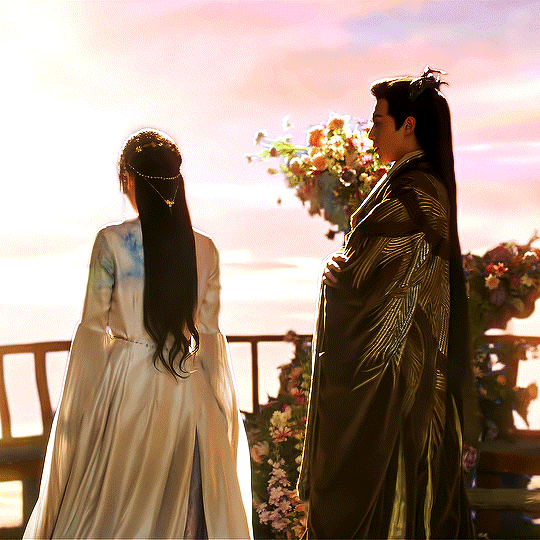
●◉✿ SOUSOU NO FRIEREN ❀ FRIEREN & HIMMEL ✿◉●
Anime: Sousou no Frieren
Characters: Frieren & Himmel
Song Lyrics: Outnumbered by Dermot Kennedy
↳ requested by Alice (@alice-chan-chan)
#sousou no frieren#frieren beyond journey's end#frieren at the funeral#frierenedit#anime#anime gif#animeedit#fyanimegifs#himawaari#tuserashes#userokkottsus#tuserelena#usertorichi#userdabiluna#useradrienne#usermica#usersophies#artsgifs#anisonggifs#ongoinganimeeditrequest#long post#HI ALICE! hope you like this!! <3#sorry it took a while ^^#every time i would look for frimmel scenes i ended up rewatching the episodes lol#anyways i enjoyed doing this edit! i wanted to incorporate song lyrics so it took more time#in fact i enjoyed it too much that i might make more frimmel sets hehehe#i even ended up making frimmel playlist on my spotify XD#i might use those songs as well on other frimmel sets <3
248 notes
·
View notes
Photo
so are y’all like me and fixate on the fact that stede has two pillows/an open space available every time you see a shot of his bed or are you normal
#OFMD#Our Flag Means Death#Stede Bonnet#Revenge Rambles#Gentlebeard#Blackbonnet#Because let's be real lol LET'S BE REAL#It makes me want to walk into the ocean <3#Like it's such a small detail#And it might be an entirely inconsequential detail#But every time I see the space I'm always like#*whispers* that's ed's#might as well stick a little sign on the pillow that's like 'reserved for ed'#Something something symbolic representation of him having room in his heart for another something something#And I KNOOOWW they probably won't have this exact sleeping set up because of everything that's going on with the Revenge#But still#EVEN STILL
1K notes
·
View notes
Text
hindsight, foresight
#call of duty#modern warfare#call of duty modern warfare#MWII#CoD MWII#blender renders#Johnny Mactavish#I built the set for the ghost render so might as well use it#this was supposed to be like a 'he gets the eye scar' kinda thing#and then I didn't want to make a new texture#bsjkbdg oopsie
647 notes
·
View notes
Text
#Old thing i never shared either#Might disappear unexpectedly so might as well feed the ai or whatever 🤷🏻♀️ (I’m joking but truly ai « art » taking over the world makes#me very very sad. Everything feels even more pointless.)#Caejose#Apparently in ur tumblr settings you can tick the « do not share my content with third parties » or something like that
117 notes
·
View notes
Text

a lesson on good karma
digimon survive week 2024
day 4: supporting characters
#digimon#gomamon#digimon survive#survive week#survive week 2024#rambling ahead. you don't have to read the tags beyond bc there's nothing that important tbh... you can just look at the art...#exhausted from being out and doing housework yesterday. then got a last-minute job with very urgent deadline today#finished everything but yeah basically i did anything but art so#irl do be like that aint it#anyway it's been a long time since i played survive and my memory isn't that good#but i always remember the part where we had to protect the gomamon#and later they showed us a path via the dam allowing the team to continue exploring#it reminded me of just how important it is to be nice and do good things whenever and wherever possible#and be mindful with the not-so-good things you do and say#be it good or bad. karma is real even if you don't know when it will get back at you#and you know in visual novel settings. whatever choice you make really determines what happens later on#yeah believe it or not i end up thinking stuff like that by helping a bunch of adorable seal mons...#mmm i'm officially behind now so i might as well take my time while also rest a bit haha ;;#this week has been fun with survive week tho fr. even though i came in unprepared (when will i change)#gotta keep surviving#png
158 notes
·
View notes
Text

One Year Anniversary
LOVE BETWEEN FAIRY AND DEVIL l 苍兰诀 (2022)
#love between fairy and devil#cdramaedit#苍兰诀#wang hedi#yu shuxin#cang lan jue#chineseartistsinc#lbfadedit#asiandramaedit#different styling saga#prangon gifs#i haven't tried out overlays for so long I am really rusty#also in the process of deleting this from storage so thought might as well make some sets before I do that hehe
315 notes
·
View notes
Text

I've been thinking of finally trying to design a more cultural / Sylvari looking armor for him.
I love the cultural armor in-game, but I never felt like any of them really suited him much. So I tried winging something based on the silhouette of his usual armor set. Since he's able to use Toxic Spores / Dreamthistles to manipulate for fights, why not his armor too?
Rapid-growing armor for emergencies, or to reinforce his normal armor? Something like that perhaps.
On procreate so its not as like... 'polished' as i want it but I wanted to draw on the couch LMAO
#gw2#guildwars2#guild wars 2#sylvari#mabaki#my art#draws the armor: guess who's not drawing this again lmaooo#i say that but i might i never know we'll see how lazy i am LMAO#i have an idea for the back as well so that his 4 vines can come out nice and smoothly without disrupting his armor#his usual armor set makes it harder for him to use the 4 back vines I imagine lmao
115 notes
·
View notes
Text

based off of @andoutofharm and @jakeabel ‘s post/tags

lydia ^
sawyer ^
#thank u guys for the inspo#i apologize for using your tumblr legal names btw but i didn’t know what else to do#i did this in like twenty minutes#also patrick being so close to the camera set off my fight flight or fuck defense#like sir if ur gonna be so close u might as well make out sloppy style with me#that or square up mf#spi.arts#spispeaks#patrick stump#fall out boy#fob
323 notes
·
View notes
Text
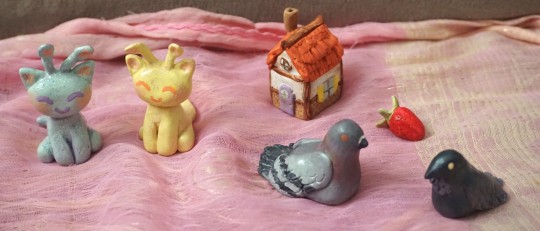
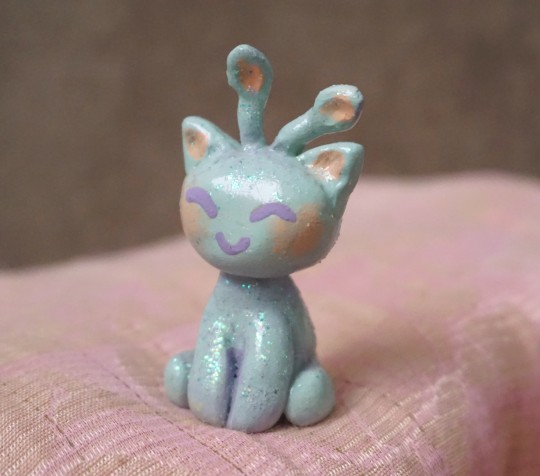
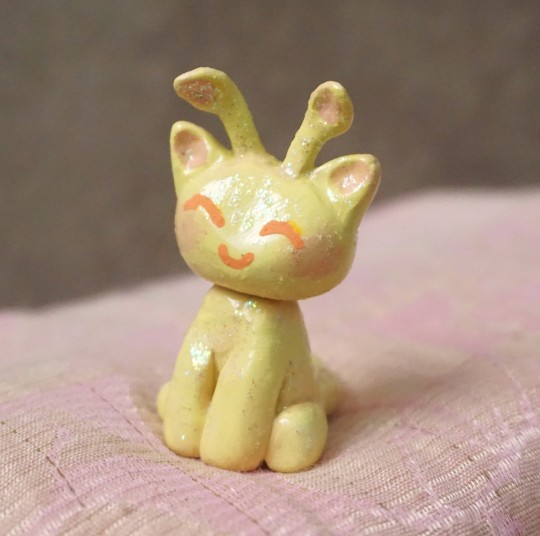
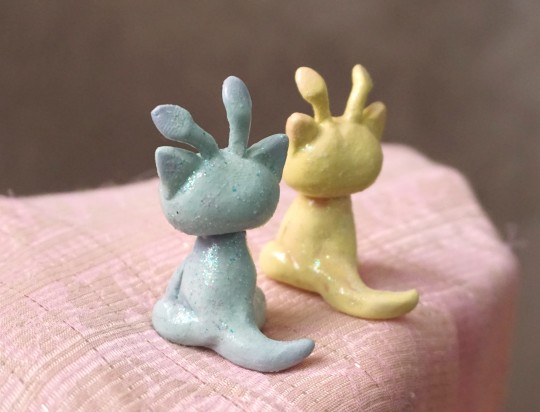
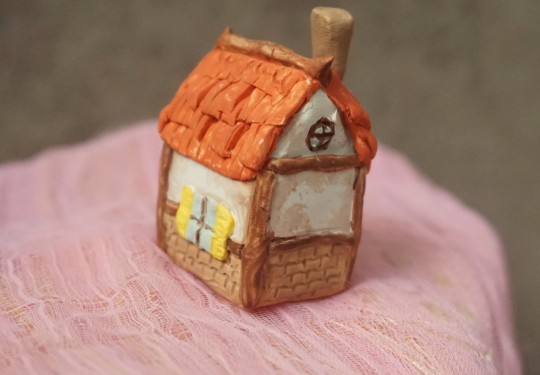
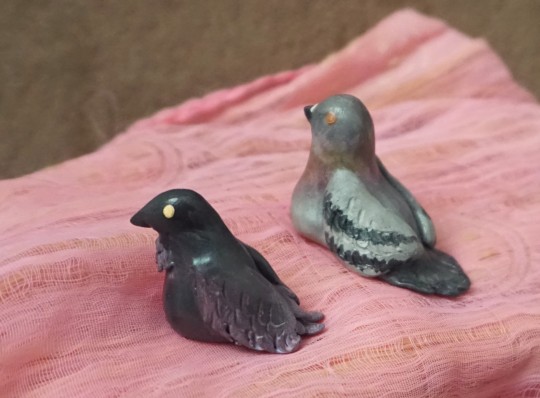

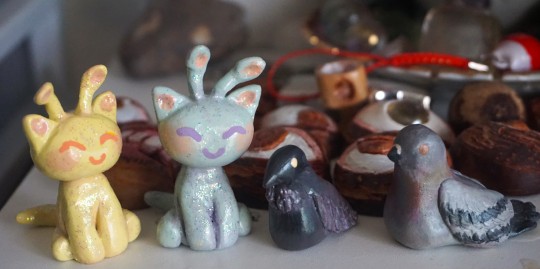
A few silly little small sculptures that I made with some of the leftover clay from the main one I did recently
#sculpture#birds#neopets#sparkly little aishas my beloved.....#Though I actually kind of liked them with a matte finish more?? I wanted to try out making them sparkly and shiny..but#I think they might have looked better before adding all the shine. BUT I kind of like both. Maybe I should make two more that aren't shiny#just to have variation lol... an entire army of tiny aishas.....#The little house is so bad lol I hada headache at that point and kind of just wanted to get everything over with#(I bake the clay all at once so I had to get the smaller ones done to go with the main one)#and was like.. zero effort into making things line up or measuring at all. one window on one side is like twice as big as on the other lol#but I think from afar ifnot examined too closely it's still kind of cute. The birds were also just random like 'what can I shape out of thi#s small blob of clay I have leftover' etc. I did actually put irridescent eyeshaow on the pigeon but it just doesnt show up in photos ToT#The other bird is not anything in specific... some sort of random fantasy creature bird with slight purple on it's wings or something#The strawberry is exclusively just a quickly done accessory for the birds.. I wanted them to have a little meal to share#even though I dont know if birds eat strawberries#the last picture in the set is them all sitting on a shelf (the most well lit place I could find) but looks weird#since it has all of my avocado pit eyes in the background......... ominous backdrop for such peaceful little creachures..#you kind of cant tell what they are from that angle though i guess lol
132 notes
·
View notes
Text
Not that I will be over David talking about the GO 2 kiss anytime soon, but I find it really interesting that his and Michael's kiss was awkward for other people, but not for them.
We know David has kissed countless men (on and off screen), and Michael hasn't shut up about snogging Stephen Fry in 25+ years, but it's this kiss that seems particularly unique to both of them. Because If it was just any other "work kiss" or something the crew had seen a million times before, it wouldn't be nearly as noticeably awkward. Which tells me that this was normal for Michael and David, but not for the crew. That there was something about it that was a real kiss, and that was what others were picking up on...
#david tennant#soft scottish hipster gigolo#michael sheen#welsh seduction machine#good omens 2#remembering as well Rob Wilkins calling them 'the loveliest couple' on set#and film crews see TV kisses all the time#so for this to be awkward something had to have stood out about it#👀#curiouser and curiouser#at this point the subtext might as well be a billboard#but i will leave it to my followers to make up their own minds#ineffable lovers#discourse
87 notes
·
View notes
Note
h-how do you ever finish any of your work? genuine question because you seem to be productive despite your agreste syndrome and I need to learn your ways. but also how do you ever finish any of your work
unclear. last night i stayed up and finished a report worth 25% of my grade at about 5am, arrived on time for my 9am lecture, and spent about half of it zoned out while thinking about seventeen year old emilie agreste. and i was one of the most active participants in the class discussion
#in some ways it IS the move to go to grad school right out of undergrad#because your body can still sort of operate like a college kid#i’m on about 3ish hours of sleep rn and this morning it felt SO over but now i’ve eaten something and we’re so back#i also don’t really do caffeine. except sometimes i’ll go get one of those panera death lemonades#i might be able to snag a short nap before work#but anyway about seventeen year old emilie. i was thinking abt how she was in that movie solitude and adrien said she was seventeen#WAIT. NO. HE SAID SHE WAS SEVENTEEN IN THAT PHOTO ON HIS DESKTOP NOT IN THE MOVIE#well. okay whatever i’m gonna tell you what i was thinking about anyway#OKAY i’m back i just checked the wikipedia page and then i watched the end of gorizilla. to make sure i’m not lying. because i’m normal.#anyway i was thinking about the solitude film and how it’s super rare and old and obscure and whatever. and how apparently#emilie wrote it herself and andre produced it#and i’m thinking about how gabe was discovered by audrey and that’s how he got his start in the fashion industry#so now i’m like?? did gabe and emilie first meet on the set of solitude? because gabe was designing costumes or whatever?#and that’s how audrey found him? have people already thought about this??#also i just checked and it doesn’t say emilie’s last name in the credits and also it’s ‘graham films’ with the twin rings logo m#so i’m assuming she’s still emilie graham de vanily at that point#anyway it comes back to seventeen year old emilie because i started imagining seventeen year old runaway emilie having her new life in pari#after escaping her british nobility life#and the first thing she does is write and star in an original movie. of course.#and she meets this repressed bisexual punk upstart costume designer who is so the opposite of everyone she’s ever known#and he’s immediately so unhealthily obsessed with her. which she appreciates.#and then they proceed to have the most toxic doomed evil relationship of all time#also she gets cheated because once gabe gets money he represses himself SO hard that he is now exactly like all the people emilie grew up w#but at least he’s still obsessed with her#this is what i was thinking about during class today. i don’t know how i get anything done either.#ml#anna rambles#asks
110 notes
·
View notes
Text
What we also need to get into is how fucked up Kuras gotta be for Leander to turn out that way because, at the end of the day, Kuras was kind of like a mentor to Leander so if Leander can come out like That then what the fuck does Kuras have in store.
#touchstarved#touchstarved game#touchstarved kuras#touchstarved leander#gotta play the Kuras route for that OG flavor#getting gaslit so hard reality warps#and the way kuras set up i know he could do that too#not making it out of that relationship your mind intact#might as well get a lobotomy
86 notes
·
View notes
Photo

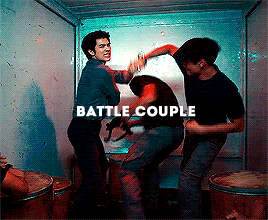


kinnporsche + tropes
#i have enough tropes for another set or two so i might make more depending on how well this goes over#kinnporsche#kinnporsche the series#kpedit#kinnporscheedit#kinn x porsche#kinn anakinn#porsche pachara#kinn theerapanyakul#porsche kittisawasd#tuserbia#tonanons#userjaehwany#usermor#samblr#usernuria#userspicy#userjap#**#kp*
2K notes
·
View notes
Text
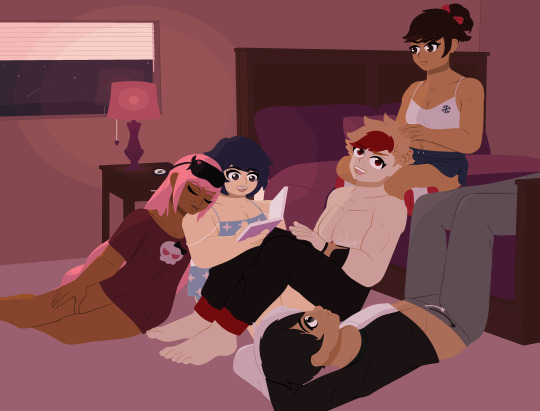
sleepovers save money on hotel rooms while on missions 👍
#finn's ocs#finn's art#sorry i was super offline the past few days but i had some time to draw between stuff so. them :)#besides i might as well draw all them hanging out like this after drawing PJ designs. but unlike in those i gave polaris and saiph pants#let them at least be decent while hanging out LOL#i want to draw lots more misc oc stuff now that i have all the refs done#but somehow i have too many ideas and yet none at all at the same time! if you have suggestions lmk 😅#anyway polaris is annoyed at saiph here because he wont stop moving his head even though the braiding was his idea lol#bella passed the fuck out shes one of those ppl who have a very set sleep schedule#wakes up at 6am falls asleep immediately at 9pm#lets all pray she doesnt wake up with something stupid drawn on her face tomorrow#mira is just having fun tho shes reading to everyone every cute :) saiph interrupts with commentary (causing further annoyance from polaris#al is mostly observing like hes just happy to be hanging out. also having al be the most in the shadows because of course#but he likes watching his friends interact. but also hey man his eyes are up there#anyway i tried my best w the colors here so hopefully it looks okay. i wanted something warm but also kinda dark to give off late night vib#i hope tumblr doesnt kill the quality tho! it looks kinda blurry rn but it might be ok when i hit post#if it fits well i might make it my new blog header too? maybee#^_^
73 notes
·
View notes
Photo
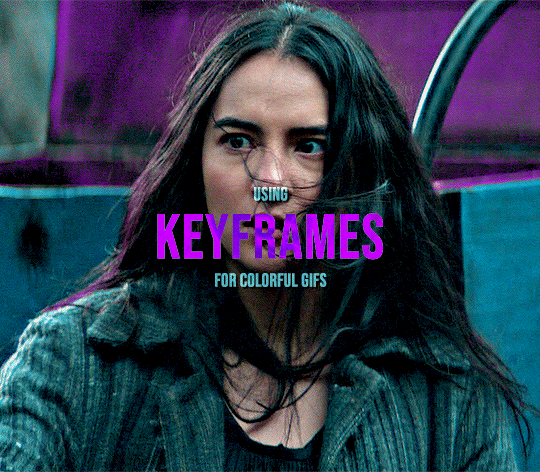
KEYFRAME TUTORIAL FOR THOSE WITH A WORKING KNOWLEDGE OF PHOTOSHOP AND GIFMAKING
This is my gif with the coloring I want it to have eventually (including the manipulated color). I changed the yellows and reds in the scene to be purple. I want the majority of the gif to be purple and cyan, but do not want it to be on her skin.
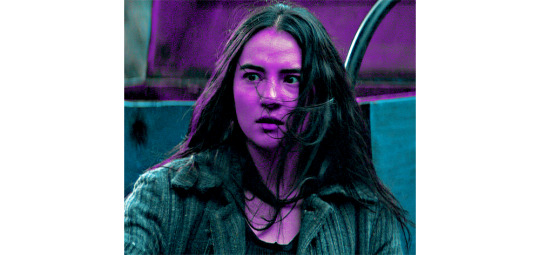
First add a layer mask to the adjustments that are creating the color you want to remove. I used several layers to create the purple coloring, so I grouped them together and added the layer mask to the group instead of having to do them individually. In this case, I erased anywhere the purple was on her skin.

She is walking away in this scene, so this layer mask alone is not enough. This is where keyframes come in.
In the timeline window, scroll to the layer that your layer mask is on (or in my case, group). On the far left side, each of the layers should have an arrow which toggles a drop down menu. Click it and it will list options for Opacity, Layer Mask Position, and Layer Mask Enable. Make sure the current time indicator (small blue arrow and red vertical line in the timeline window) is positioned at 00:00:00 and then select the clock icon next to Layer Mask Position. It should place a small yellow diamond at the same place as the indicator. Each successive move of the mask will place a grey diamond at the timestamp that you move it.
CMD+click on the layer mask in the Layers window so that the area of the mask becomes outlined with a dotted line in the main workspace. Click the chain icon next to the layer mask in the Layers window to unlock the mask's movement.


The next steps are the most tedious. You have to manually move the layer mask every few frames to a new position that follows the movement of the gif. I usually zoom the timeline in so that each second is broken into six sections and pick a new layer mask position at approximately each section. If there is more rapid movement in the gif, you may have to pick new positions at more frequent intervals and vice versa.
After the initial layer mask is set at the 00:00:00 point in the timeline, select the next interval that you want the layer mask to move to. Do this by moving the time indicator to your chosen point. Now with the move tool, click within the layer mask and drag it to where it needs to be to keep coverage on your desired area. The longer/more frames in the gif, the more keyframe points you will have to select. This gif was about 2.5 seconds long and I used 14 different points.


These are just a few of the keyframes I made on this gif. You can see here that the original area that I erased in the layer mask doesn't quite cover all of her skin throughout the movement. I just erase a bit more until I'm satisfied with the coverage.
Once you have mapped all the points out, deselect the mask area and click the blank space where the chain icon was to make it reappear and return the mask to a locked position.
Scrub through the gif to make sure that the mask covers everything you want and also that the keyframes make it move smoothly. Shorter intervals and minor position changes between keyframes usually keeps choppiness (this normally presents as the mask noticeably jumping to a new position) to a minimum. You should not be able to notice the mask's movement except in the way it removes color from specific areas as intended.
Export and save the gif as normal.
This is my finished result:

#userfanni#omgari#usersunny#userbells#userkraina#tuserabbie#tusergabriela#useroli#userangelic#supervalcsi#userphe#keyframes#*tutorial#tagging a couple of you who have been like ‘how tf did you make this’ on sets that i used this technique hope you dont mind#idk how coherently this reads or if it even explains it well enough but feel free to ask for clarification#there are also other keyframe tutorials on here that are written much better so check those out too if mine doesnt make sense#but yeah this is how i make my vibrant gifs that have movement in them#i'm going to make a tutorial explaining the actual coloring process too eventually#might make a part two of this explaining how to use this method for more complicated movements#like when your subject moves in multiple directions or there are multiple subjects#riah.gif#riah.txt
522 notes
·
View notes
Last Seen Blogs

francelangue-blog
Learn french with France Langue

wultan
Untitled
quiet--menace
Quiet Menace
cedcedphotography
Sans titre

blinkverogruntstyleshirts
Blinkvero Grunt Style Shirts