#ours; tutorials
Text
AO3 now has a tag for AI works!!!
That means you can filter it out!*
To filter it from your account, and never see any of it again, follow these steps.
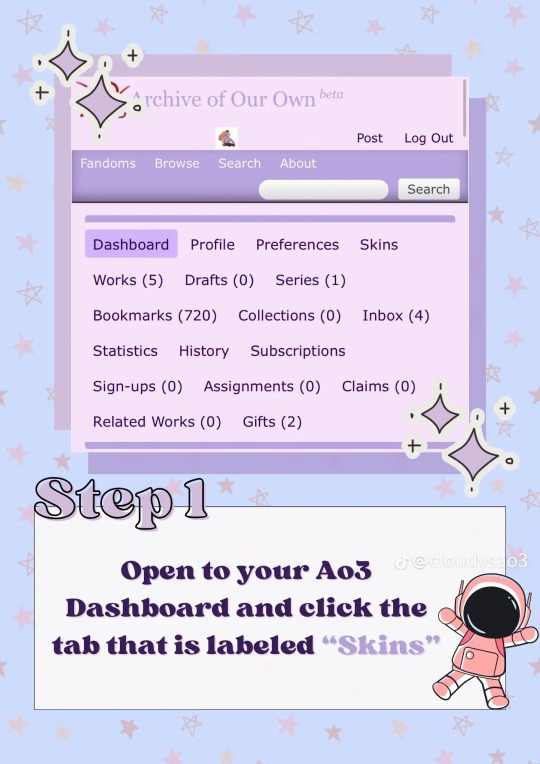
- First, log in to your AO3 account
- Click on this link or paste this in your browser bar
https://archiveofourown.org/skins/new?skin_type=Skin
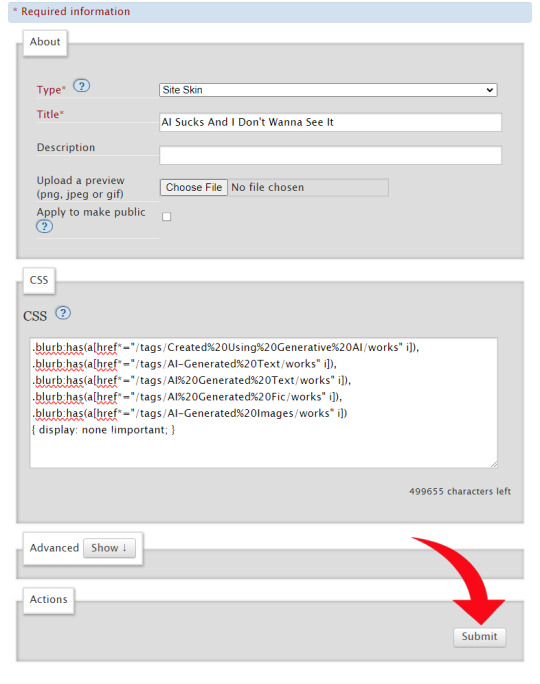
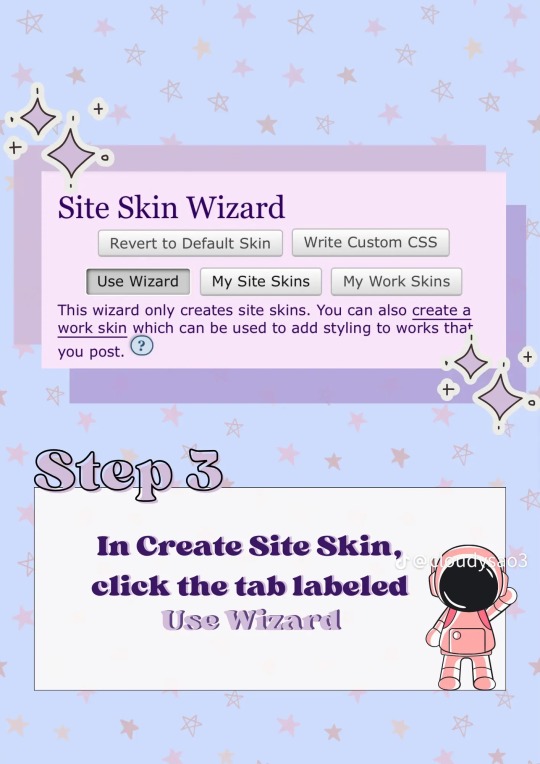
- Set "Type" to "Site Skin"
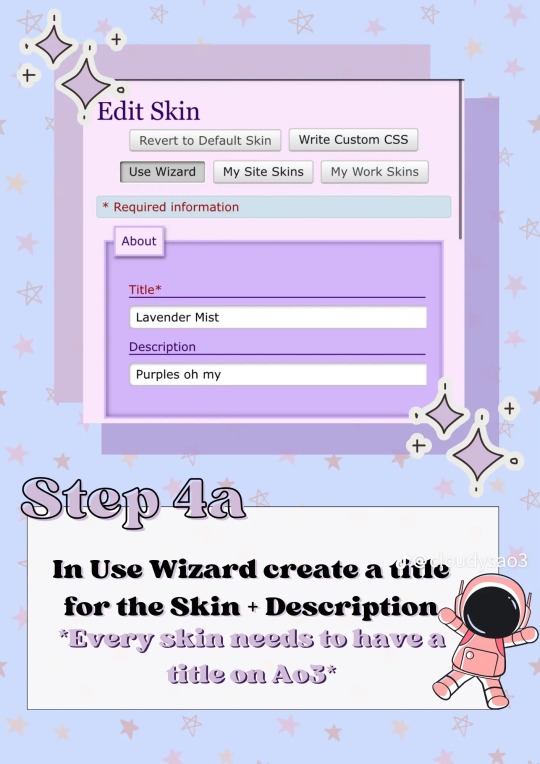
- Set "Title" to whatever you want (Something like “No AI” so you'll know what Skin you just made)
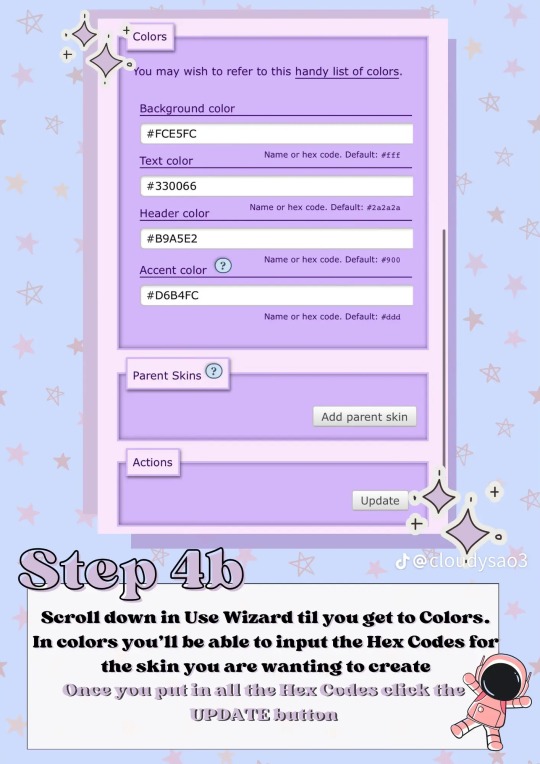
- Then click into the large "CSS" box and paste all of the bolded text below
- hit the "Submit" button
.blurb:has(a[href*="/tags/Created%20Using%20Generative%20AI/works" i]),
.blurb:has(a[href*="/tags/AI-Generated%20Text/works" i]),
.blurb:has(a[href*="/tags/AI%20Generated%20Text/works" i]), .blurb:has(a[href*="/tags/AI%20Generated%20Fic/works" i]),
.blurb:has(a[href*="/tags/AI-Generated%20Images/works" i])
{ display: none !important; }
- Hit "Use"
Presto!
No more AI fics or art in your results!
(assuming everyone tagged properly and your browser has the flags enabled)
A blocklist to be used with the Permablocking Specific Tags - Site Skin tutorial by Eli0t
*browser dependent
818 notes
·
View notes
Text
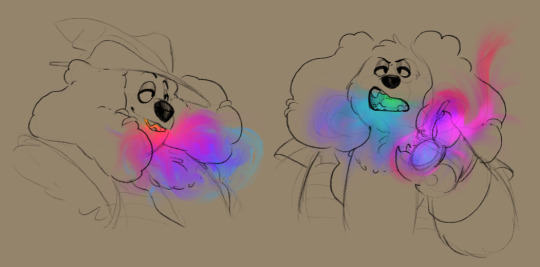
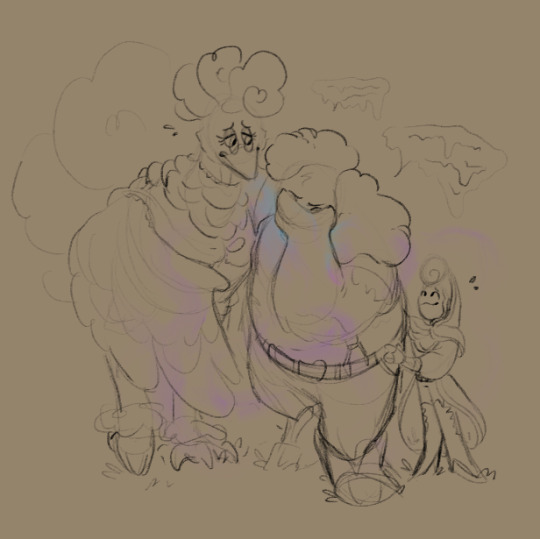
thinkin' about Bardaby and his illusion smoke...
#went on yet another bardaby bender. these are only part of it lmao#i am often seized by the fatal need to Draw Barnaby In Some Shape Or Form#but yes. thinking very hard about the illusion smoke#i feel like sometimes he uses it recreationally... mixed with other stuff to dilute it ofc#but it keeps the color!#im imagining that it can act sort of like a Mood Ring!#the core color that he exhales yk yk!#but using it full strength for proper illusions and such#he's gotta be careful about it! it'll fuck him up!#he's built up Quite The Resistance to illusions and illusion magic over his life#but everyone has their limits...#scribble salad#wh fantasy au#IM NOT USED TO DRAWING SMOKE. IT LOOKS BAD LMAO#i'll have to work on that! look up tutorials! Practice!#anyhow i think the other scribbles need their own post#its mainly bardaby and our little warlock...#there are three ways i love drawing barnaby#i love scribbling him angry. i love scribbling him with howdy. and i love scribbling him being soft w/ wally#side note i realized earlier that part of the reason why i love characters who are just so much bigger than everyone else#ex: poppy & barnaby#is bc then its like. they're the smaller guys' personal jungle gym lmao#free bed! free climbing wall! free bean bag! free Getting Tossed Around!!!!#all wrapped up with the wonderful bow of Friend!!!!#...my touch starvedness is showing isnt it. away with ye demons!!!
1K notes
·
View notes
Note
i recently found your art via pinterest and just found your tumble through it and i just wanted to say how blown away by how amazing your compositions are, they’re so complex and detailed at the same time!! I truly aspire to have the same level of greatness in my own art.
if you don’t mind me asking are there any specific techniques you use to create your compositions?
Hi!! Thank you!!!!
So, composition...
I don't have a specific technique, as a self taught artist I usually make lots of experiments to see which shape I like better.
(It's a true pain when it comes to anatomy, (i did follow an anatomy class but I keep forgetting the basics) and I'm quite sure I'm still making mistakes,,,,)
I cannot do a proper tutorial on how I think my composition, but I can show you some examples, hoping they can help a little:

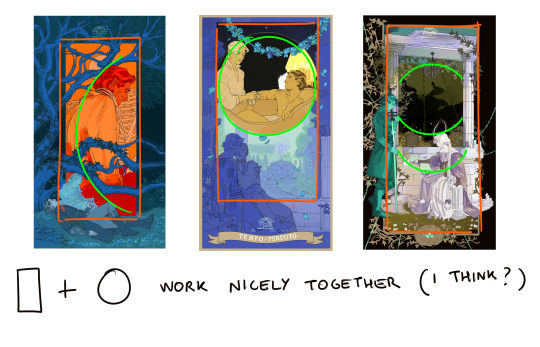
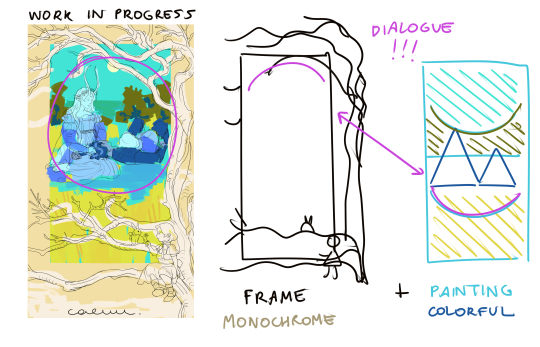
Lately I'm experimenting composition through color contrast!! Cold vs Warm, for example. (And to think I used to say I'd be stuck with gold forever,,,)
So..........hope I didn't bring you more questions than answers! Maybe one day I'll make a better teacher than 'look at these shapes...they're...shapes.'
But yes this is how I think things usually -- doesn't mean I'm 100% right (o´▽`o)
#ask#text#artists on tumblr#tutorial#NOT really#but I finished ideas for the tags#i also forgot to post my scheduled art for today but our dnd session went wild with divorce drama gdkgjd
689 notes
·
View notes
Text
So with AO3 recommending locking your fics to help prevent scraping for AI use, I know a few people (myself included) who have locked down their fics. But it’s made me curious how many people are locking so…
Also reblog this and tell me in the tags why you do or don’t plan to lock your works.
For those of you that want to lock your works but don’t want to do each fic individually, here is a tutorial for how to lock all your fics at once.
1K notes
·
View notes
Text
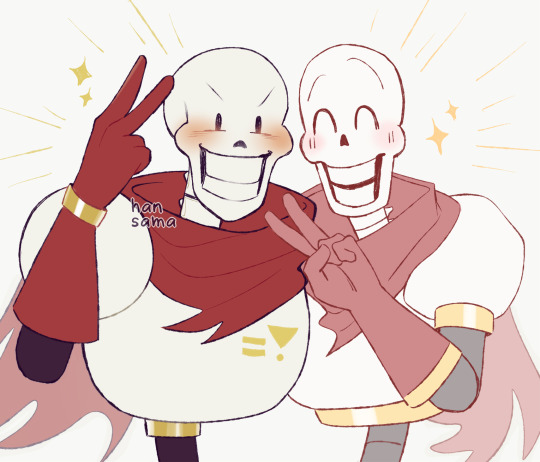
I tried to sketch Papyrus in both my art style and @skull-otaku xD
#undertale#papyrus#undertale papyrus#i was going to do a warm-up sketch#i remembered the papyrus tutorial skull-otaku made#so i did paps in both our styles xDDD#this was very spontaneous LOL#anyway the truth is i'm not sure if this really IS my style of drawing paps ASKDLHGLKDHG#I DON'T HAVE ONE?? X'DDD#but at least this is how i draw the head! i think!!!! x'DDDDD#also paps is still not easy for me to draw ==;;#he problem isn't with the head i think but rather with the body???#Also the mouth sometimes ASDGDJ#idk idk xDDDD#have a drawing of two papses!!!#they're cute!#i don't think i did Skull-otaku's art style justice but i tried my best x'DDD#their whole artstyle is nice i like their sans as well#also this made me realize how wide I draw pap's head in comparison to other artstyles x'DDDD#their paps head is very long/vertical/thin?? XDDDDD#it's really cute
1K notes
·
View notes
Note
Here's a tutorial for changing tag colors: https://archiveofourown.org/works/53119543

THANK YOU!
Here is a clickable link for anyone who needs that - https://archiveofourown.org/works/53119543
and I shall tag @sorbusaucuparia to close the loop!
#mod remi#ao3 skins#ao3#archive of our own#y'all are amazing did you see how quickly that went#if there are more tutorials feel free to put them in the notes/reblogs!
148 notes
·
View notes
Text
This is for the ao3 users who enjoy color or prefer non-white backgrounds
There is a TikTok user who made a tutorial of how to make your ao3 colorful, I’ll link her profile down below cuz she has MANY diff skin tutorials
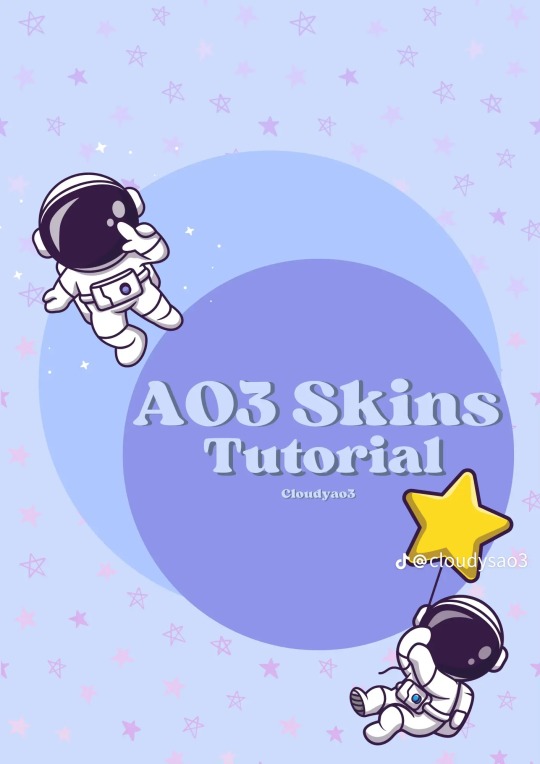

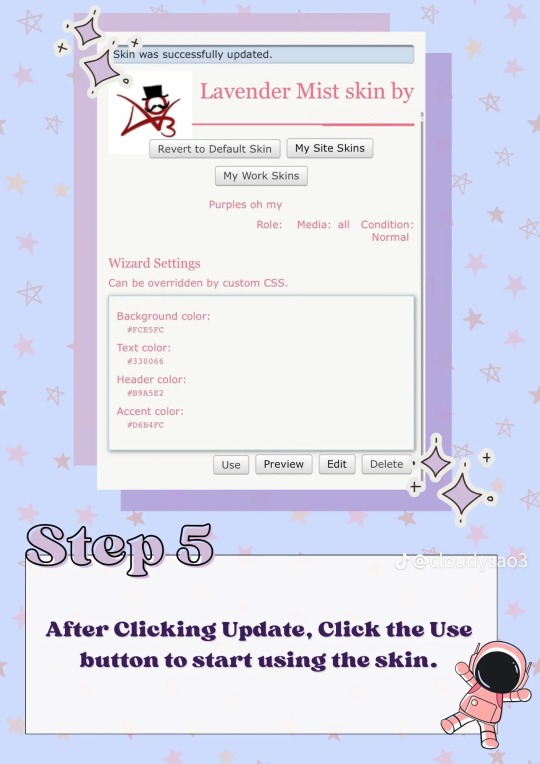
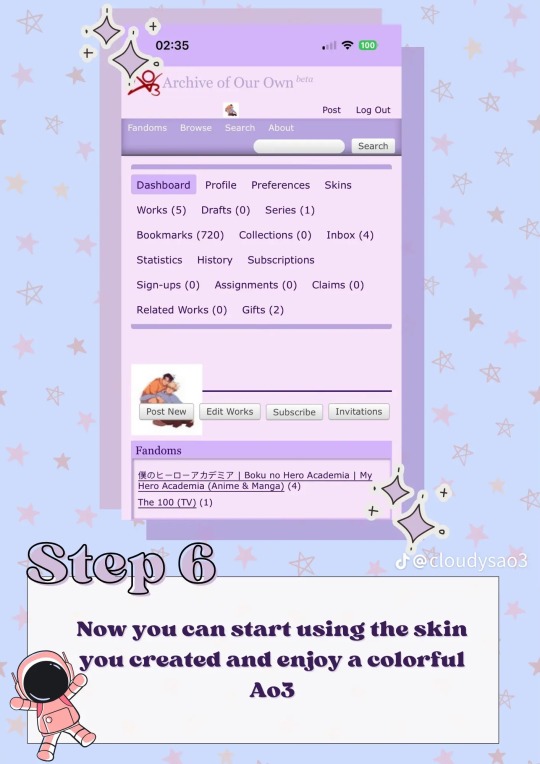
Here is her tutorial, here is her link to her page.
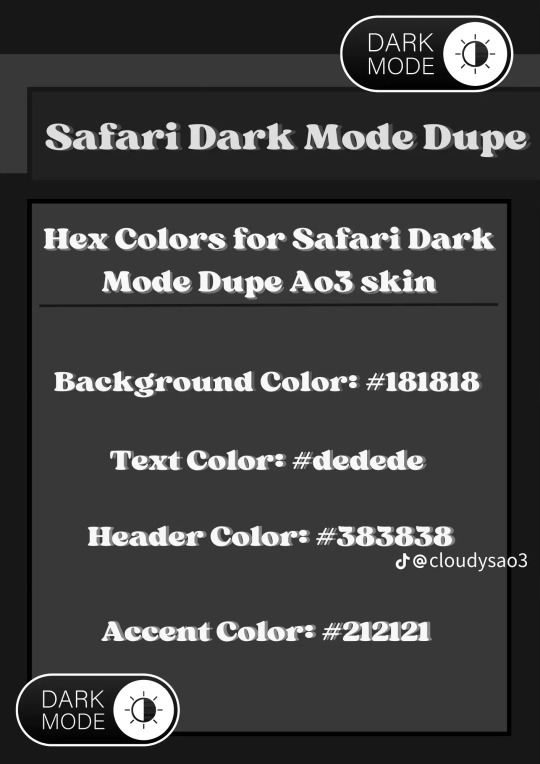
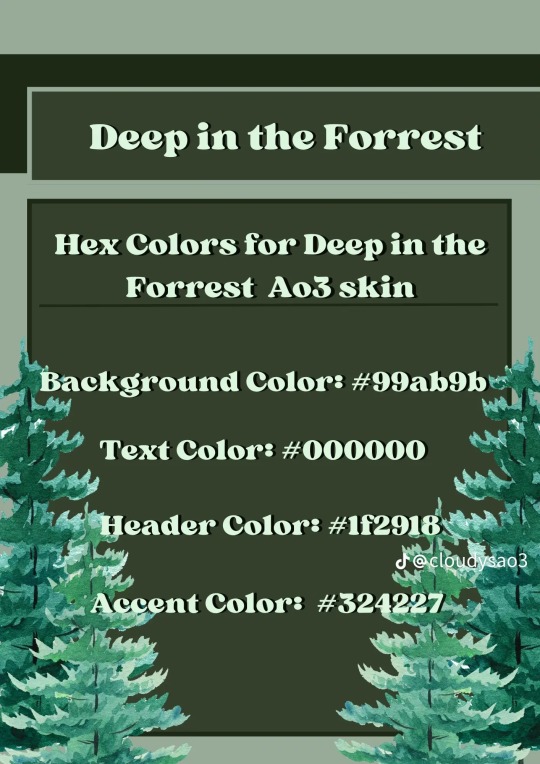
These are two that caught my attention, but that’s cuz I need darker colors, she has a lot of pretty and colorful themes for y’all to check out!
Enjoy!
And thank you @cloudysao3 (her TikTok and Instagram handle)
122 notes
·
View notes
Text
Ao3 Recommendations
Wish ao3 had an algorithm? Wish it would recommend you the best of the best? Ao3 can’t, but your fellow fans can all through the magic of the bookmark search. How is this done?
Find your tag of choice (fandom/ship/character/trope). The default search is by works. Set it to bookmarks.
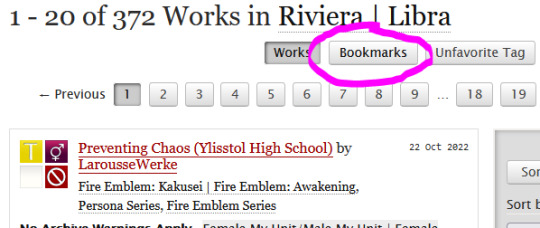
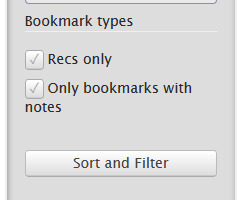
2. Add filters like normal. Check ‘rec’ and ‘has notes’ near the bottom. Sort.
And voilà. Now everything listed comes with positive reviews for your perusal.
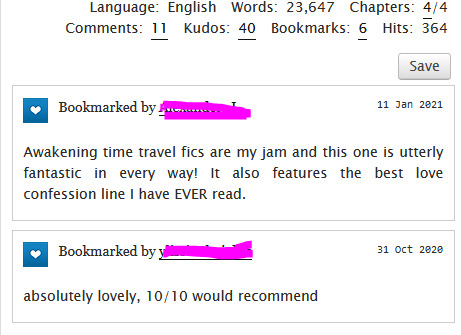
Sit back on your divan and let your servants feed you grapes knowing that other brave souls went before you to bring you these gems for your illustrious inspection.
Side Notes:
Authors do see bookmark comments. Do not be an ass to people sharing their art for free.
This method is biased towards older works. Try not to use this search method exclusively or you’ll miss out on hidden gems.
#i had to turn reversi off for this and it almost blinded me#ao3#ao3 tutorial#archive of our own#fanfic#fanfiction#posting this mostly bc i tend to forget about it myself on the reg#and microscopic fandoms won't get much use out of it so ymmv#ao3 tips
2K notes
·
View notes
Text
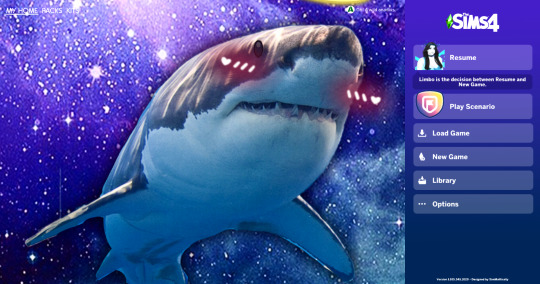
How to Customize your Main Menu in The Sims 4
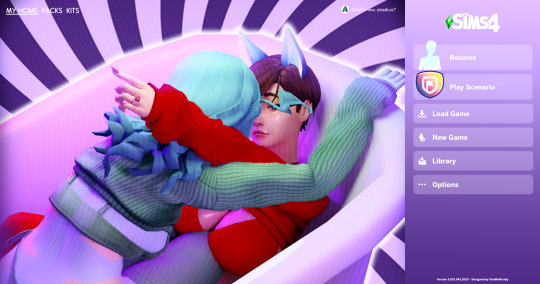
...Like this!
Special thanks to @sdmsims for pointing us in the right direction for figuring this out.
This tutorial will (hopefully) teach you how to make your own menu screen for TS4 using SimMattically's Refreshed Main Menu mod. If you've ever made a loading screen before, the process is very similar to that.
This is a 10 step process, and it's a bit lengthy. So make sure you have the time to kill before beginning.
Read on for the tutorial.
YOU WILL NEED:
SimMattically's Refreshed Main Menu mod
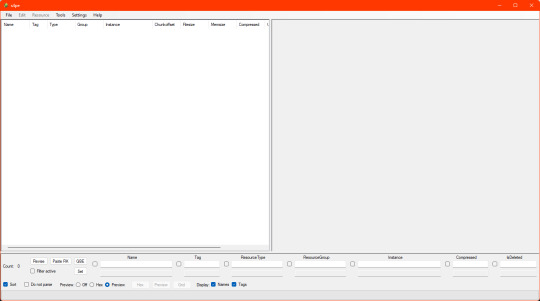
S4PE
JPEXS Free Flash Decompiler
Your choice in image editor
STEP 1: ACQUIRE MOD
This tutorial assumes you already know how to download, save, and load a mod into your TS4 game.
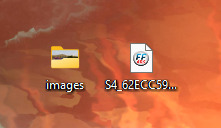
The mod will be downloaded to your computer as a .zip file. Extract the archive to somewhere you will find it.
Here is what is inside:
The base mod (SimMattically_RefreshedMainMenu_BASE.package)
The background files (They each begin with SimMattically_RefreshedMainMenu_BG_[...])
Optional files (One for an animated logo, one for the scenarios button. SimMattically_RefreshedMainMenu_AnimatedLogo.package and SimMattically_RefreshedMainMenu_ScenarioButton.package respectfully)
You will want the BASE, any optional file you'd like out of the two above, and a BG. For simplicity's sake, we will use BG_Arbour.
So, in your mods folder, you should at least have the BASE file and BG_Arbour.

STEP 2: BOOT GAME
This is to check and see if you've installed the mod correctly. If you have, you should see something like so;
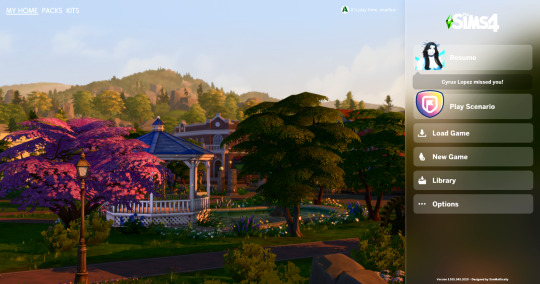
If you see something like this, congrats! Now close the game.
STEP 3: OPEN BASE FILE IN S4PE
Open up S4PE. It will look something like this;
Navigate to File > Open...
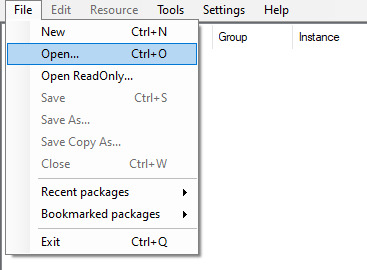
Navigate to your BASE file in your file explorer and open it. It should now look like this;
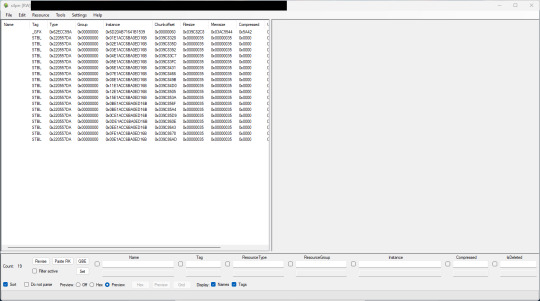
This looks like a lot here. However, we are in need of only one thing from this list.
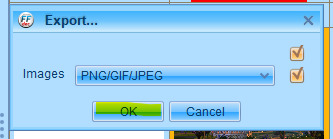
STEP 4: EXTRACT .GFX
We want the thing at the very top of the list -- the _GFX.

Right click that line. Go to Export > To file...
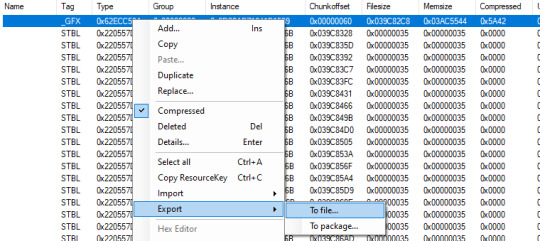
Export this file to somewhere you will find easily on your computer.
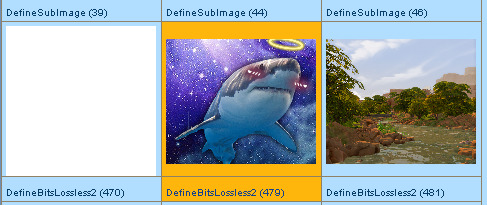
STEP 5: EXPORT IMAGES FROM .GFX IN JPEXS
Open your .GFX file in JPEXS, and navigate to the panel on your left. Click images. It should look something like this;
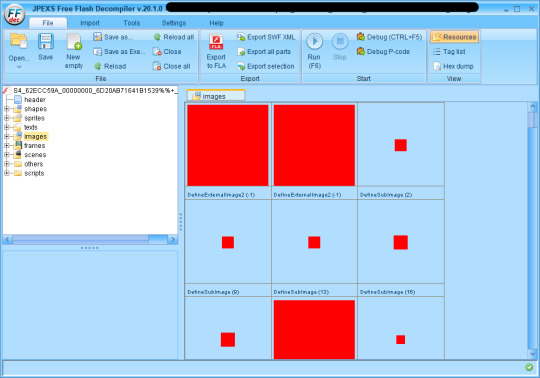
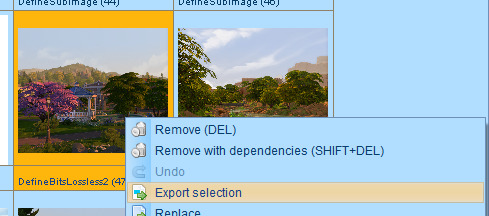
Scroll until you find the first box with an actual image in it. In this case, it's Arbour. It should be the first one to appear.
Right click it. Export selection > OK. Save it somewhere you will find it.
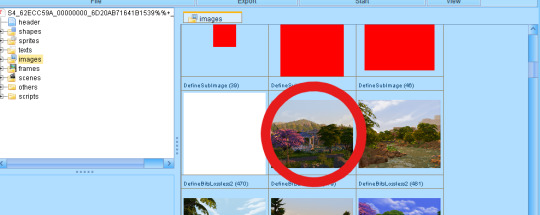
Now, scroll down some more, until you reach the first sidebar image.
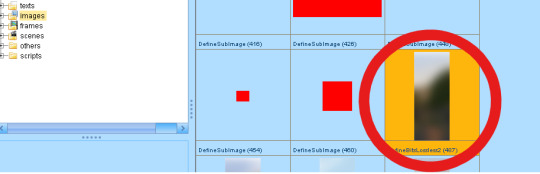
Again, this should correlate to the Arbour background. Repeat the same process as above for exporting.
Your images will save in a folder called images. Like so;
STEP 5: MODIFY IMAGES
NOW HERE IS THE FUN PART BABEY. This is where you let your imagination run wild! Open your images up in your favorite image editor and go nuts.
For the sake of this tutorial, I will be using a random image from my SSD.
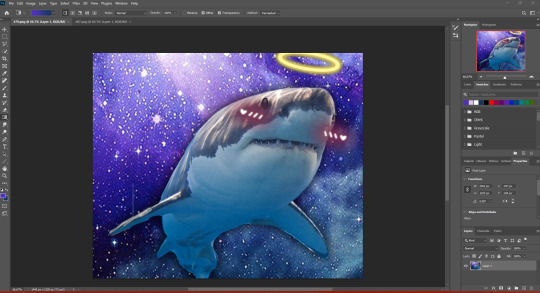
And a gradient created by color picking this image.
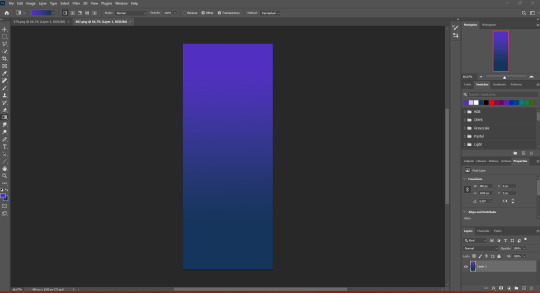
Once you're satisfied with your work, go ahead and save these. I would just save them in that same images folder to save time.
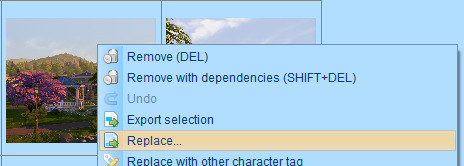
STEP 6: REPLACE IMAGES IN .GFX IN JPEXS
Go back to JPEXS. Go back to the first background image in the list.
Right click it. Hit Replace...
Navigate to that images folder.

And hit open! Congrats, you replaced your first image.
Scroll down to the first sidebar image. Rinse and repeat the steps above, but with your sidebar image (my gradient, for example).
And now you have your imported images! Save the .GFX file, and go back to S4PE.
STEP 7: LOAD NEW .GFX INTO PACKAGE FILE USING S4PE
Right click the _GFX line again. Then go to Import > From file...

Navigate to wherever you saved your GFX. Open it. You will be greeted by this window.
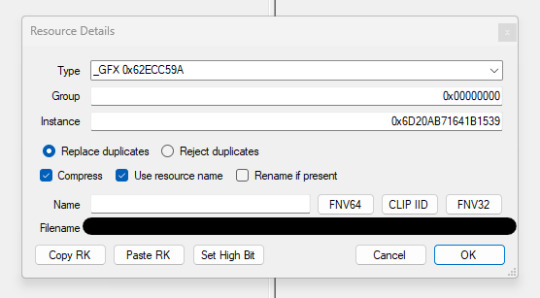
DO NOT TOUCH ANYTHING!!!!!!!!!!!!!!!!!!!!!!!!!!!!!!
Just hit OK.
Once it's in, your list should look like this;
The old _GFX will be crossed out. This is good!
STEP 8: SAVE PACKAGE FILE
Navigate to File > Save. It may take a moment to save, be patient. Close S4PE, load the BASE mod into your mods folder, boot game.
STEP 9: THE MOMENT OF TRUTH
If you did everything correctly, you should be greeted by your new Main Menu.
STEP 10: RELISH IN YOUR SUCCESS
YOU DID IT!!! You might find yourself wanting to forever stare at your new menu screen. This is normal and good. Congrats!!
SOME THINGS TO CONSIDER:
I couldn't find a TOS for SimMattically's mods, so I would recommend you use your new menu screen for personal use only.
I am thinking that similar steps are taken with different modded menu screens, so if you're a tinkerer type. Food for thought.
In the original images for the mod, the sidebar is a piece of the BG with some blur to give the sidebar a frosted glass look. We personally went with a gradient because it's easier, but really, you can do whatever you want.
If anyone has questions, feel free to send them our way! Thank you for reading.
111 notes
·
View notes
Text
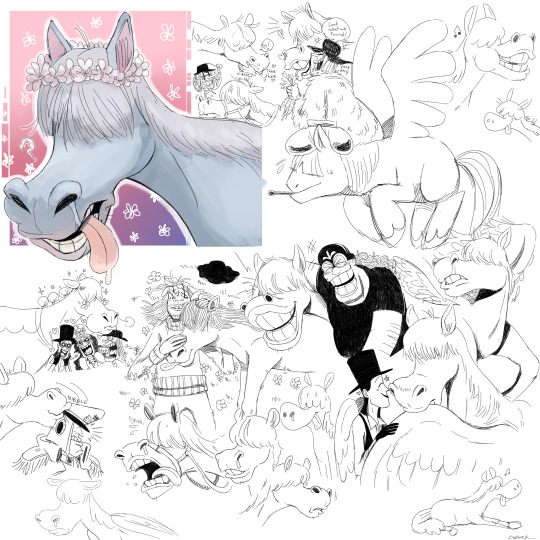
#before I took a break from social media i indulged in so many horse media and tutorials to give better justice to our boi stronger#ma#one piece
62 notes
·
View notes
Text

I played The kid at the back and had fun! so i did some drawings (some Sol and oc silly interactions and BRITTNEY and smol Jess hidden)
These are from playing day 1 (the drawings are months old) but i played day 2 recently so you will hear from me later to not spoil anything


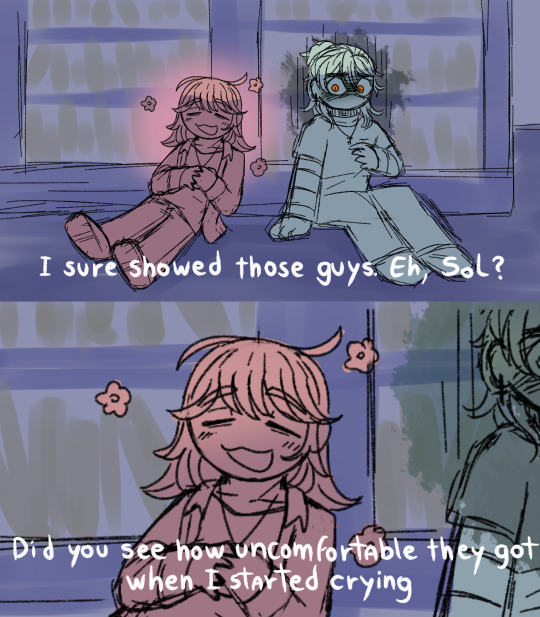

used the template from twitter loved the characters and the story and the art and the vibes of the game thank you muah muah
#the kid at the back vn#tkatb vn#solivan brugmansia#the kid at the back oc#NEURON ACTIVATION MONKEY SEES CHOKER#you got my attention with Brittney i was sold instantly and i loved her personality and i can't wait to know more and see her in situations#if someone sees this please help Brittney hair tutorial i doin't know how it works i triedmy bestr#eyestrain#<-sorry#okback to my enclosure 🍖#we will go back to our usual content but im busy and scared (the usual) so it's going to take a while✌ have a good day or night good night
108 notes
·
View notes
Text
Relationship where we get all dressed up and put on our fanciest clothes together just because
#wlw#wlw mood#sapphic#sapphism#lesbian#i am not immune to the feeling wearing a pretty dress for an Occasion gives me#makes me want to put on my pretty clothes all the time#like just dress up with me for no reason#wear your fav suit while we eat macaroni out of the pan#put on your best dress to sit and play a game with me#lets dress up and awkwardly follow a youtube dance tutorial in our shitty little living room for no reason#im gay and i like sleeping
72 notes
·
View notes
Text
My friend and I made our Math Projects Limbus themed and he put several inside jokes our teachers would definitely not understand but I love this screenshot too much to not share it

#limbus company#limbus sinclair#lcb sinclair#context: he was using don and kromer as an example for a formula and Sinclair made a cameo for a few secs before leaving because...Kromer#also we both formatted our videos to be a limbus tutorial even though only our teachers will be watching it...still it was a fun project
70 notes
·
View notes
Text
Alright I have now actually been working in a bank for a while and I gotta say,,,,,, it kiiiiiinda takes the drama out of Leverage.
Like. Do you know how easy it would be to rob us? Currently the only alarm that requires a code has been permanently disabled for over a month due to construction on the upper floors. The key cards that let you access the vault are given to the tellers- aka the college kids who let just about anyone in if they ask. Hell, I've given spare keycards to employees I didn't even recognise because I'm bad with faces and didn't want to be rude, they were wearing the company color so I just said sure here you go. There's just physical keys lying around everywhere. We also technically have a vault inside the vault that only head tellers can access, but I have never seen it closed.
Like. Robbing us wouldn't take an episode, it wouldn't even take a whole scene. Parker would be downright offended if she came to rob us. She wouldn't even have to crawl through any air vents, pick any locks, anything- literally just wear blue and ask politely to be let into the vault.
We would disappoint Parker so bad
#also none of us have changed our passwords in months#and anyone who just says theyre IT can access p much anything#honestly with the construction crew in the building we're just asking to be robbed#we got people in here 24/7 and no alarms#and the panic buttons get accidentally hit so often i don't think they'd even work#anyway enjoy this tutorial on how to rob [REDACTED] bank#leverage#parker leverage#our only saving grace is we usually only have like 1mil or less cash at any guven time#but still
39 notes
·
View notes
Text
hmm... 2 am impulsive idea way too amibitious for my own good: what if i just made a minecraft mod that adds different cow/horse/animals breeds to 1.20+
#*alfred voice* i miss my animania tails. i miss her a lot.#i..... ive been thinking abt this for a few days but like#i have a horse bf#and a dog bf#and i love farm animals but especially cows#with our combined knowledge and maybe my blood sweat and tears slash 48 hours of yt tutorials...#maybe we could make it happen?#ive been really enjoying modeling#so. thinking ....#moo.txt
65 notes
·
View notes
Text
Reblog if you're getting the same ERROR 500 page. I've tried logging in, clicking on various categories to read fanfics, the latest article, etc. only for it to show this.
Literally no matter what I click on this shows up. I can't check their Twitter account because Twitter is apparently anti-VPN and the last time they posted anything on Tumblr via @ao3org was two (2) days ago. And what's even funnier? This even shows up when you click contact support. How tf are we supposed to contact them if this keeps popping up??
35 notes
·
View notes
Last Seen Blogs

martyg84
El arte a mi manera!

spiderlilac
only sweeter
monarch627
content with a cellar

training-courses
Untitled

paint318
Untitled