metal-diy-projects
DIY OR DIE BITCHES
Heavy metal DIY projects, advise, tips and tricks. Anything from patches and pins, to battle jackets and leather boots. Crafts and ideas brought to you by a fellow metalhead with passion for her favourite artists, but with a very strict budget
54 posts
Don't wanna be here? Send us removal request.
Last Seen Blogs

whodecideswar
Emergence
princess-prettyboy
Elf Lover

ypokeimenon
Ypokeimenon

perfect-chancellor
Something I would never do

Note
First off....WHAT AN AMAZING BLOG! Ive been looking for a blog like this one for a long time!! Anywho lol Have you ever heard of Buckethead?! Stay metal! 🤘
Thank you my friend! I’m really happy that you like it, even if my uploading schedule is almost nonexistent!
I have listened to Buckethead in the past, but he isn’t really my thing. I’m more of a thrasher/death metal fan than anything, not a fan of prog/tech stuff, or however you call what he plays :) I’m currently really digging the latest Monstrosity release! Listen to that if you want a general idea of what I like
10 notes
·
View notes
Text
Metal DIY Projects #9: Making those fucking band tshirts fit (1rst Method)
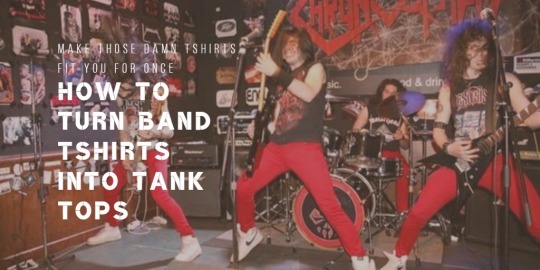
As much as I love band tees, they never fit me nicely. They are always too long or too wide for me and those damn sleeves always looks weird on my shoulders. If you are seeking for ways to upcycle old band tees or turn new ones into their better fitting counterparts, this tutorial is for you!
(The band in the banner is Chronosphere, really awesome guys check them out!)
The materials that you are going to need are:
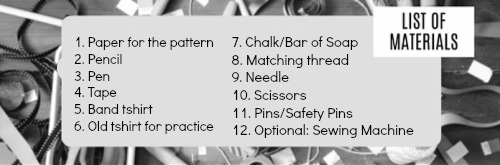
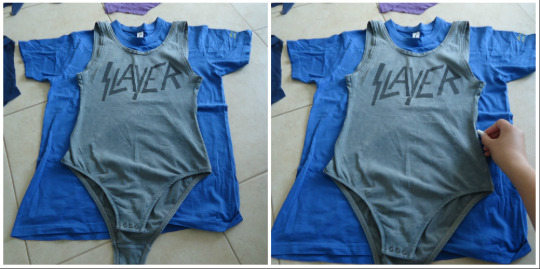
1. First, grab a tank top that fits you nicely. Place it on your practice tshirt (I went through 2 of them to make the pattern!) and trace it around with chalk/soap.
I didn’t have a tank top with me at that moment so I used this Slayer bodysuit. It had an open back and a wider collar, but I choose to keep the original collar of the tshirt, since I also want to be able to wear it at shows and be comfy.
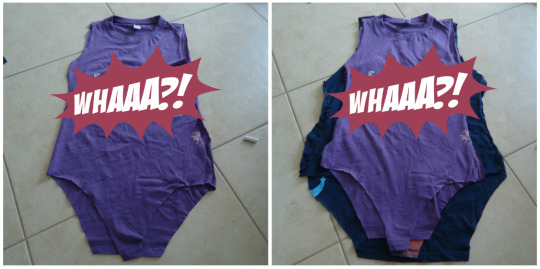
2. Cut the tshirt on the outlines that you made and try it on. I fucked up quite a lot here, because I forgot that my bodysuit is made out of really stretchy fabric while my other tshirts were not. This is why the purple test tshirt didn’t even fit me. (Whaaa?! stickers cover the company logo on it)
I just added 6 centimetres to the side measurements and cut a new test tshirt, which as you see in the second pic, is much wider. I also cut the lower half of the tshirt, because I accidently traced the crotch area too and almost ended up with a body suit.
Pin the sides of the tshirt and wear it to make sure that the fit is just right before moving to the next step.
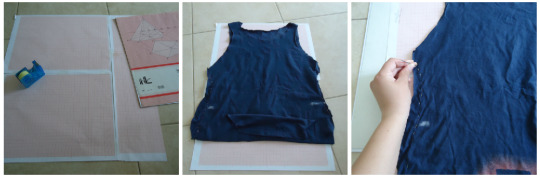
3. Tape large pieces of paper together to make your pattern. I used millimetre paper, but butchers paper, magazines and newspapers are fine too.
Place your test tshirt on the paper and then, place a soft cardboard underneath it.
With a needle, start poking holes where your pins are to transfer the design on the paper.
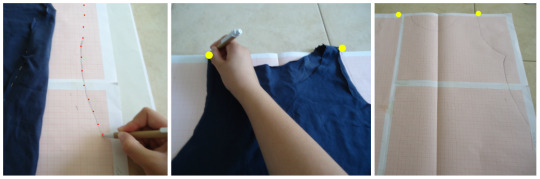
4. Trace the holes (red dots) that you poked to draw your pattern, as shown in the first picture. Do this only on half of the tshirt.
Instead of drawing and poking holes around the entire tshirt, just mark the outer side of each shoulder strap on the paper (yellow dots) and fold the paper in half, making sure that one yellow dot is sitting exactly on the other one.
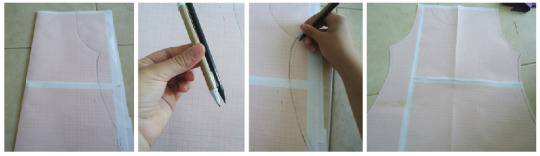
5. Time to draw seam allowence. Fold your paper in half.
Then, tape your pen and pencil together. Then, follow the line that you just drew with your pen, and your pencil will draw a parallel line to that, which will be about a centimetre away from the actual line of the tshirt.
Cut the pattern out while it’s still folded and unfold it to reveal your pattern!
Personally, I wanted a high collar tshirt, so I used the same pattern for the back of my tee. If you want an open back, just make anpther pattern following this method.
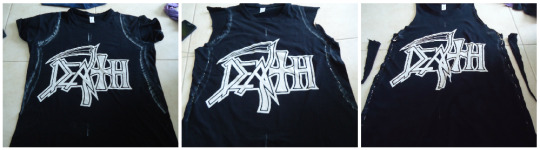
6. Go grab your actual band tshirt!
Place the pattern in the middle on the tshirt, and trace it out with chalk/soap.
Then, cut the sleeves off at the seams of the tshirt (not the ones that you drew) and pin all around the chalk marks. Wear it and check the fit. Make any adjustments that are needed. Personally, I took in the armpit holes a bit, to make it fit fit more snuggly on me. I used safety pins fo rthe armpits so that I wouldn’t stab myself every time I wore it to try it out
After you are sure that it fits perfectly, cut around the chalk marks and throw away the scrap fabric.
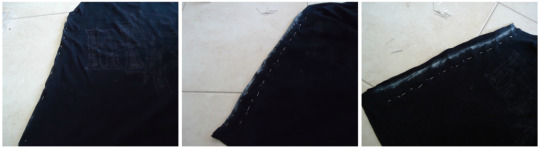
7. Prepare your tshirt for sewing!
Turn it inside out as shown in the first pic.
Then, pin it again following the line of first pins, but this time leave a five cm margin. Draw a line of chalk on the first pins as shown in the second picture.
Remove the first pins and ufold the fabric. Behold! Your sewing line! Do this on both parts of the tshirt.
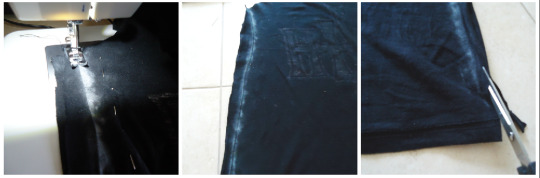
8. Sew according to the line of chalk. If you have a sewing machine, do it with a straight stitch, but if you don’t and you have to do by by hand, follow this tutorial to learn how to backstitch. Do this to the chalk marks on both sides of the tshirt.
When you are done (second pic) take your scissors and cut the excess fabric leaving about a finger width of fabric next to the seam.
Hope you’ve enjoyed this tutorial! Message me for any questions you might have, and don’t forget to send me your own creations! :D I will feature them all on my blog!
Until next time, stay thrash!
#diy#do it yourself#band tees#band tee#band shirt#band tshirt#band t-shirt#death band#death#sewing#sew#DIY Projects#diy project#clothing#clothes#death metal#metal
104 notes
·
View notes
Text
Updaaate
I have to admit that this blog is kind of a trainwreck since I haven’t had much time to work on it the past months, but I promise I’ll be coming back soonly!
Stay thrash baes<3
7 notes
·
View notes
Note
This blog is so freaking cool, thanks lml

9 notes
·
View notes
Text
Metal DIY Projects #8: Band Pins (1rst Method)
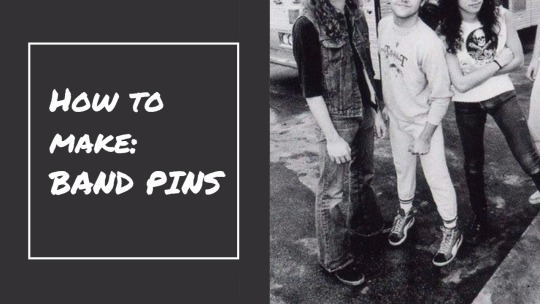
Ah, band pins. They are cheap, easily replacable and they are perfect for filling-in empty spaces on your battle jacket. If I could, I would have decorated everything I owned with pins. I love the sound that they make when you walk around and they hit against each other.
But what if you can’t find pins of the bands that you like? If you have had no luck finding pins in your local merch shop, I suggest following this guide to make them on your own!
((Please keep in mind that this is the first tutorial I ever prepared for this blog and the photos aren’t of the best quality :3 ))
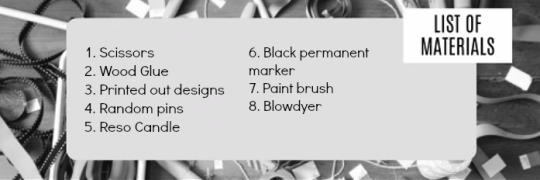
The materials that you are going to need are:
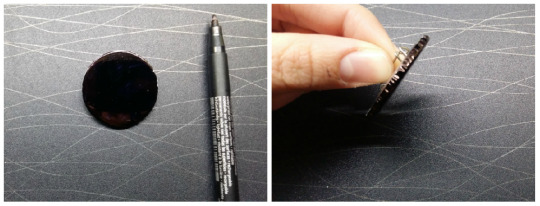
1. Paint the entire pin black with your marker. Make sure to cover the design on it very well, and don’t forget to paint around the face of the pin, as shown in the second picture. You might have to do a second coat.
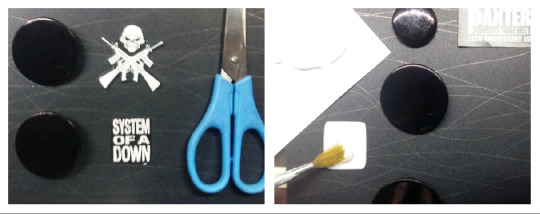
2. Cut around the designs you have choosen for your pins. Make sure that they can fit on the pin before putting them on.
Apply a thin coat of wood glue on the back of the paper and let it dry for a tiny bit before sticking it on the pin. Press it down well, smooth out the surface and wipe the glue that leaked on the pin from under the paper.
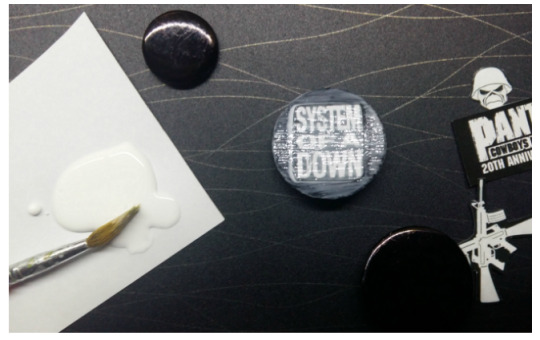
3. Apply a thick coat of glue over the design, once it’s stuck in place. Let it dry until the glue has turnt clean and then repeat once more.
Now, let the pins dry in a box, away from dust and hairs. Let them sit there for a night. Make sure that the top layer of glue doesn’t feel sticky to the touch before continuing to the 4th step.
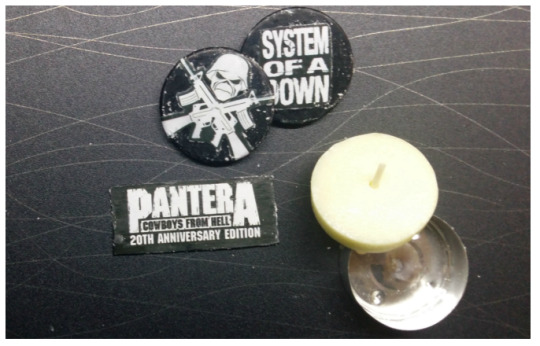
4. Now grab your reso candle and start rubbing it on your pins until a fine coat is formed.
With a blowdryer, start melting the wax on the pins. Cover your hand with a towel or with your sleeve as you hold them in place to melt it, because the back metallic part can get very hot very quickly. Once the wax is liquidized, let it dry and repeat two more times.
Wood glue is not water resistant, at all. By covering the pins with a thin layer of wax, we are making sure that the paper design is sealed in and that the pin will not get ruined if you get out in the rain wearing it.
5. The pin is water resistant enough to withstand rain, but it will not stand a single chance in your washing machine. I had the pins pictured on my bag for 11 months, and I was amazed how well they held on. Just don’t throw them in the washing machine, as we said before. :D
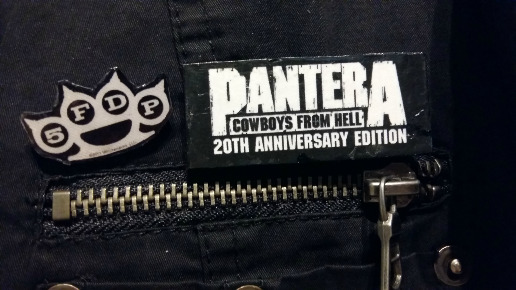
Sadly I never took any pictures of the end result and I only kept the Pantera pin long enough so that I could take a picture of it. As you can see, the wax didn’t affect the colours/texture of the pin, and it is still holding on perfectly.
Also, the FFDP pin (yeah, I used to love those guys for some reason...) was also a DIY pin. I tried making 14 pins and it was the only one that turned out perfect.
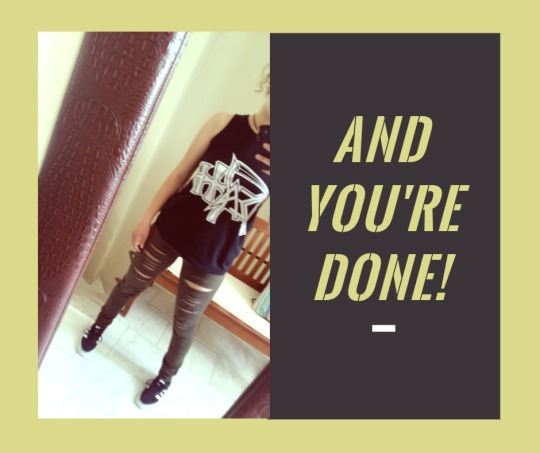
Aaaaaand you’re done!
Thank you for following through this tutorial and I hope I have helped you out somehow! Send in any questions that you might have, submit your own DIYs, or even send picture of what you have made for me to feature on my blog!
169 notes
·
View notes
Photo
Her name is Metallicat and she's mine 😂

Apparently, I made a new friend today 😄
40 notes
·
View notes
Text
Metal DIY Projects #7: Thrash-as-fuck shoes

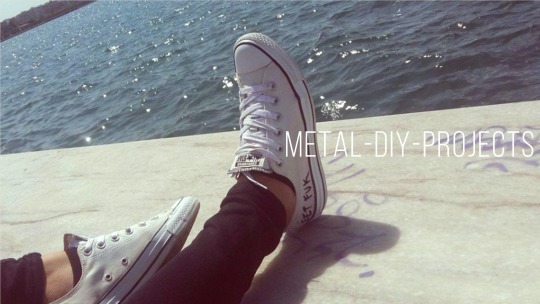
White high tops and skinny jeans. If that doesn’t scream 80s fashion to you, I don’t know what else does. Thrashers have been wearing these since the early 80s, thank Lemmy that they are back in fashion and we can find them everywhere for decent prices.
But, what if you don’t have a pair of high tops? Maybe they don’t fit your style, maybe you have amazing friends that will step on them just for giggles.
I’m here to show you a great alternative to flashy white high tops, that you could make with things that you could have laying around the house!
The materials that you are going to need are:


1. First, find thes shoe that you are going to use for the DIY. For me, personally, it was this pair of Converse that I had for so many years now, that from dark blue, they turned grey, and they pink-ish brown. I was going to throw them away, but then I had this great idea..!
The only thing that you have to watch out for, is the fact that not all fabrics change colour with bleach. Synthetic fabrics will not change colour at all, while those made out of cotton will turn completely white after a few hours.
To test this out, drop a drop of bleach on the fabric of the shoe and let it do its work for an hour. If the fabric has changed to white (or at least cream white), your pair of shoes will do just fine for this DIY!
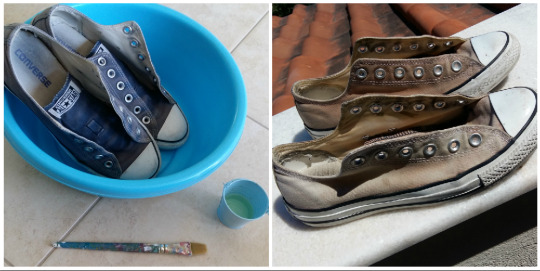
2. Prepare the shoes for bleaching. Remove the laces and put them aside. Wipe any mud and dirt from the shoes and put them in a bucket. Take them outside, in a well ventilated space, like a balcony.
Make sure that you are wearing old clothes that you don’t mind staining. Wear your mask, or at least tie a cloth over your nose and mouth. You don’t want to breath in the bleach as you work. It will make your eyes itch, and your throat will feel dry and sore. Wear plastic gloves and secure them around your wrists with hair-ties. Finally, if you have sensitive eyes, wear sunglasses.
In a container, mix 3 parts of bleach and 1 part water. With a brush, start applying the mixture on your shoes. Make sure to cover the entire shoe as you work, and that it is absorbing the mixture well.
Personally, it took me five coats to reach the colour that I wanted. You can see how mine looked like after the first application of bleach and... yeah they suck. They look worse than they did before I started. Continue applying bleach until you are satisfied with their colour.
Also, make your life easier by letting them in the sun between coats. The sun will speed up the process so much more! I did this twice, once on my own on a sunny day and once with a friend on a rainy day.
It took me two hours with breaks to bleach them out, but when I did it in an enclosed space with no light, it took an entire evening. Good luck to people living in countries where sun is scarce. xD
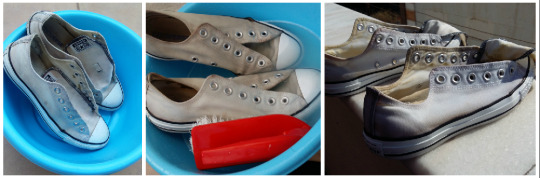
3. Time to wash all the bleach away! Start by letting them dry once they are white enough for your taste. Take them inside and start rinsing all the bleach off under running water. It is very important that no bleach stays on the fabric of shoe, because if it does, it will start leaking into your socks once you start sweating. This might cause skin iriitations, so watch out!
Once your shoes stop giving off that weird smell that bleach has, put them in your bucket and apply detergent all over them. With a hard brush (or with your hands if you can) start cleaning the shoes, until no dirt and dust is left.
Let them dry in the sun for about two days. You want them to be completely dry before you move to the next step.

4. As you wait for the shoes to dry, wash your shoe laces with some more detergent. Applying bleach won’t make them any whiter, as they are made from synthetic fibers, so try your best to clean them. Let them dry too.
Lace up your shoes and walk them around for a bit, to break them in. Converse have a tendency to tighten up after washing, so take a walk around the house to loosen up the fabric.
Now, your pair is white as a fucking canvas! You can either leave them like that, or you can follow the steps below to add a design of your choice.
And of all the things I could have choosen, I decided to write EET FUK on them.
Yeah. So unique, I know.
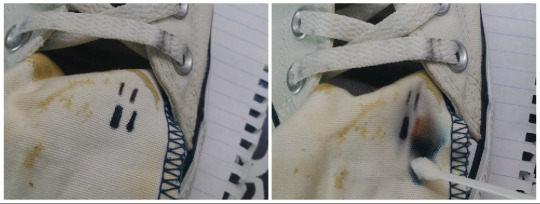
5. Time to test out which inks will work the best. I turned the tongue of my shoe inside out and and drew four lines with four different pens/markers:
Ballpoint pen
Archival Ink
Permanent maker
Colouring marker
Then, I soaked the fabric with water and started rubbing them with a cotton swab. I went with the ballpoint pen and the permanent marker, as they were the onces that even after 10 minutes of rubbing, faded/bled very little.

6. Using a picture of the guitar as a guide, I sketched out the EET FUK sticker on a piece of paper. With an exacto knife I carved the basic outline of the letters to use it as a stencil then taped it on the shoe.
With a pencil I marked the outline on the shoe and removed the stencil. I did the same thing for both shoes.

7. I went over the outline with the pen, and then did the same thing with the permanent marker. Using my picture as a guide, I smudged the ink to make it look more like the sticker and added more details with my pen.
I did the same thing for the other shoe, and erased any remaining pencil outline with a white eraser.
Aaaaaand you’re done!
Thank you for following through this tutorial and I hope I have helped you out somehow! Send in any questions that you might have, submit your own DIYs, or even send picture of what you have made for me to feature on my blog!
Fun Story: I always wanted to get my hands on that legendary guitar. I saw once a replica at a local guitar shop and I was drooling in front of the glass display, long enough that one of the employees came out of the shop and asked me if I wanted to come inside and play it.
#metal#thrash metal#heavy metal#diy#do it yourself#metalhead#shoes#shoe#eet fuk#metallica#hetfield#white#bleach#bleaching#craft#arts and crafts#crafts
19 notes
·
View notes
Text
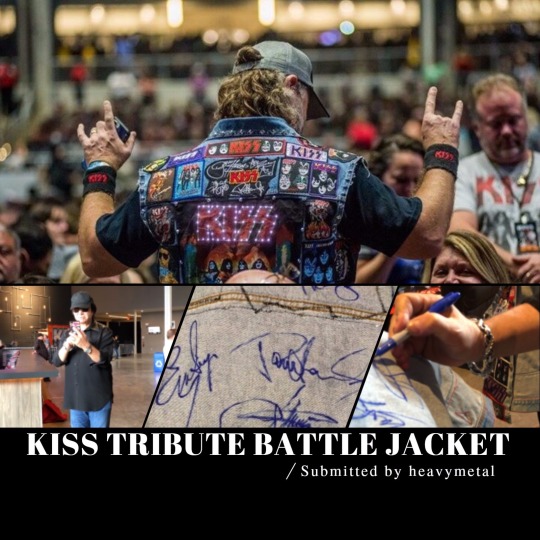
DIY Metal Projects #6: Adding lights to your vest (AKA Kiss Tribute Jacket ‘Part 2/2’)

PART 1
Once more, this amazing tutorial was submitted by @heavymetal. Thank you for taking the time to take pictures of your amazing work! :D
The materials that you are going to need are:
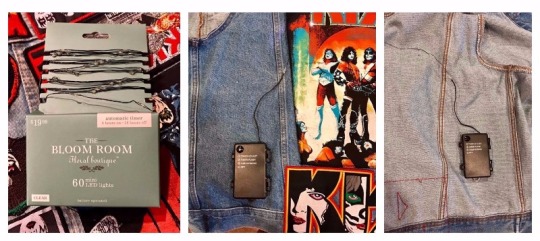
1. Start with your LED lights. I have included the brand that @heavymetal used for reference and I am not sponsored by it in any way.
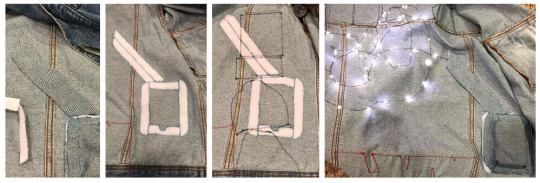
Place the first LED light in the first hole of your backpatch and see how far the cable can reach from that point. Mark the denim where the battery box is located and turn your jacket over. Follow your markings on the other side and trace around the box. This is where you are going to place it and secure it.
Note that you should do that before stitching any patches on that side of the jacket! If you have already stitched any patches, remove them before starting, to avoid stitching over your designs.
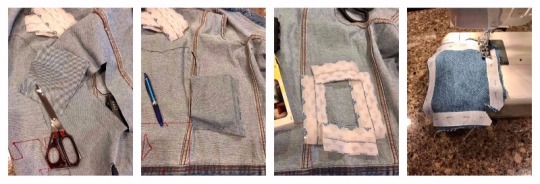
2. Use fabric scraps/denim from the sleeves that you cut off, to make a pocket for the battery box. Take measurements and cut a piece large enough to cover the box all around.
Then, snip the edges in a shape as shown in the last picture, and cut 8 pieces of velcro as shown in the third picture. Four for each side of the pocket and four more for the vest.
Using a sewing machine (doing it by hand will just take more time), sew the velcro pieces where they belong. Use pins to secure them in place while you sew.
3. Make sure that the pocket is big enough for the battery box. Place it on the jacket and use the cover that you just made to secure it in place. Wear your jacket and jump around to see if it stays in place.
It might sound silly, but this is normally how I test things I sew on my belongings. It works well with chains, plus you have a good excuse to be an idiot. Win-win.
Also, turn your vest around and check whether you have sewn over any patches or not. Don’t worry about the seams being visible, you’ll cover everything up later!
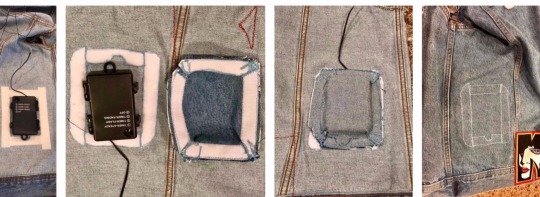
4. Cover up the cable. Place the cable leading to the LED lights on your jacket and trace a straight line. Cut another piece of denim/scrap fabric at the lenght of the line, and add four pieces of velcro; Two at each side of the cable, and two more on the piece of denim. Allow some space between the velcro pieces for the cable to fit between. Sew everything in its place.
After that, have fun stitching your patches on the other side of the jacket. Make sure you have removed the pockets that you made for the battery box and the cable before doing so.
When you are done, place the battery box inside the pocket and the cable through the cover and see if everything fits alright.
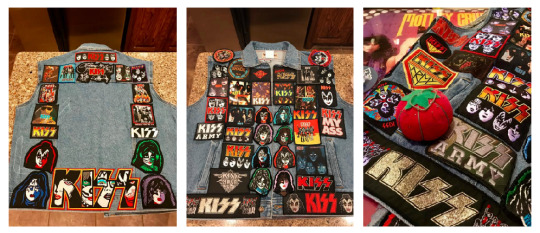
5. Sew every patch that you have on your jacket, except for the back patch. Find a placement that you like and pin them in place.
Afterwards, grab a beer and enjoy stitching them in place. Time to think about the meaning of life, or listen to a podcast.
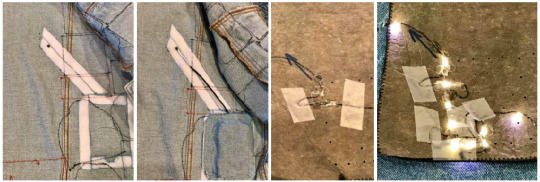
6. Poke a hole at the end of the cover for the cable and thread it through the hole.
Turn your backpatch over and start stitcking each LED light into each hole that you made earlier on. Secure the cable with hot glue, and keep it in place with tape while the hot glue dries. Remove the tape when the glue is dry.
Don’t touch the hot glue to see if it has dried! It is going to burn your skin off! Instead, poke it with a pin or a needle to see if it has hardened.
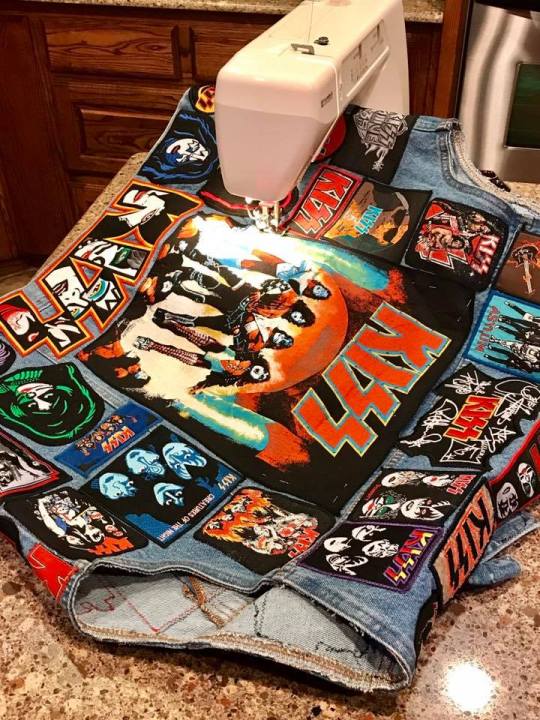
7. Once you are done with the lights, turn your vest over and start sewing the back patch in place. Keep it where you want it to be with pins, and be careful not to stitch threw any cables by mistake!
Aaaaand you’re done!
Great thanks to @heavymetal who provided me with photo material for this amazing project. This is a truly unique and amazing battle jacket, and I am so jealous of the end result! (I don’t really like Kiss, but who the fuck cares xD I’d wear that for sure)
Actually, his battle jacket was so unique that Gene Simmons himself took pictures of it during a Meet&Greet with fans! @heavymetal had his jacket signed by the entire band as you can see in the pictures above. How fucking awesome is that?! I’d be losing my fucking mind if I had my own jacket signed by literally any of the bands that I listen to, much more if they were that impressed by my work! Kudos to the man behind this awesome DIY project! \m/
#kiss#hard rock#metalhead#diy#do it yourself#battle vest#battle jacket#kiss band#kiss army#metal#heavy metal#heavymetal
103 notes
·
View notes
Photo
Apparently, I made a new friend today 😄
40 notes
·
View notes
Text
Small update
I added a short About Me page for all of you lovely people!
Get to know some random facts about the person behind the blog.
Stay metal!
~Irene
2 notes
·
View notes
Text
metal-diy-projects:
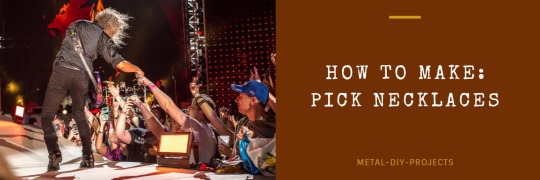
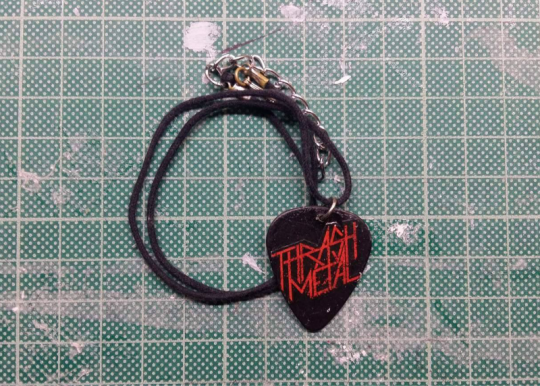
Metal DIY Projects #2: Pick Necklaces
The materials that you are going to need are:
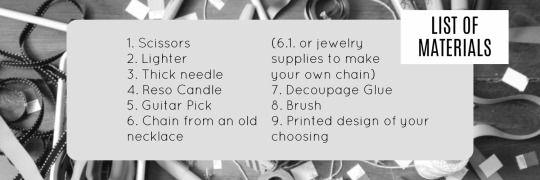
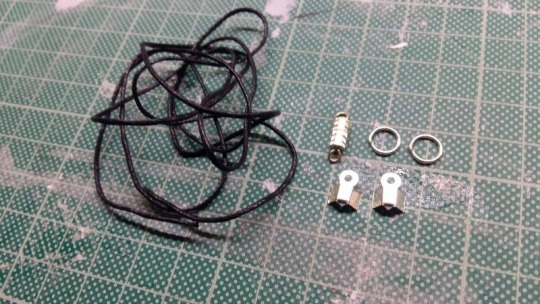
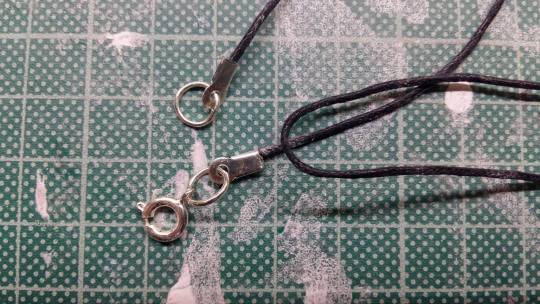
1. The jewelry supplies (shown below) that you are going to need are:
A clasp
Two rings
Black cord
And those two little things on the bottom that I have no idea how to call them.
For this DIY, I used an old necklace that I had, but if you are doing to use craft store supplies, I suggest that you use a set of pliers to secure the metal bits in place.
Start by cutting the cord in the lenght that you want it to be. Then, using your pliers, attach the two-little-things-that-I-don’t-know-how-to-call at both ends of the cord. Essential, what you are going to do, is place the cord between their two “wings” and then press them back down, over the cord to secure it in place.
When you are done, open the rings and attach one at each side of the cord.
Finally, separate the two parts from the clasp (mine has to be twisted into place and therefore is separated into two pieces) and attach each of them at one ring.
2. What you want to end up with is this plain black necklace:
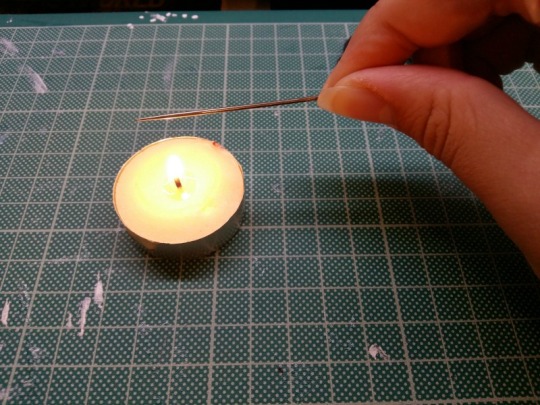
3. Now, grab your lighter and light up your reso candle. Then, hold your needle over the flame for a couple of seconds and warm it up. Be careful not to touch it, like I did. This thing burns like fucking hell!
If you have sensitive skin, I suggest that you hold the needle with a small piece of fabric between your fingers. This thing gets hot really fast.
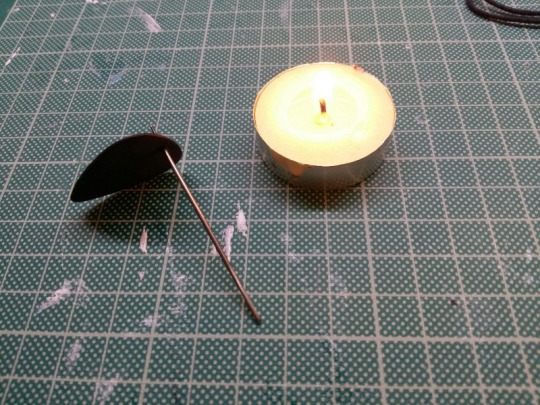
4. As you wait for the needle to get burning hot, grab your pick and mark where you want the hole to be. After a minute or so, pull the needle away from the fire and pierce through the plastic using your hot needle.
You might need to return to warm the needle again and repeat the proccess if it doesn’t get through the plastic with the first try.
5. Now, using one more ring from the craft supplies, attach it to your cord. Open the ring with your pliers, and tighten it back again after you have passed it through your necklace.
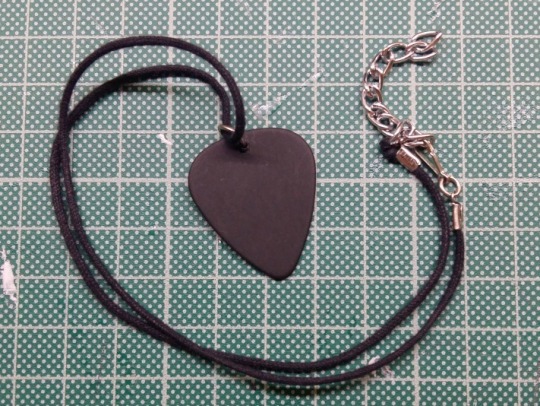
6. Now, you can wear it! You can either leave it as it is, or add a design on it. Alternatively, you can buy picks that have already printed designs on them. Or, you can even make that with a pick that you caught at a concert! That’d be really fucking neat!
7. Sadly, I wasn’t able to take pictures of the proccess of decorating my necklace, but I will try to explain it as well as I can.
First, find a design that you like and print it out. Cut it out in the same size as your pick, or cut it around the border, just like I did.
Then, apply a layer of decoupage glue on the pick, and stick it on. You could use wood glue to do that, but it wouldn’t be waterproof.
To waterproof your pick, apply another layer of decoupage glue over your design when the first coat dries.
Leave it to dry inside a box, or inside a drawer. Decoupage glue takes about a day to dry fully, and you don’t want dust and hairs to be sticking on your necklace. Wear it when the glue doesn’t feel tacky anymore. If you wear it earlier, dust might stick on.
So, that’s it! We’re done!
Have you tried any of my DIYs? Do you need any extra tips or help on your project? Feel free to send me a message, or submit your creations!
42 notes
·
View notes
Photo

Apparently, this blog now has more than 100 followers... Wow guys, thnx.
9 notes
·
View notes
Text
DIY Metal Projects #5: Notebooks

School started the other day and I am really damn pissed. Not sad, but extremely angry and everyone and anything. :D
I hate not having enough free time for myself, and I also hate wearing ankle-lenght jeans while the sun is trying to burn the entire country alive. So yeah, I kinda despise being there.
At least, I could make this a bit more fun. Bringing metal in school can make your time there pass easier. Starting from your bag, the next thing that you can decorate are your damn notebooks.
The materials that you are going to need are:

Covering the notebook
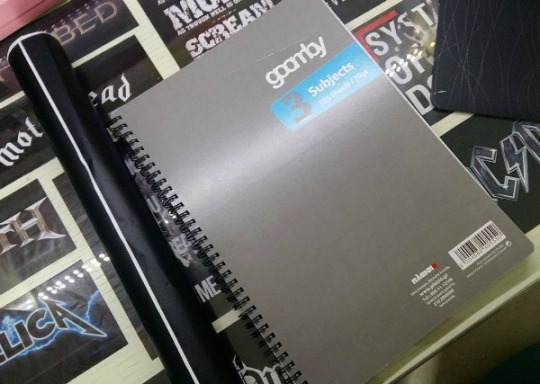
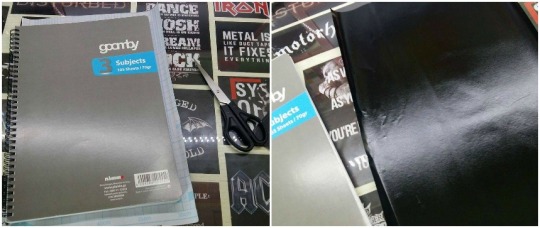
1. Start with a notebook of your choice and grab the coloured contact paper that you like the most. The one I bought is mat black, but I also thought about getting a fluffy grey one to do the rest of my notebooks. (My life is complete now that I know that fluffy contact paper exists, bruh)
Now, cover the front part of the notebook with the paper. Unfortunately, this proccess required both of my hands and I was unable to take pictures of how I did it.
Thankfully, this video will show you the exact same way in which I did my notebooks.
2. If you are starting with a spiral notebook like mine, you are going to have to cover the front and the back separately, with two different pieces of contact paper. Just place your notebook on the paper and cut around it, leaving a 3cm margin (around one inch) around the areas marked in the picture below.
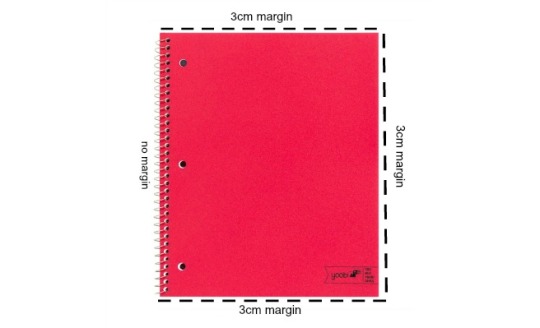
After doing that, peel the sticky side of the paper off and stick it on the front part of the notebook. Carefully slide a ruler across the surface to avoid any bubbles, as the person in the video did, but don’t fold the edges in, yet.
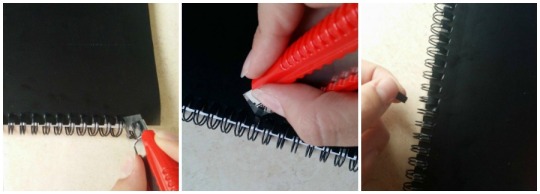
3. Now, let’s get rid of the sticky paper that has stuck on the spiral of the notebook. Carefully, use your exacto blade to make two slits right next to each spiral, so that there will be one spiral between two slits. (1rst picture)
Then, puncture a hole every two slits, exactly where the holes for the spiral of your notebook are. (2nd picture)
When you are done, pull the pieces of contact paper that you have cut around and free that damn spiral. Wipe the glue that could still be on the spiral with a baby wipe.
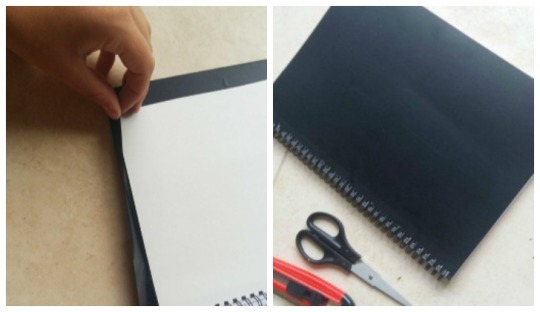
4. Now, fold the paper in, just as it is shown in the video to achieve a smooth look. Close your notebook and place a couple of heavy books on top, to flatten it, in case you have accidently bent the cover while working with the contact paper.
Decorating the notebook
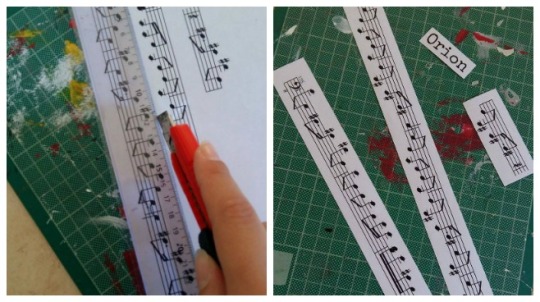
5. Choose the design that you want for your notebook and cut it out.
In my case, I really wanted to have a part of Orion’s bass score on my cover. It’s the middle melodic part, right before the guitars kick in.
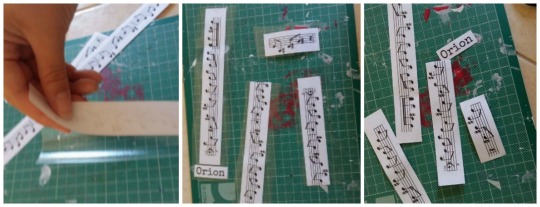
6.Flip the designs upside down and stick them on the transparent contact paper (1rst picture).
Using a ruler, smoothe out the bubbles (2nd picture) and cut around the shapes with a pair of scissors (3rd picture).
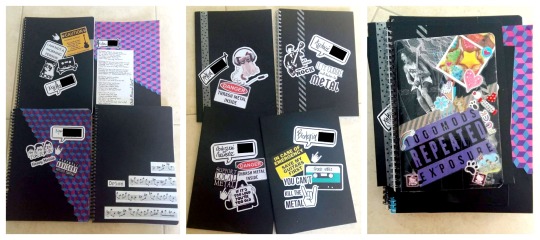
7. Time to go wild with the designs! Using wood glue (preferably) or a glue stick, stick the designs that you have sealed with transparent contact paper on your notebooks. Use wrapping paper, stickers and washi tape to make everything more interesting.
I did many different designs this years, that you can use as inspiration for youw own crafts.
(1rst picture up right) You can write lyrics on your notebook. I choose Death’s Perennial Quest for the cover, but you can do whatever lyrics suit you best. It is advisable not to have very offensive lyrics or swearing on the cover of your notebook, since it can get you in serious trouble in some strict schools.
(2nd picture) Glue random guitar and metal memes on the covers of your notebooks. Use, google “tumblr *** stickers“ and add a subject of your choice to the *** bit to find many cute pictures to add on your notebooks.
(3rd picture) Or, just grab every single scrap of material that exists on your desk and glue it on. That last book is my agenda for this school year, and it has everything on it, from pieces of fabric, to band stickers (Check out 1000mods if you love Stoner metal!) and from pieces of napkins to silly stickers. The dude in the photo is Samy Elbanna from Lost Society. I wanted to have a v-shaped guitar on my cover, but I was too bored to print out anything more and I just taped this picture of his on the cover. I have gotten the weirdest looks from this notebook, but I like it a lot :p
So, this is it! :D
Feel free to send in questions regarding the tutorial, asks and submissions.
Send in your own creations and have them all featured in my blog!
Happy School year I guess. Fuck shit up, sleep in class, whatever you do.
Or study, that’s also an option :D
#school#school hacks#notebooks#notebook#school notebook#metal#heavy metal#thrash metal#metal meme#metal memes#tutorial#diy#do it yourself#tutorials#notebook tutorial#school tutorial#school year#metalhead
545 notes
·
View notes
Photo

I HAD TO

78 notes
·
View notes
Note
Song recs: Sahon - Total Annihilation, Mahatma - Beginning of the End
Thank you! I just gave those bands a listen and they are pretty fucking cool. Mahatma is closer to my music taste, it sounds like a mix of good ol’ thrash with some death metal elements. Niiiice.
I have never listened to any Korean bands before.. I am glad that I found out about those guys tho! \m/
3 notes
·
View notes
Photo
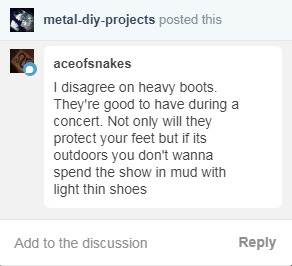
@aceofsnakes made a fair point here!
When I was writing this, I was thinking about my own pair of boots, which are really heavy and covered in straps which are all purely decorative. They are the type of shoes that look good, but are not really made for heavy duty work.
If any of my readers owns boots that are sturdy (army boots are your best choice), wear them above anything else to any concert that you go to. Those that have hard toes will protect your feet from getting hurt if you are stepped on, your ankles will have great support and you will keep your feet dry no matter the weather.
I’ll go back to correct this right away. Thank you for your comment!
5 notes
·
View notes
Text
Tips and Tricks #3

So, I have apparently gone to my first metal concert... Jeez.
My neck still hurts like a bitch, but I had a fucking amazing time nonetheless!
Aaaand that’s the reason why I’d like to share some tips and some pieces of advise with you all, so that you will not make the same mistakes as me..!
Wear comfy clothes. I am talking tshirts, jeans made out of elastic fabric and comfy shoes. Don’t come to the concert wearing leather boots with studs and straps and tight-fitting jeans.
I know that it looks cool, but if you are planning to mosh and thrash around freely, think about your clothing choices again.
However, if you own a pair of boots that are sturdy (army boots are your best choice), wear them above anything else to any concert that you go to. Those that have hard toes will protect your feet from getting hurt if you are stepped on, your ankles will have great support and you will keep your feet dry no matter the weather.
The clothes that you are going to wear will be covered in sweat and filth by the end of the night. Wear something that you will not mind sweating all over. Also consider the fact that you might tear your clothes (especially your jeans) while moshing. Don’t wear your favourite pair that night.
Don’t wear loose jewellery. You don’t want to lose them, or get them caught somewhere. Also, wear those that you do not mind losing and avoid those made out of precious metals that costed you a shit-ton of money.
Remove your piercings or cover them up! I had my helix piercing almost torn out of my ear during a wall of death. It still hurts like a bitch and I lost my earring. Thankfully, a dude in the pit helped me put the earring that I had in my earlobe in the place of the helix piercing, so that the piercing woudln’t close. Great guy.
Wear studs instead of bars and rings, and if your piercings are fresh, cover them up with a band-aid. They will not get caught anywhere and you will be free to enjoy the concert.
Don’t carry a bag. My friend had a backpack with her, and at some point, someone tried to steal her belongings while she was enjoying the music. We found the bag open but nothing was missing.
If your belongings don’t fit inside your pockets, place them all inside a purse/case that can be attached to your belt.
The safest place to be is at the back or at the very front. This goes out for the people who do not want to get involved in a mosh pit/wall of death. Anywhere in between is a no-no if you just want to enjoy the show. However, keep in mind that the crowd gets more energetic as you walk closer to the stage.
There is actually a mostpit etiquete! Killbot&GorGor Attack made a great video on it, and you should definately watch it!
Take it from me; it was my first show, and I am not the most muscular girl around. I had the time of my life, I only stepped out of the pit for a ballad, and I didn’t even hurt myself. Yes, I fell a couple of times, but there was always someone to push the crowd away from me and lift me up.
Remember not to be a dick. I saved a dude’s ass from falling on the ground while he was crowdsurfing and he had the biggest smile on his face (he looked a bit scared too, but I can’t blame him!). You are going to have an awesome time if you help those around you do the same.
I actually made a tiny concert first-aid kit to carry with me. It proved so damn helpful and I am glad I carried it with me. It contained:
a. Tissue paper
b. Two band-aids (to cover my piercings)
c. Bottle opener
d. Pen and paper (for autographs and what not)
e. Money
f. Your ticket (placed in a ziplock bag in case it rains)
g. Tiny container with unscented moisturising cream (apply on the scabs that you get from injuries on your joints so that they stay soft while you are at the concert. Scabs that harden will make your hurt and itch as your skin stretches while you move, and it sucks balls)
Carry a scarf or a handkerchief with you. I always keep one tied around my wrist, and it came in handy at the concert. The majority of the people there where smoking weed, and I didn’t want to breath in the smoke, and I tied it around my nose and mouth.
It looked really nice with my tshirt too! The colours matched xD
The first thing you want to do when you return home is to put your clothes outside. You might gotten used to the smell, but next morning you will realise that their stink will cause you a gag reflex. Keep them out of your room and wash them right away the next morning.
DON’T SLEEP WITH THE A/C ON! This is what I did and I got sore muscles all over my back and neck. It might sound stupid, but wrap yourself with a blanket and stay warm throughout the night to avoid waking up sore the next morning.
Well... that’s it for now. I truly hope that I have helped you somehow!
Feel free to send me a message and ask more questions if you feel like it, I will be happy to help! \m/
#metal#thrash metal#planet of zeus#concert#first concert#concert experience#tips#tricks#tips and tricks#metalhead#mosh#moshing#wall of death#circle pit#mosh pit#stoner metal#heavy metal
42 notes
·
View notes