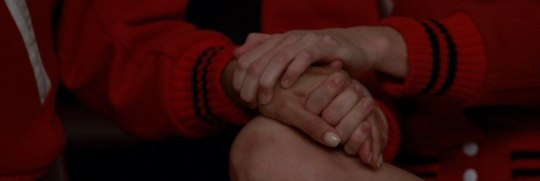
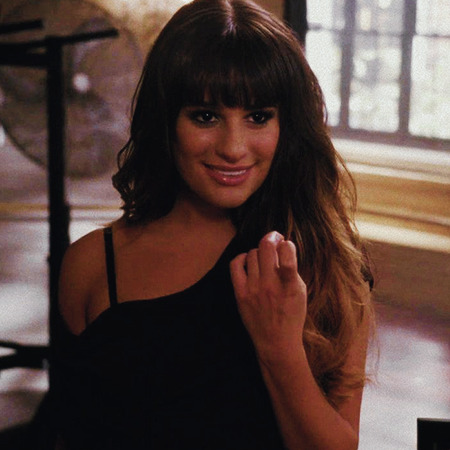
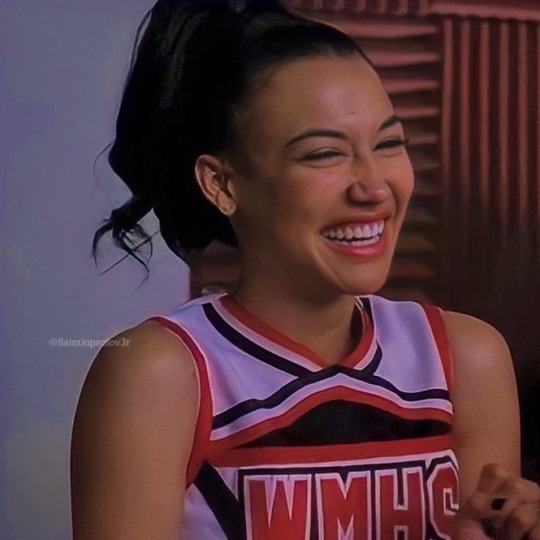
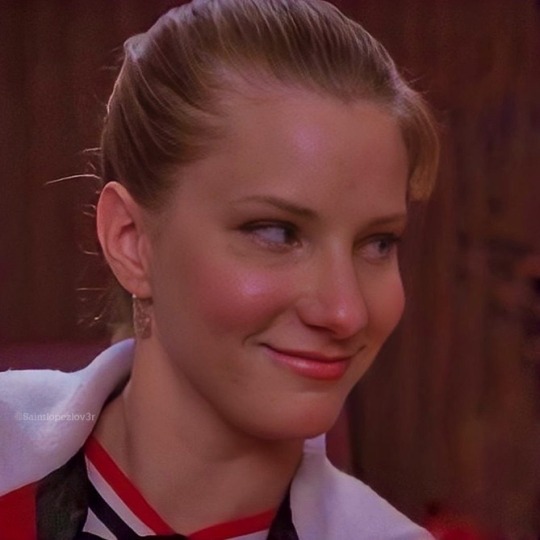
#brittana icons
Text
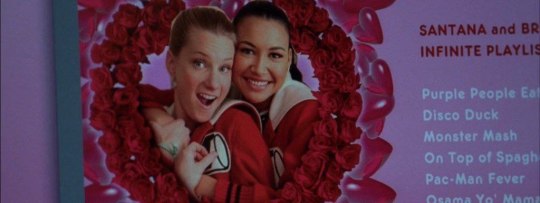


brittana headers
#glee#glee packs#glee icons#gleeedit#glee headers#brittana#brittana icons#brittany pierce icons#glee santana lopez#santana lopez#brittana headers
100 notes
·
View notes
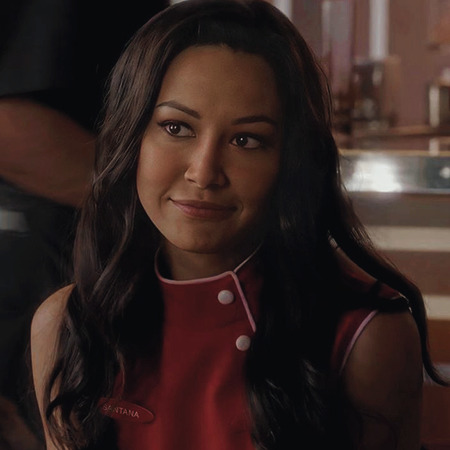
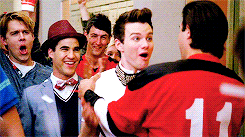
Photo


— like or reblog if you save, please. follow me on twitter
#glee#glee icons#santana lopez icons#santana lopez#brittana#brittana icons#brittany s pierce icons#kurt hummel icons#klaine icons#blaine anderson#finn hudson#rachel berry#rachel berry icons
33 notes
·
View notes
Text


gonna love these lesbian jokes
#glee#brittana#dickinson#emisue#brittney pierce#santana lopez#emily dickinson#susan gilbert#lgbt#lesbian#queer#wlw#lgbtqia#gay#sapphic#tv show#wlw ship#femslash#sapphic icons#wlw shows#lesbianism#lesbian memes
365 notes
·
View notes
Text
I will forever be upset that there wasn't an ABBA episode in glee
#glee#it would be so iconic#santana lopez#mercedes jones#glee club#klaine#rachel berry#brittana#faberry
136 notes
·
View notes
Text


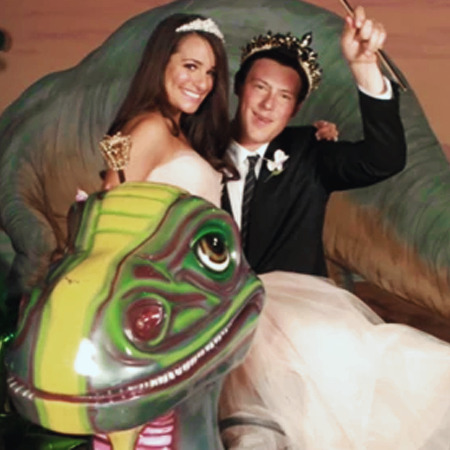
Glee season 4 behind the scenes pictures that make my heart happy af!
#glee#glee edit#finn hudson#gleek#glee imagine#finn hudson icon#edit#tiktok#fan edit#glee cast#glee santana#santana lopez#artie abrams#brittany s. pierce#brittana#rachel berry#glee bts#glee behind the scenes
57 notes
·
View notes
Text

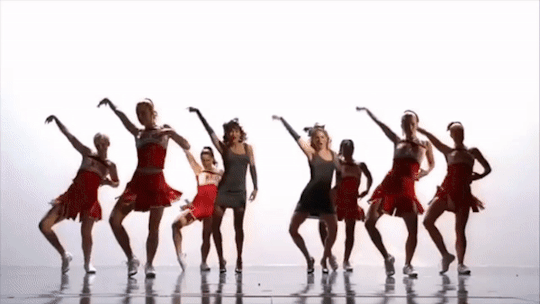


Dance With Somebody
I Wanna Dance With Somebody

#glee#glee gifs#glee songs#brittana#gleedit#place: ohio#gleeedit#santana lopez#brittany pierce#gleesource#glee edit#glee club#place: mckinley high#glee season 3#william mckinley#glee icons#gleek#dailytvgifs#gifset
65 notes
·
View notes
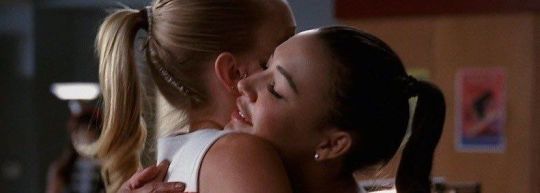
Text
Matching Icons


Santana Lopez💋 & Brittany Pierce🦄
Glee
51 notes
·
View notes
Text
#brittana#brittana polls#glee#brittana headcanons#glee polls#santana lopez#brittany s pierce#brittany pierce#glee x some VERY slutty and iconic songs
3 notes
·
View notes
Text
ok my mobile theme has been bisexualised 🫡 what do we think?
#i quite like how it turned out#i had made a leliana icon but i wasnt really vibing with it#i mean. its cute but i didnt like how it looked with the header#i thought the barbie thing would be cute#and i was right !#also back to the header. it looks so fucking good im so proud of myself#my gifs lately are so pretty#i also changed the sidebar gif on desktop theme. since its very minimalistic theres not much to bisexualise there unfortunately#but theres another brittana gif too <3#cami.txt
7 notes
·
View notes
Note
another thing i'll always be grateful to naya for was not having brittana become this male-gazey sexualized joke. without her, they probably would've just kept the jokes of 'oh yeah we make out and sometimes have sex for guys'
Oh absolutely. Like she said, it started out as a funny (hot) thing but there are people out there it’s not a joke to. God bless her soul.
There’s a Lot to discuss about how Santana continued to be a highly sexualized character in a male gazey sort of way even after coming out and Brittana’s general state of being allowed implied intimacy when it was for the guys but then the show taking so long to show their actual Girlfriend things like kissing. Believe me, it’s a LOT. But never forget that they could have just remained a joke for the straight guys and they became so much more partly because Naya Rivera listened to fans and recognized the value of actual representation. She was so real for that. And when, in 20-bloody-10 as a 23-year-old slowly rising from a background character? Please. We have so much to be grateful for.
#people forget how violently homophobic even 2010 was#how much of an incredible push this was from naya#glee's general treatment of girls was beyond her control but GOD BLESS#for everything she did for queer girls everywhere#a true icon forever missed#sigh#people really don't appreciate brittana's trajectory enough#from male gazey joke to WIVES#anon#glee asks#naya rivera#brittana's transgression
14 notes
·
View notes
Text
S3 canon divergence au where Sue finds out Brittany released porn of Santana without her permission and hauls out the cannon from s2 and shoots Brittany into the sun and we never see her again 🥰
#glee#lol glee#my thoughts#sue sylvester#Santana lopez#shittany pierce#anti brittany pierce#anti brittana#and then if you wanna bring her back for the s5 guest spot#which you shouldn’t but oh wel#just start the ep with her landing again and showing up at mckinley#so we don’t have to worry about where she’s been bc it truly doesn’t matter#we’ve all seen the iconic Barbie life in the dream house ep right?#the pool party one#Ryan flies off the slide and into the sky just to land in the pool at the end of the ep#that’s the vibe#just keep her gone much longer
16 notes
·
View notes
Note
do you think you could please do a tutorial for your greys anatomy edit (kinda similar to your brittana edits) i'm shocked if no one has ever asked you before for tutorials (and if you do i'd love to see them) your edits are so gorg and you're incredibly talented !
Totally! Bare with me, this is my first tutorial in like 8 years. Haha. I'll show you how I made this one:
For reference, I use Photoshop CS5. (My computer hates the newer versions. It'll run three different video editing softwares but hates photoshop. Idk lol.)
Okay, first you want to make 2 gifs with the same amount of frames. That's important. And then you want to convert them to a smart object.
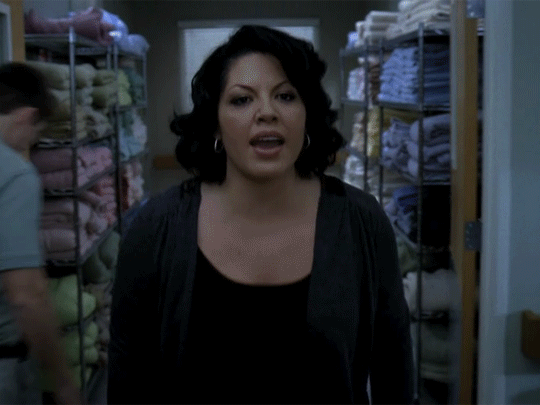
So we have these two gifs.

Now, depending on what you're doing, you can do this next step now or you can color your gifs how you like, save them separately and then reopen them with all the coloring on them. Sometimes I do this if I'm working with a lot of effects but since these two gifs have the same coloring, we're going right click on one of them (it doesn't matter which one tbh) and you're going to select "duplicate layer"
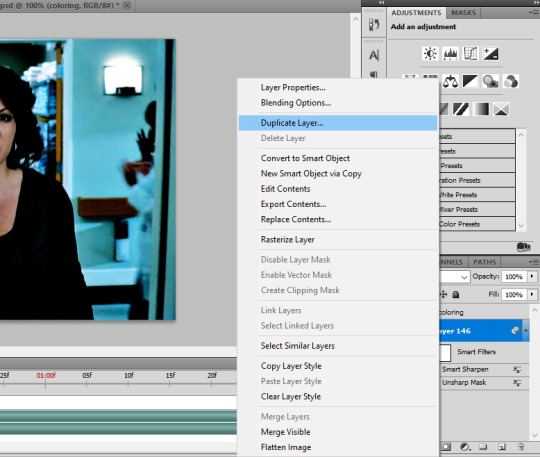
A little box will pop up and this is where you're going to select the project name that you want to essentially paste this gif on top of.
Set the top gif to Screen.
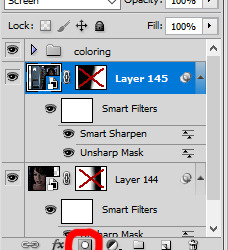
The first thing I usually do is sharpen them.
So I use Smart Sharpen and Unsharp Mask with these settings:
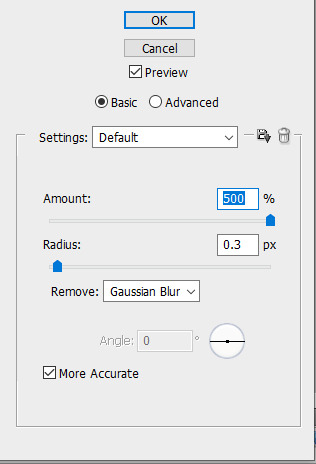

With Unsharp Mask, you have to tweak them depending on the gif, quality, what effect you're going for, etc.
Then we add some basic coloring:
Now, I have a base for specific shows because all shows are colored different. Grey's is more blue toned whereas Glee is more yellow toned. However, since coloring is a bitch sometimes, I'll add a PSD that I use ALOT. You can download it here.
So now that we've sharpened and added some coloring, this is what we have (separately):
This is what it looks like after I set it to Screen (and I moved the top gif a little to the right.)
Obviously, we need to get rid of those lines and make it so that each gif is more visible.
So now we blend.
On the top gif, you're going to add a layer mask to that gif. So with that top gif selected, you're going to select the mask button that looks like this:
Select your brush tool and use a soft brush to erase what you want from the background of each gif. (Make sure to repeat the previous steps to get a layer mask on the bottom gif.)
I have this now, after using the brush tool.

As you can see, it's very blue and I wasn't feeling blue for this gif so we want to change blue color. That's where the Selective Color comes in.
We're going to get rid of that cyan tone. So you're going to add adjustment layer and select Selective Color.
All I did for this one was adjust the cyan tones in the drop down box.
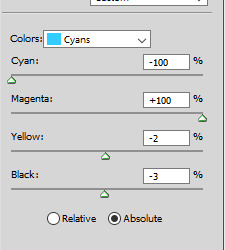
Now we have a pretty purple tone!
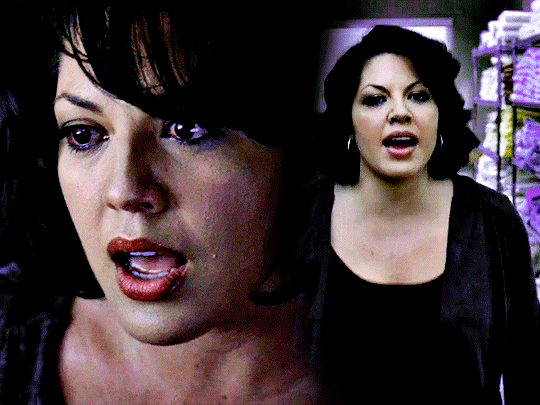
Now, we're going to add a light grey squareish box this to outline.
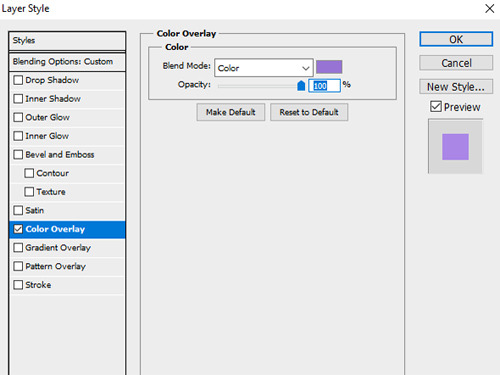
Set the blending mode to exclusion. To get the bar (and we'll do this again with the text) you're going to select the FX icon.
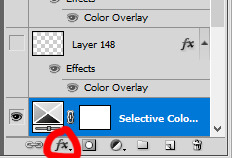
Select Color Overlay. A box will popup. You're going to set the blending mode to Color and then select whatever color you want the bar to be. (If it comes out with too much white, adjust the color of the bar itself to a darker shade.)
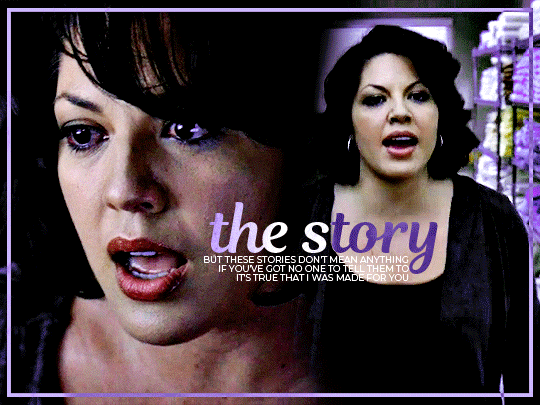
Lastly, we're going to add our text. For this gif I used Magnolia Script and Montserrat.
To get the purple effect on the "The Story" text, you're going to do the same thing you just did for the bar.
Voila! I hope this helped. If you need any further assistance, I'm always happy to help!
#tutorial#gif tutorial#blending tutorial#usergif#completeresources#mine#also anon you’re so fucking sweet
101 notes
·
View notes
Text
244 notes
·
View notes
Text
re: that stupid poll...im glad we won and im glad it was so close but im getting war flashbacks with the massive moral superiority complex certain klainers have about being mature and understanding about their ship unlike those toxic brittana stans girl I'm too old to start shit over this but all I will say is you guys are no fucking picnic either you know that right. both these ships are iconic in fandom history and it's a dumb poll for god's sake. you can dish it out and moral police literal 15 year olds over their ship for years but some kid will make a dumb joke about "klaine winning this poll is misogyny after brittana had to share their wedding" and y'all will lose it and refuse to shut up about brittana stans being god's curse on gaykind. im sorry but it's obviously a joke and i say this as a blaine kinnie and someone who likes klaine. we have heard so so so much shit while literally just minding our business from your fandom for years and we're not the ones who think we own this site and this fandom. being in a fandom will mean having to hear people be immature and make fun of your ship. on both sides. y'all have been doing it to us for years. calm down
#brittana#if im a little extra passionate about brittana winning this poll its because of all the shit ive had to hear from your fandom over the year#WHILE LITERALLY MINDING MY OWN BUSINESS AND NOT EVEN MENTIONING YOUR SHIP#so yeah every fandom has its rotten eggs stop shitting exclusively on ours like yall are gods#i remember feeling so bad about shipping brittana when i was like 14 cause of the constant negativity#EVEN AFTER filtering the tags#idc now obviously but yeah#anyway ship wars are stupid just enjoy what you want to hope this helps:)#its the selective moral condescension for me#glee
23 notes
·
View notes
Text

Star Maps - Two actresses. One iconic sitcom reboot that could either make or break them. Santana Lopez and Brittany Pierce are about to find out that being funny is serious business. A celebrity AU which finds Brittana landing roles in a reboot and reimagining of the American TV classic, I Love Lucy.

#brittana#santana lopez#brittany pierce#i was dragging my feet but decided to finally post in honor of Lucille Ball's birthday#lets see how i do keeping up with this
43 notes
·
View notes
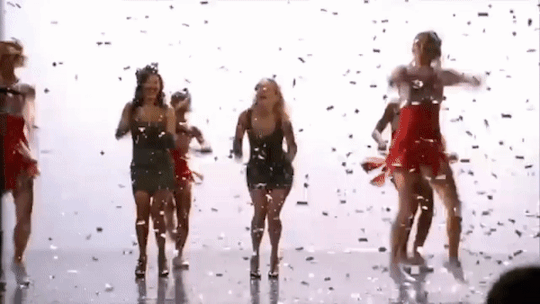
Text


Tongue Tide
Take me to your best friend's house
Going around this roundabout, oh yeah
Take me to your best friend's house
I loved you then and I love you now, oh yeah
Don't take me tongue tied
Don't wave no goodbye
And don't break
#glee#glee gifs#glee cast#glee songs#gleeedit#glee club#glee season 3#finchel#brittana#klaine#artie abrams#mike chang#tina chang#gleedit#gleesource#glee edit#glee icons#place: mckinley high#place: ohio#gleek#william mckinley#dailytvgifs#gifset
59 notes
·
View notes
Last Seen Blogs
elixirnaturel-blog
Elixir Naturel
ttaekookk
kth + jjk

medfetgirl666
EKGs and oxygen
beecastle
Enjoy The Butterflies
marymeamor
Well duck