#did this need 4 gifs
Text
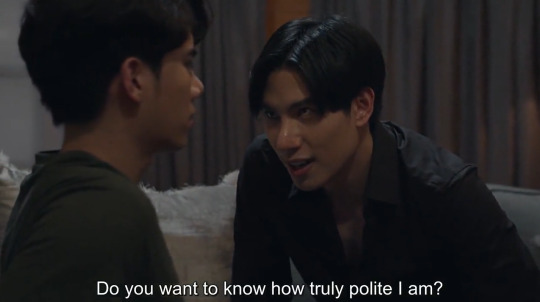
Sex is great and all, but have you ever watched a scene with so much tension that your soul left your body?
Like Togawa's thumb in Nozue's mouth?
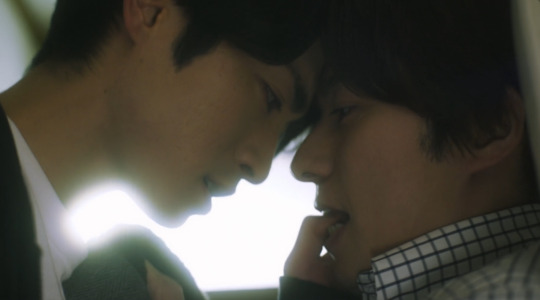
Or Teh smelling Oh-aew?
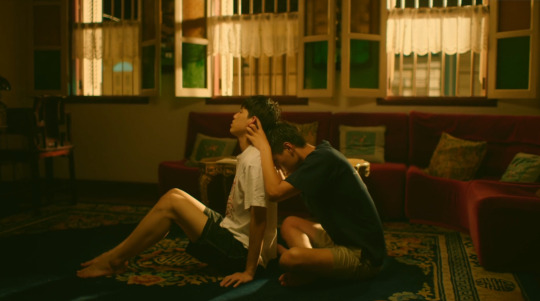
Perhaps Ritsu giving Masumi some water?
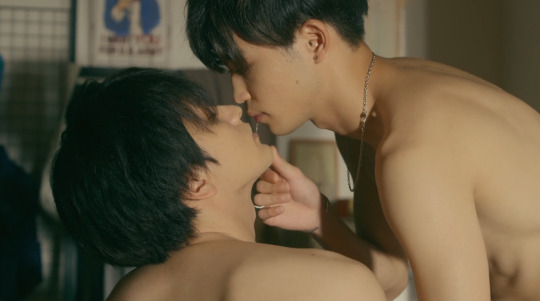
Maybe Mangkorn commanding Yai to kneel and not speak?

Possibly Vegas sniffing Pete while forcing Pete to talk to his grandmother?
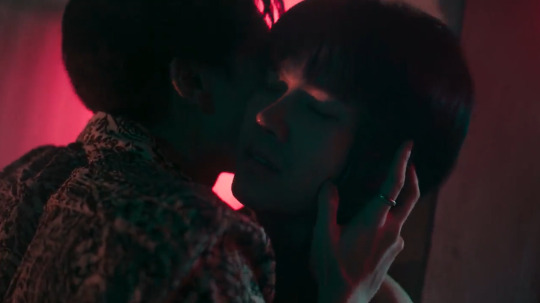
When Tan leaned into Bun and asked him this?
Did Li Cheng licking Mu Ren's lips finally do it?
Or is your soul intact and still very much tethered to your body?
#This is The End of the World with You's fault!#That “could I get a sip?” scene did me in#Who needs kissing when there is sniffing?#My type is unhinged feral behavior#Old Fashion Cupcake#I Told Sunset About You#The End of the World With You#Big Dragon#KinnPorsche#Manner of Death#HIStory 4: Close to You#My School President
3K notes
·
View notes
Text

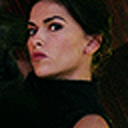
SOPHIE OKONEDO as LADY HATTON in HELLBOY (2019)
#sophie okonedo#lady hatton#hellboy#hellboyedit#hellboy 2019#filmedit#cinematv#gif#mine#so*#film*#i... did not watch this 🙃#the pre-tearny grey wig#and the pre-siuan fur coat#lol#sophie okonedo saturday#*#i feel the need to add#for those like 'omg gotta watch'#she's in it for like 4 minutes starting around the 18 min mark#so... do with that what you will
317 notes
·
View notes
Text


12 days of skzmas [8/12]
↳ skz code: 14 & 15
#createskz#staysource#bystay#melontrack#usersemily#adriblr#dreamytag#meltracks#usersa#thestephtag#stray kids#skz#*intro:gifs#*skzmas#skz code ep 15 my beloved 🥰#super late but I did it 😮💨#now I just need to finish 4 more sets 💪😤
269 notes
·
View notes
Text


RESIDENT EVIL 4 (2023)
this time... is different.
#resident evil 4 remake#re4r#re#re4redit#reedit#residenteviledit#leon kennedy#leon s kennedy#dailygaming#videogamedit#gamingedit#my gifs#i need to actually sit down and keep a list of tags to use lmao#so i've been meaning to play with scene for a while and finally did it ayyyy#i'm happy with the saturation#also i just#the grin at first like yes good she's safe time to take a nap#also thinking about how ashley managed to get that unconscious man into that chair is both hilarious and amazing#cause he isn't small by any means#also something i like more in the remake than the original is him making her go first.#like i understand him going first in the og because he doesn't want her hurt#but how can you save someone if you get fried by a plaga laser?#also the hand holding i love that
306 notes
·
View notes
Text


The L Word | S2E01
#the l word#shane mccutcheon#kate moennig#in a horrible mood but i still had the episode open from last night and laughed so hard at this awful outfit i almost briefly forgot#i actually love it in concept i just dont know what they were thinking with the random sidepieces for her hair which i think throw the whol#thing into this weird sort of disarray#but i love the short blazer sleeves ovr the shirt a lot also how weirdly unironed the shirt kind of appears#also the low jeans with the belt..? not crazy about the decor on the blazer tho#but i love the glasses forevr#but again i feel like her hair is so weirdly fried in this or maybe cked with hairspray#anyway im fine sorta#actually really funny to post this also after the last one bc she looked so good in that and so BAD here#soryr this outfit deserved its own complete commentary in tags but lookbook coming eventually#also im pretty sure her hair is like tied back in some sor tof way which also looks horrific#who did this literally whos idea was this#also sorry it was roiginally 4 but looking at them together i think it only needs 2
249 notes
·
View notes
Text


wriothesley • character teaser: indispensable protocols
#genshin impact#genshinedit#genshinimpactedit#genshinet#wriothesley#mine*#wriothesley*#surely i do not have a particular reason as to why i giffed this specific part of the teaser i have no idea what ur talking about#ok but hoyo rly did Not have to zoom into his chest like that LMAO#i might do a couple of rolls into his banner next week#maybe just like..... two 10 pulls and if im not lucky im out LOL#bc 1. the 4 stars aren't ideal for me (thoma is c6 + chongyun and d*ri i don't use)#and 2. furina is next patch i need to get the hydro archon to continue my collection 😤#maybe on a rerun if i like his playstyle i do love my reverse melt units <33
286 notes
·
View notes
Text
kinitopet has gotten more polygons and now has limitless power
#my art#blender3d#b3d#kinitopet#3d art#based on my other kinitopet drawing from a week or so ago#spent like almost 4 hours straigt deciding I NEED TO MODEL KINITOPET NOW and then did this#not sure what possessed me there#but now i just have a kinitopet model to put in wacky situations#gif
109 notes
·
View notes
Photo


FELIX @ FNS Kayousai (211214)
#this did not need to be 4 gifs but here we are#stray kids#skz#bystay#createskz#felix#lee felix#gifs
740 notes
·
View notes
Note
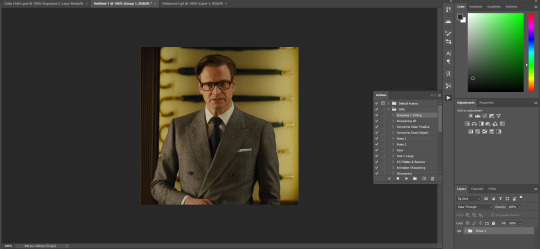
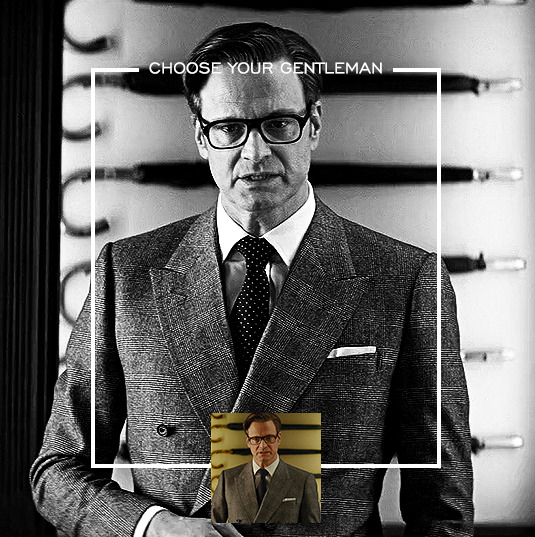
Hi, I love your blog and your edits. I was wondering if you could do a tutorial on how you combine multiple gifs into one in the first gif of yours MIKELOGAN’s 5K FOLLOWER CELEBRATION || GET TO KNOW ME MEMEFAVORITE ACTORS [2/10]Colin Firth (September 10, 1960) set? Thank you for reading this and helping me.
thank you so much, that's so kind!! this is the post in question (which was inspired by this gorgeous set) and i'll break down how to do it step by step below the cut!

i ended up saving this gif as a psd because i remember it taking me so long and being really frustrating, i just wasn't sure why. for reference, i posted that set back in september, just over four months ago. looking at the psd, i can see just how far i've grown as a gifmaker bc that thing is a hot mess. i made it about 3x more complicated than it needed to be, so let's do this the right way lol
note: i was still using 0.07 frame rate at this point. i have since switched to 0.05 for smoother, quicker gifs.
what we're going to do is create all of these gifs separately and put them together at the end. in total, there are 6 individual gifs. let's start with harry.
i gif by importing video frames to layers, but if you prefer to screencap, load those in instead. because this ends up being a pretty large gif, both in size and length, i kept it to 20 frames per clip.
once you're satisfied with the frames you've chosen, crop your canvas to 540px x 540px. this is what i'm left with

this is when i sharpen my gifs. everyone's process is a little different. i created my own sharpening action, which converts my frames to video timeline and then sharpens.
the next step is to color your gif. if you're going for the overall look in mine, here were my layers:
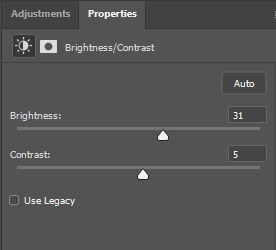
a brightness/contrast layer with brightness set to 31 and contrast to 5. this will depend on the scene you're working with

a levels layer using the black and white eyedroppers. the top one is your black eyedropper. to use it, click it and select the blackest part of your gif. do the same with the white eyedropper and select the lightest part of your gif. you may need to play around with selecting different points depending on your scene and the original coloring
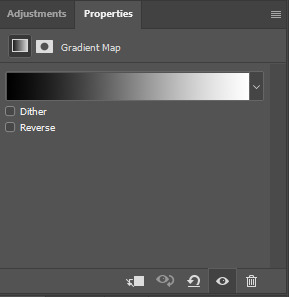
finally, a simple black & white gradient map layer on top
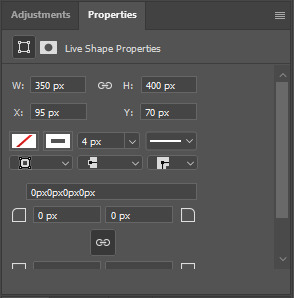
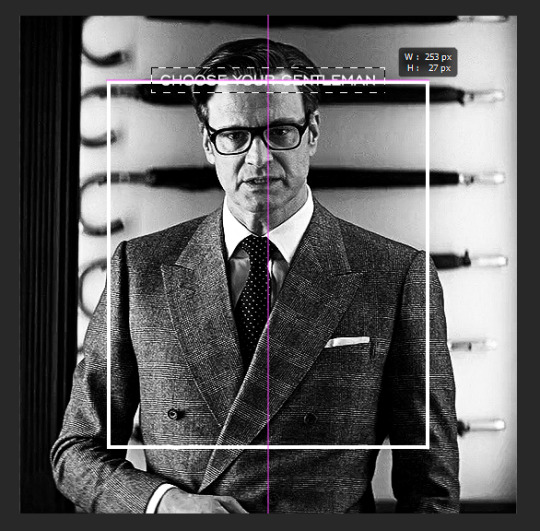
now we're going to add the thin rectangular border in the middle of the gif. i use the rectangle shape tool for this (press U on your keyboard) and these are my settings (x and y coordinates don't matter):

to center it perfectly, i use ctrl+T and drag it until it snaps into place with both the vertical and horizontal guides.
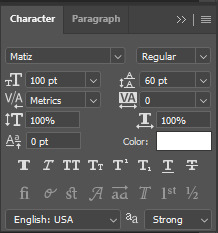
next, let's add the "choose your gentleman" text that goes at the top of the border. here is the font i chose and its settings:

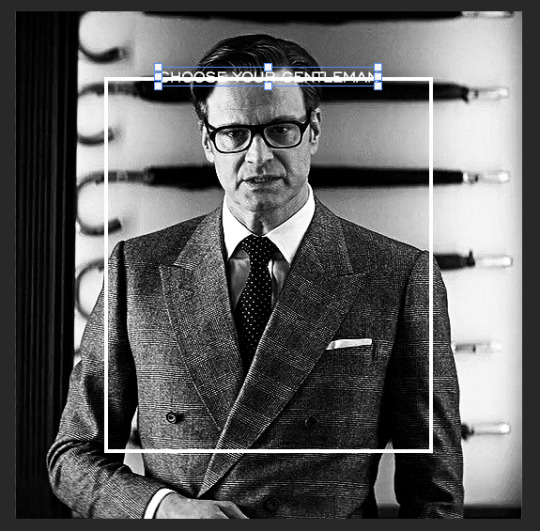
once again, press ctrl+t and drag this to the vertical center of your gif and to the center of the top of the border. you should feel and see it snap into place. this is what we have now:
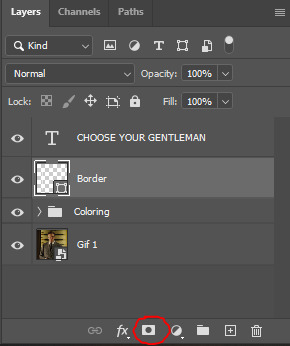
now, we're going to use a layer mask on the border so we can read the text. select the rectangle layer and click the layer mask button
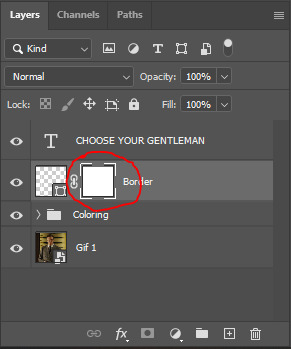
with the layer mask selected (as shown in the second image), use the rectangular marquee tool (M on your keyboard) to draw a rectangle around your text, taking care to keep it just a little larger
as you can see, you'll know when you're perfectly centered through your text layer and vertically on the entire canvas. select your brush tool without deselecting this rectangle (B on your keyboard) and paint the selection with a black brush. this masks that part of the border!


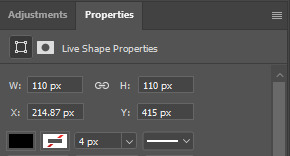
let's add the small square gif that goes at the bottom of the border now. i think the easiest way of doing this is to use the rectangular shape tool (U) again. the size of this gif is 110x110, so create a black square of that size with no stroke. Use ctrl+T to drag it to the center of the bottom of the border (the x and y coordinates don't matter):
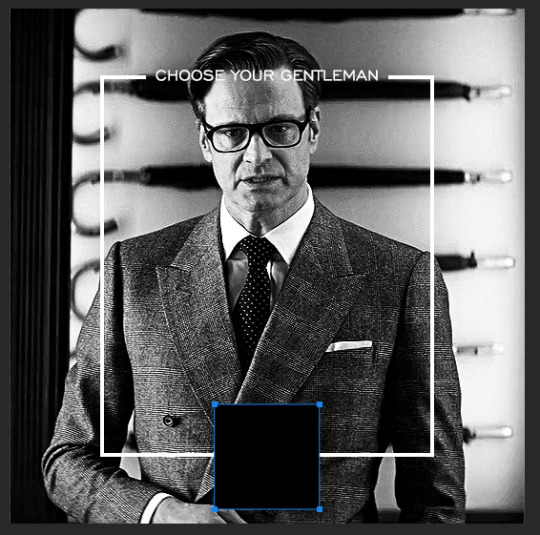
now duplicate your original gif layer (ctrl+J) and drag it to the top of the layer panel. right click on it and create clipping mask. this will make it so the gif only appears within the confines of the square we just created. resize your gif by using ctrl+T and, making sure the proportions are locked, drag the corners to the edges of the square.
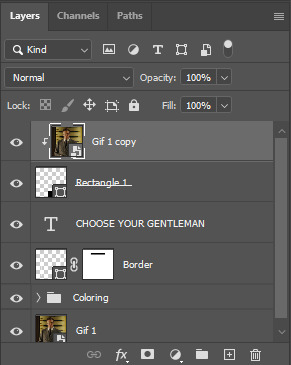
this gif is not colored at all as we only duplicated the gif itself and not the coloring layers. i duplicated those as well and dragged them on top of our small gif, but it's important to make sure those are using the clipping mask as well. you can click this on the properties layer of each adjustment layer to make sure they do.
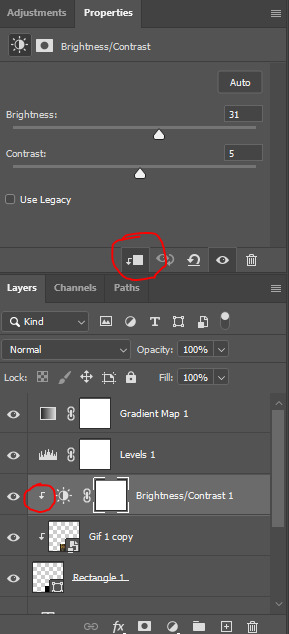
you'll know you've been successful when you see the small arrow next to each of your coloring layers. this keeps them from affecting the coloring of the larger, main gif.
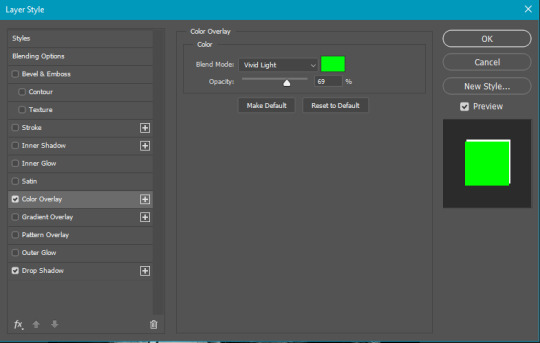
we're going to change the gradient map adjustment layer from black & white to black & lime green (or the color of your choosing). click on that layer and then on the map. this will bring up the gradient editor. click on the small white color stop at the far right end of the gradient and then on the color picker, choose a new color.

the hex code i used for the lime green is #00ff0c
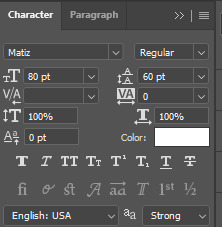
our last steps are the angle brackets on either side of the gif and harry's name in the center. here are the settings i used for those (angle brackets on the left and harry on the right):
the layer styles for harry's name (double click on the text layer to call up this menu OR right click > blending options):
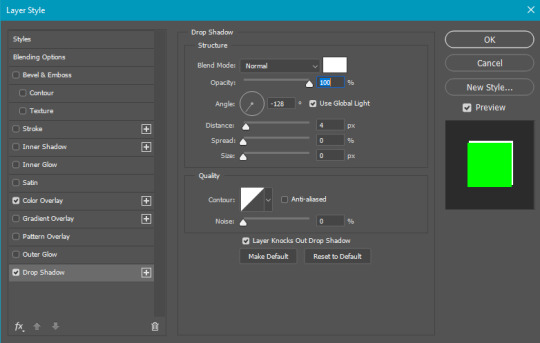
and for the angle brackets:
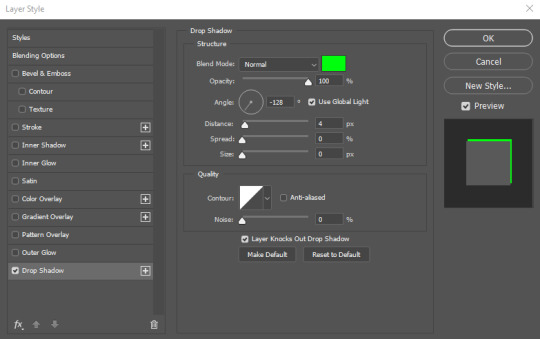
by now, you know how to utilize ctrl+T to move these layers where you'd like them. harry's name is centered horizontally and vertically and rotated at a bit of an angle and the angle brackets are centered horizontally and i just eyeballed where to put them in relation to the space between the border and the edge of the gif.
this is the complete first gif. what i would do for your own sanity since you have two more of these two create is 1) save it as a psd just in case something crashes and 2) don't convert it to a smart object until you have all 3 gifs completed and are ready to put them together.
the nice part about having the first one done is you've ultimately done the hard part. create your two other gifs, but you'll be using at least roughly the same coloring and all the same text, just with the colors adjusted, so you can drag those layers from your completed first gif to your others as you work on them.
once you have all 3 gifs completed and still on 3 separate canvases (and saved as psds bc this is adobe friggin photoshop and shit breaks all the time), convert all layers on all the gifs to smart objects. this will simplify the final gif and make things much easier.
then, bring gif #2 and gif #3 both onto gif #1's canvas. this is what it will look like at first on the timeline and in your layer panel:

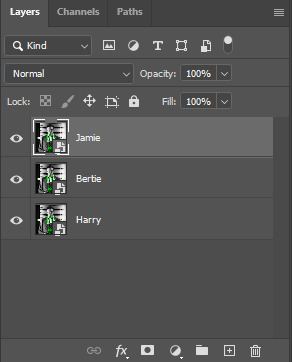
(full disclosure, i'm not making the other two lmao, i'm lazy and i already did it once in a way harder way 😂)
to get the gifs to play after one another rather than simultaneously, you just have to drag them after one another on the timeline!
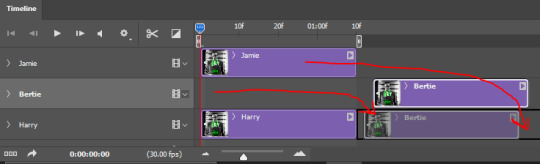
a little bit hard to show the actual process, but you're just clicking the bertie layer and dragging it down to harry's line after the harry layer. then do the same with the jamie layer, dragging it down to the harry layer after bertie. when you're done, it should look like this:
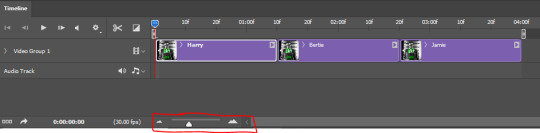
btw, the little slider i circled is what enlarges or shrinks the timeline view, so if you need to see something broken down a bit more/slower, drag it to the right. if you need to zoom out, drag it to the left.
and that's it! export and save your gif!
if you have any questions or anything is at all unclear about this, please let me know! i'm happy to help!
#answered#Anonymous#gif tutorial#my tutorials#gifmakerresource#completeresources#dailyresources#LISTEN. the way i did this 4 months ago was SO FUCKED#i made it SO SO much harder than it needed to be#you know what that is? growth.
89 notes
·
View notes
Text
can't sleep so i did this...fake pink video gaaaame
#my art#*monday#i uh. couldn't figure out how to use a 4 color palette for this. i tried i rlly did. the big portrait was too hard for me tho#so it has a couple more colors#i also DID finish drawing vilya. i'll post her l8er#keep looking at this and thinking abt that one post...whats the pink they put in pink lemonade...thats pussy babe#i need to sleep so bad plaese god
62 notes
·
View notes
Photo


I’m fine, I’m fine.
#Stranger Things#Strangerthingsedit#Stedit#Dailystrangerthings#Stancy#Stranger Things Season 4#S4#4x07#Steeb#Nance#Now for my tags:#Mine#Mine: Steeb#Mine: Stancy#Mine: Nance#Mine: Gifs#I'm NOT FINE#when I tell you I couldn't breathe#words cannot do it justice#the whumpiest Steve ever to whump and boy did I NEED it#it felt like a fanfic I wrote#or like 7 of the fanfics I've written
1K notes
·
View notes
Photo


The Dragon Prince - 4x01
#tdpedit#the dragon prince#tdp janai#general amaya#tdp gren#the dragon prince spoilers#tdp spoilers#the dragon prince 4x01#amaya x janai#femslash related stuff#goodness!#how much did the timeskip cover!#yeah I'm a bit miffed we didn't see most of their development#or the thought that they've gotten close enough to get married but janai still needs a full translator#but eh#look how pretty this is!#my gosh#the scene seemed an obvious setup for it but as soon as the framerate picked up in gif 4 I knew for sure#and I do like the little detail where even as janai is signing wrestle she's mouthing out marry#remember in s2 anon we were like I would like to see it#and s3 kinda delivered#now we're here :>
483 notes
·
View notes
Text
🐓💍🤠The LOTR Proposal🤠💍🐓
Bradley "Don't Think Just Do" Bradshaw buying a ring on his way to Jake Seresin's temporary housing, several days post-mission, (days he spent at Icemav's big house, under the loving care of one Icepops and one injured Mavdad).
After a superb 'mav-style'-mad-running, Bradley arrives at the house, breathless, and says to a confused and sleepy-looking Jake:
"There's good - and some might say VERY good- in this world, and it's worth fighting for."
*gets on one knee and offers Jake the Ring*
"I can't carry it for you, but I can carry you for the rest of our lives, if you let me."
"Marry me, My Precious?"

Bonus:
"Wow, Bradshaw, did you get me a lotr mood ring?!"
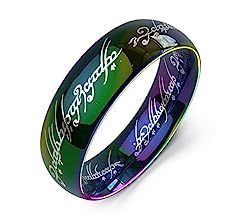
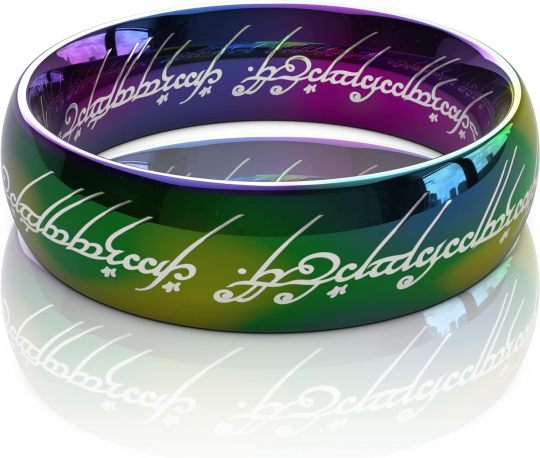
#hangster#sereshaw#hangaroo#bradley rooster bradshaw x jake hangman seresin#jake hangman seresin#bradley rooster bradshaw#1) They're exes still in love and pining extra hard.#2) Jake is a MASSIVE LOTR NERD.#3) Bradley was at first supposed to only tell Jake he still loves him but as he ran past a nerd shop where Rings were display he...#did a solid Nick Bradshaw-style - the buying of a ring completely unplanned and free-style!#*even more stylish what with the ring being a mood ring xD* *Bradley wanted the black one but was in a rush*#4) He WILL give a proper engagement ring later though... but Jake keep the LOTR mood ring with his dog tags <3#5) Oh and Jake was just having a nightmare in which he wasn't fast enough and the love of his life died in front of him...#so he's in need of Bradley cuddles...and his fiancé will provide eagerly and happily#mushy mood & lotr marathon equal this post apparently xD#for real though I need to buy a lotr ring.... :O <3#🐈red🐈furry🐈cat🐈tag🐈
68 notes
·
View notes
Text


" So then, you will comply, yes? "
#re#re4r#resident evil 4 remake#re4redit#reedit#ashley graham#leon s kennedy#leon kennedy#gamingedit#my gifs#i need a better tagging system but im lazy#ive been wanting to do this for a little while now so i did the thing#was he really expecting a yes after that monolog like yeah sure have the girl that sounds super convincing#and not at all sinister
461 notes
·
View notes
Text


Everyone likes to shit on Season 3 but did you know that Orla has the fastest flat-Earther-to-round-Earther conversion rate of any living human being
No but seriously, next to Oprah's "fuck the critics" spiel in the Season 2 premiere, this is the best jab in the entire franchise thus far
...Do anti-vaxxers in Season 4 next you fuckers, I dare you
#i need to mine episodes for the season 3 “odd squad needs you” ads actually because none of my copies have them#and when i say there are more nuggets of gold hidden in there I FUCKING MEAN IT#i love how they did this with orla too b/c it ABSOLUTELY checks out for her#season 4 better bring the REAL fuckin' shit and pull NO fuckin' punches...do your worst bbc#odd squad pbs kids#odd squad#odd squad season 3#odd squad mobile unit
39 notes
·
View notes
Text


will brett baty sign an orange?
#please look at my beloved#babygirl in training#posting this for ME and ME!!!#also did this need to be 4 gifs absolutely not#anyway#brett baty#new york mets#ny mets#*mygifs
21 notes
·
View notes
Last Seen Blogs
chimera-the-golden
Thoughtful Anarchy
acecroft
VIBES

radiumray
Untitled
michmichelamichi
ventieventitre

stars-bleed-hearts-shine
https://www.tinnitusmiracletreatments.com