#editted because my CLIPPING TOOL HATE ME
Text
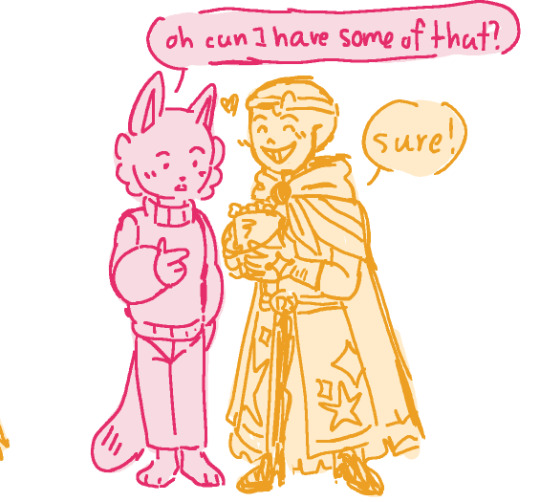
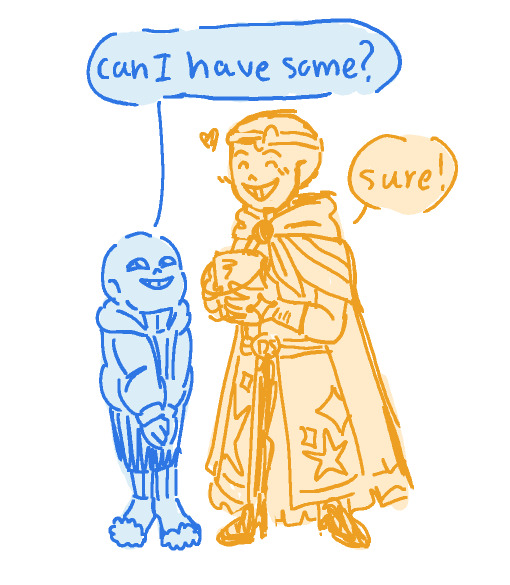
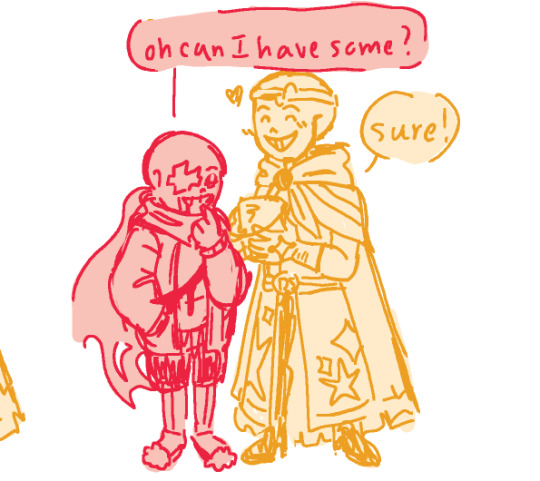
Candy-A Lesson In Atlurism
(transcript available in alt text)
(geno & error by @/loverofpiggies and dream by @/jokublog)
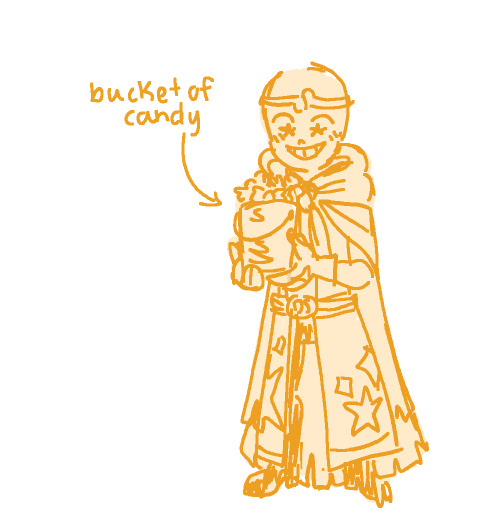
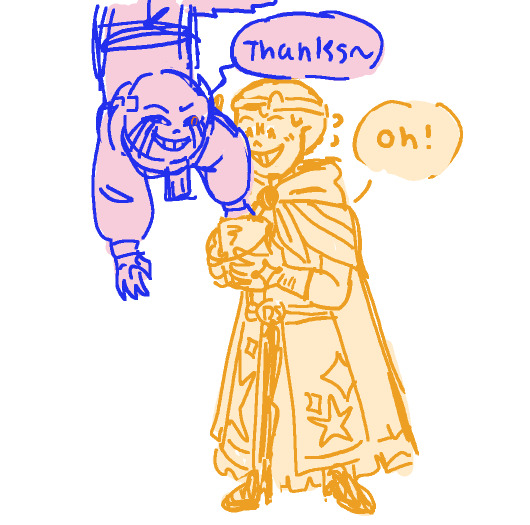
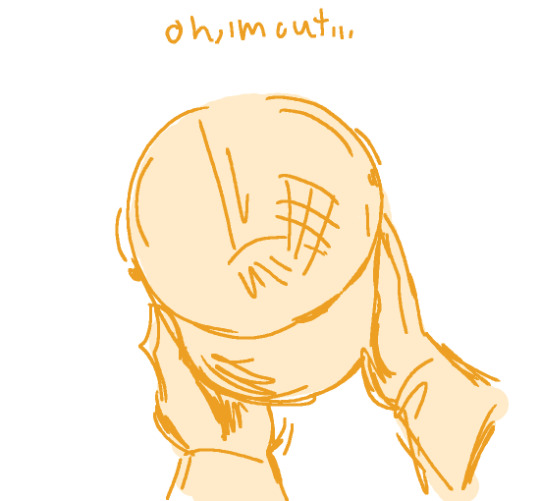
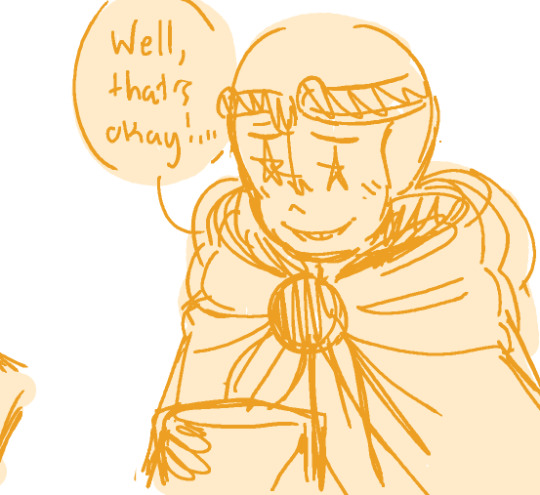
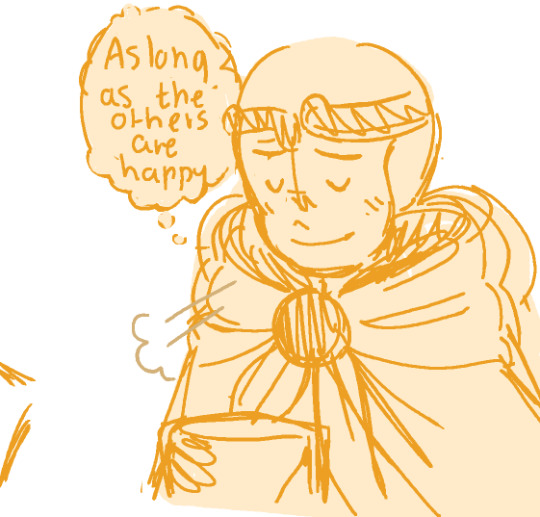
the good ending...
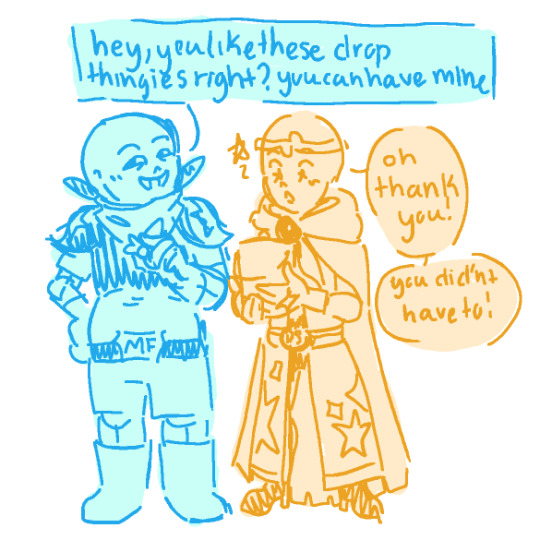
#dream sans#i read his character analysis and had to make a comic about it#the sans I used were random#i couldnt figure out who would ask politely#LMAO#swap sans#us sans#blue sans#geno sans#babybones sans#the cat is also random#error sans#dreamtale#this is also inspired from the fact dream likes sweet treats!#the candy is a metaphor#obviously#underswap#aftertale#errortale#i like drawing error being a jerk sorry#ahh fatal altruism#editted because my CLIPPING TOOL HATE ME#toffeesdoodles
207 notes
·
View notes
Note
how did you get started making music, tools-wise?
I've talked about this a bit before and I don't necessarily recommend doing this, so skip the following two paragraphs and go right to the one under the break if you actually want the method I recommend
I lied to a girl I liked from my school and told her that, because I could play guitar I could also play piano, so I could teach her to play piano. both of these statements were lies.
I had to panic and learn both guitar and piano one week ahead of the lessons I was giving her as an excuse to hang out. so I self-taught in a haze of panic and "maybe she'll like me" (she did not) (but she kind of did) (but she was bicurious) (but she was wishy-washy on if she wanted to get together and her parents didn't like me) (and her parents were homophobic) (I think she might have texted me at one point years down the line to tell me she had a girlfriend but it was after I deleted our text history and I'm chronically unable to remember to put people's names into my contacts so who knows)
but that's all an aside. that's a bad method.
anyway if you want to start making music in earnest, doing what I did when I got serious about making songs instead of trying to impress girls whose parents wanted to destroy me with their minds here's a better answer
go acquire FL Studio. it's apparently really easy to do this because people have been acquiring it for years, or so I've heard. FL is good for learning because you've got 20 years worth of free tutorials available to you on youtube to dig through and plenty of stock vsts to play with out of the box
FL Studio is, realistically, the only tool you actually need to start making music. you could get away with less, but it's what I used, and as long as you don't pick up Specific Bad Habits, your experience with it will transfer to other DAWs if you decide to switch it later
that's all, really
if you go this route, the golden rule I'm going to impart on you right now is that you need to have a limiter on your songs. the default FL studio song templates have one, so you should keep it until you know enough to know why you might adjust something like that
it doesn't matter if it sounds fine in the editor without a limiter. everyone thinks it's not a big deal at the time, but as you get more experienced, there's literally nothing short of getting in legal trouble that you'll regret more than realising that your old work is almost entirely unsalvageable because you didn't put a limiter on it and now half of the audio is just lost data to clipping
I'm gonna put a few more recommendations for things I've used, just so you can consider them if you need something else to chew on. everything past this point is entirely optional and you'll do just fine with FL Studio alone. in fact, probably don't worry about everything below the line
-=-
items marked with [F] are free.
DIGITAL AUDIO WORKSTATIONS THAT AREN'T FL
for tracker-based editing and chiptunes, use Renoise. you'll either love or hate trackers, and while they have a steeper learning curve than piano roll DAWs, they might come more naturally to you. I personally think that Renoise is a lot of fun to use. it kinda has an "addictive" quality to it, as funny as that is to say
for quickly sketching songs, use [F]Jummbox. it's an html workstation (multiplatform!) that writes your sketches to a url, meaning it's pretty easy to collaborate on musical sketches. Jummbox is good for making chiptune style instrumentals, but what makes it especially accessible is the fact that it works on a piano roll system, which will be familiar to you if you're working in FL
for writing sheet music, I recommend starting with [F]Musescore. I'll warn you right now that there aren't really any good notation editors and you're making lesser-of-evils decisions when you pick any of them, but it's probably the best compromise out there right now. it's the one I use when I need to hand something to a physical musician. you can also export pieces as midi, although there's better ways to do that lol
-
VSTs
if you can acquire Pianoteq, do that. if you feel uncomfortable with acquiring it, [F]Keyzone Classic is free and can sound pretty nice with a bit of work, but you really have to learn to work with it
if your workstation can handle it performance-wise, go pick up [F]Vital - Spectral Warping Wavetable Synth. there's tons of free presets for this out there and it sounds good. cool synth. Serum: Advanced Wavetable Synthesizer is also good and has plenty of presets, but it's on the pricy side, so consider how comfortable you are with [finding a friend to buy it for you]
[F]Decent Sampler doesn't do much out of the box, because it's just a tool for playing sample banks, but if you go to [F]Pianobook, you can find tons of weird and fun sample packs of just about everything you can imagine. sounds derived from folk instruments, industrial equipment, lego sets, stylophones, choirs, whatever. incredibly useful.
Valhalla VintageVerb. this is the reverb plugin. you want this one. [F]Valhalla Super Massive is also good but it's more focused on alien-sounding reverb effects and enormous spaces, so it's kind of got a niche use case and you should be a little careful with it
if you've heard a lo-fi hip hop song on youtube, it probably used [F]iZotope Vinyl. this one can save you a lot of time if you're going for that sound because it comes with all the little vinyl flourishes outside of compression (like dust crackling) that you'd otherwise have to add yourself
[F]Genny VST is advertised as giving a genesis/megadrive sound, but what actually makes it shine is that it's an actual synth emulating the YM2612 and SN76489 sound chips. this means you can create your own sounds that work within those specs, which is a lot of fun! definitely beats just using samples, if you ask me
-
HARSH VSTS THAT I PERSONALLY LIKE BUT WHICH ALSO MIGHT !!HURT!! YOU. SO BE VERY CAREFUL USING THESE.
[F]Tritik Krush is a bitcrushing plugin. it does a good job of bitcrushing and downsampling. I use it a lot in my songs, but you've really gotta know how to keep this one under control, because it's fully capable of making painful sounds on accident and can completely devour your mix
[F]FSA Latcher is a gorgeous noisebox. it screams in horrible ways and makes dying machine noises in various colours. this is the musical equivalent of working with radioactive material, so be extremely careful using this in anything you don't want to hurt the listener's ears
girlfriend just told me I have to recommend [F]Noise Engineering Ruina to you if I'm making a category with this heading. I don't personally use it, but she likes it (she's better at music than I am) and it's free, so you should go pick it up. "it annihilates sounds very deliciously" (maybe I should use it)
-
hope that helps a bit!
179 notes
·
View notes
Text
I hate that I don't know anything about video editing, because I desperately need a Stolitz edit to My Boy Only Breaks His Favorite Toys. Like, maybe it's the brain rot talking but I dare you to listen to that song and tell me it's not 100% Stolitz coded. Just all of it.
Edit: If anyone can tell me how to get the clips or the songs or what editing tool they use I would love to start. I just have no clue how to begin.
20 notes
·
View notes
Text
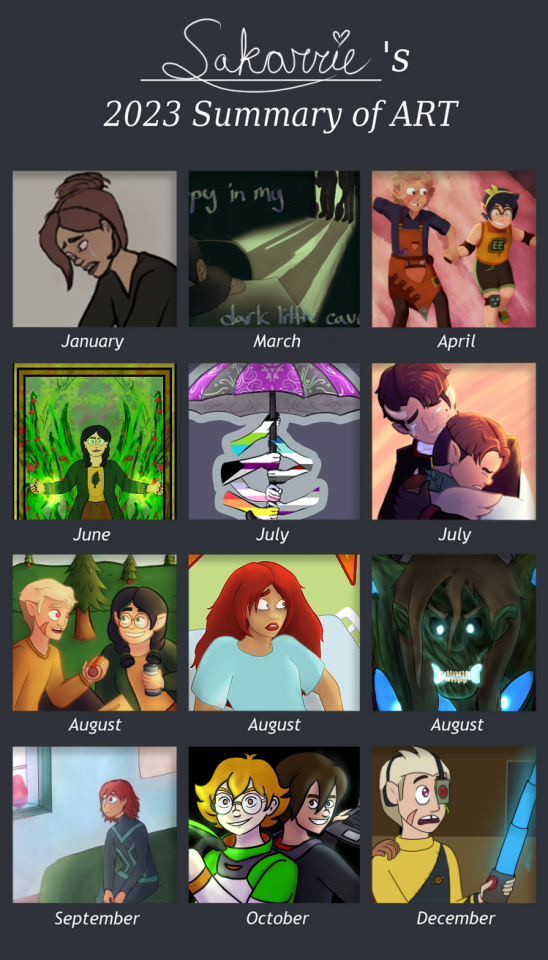
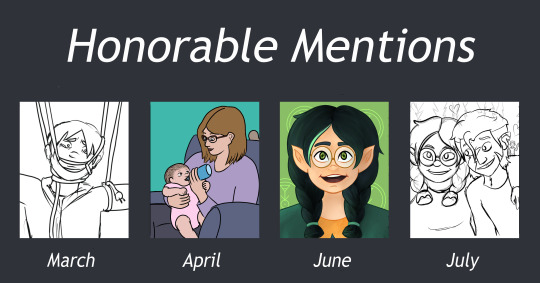
It’s that time of year! Here’s my 2023 art summary! After two years of having to include non-colored pieces, I finally did enough ‘full’ pieces to fill my art summary template! I did have to get a bit creative with the months since I was able to draw a LOT more during the summer, but I’ll take it! Sorry it's a bit blurry. I'm not sure if that's just for the preview or not, but it was a smaller file than normal and since these reflections are 99% for my own interest, I decided it wasn't worth trying to change.
As usual, I got rambly so reflection questions are answered under the cut. The template I used is available here in case anyone else wants to make their own! My fic summary will be coming in a week or so, so stay tuned for the stats and round-up there. :)
What events did you participate in (with art)?
Player Appreciation Week, Fandom Trumps Hate, Dear Fellow Traveler (Animatic), Weird People (Editing), SPN Comfortably Queer Zine (dropped), and lots of zine applications for page artist, merch artist, comic artist, and spot artist roles!
What was your biggest challenge this year?
While time, like last year, was still a challenge, I think my biggest challenge was a mix of low motivation and an intense perfectionistic mindset. At the start of the year, I got super into TOH and was super hyped about all the zines with apps opening. I really REALLY wanted to get into them and figured I should apply for art too just cause it would increase my overall chances of getting in. After the finale, I did a screenshot redraw that ended up being absolutely fantastic for where my skill level is. I went deeper into rendering than ever before, and somehow it worked for me.
That probably was the start of my unreasonably high expectations, and I got it into my head that maybe if I could make a whole portfolio of artwork at that quality level, I actually stood a chance at getting into a zine as an artist. From then on, I was hardcore crash-coursing perspective, rendering techniques, and generally trying to improve without allowing room for mistakes. While I do think it helped me grow a lot, it burnt me out so I struggled to work on stuff past summary (when all the zine apps were) and even dropped from the SPN Comfortably Queer Zine cause my imposter syndrome was so strong. (Though that was also partially because it was a ‘sign-up and you’re in’ zine, so they never saw my art during the application process and had no way of knowing if I was good enough.
What was something you were surprised by?
I’m pretty sure I discovered the perspective tool is CSP this year! CSP has so many tools I’m not aware of (despite watching tons of tutorials and guides), so it wasn’t super surprising but it was nice. I have to say, they’re a serious hassle to work with and require a higher understanding of vanishing points and such than I currently have, but I could see it being very useful for future scene art pieces.
Did you try anything new this year?
Yes! This year I kicked down the door to the merch world and have been collecting and designing throughout the year. Though the designs have mostly just been for zine app portfolio’s, everything has worked out really well for me and I hope to produce charms for my collection as I improve my skills.
Where do you think you most improved?
Definitely my confidence in rendering! And probably my rendering itself too. I did a ton more pieces with it this year and it’s definitely a favorite part of the art process for me. I think I’ll have a lot more fun with it this year too, since I’m trying to keep it lower pressure, so I can experiment more to find out what brushes and styles I like most.
What are you most proud of?
I think I’m most proud of how ambitious I was with my zine apps. Though I didn’t get into any for art and it burned me out a fair bit, I did a lot of hard work and made pieces I can be mostly happy with. As for specific pieces, I’m very proud of my animatic clip for the Dear Fellow Traveler MAP (which is what the Belos art from the summary is from). My portion was about 5 seconds with 24 fully colored and shaded frames. A few of those were moving frames too, so the end result is the closest thing to actual animation I’ve done. I also really like the rendering on the Huntlow Epilogue art and generally how the Steve&Matt hug turned out.
How’d this year compare to your 2023 goals?
I honestly couldn’t remember what my goals were, but all things considered, I didn’t do too bad! Thankfully past-Sakarrie was wise and made it a bullet list so I can just check things off.
Met:
-Player Appreciation Week
-Add to zine portfolio
-Apply to at least one zine as an artist (fine if don’t get accepted)
-Keep experimenting with backgrounds and shading
-Pull out some old WIPs
-Build more consistency of style
The checked off ones I definitely met, so good for me! This was a very zine-focused year, so I way exceeded those goals. The last two I did do, but they’re a bit subjective. Specifically, I think the ‘WIPs’ I was referring to were old sketches, but most of the old WIPs I revisited were already colored and I was either adding rendered or cleaning them up for zine usage. As for style, I’m REALLY bad at telling haha. That said, my characters seem reasonably similar when I draw them, so I’m going to tentatively count it.
Kinda:
-One fully colored piece per month
I’m gonna give myself a half check on this one. I didn’t have a fully colored piece every month, but I did have over 12 fully rendered pieces in the end, several of which had backgrounds. So while I didn’t meet the letter of the goal, I feel like I met the spirit of it.
Did Not Meet:
-Finish Huntlow comic
-30 minutes animatic digitalize rough draft
-Maybe make some fanart of my favorite fics
These don’t shock me. They’re all personal projects and this was a very external-goal-driven year for me. The Huntlow comic is a big love of mine but it’s definitely ambitious for where my skill is. I’ve got the whole thing messy-sketched and most of it has been clean sketched, but the jump from that to lineart is gonna be hard, and I have no idea what I’d be doing with color since the panels don’t have a background. That said, I do feel like it’s some solid work and I adore the angst vibe of it, so maybe I’ll get it done one day. I could also see myself posting it as a messy lineart comic so that others could enjoy the concept being executed in case it never gets finished.
As for the 30 Minutes animatic, I still 100% intend to complete it eventually. I love the way it fits to the music and I’m so proud of the thumbnails. Even if it never becomes a full animatic, I want to digitize the frames and line it up with music so I can share the concept I see in my mind with others. My brain was somewhat overtaken suddenly by TOH this year, so now that that’s settled and I’m hoping to follow my muse more this year, maybe this will be something I can get excited about again.
The fanart for favorite fics is no surprise since it’s kinda the tack on. With low motivation and projects with deadlines that needed my focus, personal art like this was buried way below other priorities. It’s a nice though for sure though.
Alrighty then, now it’s time for 2024 goals!!
Oh goodness, I really don’t know what to expect of myself. I definitely am going to try to allow for more personal projects with lower pressure, but I do still have some goals. Hopefully most can be accomplished without applying big pressure though.
2024 Goals:
-Number One Priority: Create for my and don’t put myself in a place to get crazy burnt out and still have requirements. If I meet this goal, then it’s okay if I don’t meet any of the others. (It would be sad.... But I would still count it as meeting overall goals.)
-Participate in Summergen and PAW Week (Art or Fic)
-Design Handplates charm as anniversary gift (November)
-Design CS Charm
-Have a fully usable Zine Portfolio (Currently need more merch samples and rendered pieces with backgrounds)
-Apply to new TOH Zines or other loved fandom zines. If I end up getting into any, I can pull back, but since that doesn’t seem likely, I want to get into the habit of always being ready to apply with what I have.
-Make an ongoing project list to pin to my tumblr. This applies mostly for fics, but that way people coming to my page can see what fandoms I’m actively creating for and what they can look forward to (as well as have an opening to ask questions if they’re interested).
-Post more (at least 10 times throughout the year) and add my best pieces to instagram (8+ pieces by end of year).
-Do ONE of the following:
1. 30 minutes digitized so it can be shared with music
2. Open Up Your Eyes fully thumbnail
3. Fanworks for other people’s fics
4. Participate in an extra bang or exchange with art
5. Design and manufacture a pin
-Play with different brushes and rendering styles
-Draw something from scratch every month, no matter how small
-Not exactly art, but I want to have a finalized long-term merch display plan for all my items
Overall, how’d the year go?
I think I did well! I didn’t meet all my goals and I pushed myself too far, but I learned and improved a LOT this year. All things considered, I made pieces that last year me would be blown away by, so I think that’s an automatic win. I’m pretty uncertain on how this next year will go (even more so than last year, which is surprising since I was changing schools last year), but I’m hoping to enjoy what I do and create art semi-regularly. Here’s to 2024!
#sakarrie's art#the owl house#carmen sandiego#voltron: legendary defender#non fandom#willow park#toh hunter#cs player#cs carmen#cs black sheep#cs the cleaners#belos#toh mattholomule#toh steve#tw puppets#huntlow#willow/hunter#angst#fluff#end of year#art summary#2023 summary of art
18 notes
·
View notes
Text

You guys sleep on their friendship too much 😔
Time-laspe (I tried to download the video and attach it to this post but I think it was too big and my computer is tired because it won't download. That is the link, you can watch it if you'd like too, I know I like to watch art time-laspes. It is around fifteen minutes though, I didn't know how to make it any faster so there's your warning)
(Okay so I'm just now realizing that the part of the video where I used actually colors got cut off 😐And I can't even fix it because I've already deleted the clip off my computer and emptied my recycle bin. I'm so upset now, I'm sorry 😭😭I'm not a tech savy person at all)
You don't have to read this if you don't want to, it's more of an artist's note to myself. If you want to know more of my thought process while doing this then you can read it though.
First, I just want to give credit to the base I used!
Second, I used Krita to draw and Canva to put the video together. I've never really used another drawing app/software thing before (I've used Procreate a few times on my sister's IPad but it's not like I'm going to draw anything South Park on there) so I don't really have anything to compare it too. It's free though so... how much better can you get. The only thing I don't like about it so far is that the fill tool kind of sucks but it's not too bad, you just have to go over the edges to get a solid color (at least from my experience). And I've been using Canva for a while now, I've put together a few videos before but not in a while so I was a little rusty. The only thing I don't like about that is that I have to pay for an upgrade if I want to download a long video.
I started trying to draw seriously in April and now it's July so it's been like two months (?). I haven't posted anything since May I think but I've still been drawing a lot, I just haven't finished anything worth posting up until today.
I started out drawing this thinking it was going to be bad. Then about halfway through I thought it might actually turn out alright. Then I finished it and I kind of hate it. I think it would be much better if I practiced shading and textures but I'm too lazy for that, at least for now.
I hardly know anything about art, whether it be digital or traditional. I don't know anatomy, color theory, perspective, none of it. You can see on the time-lapse that I basically traced the base I used, did the faces and clothes and then colored it and that took me ALL DAY! Granted I had breaks like when I made my lunch and ran over to my grandma's house but other than that, I've been working on this piece (along with Stan but I did most of Stan yesterday, I just colored him this morning).
I have mad respect for every single artist out there because this is so hard... but for some reason I want to keep doing it. I know it's going to be super satisfying to look back on my art work from two years ago and see how much I've improved (hopefully I've improved, please tell me I'll improved)
As you can probably tell, I didn't get everything in the time-laspe. Recording the process was so hard, I tried to do it with Stan yesterday but I barely knew what I was doing and I kept getting called by my mom to do stuff so I had to keep pausing and un-pausing so I gave up and tried again today. I think my computer is worn out by working all day because not only have I been drawing on it all day but I have also been editing the video all day. I really like when artists post time-laspes though because it gives me an idea of their process and it's really nice to watch.
But anyway, I ended up giving Jason eyeliner because one) he's metro, two) I headcanon him wearing eyeliner (same thing with Tweek) and three) he needed a little something MORE to him, if that makes sense. I orginally wasn't going to give him eyeliner because I was afraid he would look too much like Tweek but once the picture was done, I decided they wouldn't look too similar. I also gave Tweek and Jason both freckles because for Jason, it's canon and for Tweek, it's my headcanon for him. You probably can't tell that Tweek has freckles because I made them really faint (on purpose) and I like to think he'd only have a few on his cheeks and nose. I gave Jason a lot though because I'm pretty sure that's how it is in the show. Lastly I forgot to color Jason's shirt in so that's everything that's not on the video.
I think the hardest thing for me was the eyes and the clothes. I have a love-hate relationship drawing eyes. I love looking at how different people draw their eyes but when it comes to drawing my own eyes... yikes 😬Also I think it's the facial proportions that might make this seem off, I think I have a bad habit of making the eyes too big but that's what I've been doing ever since I was a little kid so now if I make the eyes small, it just looks off. And again, I didn't do anything shading so it probably makes the picture look flat. Plus I have no idea what I'm doing.
I also usually have a hard time drawing hair but today I had a pretty easy time doing it. I was really surprised. Also another headcanon of mine for Tweek is that he has platinum blonde hair. I love platinum blonde hair and just blonde hair in general and his hair is SO YELLOW, I feel like if he was older than he'd dye it. Also they are both teens in this picture.
Tweek looks really pasty here, I tried to give him pale skin but I didn't mean for it to be THAT pale.
I think that's all I have to say. If you read this and have any tips for me, I'd love to hear them. I'd love to redraw this in a few months or maybe in a year if I decide to keep drawing, I know there's defiently room for improvement.
Despite all the complaining I just did, I don't HATE this picture per say. I really like my art style, it's simple but cute (imo of course). I feel like if I learned more about shading and learn how to draw faces and clothes better than I'd do a lot better. I think Stan was a lot cuter but this is cute too.
Lastly, ignore the two random dots if you find them, I'm too tired to fix this.
Anyway, if you read all of this, I really appreciate you! Have a great day/night! ❤️❤️
#south park#south park fanart#tweek tweak#jason white#sp tweek#sp jason#sp twason#twason#tweek x jason#jason x tweek#this can be seen as platonic or romantic#metro tweek#metro jason#south park is gay#south park metrosexual#my art
7 notes
·
View notes
Text
I am a converted football fan
And no, it's not just because my queen Tay Tay
is dating a football player.
Last week I went down the binge hole of the new Netflix documentary on David Beckham and lemme tell ya - I finally get the hype around football!! Or at the hype least around Beckham's football career. I was hooked beginning to end! And Victoria - oh Victoria, what a sound sound woman. Mind you, I knew NOTHING about any of this and seeing the events play out was as engaging as any other documentary. Is England gonna win the World Cup? Maybe, hope so, oh my god, what the hell, no, you're kidding, poor Beckham! The Taylor Swift parallel wasn't for nothing - that man's reputation was dragged through the mud almost as much as she dragged herself in "Out of the woods" music video. And just like her, he found his way back to the top. Soap opera gold.
The drama was unreal yes, but the only reason I was glued to the screen beginning to end was because of the way the drama was paced and pieced together. Michael Harte you unlocked a new girl crush! The man edited the series with so much heart, humour and urgency I was beginning to question if I fell victim to a propaganda tool (especially given the series was produced by Beckham's production company). There are many, and I mean many things he did right, but I'll try to condense it into top 5 for the purposes of this blog:
I'm not the biggest fan of talking heads docs, but in Beckham, the interviews communicate much more than the information the subject is willing to share. Harte almost cuts around that and favours the moments before the interview begins, or when the subject has said something that doesn't make them look that well on camera (the infamous Rolls Royce clip) and he never shies away from including the director in the scene. He sets up the character and the atmosphere the director has created long before they open up to us. Documentary gold!
The reason England could have won the World Cup match for all I knew is because of the way Harte builds tension across interviews. He doesn't hint and reveals only as much as we need for the story to progress. And once we've bitten all the nails there are to bite he'll hit us with the hard realisation. Even if you know the history, it feels like Harte is able to rewrite it with the following cut.
Violence, hateful slurs and all around toxic masculinity are the things I always associated with football and therefore, kept my distance. Having watched this documentary I realise it's the things that happen outside the pitch rather than the things on the pitch that define football. This series beautifully builds the friendship and solidarity between players, the way they care and protect each other. Surprisingly, it's a wonderful portrayal of positive masculinity and sets up a great example for the boys.
It's hard to see David as anything more than a pretty face off pitch. The documentary even addresses the fact he is very awkward when giving interviews and most of the time just smiles. The interview sessions take place in his home and the few observational moments paint a much bigger picture of the star that is David Beckham. For one, the man for sure has OCD - I mean have you seen his wardrobe layout for the week? And let's not forget his singular grilled mushroom! But perhaps the most important of them all - his relationship with Victoria and how much joy and love the pair shares after all these turbulent years. Which brings me to my final point...
Victoria. Again, knew nothing about the woman except her Posh Spice years and the fashion reinvention. And those speak for themselves because immediately she is a woman who is not defined in relation to her husband - she had a career long before and long after him. And in between, she had 3 children! And he did not attend a single one of those childbirths. What struck me the most about this series was the space that was carved out for the experience of being married biggest sports star in the world who lived from a match to match, photoshoot to photoshoot, country to country and the sacrifices he didn't have to make for his family. All the while she was being ridiculed for the weight she gained whilst bearing a child or being unhappy for having to move her entire life to a country where she didn't even speak the language. Michael Harte, you are a proud feminist - I see you!
So naturally, after having finished the series I searched the man on IMDb to see what else he has done and if there is a clear style in there somewhere. As a follow up I opted for Still: A Michael J. Fox movie and guess what - I just proved my own thesis. The man is a feminist. Not only does this film have one of the most creative and original approaches I have seen in recent TV documentaries (Harte went through Fox's entire filmography and constructed the narrative around the voiceover from his audiobooks accompanied by sequences from his movies that depict what's being said), but is just as aware of its responsibility to balance out the protagonist's personal life and overnight success. In a sense, what both Beckham and Michael J. Fox have in common is that their life's success is as much defined by their career as it is by their commitment to their family. Something which often gets overlooked when filmmakers endeavour to make portraits of these larger than life icons. To conclude, imma let my girl Keira have the mic:
5 notes
·
View notes
Note
Heya thank you so much for the art advice earlier! I was wondering if you had any specific suggestions for programs and/or brushes (you know specifically for someone whose only fine art experience has been in pencil and charcoal 😭) .
I’m currently using iArtbook because it’s free. I know Procreate is probably the most popular program but I’m literally -$300+ in my bank account right now, so that isn’t a current option 😅.
However I do believe you can upload brushes to the iArtBook app, honestly I’m not sure, I haven’t tried but you can edit the brushes in a very similar fashion to Adobe Photoshop. So I’m assuming you can also download and upload brushes. I actually really like this program because it has a similar feel to Adobe programs and as a Photographer I’m very experienced with Adobe (I have an Adobe Cloud Account).
In all honesty I’ve never been a good illustrator (since my main focus in my fine arts education was always photography) , but I find the activity meditative and I’m ALWAYS looking to improve.
(Also I was gonna DM you but cant so sorry for the long question 😅)
Yo, it's all good. No apology necessary.
I can only suggest what I know. I've never used Procreate, and I've never even heard of iArtbook. I'm also one of those that absolutely will torrent my art program of choice. And have.
A long, long time ago (like probably thirteen years), I got a copy of Corel (Coral? Idek anymore) free with the purchase of my Wacom bamboo tablet. I didn't know what I was doing yet and I hated it. My laptop hated it. It was very heavy and lagged big time.
I switch to Gimp, which is legally free and open source. I used Gimp for years with zero problems. You can import a lot of Photoshop brushes into Gimp without issue. Compared to Photoshop and Paint Studio, it's incredibly underpowered. Looking back at the art I made, however, I was not poorly off.
From Gimp, wanting more, I then switched to Photoshop CS5. It was incredibly easy to find and install. Personally, I say screw Adobe, since their current model is subscription based. I hate that. I used PS for yearsssssss, up until last year, I believe. It wasn't too heavy for my laptop to handle unless I used too big of a brush. It allowed me to expand my knowledge of digital art programs. It has way more to offer than I'll ever use. But as i mentioned before, the natural art brushes are ... okay, and the blending tool is awful. I learned to NOT ever use the blending tool because of PS.
Throughout time in my PS years, I switched from a Wacom Bamboo tablet to a Huion pen tablet (three different ones) to a Huion Kamvas 16 Pro tablet. With my family's help, I put money towards improving my art by way of hardware, and each tablet became significantly better. A good tablet will help TREMENDOUSLY, but by no means does anyone *need* to splurge on a screen tablet like the Kamvas series. I recommend Huion. It's hard to go wrong with them. In case that ever tickles your fancy.
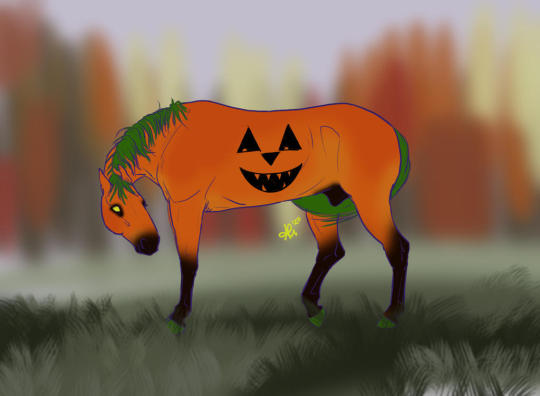
Like, I'm pulling examples of art I've done with these programs and tablets, specifically unshaded pieces, to show that the software and hardware doesn't necessarily make the piece.
Now, I'm using Clip Studio Paint because it comes with so many native traditional brushes. Again, the company switched or threatened to switch to a subscription pay, so I have no qualms in resorting to circumventing their purchase page.
I will say, I think I love Clip Studio more than I ever did Photoshop. The brushes are just ... perfect.
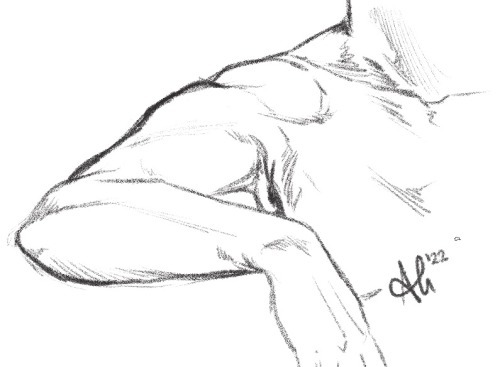
Like this. This isn't pencil and paper! It's the pencil brush that comes with Clip Studio. It draws JUST like a pencil and I feel like I'm in my natural element when I get to use it.
If you do decide to use PS, or a program that is PS brush compatible, I'll have to find that set of brushes that works similarly to these.
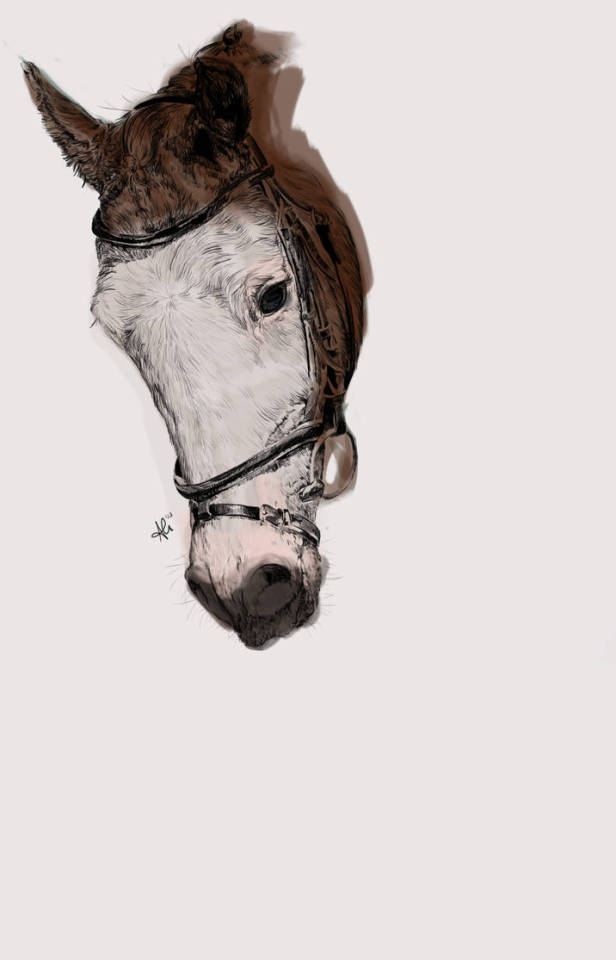
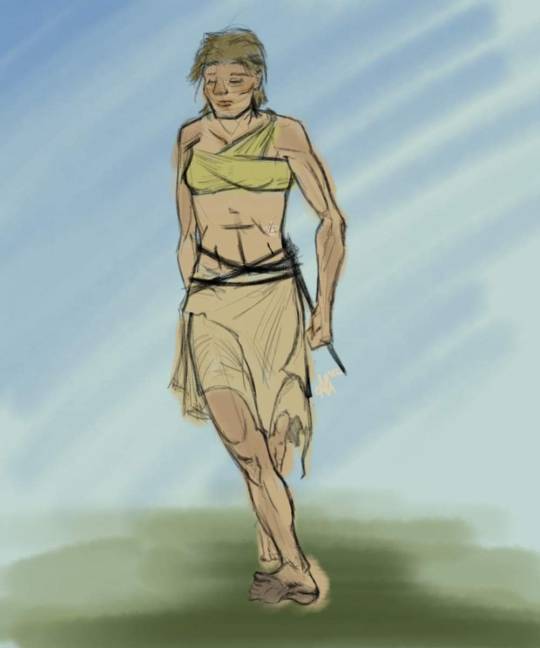
These pictures both used one of the pencil brushes from that set in PS. The horse was painted with a watercolor wash brush; the human with a chalk brush. It's nowhere near as versatile as what can be used in Clip, though.
But I'm sure you could find many brushes through dA and gumroad to use until you find the one that works for you, too!
4 notes
·
View notes
Note
do you have any other writing advice 🥺 i need to work on a fic that i keep putting off, and everytime i sit down to write i get distracted and can't manage more than a sentence or two 😭 what works for you? ~🩷
Well, i have adhd, so i tend to make it difficult to focus on other things. I think ab the fic so much that i just gotta write it down.
A good way ive found this is headphones and blasted music. It blocks everything else out and helps me a lot. Also, the right songs have impact on the fic!
I turn lights low as well! Its why i write better at night! I have total focus on my screen bcs its the only light source!
Also, make sure you take care of all your body's needs before you sit down! That reduces interruptions and makes it easy to stay in the zone!
A good thing is motivating yourself to write by saying that if you don't write, you'd better be doing something you absolutely hate to do. For me, that is chores.
Or the alternate. If you can't focus, go for a walk! Do something else for a bit. Then come back and refocus.
I alternate between both of those!
I also tend to make sure I'm not forcing a fic to be written, which is why it takes me so long. But it also means i have plenty of time to catch any errors in my work before the final edits come into play.
If you can't write, edit what you have written.
Always go back over what you've written previously so you can keep continuity!
In general its as simple as working around the procrastination habits.
Using a new tool can help! I mean ive been incredibly productive the past three days haha!
If something isn't working in a story or you can't figure it out. Jump around. Ask for help. Ask for other's thoughts.
If you're demotivated, share w other friends your favorite clips!
Generally i like to build community as im writing so i keep the motivation and momentum!
Its part of why i actually do work on fics others talk ab w me. Because it gives me motivation to see another person go 'omg I can't wait for this!'
In the end, writing tips can be useful or useless. Pick which work for you, leave what doesn't!
Your individual needs change too!
If its a style thing keeping you from writing. Change the style then!
Do what helps! I hope these tips do help!
0 notes
Text
YCGMA review
OK, so ages ago I am said I was going to review your city gave me asthma. Um, so I might do that now. Using the Dictation tool in Microsoft Word. Coming back to write this start at the end, now I'm just going to say I really hate that this program censors swear words. Like, literally Why? If I say swear words, it's because I want to write swear words. What the ****?
I haven't done too much editing on this, so if it's kind of weird and kind of very obviously spoken word, that's probably why. I am just prioritizing my hands today.
So the first song in the album is Jubilee line. And I really like it. I really like the clip of like, idk, regular life audio. It was really cool when I went to the train, took the railway in London. And got to experience it for myself. My favorite lyric from that song is probably “Shout at the wall. ‘cause the walls don’t fucking love you.” I do have this song in some playlists, but it's not one of my favorites. It's totally fine.
The next song is Saline solution. I really liked this song for singing about painkillers personally, as someone who has to rely on painkillers a lot. I really like the language in the song. Uh, it's funny. It's, um, poetic in a funny way. Elixir and melodramatic and pragmatic. Yeah, it's just greatly enjoyable. This is one of my favorite songs from the album.
The next song is Since I Saw Vienna. I don't listen to this much anymore. But I can't play this on guitar. Uh. It was the first song I learned with like picking or however you say that technique like instead of playing chords. And uh, it's uh yeah, it's not bad. But it's a lot more allo than I'm personally a fan of. I will admit it is genuinely really fun to play on a guitar.
The next song in the album is Losing Face. Basically, it's about, well, losing face. This one's really high energy, which like, really like. It's good for when you're in the bad place. And as generally losing face implies, it's that it really expresses that feeling of being completely out of control. And like you, you just have to be honest because yeah, you can't anymore. And to quote the song, it's like. “Well, I don't know what to do.” And yeah, it's, um, losing hope. And just like. What? What is even why? And I guess in the actual song it's about specific situation. Uh, so that's a thing. I don't really care as much about the specific situation.
The next song is Your sister was Right. I think it's generally about like this feeling that you're like a bad person. And I don't know if that's a feeling that's very good to entertain for too long. The problem with identifying yourself as a bad person who does bad things is, it may hinder you from making improvements in how you act. It depends a bit, but I think this is one can easily be destructive. It can also be nice when you feel like you can't admit your mistakes. And to just like. Yeah, get out of your head with a different opinion. Um, I don't know.
And then there is La Jolla. So this song is one of the reasons you should listen to this album as a whole. Rather than individual songs. Because it uh.I don't want to spoil too much, but this hints at a later song. I think you could definitely argue that this song is about like depression or like chronic bad mood, but those are basically the same. Technically, depression often doesn't have a cause. I believe. This album is, as earlier stated, kind of about hating London. And at least from what Wilbur has said himself it's about Hypochondria or like health anxiety. Oh, but yeah. Anyway, back to the song, it mentions self-hate, which is like I assume that it's common, but maybe not. Hopefully not. But yeah, I'm glad it does, we need to talk about the bad stuff sometimes.
And next up is one of my favorite songs and I also I would really recommend it because it doesn't have any romance. It is. I'm sorry, Boris. It is a political song. Uh, so this is obviously about yeah, it's about Boris Johnson, which also implicates the Tory Party in the UK. It basically talks about how the politics are so bad, and they're going to ruin all the favorite things, all the nice things the government does for the people. I have also tried this on guitar, I don't remember if I managed to learn it. Uh, but yes, I mentioned uh, this is um, the song that. Uh. Continues on one of the previous songs. I've forgotten which right now, but yeah, you can read the last paragraph I think this is so such a nice song to listen to, honestly. Uh, Wilbur says. This is just an artist I really like. I I love the way he sings, the way he makes the general musical picture. Uh, I think the instruments are always great and the melodies, it's some of my favorite music honestly.
I don't listen to this of us much anymore. But I do really like it, and I really did like it when I used to listen to it a lot more. I might start listening to it again, I'm not sure.
0 notes
Text
I haven’t been able to stop thinking about these watercolor supplies I’ve been eyeing since June. Like every week I’ll open the website and just stare at them and recheck their price and rewatch these watercolor tutorials and just.....think about 100% cold-pressed cotton sheets and....
I just really miss traditional mediums. I haven’t sketched in a while because of more work coming in which is also good but I do miss it now.
I’ve been thinking a lot about the Painting classes we had in uni as well and ugh i’d love to just have that much time and all my supplies again.
#oh othila#i....gave my supplies away at my office before i moved here in mid-2016#because i couldn't pay for extra space in my luggage and i was already exceeding weight limit#anyway.....i don't even have half as many supplies as i used to#and now i constantly miss just being able to start a little thing on a whim#i'm absolutely loving clip studio tho#and i'm trying newer digital tools in vector illustrations for my work as well#so it's all been progress#which is why i'm not entirely hating this year#it's been a good year so far#EDIT: I reread this post and i can no longer tell if i want to buy the supplies and use them or buy them and make love#to the 100% cold-pressed cotton sheets#....and that my friends is exactly why the universe doesn't allow me nice things
0 notes
Text
Surprise! (Sapnap x Reader)
Request: “Sapnap X Reader where he surprises the reader while she’s streaming”
Words: 1.5k
“Hello chat how are your days going? Good, bad? Finals!? Oh my gosh I hate finals dude I’m so sorry f to pay respects,” you paused to stretch and adjust your headset as you had just started your stream. “I’m kinda just bored today chat so what should we do? Mods can you all run a poll or something?” You glanced at your discord and saw messages from Sap.
“Hey angel!”
“Oh you’re streaming!”
“You look cute on stream”
You rolled your eyes but chat caught you blushing and saw that Sapnap was viewing the stream, and immediately lost it. They’d been shipping the two of you for months, but little did they know you guys had been dating for three months, since you met up in person for the first time. It hadn’t felt like the right time to announce to the world and you’d wanted to establish your relationship privately before telling the fans, but that didn’t mean you’d had a couple slip ups leading the fans to theorize.
This included you calling Sapnap various forms of babe, bubs, Nick, love etc. Same went for Sap who gets teased for endlessly rushing to your defense on the SMP and responding casually when you call him a pet name, almost like he does it all the time... yeah, chat was on to the two of you.
“Shut up guys and tell me what we’re doing today! We could go grind netherite tools and chill? How does that sound?” the SMP always got a resounding yes, and just like that you were off, the SMP had won the poll anyways.
You messaged Sap in discord, “wanna call for the stream?” and quickly he was on the call with you.
“Hello Mr. Sapitus Napitus, how’s your day going on this fine Friday?” you laughed as you ran through the nether, having just collected enough wool and planks to make beds. “It’s going, I was bored as heck so I wound up here, what about you?” You knew the longer end to that story, his family was out and he thought editing would take longer but now he was stuck at home. “Same same, I’m chillin and got bored after scrolling on Tiktok for like two hours so now I’m here!” You moved on, blowing up the nether hunting for netherite scrap while talking with chat.
A familiar notification went off, “water check from, um ,GogySupremacy420,000, oh my god what a username. Alright everyone drink some water! This is good I haven’t drank water since like breakfast.” you heard Sap pipe up, “you’ve eaten since breakfast right?” you rolled your eyes, “nope I’ll eat after stream don’t worry Simpnap” tacking on the nickname earned a scoff from the simp himself. “Not a simp,” he answered, giving you a punch in the game making you hit him back. After a mini fight ending in you threatening to place a bed and effectively kill the both of you, you were back to mining.
“Hey I’ve gotta go drive and grab something want me to stay on call though?” your head whipped to discord to look for another message, knowing Sap didn’t have anywhere to be tonight. But there was nothing. “Oh I don’t mind, chat and I enjoy your company!” you said with a grin. You’d made it to enchanting now, having found all the netherite you needed.
As you sat on the spider spawner you heard Sap get in the car, the familiar beep of him unlocking his car and the revving of the engine making you laugh, “you’re car is literally so old I’m surprised it starts,” you heard Sapnap scoff, “old?! don’t you dare speak to her like that, she’s beautiful,” you rolled your eyes, Callahan who must’ve been on your stream quickly piped up in the game chat “Y/n is jealousss!” now it was your turn to be offended, “you think I’d be jealous of a bucket of rusty bolts and oil? No chance,” you laughed, checking chat as they were spamming JealousChamp. “Whatever you say ba- Y/n,” Sapnap played it off with a cough and you quickly changed the subject to how much XP you would need for all your tools.
“Hey I’ve gotta go on deafen real quick be back soon!” Sap’s voice flooded your mic, he must’ve brough the mic close to his mouth because his smooth and deep voice curled around the mic perfectly, sending shivers down your spine as his warm tone filled your headphones. “B-bye” you choked out, pretending to adjust your headset as you continued killing mobs. “So chat, got any questions to pass this alone time?” you watched the chat speed up, hoping your mods would filter out poor questions. “Favorite. color? Easy who knows? Yup! You guys know me too well. Ooh favorite fast food place? This is hard cuz I don’t wanna say something you all don’t know but I can tell you guys my McDonalds order because it’s immaculate. Do I know Sapnap’s order? This is a good test you guys, I’m pretty sure it’s like an ungodly amount of spicy McChickens and a Dr. Pepper but I swear he changes it like every day.” you laughed, reading out other people’s orders then moved to debating if the icecream machine is actually broken or if the workers are just lazy. They’re lazy, confirmed by workers in chat apparently.
“I’m back but I have to go in like five minutes, did you miss me?” Sap’s voice flooded your headphones again. As you adjusted his volume you teased, “hmm nope!” to which he began pouting making you laugh at his “baby rage”. Just as you were finishing with enchants on your axe he had to go. “Don’t miss me too much I’ll talk to you later, chat behave yourself I know you all will miss me but just leave y/n open in a muted tab,” he teased making you roll your eyes, “whatever we’re gonna have a super secret conversation after you’re gone about how we only let you on the stream out of pity right chat?” you couldn’t stop smiling and laughing through the teasing. “Okay okay, I actually gotta go, see you soon,” you bid Sapnap farewell and returned to joking with chat, turning on media share to pass some time as you reacted to animatics, hilarious compilations, and the occasional y/n x sapnap video making chat light up as you laughed through the videos.
As you watched the videos and killed cave spiders you got a text from Sapnap.
You still streaming?
Yup! Where’d you end up going? you replied.
Open your door and find out
Your breath hitched. “One- one minute chat,” you pulled your headset off and heard a small rustling in your hallway. As soon as you tabbed out of the game you stood up, rushing off camera to fling your door open and,
There he was. His smile was infectious and you couldn’t help yourself from screaming and running into his open arms. As he held you, rocking back and forth, you heard him mumbled. “I missed you” Into your ear while you clung to him. “I missed you more,” you whispered back, Finally, you released him enough to peck his lips, unable to wipe the grin from your face. “I got food cuz you said you didn’t eat and I figured if I had time I wanted to spend it with you!” your heart practically melted, taking a bag of food in one hand and holding Sapnap’s hand with your other you realized you forgot to mute or end stream.
“Um, so I’m still streaming... what do we do?” you glanced up nervously but Sapnap just started laughing, “oh my god I guess I can say hi so chat doesn’t lose it’s mind,” you swallowed nervously, glancing down at your phone you had been tagged in endless clips of you running off camera then screaming about 15 seconds later. “Yeah better give them an answer,” you giggled.
Rushing back to your setup you saw chat blowing up as you put your headset back on. “Heyyy guys! So yeah, um I guess I can just show you that, we have a special guest!” You gestured to Sapnap to come into frame, pulling up a chair as he sat down next to you. “Yeah I gave y/n a visit cuz I was bored. Hi chat, hello, hello! You guys are going really fast dang,” Sapnap gripped your hand under the table, you squeezed back, leaning into his embrace. “So um, I think Sap and I are gonna hangout, right?” you glanced at him and he nodded, he really hadn’t stopped smiling since he got to your place. “Yup! Maybe if there’s time we’ll go live again I’m not sure! Kinda spur of the moment yeah?” you finished your thought. Saying goodbye to chat you ended stream just a few minutes later.
“We’ve really gotta tell people soon, I wanna be able to hold your hand on camera not just off,” Sapnap said between bites of food. “Yeah, I think it’ll be okay right?” You had always been nervous about stans hating you or people trying to get in between your relationship. “As long as I’ve got you I’m more than fine, I’m- I don’t know I guess I’m pogchamp,” you shook your head, “god you are such a dork,” Sapnap scrunched his nose with a laugh, “I’m your dork though so I’m so special!” and you couldn’t agree more. <3
#sapnap#sapnap x reader#dream team x reader#dream team fanfic#sapnap fanfic#mcyter fanfic#dteam fanfic#sapnap cute#sapnap x you#dream x reader#georgenotfound x reader
460 notes
·
View notes
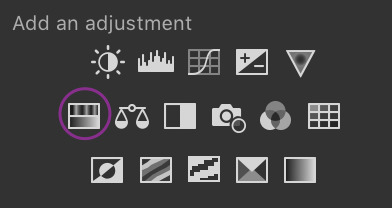
Photo
GIFFING 101 - YOUR ULTIMATE GUIDE ON HOW TO GIF
I have gotten many, many asks before about how I gif and I finally decided to make a tutorial. This is going to be very long, very image heavy and with a lot of details and examples. I mean it, I’m going through every, single aspect of giffing that I can possibly think of. From start to finish. And please read the disclaimer at the very start.
* I use a macbook pro but this should probably work on windows too!
I hate doing this but if this helped and you want to, please consider donating to my ko-fi or if you want, commission a theme or page from me at @amaanat <3
tutorial under cut, I hope it helps!
★★★★★
- CONTENTS
disclaimer
what will you need to create gifs?
how to download videos?
extracting your scene from handbrake using VLC / built in video player
opening in photoshop
trimming, cropping and resizing videos
sharpening
colouring and psds
masks
adding subtitles
editing frames / timeline speed
multiple gifs in one grid.
actions
exporting the gif
last minute tips and extra links.
★★★★★
- DISCLAIMER
First off, this is not meant as a post where I am saying look here, this is the only and perfect way of giffing. Not at all. When I started out, there were many tutorials available that helped me figure out how to gif, and I slowly developed my own style and I would like to create an in depth tutorial that helps you grasp the basics. Heck, make your gifs whatever way you want, go absolutely crazy on colours or whatever, this tutorial is just here to guide you through the process of gifmaking, because I know it can be very intimidating to people who are just getting into it. That is why I made this and why I spent 8 hours writing this, because I want others to know too and this is the kind of in depth tutorial I needed when I was starting out 4 years ago. Thanks for reading, hope it helps and go crazy ahhh go stupid.
★★★★★
- what will you need to create gifs?
photoshop. I use photoshop CC 2020 on a mac and I pay monthly bc of student discount. There are many, many links you can find on @completeresources for downloads. You can use any photoshop you like, as long as you have the timeline option.
Handbrake. This nifty program is used mostly to convert MKV files to MP4, but I also use it to quickly extract the part of the video I want, because opening an entire movie in photoshop can quickly clog up space bc of cache and it’s a pain to find that one second scene you want with that tiny scrollbar. Download it from here.
your video (downloading explained down below)
extras: VLC, just to find how many seconds the scene is at, so we can input the time in Handbrake. You can use any other player though for that step, I use VLC or Quicktime. Download VLC from here.
★★★★★
- how to download videos
Ok so I will quickly go through a few methods here for getting your clips.
1. t*rrenting.
This is the most popular method for getting your film or tv episode. I personally get my t/rrents from rarbg dot to or if I am having trouble finding one, I go to 1337x dot to, because they compile them from different sites. I copy the magnet link and go to the qbittorrent application, import magnet link, choose the files I want and it downloads. Remember, the higher the seeder leecher ratio, the quicker it will download.
But which file should I choose?? there’s so many? Well yes there are many many files for different movies. On RAR, I found more than 40 t/rrent files for Endgame. I think that generally, the 4/5 GB 1080p copies are just fine. I have compared giffing with a 60GB Interstellar Remux (which is directly ripped from bluray) file to giffing from a 4GB 1080 file, it literally gave me the same quality and the 1080 looked crisper. So yeah don’t kill your computers space, just go for those 3/4/5GB files.
hot tip - don’t download from yify, the quality is way worse.
2. movies from twitter accounts such as logolessHD.
these accounts post MEGA links to movies and shows, but you will have to request to follow them to be able to get the links. Then you can download the movie from there. The accounts you can get these links from are here: 1 - 2 - 3 - 4. The quality can be a bit less though compared to t/rrents. Here is a link to a tumblr blog with these kinds of downloads too.
3. downloading from youtube.
ok, use 4kvideodownloader for this. It is incredibly easy to use, you just need the youtube link. Always Always go for 1080p, if you can’t then 720 at the most because otherwise quality gets really bad really fast.
4. netflix / screenrecording
If you don’t want to download / can’t find something, try using netflix and screen recording. In my experience, SC only works on google chrome and not safari so jsyk!! Here is a tutorial on how to screen record on mac (or for quick access, click command+shift+5) and windows.
NOTE: quicktime screen records at 60fps, which is nearly thrice the frame rate of movies and shows, so at the end you may end up with duplicate frames in the timeline of photoshop, so you will have to delete those frames one by one sorry.
★★★★★
- extracting your scene from handbrake using VLC / built in video player
muahaha here’s where the magic starts to happen. Open handbrake and import your video. For this part I am going to use a scene of Keanu Reeves from the 2019 movie Always be my Maybe. I will demonstrate with that scene up until colouring, because then I will show how I colour different scenes!
So when you have opened the image in HB, you get this layout. (link to imgur)
it is a bit intimidating, I know. So basically, first, click on where it says chapters near the top right and click seconds. then, input the time you want to extract from the entire video. For the Keanu scene, that scene starts at 00:57:18 and ends at 00:57:21. These are not exact timings, I usually add an extra second so the entire scene is captured and I heavily recommend you do the same.

Now down below, you can click browse and edit where your new video will be saved and you can also change the name of the new clip. Always ALWAYS remember to keep the .mp4 ending do not cut that part out!!! If the ending says .m4v change it to mp4!!

Ok then I undertake the following steps to ensure the video that will be exported is of the highest quality possible:
Firstly, I uncheck all these three boxes:

Then you see this bar here right? Well I will edit the dimensions, filters and video now. You don’t have to do anything for audio, subtitles or chapters so leaving that alone is best. Lets go to dimensions first.

Here are my settings for dimensions:
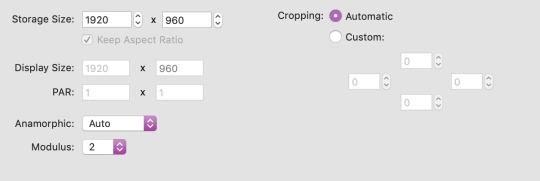
The storage size depends on if your file is 1080p or 720p. Most movies are shot in a ratio of 2.35:1, so if it does not say 1920x1080 like a 1080 file should be, don’t fret. The cut off parts are just the black bars you see when watching the movie. Handbrake doesn’t recognise nor convert them so that’s one less thing we have to worry about.
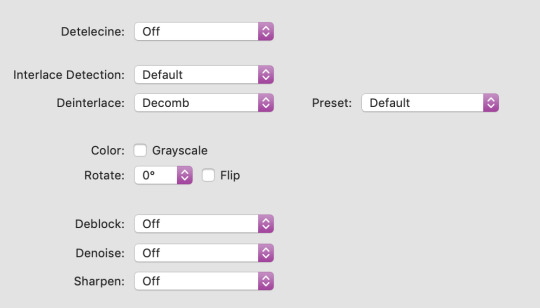
Now onto filters. Literally do NOT change anything there. Leave the settings as they are, which is like this:
Finally, go to video. You will see this kind of window and these are my settings (imgur)
Firstly, leave video encoder at H264 or 265 depending on how your video is encoded. For the FPS, choose same as source for the framerate and click constant instead of variable!!! This will ensure your video is smooth. For quality, bring the slider all the way to the right. RF0 means it will be at the best quality possible. I didn’t edit the settings at the bottom at all so just leave them be.
Now click this green icon (imgur) at the top and your video will start encoding! It does not take long at all and then your video is ready to made into a nice lil gif!
★★★★★
- opening in photoshop
woohooo we got our video!! Ok now open photoshop. Click on file -> open:
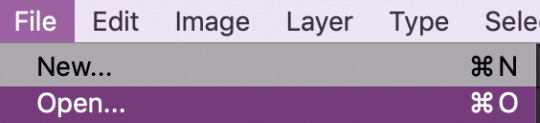
now search for the file you extracted from VLC and import it! Now your screen will look like this (imgur). With a different video, of course lol.
★★★★★
- trimming, cropping and resizing videos
ok so firstly, we will trim the video. As you can see in the image I linked in the step before, the screencap you see is of someone else in ABMM, not Keanu, like I want. So use this slider:
and click and drag it to where your scene begins and shows up in the window. Then, click the following button to split at playhead.

This will split the clip and so the timeline and layers section will look like this (imgur) (mine has three sections because there was space before and after the keanu scene so I cut two parts which made three clips)
so now all there is left in trimming is delete the layers of the video you do not need! For me in that image it was layer 1 and 3!
cropping and resizing
This depends on the kind of gifset you want to make. This picture is a handy guide for resizing:

This post is also very very useful for resizing info
Ok now I will crop my gif. Click on this tool:

and now my interface looks like this. I am using the ratio 6 by 4 but you can use whatever you want.

Ok now you may need to crop some black bars but since I don’t have to, I just moved the crop area around a bit and clicked enter to crop it. Just play around with sizes and whatnot, and get a feel of what you like!!
cropping tip: crop as close as you can to the edges. The more you zoom in, the more pixels that will be visible and it will make your gif extremely grainy!!
So now for resizing, go to image -> image size or click command-shift-i

and you will get this window.

A LITTLE NOTE - I personally do not use automatic but a friend who shared her sharpening psd would prefer if I kept it secret, but automatic is what most people use and it is what I used up until november 2019 and it worked just fine.
Ok anyway now I want to make my gif 268px wide so I will input that as width and make sure you click this!! It makes sure your height and width are proportional!
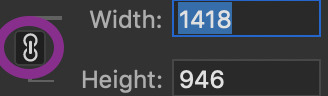
ok now we have this. After you’ve done that, click ok!

congrats, you just resized a gif!! Your gif probably looks smaller now in the main window once you click ok, just zoom in to it! don’t worry about it looking bad quality, sharpening is next!
This is how my gif looks with trimming, cropping and resizing (with 0.05 speed)
★★★★★
- sharpening
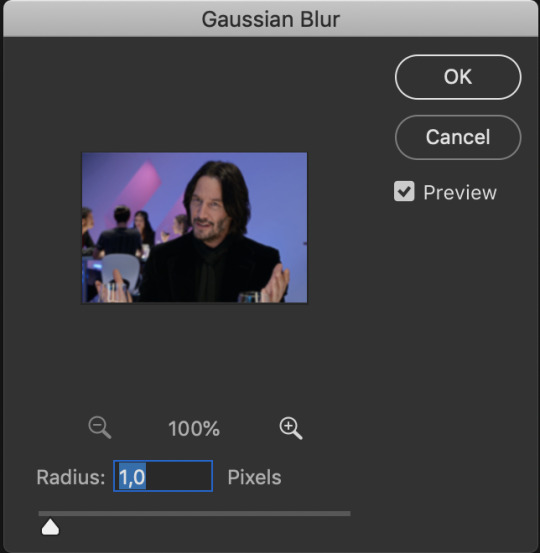
Now we sharpen! Make sure your layer is selected Go to filter -> sharpen -> smart sharpen and this window will pop up:

These are my settings which most people use. Just remove gaussian blur
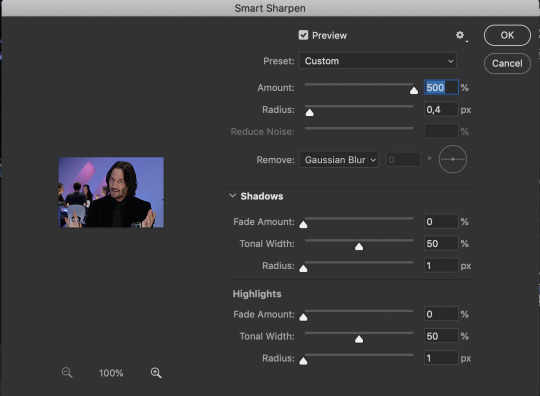
I have more accurate and use legacy checked too!
click ok! Now ... your gif might look a bit oversharpened. That’s why we use a bit of gaussian blur. Go to filter -> blur -> gaussian blur.

now I think most people also use a 1.0 radius so set that and click ok.
But now your gif looks too blurry. Lets fix that. Double click the icon below in the layers panel

and adjust the opacity! My go to is between 25 to 35, just so the gif looks smooth!

Now we’re done with sharpening! This is how our gif looks with sharpening with 0.05 speed:

sweet right? Now .... the best and hardest part ... colouring!!!!
★★★★★
- colouring and psds
First I will shortly talk about psds. They are photoshop files, that save the entire document which means you can share it with someone after uploading it and when they download and open it, they can edit the layers, tweak things just like they made the file in the first place. Many people upload psds of gifs with colouring so others can use that colouring. You can find so many psds on completeresources (I only linked gif psds but they have psds for icons and headers too) or allresources. I do not use psds but colour from scratch every time so I will not be explaining them further, sorry.
So for colouring, I will go very in depth into different styles. Here are the main types of colouring I have noticed people use on here:
simple - I normally use this for scenes with people in it
vibrant, bright - I use this for scenes with lots of colours in them
pale
black and white
gradients - I use this to spice scenes up a bit
colour palette
I only go for simple, vibrant and gradients and never do cp, pale or black and white, but I will link a few tutorials by talented creators who do and after that I will explain the three ways I colour by showing you three different examples :)
Some useful tutorials I have found for pale/bw/cp colouring are:
this pale tutorial by @samecoin. Especially useful read because Tippy explains how to avoid whitewashing in pale edits.
this pale tutorial by @kateausten. Very easy to read and to follow.
this colour palette tutorial by @freddyfreemen. They explain the basics and provide a psd too.
this colour palette tutorial by @stenbranlons. Very image heavy which guides you through every step of the way.
A blog dedicated to pale resources is @finesources and is definitely worth checking out!
this tutorials page by completeresources has many many tutorials on how to do different kinds of styles
Btw, this is a useful website that explains all the different adjustment layers in photoshop if you’re still getting the hang of them
ok now onto my examples for the colouring. I will first do simple colouring for which I will use the keanu gif. For vibrant and gradient I will use two different gifs. I usually put my colouring into a group so first, close the video group layer and click this to make a new group which will contain the adjustment layers for our colouring:

SIMPLE COLOURING
First I will brighten the gif up with some curves. That is this tool:

Then you get this window:
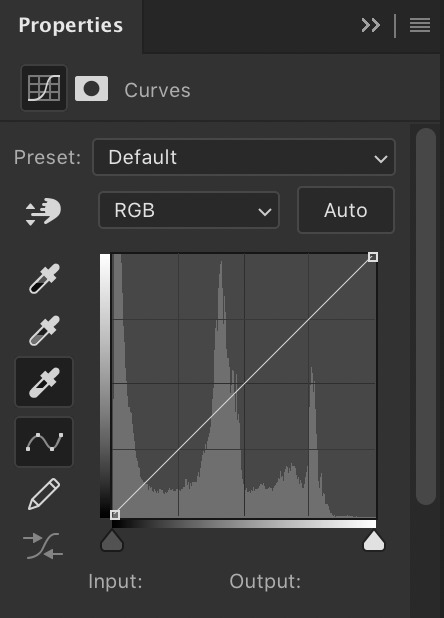
As you see, I have selected that white eyedropper tool. Using that I will brighten the image. Basically, you want to click on the whitest part of the gif using that tool. This is because wherever you click, the eyedropper will turn that part into white and adjust the entire gif that way so if you click somewhere dark, you’ll get this white bright fuzzy mess. So I clicked on the lightest place which imo is the white specks near the glass in front of his hand and now my gif looks like this:
Ok now if you look at the above image, there is a black eyedropper two steps above the white one. You want to use that to click on the darkest place of the gif bc it’ll turn that to pure black. Here is my gif when I did that:

not a massive difference but it balances things out. Now I will add some saturation. Click this icon:
which brings up this window. I have already set saturation to around 15 to make it a bit warmer:
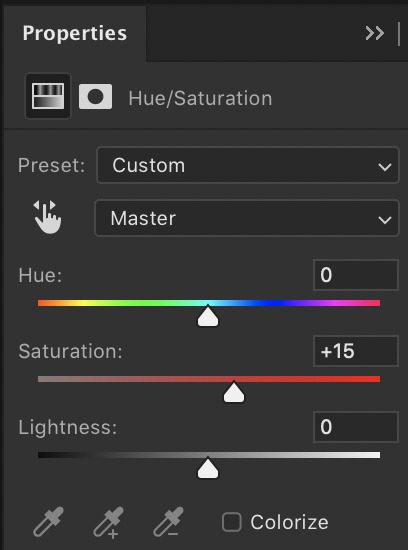
and the gif looks like this now:
I think it looks nice, but I would like to add something extra. That is why I am going to play around with selective colour to make the background pop a bit and make the black colour more dark. So click this icon:
and you get this window and these colours (imgur). You can play around a lot with selective colour and manipulate colours! So if I turned the black dial on reds to +100, they would become wayyyy darker. However because I want the background to pop, I would use the colours magenta and blue (and black for the final touch). For those my settings are this: 1 - 2 - 3 (imgur). So now my gif looks like this:

And now i think we are done! For comparison, this is what the gif looked like with absolutely no colouring or sharpening:
And that was all for simple colouring!! Lets move on to vibrant colours!!
VIBRANT COLOURING
For this I will use an example from Thor: Ragnarok bc thor is my soft bb. I did not do much for this first example except play around a lot with selective colour and I used the exact way of adding saturation and curves as shown before. Honestly just playing around with selective is the best bet to get vibrant colouring. The gif without sharpening etc was this:
the gif after colouring and sharpening is this:
pretty sweet huh? Just play a lot with saturation, hue and selective colour and channel mixer and you can create a lot of styles that way!
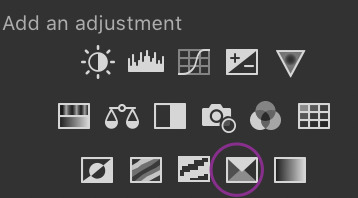
GRADIENT
for this I will use another clip from Thor, but from The Dark World. It is a bare clip where it is raining and I will add a gradient on it. This is the gif without colouring nor sharpening:

now we will do the sharpening and colouring. I already applied a basic curves and saturation layer so now it looks like this:
It looks a bit better right? Ok lets get that gradient applied. Click here:

and click on gradient, NOT gradient maps bc those are different things and I honestly dont know how maps work.

now this is what will appear, I haven’t changed anything to this yet:
What style, colours, angle you choose is up to you. I personally am going for 0 angle because I want it going right. Now, to choose colours, double click on the colour shown next to the word gradient. This window will show up:
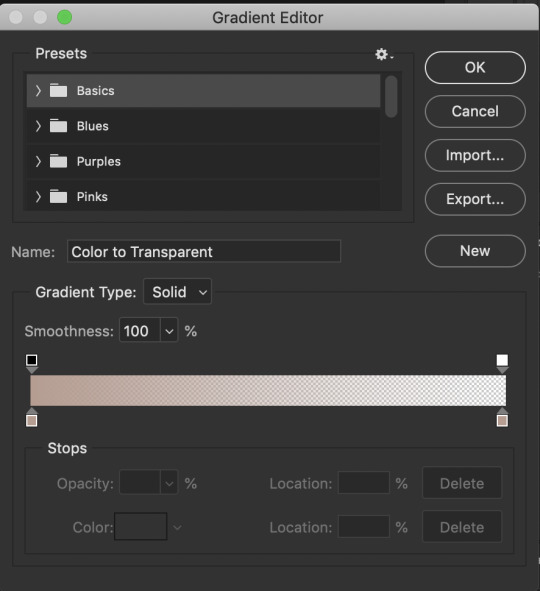
The fun part is you can do what you want here. Just experiment, click the buttons, adjust opacity etc. When you click at the bottom of the bar somewhere another stop marker appears meaning you can have even more colours! Just click on the bottom markers and edit to your hearts content! Use the top button to adjust opacities. Personally I went for this gradient:

Ok but now we have a problem because our gradient is fully covering the image and you can’t see anything. That is where blending modes come in. Right click on the gradient layer and click blending options. This window will pop up (ingur). When you click blending mode, these options appear (imgur).
Here is a good guide explaining the blending modes
I just recommend playing around seeing which one suits you. I went for overlay, which makes my final gif look like this:
and that was that on colouring!! Let me know if u have questions about it! Onto the next part, masks!
★★★★★
- masks
I will not go in depth here, but instead I will link some tutorials but the amazing @thepunisher who has explained it much better than I ever will be able to. The tutorials are all in this link. If you have any questions do lmk but idk how I could explain it.
★★★★★
- adding subtitles
although we wish we could, we can’t all lip read so we need subtitles also I’m hard of hearing and need them anyway but yeah, I will quickly highlight how I add subs! I use the font Arial Rounded MT Bold Regular.
I will first link to this post because it helped me a lot and may explain stuff better than I do.
Lets take the keanu gif we had earlier. In it, he says ‘fish flakes’. Now what I do is this. Click on this icon:

and drag a box around the gif fully. Add your text. Mine looks like this now:
Well that ... does not look like a subtitle. BTW my settings are:
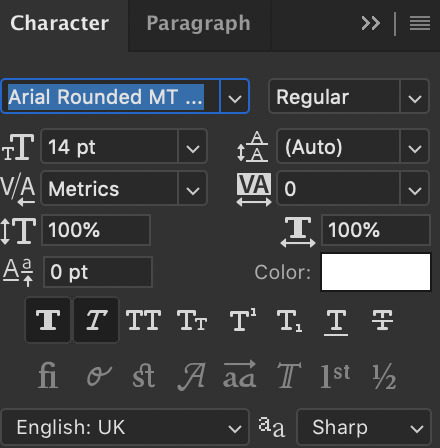
*when there are two people speaking I change the colour of the second person to #ffff00 - also for 540px gifs I usually use 12/13px text.
Ok now I will add the stroke and drop shadow. Right click on the layer of text, click blending options and change your stroke and drop shadow settings to this and this (imgur). Now just click the move tool or hit V on keyboard to select it and drag the gif down wherever you want. Now my final gif looks like this:

Ok, now if you have two gifs and you want them to be the same distance from the bottom, right click the text layer of the first gif document, click duplicate layer and you will get this window:
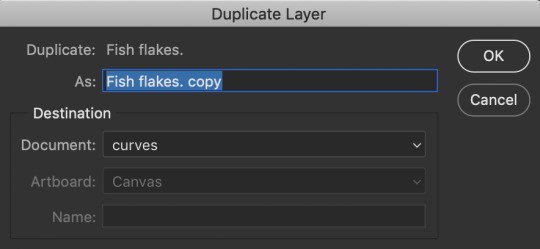
now click on destination and depending on what files you have open in PS, you will get this window:

now just choose where you want the text to go and if the gifs are the same sizes itll appear exactly where it did in the first one and you can edit the text for the second. You can do this with adjustment layers, groups etc too!!
Now text is done! Off to the next part!
★★★★★
- editing frames / timeline speed
We are done editing, now time to convert to frame animation and edit the speed!
Ok click on the four bars on the right side of the video timeline. It will bring up a menu. From there, select this:
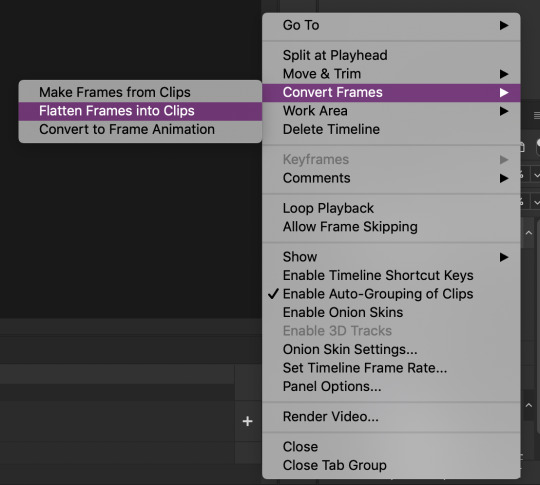
This will make individual layers of every frame into clips. Now, click this at the bottom left side of the video timeline:

This will convert your video timeline to a frame animation timeline. Now it looks like this (imgur). you’re probably wondering wait where the heck did my layers go well don’t fret, lets click the four bars on the right side again and click this:

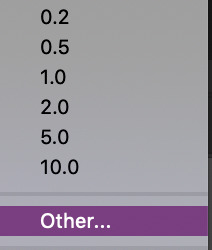
now look! We have got all our frames into the timeline! Just delete the excessive frames at the front. Now click the four bars again, select all frames and then click the number at the bottom and change it to 0.05 or 0.06 or whatever speed you want:

Now we are done with this step!
★★★★★
- multiple gifs in one grid
I myself am not going to explain this, instead here are links to a few amazing tutorials that will help you further
this tut by @brolinjosh
this tut by @futurist
★★★★★
- actions
Now actions ... man they make everything so much easier. Basically actions are a sequence of steps you undertake in photoshop that are recorded which you can then save and use on multiple files. This makes the giffing process much much faster!!! For instance, these are the actions I have saved (mind the doubles lol I am experimenting a bit!)
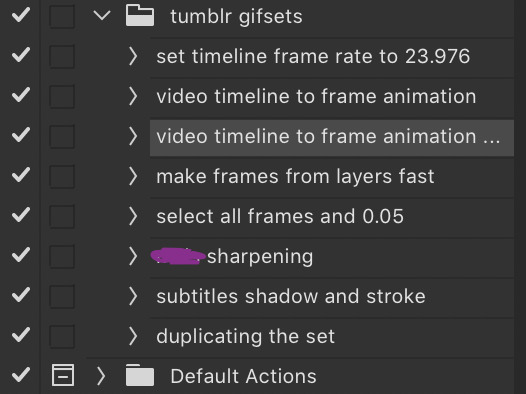
As you can see, I have one for undertaking the entire video timeline to frame animation process and one for sharpening and the subtitles. It has saved me around 75% of the original time I put into creating sets before which is a lifesaver.
I cannot explain how to make actions bc I am really bad at explaining stuff, but here are some tutorials:
- https://helpx.adobe.com/photoshop/using/creating-actions.html
- https://completeresources.tumblr.com/post/66560261468/how-make-action-%D0%B7
- https://completeresources.tumblr.com/post/50583786863/how-to-use-an-action
- https://completeresources.tumblr.com/post/50362731526/how-to-use-actions-on-gifs
https://www.creativebloq.com/adobe/create-own-photoshop-actions-61411918
★★★★★
- exporting the gif
now we’re at the final stage! When you have your gif ready, go to file -> export -> save for web legacy
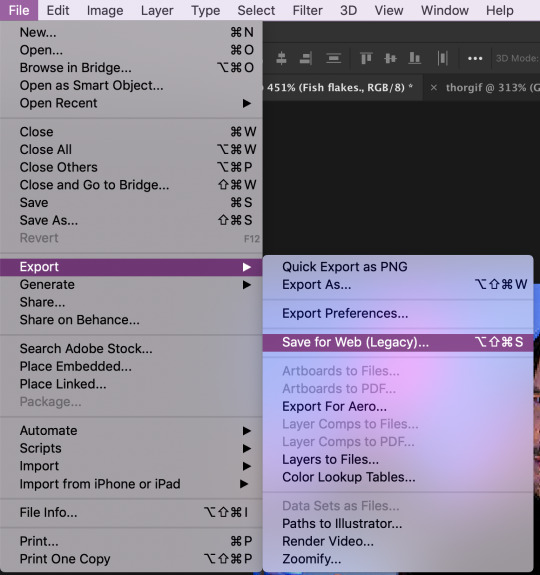
ok now the next window is this which looks intimidating I know
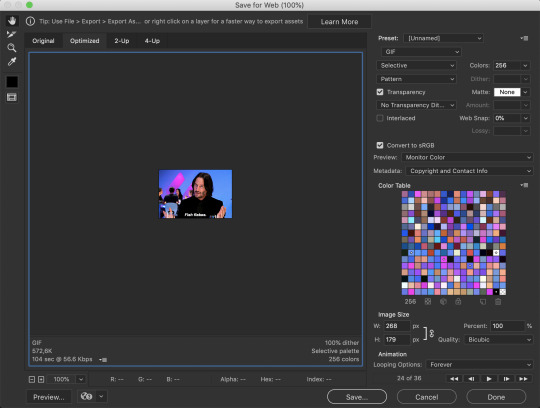
Well basically, those are my settings above. Make sure the looping option is set at forever. Also on the left size you see how big your gif is, make sure it is under 8mb but tumblr is unstable so keep it under 5MB and it should be fine.
I use different exporting types at times. Sometimes I use selective and pattern, sometimes diffusion or adaptive+dif. Just remember that the gif size depends on which you choose so keep that in mind. Here’s the difference (if u can even spot it).
selective + pattern

selective + diffusion

adaptive + diffusion
Personally I mostly only use selective + pattern!
btw make sure your matte is at NONE!!! This is because otherwise you have those whitish transparent borders on your gif, esp noticable on dark gifs, like shown in this tutorial by the talented @joewright !
And congrats, you have officially made a gif! Now go experiment, have the time of your life and do whatever the heck u want with your gifs. And if you want me to see them, tag me!! I track #usernums !!!
★★★★★
- last minute tips and extra links
man idk what to say here really but here goes:
@completeresources and @allresources are amazing places to learn more about gifmaking, pls take advantage of the opportunity
reminder: quicktime records at 60FPS, so unless you want a laggy gif delete the extra duplicate frames in the frame animation timeline!!
When opening import video frames to layers, do not click skip every second frame!! do not!!!!
Do not steal gifs. Try making them. I know it takes time and it can get frustrating but don’t post someone elses gifs as your own. Even the ugliest gifset in existence made originally by someone is better than a stunning set put together full of stolen gifs from various users. Don’t be that person
Don’t be afraid to ask for help pls just go on anon if u want!!
use the tumblr dimensions!!! I cannot stress enough how important this is because if you don’t, your gifs will look stretched af and lose quality so like .. don’t do that
1K notes
·
View notes
Text

For this gif tutorial I’m going to try to keep it as basic as possible, I may add a few tips for coloring at the end, but for the most part this is going to be how I make my basic gif. Also I’m not going to use my vapoursynth to process the video beforehand, just because I know not everyone uses it and it’s harder to learn. This is going to be just a downloaded mp4 video through the gif process. Don’t let the idea that this is a BASIC TUTORIAL fool you, I’m going to try to teach you a lot of things. It’s gonna get wordy, but i will try my hardest to keep the process easy. I’m just going to explain what things do instead of having you just copy + paste my method and not know what it means. okay? okay.
Before we start though, if you plan of giffing live stages you either need to accept the they will not be super crisp and clear OR learn how to use avisynth/vapoursynth to resize the videos without quality loss.
If you just want to gif music videos or variety shows then this should still give you HQ gifs.
Other notes:
try to ONLY use 1080p and up video if possible, maybe 720p if you’re really desperate, but anything under that... it’s not going to look good at all, so try to avoid using them.
The Photoshop I am using is PS 2020, so all my screenshots will be from that version and with my weird set up. But I’ve been using pretty much the same method since cc 2015 so other than the fact that some placements and names are tweaked, it’s the same. (If you can’t find something on your version shoot me an ask and I’ll try to help! And asks I get on this tutorial I’ll link HERE for future reference)
CUTTING VIDEO
To cut videos I’ll just use my quicktime player.
I use edit > trim to select the portion of the video I plan to gif and save that as it’s own new mov file.
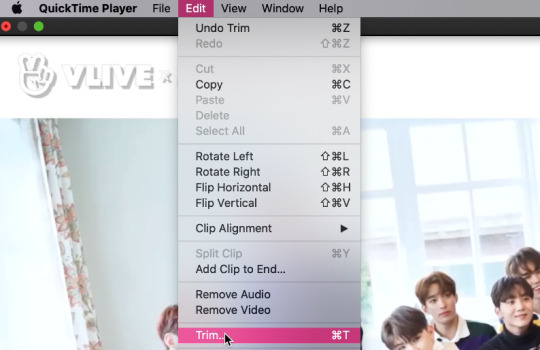
which pops up this tab

that you just slide until the part you want to gif is selected

then just save it as a new video and your done with part 1
ENTER PHOTOSHOP
Now what we’ll do is open our photoshop and import that clip into layers
FILE > IMPORT > VIDEO FRAMES TO LAYERS and select your video.
A small pop up will appear to show the clip you’re opening, you can trim it further here or just keep going by clicking okay
my setup is weird for drawing BUT you should have it looking remotely like this:

The things you will DEFINITELY need to see are TIMELINE, LAYERS, ADJUSTMENTS. If you don’t have these sections you can add them to your screen by clicking on the WINDOW tab at the very top menu bar and clicking on them

LAYERS - this is pretty self explanatory but each row is a layer in the gif. the more layers the bigger the gif will end up, the longer it plays. So bigger clips will have more layers and end up as larger gifs in the end.

TIMELINE - This is where you can edit the gifs timing (make it faster or slower)
We’ll be doing a bit of work with it so it’s important to know it well
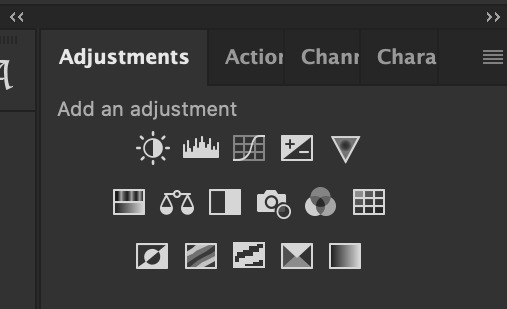
ADJUSTMENTS - Best friend and worst nightmare. this is where ALL the tedious recoloring is done. VERY rarely would you not use these. 99.9% of kpop things are filmed through a green or blue lense so you’ll want to fix that to not have ghost idols
So, Let’s make a gif
Step 1 - In the top right corner of your timeline is a set of lines, click there and then click SELECT ALL FRAMES

under each frame is a time stamp (this video’s is 0.04) this decides how fast each clip goes by, or how quickly the gif moves. Personally I prefer slower gifs, but I say anywhere between 0.04-0.06 is a decent speed.
Step 2 - with all the frames selected, click on the small down arrow next to any of the frames and change the speed to your liking. (I’m going to use .06)
Step 3 - in that same tab of lines we’ll now click CONVERT TO VIDEO TIMELINE, which will change our Timeline to look like this:

Step 4 - Back in our very TOP menu we’ll click SELECT > ALL LAYERS, then on the TOP menu click FILTER > CONVERT FOR SMART FILTERS (this might take your computer a minute since our File is still pretty large.) Now our Time line will look like this:

Step 5 - Sharpening
This one is VERY MUCH something you’re going to have to play with to get your settings to be how you like them. It’s also where I’d use topaz adjustments, BUT since I said we’re doing basic PS gif we’re just going to be using smart sharpening. SO:
in the TOP munu again, click FILTER > SHARPEN > SMART SHARPEN
A pop up window will appear and you can edit the settings to your liking. Mine:
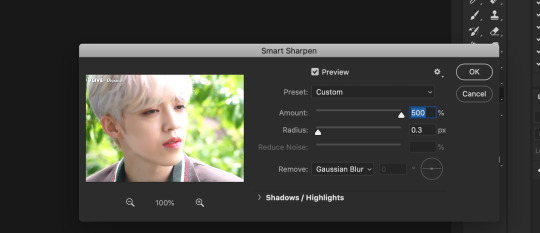
Step 6 - Resize your gif or crop it to tumblrs standards: big singal gifs have a 540px width || Two gifs use 268px || and three gifs use 177/178px
To do this we’ll use the crop tool and type in our dimensions in the menu bar:

and then crop to your liking. (this doesnt resize the gif it just crops to the correct ratio so we still have to shrink the gif)
Next, we’ll resize the gif to that size in the TOP menu click IMAGE > IMAGE SIZE a pop up menu will appear and you’ll type in your resize ratio and click enter.
Now technically thats a gif. it’s TECHNICALLY done. but mine is white washed and there are words on it that I dont want so onto the coloring and blurring.
First I’m going to show you how I blur text on gifs. because text is EVERYWHERE in kpop content and it’s hideous and I hate it. so lets kill it.
BLURRING LETTERING
First we’re going to add a new blank layer to our LAYER TAB by clicking the little box with the + inside at the bottom
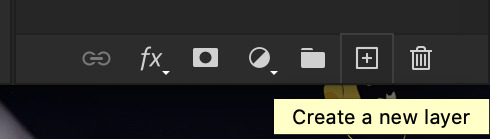
Sometimes doing this can mess up the timeline’s selection but its SUPER easy to fix so lets do that.
So in our timeline we have these two bars on each side that select what part of the gif will play. this is also where you can readjust your gif if it has extra frames at the end, or it ends up being too large and you have to make the gif smaller to save it. Just click and drag the bars back to where our gif actually ends, and all is fixed!

Now on our new layer we’re gonna take a paint brush (one of the ones with a lot of fade NOT the solid circle ) and paint over where the words are like so:

MAKE SURE ITS ON OUR BLANK LAYER AND NOT THE GIF LAYER!!
I know it looks stupid but trust me okay.
Now in your LAYER tab we’re going to duplicate our gif layer by right clicking on it and selecting duplicate.
Then we’re going to drag the new gif layer so that it’s above the paint layer in our LAYER tab :
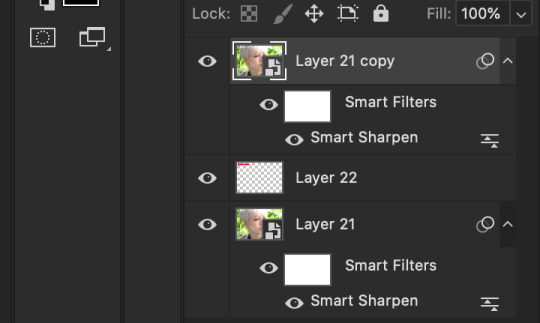
Now, right click on the top gif layer and select CREATE CLIPPING MASK. it should put a little down arrow to the left of the picture, toward the paint layer. This means the gif is ONLY visible where that paint is now.
So we’re going to click on FILTER in the TOP menu again (while we still have that top gif selected!) and Go to BLUR > GAUSSIAN BLUR. a pop up menu will appear and you can just drag the radius until the text is as blurry as you want it to be. (also IF you missed part of the text, you can just go add more paint to your paint layer and it will blur wherever you paint!)
so now my gif is like so:
So now we’ll color him, because he’s pretty washed out.
ADJUSTMENTS
This is where I’m going to be the least specific about what I do and more about what tools do, so that you can learn how to color things the way you like them!
The Adjustment tab on Photoshop has 16 options but I’m really only going to talk about 6 of them. We’ll do it in order though. All the actual adjustment tools will open in the PROPERTIES tab
Brightness / Contrast - Pretty self explanatory, but definitely should be toward the end of your coloring, as if can effect the quality a lot. Small adjustments do A LOT so don’t go crazy,
Levels - Levels is all about the balance of how dar or light your gifs will be if you adjust in the RGB layer it will adjust for the entire image, but if you change the selection to RED/GREEN/BLUE it will adjust just those colors hues. Also there are three small droppers to the left of the graph. using those you can select which part of the gif you want the image to recognize as the lightest/darkest part of the gif, and the tool will adjust the gifs coloring to that point. ( play with those droppers! magic happens i swear!)
Curves - Kind of like levels but instead of how light or dark the entire image is it works more on contrast. REALLY play with the curves options, i’m sure most things you can do with other tools can also just be done in curves if you’re patient enough to learn
Vibrance / Saturation - Vibrance will make duller parts of an image higher contract and brighter and saturation will make everything a more neon shade. or in reverse lowering vibrance will dull out the things that were already neutral and saturation will dull out the more vibrant parts of the image (usually reds)
Color Balance - Good for fixing tones. so if a live stage is SUPER BLUE!!!!! you can readjust and calm down the blues to dull them out or get rid of them completely. Again play with this its insane what it can do
Selective Color - adjusts the different colors in your image without touching the other colors. if you wanna touch the reds, make them pinker but not change the blues and greens, you do it here
If you want MORE drawn out explanations of what each of the 16 adjustment layers do here and here are actual articles you can look at. But it’s all about practice. playing with all the adjustments alone and together. Finding out what you like to do!
Now when you gif is ALLLLL colored and you’re ready to save it we do FILE > EXPORT > SAVE FOR THE WEB and a whole new window of options pops up. I’ll give you two examples of how to play with those options and then we’re done!

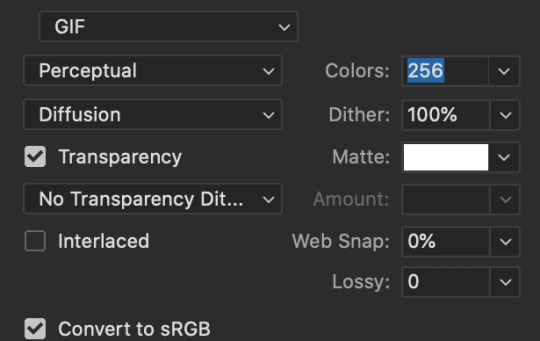
keep in MIND tumblr’s gif limit is 10MB which is pretty huge now, but still watch your gif size!!!!
AND SAVE your done!

I hope this was helpful! Let me know if you have any questions,again I’ll have an ask tag for it and it’ll get linked HERE if people end up needing help!
Happy giffing!!!
#drm.pst#drm.txt#Gif tutorial#this is LONG okay please be aware of that before you open it#als i did NOT reread it because it took me 3 hours to type out so it's probably a grammatic nightmare#BUT i'm JUST under a new milestone so i'm gifting this early because i had the patience to do it today lmao
98 notes
·
View notes
Text
“Should I use InDesign to lay out my books?” - A Passionate Guide
Ok, if you are like me, you recently stumbled upon @armoredsuperheavy‘s brilliant blog about bookbinding and fanfiction, and now you are excited to throw yourself head-first into bookbinding.
This also means that you are about to invest a fair amount of time into figuring out how exactly to lay out books. What you end up getting comfortable with will most likely be what you end up using long term, so it is worthwhile giving it some thought. The question really comes down to this: who's name will you be cursing for the foreseeable future? Adobe? Or Microsoft?
Full disclosure: I only started using InDesign because I was forced to. I worked as an editor at a newspaper, and that was what we used. The beginning was hell. I won’t sugar coat it, it sucks. In the end it was worth it. Once you figure it out, InDesign’s potential far outstrips Microsoft Word (in my opinion).
That encouragement means very little when you open this treacherous program for the first time and see THIS:
“What?! I will literally give you $100 if you guess what all the buttons on the left are for. How the fuck do I make the margins disappear!?”
So, if using InDesign means figuring out what at least one third of the tools on the left are for, lets talk pros and cons.
Let’s get the cons out of the way.
It is expensive.
Adobe is not fucking around. This puppy costs 20 bucks a month (Canadian) to RENT.
If this is out of your price range, do you still have options? Yes. Do they range in legality? Also yes.
I think I could potentially get in trouble for telling you to find your friendly neighborhood torrenting site and steal this software. I will say, outright, that no one should steal software ever. Got it? I would be very upset if someone were to message me for specifics.
As you naturally wish to be law-abiding, there is also the quasi-legal option of repeating the 14-day free trial. My friend works at a professional print studio in Russia, and this is the tactic they use: every 14 days they uninstall all of the software from all of the computers, and reinstall it with a new trial. Every 14 days! At a professional operation! My friend hates working there.
It is not initially intuitive.
I’ve covered this, but it bears repeating because it is a serious hurdle. Keep in mind, that with time, InDesign becomes more helpful than other software. Now when I use Word I find myself reaching for keyboard shortcuts automatically, and feeling bereft at the lack of my favorite tools. Nonetheless, expect a time commitment up front learning how to harness this glorious and confusing computer program.
It can run kinda slowly, depending on your computer.
Up until two months ago, I had the world’s most precarious laptop. I bought it for $200 in 2015. It once took half an hour to restart. Inexplicably, when it got stressed, it would switch to Spanish. It was literally and figuratively falling apart. And yet, it ran InDesign.
Granted, it worked slowly. If I asked it to process too many images at once it would panic (again with the Spanish), but for the most part, it worked. If you have a slow computer and are patient, then InDesign will probably work fine on your computer. If you are not willing to suffer, stick to Word.
You will also need Photoshop (sometimes).
Part of what makes InDesign glorious is that it is professional software that is designed specifically to work with print and anything text-heavy. I love that about it. It even manages to do some handy things with images! But, inevitably, you will need to learn some Photoshop to punch up your graphics.
I have, admittedly, only learned the bare minimum Photoshop in order to feed my InDesign addiction. It was a pain in the butt. For example, inexplicably, Adobe has not standardized keyboard shortcuts across the suite. As with InDesign, now that I’ve learned the tricks, I adore it. But you should go into this knowing that with Adobe, the fun never ends.
Printing signatures is the WORST.
Adobe, please explain to me, in front of God and everyone, why the hell you would make this software specifically for laying out books etc. and not include a method of printing signatures?! I’m livid. This is absolutely where Word wins the day. It is almost worth using Word just to print the signatures so nicely and easily. I’m not kidding. Me—a person who has used InDesign professionally—almost wanted to switch software entirely just because of this. Hands down, InDesign’s biggest goof.
Despite this crime against bookbinders everywhere, you have options. You can export your design to a PDF and literally print each signature separately (I am fucking livid) or you can complain enough to your friends that they offer to buy you a lovely program called BookletCreator for your birthday. It costs $20 bucks USD and it was worth every penny.
However, Adobe, FOR THE AMOUNT THAT YOU CHARGE FOR YOUR PROGRAM, I SHOULD NOT HAVE TO PURCHASE ANY ADDITIONAL SOFTWARE IN ORDER TO PRINT MY BOOK. Did I mention that I am livid?!
But InDesign must be worth something, right?! Otherwise why would I be writing a long post encouraging people to use it? Let’s talk pros:
The horsepower on this baby will blow your mind.
Forget what I just said about printing signatures; imagine using software that was literally made for this. You wanna do a thing? InDesign has got you. Are you a perfectionist? This software was designed by people as pedantic and obsessive as yourself. It gets you. Dream it, google how to do it, and InDesign will deliver. This is really the main reason to use InDesign; it is the professional standard for a reason.
There are so SO many resources available to help you learn.
Almost everything I’ve learned about InDesign I learned from Google or YouTube. Honestly, if you have a question, I promise that other people have already asked and answered it. The advantage is that because this software is specifically for laying out books, there is lots of information available specifically about how to do what you want to do. (This may also be true for Word, but I’ll be honest, I only used Word for a book layout once, so I can’t say for certain either way.)
Once you figure it out, InDesign will give you back hours of your life.
Things like master page spreads, clipping paths, tint, the eyedropper tool, and the one-hundred-percent adjustable text are just... lifesavers. My experience with Word is limited, so my frustration using it was probably due to my own ineptitude, but honestly, when putting together my thesis, the tears I cried trying to get page numbers to format correctly were some of the most bitter text-related tears I have ever shed. I can take care of the whole operation in InDesign in a matter of minutes.
Hours. Of. My. Life. Saved.
This is an actual marketable skill.
Ok, bear with me here.
I have used InDesign for every single job I have had since I worked at the newspaper. That includes working as a bookkeeper and a kindergarten teacher. Hell, I even made my resume to get those jobs in InDesign. There is no job that I forsee in my future that doesn’t include some form of text-based design. Even when my work has absolutely nothing to do with layout (see: kindergarten teacher) I still found some way to use it. My previous boss was actually so thrilled about my InDesign skills that she had me run a 101 seminar for the other employees. (Did any of them end up using it? I suspect not. Did they look at me strangely for being so enthusiastic about design software? Absolutely.) I’ve even managed to use InDesign to branch out from freelance editing to take on design projects as well.
In short: if you learn how to use InDesign, put in on your resume. You will be surprised at how much mileage you get out of it.
With Adobe, the fun never ends.
I know I joked about it before, but really, I love seeing what this program has in store for me next. For example, thanks to bookbinding, I discovered that InDesign will do a lot of things that I had previously assumed were the domain of Word, such as spell check. I literally stumbled onto a measuring tool today that I wish existed irl to help me glue my covers together. Part of the beauty of this software being so intricate is that there is always something new you can do. I love learning how to harness a new feature, and then watch my design improve over time.
Using this program you really get the feeling that the sky is the limit. Look, just the fact that I’ve now resorted to saccharine platitudes about computer software tells you that InDesign is remarkable. Considering that this program has made me suffer so significantly, I have either seen the face of God, or I have Stockholm syndrome. Take your pick.
TL;DR, at long last:
How complicated would you like to go? Either way, for bookbinding you’ve got to learn to use software in a new way.
Do you just want to get your book laid out reliably with little fuss? Word is for you!
Are you interested in delving into the details? Do you have the patience of a saint? Try InDesign!
Both work. Both are good. But you can pry InDesign from my cold dead hands because I adore it.
#Honestly#No shame towards Word or anyone that uses it seriously#Like I said I have little experience actually using it for laying out books#But InDesign is very good.#Bookbinding#fic#fic binding#If people want I can start putting together tutorials about how to do all of this stuff#And all of y'all can learn from my mistakes and hopefully learn faster than I did.#Аня есть что нибудь здесь про тебя#заметишь?#InDesign
175 notes
·
View notes
Photo

Hey guys! 😊 I’ve written this tutorial on how I edit my screenshots! It’s maybe a bit (a lot) more detailed than I originally intended, but I hope it gives you some new ideas/tips/tricks! 💗 (included below: how i fake reshade xD)

So I’m gonna start with this unedited screenshot of Felicia. 😁 I don’t use Reshade in my game, too much hassle. :P Instead, I use overlay textures and Photoshop actions to make my shots look pretty~ 😁
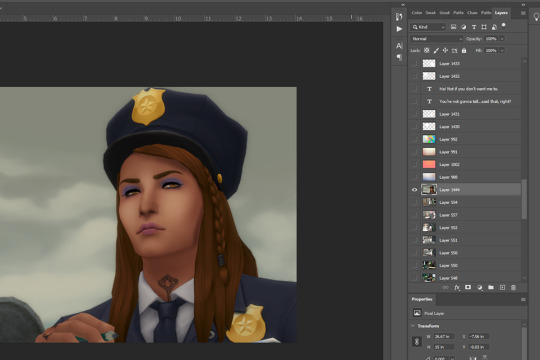
Here’s what that shot looks like after I’ve dragged it onto my echo_base.psd (the file I use for all my Winter Echo posts). I resize the shot only after bringing it onto the psd (but for this one, I’m leaving it at the original size). For Winter Echo panels, I use dimensions of 1011x608px at 72dpi.

Here’s what the shot looks like after I’ve turned on my four overlay texture layers above it. I have a large collection of these because I use them in my illustration work. Most of my textures I get from Adobe Stock (or make myself) but you can find a lot of great free ones on google images by using search terms like “gradient texture” or “overlay texture” (to get the best ones, change your image search settings: Tools > Size > Large). Here are the four I’m using for Winter Echo without their overlay effects applied:


And here are the specific overlay settings I’ve applied to each one:

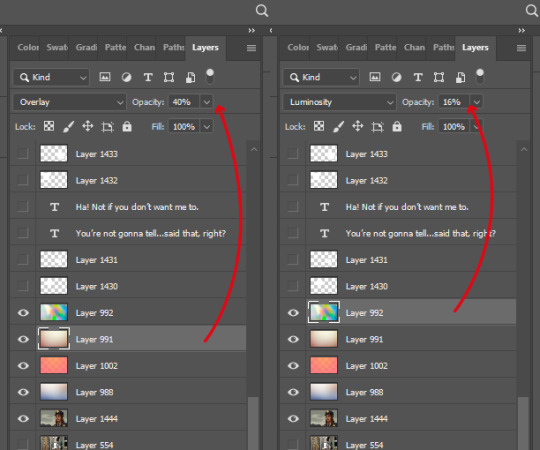
This requires a bit of trial and error! If you use this method you’ll probably end up mucking around with the overlay effects and opacity a lot because the results will vary according to the textures you’re using and the lighting in the shot underneath. These specific textures and their settings took me a while to settle on and I’ve used a variety of others in the past. 😊

This brings me to the Actions Panel! xD If you use a lot of lighting and colour adjustments on your shots, actions are a really good way to record them so you can apply identical effects to each shot. The shot above has had my “WE Indoor New” and “WE Colour Adjust” actions applied. But that doesn’t help you much, so here’s what I’ve actually recorded for those actions:
Photo Filter

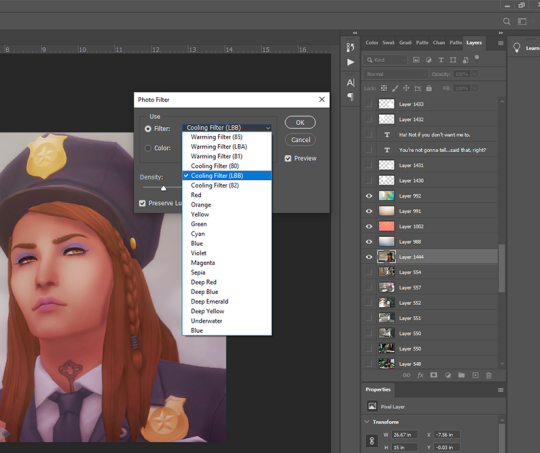
First step is always Photo Filter. Sims shots tend to come out a bit too warm imo, so I usually apply a Cooling filter (LBB is slightly purple).
Exposure
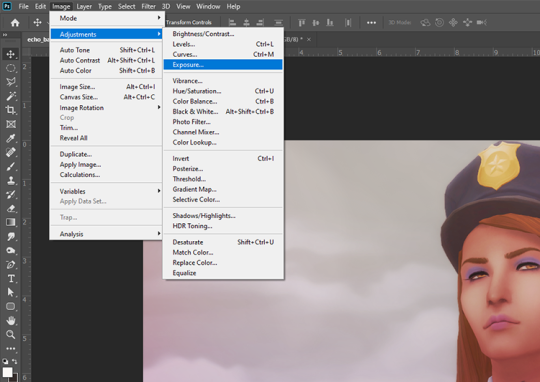
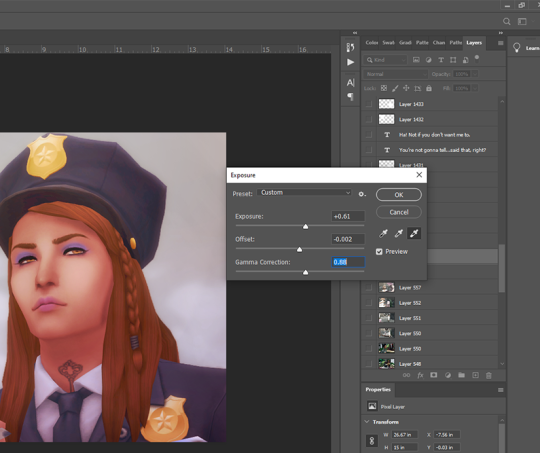
Exposure is a bitch to adjust because it will often have wildly different effects in different lighting. So I usually only adjust this a little, and let my textures do most of the lightening/brightening. You can get some very interesting effects with this though (e.g. I used to increase the offset a fair amount to make my shots look more dusty/soft).
Colour Balance

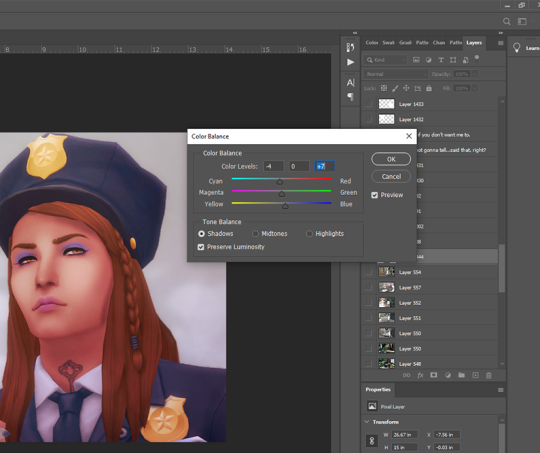
Again, my textures and photo filter are doing most of the work here, but I always add a bit more blue to shadows, and sometimes a bit of yellow to highlights just to take some redness out of skintones.
Levels

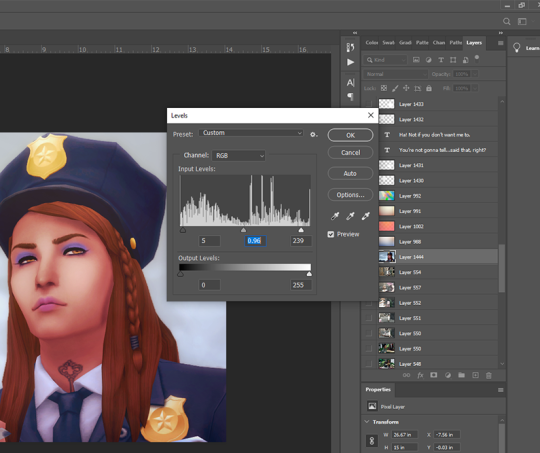
I use this instead of brightness/contrast. Just to make whites a little more white, and blacks a little more black, because sometimes my textures can make them a bit dull. Adjust as you like!
Noise

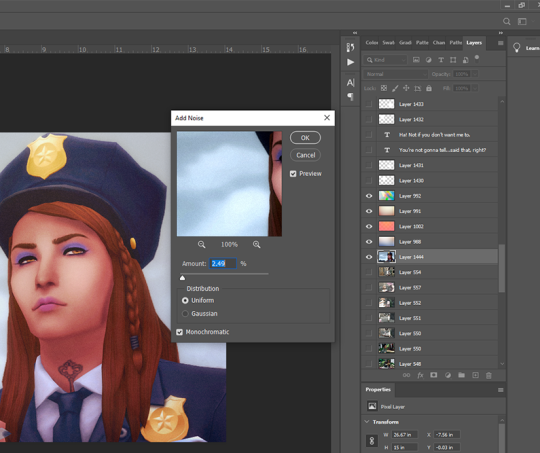
I used to use an overlay texture for this, but I like the consistency of Photoshop’s Noise effect. 😊 Don’t go nuts with this! A tiny bit of noise goes a long way. xD (and also, a higher noise level that looks good on a close up will make your wide angle shots look like a blurry mess, trust me 😅)
That’s all the effects I use in my recorded actions! Next step is...
Dodge & Burn
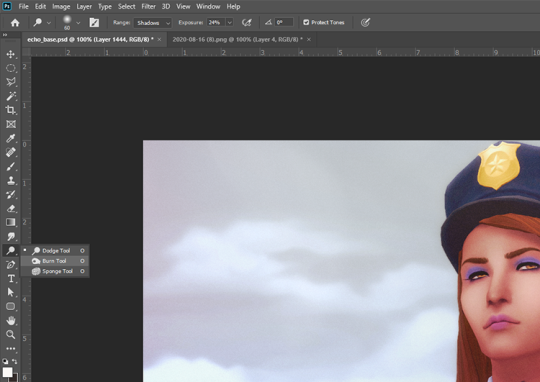
I only use this on shots that need a little extra depth, and only on faces/hair/clothing. Mostly I use the dodge tool on the T-zone of faces and the burn tool (with a large, soft brush) around the sides of faces. Keep the exposure very low to control how much shadow/highlight you’re adding. (You might also want to work on a duplicate layer for this step, in case you end up hating the result and wanna go back to the original xD)
That’s pretty much it for how I edit my shots! Obviously I haven’t gone into the tiny editing things like smoothing really angular edges, fixing clipping, etc or we’d be here all day. 😅 But here’s a little bit extra about how I make my speech bubbles:

I use Photoshop’s Rounded Rectangle tool on a new layer...


The corner radius can be adjusted in this panel. If you can’t see this panel, you can find it under Window > Properties.

Then I use the Polygonal Lasso tool (right-click on the Lasso tool to find the Polygonal Lasso) to draw a triangle on a new layer, and fill it with white.

I merge the two layers (the rounded rectangle layer & the triangle layer) and bring the opacity down to around 75-80% (depending on the shot in the background - if there’s a lot of detail behind the bubble, it needs to be more solid so the text stays readable). I’ve added text afterwards in this example but I always put the text in first, so I know how big the bubble needs to be and where to place it. I keep all these bubble and text layers in the psd until after they’re posted, so I can easily make edits as needed. 😊 (but I don’t keep them forever, because I’d have thousands of layers by now and the psd would take 10min to open 😅)
I hope that was all easy enough to follow!! If you have any questions at all about any of this stuff, or need help with Photoshop in general, please feel free to leave me a comment or shoot me a message! I’m always happy to help 😁💗
83 notes
·
View notes
Text
Story Process Challenge
Tagged by @nocturnalazure in the text, but I hope this counts :)
1. Your writing process - show us a part of your script or explain how you write your scenes. Do you write in screenplay format or novel format? Etc, etc.
Sims-stories I write in digital format almost exclusively and usually in dialogue form. Here’s the first page of “Wild Hunt”. It all started out with Lavinia’s character description and stayed there a very long time. Then it also has a stock of Gothic names, which is copied from another document, hence the German headline. Being me, I sometimes leave some silliness, like the extra-characters.
(The thing about the blacksmith was that when these ‘barbarians’ caught an artisan, they sometimes crippled them so they couldn’t run away, but had to work for them. Unfortunately I couldn’t fit such a character into the story. He’s still there from brainstorming days)
This is the market scene from Chevalry, along with a lot of cut scenes. I always quote this as an example why some of the best scenes aren’t even there in my writing. The text is green because I used this to mark it as the story-in-the-story. (The expression ‘shock-blanket’ is a reference to an episode of Sherlock. Some expressions (”slain” “daughter to”) are also borrowed from Shakespeare-plays)

2. Scene building - show us you in the middle of scene building through pictures, gifs, or a video. Explain what is the best thing about scene building and what is the worst!
I rarely take pictures of half-built sets. Wherever possible, I prefer using places built by experienced builders. I have zero sense of architecture. A square small place is the most I can be trusted to do myself. Generally I prefer to work with decor and plants.
This travelling cart was a different kind of challenge. I built it on a 10x10 lot and it had to be placed first, before I constructed a new set around it. On the second picture you also see the cleverly camouflaged mailbox :)
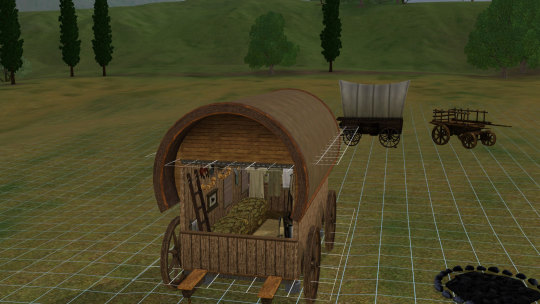

3. CC/Pose Making - do you make your own cc/poses for your scene? If so, what is your process like to create? Do you just go off the top of your head? Do you use reference photos?
I think it’s safe to say that I’m a pose-maker. Although I make a lot less poses than I used to. Partly because of time, partly because I don’t like the washed-out Blender under Windows 10 :/ In the heyday of Chevalry, I would quit the game and pose the scene myself, if I wasn’t 100% satisfied. Though the only scene I ever posed start-to finish was the haircutting-kiss. Nowadays, I rather try to work with existing poses. Back when I took requests, I sometimes worked with reference pictures, and they do give the scene some extra depth. The scene modelled after a still from “Anastasia” really taught me how much detail the artists had put into their characters’ expressions, and this translated back to the resulting poses.
4. Getting in the zone - What do you do to get in the zone to work on a scene? Examples include: show us your playlist you use when working on a scene, what’s your go-to scene snack/drink, etc.
I kinda miss living on my own, when I could dedicate a whole day to shooting a battle-scene for Chevalry. But in fact I decided to tell this story then and there because I knew it was the perfect time of my life for doing so.
I’m super shy with music, and I have a limited music-library (by modern standards), which I listen to over and over again. Many of these songs have influenced characters, but can’t even bring myself to hunt them up on the internet.
5. Screenshot folder - give us a look into your screenshot folder to show us just how much goes into ONE scene for your story. (Scrapped pictures encouraged!!!)
Here is Of Chevalry, end of Chapter 6. The green ones are reference shots for depth of field blur (I don’t use Reshade). The ones with Sarmanna in a bath-suit are for editing her hands back into the picture, when they clipped through the dress.

MCarric Scenes, most recent: You’ll notice there’s a lot less greenscreen blur nowadays. I usually draw it with the blur-tool now. I still need to find a good occasion for this lovely rainbow I captured...
6. Captions - are you a caption on the picture kind of storyteller or captions in text box type of storyteller? Why? Do you do both?
Although I am more of a visual storyteller, I very much prefer the text in the post. I’m very given to typos and spelling errors and I’d hate having them baked into my pictures. Also I find the text easier to read in the post.
7. Editing!!!!! - explain and show us your process editing a scene through a video, gif, or picture. A Before and after will suffice if you aren’t in the middle of editing a scene as you answer this.
I like editing my pictures in a way that makes them look like they had been like this in game all along. Here’s Sarmanna in a bath-suit again. In cases like this one, you can even bring out the feeling a bit more. I could have dug her left arm out of the skirt. But as she’s feeling very shy and vulnerable in the scene, I made it look like her arm was close to her body. I also have a photoshop action which gives this slightly desaturated old-painting look to the images.


8. Throwback- show us an ANCIENT story scene you did in the past and explain how you would do the scene differently today!
In 2014 I tried to tell the backstory of Anja Tilney, a Maplethorpe Island inhabitant. It was the first time I tried messing around with poses, and I remember I included this shot because Simmagmeg had just released these poses which meant much to her. This scene I still think turned out cute, but on the whole I wasn’t feeling the story any more, after a while. It was rather simply constructed, but still I felt I couldn’t do it justice with my skills back then.
I just reread it for the first time since (here...), and it isn’t quite as bad as I remembered, but back then I scrapped the project and decided to stay well away from Sims storytelling in the future...

tagging @arielovessims, @thethingshesaidthesims3, @windermeresimblr, @unsimspirational
16 notes
·
View notes
Last Seen Blogs
kinnie-aesthetics
welcome welcome!!

usayciao-isayl8r
Is It Better To Speak, Or To Die?

langguage
simplicity
milos-art
mostly naruto

kaibasetokc-blog-blog
The ice cold heart that doesn't feel