#updated with pics now
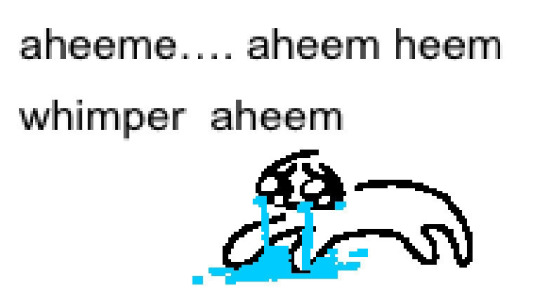
Note
Are you questioning your existence right now?
Seeing how people starts to help out of blue?
Can you feel it~?
*dancing to the music*
IM QUESTIONING IT SO INTENSE YOU HAVE NO IDEA

#every time#EVERY TIME I THINK OKAY IM COLLECTED NOW#MY PHONE DOES BZZZ BZZZZ NEW DONATION ALERT#AND IM LOOZING MY MIND ALL OVER AGAIN JDNDBDJD#this whole time I was sitting here drawing the update#and like#every time my phone vibrated#my braing goes#holy fuck some person loves your silly pics THAT MUCH#HSHDBDJSKDNFGFJFKF
1K notes
·
View notes
Text
From late November
#the walten files#twf#the walten files fanart#twf fanart#susan woodings#doodle#fanart#procreate#digital art#art#portrait#guess who’s Finally updating#also I fixed the pic on the right just now#fixed the nose and added a tad more contour#the original drove me insane with how the nose looked#it just didn’t look accurate at all#I’m sick rn bare with me I’ll reply to inbox messages soon EEEGH#tysm for the love lately tho guys#but ya these r from the end of the month in November
427 notes
·
View notes
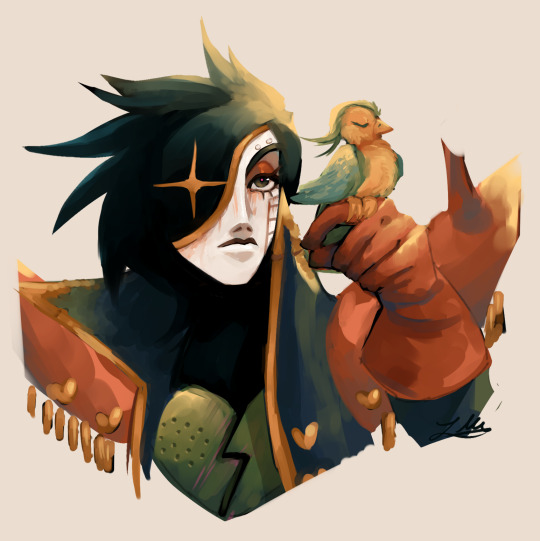
Text

#George day#dreamblr#georgenotfound#gnfblr#dreamwastaken#art#dream fanart#lighting my greatest enemy#update#i chage the pic and fix the lighting but now theirs 2 versions of this fluting around#this the fix version
193 notes
·
View notes
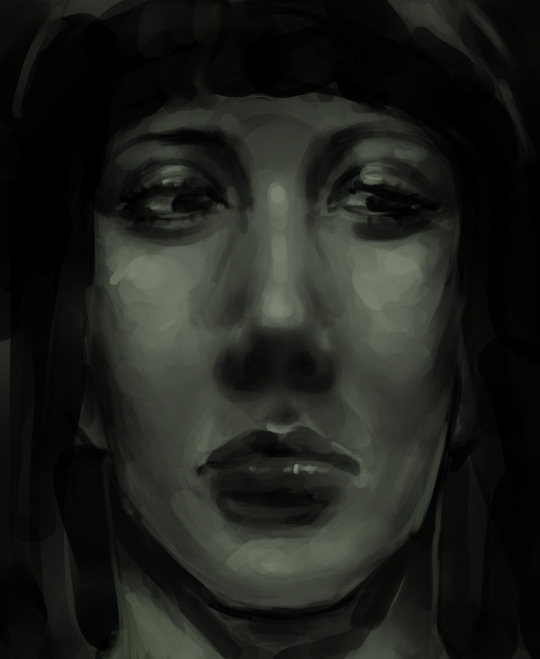
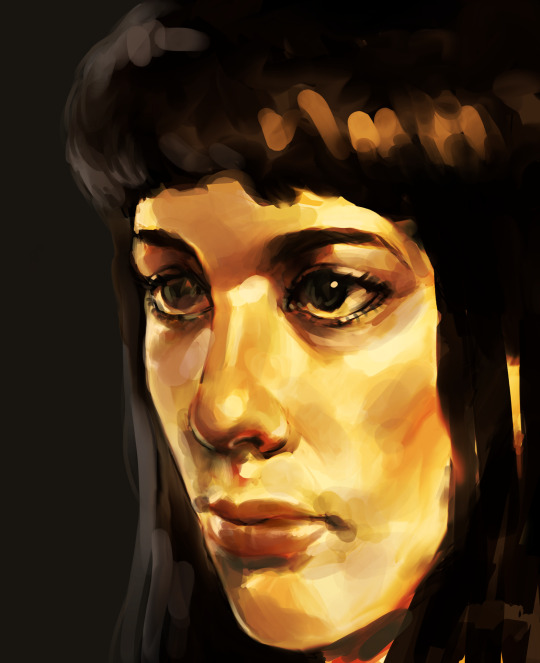
Photo


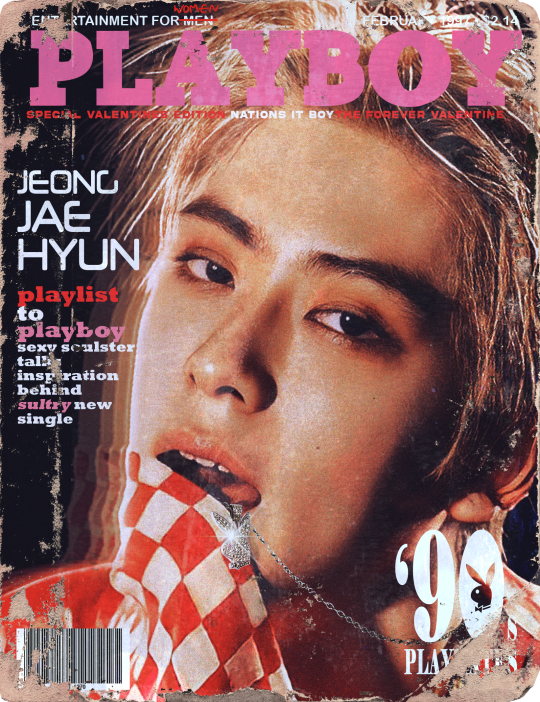
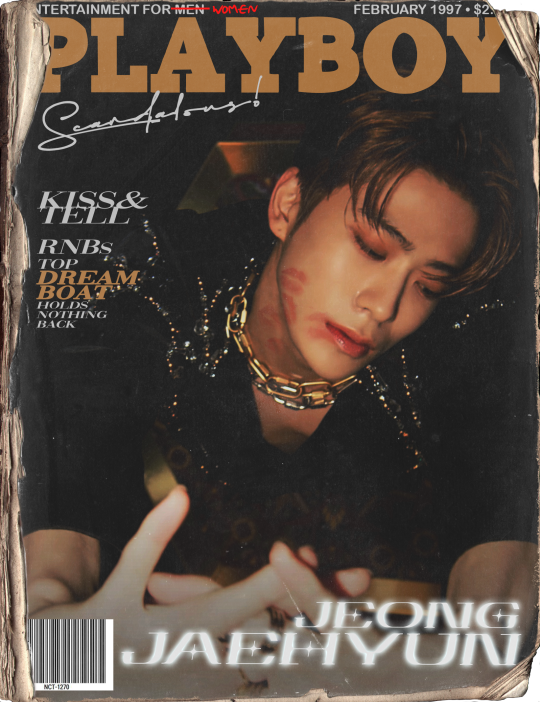
coverboy 1997
for my best girl @butterflyutas / lipstick insp.
#nctinc#jaehyunnet#jaehyun#mine*works#mine*gfx#gfx#this ones for chloe <33333333#shes always so supportive of me even when i bring her all 328698925820 of my ideas but then never turn them into anything#love u girliel :(<3#also if yall saw me post this earlier no u didnt &i will testify as so in court#tumblr didn't update my draft &then the format was all weierd#anyways here these r <3#now pls dont look at the first one i posted anymore look at these ive learned how to use photoshop since then xkjbxk#let me know yalls favs#i tried to make fun suggestive captions w out being weird yk xjxkjbx#might make a whole set for 127 bc ik theres some perfect taeyong or johnny pics for this
2K notes
·
View notes
Note
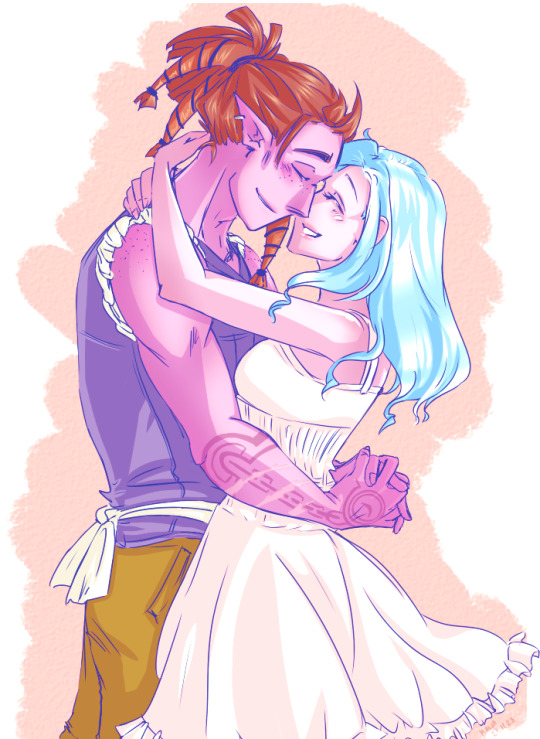
"Laughing stock" can be their ship name ;)
OHHHHH GALAXY BRAIN thats so good omg. LaughingStock my beloved <3

#i KNEW there was a fitting name along those lines#my dumbass self was sitting there last night like 'something... stock... joke... nah theres nothing'#but you Got It ty ty#with the help of everyone we can get this name Approved and Widely Used & Accepted#because its stellar#either way im gonna be tagging my howdy/barnaby stuff with it#welcome home#scribble salad#rambles from the bog#welcome home puppet show#howdy pillar#barnaby b beagle#LaughingStock#edit: and no one will see the reblogged version where i lost my mind in the tags#over CONTINUALLY FUCKING UP THIS SKETCH#first i forgot his antennae that i Actively Reminded Myself To Draw while making this#then i updated the pic here but i accidentally erased a bit. and also the blushy effect is gone now so fuck me i guess#im incensed <3 purely off my rocker <3
613 notes
·
View notes
Text

La niña no ha muerto sino que duerme, degollá.
monotype and mixed media on canvas
#update: worked on it some more even tho i thought it was finished and now it looks better... but i'm too lazy to take a pic and re-edit rip#traditional art#iinky art#artists on tumblr#art#monotype#mixed media#contemporary art
224 notes
·
View notes
Text
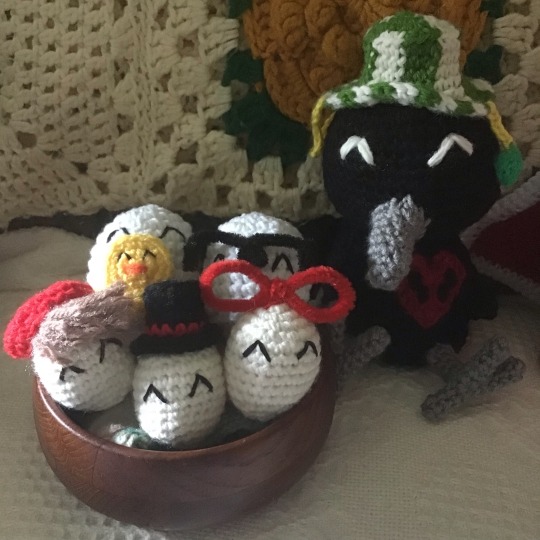
He’s babysitting :)
Tallulah baby I’m so sorry for your hair, I tried my best I’m not a hairdresser 😭
All the eggs were free form, I’ve not used any patterns yet.
Philza post with pattern links (X)
#candys mcyter plushies#qsmp#qsmp fanart#qsmp eggs#qsmp tilin#qsmp juanaflippa#qsmp chayanne#qsmp dapper#qsmp philza#philza fanart#crochet#candy speaks#fiber art#oh how I dread the day I’ve made all the eggs. bc then I have to tag them all#tallulah kinda looks like she’s wearing a beret. don’t mind that#also u don’t need to know this but the bowl the eggs are in was too deep so I put them on a folded sock 😂#Update! figured out how to add an alt description to the pic so now theres that
330 notes
·
View notes
Text


I'LL NEVER LET THEM HURT YOU, I PROMISE... 🦇🦇🧛♂️
Credit
#Ray Toro#Gerard Way#Mcr#Mcrla4#Return#Mcr return#Return era#Vampire at the vampire mansion....#My Chemical Romance#Edit: updated the Ray pic bc it wasn't HD.. It's fixed now :)
809 notes
·
View notes
Text
#palia reth#palia#reth#player character#reth x player character#kawalaba#waiting for update#thank you to everyone who tried to cheer me up#sorry for the repeat pic post but i had wanted to color this for a while now. i just really like this one
72 notes
·
View notes
Text
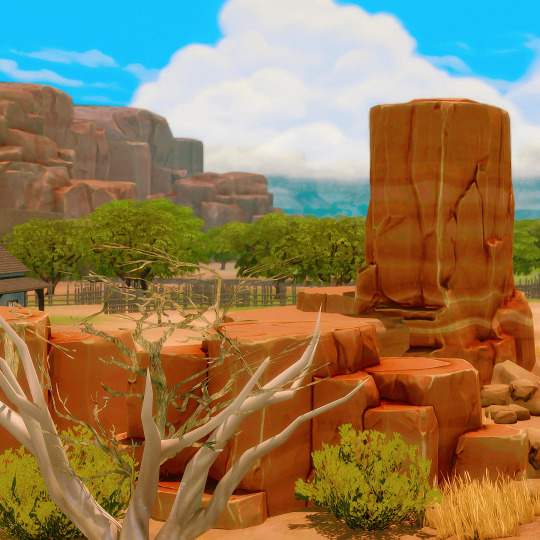
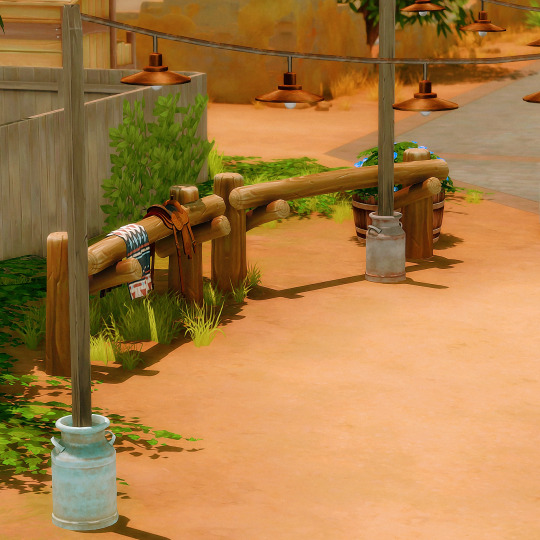
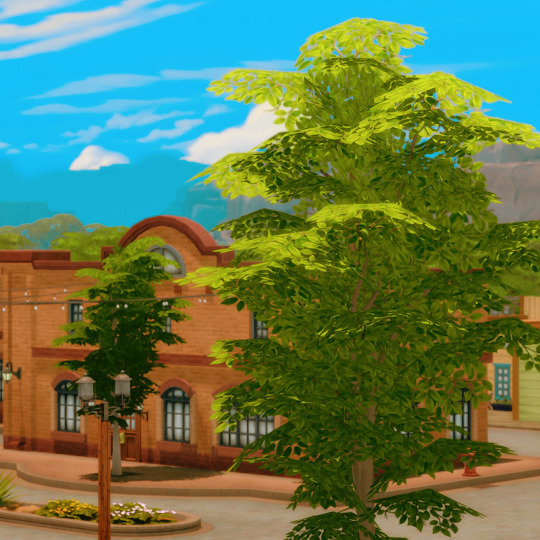

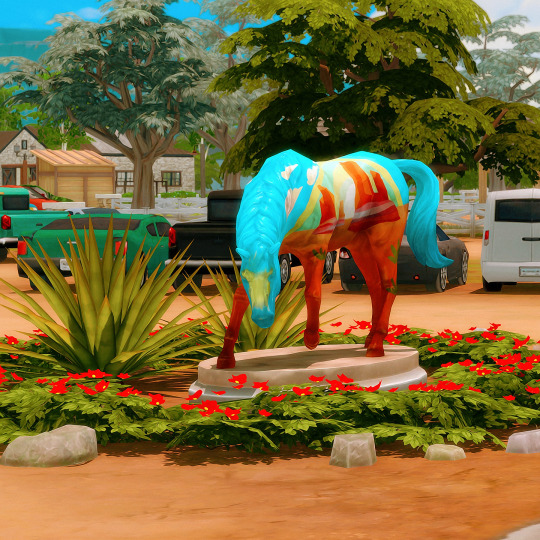
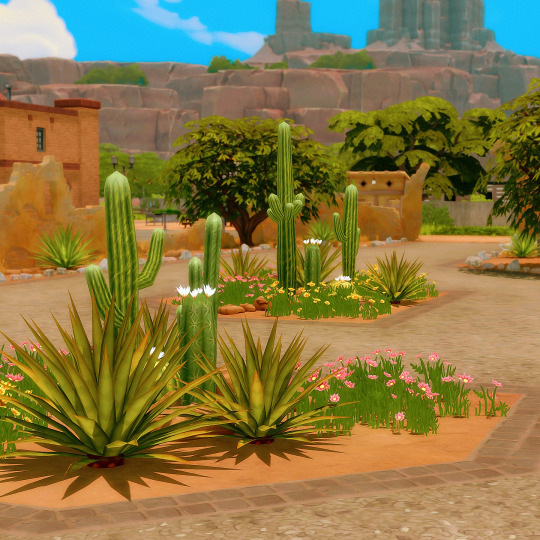
the world looks pretty
#updated my game & mods#didn't play apart from taking these pics though rip#ts4#sims 4#simblr#ts4 scenery#ts4 horse ranch#chestnut ridge#don't really know if i will play with this pack right now#i have globetrotter and the bunnies#and i'm invested in the bunnies rn
145 notes
·
View notes
Text
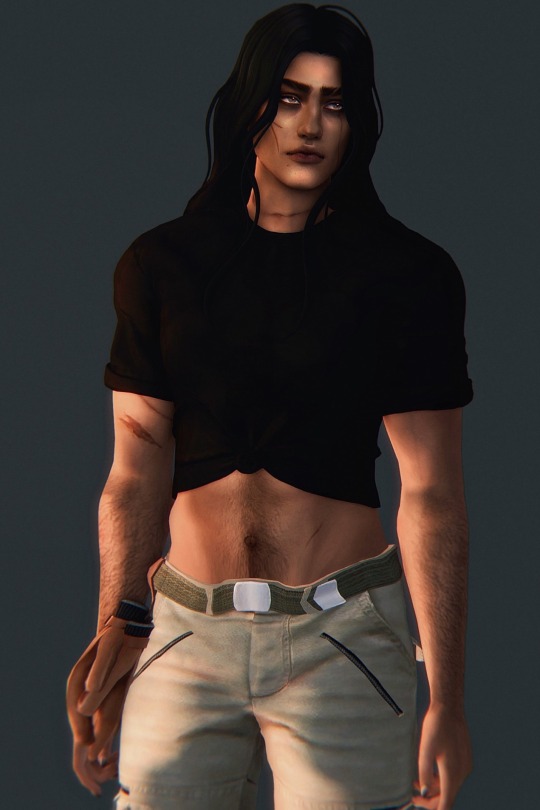

#river dipping#alessandria zeferino#delphi sol#lykos#ts4#they’re so sexy………………#LIKE. TAG ME IN PLEASE.#anyway good morning 😁😁😁…..#……it’s noon 😁😁😁#i stayed up last night editing those screenshots of delphi 🚶 sleep schedule is a mess again#again i’m a very slow editor… idek how it takes me as long as it does like. i’ll blink and three hours have gone by i can’t explain it#but now there are just two more lykos ocs to make posts for 👨❤️💋👨#unlike echthroi which has an array of side characters… lykos is just the four members of the pack and the antagonists and peripheral ocs#who aren’t really involved directly… the werewolves are very insular#nicholas is actually an outsider but he becomes part of the narrative after a point#anyway….. 🚶 cannot lie i miss mattodore have been staring at the lykos ocs for too long 🙅#will probably read for most of today……. but i do still need to take that screenshot of matthias and the updated cas pics#i keep saying i will and then. don’t. do that.#but i rlly don’t have much else to do today so#🫵#i will do that 🫵🫵🫵#i want to reread their questionnaires anyway so it’s like. chop chop
41 notes
·
View notes
Text
I'm not gonna indulge too much in my Undertale AU on Tumblr, I am gonna just keep it private as I do wanna keep my main focus on my FNAF AU, but here y'all go
It's a little rough, but people really liked my Mettaton AU design so I wanted to desperately draw him :')
It's not the best, but I wanted to draw something today.
#i spent all of today mucking around with my art fight#changing profile pics for characters and editing all 90+ of my attacks to have updated thumbnails#aswell as adding characters and such--- it was alot#so this was a nice random sketch i did just to wind down.#I also randomly painted an eyeball out of boredom so THAT'S something#but yeah i hope this is ok#its rough like i said but theres a charm to it.#a little about my AU mettaton as a treat:#he is heavily posessed. he ran away from alphys halfway built between ex and neo#and has to power himself by using his actual ghost alot of the time#he salvaged his charging supply (or batteries idk what makes him run)#but the body is insufficient with power so he has to rely on possession alot of the time especially#when the body ages.#his eyes flicker pink when hes posessed and his ghost self does make himself appear outside of the suit#but with his soul still bound to the body#he can only go so far before he cannot anymore. he is literally tied to his body now HSGSVSV#he also goes by Hapsta in my au. a play on Hapstablook and also to avoid toyhouse sniping me#tho you can call him mtt or mettaton anyways idm lol#mettaton#undertale#undertale au#undertale oc#mettaton au#my art#my oc art
53 notes
·
View notes
Text
Dealing with images on Dreamwidth
Okay, one more Dreamwidth post!
DW is geared around text posts and currently handles images rather awkwardly. But it does actually have image hosting capabilities, though the space isn't unlimited (I've never come near to maxing it out). I was thinking about that and figured I could make a post over here about how I back up images to Dreamwidth, and then post them using the Rich Text Editor.
I tried to explain what I do as clearly as I could, but the detail might make it sound more complex and difficult than it really is. I'm sorry if so! But here goes:
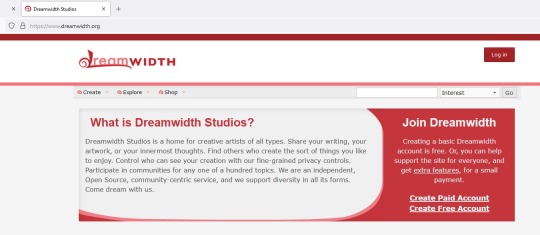
Step 1: Go to the main page at www.dreamwidth.org. It should look something like this:
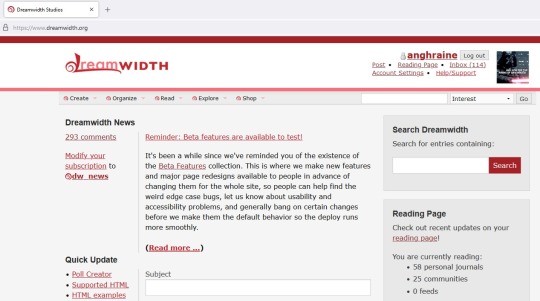
Step 2: Click the red button in the upper-right to log in. Once you do, the main page should look something like this:
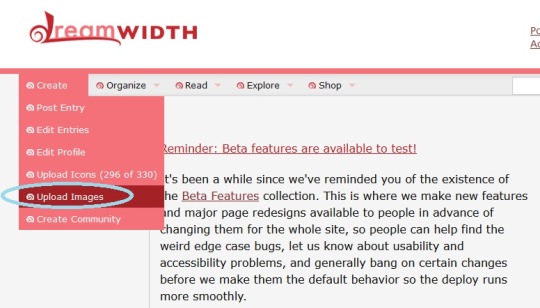
Step 3: If you look below the Dreamwidth logo, you'll see five categories of things you can do. You want the first category, "Create." Click on it and select "Upload Images" from the drop-down list. I've put a blue circle around it in the picture below:
Step 4: Upload your picture!
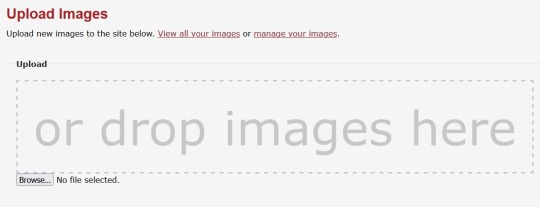
The picture above is the standard "Upload Images" screen. From here, you can click the link to "View all your images" to see everything you've uploaded, and I think "manage your images" lets you adjust titles and descriptions of the images and such. But what you want is the "Browse" button. It'll take you to your computer files and you can upload the picture or pictures you want.
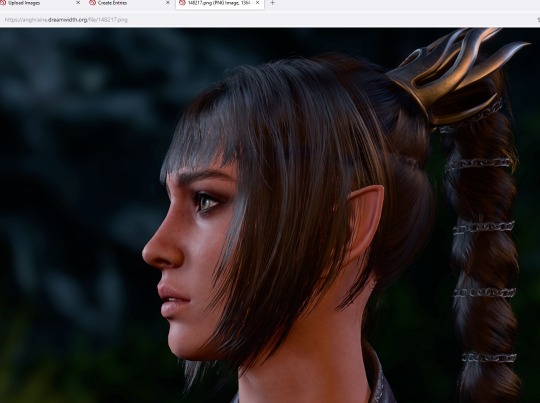
Let's suppose I want to upload two pictures from Baldur's Gate 3:
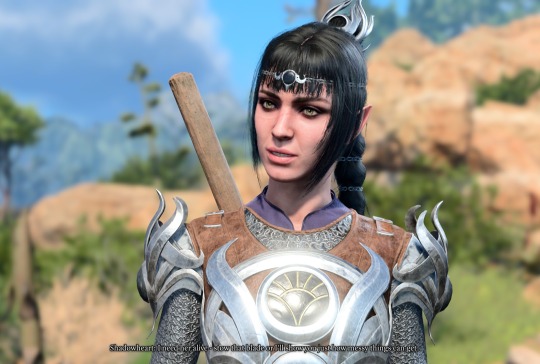
and
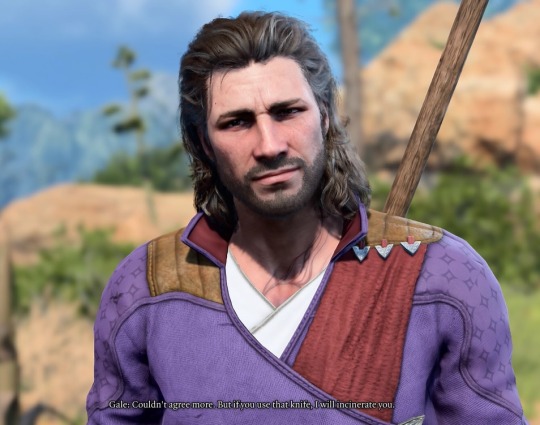
Okay. So after I click "Browse", find the right folder on my computer, and use CTRL+click to select both of these pictures (you can also upload pictures one-by-one if you wish), the space below the "Browse" button will show the pictures you've uploaded. It should look something like this:
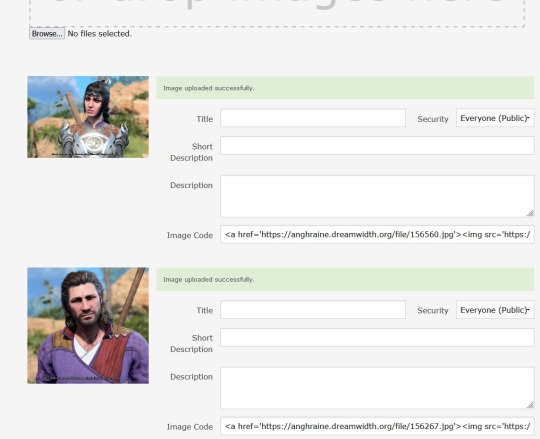
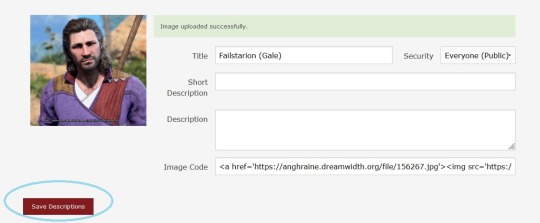
There they are! You can give the pictures names in the "Title" boxes, but if you want the file names saved, make sure you click the "Save descriptions" button below the pictures (circled in blue below):
At this point (much faster than it sounds like), you've uploaded the pictures to your account where you can look at every picture or file you've ever uploaded to Dreamwidth. That's cool, but they're not actually in a post yet.
Step 5: Make a new post.
In a new tab, open Dreamwidth (www.dreamwidth.org) again. It's important that this is in a different tab and you don't navigate away from the one your pictures are showing on.
You should see the "Post" button in the upper right of the main page, below your username. I've circled it in blue here:

Click on "Post."
That'll take you to the Create Post page where you actually put things on your blog.
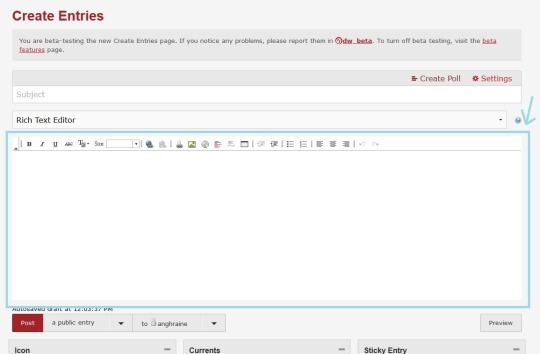
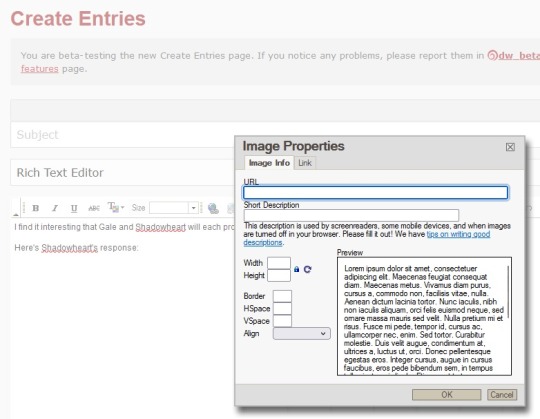
I'm currently trying out the beta version of this page that's going to get applied pretty soon, so the style looks a little different here than in standard Dreamwidth. I figured I'd use the beta version because a) it's what people will see in the future, and b) we're going to use the old Rich Text Editor that is the same in both styles.
The Rich Text Editor has a blue rectangle around it and a blue arrow pointing at it in the picture above.
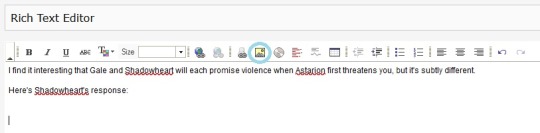
Let's narrow in on the Rich Text Editor. Like in any post, you can just start typing into the Rich Text Editor, if you want words at all. So here I typed a little explanation for the BG3 pictures and put the cursor where I want the pictures to show up.
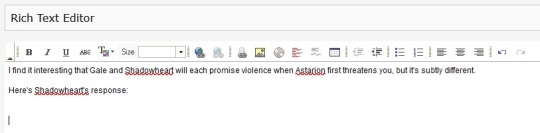
You can see that there's a bar of options above what I've typed, with buttons that let you bold, italicize, underline, etc. We want a button further on—the square button with a yellow background that looks like a tiny landscape of mountains and sunshine. I've put a blue circle around it on the screenshot below:
Step 6: Add your pictures!
Clicking on the little landscape button will open a box where you can paste the URL of any image you want to put in your Dreamwidth post. The image doesn't have to be hosted on Dreamwidth—you could paste a link to a picture on Tumblr or whatever—but it'll be more stable if it is, so that's what we're doing.
It looks like this:
Since we already uploaded our pictures to Dreamwidth in the earlier steps, we just need the URLs for the pictures. There's a pretty easy way to see what it is.
Step 7: Copy-paste the URL.
Click back to the tab with your newly uploaded pictures. There will be a code at the bottom of each one. In our case, it looks like this:
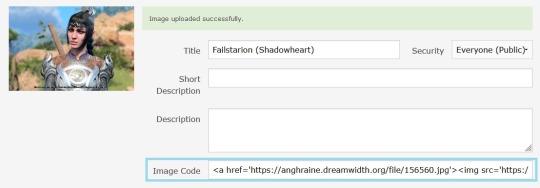
It might look a bit intimidating if you're not used to code, but you can ignore the most of it. You just want that little part that begins with https and ends with .jpg.
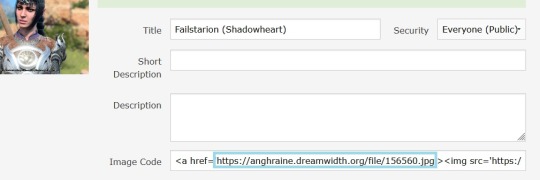
Copy the URL (I've put a blue box around it above) and click back to the Create Post tab. The "Image Properties" box from Step 6 should still be up.
Paste the URL into the top box that says "URL." I've surrounded the correct box with a red rectangle in this picture:
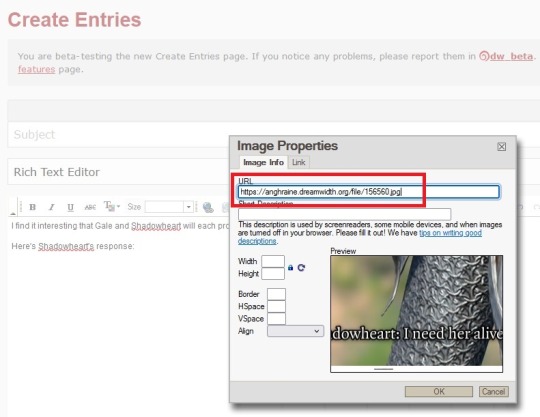
Hit the "OK" button at the bottom and:
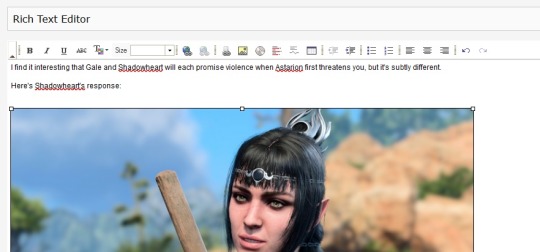
You'll see tiny boxes around the frame. Those will go away if you click anywhere other than the picture; they're for adjusting the size.
Step 8: Adjust the picture if you want
You know how Tumblr automatically stretches/shrinks pictures to make them fit? Dreamwidth just leaves them the way they are, so if your original picture is very big, it will look very big, and if it's small, it will look small. But you can adjust the picture yourself.
Maybe my picture of Shadowheart seems really big compared to the text and I want it smaller. I'll click on the tiny box in the upper-left corner of the picture (that one simply because it's the most convenient) and drag it inwards until the picture is the size I want.
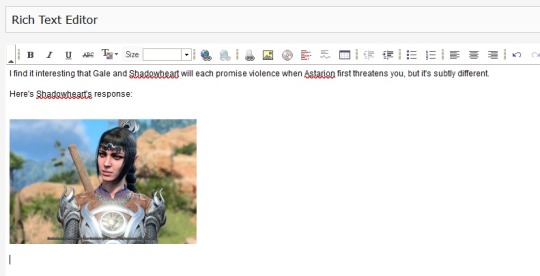
And there she is!
BTW: No matter what size you make a picture look in your post, once it is posted, you can always right-click with your mouse and say "open image in new tab" to see it in its real size.
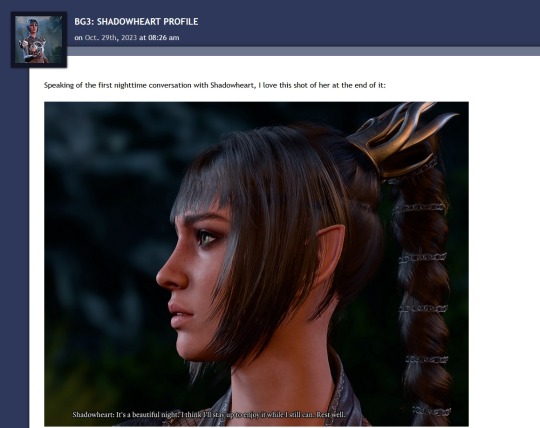
Here's a real post I made with a picture of Shadowheart I'd slightly shrunk in the Dreamwidth editor:
But if I right-click on the image and tell it to open in another tab, you can see that the saved picture is actually full-size:
So feel free to adjust your picture in the post however you want; it won't change the version you originally uploaded to Dreamwidth.
I'm sure there are other ways to do this, but that's how I get images uploaded to Dreamwidth and then embedded in Dreamwidth posts!
#there's been talk of a proper image upload function within Create Post but they've had more urgent updates so ... maybe#for now this works though#anghraine babbles#dreamwidth#long post#anghraine's pics
54 notes
·
View notes
Text

.... Look a bit closer
Tone is stored in the Lennon
#now watch me try to take that fuckin pic out#the beatles#john lennon#paul mccartney#60s music#george harrison#ringo starr#the fab four#beatles memes#update#i managed to rescue the lennon
25 notes
·
View notes
Text
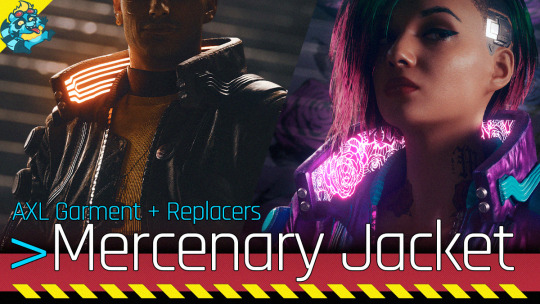
▶ MOD UPDATE: Now available with 🔀 Garment Support!
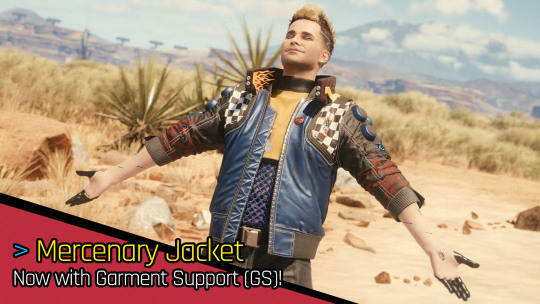

▶ On Nexus
#Cyberpunk 2077#Cyberpunk 2077 Mod#Mod Update#mmmMMMH Motivated to work on the next drop of those now OwO#Which should be... for sure Valentinos and Maelstromer#I'll see for the other two 👀 might slap a Barghest in there#Panam Palmer#Judy Alvarez#kiss kiss mwah mwah to Halk and Small for the pics uwu used them for the color previews
23 notes
·
View notes
Text
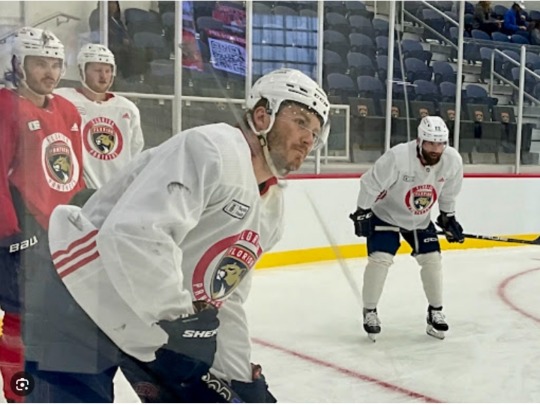
Small Update on Panthers as Matthew left practice early with a apparent minor injury


#matthew tkachuk#florida panthers#nhl.com#florida hockey now#photo of Matthew is a older pic#injury update#hopefully all is fine
28 notes
·
View notes
Last Seen Blogs

isananika
ISANANIKA

hockeylady14
Untitled

noeudpapier
Noeuds & Papier
lycaen-art
Inconvenient Ideal
sinneratheart1
sinneratheart1