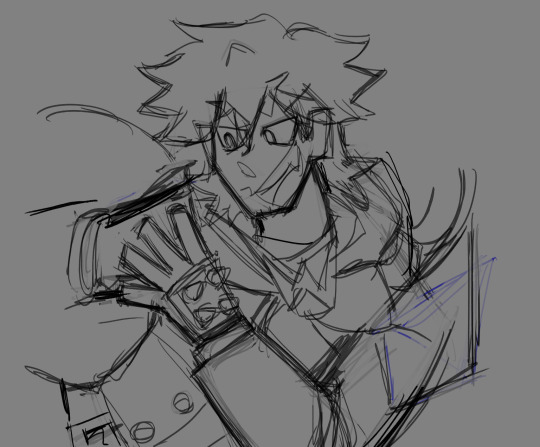
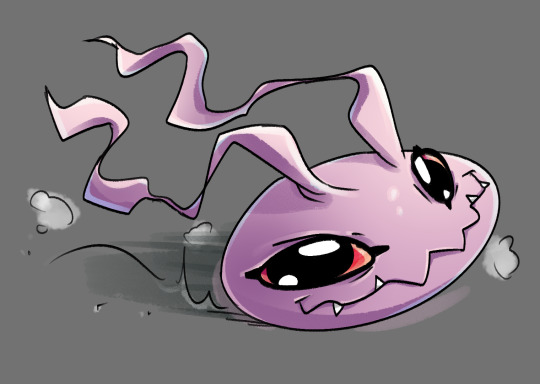
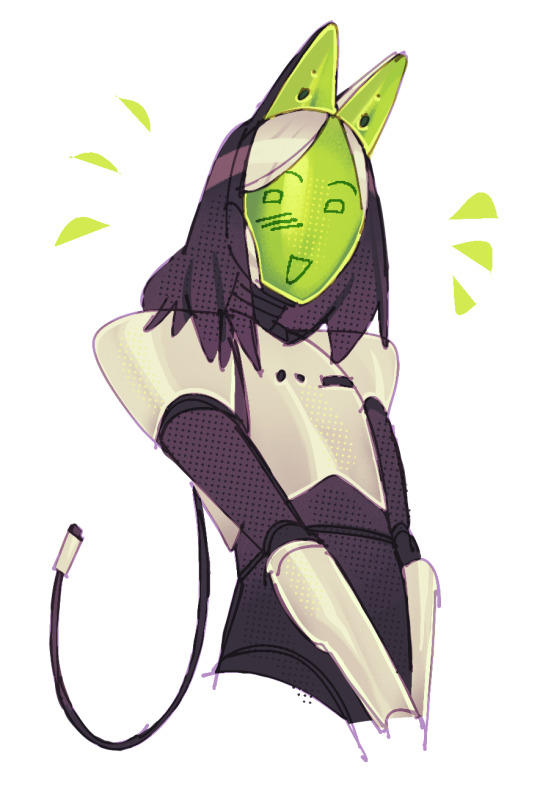
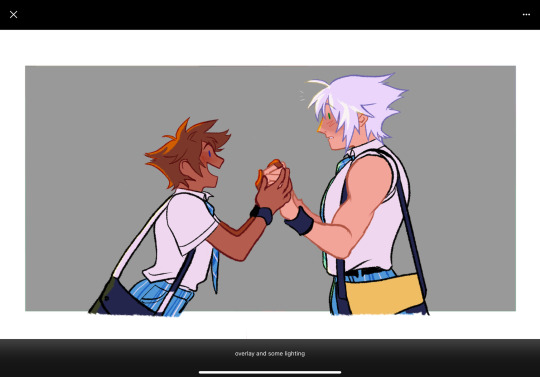
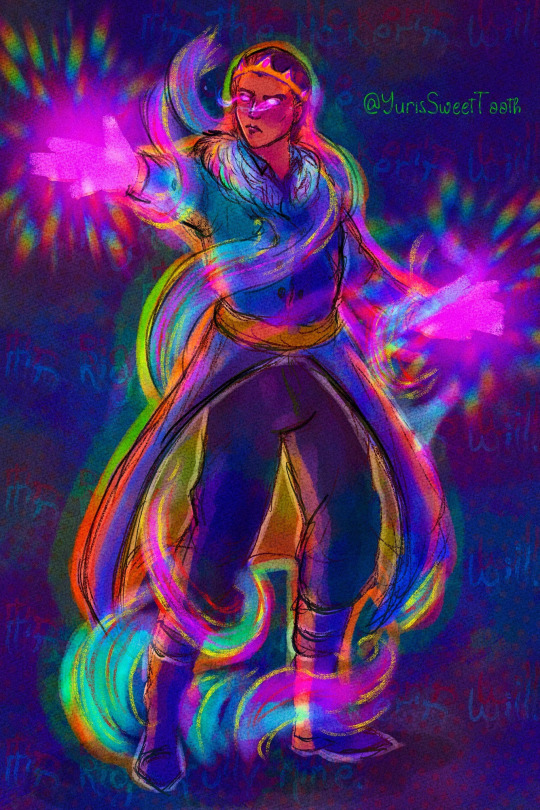
#also i messed up the layers and now it looks like the lineart is having a stroke oop
Text
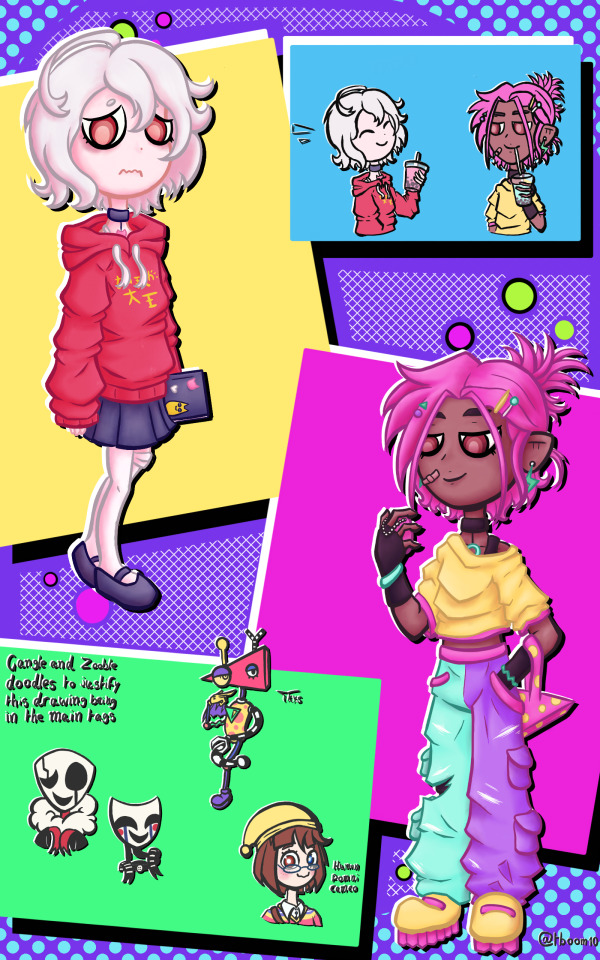
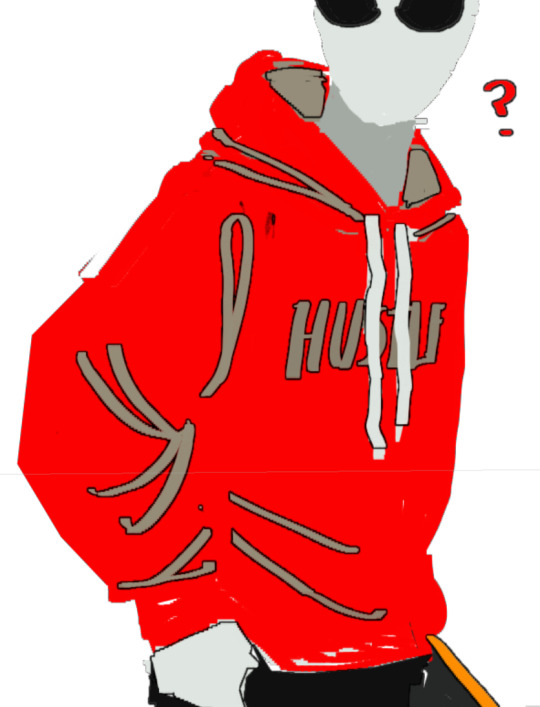
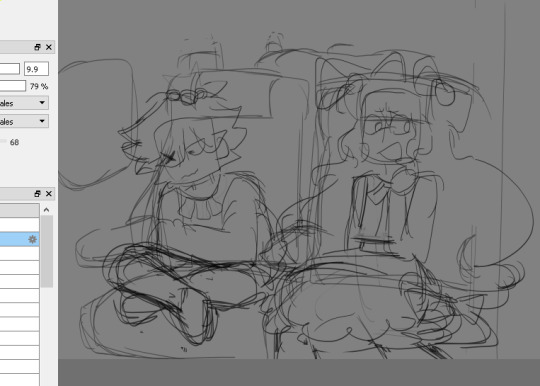
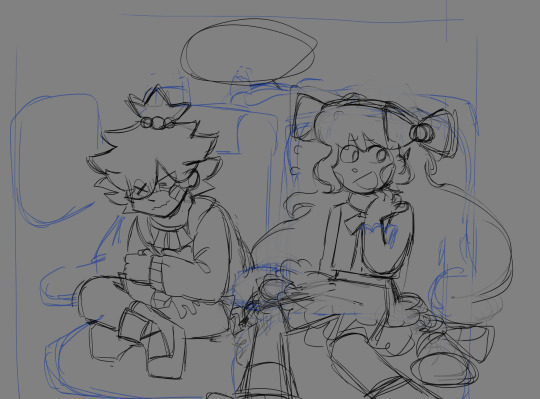
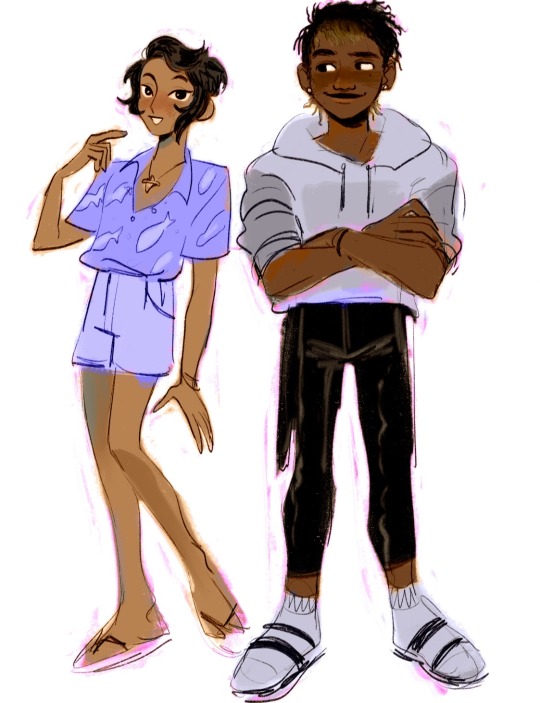
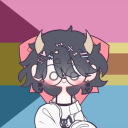
i felt like drawing something with vibrant colours as did i feel like drawing humans, so i did both.
the humanizations (? is that the right word?) of gangle and zooble and pomni too /ref were made by SonaDrawzStuffYT. i dont think she has a Tumblr, so here's a link to her youtube channel:
(if she has a tumblr, let me know so i can credit her for the designs)
#note: despite my having drawn a bit of abstragedy art before and posted it this is not intended to be read as ship art#im kind of uncomfortable making ship art with designs from someone who hasn't given permission to do so y'know#so even though i find abstragedy cute here they are just a gal and zooble being pals#tadc gangle#tadc zooble#tadc human#the amazing digital circus#tadc fanart#tadc#sorry if its a bit inconsistant btw#my drawing program stopped working after drawing gangle so i had to delete and reinstall the app and all the brushes were reset#another thing i worked on was unfortunatly set back a decent amount but this one luckily didnt. the worst thing it affected were the brushe#i tweaked the designs a little bit cuz why not.#i'd like to think they drink boba tea together. idk why but it just feels right#also i messed up the layers and now it looks like the lineart is having a stroke oop#i worked on and off on this for like 3 weeks lol#gaster ut/dr and puppet/marionette fnaf cameo (i've seen gangle cosplay as both and i think its cute as peck so i added them here)#kys stands for keep yourself safe here#too many tags
37 notes
·
View notes
Text
Handy book of tips and tricks for using Krita (by a user thats used krita for a while)
HI! So i'm a krita user, and i figure since i know fellow artists that are moving to krita, i might as well make a handy guide to some of the tricks i use to snazzy up my art and basic howtos. This will be splitup into three sections: Tools, Layers, Filters. I'll also be interspersing how i used them in my art as examples!! Thisll be a two parter so hold on tight.
Shortcut keys:
P = colourpick
E = eraser
B = brush
Tools:
Obviously try using all of the brushes and seeing which ones you like. Krita has a myriad of handy and good brushes, and you can even make your own if you feel like it. I personally like to modify the rectangle eraser to a normal brush and using it, before i modified it a little more to be my own brush.
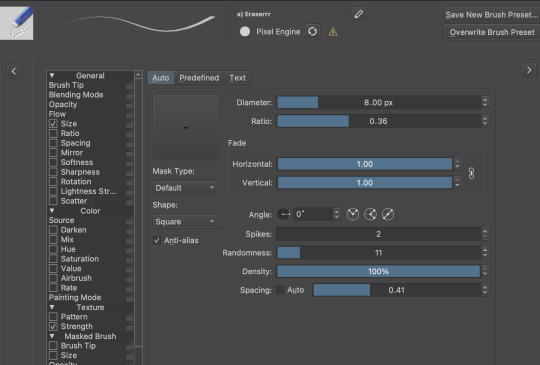
You can change the settings of the brush youre using on any layer by clicking this little dropdown menu in the top left of your screen. That little three dot button by the left side also goes into more detail about the brushes in case you want to fine tune a brush to your liking.

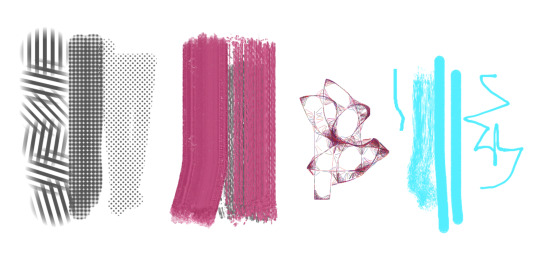
Personally, these are the custom brush edits ive used to make my art just that bit crunchier. As you can see, theres a lot more options you can tick and mess around with if you feel like it too.
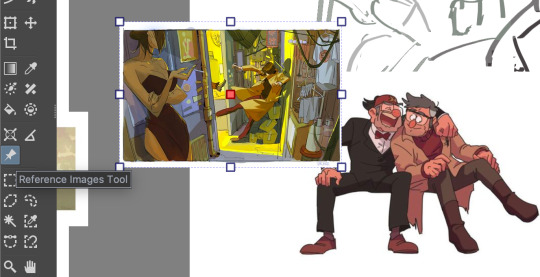
The pin button is the reference tool. If you copy paste an image into krita while the pin tool is selected, it will appear as its own image above all layers that can be moved around using the pin tool to use as a reference. Real handy so you dont waste layers on ref images.
Layer styles
Ok, you probably know the basics of how to change layers, (its this little dropdown menu here) but did you know that krita has a cool thing called LAYER PROPERTIES??

If you right click a layer and click this little button here..it should bring you to this handy menu with styles! These are really useful
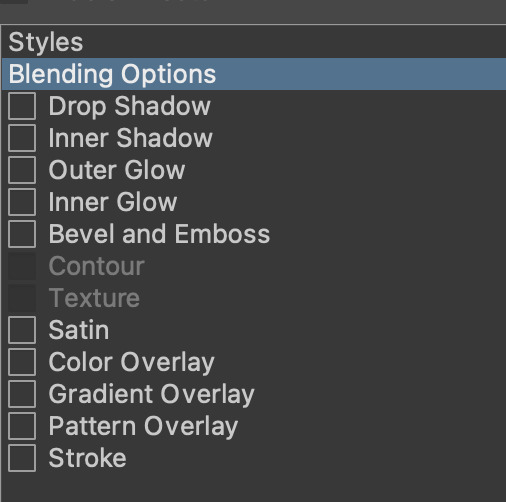
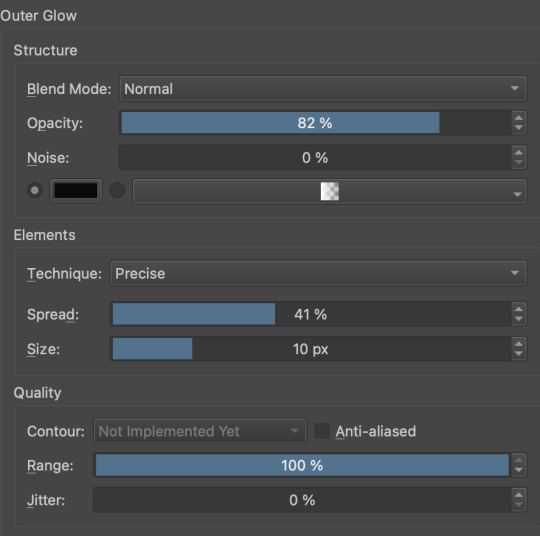
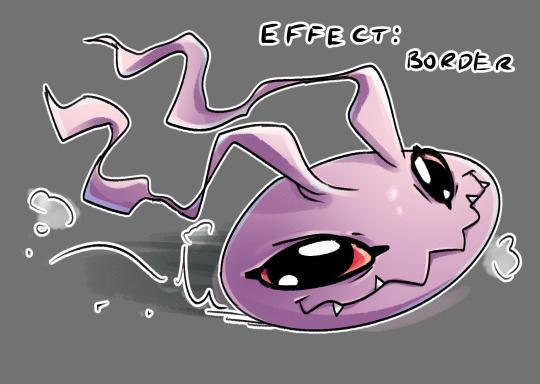
Now, i used to usually use outer glow set to these parameters to give the illusion of lines (and this is how anime artists usually line their very delicate pieces of hair and stuff), but i found an even better way!!
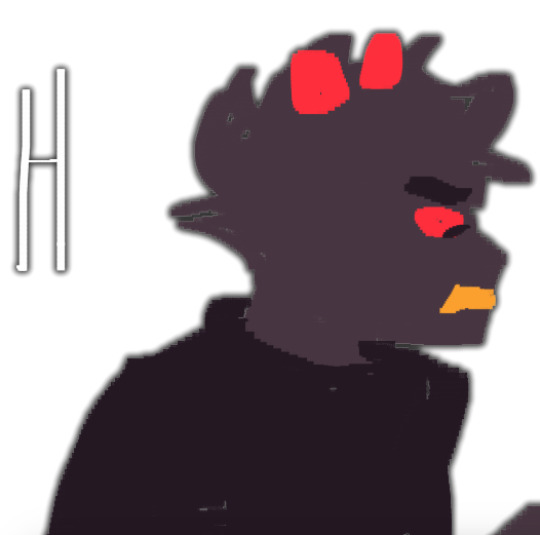
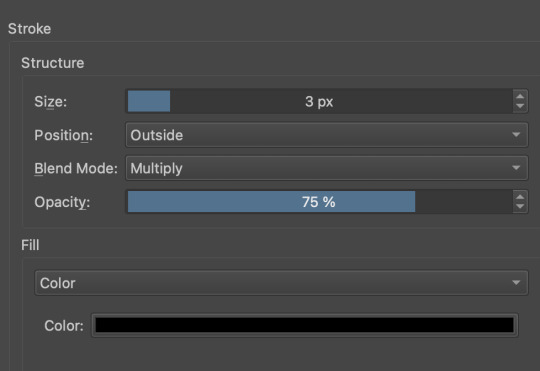
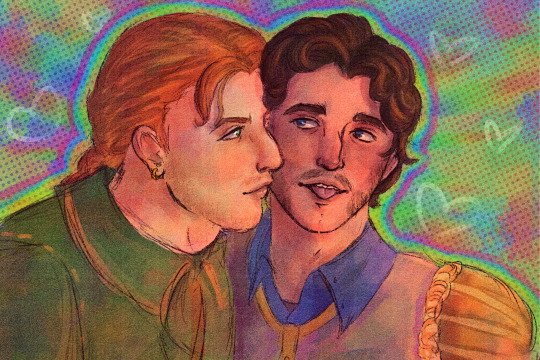
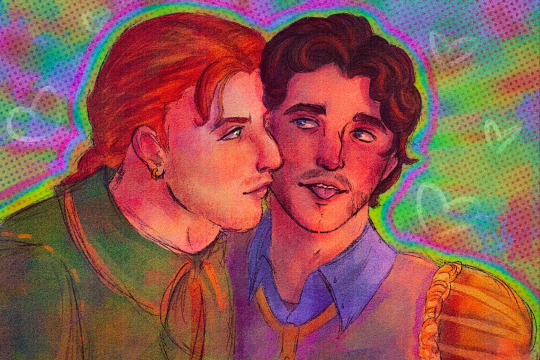
Its called stroke, and you can just modify it to be as thin or thick as you like. I recently used it for these two pieces, because its more precise, and used across multiple layers makes your work look cool and like you gave a damn about lineart. This is especially helpful if youre a stubborn son of a bitch that isnt going to to take the time to line your lineless work, or if you want to line really small items like string on shoelaces and not have it look messy (just set the colour to white and draw as usual.)
PART TWO
64 notes
·
View notes
Note
Hi! I love your art and I’m so curious to know what your art process is like!
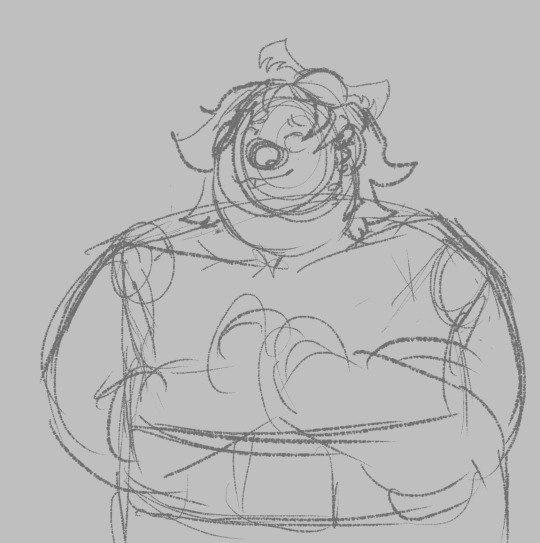
i've been trying to figure out how to answer this & i've honestly realized that my process is a mess LOLOL i did record myself!!! drawing fishlegs bc he is the fave & easiest for me to draw! i hope everything i explain under the read more makes sense!!
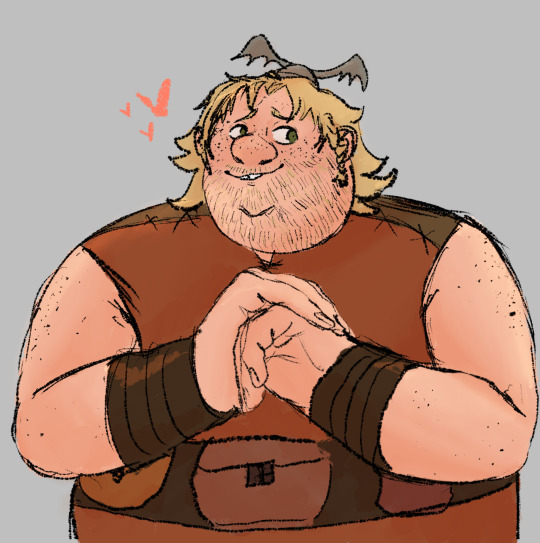
it took me over 44 minutes to draw & the screen recording in the art program i use (autodesk sketchbook) brought it down to about 7 minutes and 25 seconds. i didn't wanna speed it up even more bc it'd be way too fast & jarring i think but!! i've uploaded the video to youtube (with some animal crossing music <3)!! i will still try to explain what i did here tho!!
my initial sketches are EXTREMELY loose! i start with the head by drawing a circle & extending past it for the chin of the character & proceed to do the nose, eyes, & mouth!! hair is next, but if there's a helmet i need to draw, i'll do that before the hair!! then i'll do the body starting from the shoulders & going down!! for the hands i just do circles/a general shape! no details!!
the sketch layer is a layer of black for the brush color with with lower opacity
i immediately do lines on top with the same brush but with black at full opacity on the kayer above!! this time i actually take my time to be more careful with details BUT i am still very sketchy & if smth isn't 100% accurate after i try a few times, i leave it be! hands however...
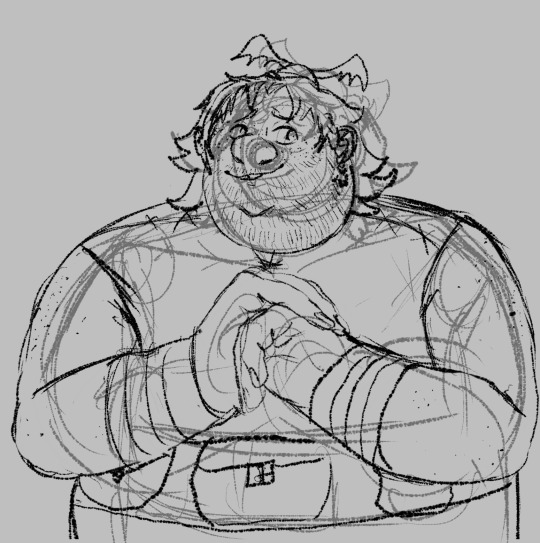
i almost always end up taking a photo of my hands using the front facing camera set to a 5 second timer on my phone! i also draw using my phone so it's literally having everything i need all in one place lol!! i do trace my own hands but obv i adjust based on what i'm drawing!! fish's hands are def gonna be wider than mine!!
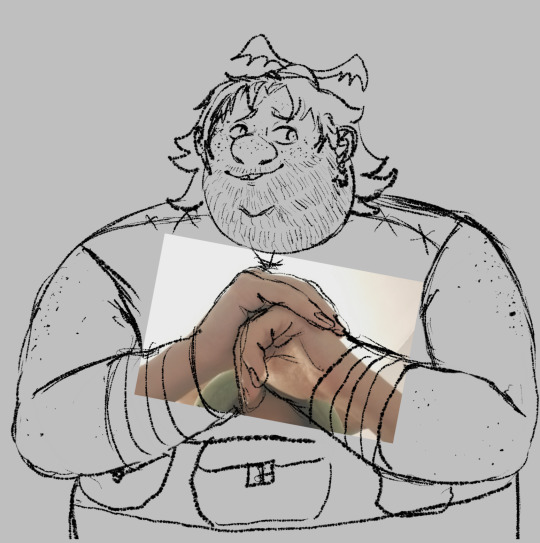
NOW for color i color pick directly from screenshots!! however i use it mostly for flats & then pick my own for shading!! let's focus on the flats for now!! i start with the skin always!! the skin is going to have color layers above and below it, so it's easier for me to see where everything else will go if i've got the skin all settled. here you can see my color layers!! these are ALL flats!!

shading & lighting i don't rlly... focus on being accurate 100% but i try to do it based on where a shadow would absolutely be/to give the appearance of some type of depth (my art is very flat either way tho!) like where his lower hand is cupping i'll shade but leave the top of the upper hand unshaded for the most part! i lay out everything in a multiply layer first (can be any color u want based on the vibe u want!!) & then use a smudge tool to blend it out!! same goes for the lighting layer!!!

my art overall is a lot of scribbling big lines & curves then using the lineart to do the same but slowly make adjustments until it looks acceptable to me. it's SO much erasing & reshaping & i always have sketch lines everywhere but i like how it looks. it looks like i drew it, u know? plus the httyd books art style is a HUGE inspiration to me, at my core. i didn't even realize it was until ppl on here pointed it out :') i also enjoy drawing fast & moving on!! which is just smth i've trained myself to do since my star fox days (the reason i draw in the first place!!)
thank u!!!! i hope this made sense!!
#rose answers#evilwriter37#httyd#fishlegs ingerman#httyd fanart#🌹 art#i hope this makes sense!!!!!!!#this was rlly fun to do!!!#i'm so unaware of my own process that i feel like it's a lil painful to watch the screenrecording of me#BUT u know what it works!!!!#also: i love drawing freckles LOLOL
25 notes
·
View notes
Note
Do you mind explaining how you make your art style.
I pride on imitation but I can't seem to crack how you make art like yours.

HELLO no problem (using this as an excuse to not forget my process too 😭)
for my style you just have to know how to use diff layer modes (for colouring) but also how to put this option

for lineart details (^ it makes you colour inside of the flats from the layer below) IM EXPLAINING HORRIBLY
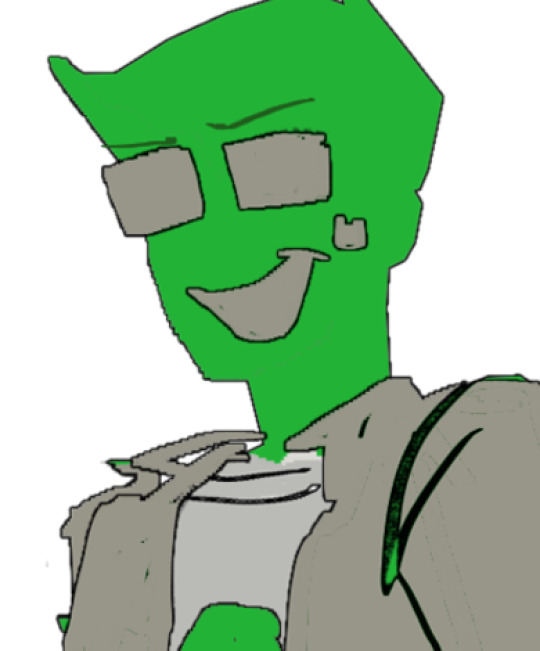
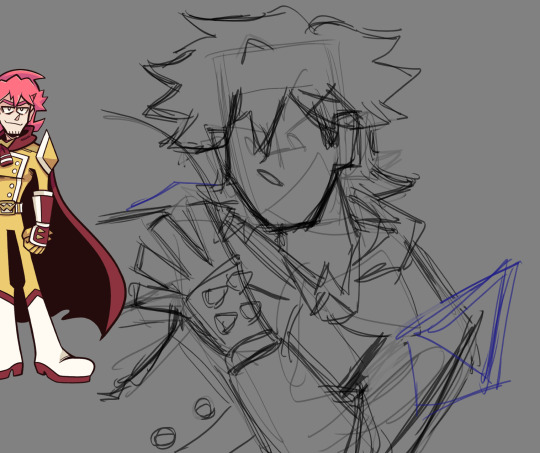
i dont know if you were asking for the colouring or everything in general? but okay lets take giovanni as a lab rat
LETSGO so what i recommend is a lot of defining

so you first are going to have something like this , no details just focus on the pose
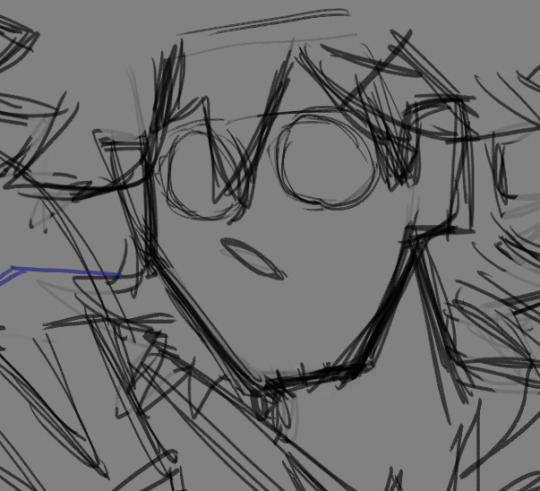
NOW TO THE SECOND SKETCH you should do the head and body in different layers bc sometimes u might mess up in proportions and its easier like this
^(on the first sketch the face is all over the place and not accurate so what helps me is check the forehead size for guidance of where to start the eyebrows and eyes )


see u got a head shape BUT ITS MESSY so time to do the body

awesome
now you make it fit
this looks creepy but sometimes its good to make these as a guide of where the limits of their eyes (+position of their eyebrows) are (also helps for the distance between the nose and eyes)

i prefer their eyes dont touch the corners/sides of their heads idk if that makes sense

SOO IT TAKES SHAPE just get them surgery anytime you see something that looks bad / or that could look better
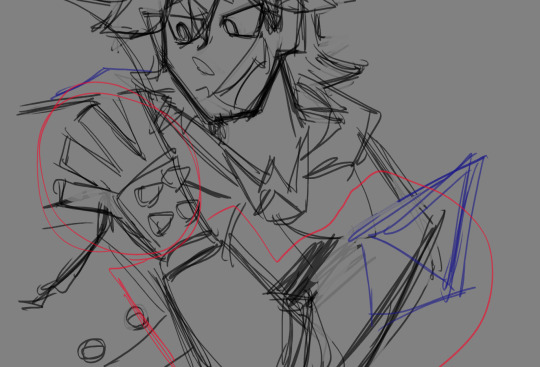
LIKE THIS WHOLE SECTION
this man and his weird shoulderpads whatever . theres always stuff to modify , here by example i personally dont like the head size so
wooo giovanni exists
let me know if you wanted the colouring process or a character in specific 👍
#long post#i made a colouring tutorial another time but it was a different type of shading idk if thats useful#giovanni potage
17 notes
·
View notes
Note
HII I’m not sure if this is the right blog but I’m so curious about how you color artwork, like what brushes you use, I really love your style and have thought about taking some inspiration from it
Hi! :D This is fine, I'll reblog it to my art blog so it can be easier to find, no worries.
I'm not the type that uses too many different brushes! I ended up comfortable with just a single brush for most of my work unless the style calls for something else (like soft look of Rain World, which I did a little step by step for here~)
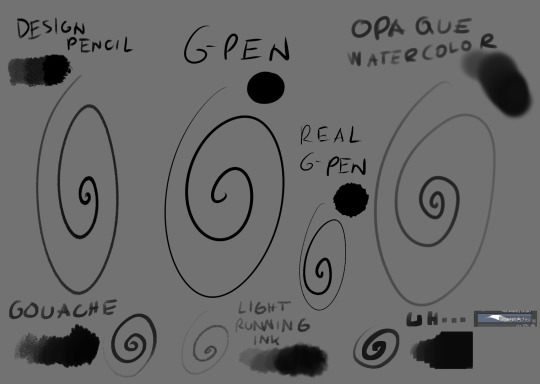
The main brush I use for just about everything is Design Brush. I use it for sketching, I use it for lineart and I use it to add shadows and highlights! I also like to mess with the backgrounds with it
I got hooked to Real G-pen recently for fun lines and texture! Opaque watercolor is what I use for soft rendering like slugcats~ Gouche is very fun to paint with also because of the texture! I haven't used in awhile tho. Light running ink is what I use for smokey effects, clouds, stuff like that! I love the brush! And uh... the last brush is called *checks the source* Nouchika Square Brush. It's free! It's square! It's new to me! very fun to use!
Details about the steps with Design pencil:
After sketching, I basically just lineart with the same brush in a different layer (or multiple of them, if needed!). Once done, I also duplicate the lineart layer to make the previous a little sharper, since depending on the pressure the brush can be faint or very strong, which will come in handy with colors later!
Single layer VS doubled:

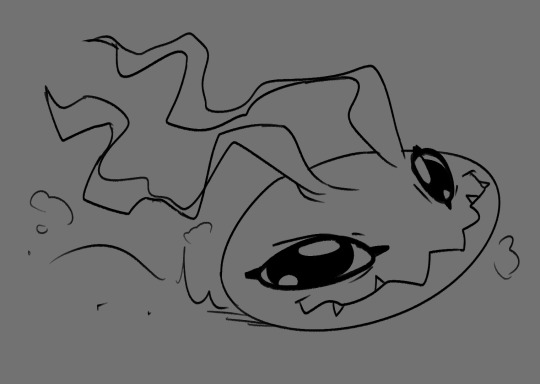
Next, for easy color in, I select the areas outside of lineart, invert selection and even shrink it by 1 pixel. Then, I color the new layer bellow lineart flat with one base (in this case, Koromon's pinkish color)
Above it, I hand fill other colors and yes, there are probably easier ways to do that but I am way to used to the hard way XD Note that I rely on this: Hold CTRL and click on base color layer to select everything in that layer, then make a layer and color within that, so I don't cross the border/lines.

I usually lock layers for the next part but you can also just make a new layer above.
Use gradient tool (with which ever options) and select colors that are slightly shifted in hue and saturation from the base color picked one and toss in a bit of gradient shadow and highlight in each locked color!

Remember, color picker is your best friend ever to befriend in any art program! it will help you find hues in this gradient you can work with to add to the shape while doing the simple render!
Now, I use the same brush still but I change sizes depending on which area I'm going to go across. Nice part about it is the aforementioned pressure that can apply less or more color depending on how much you press down. I go with the light strokes over first and then stronger ones above! you can get softer shading this way! Same with highlight~ If something feels off somewhere, color pick the nearest hue and stroke the mistake away~ You can do the same if you want to use any present hue in another part of the figure

after that's done, I then tend to put another layer and select Overlay option on it to add at least a little bit more shadow or highlight (I chose highlight in this case). There is no background for this drawing so I figured it would be nice to add a little bit of cold colors to the warm ones Koromon is made of.
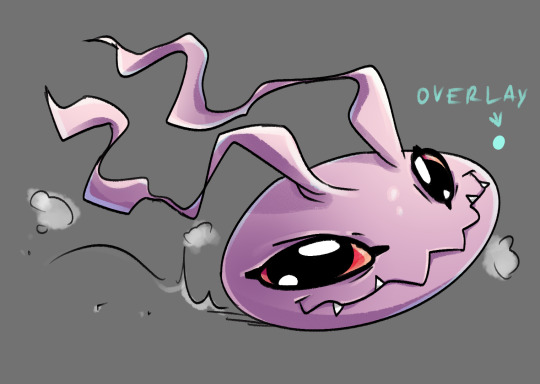
You can play with other layer options or even edit and color adjustments like tone curve, color balance and brightness/contrast, with any color layer! I do it a lot actually~
You add some extras if you want and you're done~
There is not much to it, so I use this for a simple style commission!
#ask#my art#sorry if something sounds odd it's a little later here as I toss this together dfgjgh#I dunno how good is to use the brush I use I'm just a bit too used to it with how I handle my pen pressure#I noticed it has a different(?) texture on my older tablet somehow?#might be the dps difference between tablets#but anyway#that's how I roll~
14 notes
·
View notes
Note
hii!! i was wondering if I could ask what is your usual colouring process? how much time one fully coloured piece and doodle take! I adore your ocs so much they inspire me to draw more myself:3 they feel so alive!
hi anon! thank you vey much, i'm very happy to hear that you feel inspired!
i wrote up a little something for your questions under the cut:
so, first of all, the way i color things ranges from drawing to drawing, especially if i feel like playing around in the process. sometimes i decide to try something out (palette, filter, technique, brush etc) and if i really like how it looks i may recolor the entire drawing lol. point is, there's a lot of sidetracks to my process (especially now, since i'm trying to get used to a different art program than the one i used previously) but the very basics of it are as follows:
1. i sketch and line whatever it is that i want to draw (this might take a while depending on whether i have a solid idea right away or not; in the latter case i might do some thumbnails first to figure out how i want the drawing to look. you can't really see here, but when i line things i usually draw on the same layer as the sketch, and after i'm done i adjust the brightness/contrast settings of the layer to get rid of the sketch underneath. it might seem like i'm just making my life harder this way, especially since this method only works if you sketch with a lighter color (or make it lighter in settings before starting lineart) and your lineart is drawn with a solid opaque brush (which is how i always draw), but it helps me to not get caught up on trying to make the lineart precisely follow the sketch. it also makes changing things on the go much easier, since i only have to erase on one layer.

2. after i'm done lining, i underpaint with a solid color (usually the skin color, but sometimes something random), then block the alpha channel and color over it with flats;
3. i don't color everything at once, instead going piece by piece, which helps to keep the drawing balanced color and contrast wise. i pick a desired area with magic wand and then go about rendering it properly (which usually involves adding some value variance with an airbrush and then laying down shadows/highlights/etc). you can't see this here either, because for some reason i forgot to do it this once, but i also usually lower the opacity of the lineart layer halfway when i color. it helps me concentrate on colors and how they look together better;
4. when i'm satisfied with color, i recolor the lineart to be whatever color i think fits the piece better and change lineart layer settings to either multiply, color burn, or linear burn. after that i just play around with filters, add decorative details, and clean everything up. it's also worth noting that sometimes i starts trying out filters/effects directly while coloring because i want to explore some alternative colors or palettes; i also have a tendency to pick very pale & unsaturated colors so messing around with HSB (hue/saturation/brightness) & depth/contrast settings while coloring helps a lot.
5. cropping it & there you go!
this one took me 1,2 hours. depending on how complex the drawing is it might take me much longer (especially if im working on a commission) so i'd say my average time drawing is somewhere between 2-6 hours. if a drawing takes longer than that i break it apart into several days of work. don't draw for too long! it's bad for your health.
as for sketches, as i mentioned previously, it all depends on whether i know what i want to draw or not, and if i do, i usually just go straight at it:

this one took me 20 minutes. on average, a doodle can take anywhere from 10 to 40 minutes, more if i want to make it look fancy, but at that point it enters the vast limbo between sketch and finished piece.

that's it! sorry the gif quality is really bad, it's the best i could do. here's a video of the same stuff, hopefully in somewhat better resolution
#character: kotya#character: shurik#setting: robot#artist: cbge#askbox#had to cut out footage of me playing with filters bc it was flashing rly bad
27 notes
·
View notes
Note
would you be willing to make a tutorial, vid/ speed paint or step by step, on how you color? i'd love to know how you approach coloring, b&w or in color! you don't even have to explain, of that's difficult, i'd just like to see how you color & if you use multiple layers. or if you have any tips/ tricks for CSP or procreate? sorry, trying to study your art since i really love how you draw & color all of your pieces. ;w;
thank you so much 🥺💕 I actually share step by steps and videos over on my patreon but ive wanted to make a speedpaint video for some time now!! Since I haven’t been finishing any illustrations lately i don’t have anything new but!! I can share some old stuff below:

While i tend to change things up depending on the piece, I do tend to follow certain steps. If it’s line art, i’ll sketch -> lineart -> block colors -> shade -> usually multiply a cool tone -> add color accents on top of that and if i do a more flats heavy piece it’s basically the same minus the line art.
I tend to (try) to approach stuff with values first so i usually go for greyscale, maybe a gradient map (i’m trying to figure these out lol) and then mess with colors after


sometimes that leaves things more saturated or a little flat and it really depends on what i’m going for.
I do the same for when i block colors in first.


I feel that i’ve actually been struggling with trying to get my colors just right recently but! I do try to think about how i can improve them when i’m working. For example, having warm vs cool tones to create focal points. Trying to keep palettes cohesive so there’s only one or two accent colors. I also like to add pops of complimentary colors to line art/accent spots to bring more attention to them. At the end of the day I kind of just… do things at random though and it’s all about working with a piece until it just feels right. Sorry the information is a bit more vague then anything but studying other artists is a thing I do a lot, as well as just doing general studies! It helps teach your eye what colors go together, why you like certain color combos, and how to focus on the shapes more than anything 👍
Also here’s a time-lapse if you’d like to take a look! There’s a lot of flashing at the end as I swap through colors so be warned but! the general gist of my workflow
hopefully that at least answers a question or two but if you have more feel free to ask! thanks for reaching out !!!
19 notes
·
View notes
Note
Hi! What's your drawing process look like? Do you sketch shapes, or go straight to colours and layer them up to get what you want?
Omg someone wants to know myyyyyy process? Ahhhhh! Let me warn you, this just what works for me and I definitely recommend learning the fundamentals instead of doing it my way.
I’ve been doodling for over 15 years, (thanks middle school math for kicking off my art hobby) so a lot of this is lots and lots of practice.
I typically start off with shapes of some kind or some sort of marker for basic composition.

Once I know where things will be, then I jump straight into it. I like to clean up my sketches as I go, (to make sure the lineart is clear for when I do my final lines) so it’s way cleaner in this photo than during my process.

I used to work my sketch into my final piece but now I just do a new line art layer. It looks better that way. Once I have my sketch and I’m happy with it, I’ll put down my clean lineart.
I then add color (flats) then shading. I tend to use a lot of layers because I like the ability to easily change something. I also will shade right above the color layer instead of on top of the whole piece so it’s easier to fix/ manipulate.
(If it’s more complicated I label the layers but I didn’t this time)

I also don’t usually use masks, which I know some people will swear by. I don’t like them, so I paint everything manually. I came from physical media so this just feels better to me personally.
And I just keep working it until I’m happy with the results. This will usually be testing colors and layer types ☺️ Sometimes I’ll transfer it to photoshop if my colors need correcting and it’s too late but I really haven’t used photoshop to mess with the colors since my Aquarium piece. (That’s why the colors look soooo cool in that pic is because of that). (Heres an example of before and after those updates).
Before color correcting:

After:
I hope this answers your overall question! ❤��� Thanks for the ask!
14 notes
·
View notes
Text
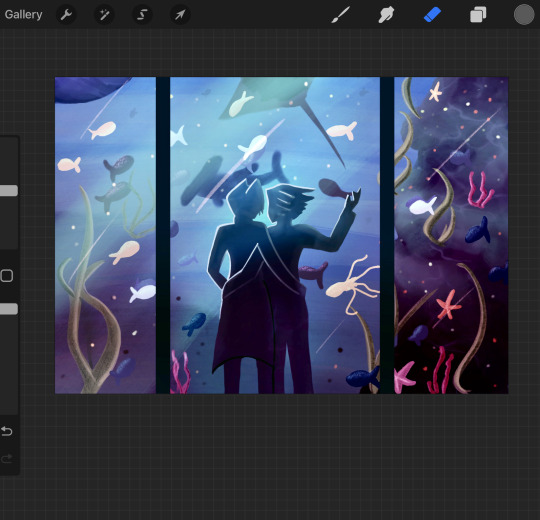
Nezuko WIP: a process

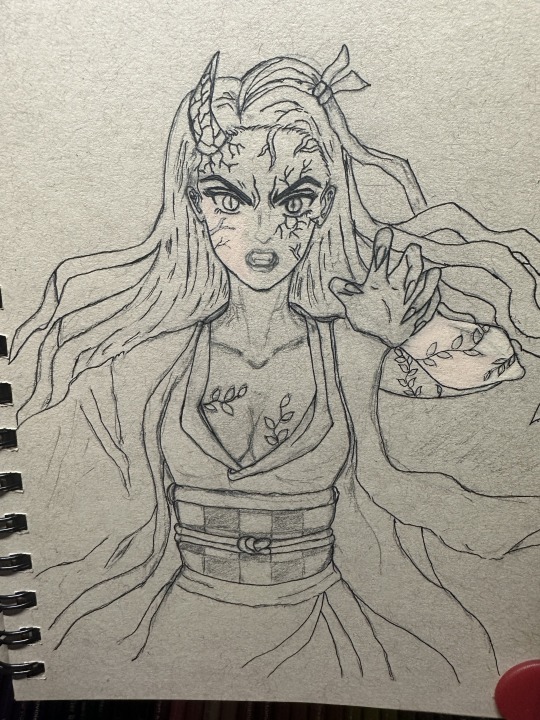
started out like this. Don’t mind the lines and such. Tried to erase as much of it as possible.
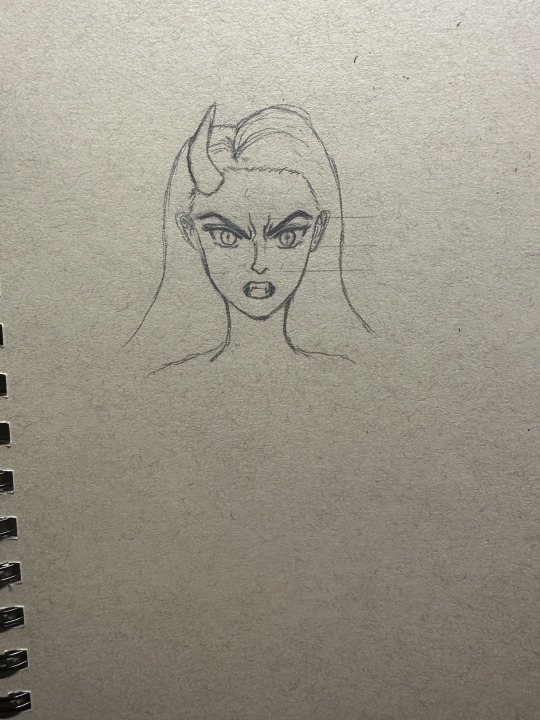
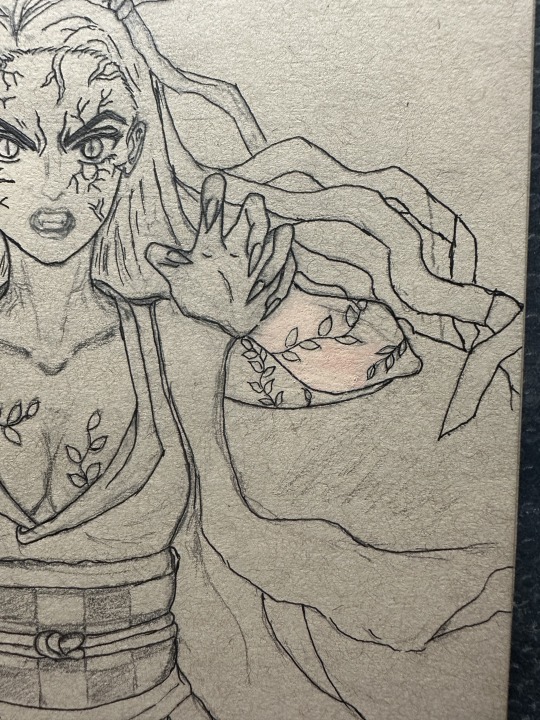
then gave her a body and a hand (jfc I labored…still labor…over anatomy, mainly hands. Hands will forever be the bane of my art existence.) Also gave her boobies because she is in her demon form, after all. Not sexualizing her, it just be facts. Anyway…
minor shading here and there (I’m so used to shading from the get-go. It’s bad.)
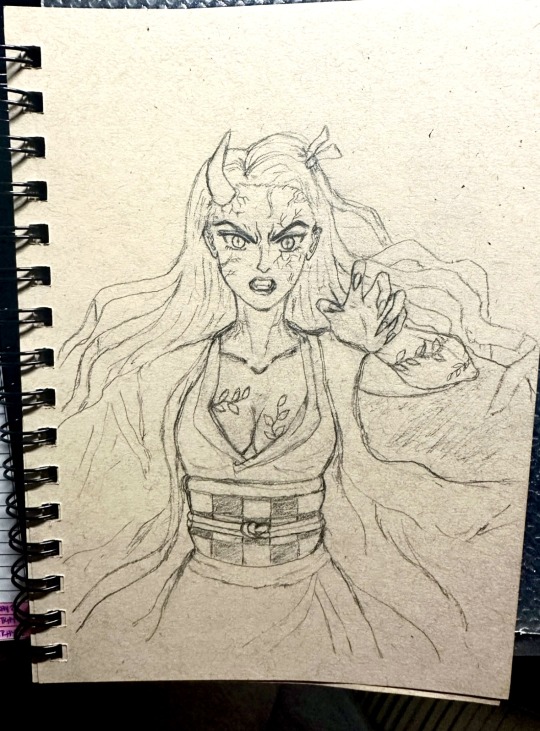
Started the lineart. Don’t have a manga pen or whatever legit artists use so it’s the Pilot G-tec in 0.4mm & 0.3mm for me. I fcked up in some spots already 😅
Keeping the finer details/shading as a placeholder for now. I have to figure out color combos with colored pencils because unlike digital art, I unfortunately can’t undo/erase/add layers 😢 so if I mess up, it’s staying.

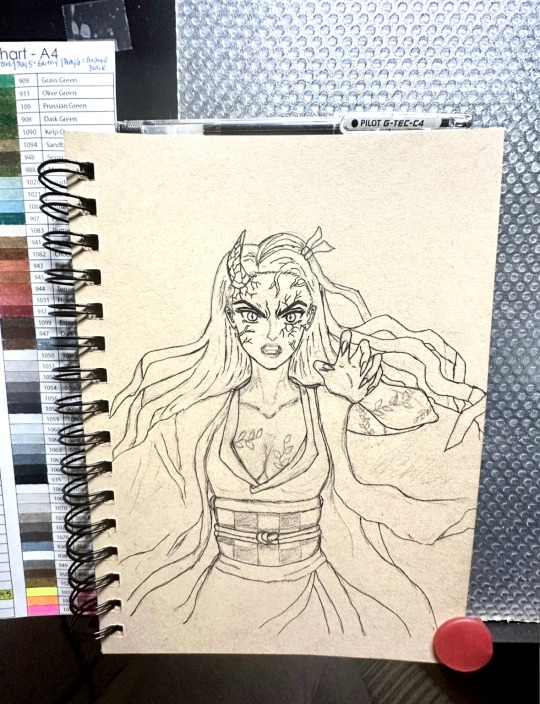
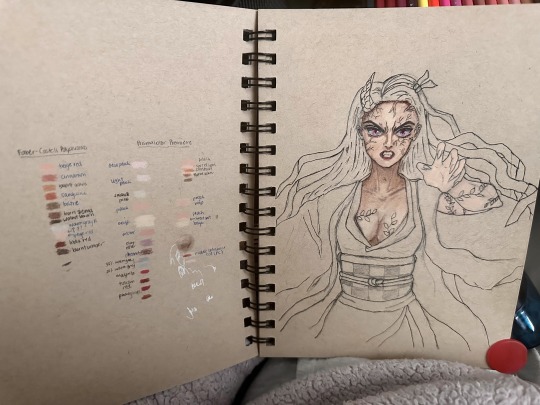
Made a mini swatch on the other side of the page & tested them on her arm bc who cares abut the arm lol….and because see note above. I have 370 colored pencils in my arsenal (Crayola, Faber-Castell & Prismacolor) so it took a while to sort through colors. They definitely don’t present the same way on paper!
Looks like the “sweet spot” for the skin base is a mix of peach and beige (Prisma). I hope I’m right 🤞

I started shading because I have issues.
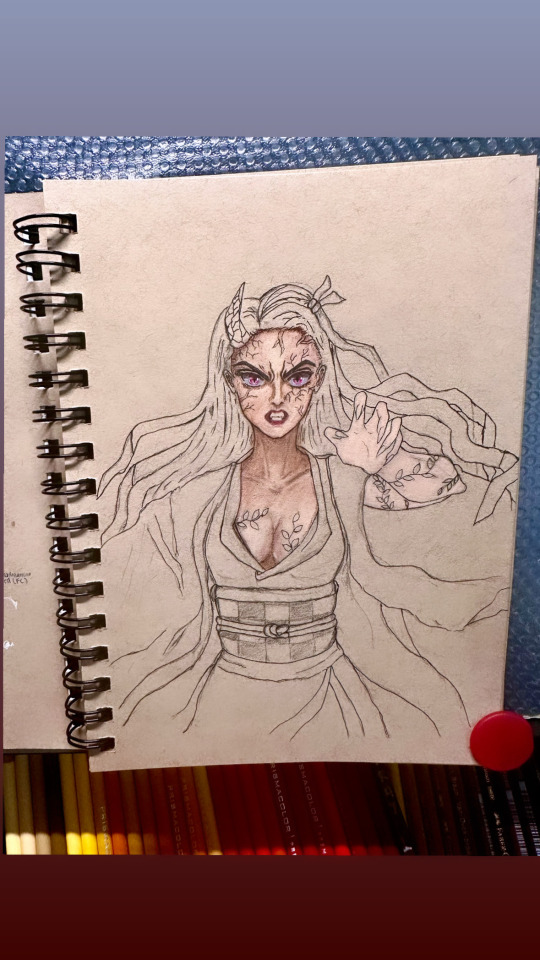
I used like…6 different pencils to get the base shading on her body. I am a fiend for blending so cotton buds are my besties rn. I’m gonna go over it again and shade things darker once I’ve laid down the base colors on everything. I’m a visual person and need to see everything laid out first. Idk I’m weird, ok?
also…maybe it’s just me, but she looks an awful lot like Daki here…🥴👀
…and this is where I’m leaving off because I need to go to sleep. I’m working three night shifts in a row starting tonight so I’ll pick this up when I’m less dead, I guess.
I’ll post the rest of the process next time! Until then, toodles!
#eleven's doodles#nezuko#demon slayer#nezuko kamado#demon slayer fanart#art process#work in progress#my art#art#colored pencil#traditional art#sketch dump
25 notes
·
View notes
Note
I dont wanna come off as pushy, but someday could you do a speed-paint video please? Ive asked like 20 tumblr artists key facts on learning stuff and like 11 of them went “speed-paints”, and your shit(affectionate) is cool so yea sorry for long ask bye gn I'm tired.
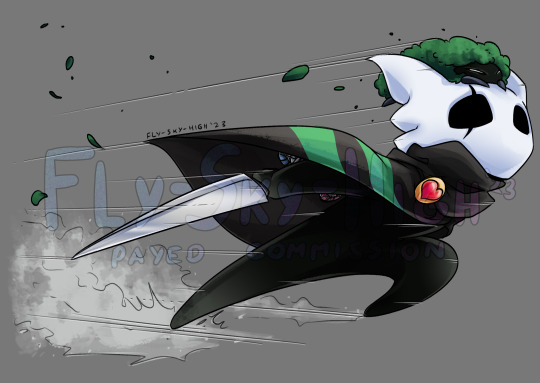
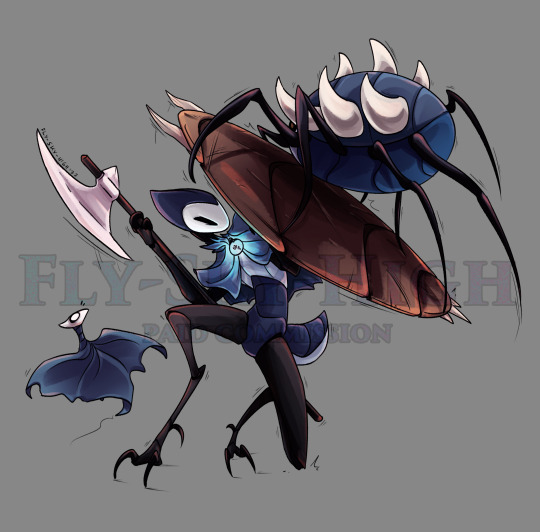
the few speedpaints ive recorded are heavy enough to crash my computer when i try to load them so have a set of stages in my drawings instead
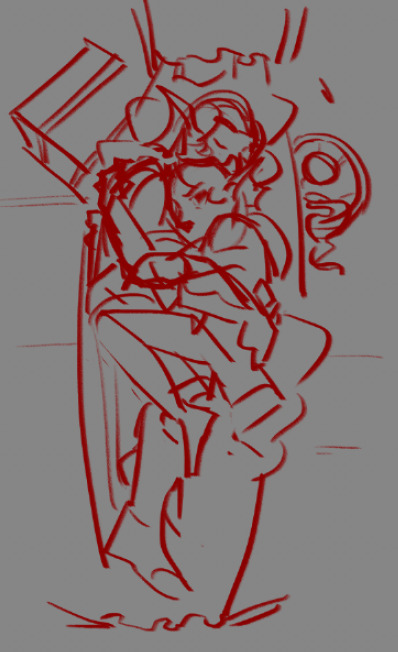
sketch: i lay down the composition and body language, if im feeling confident ill also plan values but i didn't in this case. i try to keep a very loose vibe as the more layers to lineart the more stiff the characters can feel
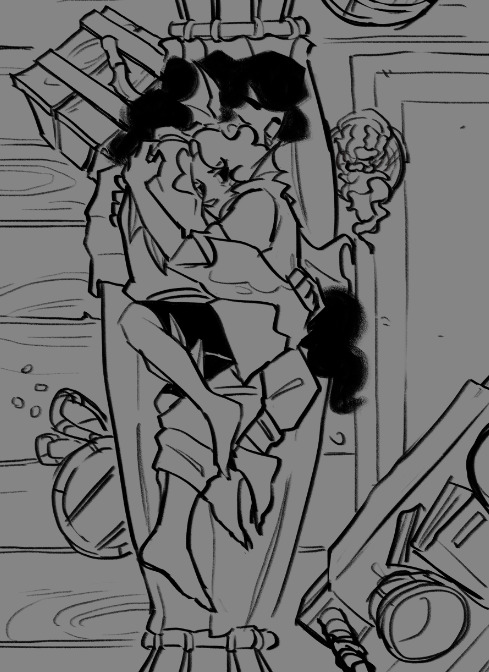
lineart: shit gets cleaned up, characters and background defined, keep background, characters and foreground linearts on different layer groups, you'll thank me later

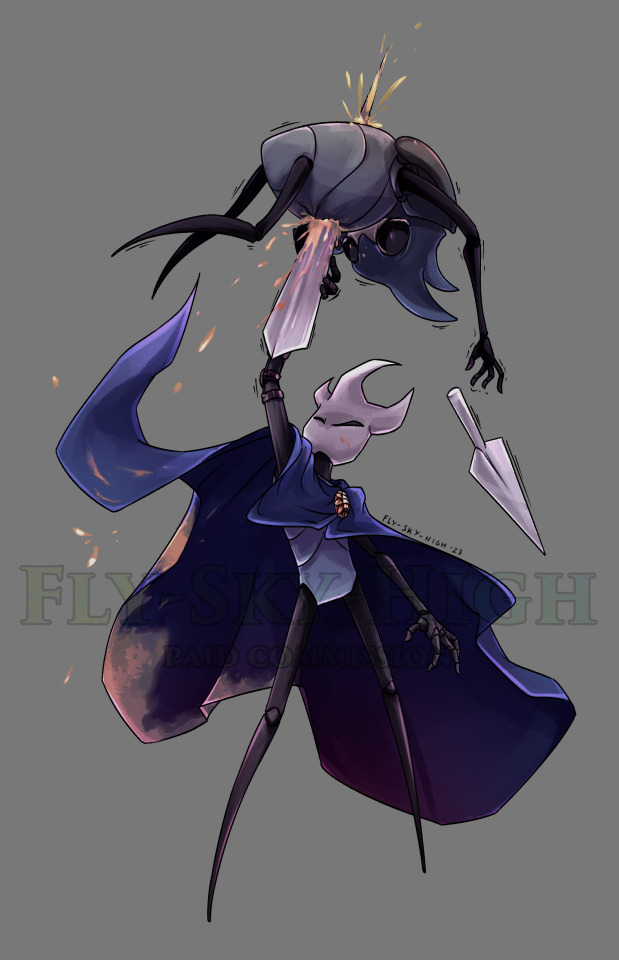
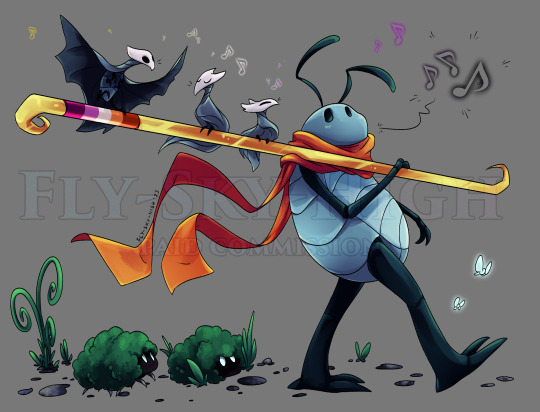
flats: the ugliest stage in my opinion but necessary, start planning a light source for the next step

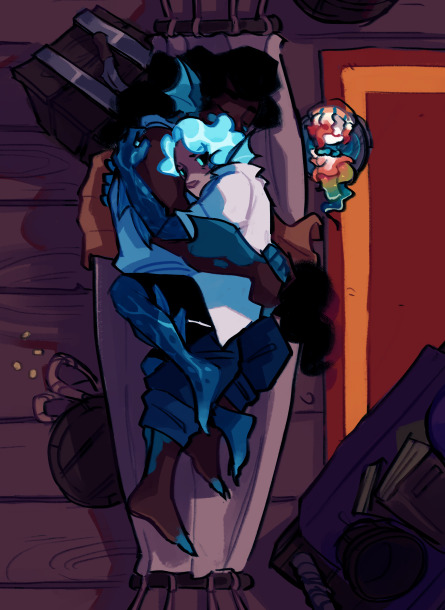
base shadows: simple as well, just shade based on light source and bouncing light, you can also do some rendering on some parts. i like to do my initial shading without multiply layers as it gives it a bit of a painterly look
coloring the lineart: helps pull the piece together and add a sence of depth, this is also why we separated the lineart layers so they work more smoothly without cutting of colors
now i would consider this done but i wanted to change the mood so we now go onto extra stuff
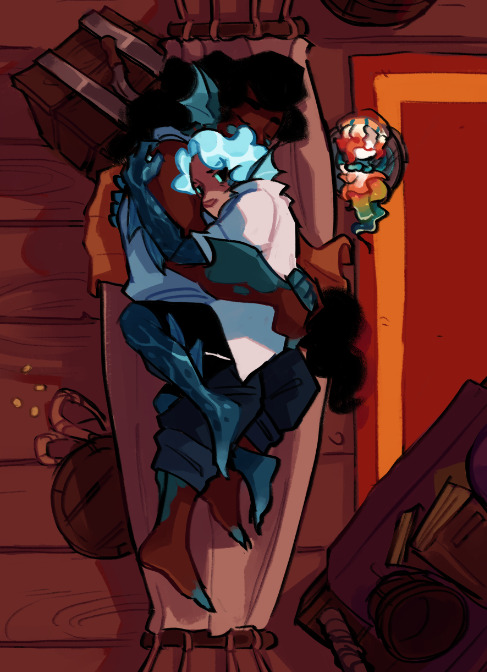
here i did some heavy hue altering to a colder atmosphere, mostly using hue shift and lighting settings on editing
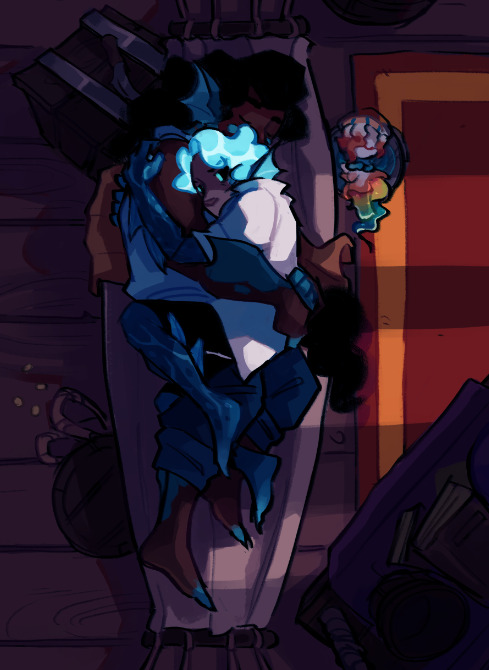
multiply layers are your friends for dramatic shadows, use them wisely, i actually erased them in mariza's hair to make it stand out
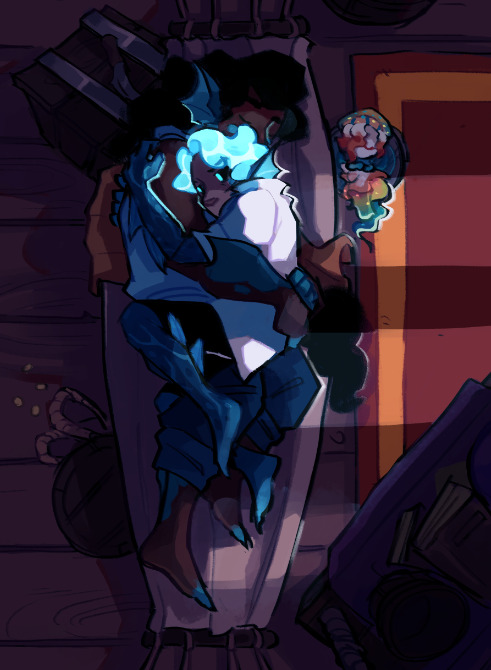
lighting time to make the shadows stand out more, remember that its also going to reflect on surfaces near them so keep a track or those. i used glow layers for this
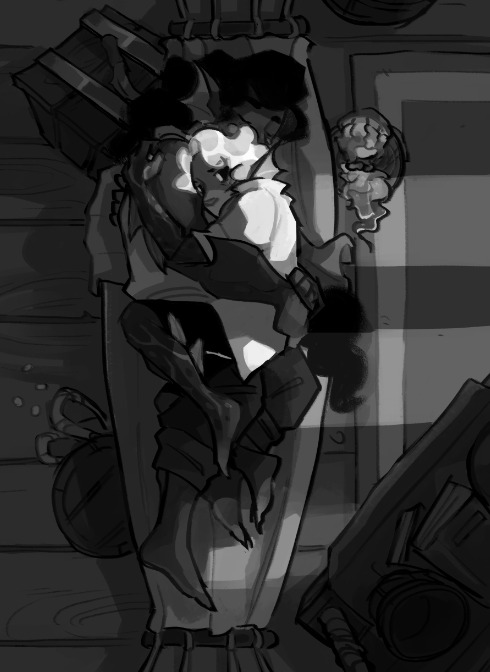
value check! something that should be done across the entire process, helps you track your shadows and lights without the colors getting in the way. use it to avoid muddy areas of greys on your art
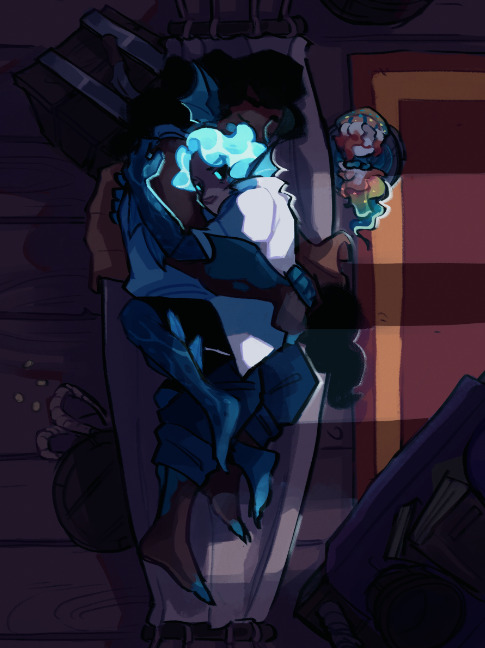
mess around with some settings and gradient maps and boom! you got your fully done ilustration, theres a lot i didnt touch on like painting rendering and some extra pizzaz i like to add but im running out of image capacity and time so i hope this helped
happy drawing!
#pada asks#my art#idk how to explain art stuff so this is a bit of a mess#but so is my art process to i guess it works out in the end#long reads#long post#art advice#art tutorial#tutorial#digital art#ilustration#artists on tumblr
214 notes
·
View notes
Note
How do you color your hand drawn drawings? Like, do you color them digitally, or is it all by hand? Either way it looks really good and I’m curious.
Hi!
Most of my colored art is colored digitally, I usually use an app called Medibang Paint and use the "extract lineart" tool! It's super handy for me since I draw most of my art traditionally, and the fill tool doesn't really work in Krita (the program on my laptop)
Here is a quick run through:
First, import the image you want to extract the line art from. You'll find that in the layers tab on the list that comes up from tapping the + button. Tap, "Select an image to add"

That takes you to a gallery thing where you can pic your drawing.
It works best if you use an already cleaned up scan, but you can do color adjustments in other apps (I use pixlr) to get the background actually white. Otherwise you won't get clear line art. @masterfuldoodler has a FANTASTIC tutorial on how to use that app to clean a photo.
Select your size etc to finish the import, then hit "Set"
Press yes :D

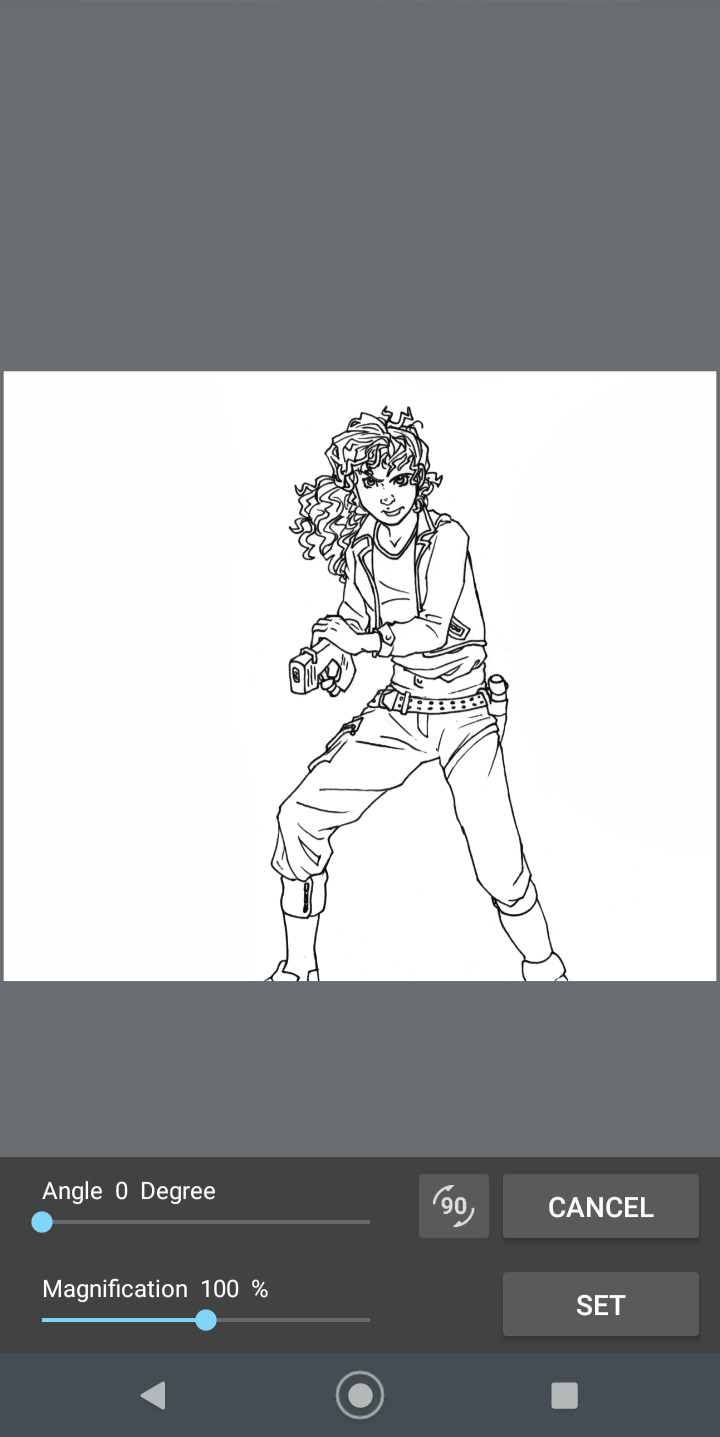
That takes you to this page where you can adjust the settings of your line art by how dark it is, how thick it is, or how much fuzz reduction you want. I usually just go with Auto 1, but sometimes if it's thinner lineart like this drawing of Grace, you'll need to mess around a bit.

Hit "Set" and you're good to go!

Happy coloring! (Also another tip, if you're using the fill tool, adjust the fill radius at the top to 1 pixel so you won't have any gaps ;)
Link to @masterfuldoodler 's Pixlr tutorial:
#thanks for the ask!#i hope this helps you!#feel free to ask either of us if you have any questions#ask#text#tutorial#medibang
13 notes
·
View notes
Text
My Typical Art Process✨🌈
Was gonna reply to anon with this, but figured it was a bit too unrelated so I'll make a separate post! I do kinda wanna share my process anyway for anyone curious. I made something similar for twitter once but I no longer use twitter and my style has changed since then so here's a new one!
Tl;dr I draw for fun only and I have learned that textures and overlays and post-processing can do a LOT when it comes to making something look more "complete" while also not taking a lot of additional time. This is just my personal style spawned from my laziness and my love of harsh colors😆

I'll put it below the cut because it's long!
So to begin with, when I doodle (as opposed to a proper drawing that I take my time on) this is my typical "lineart":

I just draw the… what do you call it? The under parts… Like the circle and shapes, etc. to get the pose. Then lower the opacity and do another sketch on top of that. Then I lower the opacity of that and do ANOTHER sketch on top. 😆 I do that as many times as necessary until it looks like something. I don't worry a ton about anatomy or messiness or stray lines, it's just for fun to get an idea out of my head :)
Sometimes I also leave the under-sketches in or sometimes I turn the layer off. For this one I left them in.

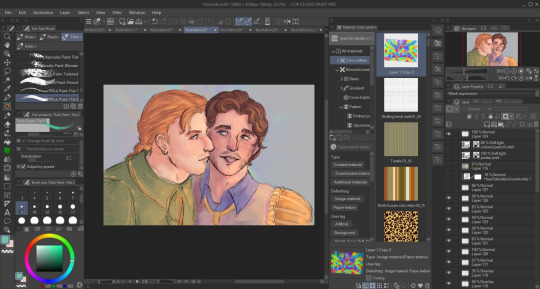
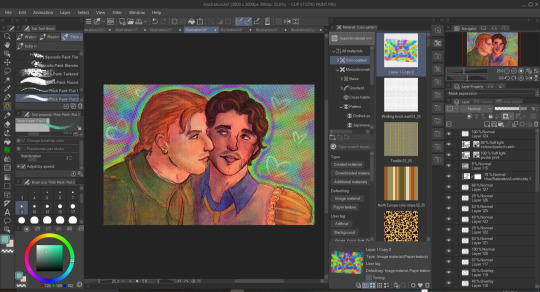
Then I turn on all my textures, overlays, and H/S/L correction layer and crank the saturation up. The selected colorful layer was something I made once and saved it as an image material so I can just slap it on any time as an overlay. You will see it in almost all of my art, she's my beloved crutch and also I just like it lol. Other than that, I sometimes use paper textures that CPS came with and sometimes I make a perlin noise layer with the smallest grain size and set it to 'soft light'.
I also have recently been using a manga screentone overlay that comes with CSP.
Then I start coloring underneath!
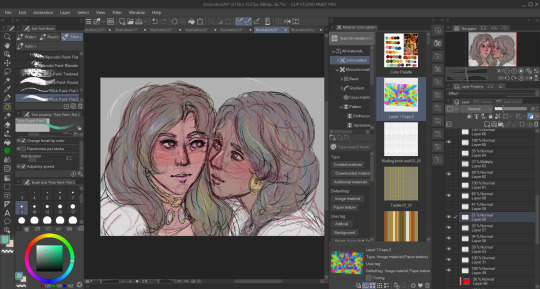
This is how it looks without all of the blinding colors and textures I put there to distract you from the mess lol
Even in ones where I DO put in effort and try to use better anatomy and clean up a lot of the scribbles I pretty much never use clean lineart simply because I cannot be bothered 🤷🏾♂️ I don't really do anything different here, I just spend more time one it:
Also, even then the overlays and textures do a lot of the heavy lifting. Some of the overlays and effects I draw myself like the rainbow boarders around them and of course the doodle hearts. I don't draw backgrounds very often but I don't like an empty background so overlays or little doodles or text effects typically go there.

I should also mentions that I use the lightroom mobile app to further enhance all of my art, as shown above in the before and afters. I don't really have much to say on this point. I used to use lightroom mobile a lot when I did doll photography and I pretty much just wing it based on what I learned doing that. I like to mess with the texture settings and do masking edits to change the foreground and background independently to get better color balances. Like a bozo I pay for the subscription but I bet you could use any old editing app.
Oh, and I do pretty much everything with these brushes here. I got them a while back when they were free for 48 hours but unfortunately they are no longer free and cost 80 clippy now :( Should also warn you that they saturate any color and idk how to stop it from doing that so I just adjust the color accordingly before using or edit in post. Very nice though!!
Some other (free) things I like and use a lot:
Warm color set
Watercolor paper texture (free)
Cloud brushes
Watercolor auto action
Real paper textures
Prism brushes
Freckle brush
Aaaaand that's basically it!
#eye strain tw#we do not discuss my 100+ layers...#long post#artists on tumblr#digital art#jun rambles
11 notes
·
View notes
Text
There's a new Schlock Mercenary Kickstarter, which means I should probably get busy figuring out what to do with my merch from the last Kickstarter. Besides the book, I got two pins and three Challenge Coins. I've seen people display pins using what is basically an embroidery hoop, and most of them use just fabric (plain or patterned), but, look . . . I'm am embroidery person now. If I'm going to do a hoop, I'm going to make it cool.
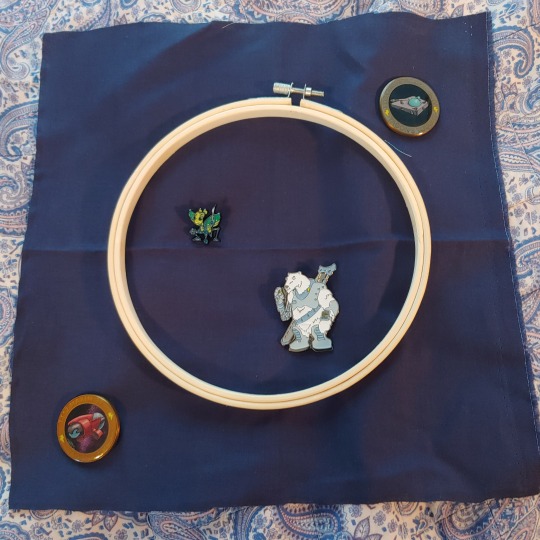
I think this dark blue fabric will be a good choice as far as color — it looks appropriately spacey, and both of my pins show up reasonably well against it. Still trying to decide what embroidery to do, though. I could keep it simple and do constellation patterns, though I'm also possibly doing that with my Cosmere pins, so . . . not sure if I want to repeat that. I could also maybe throw in a planet or two if I went this route? Or Eine-Aifa lineart, though I don't remember if we ever see that in full view.
I could do line art of some of the ships from the comic (probably with the ships on the challenge coins also in the picture). I really enjoy the ship designs in this strip, and this seems like a reasonably straightforward option. Downside: I know one of these characters wasn't on either ship, and I can't remember which ship the other one was on, and I know it'll bug me if I mess it up . . . I could probably resolve this by rereading part of the comic, but then I'll end up rereading the whole comic, and I cannot afford that time right now.
A small, absolutely mad part of me wants to try to do an actual scene of some kind, but the larger part of me that recognizes the limits of my artistic skills is trying to lock the crazy bit in a closet.
I'm also poking at the idea of painting the embroidery hoop, probably in spacey silver and blue. I have paint left over in appropriate colors from when I made a sword and dragon eggs . . .
If anyone has made these before — do you normally use multiple layers of fabric? Fabric and batting? Fabric and felt? I feel like a single layer of fabric isn't enough. (I'm going to look up some DIYs, but I like hearing people's actual experiences.) I have another hoop to finish before I do this one, so I have time to figure out what I'm doing.
Side note — as I said, there's another Kickstarter going on now! They've already met a bunch of the stretch goals, which is exciting. I'm really hoping we can get to 2,000 backers, which would probably blow the minds of the people running the campaign, and I want to see what they come up with as a reward for that. I'll drop a link here if you want to check it out. (You should also go check out the original comics, if you haven't read them. They get so good.)
kickstarter
#taleweaver speaks#this is both a genuine project post#and a little bit of a blatant promo post#but as I have said before#I will shill for authors if I want#and the fact that I am actually spending money on something#that I can EASILY get online for free#should say something about how big a fan I am of this series#embroidery#schlock mercenary#mandatory failure
4 notes
·
View notes
Note
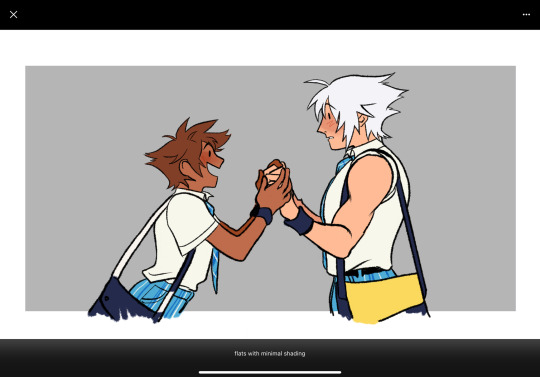
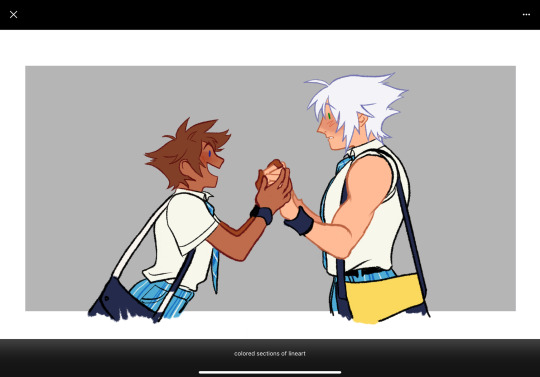
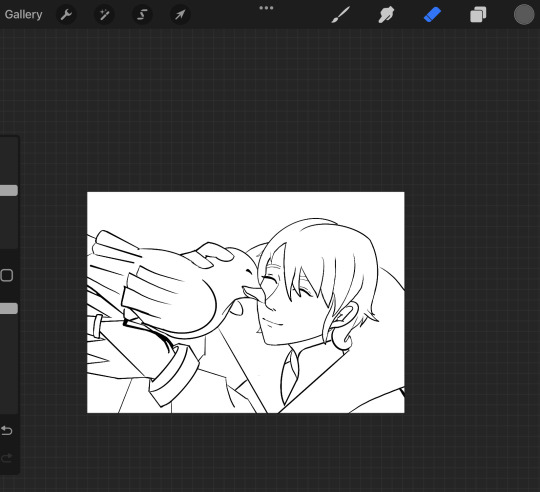
Remember that art you did that was just Nine and Sonic high fiving (except it were only hands)
Did you use any special brushes?????????? Or just what brushes did you use in general please dont gate keep 🙏🙏🙏🙏
Might as well just answer these asks in tandem because 1 that is literally one of the nicest things anyone has ever said to me?? You mean I have an artstyle?? that it is tangible??? That its good enough for someone to want to copy it, hello????? [Positive, extremely extremely positive, crying tears of joy positive]
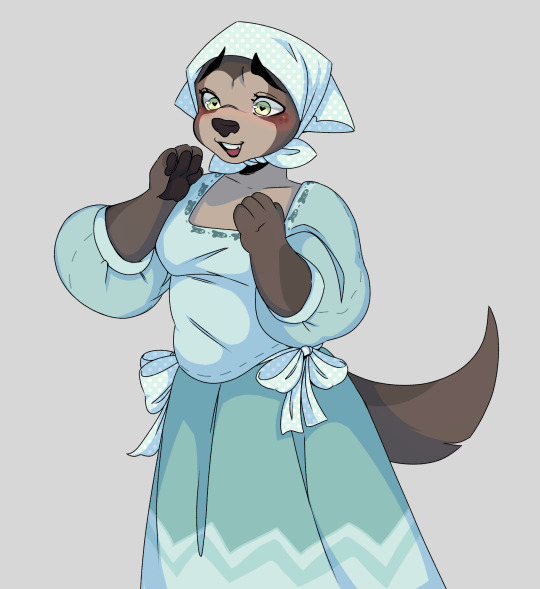
And 2 I am so fucking sorry (but also maybe good news for you since you're looking to copy) if you were expecting some epik brushes or techniques, because I literally just use the basic pen, pencil, airbrush and mix2 brushes (plus the eraser ofc) in Fire Alpaca. Like dedass just the first one, no change in the settings nothing. Just these guys here with me against the world.

I do attempt to sometimes use different brushes for sketching but then always return back to basics
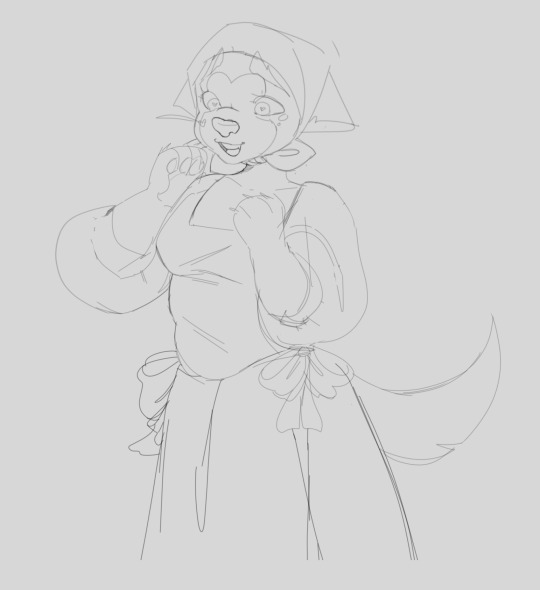
My art process is pretty much just scratch something with the pen (sketch that I clean out as I go, we don't do lineart in this house sir) slap on some colors, then put down shadows with the pencil, blend with the mix brush, realize the shadows make no sense once looking back at the light source, erase some parts and repeat until the shadows do kind of make sense
Like its just this for endless hours but it's also the only part of drawing that I genuinely enjoy x)
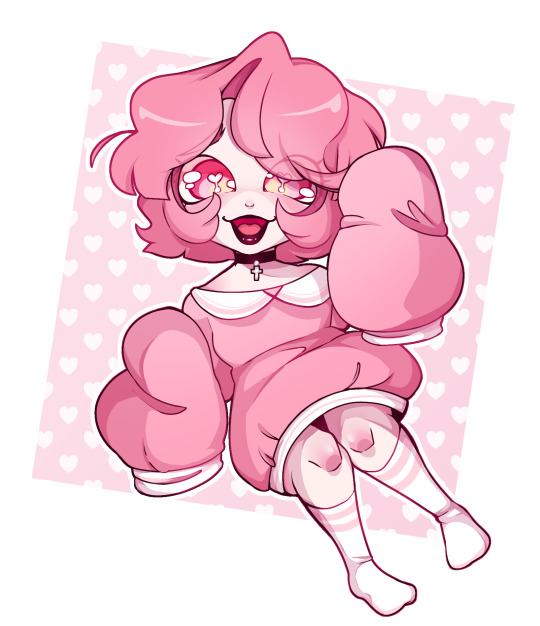
From time to time I also remember that the airbrush exists and I can use it now without the threat of it blowing up my computer, which is why the shading (well, the highlights) on the high five actually looks good (also cuz I had a clear reference picture, that does wonders) plus a pro-tip, when drawing a certain thing that glows, its easier to put the solid color of the glow down and than gaussian blurring the whole layer instead of fighting with the airbrush
True magic however, hides in messing around with the opacity and layer blender settings, I usually spend most of my time in there flipping between the options lmao. The starter basics would be Add for an extra pop in the highlights. Multiply for darker shadows, or used similarly as Overlay and that is if you can't be bothered changing the color of the shadow over multiple colors of the piece. Soft and hard light for tamer results of add and multiply. And than Messing around with Difference and Exclusion was also how I got the funky colors on my previous drawing, but that stuff is funky
So yea, no special brushes, just the bare basics and mixing them together!!
#I think. This is like an answer most artists will give#I always see so many people asking artists about their brushes#only for the artist to just go ''oh I just use this basic one for the program I have''#Not that it's wrong to ask ofc!!#I too wonder just what brush it is that makes the line look just ever so scratchy but not too much#that gives a really nice texture to the lineart#I will find it one day I'm sure#also other majority of artists actually have a special brush they made (??) but my ahh could never#raw-dogging this with the basics 💪💪#again this ask has made my day#well#midnight#but like yaaay I am finally good at art!!#at long last#i inspire people :]#it sparks joy#the silly ask box#art tips#me does arts
4 notes
·
View notes
Note
how draw..

HO HO HO? AN EXCUSE TO SHOW MY ART PROCESS?
Behold! How I draw!!
I start off with a very light, messy outline like so (rough recreation cuz i lost the og, has more detail than this)
This helps my brain out with posing and rough proportions without getting too overwhelmed.

And then I go over it on a different layer and essentially clean it all up!
I fix anatomy, i add clothes, i basically mess around with it until it looks Just Right.
Now, sometimes I just go ahead and color in the sketch because I don't feel like doing lineart, sometimes I plan out a rough color palette for bigger pieces (ex: zine pieces and gift art usually)
The clean sketching process is also when I use references the most, I look up character and clothing references, I look up posing refs, this is also when I do start looking up color palette ideas for character designs and bigger pieces.
But for lineart, I tend to drift towards textured brushes like the soft mapping pen (bleed) and soft school pen (bleed) in Ibispaint, and the marker brush in FireAlpaca with some adjustments!

I don't like going too far off the finished sketch, but I will absolutely make adjustments if necessary!
I do draw in the little white shinies of the eyes on the lineart layer, I just think they look cute!
I also use the pen to shade tiny areas like the neck/chin area, wrinkles, small gaps like the mouth and sleeves, etc. etc.
And then I lay down the colors!

I shade the eyes on their own layer, and the blush is also added in as part of the base colors. I use a lot of clipping masks during the part - selecting inside the lineart and essentially creating a base layer for the color layers. I use the selection tools, the lasso tool, or I just color along the inside of the lines to make an outline and then use the paint bucket tool to fill it all in!
This is also when I add in clothing patterns and such.
And now! Basic shading!
I use desaturated, grey-ish colors for shading. I pull all the color layers into one folder and/or merge them and I use a clipping mask on the folder for shading. For this drawing I used a desatudated light blue, but I also use other colors like red, pink, peach, purple, and green for some pieces. Really depends on what tone the piece is and what colors would look good.
I have my shading layers set to multiply and I mess with the opacity a bit, but usually it's 50-85% opacity for the main shading layer.
And then I go over that shading layer with a darker color!

Pretty much adding flavor to the shading by adding extra dark bits where the shadows might be darker. I also like to occassionally outline the shading cuz it's fun.
I didn't do this with this drawing, as it was a reference sheet, but I add a soft "glow" to my drawings after this stage. Basically, I take a really pale color (usually yellow or pink) and draw ovals where the body is being hit by the light source more, blurr it, and then set the layer to "soft light" and lower the opacity until it's barely noticable - just a soft, glowy fuzz that makes my eyes happy.
I also color in the lineart at this stage, usually going in with darker colors to make it a bit softer than the harsh black, sometimes I add a blurry glowy red or pink to the lineart around the face like I did in this pieces:

But like... depends on the vibe.
If the piece calls for it, i'll add a background, though if its a bigger project w/ actual scenery the background wouldve already been lined, colored, and shaded alongside the characters or before the characters were shaded

Year old example but yeah, my scenery techniques involve a lot of obsessing over perspective and texture and getting feedback from servers I'm in lmao
I can absolutely draw rocks and small plants, I'm just in too much pain to do so 🧍♂️
But yeah! That's a rough explanation of my drawing process, hope u enjoy Cyokie my bestie 💗💗💗💗
16 notes
·
View notes
Text
It’s Wednesday?! Again?! Apparently. This has been a weird week but now I guess it’s nearly over. Except tomorrow is my busiest day of the month soooo well it will be a relief when it’s done.
Thank you lovelies for your tags! 🥰 @frjsti @you-remind-me-of-the-babe @facewithoutheart @confused-bi-queer @martsonmars @angelsfalling16 @artsyunderstudy
Does anyone remember a cracky piece I teased a bit ago where Simon and Baz were coming up with...uh, “nicknames” for each other? Anyway. I have started putting that rough draft into something presentable and I’m really loving it. So I’m going to share some of that instead of yet more SAE which I’m sure everyone but me is tired of by now. New working title is “By Any Other Name...”
Under a cut for very slight hints of spice. And I have another ART! update
Simon POV, post canon, post coital:
"It's not my fault your prophecy is full of ridiculous sexual innuendo."
"You're making it dirty! It's not dirty!"
"It's a little dirty," he murmurs.
"Well it's not mine and I'm over all that."
He sighs. "Fine."
"Fine," I say, and turn over to kiss him. I get as far as his cheek before he's speaking again.
His brows are knit. He's being proper thoughtful now. "You are a mess of innuendo."
"You can't call it that," I say. He cuts his eyes to me in confusion and then barks out a surprised laugh.
"No, no. Think about it, Snow."
I drop back onto my wings again with a huff of air. So much for post-coital kisses and cuddles. Of course Baz wants to write his fucking dissertation right now.
If we had a whiteboard, he'd be making columns and phoning Penelope for consultation.
"Sword of Mages. Excalibur—that's definitely one for consideration."
I'm going to object again—I'd die of embarrassment—but he's already moving on, quoting the fucking prophecy again.
"'One will come to end us.' Come?"
"I'll end you," I mutter.
"How, Snow? With your great big, powerful sword?"
"Oh my god," I groan, burying my head against the duvet where it rests over his arm.
Also, more progress on my Between Simons piece for his bday. 👀👀👀

This was just before I added the lineart. Wasn’t sure how to make it look like the side Simons are projections and @tea-brigade and @gekkoinapeartree came in clutch with some great suggestions. In the end, I went with red outline and fine black interior outline, then I’ll just keep the pencil for the interior detail lines. And try an under layer of light red pencil. Lots of color testing ahead. Also, I feel obligated to say I did actually bother to draw in Simon’s hair before I lined this 😂
21 notes
·
View notes
Last Seen Blogs
eniogodoy
Enio Godoy
mandracore
☠Mandracore☠
slayedfrr
slayedfrr

domiriko
Untitled
karmilli0n
Garden of Dreams