#goth diy tutorial
Text
Goth DIY: Altered Clothing part 2 (final part)
Part 1
This part will be shorter since we have less to cover. But it's still a long post, so I'm putting it under a cut.
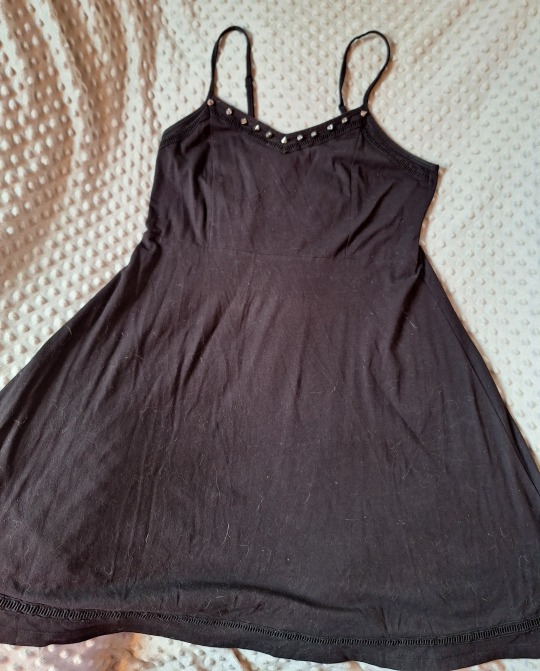
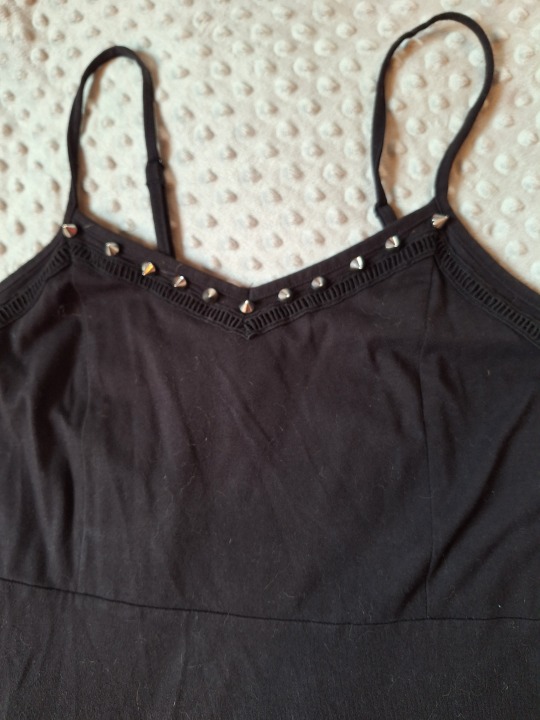
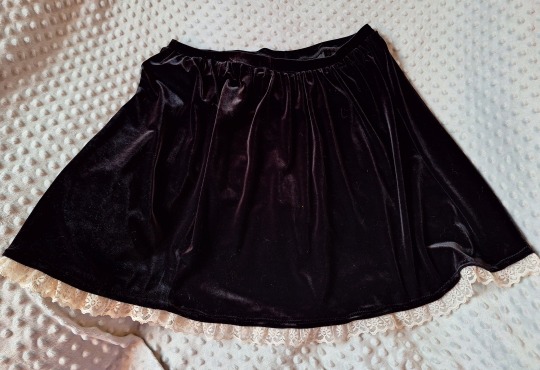
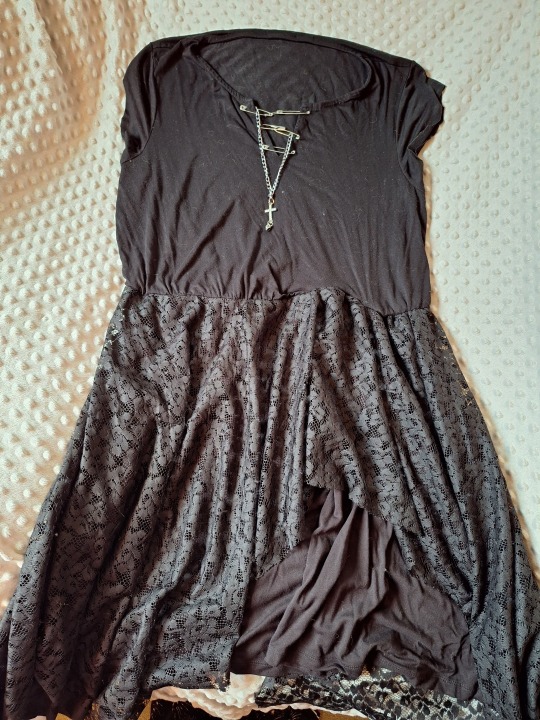
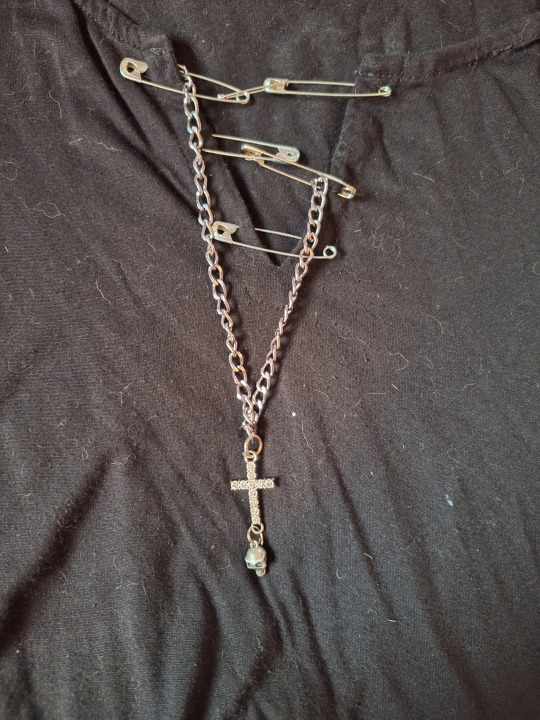
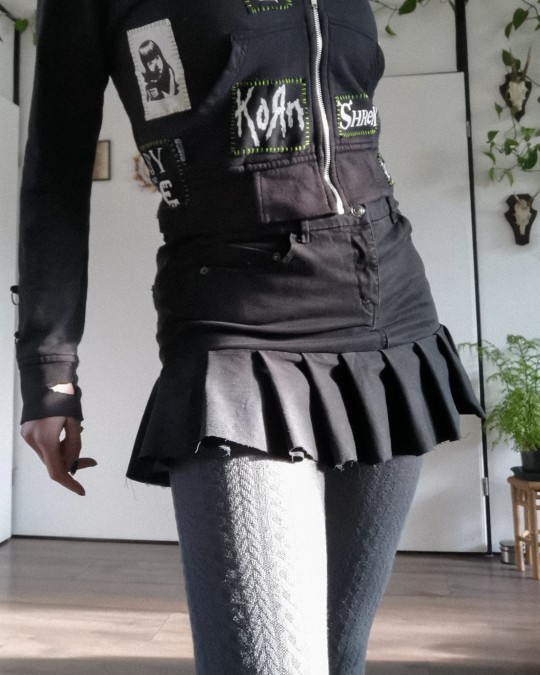
Skirts and dresses! The last two dresses and green skirt took the most sewing, but the first dress was as simple as sewing studs on the neckline. The black velvet skirt was altered a bit more to fit me, as it was originally a skirt that had small pleats at the top that made the skirt cling to my stomach and flare out further down, which wasn't flattering on me, so I cut that part off and added a new waistband to get a circle miniskirt, then added lace trim to the hem for extra cuteness and a fancy touch.
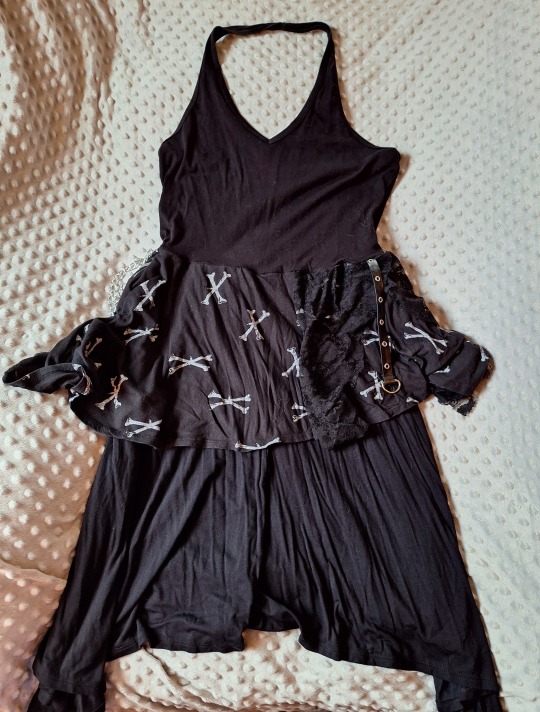
Attaching skirts to a crop top is an easy way to make a dress if you don't want to sew one from scratch, but the waistlines did turn out a little wonky, so I use a belt or cardigan to hide that. I also sew a thin line of elastic onto the skirts to gather them before sewing them to the top to make it a little easier and to maintain stretch, since these dresses just pull on. I also don't hang them by the tops, but by draping them through a hanger to avoid stretching out the tops because the skirts are a little heavy (at least mine are, since I added so much to them).
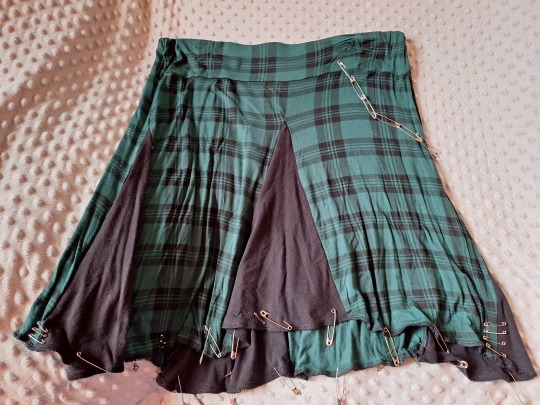
For the green skirt, I added triangular inserts called "godets" to make the skirt flare out, since it was too tight before and didn't swish. I like a good swish.
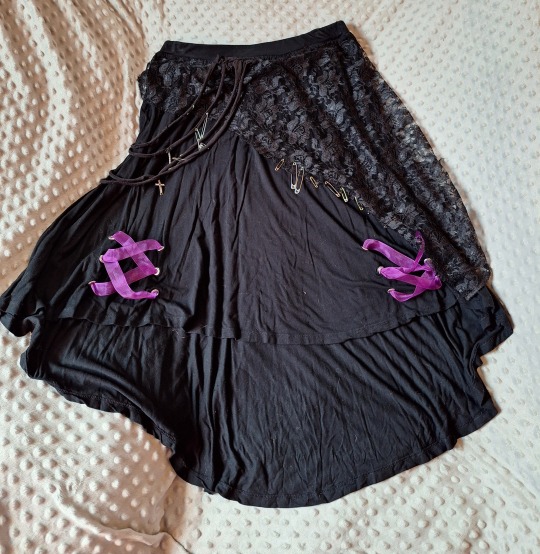
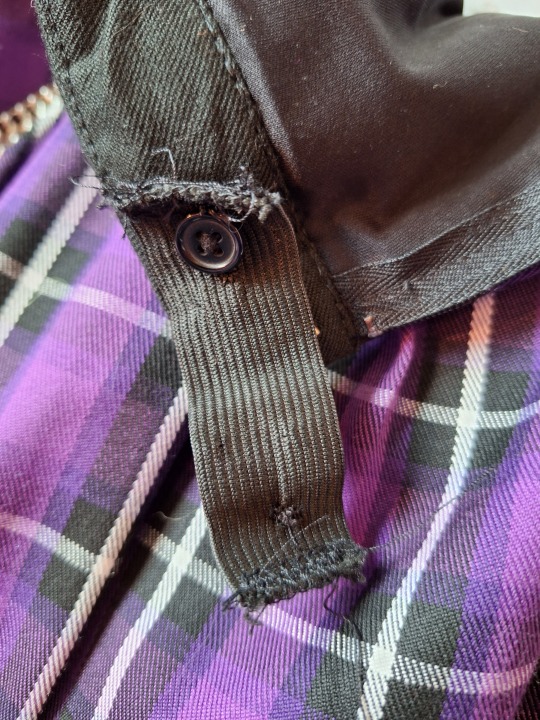
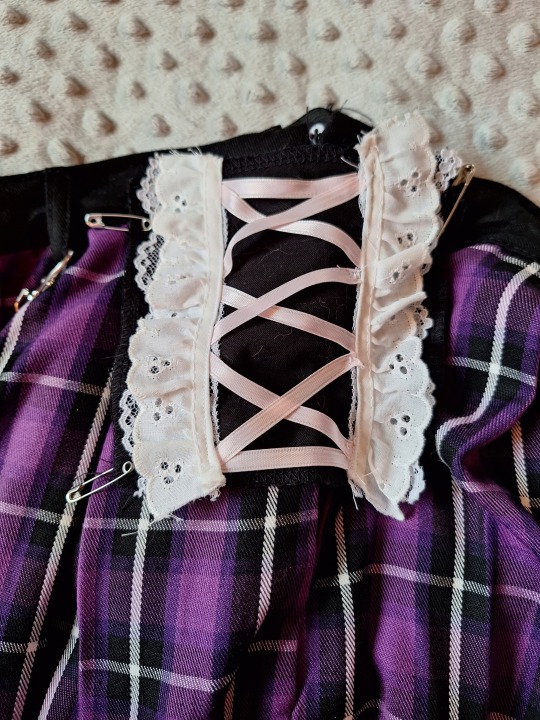
The skirt with all the lace and pins and grommets and nonsense was one of my earlier projects, so it has three mistakes which I implore you to avoid. One: I didn't line the fabric loops up with the waistband very well, so they look crudely tacked-on. Two: I didn't add any fray check to the holes I made for the grommets, so they stretched out and the grommets are no longer attached to the fabric, just floating there on the ribbon. Three: I didn't stretch the skirt as I sewed on the lace, so now it doesn't stretch in that area; it still fits my waist, but I have to fight with it to get it over my hips. The design is still cute, but I would definitely do it better if I were to make it nowadays.
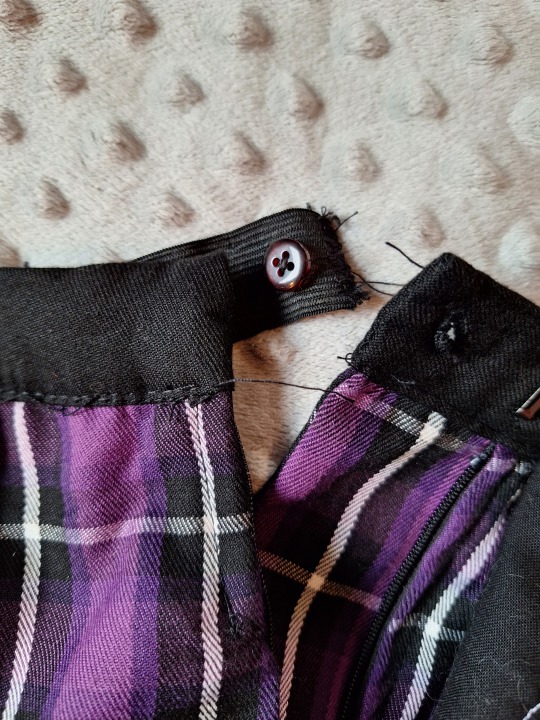
The half-and-half skirt only has a small alteration, which was actually to make it fit rather than to change how it looked. You see, sometimes you order something online in the same size you always wear from that brand, and sometimes that thing ends up running small and has no stretch. When that happens, when the skirt almost fits you and is just so close to buttoning all the way, get yourself a waistband extender. I made one, but you can also buy them. It's just a piece of elastic with a button on one side and a button hole on the other. Put that on, and BAM! The skirt (or pants) fit you. They won't quite zip up all the way, and it is a noticeable change, so I made a cute lace-covered patch to cover up that alteration so you can't tell I changed anything about it at all.

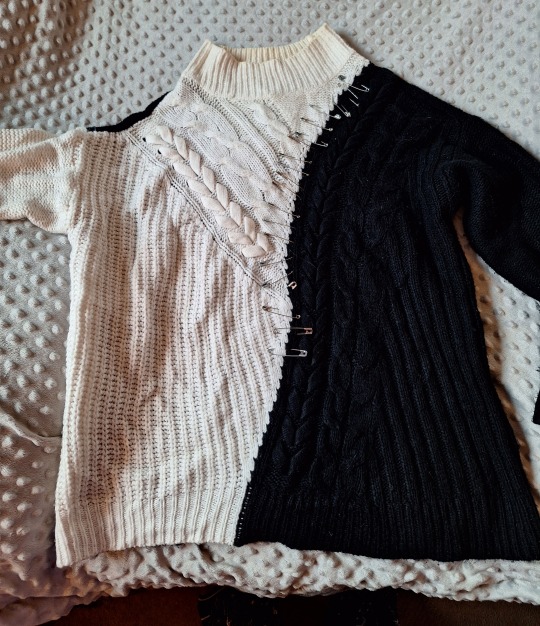
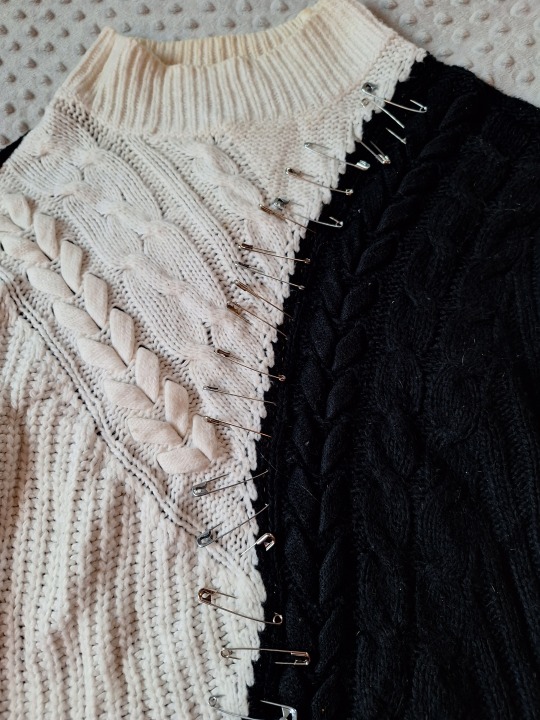
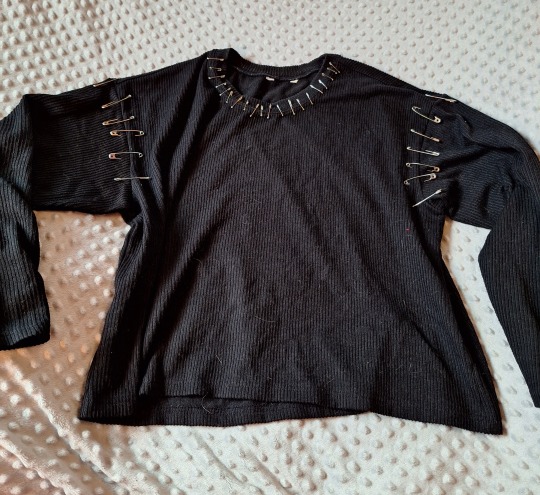
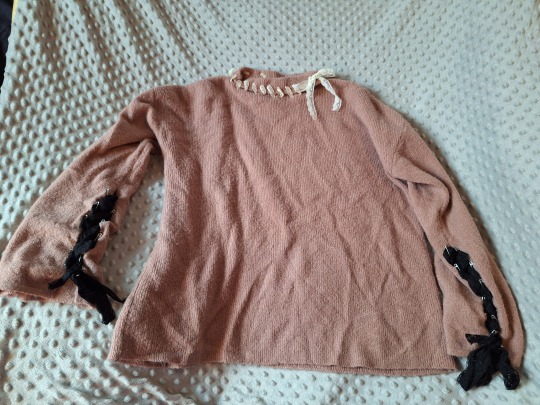
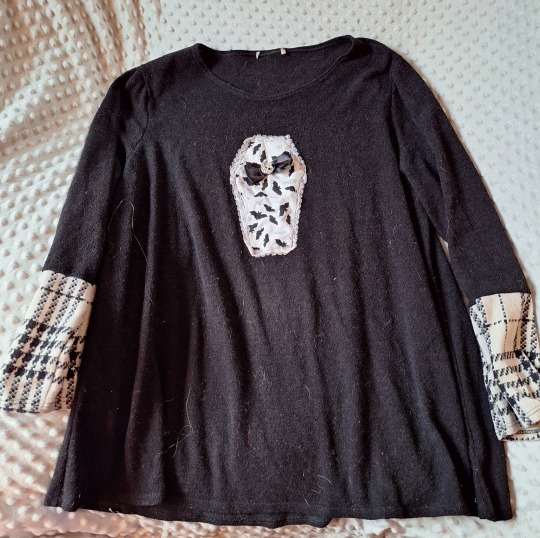
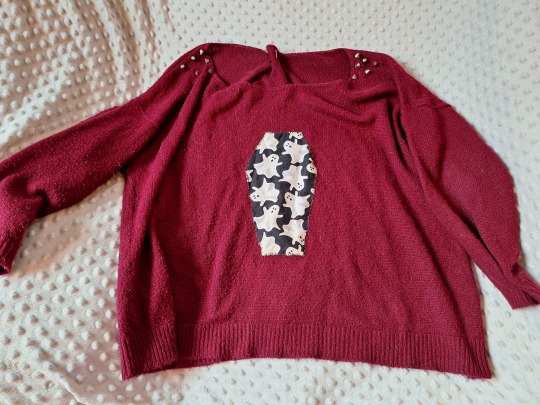
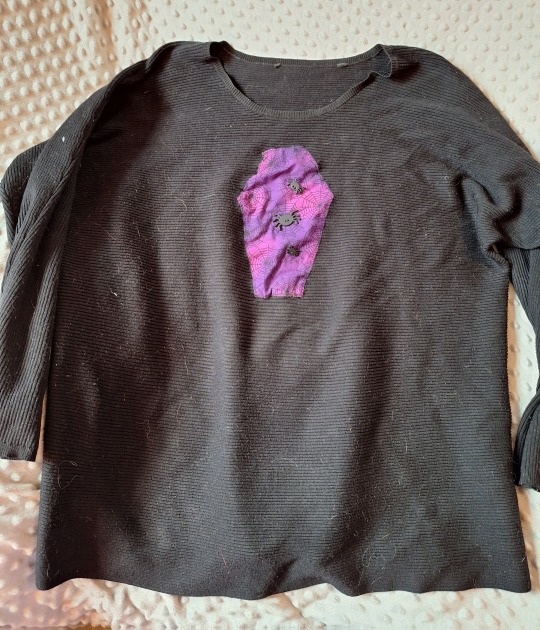
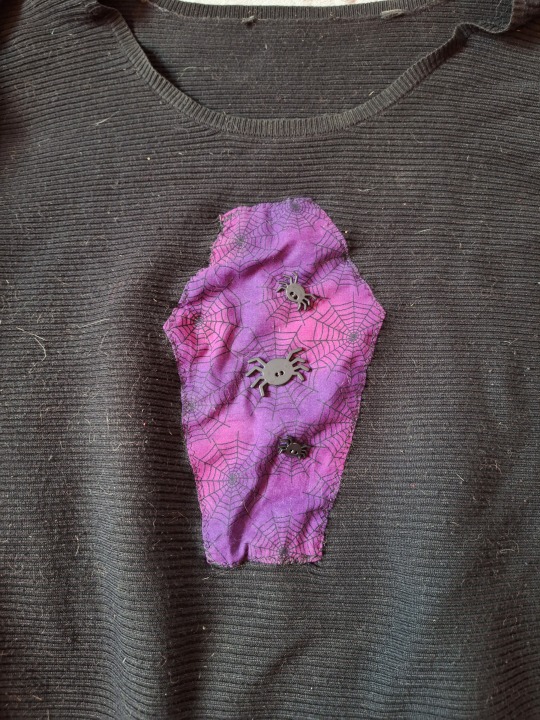
Now onto the sweaters. I love wearing sweaters in winter, but there seems to be a shortage of goth ones. Nothing a few safety pins and lace trim can't handle! The first three only have safety pins added to them. The coffin ones were done the same way I did my sweatshirts, but this was before I knew about fusible interfacing for appliques, so they got a little wrinkled and don't look as nice. I have a better method now, as detailed in the post I linked. The fabrics were all Halloween fat quarters from Walmart, and I found a picture of a coffin on Google Images as a base to cut out the right shape.
All of these sweaters were thrifted except the two solid black ones with pins--the first one came from Walmart, and the second one was given to me by my mom. Sweaters are plentiful at thrift stores, and they don't even have to be black to be turned into something goth.

That's all of my altered clothing so far, unless there's anything I'm forgetting! Which there easily could be, because I shared about forty garments O-O
I'll share the jewelry I've made next, and then the clothes I've sewn from scratch! This will come sometime in the future, though, because it took awhile to find everything, take pictures of it, and then write about it. And between you and me, I've made a LOOOOOT of jewelry and clothing, so give me some time. As I said in the last post, feel free to message me if you want more detailed instructions or ideas. I'm always happy to help!
Stay crafty!
#diy advice from your local goth#goth diy#goth diy tutorial#diy tutorial#diy#gothgoth#goth#goth subculture#goth fashion#goth clothing#goth fashion diy#crafting#sewing#mine
46 notes
·
View notes
Text
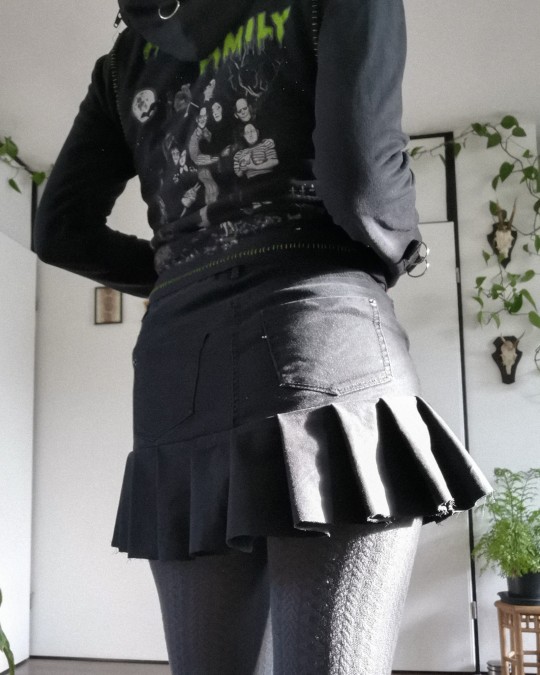
jeans to y2k/tripp inspired skirt ݁ ˖ִ ࣪✩₊ ⊹˚
I thrifted some jeans recently, not knowing if they would fit me, but buying it anyway bc 1) it was €1 and 2) if it didn't fit I could surely make something with it.
turns out it was wayyy too small 😂 so I decided it would be perfect to make one of those tripp/y2k skirts with!
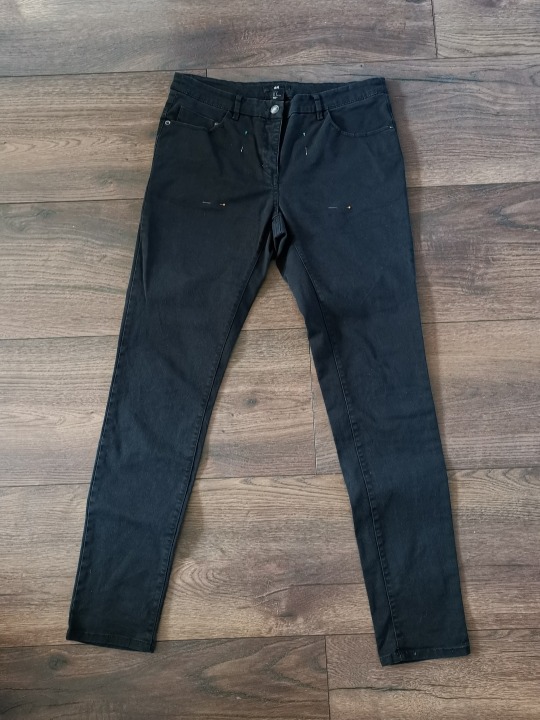

firstly I cut off the legs just above the crotch. I then tried it on, found it was too tight still, and added two strips of leftover fabric on either side. it fits perfectly now!
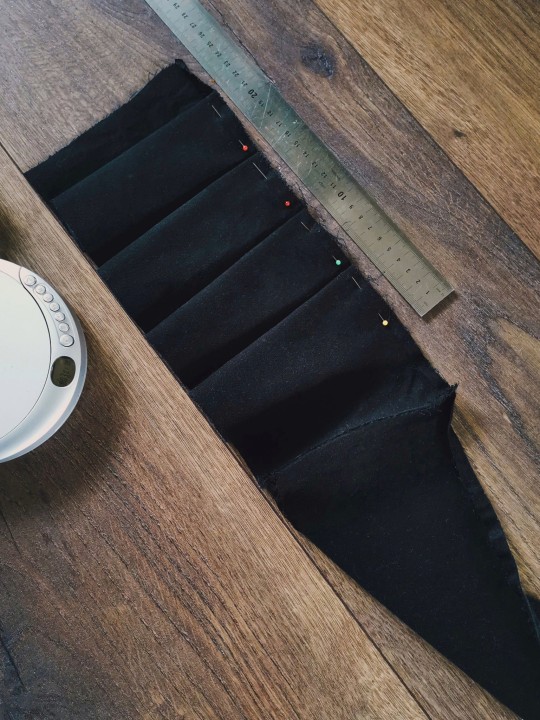
then I cut the remaining pant legs in even strips and connected them all to make one long strip. I folded ruffles of 5cm along the length, and sewed it in place before I sewed it onto the bottom of the skirt!
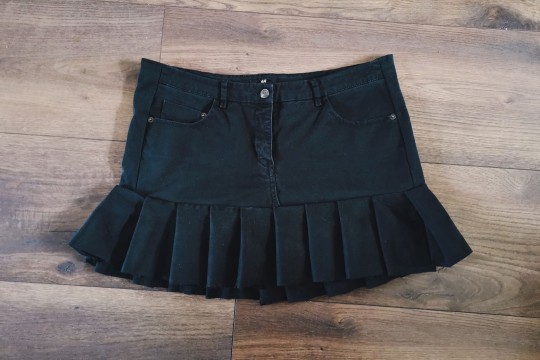
and just like that, I have a new skirt 𓆩♡𓆪 I might add some strips with d rings on it once I figure out the placement ^_^ but for now it's done
#mine#i showed it to my partner who immediately was like YOU HAVE SO MUCH TALENT#which was rly cool to hear actually#goth#alternative#diy#crafts#handmade#tripp#skirt#y2k#selfmade#tutorial? kinda???
312 notes
·
View notes
Text
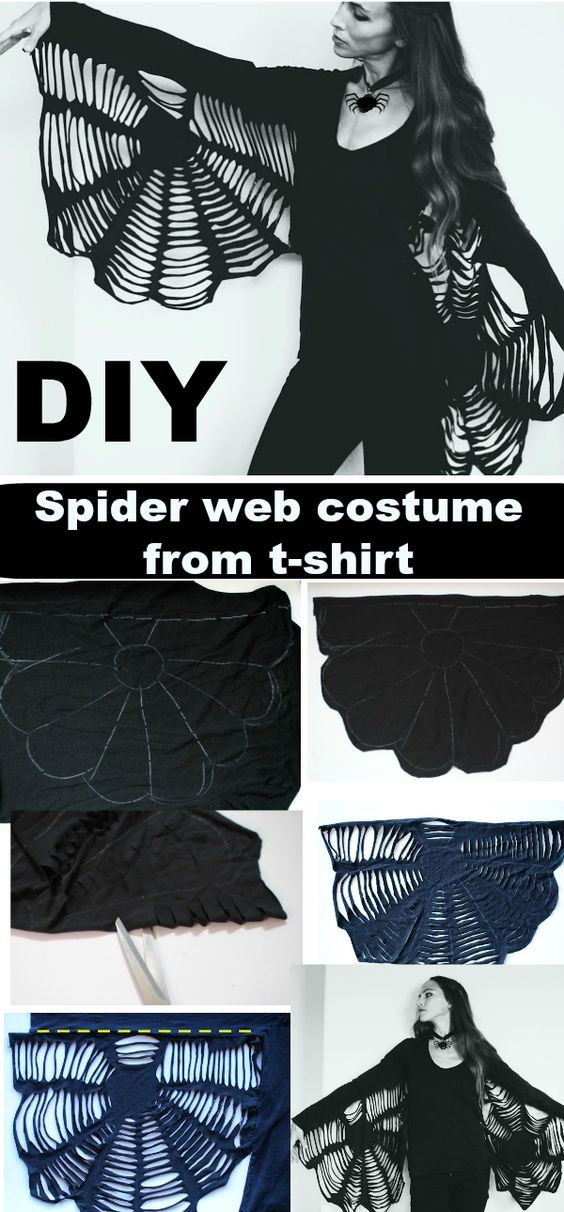
Source: Pinterest, TrashToCouture
(Sidenote: her blog also has some interesting tutorials for goth/alt-adjacent clothes, like this lace choker or a lace slip dress)
#darkcomforts#gothic#goth aesthetic#goth#romantic goth#aesthetic#diy#diy clothing#thrift flip#alt diy#alt clothing#spider web#halloween#spooky season#diy inspiration#diy tutorial#sewing#handmade#crafting#crafts#arts and crafts#goth diy#gothic diy
454 notes
·
View notes
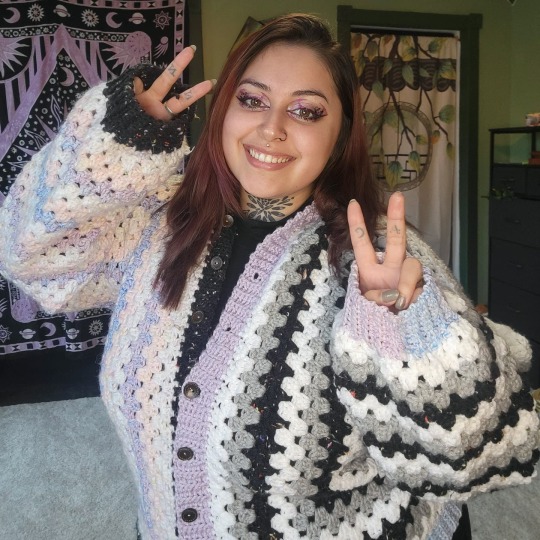
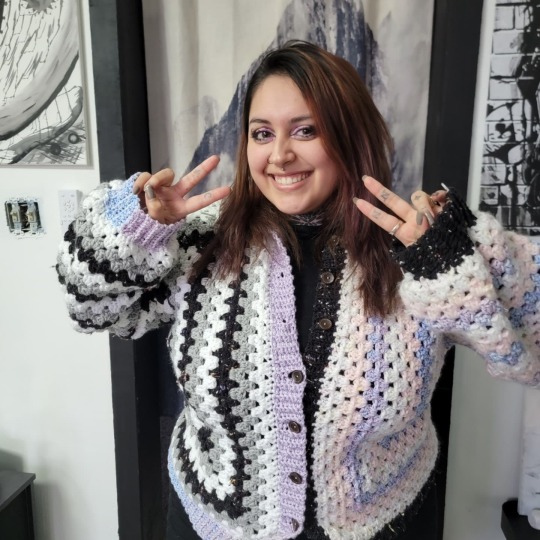
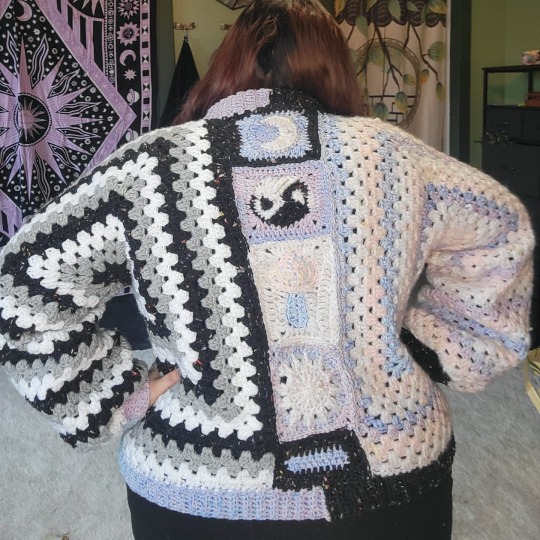
Text
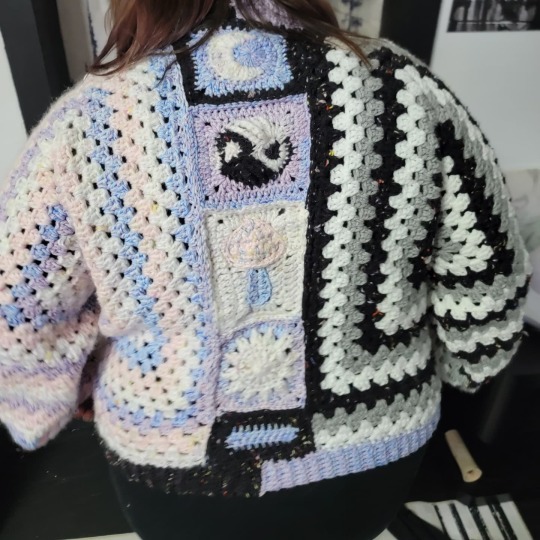
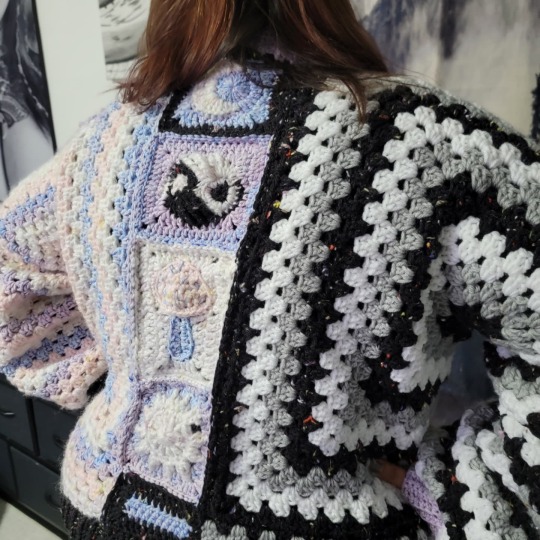
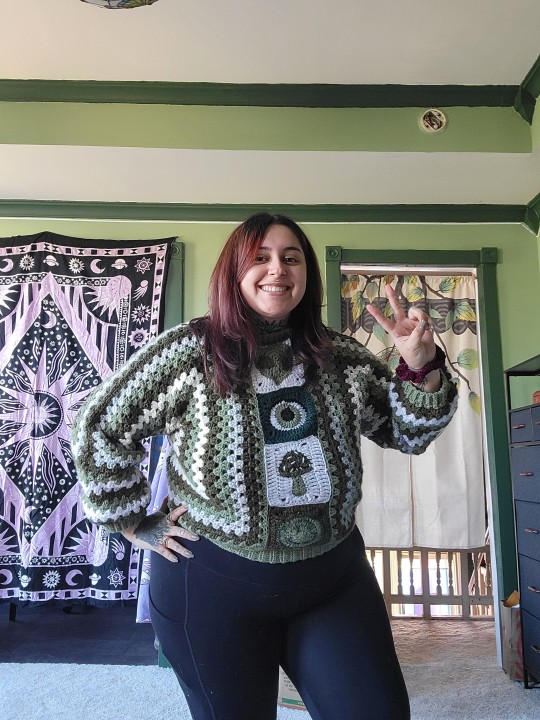
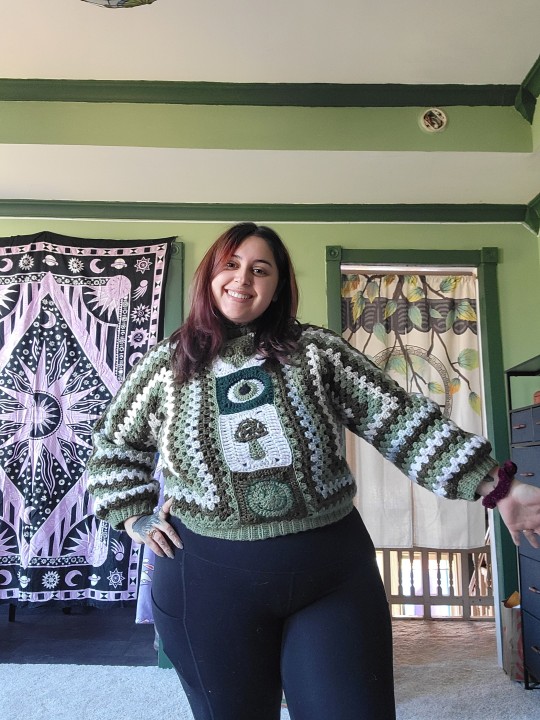
Happy Valentines day everyone! I've recently made this tutorial if you'd like to make these sweaters 💝 I hope you all enjoy it and crochet your hearts out 💓
youtube
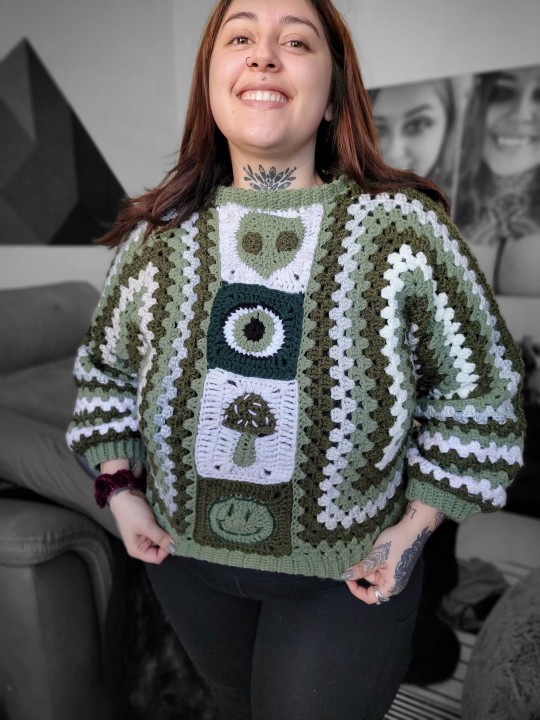
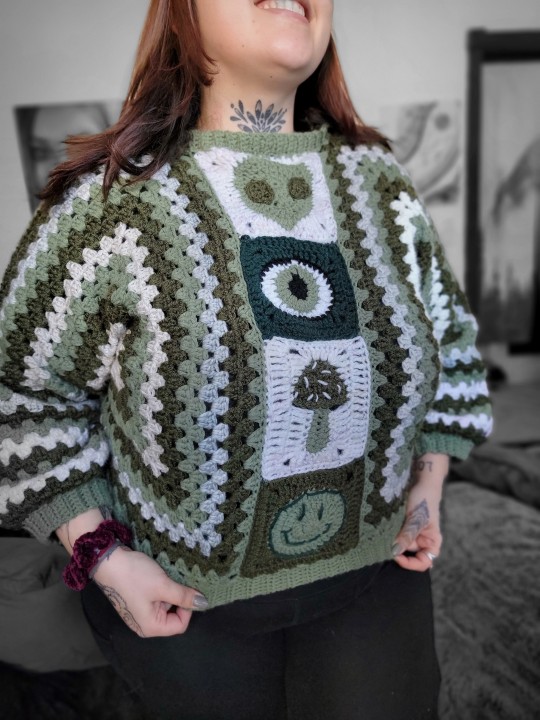
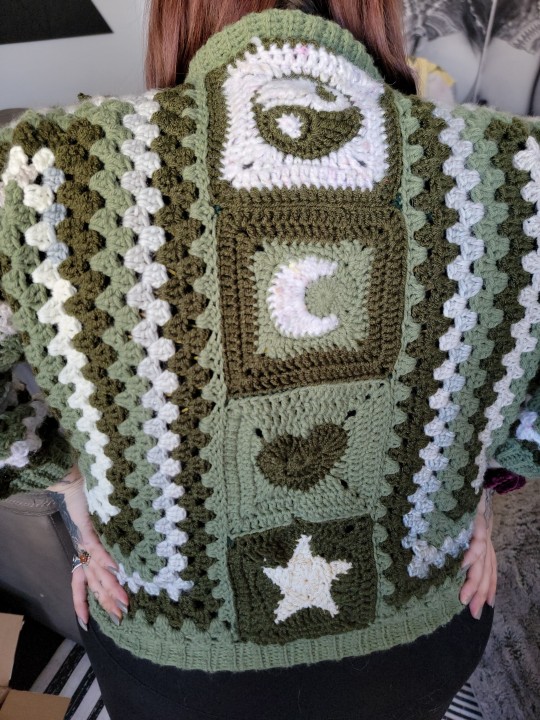
#diy clothes#diy fashion#diy tutorial#crochet diy#crochet#goth#gothic#goth aesthetic#goth girl#pastel#kawaii#cute#sweater#crochet clothes#Youtube#hippie#hippie fashion#hippie clothes
3 notes
·
View notes
Text
Made a spooky necklace last night so thought I'd make a tutorial of it, it took about 20 minutes:
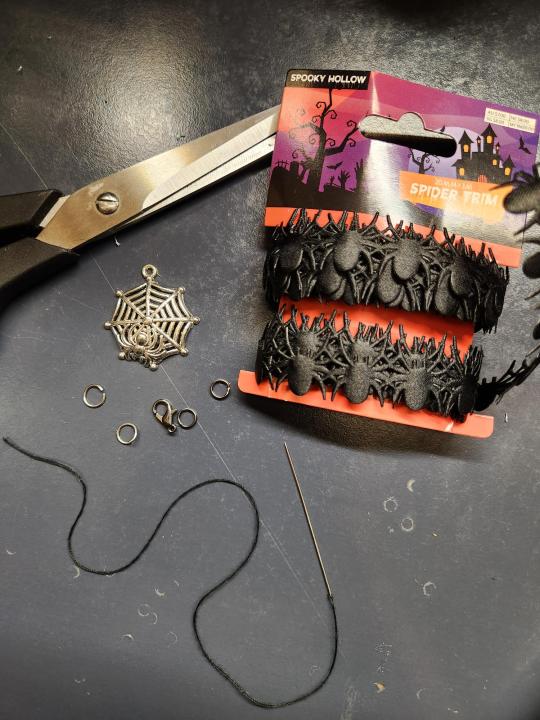

1: To make this I used 1 spider pendant, 2 jump rings, 2 split rings, 1 lobster clasp, scissors, needle and black thread, and spider trim I got last halloween.
2: First, cut the ribbon to about the right length. You want it to go around your neck with maybe a 1.5cm gap for the clasp and attachments.
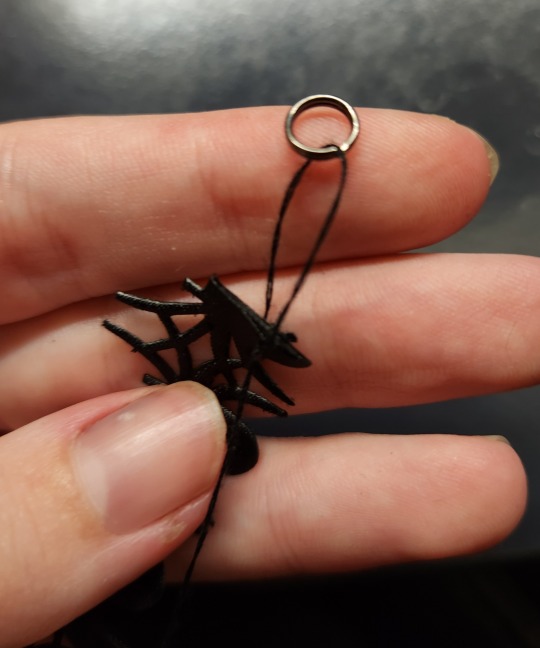
3: get one of the split rings. The ribbon I'm using is uhhh not great quality to say the least (the eternal problem of trying to make a thing that will last years from halloween items designed to be used once) so instead of looping it through the gaps in the ribbon I'm sewing it in place in the thickest bit of the material I can find. To do this, I'm just looping circles of thread between the centre of the spider and the split ring.
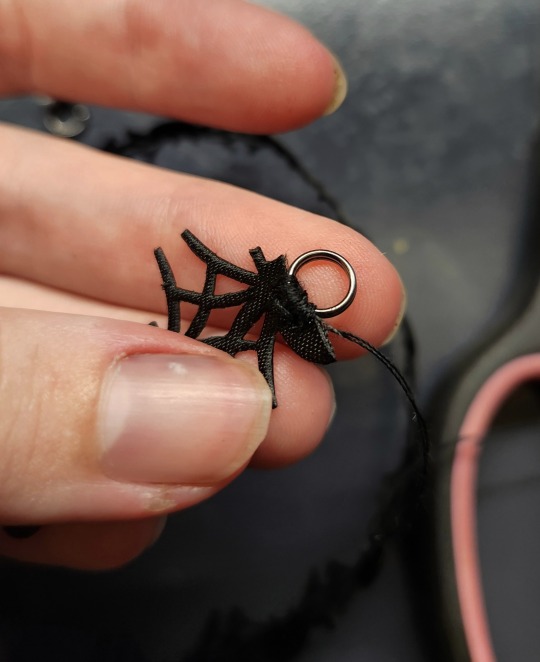
4: Continue this about 20 times until it's steadily held in place then tie the thread off.
5: Attach the lobster clasp/whatever other clasp you're using to the second split ring, then do step 3/4 again to attach the second split ring to the other side of the ribbon. Now, the overall structure is complete.
6: Add the pendant: I did this quite differently to how I usually do this (more discussion at the end) as the halloween spiders ribbon is so fragile and loves to tear apart. So I attached 2 split rings to the pendant, then used the same method as step 3/4 to sew the ends of the split rings onto the two spiders on each side of the pendant to distribute the weight. And that's it!
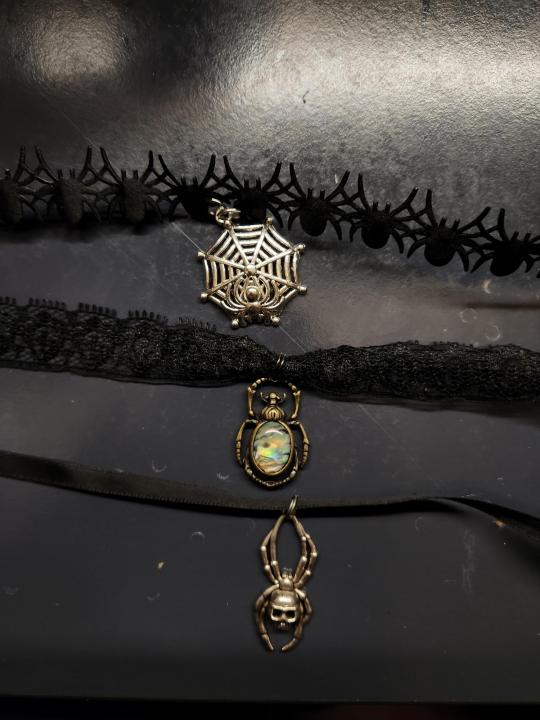
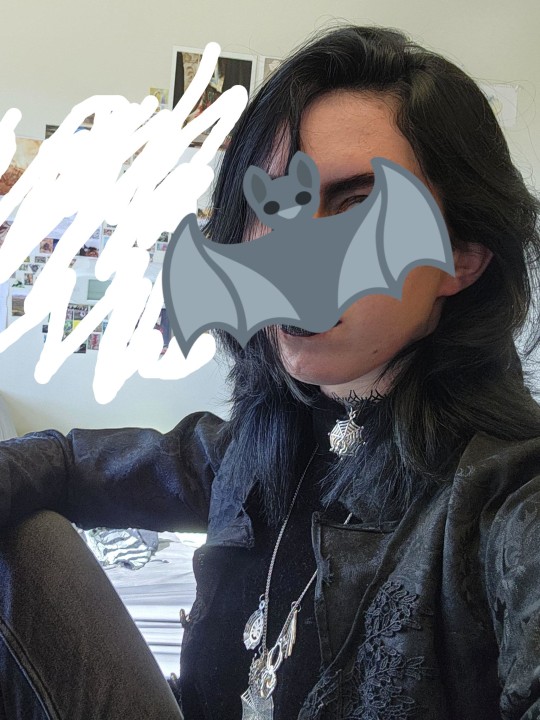
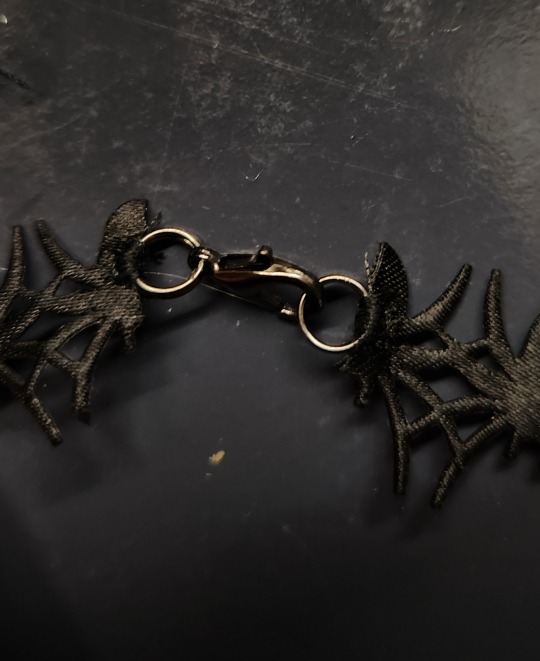
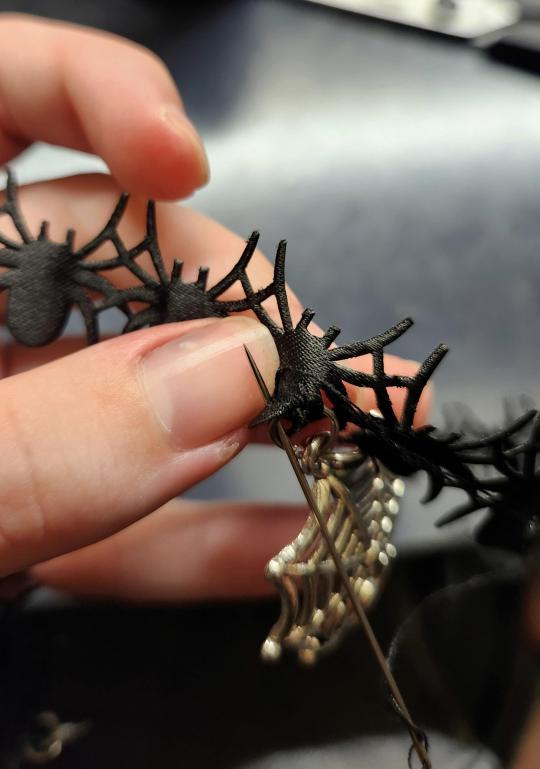
Here are 2 other necklaces I made with basically the same method. The other two are just hung on with split rings because 1: the ribbons are much sturdier, so I wasn't as worried about wear from movement 2: split rings are probably better for this because they'll scratch the ribbon less at the opening (currently having to redo an old project because I made some bad jump ring and ribbon decisions) and are less likely to fall off, but I had spent the afternoon hitting my thumb with a hammer so really could not be bothered opening split rings lol. Also, the spider with the skull on the thin ribbon is held closed with a safety pin because I was out of lobster clasps when I made it, so that's also an option. Then the last picture is me today with the necklace
#tell me if anything about the tutorial is weird and unclear I am going to try and run a workshop session for making these for our#entomology society stall and was thinking of basically using this tutorial#this is my first time writing a tutorial or anything... so not 100% sure how to do it#goth fashion#goth diy#goth goth#spider#jewelry
4 notes
·
View notes
Text
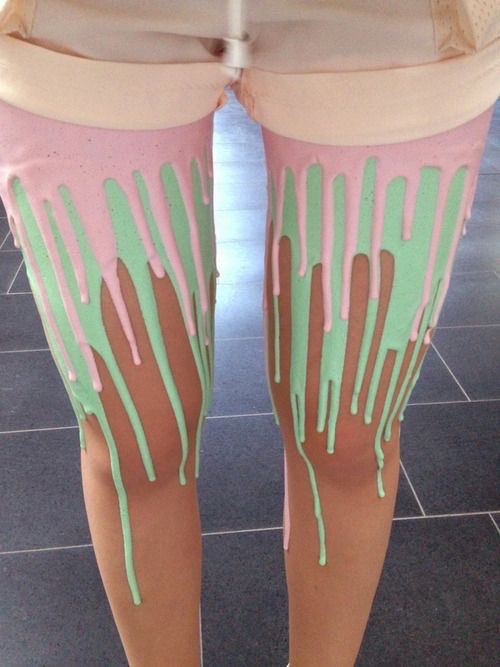
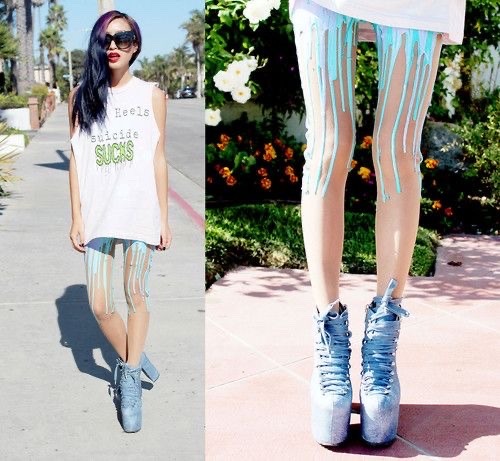
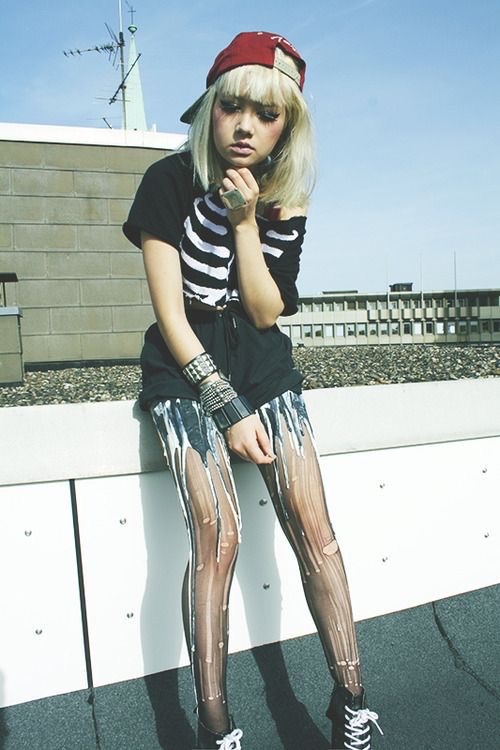
So melting tights were a thing and i didn’t know about it til literally just now… I couldn’t find any trustworthy websites that you can buy them but I found two diy vids if anyone wants to try giving it a shot
youtube
youtube
#pastel goth#pastel grunge#creepy cute#gurokawa#2010s#tumblr 2010s#diy#pastel gothic#kawaii#pastel#goth#spooky#accessories#fashion#Youtube#tutorial
17 notes
·
View notes
Photo
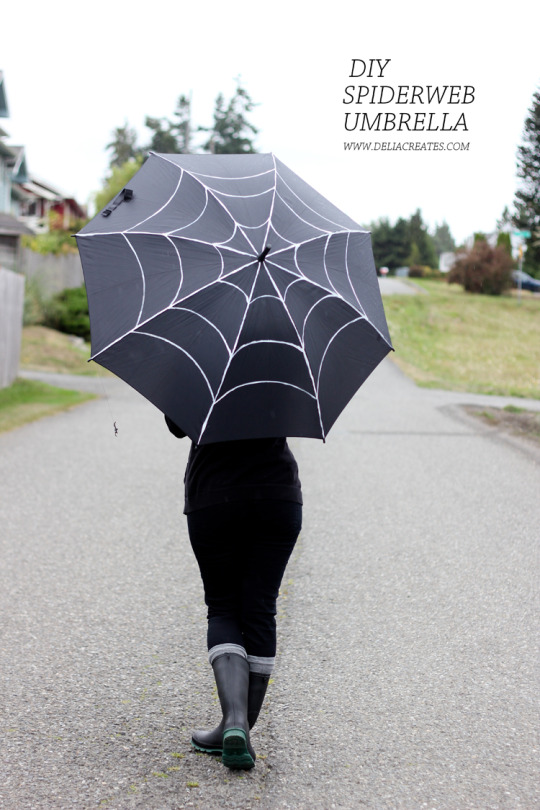
DIY Spiderweb Umbrella
51 notes
·
View notes
Note
I have a 16 almost 17 year old who wants to start dressing goth/punk, and I'm all for it, I just don't...know...how...to help? I'm not a fashion person, my fashion is funny tee shirts and jeans, and I want to help but I don't know HOW. Do you have sort of a ...starter list of shops or types of clothes or anything? TL;dr -- tee shirt Mom needs help pls
Firstly, you are an AWESOME mom.
Ask your kid what style of goth they're interested in; ask them for images, links, anything. Goth/punk fashion is a vast umbrella for all sorts of different things. No matter what they show you, remember that goth/punk fashion doesn't have to be from "subculture" stores - avoid places like Killstar, Dolls Kill (ESPECIALLY AVOID THEM), Shein, etc. A lot of the basics are things you can find at any big-box mainstream store (or Amazon); for speciality items, shops like Foxblood, Lively Ghosts, and Die With Your Boots On are great. And don't forget resale sites! eBay, Poshmark, Depop, etc.
However, some recommendations for goth/punk basics:
Oversized black shirts - tshirts, button ups, tunics, whatever. All of these can be customized by cutting off collars, sleeves, adding slashes, adding safety pins, adding lace or ribbons ... you get the idea.
Black leggings.
A black duster. Lace, satin, velvet, cotton, rayon, whatever. You can find some amazing ones by searching for "black beach cover up" on Amazon.
Fishnet tights - cut off the feet, cut out the crotch, and boom! Instant fishnet shirt to wear under other things.
Belts. No matter the gender presentation, wearing an interesting belt will make the outfit more striking. There are all sorts of faux corset belts out there (which are my personal preference), but layering a bunch of different belts is also a great look.
Boots! While there are a LOT of specialty gothy boots out there, black boots in a style like the original Dr. Marten's boots are a classic for a reason.
With those things as a foundation, your teen can start enhancing and customizing their look with accessories - necklaces, bracelets, pins, (this is where thrift stores and mainstream mall stores can be helpful - layer on all the necklaces you can find from Ross or TJ Maxx!), or shawls, scarves, plain blazers they customize, etc.
Antimony and Lace has great project tutorials. This Gothic Charm School articles that may also be useful:
Gothy DIY Tools - the Essentials
491 notes
·
View notes
Text
Although I do agree that the concept that "goth/punk/alt styles is expensive" is bs, I don't like how people act as if it's cheap.
A lot of posts are like "just diy, it's that easy!" and completely ignore that even if someone somehow manages to acquire all the materials required for cheap (which isn't a given to begin with), it takes a lot of skill and time and energy. And if you don't have the skills, it takes MORE time and energy to acquire.
Time and energy are not cheap. For some people more than others. For some people, it's not even really feasible. I think it's kind of dismissive and people who are used to making stuff don't really realise how difficult it can be for people who aren't.
Also, some things aren't easy to make yourself. There are garments that you can't really make by yourself in a week? Obviously the alternative isn't to buy overpriced shit from dubiously sourced brands but like. "Make it yourself, there's YouTube tutorials" isn't always super helpful (especially if you're not in the US).
#punk#goth#diy#i think that offering help if someone has specific questions is probably better#like if someone doesn't know where to start “this video helped me” is good but#“what specific step are you struggling with#this is how i do it“#is better
132 notes
·
View notes
Text
Altered button-up shirt--1st time lino stamping on fabric!
Note: My camera HATES the color red and makes it appear as the most eye-searing hellfire color, but this shirt is actually a pleasant cherry-red. I tried to edit the pictures to depict the color more accurately, and I think the second pic comes closest.
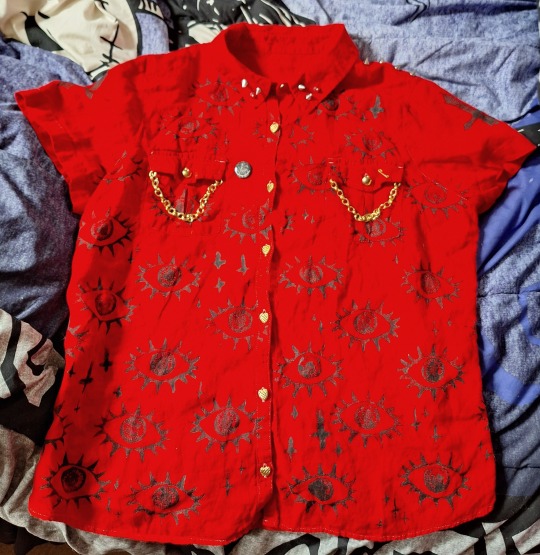


This shirt began its journey in the thrift store as a salmon-pink button-up of nice quality. It was picked up by a goth, one who had BIG plans.
The shirt was dyed red to give it some new life. Then it got a cool eyeball print courtesy of a hand-carved linoleum stamp. Some crosses on the sleeves were added the same way, and some smaller crosses free-handed here and there between the eyes. But the shirt's journey was far from over.
The shirt got a row of silver spikes along the shoulders and collar before getting bedecked in a whole new set of buttons, changing out dye-tinged white with gold. Although gold hadn't been in the original plan, it just looked so nice with the shirt's red complexion. Gold chains were added to adorn the pocket to match the new buttons.
Lastly, the shirt received a gold safety pin and a plague doctor button for being such a brave little shirt during its makeover. Now it's done, and what a glow-up it was!
#the printing isn't the neatest but it's not bad for a first try#goth diy#goth diy tutorial#gothgoth#goth#goth fashion#goth subculture#diy advice from your local goth#linoprint#linoleum stamping#mine
12 notes
·
View notes
Note
hello! i am a longtime huge admirer of your clothing/fashion sense, as well as a longtime backreader of your #victorian and #goth tags. i am really interested in what you've written about Victorian dress, and i am looking to get more into 19th and 20th century clothing for gender + diy craft reasons. i'm so sorry if you've answered similar questions before, but do you have any tips for where a newbie should start researching? either way, thank you thank you, your blog opens my mind wide and brings me much joy and reflection!
General research:
Spend some time searching the 'net, museum websites, and archive sites for fashion plates (such as archive.org—link leads to a date-restricted query for "fashion"—or the Smithsonian—link leads to fashion plates in their image collection). Take note of what you like, as well as which styles correspond to which decade. Karolina Żebrowska has a good rundown of English fashion over the decades.
The undergarments are what does the most work creating the necessary silhouette to make Victorian & Edwardian womenswear fit properly. If you've figured out a decade you want your outfit to draw on, doing a quick search for "[decade] undergarments" should bring up plenty of blog posts, which may or may not cite primary sources (such is the fickle nature of the historical blogosphere). Bustle pads and sleeve supports can be purchased or made; they're both pretty simple, and tutorials abound.
Purchasing clothing:
Reproduction made-to-measure clothing can be readily found on etsy, but can be in the several-hundred USD range. I've had some luck finding vintage reproduction clothing (like, a skirt someone made by hand in the 1980s to a 1900s walking skirt pattern), which tends to be much cheaper.
Men, women, and children wore stays and corsets. As far as I know, Orchard Corset has the cheapest OTR corsets that are good quality and safe to wear. If you get a corset in the style of a specific decade handmade or made to measure, make sure that the seller tells you what the boning material is, what construction the boning is (spiral steel is sturdiest and most flexible), how many bones there are, what the corset material is, &c.—otherwise it's an indication of an unserious maker. Follow general advice for wearing corsets at a waist reduction (lace up slowly, break it in, &c.).
Antique Menswear on youtube gives a lot of good, practical advice for wearing late 19th-century and early 20th-century men's clothing (including where to buy reproductions and how to treat them, how to modify modern shirts to 19th-century standards with basically no sewing skills, &c.).
Actual antique clothing can be found and purchased online or at estate sales—usually in very small sizes, but I've seen Edwardian skirts and petticoats in an XL (also a small size, but...). You can also just simply browse this kind of thing for inspiration and save photos of anything you think you'd like to recreate.
Even clothing that was not "meant" to be worn by re-enactors can be clearly historically influenced (e.g. the huge boom in Victorian- and Edwardian- style blouses in the 1980s), so keep an open mind when shopping for vintage clothing! A lot of 1970s dresses that look "hippy" on their own can look very Victorian with the right undergarments and an updo. A lot of 1980s men's trousers also approach the right silhouette for the 1910s-inspired three-piece suit I'm trying to put together. Witness also the recent trend for big puffed sleeves!
Making or modifying clothing:
Victorian and Edwardian manuals for garment drafting and sewing can be found online—go to archive.org and search for "sewing," "drafting," or "dressmaking," then use the filters on the left to chuse which year(s) you want to see results from. Most of these have patterns that are sort of vibes-based: The work-woman's guide is one manual that claims to have patterns laid out strictly according to a grid.
I don't sew garments, but if Victorian pattern-writing for sewing is anything like it is for knitting, that may not be super useful. People do sell updates and graded 'translations' of antique patterns (which tend to be written in only one size) on etsy and ebay—just make sure from the description that it's 'deciphered' and translated rather than a scan of the original pattern!
One of the easiest things that you can do to add some Victorian or Goth flair to an otherwise plain-looking garment is to add trim. You can knit, crochet, or tat your own trim from Victorian lace-making patterns; purchase antique trim from resale sites; or buy braided or lace trim very cheaply at any craft store. Trim doesn't just have to go around the hems and cuffs of a garment: lace "insertions" between two pieces of fabric, as well as raised geometric patterns over the surface of a garment, are common in 19th-century clothing.

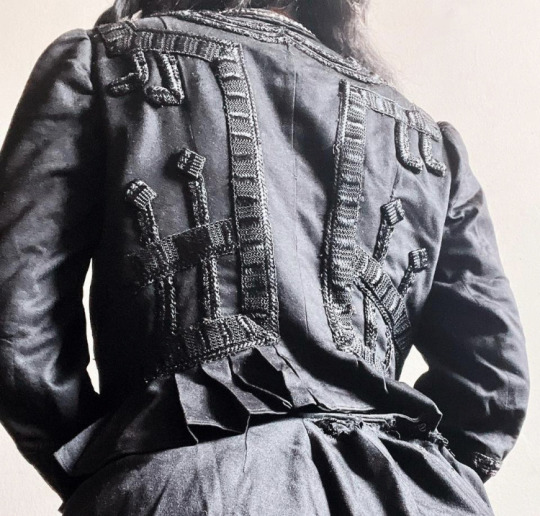
[ID: first image shows a black overdress showing lace insertions between strips of fabric of equal width, creating a striped effect. second image is the back of a black blouse with trim in a geometric design centred around right angles and parallel lines. end ID]
Jewellery (women's and men's):
Actual antique jewellery (including men's jewellery and fastenings) is not as expensive as you might think. Even if you're not willing to spend a lot of time learning what to look for and scouring estate sales for people who don't know or care what they have, late Victorian mass-manufactured costume jewellery often goes for sub-$50 or even $30 prices at auction on ebay (USD, in the US—in my experience it is even more plentiful and cheaper in the UK).
Specifically, I've lucked out with lots ("lot" as in, a bunch of small things being sold together) of "vintage men's accessories" going for $20 or so that contained Victorian cufflinks (in low-karat gold, mother-of-pearl, and jet), collar studs (in low-karat gold and base metals), and shirt studs (in low-karat gold, with garnets and seed pearls, &c.). Searching for lots of accessories is generally a good idea since by and large people do not know what these things are... but if you're willing to spend a little more for something that has been identified and is more likely to still be with its set, use the specific search term for that item (e.g. "antique collar studs").
Answers to Questions About Old Jewelry (though aimed at estate sellers and, if memory serves, full of regrettable pæans to Queen Victoria) is a good reference text to dating antique jewellery. I also recommend Miller's Illustrated Guide to Jewelry Appraising. Both of these texts are available on libgen.
Feel free to ask me follow-up questions if you want more detail on any of these points. As you can see I am perfectly happy to blather away on this topic
83 notes
·
View notes
Text
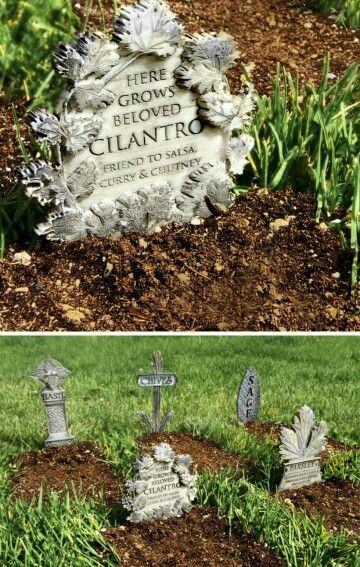
Source: Pinterest, Instructables (by PenfoldPlant)
#darkcomforts#gothic#goth aesthetic#goth#soft goth#romantic goth#aesthetic#gothic garden#graveyard#cemetery#alt diy#diy tutorial#diy inspiration#gothic diy
16 notes
·
View notes
Text
Journey Of a Goth Girl
⋆༺𓆩☠︎︎𓆪༻⋆༺𓆩☠︎︎𓆪༻⋆༺𓆩☠︎︎𓆪༻⋆༺𓆩☠︎︎𓆪༻⋆༺𓆩☠︎︎𓆪༻⋆༺𓆩☠︎︎𓆪༻⋆
WELCOME to my tumblr blog for MY GOTH GIRLIES to look scary cute >;D
·:¨༺ ♱Here is a little list of things you could find here !♱ ༻¨:·
·🕷Goth fashion inspiration
·🕷Makeup tutorials
·🕷Spooky DIY projects for room decor
·🕷Gothic literature and art
·🕷Music recommendations
·🕷 Tips in general ;)
#goth makeup#gothic girl#goth life#goth aesthetic#romantic goth#goth room#gothic lifestyle#goth alternative#goth culture#goth music#goth inspo#goth interior#goth art#goth bands
20 notes
·
View notes
Text
mini sewing and diy tutorial post
these are tutorials that have personally helped me make stuff along with a little commentary of my own, just for reference. feel free to add on!
no fancy tools are necessary to get started sewing--i personally use fabric scissors and a seam ripper a lot, though if you're working on something small (plushes, patches, etc) a tiny swiss army knife does the job just as well in my experience.
basic hand stitches and techniques
you can also use the tie off stitch to start your stitches if you are worried your knot will pull through the fabric. i've never used thread gloss before and sew just fine without it. (it does sound nice, though.)
understanding sewing patterns
personally, i've flipped a flatscreen tv or computer monitor on its side, pulled up the pattern, and gently traced onto tracing paper to change the size of a pattern--which is how that kyogre plush is so big. this is definitely, like, the "feral gremlin" technique, though. in my defense, printing is expensive.
alt, punk, and goth diy fashion tips
thrifting stuff and altering it to better suit your tastes is in my experience cheaper than buying new clothes or making your own clothes from scratch. (fabric is also expensive.) some craft stores will have a fabric scrap section where you can buy small pieces, typically a yard or shorter, which is great for details, patches, etc.
saving buttons, zippers, elastic waistbands, etc from old clothes that are worn out is a good way to build up a stock of supplies you don't have to pay for. like, i had some worn out jeggings that i cut the waistband out of and am turning them to miniskirts.
searching "thrift flip" tutorials on youtube is a great way to look for ideas, and remember you don't need a sewing machine to get started! a ruler or washable marker to mark stitches is helpful if you're struggling to keep them the same size.
#hand sewing#diy fashion#handmade#autumn.reference#autumn.personal#clearing out my drafts tonight so here's this old tut i never posted
12 notes
·
View notes
Text
Tired of people going 'all goth fashion is super easy to diy and everyone should do that instead' because like... yes a lot of it is but some very much not. So some thoughts on how much I'd recommend diying various goth fashion stuff as someone who does a lot of it:
Simple jewellery is definitely much better to diy and particularly chains and stuff. I remember going to dangerfield one time and they had a chain with a bat ornament on in for 20 dollars 🤣 ... you can get a bunch of chain from the hardware store pretty cheaply and the exact same bat pendant on it I had got like 20 off etsy for 5 dollars. It usually doesn't take that long and extra tools e.g. pliers are helpful but not necessary - 10/10 absolutely recommend for all goths or other people interested in gothic fashion
Same thing goes for distressed clothing/fishnet shirts there are tons of tutorials for that kind of stuff, and it generally doesn't require that much time, experience or materials 10/10
Minor clothing modifications e.g. some tailoring, adding/removing parts, mending damaged old clothing, changing buttons - this is something that is really useful in everyday life, usually doesn't take that long and is very useful for turning normal clothing into more spooky stuff 9/10
Designs on clothes or patches: if you get some fabric paint, screen printing ink, bleach or even acrylic you can paint designs onto clothing pretty easily. Personally I like dilute screen printing ink as it gives the nicest surface, but it can be a bit of a pain to use as you have to do a lot of layers, and it doesn't colour the fabric intuitively in the way that fabric paint or acrylic do 8/10 - would recommend very strongly to anyone who enjoys art, and recommend trying at least once to people who don't enjoy art as much (you can always make stencils), but it does take a long time and you need some materials. Also, for patches particularly for small bands it can be better to order them from the band to support the artist, but also lots of bands don't have patches or merch or international shipping to some countries makes it not accessible
Embroidery: often looks really good and professional in a way that painted designs don't, takes absolutely ages. 7/10 - would recommend very highly for people who enjoy textile stuff and maybe trying a bit for everyone but yeah if you don't enjoy it it's a pain
Smaller articles of clothing: I've made some waistcoats and shirts and stuff which have been pretty fun and it's really good to be able to do specific designs you wouldn't be able to buy (e.g. my skeleton one) and get stuff to fit right. They were all hand sewn and took a pretty long time (however you can also do it while listening to online classes or whatever), + a bit of time to learn techniques and stuff. Definitely a cheaper than buying them 6.5/10 - do it if you enjoy textile art stuff but will probably be a really painful experience if you don't and you're hand sewing. Also useful if you've got sizing or dimensions that mean you just... can't buy stuff that'll fit which is how I got into sewing
More complex sewing: I've made 2 (well, finished one and 98% of the way through another) long spooky coats and one cape with really complicated edges and embroidery and stuff. Coat 1 was entirely by hand out of not great fabric and took absolutely ages but was definitely vastly cheaper than buying it from the store, and it fit well and everything. With the cape, I got repetitive strain injury in my thumb that still is a bit of a problem 3 years later! With the final coat it was mostly by machine and then touching some stuff up by hand e.g. edges of the lining, making the eyelets and stuff, but it still took ages. Also, something I never see people talking about with diy goth clothing is how hard it is to get the materials - there were only 3 black brocade fabrics available in my city - One was really bad quality and I tried to make a shirt out of it, but it kept falling apart. One was 150 dollars a meter. The one I ended up using was really nice and reasonably priced, but I got the last 2.5 meters of it so it almost wasn't an option. So when people talk about diying clothing being cheaper it can actually not be that much because a clothing business can get fabrics in bulk + unless your city is really big there are probably not many options, so there's also shipping costs if you then need to order fabric. Out of curiosity I compared how much the coat cost in terms of materials to the price of a similar looking coat off dracula clothing which is a pretty well known and apparently quality materials and ethically made goth fashion shop and it came out a bit cheaper but not massively so (not counting shipping...) so 3.5/10 - fun to do if you enjoy textile art as a hobby, not even vaguely a practical alternative to buying a coat
And then there's other stuff like more complicated jewellery making and leather work which idk much about
31 notes
·
View notes
Note
🌻
my isp gets subpoenaed for my internet history and it’s just page after page of visits to e621 and nsfw patreons. my lawyer keeps objecting on relevance but the judge keeps overruling him, finally says “shut the fuck up, this is like, interesting”. it takes about two and a half hours of reading off entire urls before we get to ‘best dq blizzard to impress goth girl’ and ‘diy car bomb tutorial’ ‘us marines improvised explosives manual’
29 notes
·
View notes
Last Seen Blogs

wheatleygrim
means focus

bree-zen
Breeze in Cosmos

crosscarnage
That's a-moRAY (eel)

emmanina
Pretty Ting
bree-zen
Breeze in Cosmos