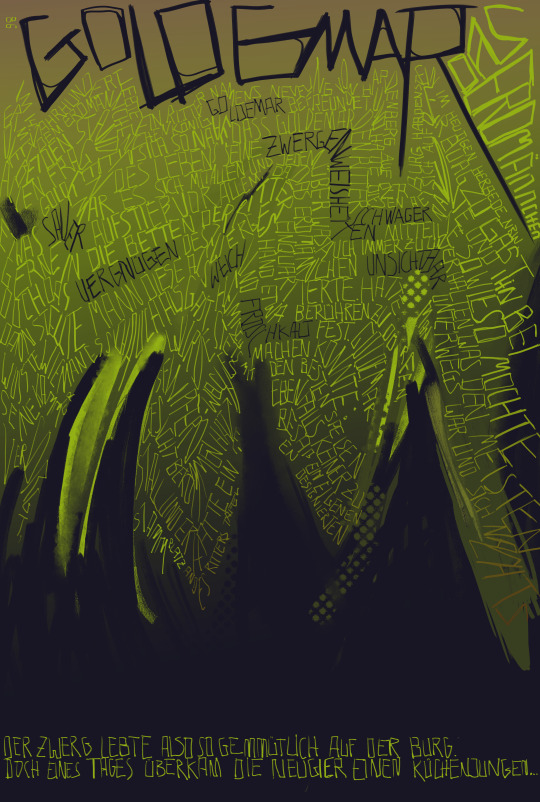
#king goldemar
Text
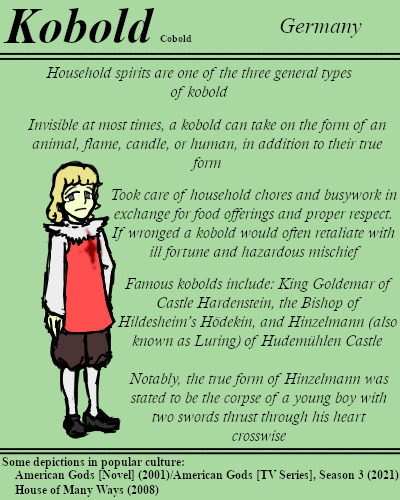
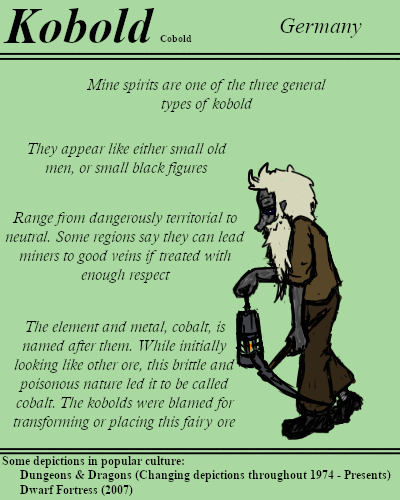
Invisible, and typically some degree of mischievous, there are three types of kobold: the household spirits, the mine spirits, and shipboard spirits.
Having previously covered klabautermann, those shipboard spirits, in this bestiary, the remaining types of kobold were only a matter of time.
#BriefBestiary#bestiary#digital art#fantasy#folklore#legend#myth#mythology#kobold#cobold#fairy#fae#fairy miner#german folklore#german legend#cobalt#fairy ore#king goldemar#hinzelmann#hödekin#fairy tale#household spirit#mine spirit
18 notes
·
View notes
Text
Faebruary/Februfairy 2023, Day 19: "Time"
"I can show you the path back to the mortal world," Herla said. "But I cannot go with you."
"Why not?"
"Because if I do, I'll age a thousand years and turn to dust."
He saw the others' looks and gave a grim smile. "Many years ago, I spent three days in the realm of King Goldemar. He gave me a fairy steed to ride back to Earth. When we returned home, we discovered that three centuries had passed, and my kingdom had long been conquered. Some of my men dismounted, and as soon as they touched the ground they aged and died. After that I spent hundreds of years on my horse's back, until I found the way here to Annwn."
A long pause ensued.
"Does that mean we'll turn to dust when we get back to Earth?"
"Not if we're a horse!" Toby said desperately. "I can turn into a horse!"
Herla waved the question off. "Time passes the same in Annwn as in our world; you'll have no problem. But it's something to keep in mind, before you visit any other fairy realms. Trust me," he muttered, rubbing his backside. "Six hundred years on the saddle are not fun."
#Faebruary#Februfairy#The Fair Folk#Fairy#Fairies#Fae#Urashima effect#Changeling WIP#Herla#King Herla#Wild Hunt#Annwn#Goldemar#King Goldemar#I might switch him out with another fairy king? We'll see.
2 notes
·
View notes
Text


Goldemar, dwarf king 2021
0 notes
Text
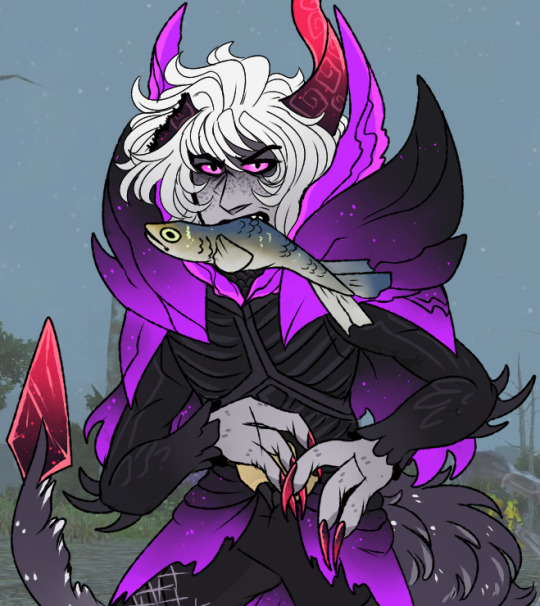
[ Art trade with @creighton-thewanderer of their character King Goldemar !! :o 💕 ]
12 notes
·
View notes
Photo
Don’t think I shared this one here?
#or I did not like. lost track#Is it funny this was blog was originally supposed to be more 'ffxiv - voidsenf/king goldemar' related#*this was originally *** ignore the spelling error#and lately I just wanna draw Zigg. they have become my beloved#everhood#bazel doodles#bazel wips#also I misspelled voidsent. ignore that too
25 notes
·
View notes
Photo

Art trade with @creighton-thewanderer! c: Thank you for the trade, these two were super fun to draw!
#ocs#art#artists on tumblr#art trade#for others#my art#king-goldemar#i absolutely love bazels characters and designs! :o
7 notes
·
View notes
Text
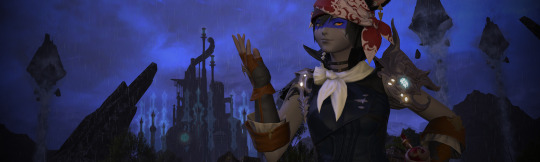
Hmm.. I could try to be Creighton in ffxiv
#Maybe use King Goldemar as the little 'halloween' thingo#I just wouldn't change the the skintone + the hair is already white#and my warrior is lv 80#time to dig for stuff HA
2 notes
·
View notes
Photo

Kuno listens to an old dwarf's tale before the throne of King Goldemar, king of the dwarfs. In: Villamaria (1877). Fairy Circles: Tales and Legends of Giants, Dwarfs, Fairies, Water-Sprites, and Hobgoblins. London: Marcus Ward & Co. >> King Goldemar (also spelled Goldmar, Vollmar, and Volmar) is a dwarf or kobold from Germanic mythology and folklore. By the Middle Ages, Goldemar had become the king of the dwarfs in German belief. In the fairy tale "The Friendship of the Dwarfs", the author Villamaria depicts Goldemar as a "mighty dwarf king" with a queen and a court of dwarf nobles at his service. He has long, silver hair and beard and wears a crown and a purple mantle. In one tale, he runs away with the daughter of a human king. Fragments of an epic poem by Albrecht von Kemenaten called "Goldemar" survive. The poem tells of Dietrich's encounter with the dwarf king. The king also features in "Der junge König und die Schafërin" ("The Prince and the Shepherdess") by German poet Ludwig Uhland. Goldemar's brothers, Alberich or Elberich and Elbegast, feature in other poems, too. According to a legend recorded by Thomas Keightley in 1850, King Goldemar was a kobold, a type of house spirit in Germanic belief. Goldemar lived with Neveling von Hardenberg at Castle Hardenstein at the Ruhr River. Goldemar frequently interacted with mortals. He called Neveling his "brother-in-law" and often slept in the same bed with him. He skillfully played the harp, and he enjoyed gambling and throwing dice. He also exposed the misdeeds of the clergy. Goldemar brought good fortune to Neveling's household, demanding only a seat at the table, a stable for his horse, and food for himself and his animal. The spirit refused to be seen, but he would allow mortals to feel him; Keightley says that "[h]is hands were thin like those of a frog, cold and soft to the feel." After King Goldemar had lived with Neveling for three years, a curious person strewed ashes and tares about to try to see the kobold's footprints. Goldemar cut the man to pieces, put them on the fire to roast, and put the head and legs in a pot to boil. He then took the cooked meat to his chambers and ate it with glee. The next day, Goldemar was gone. He left a note over his door saying that the house would be as unlucky as it had been lucky while he lived there. Hardenstein lay in a rich mining area during the Middle Ages, which may account for why the castle became associated with a subterranean sprite like Goldemar.
#kuno#goldemar#king goldemar#vollmar#volmar#dwarf#kobold#germanic mythology#norse mythology#dwarfs#dwarves#king of the dwarves#king of the dwarfs#villamaria#1877#fairy tales#tales#mythology
25 notes
·
View notes
Photo

mythology aesthetics
KOBOLDS
In Germanic folklore, the kobold (occasionally cobold) is a sprite or fairy. Although usually invisible, a kobold can materialize in the form of an animal, fire, a human being, and a candle. The most common depictions of kobolds show them as humanlike figures the size of small children. Most commonly, the creatures are house spirits of ambivalent nature; while they sometimes perform domestic chores, they play malicious tricks if insulted or neglected. Famous kobolds of this type include King Goldemar, Heinzelmann, and Hödekin. In some regions, kobolds are known by local names, such as the Galgenmännlein of southern Germany and the Heinzelmännchen of Cologne. Belief in kobolds dates to at least the 13th century, when German peasants carved kobold effigies for their homes. The name of the element cobalt comes from the creature's name, because medieval miners blamed the sprite for the poisonous and troublesome nature of the typical arsenical ores of this metal (cobaltite and smaltite) which polluted other mined elements.
160 notes
·
View notes
Text
Vex’s Not-So-Brief Guide to Eureka Hydatos
Patch 4.55 is here, and with it, the two final parts of Eureka are here - Eureka Hydatos and the Baldesion Arsenal! I’ll be splitting Arsenal into its own guide as it is very, very different to the usual Eureka. This is a comprehensive guide to Eureka Hydatos, covering all aspects of Eureka Hydatos, and will serve you will for your adventures into this part of Eureka, the Forbidden Land!
As with previous parts of my Eureka guides, I’ll open with my thoughts on Hydatos. The map is a lot more safe to run around in than every before, with most of the water ways clear of mobs, and I barely had to sneak my way around unless there was a particularly strange placement of a Happy Bunny chest. Hydatos has multiple ways to level, with some quicker than others, though all are completely viable. It plays a lot like Pyros and Anemos, with very little of Pagos to be seen other than chaining. The map is also pretty spectacular, if you haven’t gotten a chance to see it yet, it’s beautiful.
Be sure to check out my master post >here< for the rest of my guides to Eureka Anemos, Pagos, Pyros, and when I get to it, the Baldesion Arsenal. As with previous guides there will be links to exterior content, as there are many people who have made much better content than I could have on elements of Eureka!
So! This guide will cover:
Leveling
The Relic Steps
Moisture-Warped Lockboxes
Elemental Conflicts (Bunny FATEs)
Efficiency tips/tricks
That pesky extra-extra magicite
New Logos Actions and Logos Action Board Augmentation
Map
Baldesion Arsenal Entry and Support
This will be a long guide, so I’m placing it below the cut! As always, best of luck to all of you Warriors of Light who seek to venture to the penultimate part of the Forbidden Land, Eureka Hydatos!
1. Leveling
Leveling is quite simple in Hydatos, depending on the method you want to take, as there are a good few open to you this time around! These are training, chaining, and reflecting.
Training. Just like the previous Forbidden Land instances before it, Hydatos’ NMs give an immense amount of E-EXP, with the first NM giving around 11 million E-EXP. You may also notice that a weather condition, Umbral Turbulence (Which looks a lot like the skies around Azys Lla) will spawn often, complete with an NM - Ovni - who’s up around every 10 - 15 minutes. He is a level 60 NM that is always worth going to, giving around 8 million at ELvl 50, and rising to upwards of 16 million or more at ELvl 59. He’s a quick way of getting E-EXP. He will also kill you... A lot. So make sure you’ve a party.
Chaining. Back when Pagos first released you may have heard the phrase “The train is dead! Long live the chain!” This certainly was true back on release (though it has been fixed now and NM training is very much the more viable option there now) if you have the patience and time, chaining can easily work in tandem with training, or by itself. Chaining is the act of pulling mobs and killing them in order to benefit from the E-EXP percentage increases at 5, 10, 15, 20, 25, 30 kills in a chain. For those who may not know, you can see your chain number on your magia board. Find some mobs around 4-5 ELvl above you and kill them, though be sure that they’re always around that number of ELvls above you, as the E-EXP given by mobs around your own is abysmal in comparison.
Reflecting. If you didn’t do a reflect party to level in Pyros, you’ll become quite intimately familiar with how it works in Hydatos - particularly if you want to progress into Baldesion Arsenal. Reflect L is a Logos action made through the combination of Wisdom of the Ordained, Protect L, and Shell L and reflects all magic damage back to the caster for 10 seconds. Reflect parties therefore will have one member cast Reflect L upon themselves and pull all Sprites in an area, who will then damage themselves until KO. Note that this only works on Sprites barring some certain exceptions. If you go into BA, you’ll be doing this often on Sprite Island in the south east of the map.
2. Relic Steps
The final relic step is here! So you’re all on the cusp of getting that shiny, fancy new weapon that will not fail to catch eyes, but how exactly do you get it? Well the good news is that it is a relatively simple grind in comparison to previous steps (Pagos I’m looking at you) and does not involve any items from BA to complete. The steps for both the relic weapon and relic armour can be found below!
Hydatos Relic Weapon Steps:
50 Hydatos Crystals. ILvl 390.
100 Hydatos Crystals. ILvl 395.
100 Hydatos Crystals. ILvl 400. New model!
100 Hydatos Crystals, 5 Crystalline Scales. ILvl 405. Glow!
Thus you will need 350 Hydatos Crystals and 5 Crystalline Scales in total! 3 Crystalline Scales are dropped each kill from the NM Provenance Watcher, who is spawned by killing Crystal Claws, in the FATE “Crystalline Provenance” so you’ll need to kill him twice. He spawns in any weather condition.
Unlike previous Eurekas, there is an additional step that stands apart from the normal relic steps, and is completely optional to do. You can augment your completed relic into a Physeos weapon at the cost of 100 Eureka Fragments. I don’t recommend doing this at all unless you want to do progression into BA, as Eureka Fragments can only be found within the Arsenal, and are really only helpful for content within Eureka, as it will allow you incredible bonuses to your elemental damage within the Forbidden Land at +348 to elemental offense and elemental defense to whatever you’ve selected through your Magia board. You get 26 of these fragments from a full clear.
Hydatos Relic Armour Steps:
A note about the Hydatos armor is that unless you want to venture into BA for progression, you do not need the +2 armour. The +1 has the same glow as the +2 and the additional step is only necessary for progression.
+1 Armour. 50 Hydatos Crystals per each chest and leg piece. 30 Hydatos Crystals per each boots, gloves, headgear piece. ILvl 390. Glow!
+2 Armour. 35 Eureka Fragments per each chest and leg piece. 21 Eureka Fragments per each boots, gloves, headgear piece. ILvl 390. Eureka Effect. Glow!
The Eureka Effect makes your Eureka gear more effective, giving you more elemental offense and defense depending on how you’ve outfitted your magia board.
3. Moisture-warped Lockboxes
Moisture-warped lockboxes work much the same as the previous cold- and heat-warped lockboxes found in Pagos and Pyros. These are found by killing mobs that mutate or adapt within Hydatos, a good example of these are the Mylodons in the south west of the map.
Items of note that can be found in Moisture-warped Lockboxes are:
Yukinko Snowflake minion
Onslaught Orchestrion roll
Tactical Logograms
Sharlayan Aether Oil
Ballroom Etiquette: Overzealous Affirmations (/fistpump emote)
Sharlayn Aether Oil is a reagent for one particular method of entry into Baldesion Arsenal. It is untradable and unable to be sold on the MB.
4. Elemental Conflicts
The Happy Bunnies are back to their usual tricks, though this time they’ve done nothing to aggravate any of the Forbidden Land’s creatures except drink from the Val River. There is only one Elemental Conflict in Eureka Hydatos, giving around 2.5 million E-EXP (perhaps a bit more), and works exactly the same as the previous instances. You get a bunny, look in your Duty Information or Key Items for a lucky carrot, and use it much the same as you would an aether compass. Take the Happy Bunny to where they direct you and find a chest!
The items that drop from the Happy Bunny chests are as follows:
Gold Chest: Aetherically Conductive Plate, Eurekan Petrel Horn, Offensive Logograms, Penthisilea’s Spear (DRG weapon glam), Absolute Lance (DRG weapon glam).
Silver Chest: Aethertight Flask, Inimical Logograms, Happy Bunny Triple Triad Card, Aetherically Conductive Plate, Mitigative Logograms.
You may notice and consequently ask what Aetherically Conductive Plates and Aethertight flasks are for. The Aetherically Conductive Plate is for one particular method of entering the Baldesion Arsenal, whilst Aethertight Flasks are for augmenting your Logos Action storage. Both of these are untradeable and unable to be sold on the MB. Everything else is fair game to sell! You can see the Eurekan Petrel mount below!

5. Efficiency Tips and Tricks
There are two aetherytes in Hydatos, Unverified Research in the southwest, and The Dormitory in the southeast, these are unlocked at ELvl 51 and 55, respectfully.
Your Mount is unlocked at ELvl 60 after the completion of the Eureka Expedition Storyline.
Remember, remember, remember your Potion of Harmony (10% E-EXP increase made by Alchemists) and/or the Heat Of Battle FC buff (if you can have it on II or III even better!). This will make things even quicker!
Remember that mobs don’t aggro on to you if you’re 2 or more levels above them!
Hydatos Sprites aggro on cast and touch. Death Sprites (new) spawn in Gloom.
Hydatos Ashkin still aggro on low HP and touch.
Obscure Logograms are dropped by many of the different creatures within Hydatos, these are needed for the new actions. Many of the NM trigger mobs drop obscures. The ELvl 50 NM FATE “I Ink, Therefore I Am” and the ELvl 51 NM FATE “From Dusk Til Dawn” also drop these.
Every NM FATE in Hydatos barring “I Don’t Want to Believe”, “The Baldesion Arsenal: Expedition Support”, and the Elemental Conflict “Drink Me” drops Hydatos Clusters necessary as reagents for one particular method of entry into the Baldesion Arsenal. If it’s not one of the aforementioned FATEs, it drops.
Remember to get Hydatos Elementals for E-EXP and damage buffs! Also call out the position of the Elemental using <pos> in your chat box or ctrl-right-click on the map to alert other Warriors of Light to its position!
6. 7th Magicite
Yes, there’s another Magicite in Hydatos, and yes you’ll have to get it from NM drops just like the Pyros one. The required items are:
King Goldemar’s Horn. ELvl 56 NM FATE “Duty-Free”.
Molech’s Horn. ELvl 52 NM FATE “Bullheaded Berserker”.
Ceto’s Claw. ELvl 59 NM FATE “Stone-cold Killer”.
7. New Logos Actions and Logos Action Storage Augmentation
There’s 6 new Logos actions in Hydatos to create, and all require a Mneme that is found through the new Obscure Logogram. These are drops from certain mobs and FATEs. All 6 of these are required to unlock the ability to augment your relic armour to +1 and +2.
The new Logos Actions are:
Sacrifice L. [Magic Burst L, Raise L, Esuna L]
Perception L. [Wisdom of the Breathtaker, Stealth L, Dispel L]
Wisdom of the Elder. [Wisdom of the Ordained, Magic Burst L, Wisdom of the Aetherweaver]
Wisdom of the Fiendhunter. [Eagle Eye Shot L, Spirit Dart L, Featherfoot L]
Wisdom of the Indomitable. [Double Edge L, Wisdom of the Platebearer, Incense L]
Wisdom of the Duelist. [Wisdom of the Skirmisher, Wisdom of the Skirmisher, Double Edge L]
You can now store 6 sets of Logos Actions in your Logos Board, up from 3 in Pyros. You can find Aethertight Flasks from Happy Bunny chests, and hand these in to the Expedition Alchemist for an increase in your storage capacity. 1 Aethertight Flask is required for each expansion, with a total of 3 needed.
8. Map
You can find a map of Eureka Hydatos, along with a wealth of annotations and marks that are beyond helpful >here<!Credit to Noranda Lu’Luna of Excalibur World for the map, and the Eurekan Explorers Discord for the information within it.
9. Baldesion Arsenal Entry and Support
A lot of people will be doing Baldesion Arsenal whilst you’re making your way through Hydatos, and hopefully we’ll see you venture in there too! You’ll notice two FATEs that are tied to BA which will spawn, these are the ELvl 60 NM FATE “I Don’t Want to Believe” (Ovni) and the ELvl 60 NM FATE “The Baldesion Arsenal: Expedition Support”. I’ll speak more about what these do and why they’re here!
Baldesion Arsenal Entry:
This FATE spawns a ELvl 60 NM, Ovni, who upon death will give all participants who are ELvl 60, have completed the Eureka Expedition Story and the Baldesion Arsenal entry quest, and got Gold participation, a buff which will enable you to enter the portals which will now begin to be strewn around Hydatos. These will have two different phases - Unstable, and Stable.
Unstable Portal [Blue]

Stable Portal [Red]

All portals, after 5 minutes, will turn Stable from Unstable, indicated by their change from Blue to Red. So what exactly is the difference? Unstable Portals [Blue] require an Aetherial Stabiliser to use. This is purchased with one of two methods:
1 Sharlayan Aether Oil, 1 Hydatos Cluster, 1 Aetherically Conductive Plate
500 Anemos Crystals, 500 Pagos Crystals, 500 Pyros Crystals
While this does indeed look intimidating as these are NM drops, and a lot of time farming previous Eurekas, worry not as these are not required to enter Baldesion Arsenal. The Aetherial Stablisers serve as VIP tickets, as they allow entry through the blue portals and are the only way to access BA through one. When the portals turn Stable [Red] they are able to be entered without the use of an Aetherial Stabiliser!
This brings me to another point. If there are premade BA groups in the dungeon, it is far better to ask if they have space for you or your party instead of forcing entry through portals. Please do not do take portals in this instance! It messes with, and can ruin, pre-made group’s progression attempts. The best way to attempt to progress is to ask for entry into a group, or to join one of the many BA discords floating around!
The link to the one I have been using can be found >here<!
Baldesion Arsenal Support:
You’ll notice that often a ‘Support Group’ from pre-mades entering the Baldesion Arsenal will use shout chat to foretell the coming of the ELvl 60 FATE “The Baldesion Arsenal: Expedition Support”. This NM, Tristitia, is responsible for giving Absolute Virtue his health regeneration and is required for a clear. Please assist the Support Group in killing the NM to assist the people inside the Arsenal in their clear attempt! Furthermore, Tristitia gives E-EXP and 10 Hydatos Crystals per kill.
Thank you all so much for reading, and I hope this helps your expeditions into Hydatos! It’s been a pleasure writing all these guides and exploring Eureka with you all. I’ll have a final guide to the Baldesion Arsenal up when I can, and I look forward to writing more come the Eureka-Like Content planned for Shadowbringers! Some other thanks to all the people who’ve helped me explore Eureka and those in my FC such as Ririnzo in particular for their efforts.

May you ever walk in the light of the Crystal,
Vex
130 notes
·
View notes
Photo

German folk belief associates dwarves with wealth and knowledge. There are many stories about dwarf king Volmar / Goldemar, his queen and court. However this story doesn't mention the name of the king. We have a story from Nürnberg. Paul Creuz was an inhabitant here who knew an amazing magic. To fulfill some of his wishes, he used his miraculous magic spell. He placed a new table in his garden, covered that with a white cloth, placed two milk-bowls on it, and also two honey-bowls, two plates, and nine knives. Then he took a black hen and shredded it on a pan in which cabbage was being cooked. The blood dripped into the boiling food. An unimaginably tasty dish was prepared. Next morning he took one part of it left it on the table. In the evening he kept the rest of the cabbage on the table and began chanting a spell. Finishing the incantation, he ran towards a green tree and hid himself behind that. He saw two small mountain people emerging from the earth. They sat at the table, and ate the precious smoky dish that was left there. After they finished, Paul came to them and asked some questions. They answered. His wish was fulfilled. Paul Creuz practiced the same repeatedly. The little men became so familiar that they too visited him in the house quite often. But he needed to give them time to finish the food first. If he did not wait, they either did not show up or disappeared soon. He finally got their king to support him. One day after hearing his sincere chant, the little king of the dwarves in a red scarlet cloak appeared alone to visit him. Under his cloak he had a book. Finishing dinner, he threw the book on the table and allowed Paul the host to read it as long as he wanted. Eventually humans earned knowledge of all valuable secrets and great wisdom from that host of dwarfs. #folktales #germany #dwarves https://www.instagram.com/kathamukh/p/CZLajZtrPmL/?utm_medium=tumblr
1 note
·
View note
Photo


Prince Silverwings et autres contes de fées http://www.oztimeline.net/OtherFairylands.htm L. Frank Baum a collaboré avec Edith Ogden Harrison, auteure du Prince Silverwings, sur une extravagance musicale de 1904 (qui n'a jamais eu lieu), une pièce de théâtre qui a vu naître le roi Nome, Trot, Polychrome et la prémisse de trois Oz livres. Il semble donc approprié de considérer ce travail comme faisant partie de l'univers Ozian. Il y a cependant une contradiction apparente. Dans «La cité du roi de la mer», Harrison établit que les Mer-Folk furent d'abord établis par le mariage d'une mortelle princesse Selpan avec le Roi des Mers, et c'est ainsi que naquirent les sirènes. Dans The Sea Fairies , cependant, Clia dit: «Mais les sirènes vivaient avant les poissons et avant l'humanité." L'histoire de Harrison peut être considérée comme telle : le Sea King a pris une princesse mortelle pour être sa fiancée, mais elle n'était pas la première sirène, car les sirènes existaient avant les humains, mais plutôt la première d'une certaine sorte de sirène. Les histoires incluses dans ce volume semblent décrire une période beaucoup plus ancienne, peut-être se déroulant dans un pays Borderlands comme Yew ou Ix, ou même un pré Oz Oz. Dans une histoire, la terre s'appelle la vallée heureuse. Dans le scénario et le résumé général de Prince Silverwings , par Pamami Press, on peut voir que Baum avait l'intention de nommer le Roi Gnome dans la pièce de théâtre Kwytoffle, mais quand cela n'a pas marché, il est devenu le nom de la faux-magicien et souverain d'Auriel sur l'île de Yew. Un meilleur prédécesseur de Roquat, peut-être un oncle pourrait être le Nome King Goldemar (de Zauberlinda la Wise Witch), bien que cela n'ait encore été établi dans aucune histoire.
#illustrations pour enfants#livres pour enfants#livres#livre illustré pour enfants#illustrations#lherbierdebeatrixpotter
2 notes
·
View notes
Text
Faebruary/Februfairy 2023, Day 21: "Crown"
Finvarra, King of the Aes Sidhe, wears a delicate diadem of golden swirls and diamonds cut into the shape of flowers and stars. His queen, Oona, has a silver crown in the same form. Their daughters, Aibell and Cleena, have less elaborate but bejeweled circlets.
Goldemar, king of the dwarves, has a large, elaborate crown, engraved with images of dragons and studded with small gems; it is said to carry many enchantments and give him great power over his subterranean realm. His queen's is smaller but lovelier, and said to increase her wisdom and beauty when she wears it.
Arawn, king of Annwn, prefers a relatively simple coronet, and then only on formal occasions; it's sometimes joked that Pwyll wore it more in a year than Arawn has in a thousand. His wife Gwenhidw, a water sprite, has a crown made of coral and pearls.
Oberon and Titania, with their sylvan palace, are more likely to wear garlands and flowers than any sort of metal. They enforce their rule with magic, not symbols.
Morgana, the changeling queen of Avalon, shows her power by wearing a crown of iron, a substance which most fairies cannot even touch.
Gyre-Carling, the Unseelie Queen of Elfame, wears a sharp crown made of an unknown dark metal. Some say that it is what allows her to draw every wicked fairy in the worlds into her service, and that she can hear the whispers of demons whenever she wears it.
#I couldn't come up with a good story so have some random characterization.#Faebruary#Februfairy#Fairy#Fairies#The Fair Folk#Fae#Finvarra#Oona#Oberon#Titania#Goldemar#Morgan le Fay#Arawn#Gwenhidw#Gyre-Carling#Changeling WIP
8 notes
·
View notes
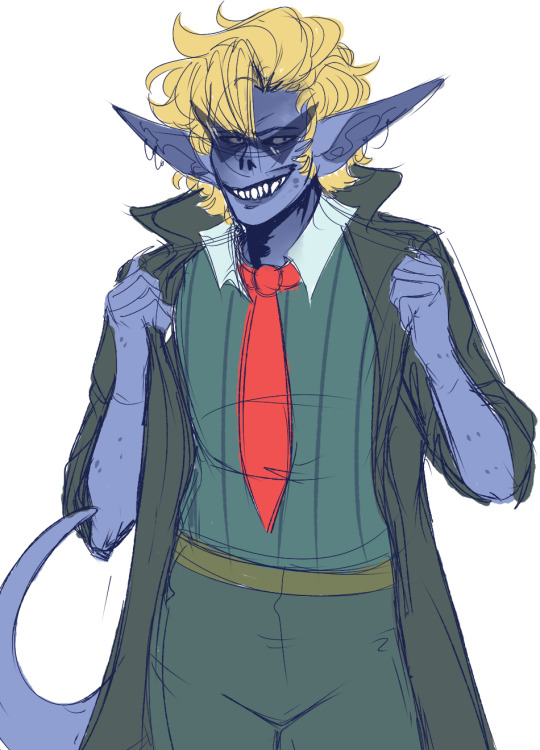
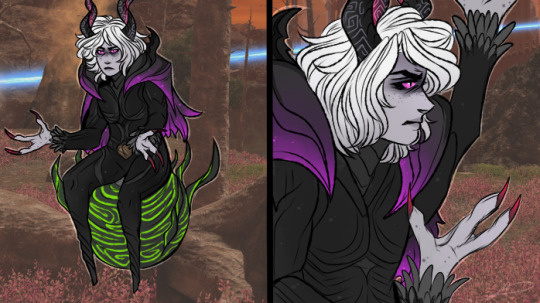
Photo
Mortals, do this

#lord of smithies. king of dvergr - a moron in hydatos#love you so much#Nothing on my mind besides Goldemar.....#ffxiv#bazel doodles#goldemar interp
4 notes
·
View notes

Last Seen Blogs

homoeohealclinic-blog
Untitled


ramyeonmaknae
ramyeonmaknae

anitabayard
Anita Bayard

atlantisinsirri
I can't save us, my Atlantis, we fall