#adobe free
Text
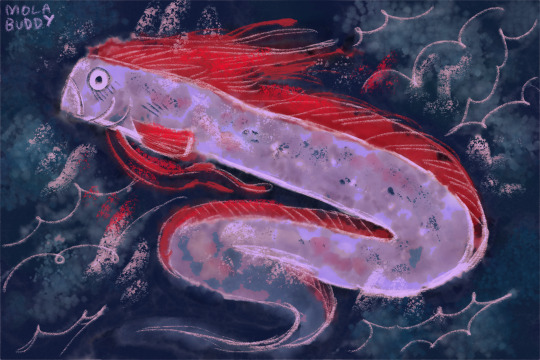
oh yeah i drew an oarfish today :]
#fish#oarfish#original art#marine life#i HATE saying nice things about adobe but this was drawn w adobe fresco which is free and actually pretty fun
271 notes
·
View notes
Text
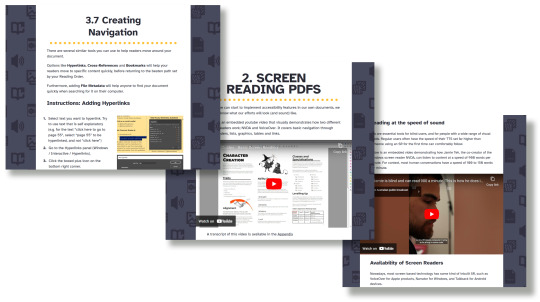
VAST Guides are here!
By using VAST, you can learn how to add accessibility tags for screen readers to your PDFs, by using Adobe InDesign and Adobe Acrobat.
I'm super excited to release a brand new publishing community resource: VAST (or Visual Accessibility Skills Toolkit).
>> WWW.VAST.GUIDE <<
VAST is a collection of short articles aiming to spread awareness about what visual impairments are, and how folks in the small press industry can accommodate them.
The guides are split into four sections:
Visual Impairment 101 explores what visual impairments are, how visually impaired people navigate digital content, and introduces some current language and definitions (circa 2023).
Screen reading PDFs explores the basics of how screen readers navigate through digital content. Includes video examples!
Using InDesign introduces different tools that designers can use to make their documents more accessible.
Putting Into Practice presents case studies of common structures in roleplaying games, and how they could be given accessibility tags using tools covered in section 3. (Coming soon!)
VAST was developed by Brian Tyrrell (me!), and disability advocate and accessibility consultant Yubi Coates. Visually impaired consultants and InDesign experts were brought in to corroborate the guides.
All of the information in the guides is up to date, and we’re committed to reviewing and updating the guides in 2024 and 2025.
This project was completed using a small pot of funding provided by Creative Scotland’s Create: Inclusion program in 2022.
#ttrpg design#indie ttrpg#tabletop rpg#publishing#visual accessibility#screen reader#visually impaired#blindness#accessibility#pdf#indesign#acrobat#adobe#free resources#I always get anxious when releasing stuff#brb going to sit in a corner now#hope you like it!
453 notes
·
View notes
Text
jello cube for my animation class :3
#animation#2d animation#adobe animate#frame by frame#proof i have way too much free time#this doesnt even feel like homework im just having so much fun#literally 'i would go to school if' meme irl
104 notes
·
View notes
Text
I've got zero clue what things to tag this please help ksjfkjskjsf
#hello animation vs animator/minecraft fandom. please fill me in I have yellow blue as peace offering#animation vs animator#animation vs minecraft#avm fanart#avm blue#avm yellow#my art#free cringe#digital art#kolourpaint#stick figure#i can genuinely say that alan becker is THE main reason i started animating#it all started with stupid silly stick figures in my pirated version of adobe flash#while i would watch his tutorial on stick figure animation on his other channel#its also like the whole reason i wanna make tutorials for animation too#maybe i'll inspire some other kid out there to animate yk?
270 notes
·
View notes
Text

Magolor trending on Twitter again. Pretty cool my dudes
#made this for a discord emote :)#feel free to use if ya want but credit be nice#magolor#kirby#hal laboratory#nintendo#fanart#adobe illustrator
242 notes
·
View notes
Video
I decided to do a BTD compilation anim to this entire song because apparently I like to start side projects that will murder me |D Currently have about 2 minutes left to do and I’m going crazy lol, so here’s the Cain Vs Rire segment from it as a sneak peek.
#boyfriend to death#animatic#animation#video#media#WIP#what possessed me to start this like i have so much free time /s#also technically the first time i've animated something using the newer adobe animate as opposed to flash cs6 loool#this will be the general quality of the entire thing im not cleaning it up lol
458 notes
·
View notes
Text
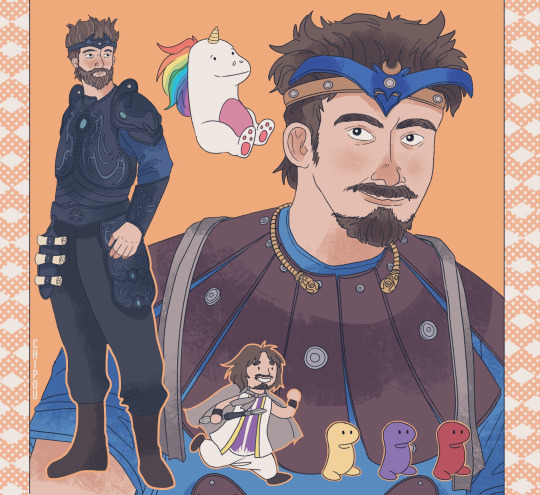
Oh oh oooh oh oh oooh
C’est le healer le plus sympa, même si avec toi on gagne pas les combats
Oui toi, Sparadrap !!
#les fans de Noob où êtes vous#👀?!#littéralement mon personnage préféré seconde 1 saison 1#11 saisons plus tard c’est toujours mon pref <3#my art#art#artists on tumblr#sparadrap#noob#olydri#sparadrap noob#fanart#digital art#illustration#adobe photoshop#procreate#eng trad for my English followers: so basically this is a fanart of sparadrap who is a main character of a french web serie called noob#it’s available on YouTube for free
22 notes
·
View notes
Text
i just want to remind everyone that photopea is free. its in your browser. its photoshop but free. i've been using it for a while and it works exactly the same. it costs zero dollars. dont give adobe your hard earned money
18 notes
·
View notes
Text

#kakashi#mygifs#more from my drafts#i hate him#anyways i dont know when i’ll make gifs again#i want to#but i no longer have adobe ps free with my school cries
413 notes
·
View notes
Text
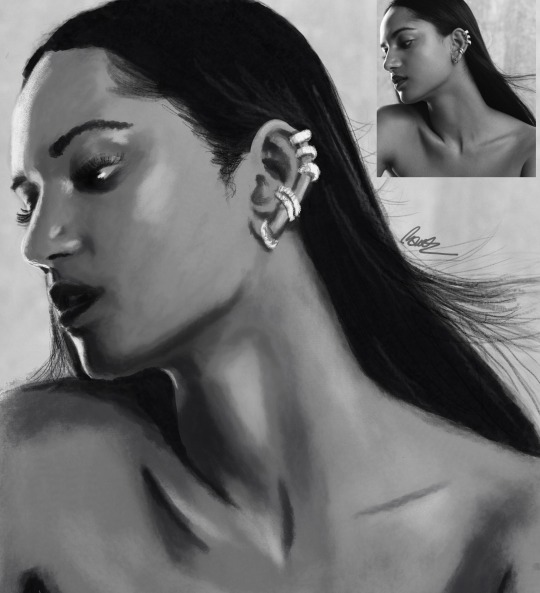

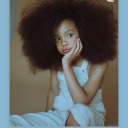
some more photo studies to practice shading and blending tools on ipad (getting there)
and also just. Women™️
#my art#amita suman#melissanthi mahut#six of crows#shadow and bone#the sandman#inej ghafa#calliope#adobe fresco#adobe fresco is the only adobe product I’ll recommend#mostly bc it’s free#artists on tumblr#art#fanart
70 notes
·
View notes
Text
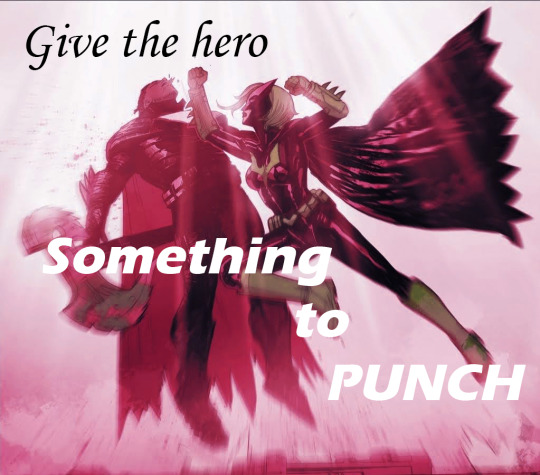
But look at us Luke, we're the ones left alone, holding some rich monster's pain. All of existence, built on his violence. All of space-time, humming to life with a single inviolate rule.
Give the hero something to punch.
#kate kane#duke thomas#luke fox#outsiders#dc comic edit#comic edit#dc comics#my first time using photoshop lmao#got it for free with my school adobe acc and obviously im gonna abuse it for comic editing purposes. although i skipped all the tutorials#and just fucked around so idk this isnt like impressive. couldnt find buttons for a lot of what i wanted to do but i think i was just looki#in the wrong spots. anyways yeah.#batman#panel from outsiders no 3 ofc#dont know what else i say here. this is v much the product of me procrastinating writing an essay draft#if the format is weird im sorry im on tumblr desktop which idk how to use. bc photoshop is on my computer and also i turned my phone off so#would stay off my phone and focus. which obviously worked rlly well lmao#swishy's comic edits#panelposting#not rlly but ill tag that too for personal reference. yeah#bats#anyways this issue is so funny to me. like yes lets talk about how batman is everywhere and is taking over everything and also cant die. in#a batman comic that is taking over things (notably the team name etc) from other characters#IRONY!!!!#anyways dark multiverse(? idfk) duke thomas i love you. you can kill as many versions of bruce wayne as you like <3
17 notes
·
View notes
Text

umm has anyone heard this song. no shows
#relearning adobe products for school in sepmtebrr. becaus etheyre free now. and i'm not trying to learn things if gerard isnt there.#mcr#art
308 notes
·
View notes
Text


"Dude, I earned that money!" | 1.05 Bloody Mary
#I've been using these three gifs for ffmpeg testing. smartblur specifically. And I genuinely can't find a difference in sharpness#when the palletgen filter is already being used. But anyway. He looks good here so have them in a lil set#1.05#pk rewatches spn number ?#dean and the family finances#good gifs with free tools challenge#<- and yeah this time they DO LOOK GOODDAMN GOOD. SO TAKE THAT ADOBE.#tools: davinci resolve and ffmpeg#technique: palletgen and smartblur special2#In which Sam is not a helpless little waif with his hands cast over his eyes being carried along by the tides of the immutable sea#season 1
75 notes
·
View notes
Text
I HATE YOU FREE APPS THAT ARE LOCKED BEHIND A SUBSCRIPTION
#i am NOT paying for your stupid fucking app oh my godddddd#JUST MAKE IT FREE#FOR FUCK SAKE#MAKE IT FREE#fuck you adobe in particular#sjonnie.text#if anyone can link me an Ai (not ai but Ai) ? 😭 i want to make a sticker sheet PLEASE
15 notes
·
View notes
Text

his honest reaction to that information
#tsukasa tenma#project sekai#wonderlands x showtime#colorful stage#made in adobe illustrator while it's still free for me#placeholder art tag
55 notes
·
View notes
Note
if it's okay, would you mind sharing your art process? your style is SO gorgeous dude. keep it up spardacest nation!!!
Thank you so much anon, and of course!
I kinda posted about it on twitter a while ago, but for anyone not also on there, here's a paraphrasing of what I said there!
(under a cut bc it's gonna get a bit long)
(speedpaint video from procreate mostly bc like I also said in that post, it's one of the few pieces I've done entirely on procreate and thus entirely recorded kdfjhdk I usually don't do the sketching + painting parts on there but every now and then I get lazy and want to get it all done quick in one program lol! It's not as good as it would look if I were using krita to render (which is what I normally use) but it gets the idea across decently of what it is that I do)
The short version of my process is:
sketch, clean up sketch for lineart, then flat colors, then paint over the flats (i make the flats my shadows and paint on the light), then a multiply layer for skin details (like lips, eyebags, etc), then an overlay layer for skin transparency details (red over the ears/nose/fingertips etc), then i do hair over the lineart, then a multiply layer with the contact shadows in a light beige/grey/neutral tone on top of everything else, and then i unify layers, paint over the details, and color correct the HELL out of it
The longer version is:
SO, first of all, I will say, my entire process for a finished/fully redered piece is pretty scattered and uses a lot of different apps, because after many years of trying out different drawing apps I found that I just worked better when I could incorporate the parts I liked best from each individual one rather than having to adapt to another app entirely!
In total, what I use is: autodesk sketchbook and procreate for the first half I do on my ipad, then krita and photoshop on my computer when I'm actually rendering (but any photo editing app instead of ps will do, I'm just used to photoshop bc that's what I learned as my first drawing app WAAAY back in the day lol), and then meitu on my phone for color filters (also any phone editing app with filters in it will do), AND also optional just for references: blender and daz3d on computer + magicposer on my phone
The actual step by step of what I do:
First of all, if I want to do a detailed, well rendered piece I will start by getting my references ready. That means either just grabbing a screenshot from the game if it's like, a simple portrait, or a photo reference, taking a picture of myself in the right pose/lighting, and if it's something more complex I will recreate the scene in Daz3D to simulate a realistic lighting, OR even just blender (i have the game models for the dmc characters downloaded, so I can just pop them in, pose them and change the lighting to get a realistic idea of what shadows their faces will cast in that specific angle/lighting.)
Note: references are pretty essential to me, and there's nothing to be ashamed about for using them! Personally I don't struggle a lot with the drawing/sketching part of art, but my tiny little pea brain cannot fathom how to make an object 3D in my mind, and how to visualize shadows realistically... thus the reliance on 3D programs to do that for me, and then all I have to do is draw what I'm seeing lol. My art improved significantly ever since I started making 3D refs so I could get /exactly/ what I needed - there's still a lot of leeway you need to learn though, because as realistic as the lighting will be in a rendering program, you'll never really get a fully natural looking image, as far as stuff like the body stretching/squishing/pulling when it's in movement, facial expressions, folds in clothing/fabric, etc... so really it's more a guide than something meant to be followed 1:1.
Then, once I'm confident I know exactly what I'm gonna draw/have the idea in my head, I start sketching it in sketchbook. Not really getting very in depth, just blocking out rough shapes - I like sketchbook and to be on my ipad for that because it feels very reminiscent of traditional sketching on paper to me, which while I'm not super confident on my traditional art abilities, I do get the most natural/fluid/non-stiff figures out that way.
Then when I think I have the general idea ready, I export the sketch layer as a png and import it into procreate - which is where I kinda start picking at the sketch and polishing it like i'm carving it out haha. Lots of liquify tool, flipping the canvas to check if it's even, blending out some of the lineart to help out with the rendering later, and then polishing up what was once the sketch into serviceable lineart. I usually reimport it back into sketchbook at this stage - while I like procreate for drawing I don't love the brushes I can use for lineart there, and so I usually only draw the "base" naked figure in there - when I'm in sketchbook I use a hard pencil to refine the details, then on a separate layer add all the things "on top" like hair, clothing, etc - usually I can get it pretty easily in one go, and once I'm satisfied I erase the naked body under the clothes and unify the lineart layers.
Then I will just do the flats with a hard brush, turning the lineart layer into an overlay layer and coloring things in with the shadow colors.
At this point, I export the file as a psd and import it on my computer - I give it a once over in photoshop first to see if there needs to be any adjusting (like whether any layer that has an effect needs to have a different effect, if all the colors look right since the ipad screen isn't the most faithful, if i wanna change the background color, etc), and once I think it's ready enough, I open it up in krita, where I do the actual bulk of the painting/rendering (as to why specifically krita: it's because I've gotten very comfortable with the brush/painting brush dynamics there and cannot seem to get as good results anywhere else, it's just the goldilocks spot of a brush for me haha.)
If anyone's curious, here's the brushes I usually use for painting:
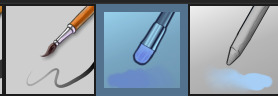
The one in the middle is my go to painting brush, left one for tinier/more refined details, right one for blending out soft shadows (though I learned the hard way to not overuse it, or it will look like I went ham with an airbrush tool lol).
(I don't change any of the settings on these brushes, so if you wanna try out the exact ones I use! Just fresh off how they come out the app haha)
I paint on the lights on top of the shadows, and just focus on that for the time being - once I'm done with the basic painting, I'll make a separate multiply layer for details like lip color, eye waterlines, makeup if there is any, eyebags, etc, and then adjust the opacity until it feels right - then I'll make an overlay layer with skin translucency details (like, when you hold your hands in front of a light and see the tips of your fingers become bright orange - many parts of your body are always a bit translucent to the blood underneath, specifically parts where the skin is thin like noses, cheeks, joints, knuckles, etc, and I found it makes the character look a lot more alive to add that subtle coloring in) - then usually I do hair on a separate layer on top of the lineart (because that way I can add small flyaways, more details, etc, and just use the lineart as a guide)
After that, I'll usually make a multiply layer on top of everything where I'll add contact shadows in a neutral color (usually pretty pale, it'll be darker anyway since it's multiply), and once I feel like I've rendered everything out properly, I save the psd and re-open it on photoshop.
In photoshop, I'll mess around with the layers a little bit more (changing hue/saturation, opacity, etc), fuck around with the background to make it look pleasing, and once I'm happy with it, I'll unify the layers and start color correcting - usually by duplicating the unified layer and messing with the curve/hsl of the image and then changing the opacity of that edited layer until it's as strong or muted as I want it to be - then I also edit the RGB curves individually and adjust the opacity of that also (because I just really like how it ends up looking if I give a bit of a red/warm tint to the shadows lol), and at that point often I will reimport the finished image into procreate for some finalizing touches! Like, blending out shadows that came out too harshly, painting over anything that came out not the way I wanted it, redefining the lineart if it got messy during painting, and adding any extra small detail that might have gotten lost like catchlights, hair shines, hair flyaways, tears, etc. I also do one last round of flipping the canvas and liquify if needed!
At this point, I export the finished image both to my computer and my phone - on my phone I open it up on the photo editing app, and add a bunch of different color filters - I don't hesitate from going completely balls to the walls here, and just kinda applying as many filters as will make an image look pleasing to my eye.
Once I think it looks good, I'll export the edited image to my computer - and then open both the version without filters and the one with them on photoshop, and use the filtered version as an opacity layer, and adjust it until it doesn't look as crazy anymore lol.
One last step I recently started incorporating was also changing the image to grayscale after I'm done, and doing one last round of curves in greyscale to make sure the values look right, and nothing is getting too lost because the values are too similar (because i know i get a bit swept up in getting repulsed by harsh contrasting lighting and can end up washing out all of rendering if I don't check myself kjdfgk)
AND that's it!
Yes it's a pretty long and chaotic process, but it's coming from years of trial and error and realizing I can just let myself fo whatever makes me happier with the results, and I don't have to stay constrained to one program if I don't like every tool it has to offer/don't have to accept the final image fresh off the painting app as the "finished" image with no adjustments allowed after, lol. I don't find it takes a lot more time than if I didn't do it this way, but YMMV.
Hope this was helpful and sorry for taking so long to explain! I just wanted to give a thorough explanation dfhdkhkx
#asks#sorry i know its a bit chaos hfdgd#but i hope its helpful anon! thanks for asking#also for anyone wondering#no i am not paying for ps lmao#fuck adobe#it is always morally correct to pirate adobe products people#if you have an alternative photo editing app you like best youre welcome to use it#but if youre too used to photoshop. everything is free on the internet if you know where to look#i also wouldnt recommend meitu bc it feels like a pretty sketchy app all things considered#im just too lazy to care to change my go to app but i would look for a different phone app#p sure theres billions that let you add funky color filters instead#actually i think you could use photoshop camera raw filters for that too#its just way too intensive of a process for my tiny potato computer and it feels a lot faster + seamless on phone
11 notes
·
View notes
Last Seen Blogs
nevou
Mil Razões.

sehun-dbd
Barely Alive
dreamgirlzonly
Dreamgirlzonly
helvreads
Helv Reads Books

ususda
my works